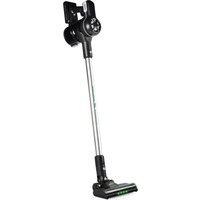
DO1190SV - Vacuum Cleaner DOMO - Free user manual and instructions
Find the device manual for free DO1190SV DOMO in PDF.


| Product type | Stick vacuum (cordless) with handheld function |
| Brand | DOMO |
| Model | DO1190SV |
| Power source | Rechargeable lithium-ion battery (non-removable), AC adapter supplied |
| Input voltage | 100-240 V ~ 50/60 Hz (adapter) |
| Initial charge time | 24 hours before first use |
| Runtime | Varies depending on suction mode |
| Suction modes | 2 modes: low and medium |
| Indicators | Battery level indicators (3 LEDs) and suction power level indicators (3 LEDs) |
| Filter type | Pre-filter + washable HEPA filter |
| Dust container capacity | Approx. 0.5 L (estimate) |
| Included accessories | Floor nozzle with rotating brush, long crevice tool, 2-in-1 brush, adapter, wall mount with screws |
| Wand length | Adjustable via release (metal wand) |
| Weight | Approx. 2.5 kg (estimate) |
| Dimensions (L x W x H) | Approx. 25 x 20 x 110 cm (estimate) |
| Maintenance | Clean the dust container after each use; wash filters with cold water monthly; clean the rotating brush regularly |
| Warranty | 2 years (excluding normal wear and tear) |
| Safety | Do not immerse, do not vacuum liquids or sharp objects, unplug before cleaning |
| Spare parts | Available on the DOMO online shop (accessories and filters) |
| Repairability | Repairs by the manufacturer or authorized after-sales service only |
| Standards | Compliant with European requirements (CE) |
Frequently Asked Questions - DO1190SV DOMO
User questions about DO1190SV DOMO
0 question about this device. Answer the ones you know or ask your own.
Ask a new question about this device
Download the instructions for your Vacuum Cleaner in PDF format for free! Find your manual DO1190SV - DOMO and take your electronic device back in hand. On this page are published all the documents necessary for the use of your device. DO1190SV by DOMO.
USER MANUAL DO1190SV DOMO
natural_image
Black and white photo of a vacuum cleaner with green indicator lights (no visible text or symbols)EN Instruction booklet Stick vacuum cleaner
Read all instructions carefully.
Save this instruction manual for future reference.
⚠PRODUCTSPECIFIEKE WAARSCHUWINGEN
natural_image
Close-up of a black DCMO vacuum cleaner's head and lever (no visible text or symbols)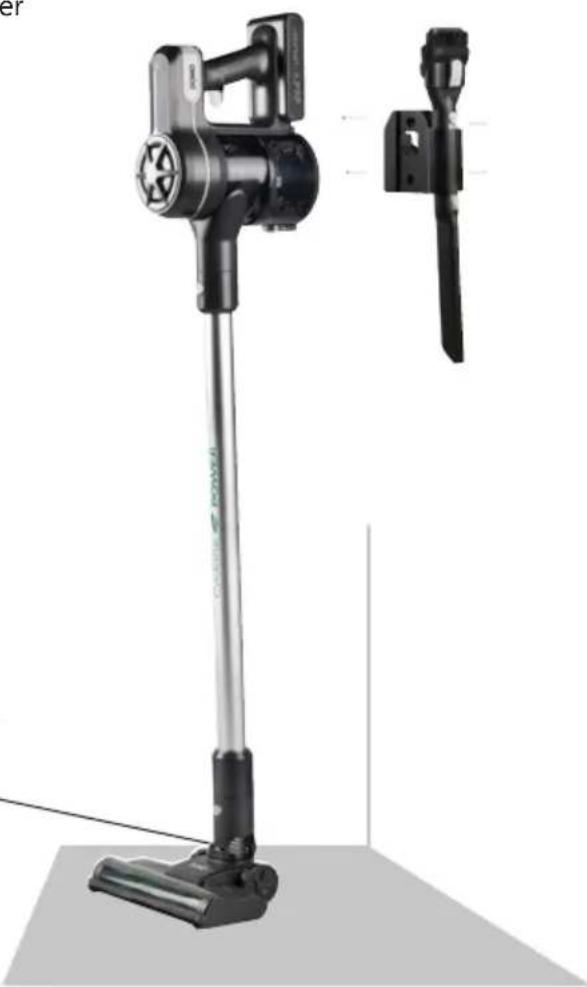
natural_image
Exterior view of a black vacuum cleaner with attached circuit breaker (no text or symbols visible)OPLADEN
natural_image
Close-up of a hand inserting a small black tool into a black device component (no visible text or symbols)natural_image
Close-up of a black DOMO vacuum cleaner with green LED indicator (no text or symbols visible)
natural_image
Two black hairbrushes with textured surfaces, labeled 2 and 3 (no text or symbols on the main objects)DE VLOERBORSTEL SCHOONMAKEN
natural_image
Symbol of a trash bin with crossed lines indicating no waste or discharge, and a solid black rectangle below (no text or labels)⚠AVERTISSEMENTS SPÉCIFIQUES AU PRODUIT
SUPPORT MURAL
natural_image
Close-up of a black DCOMO vacuum cleaner with attached circuit board (no visible text or symbols)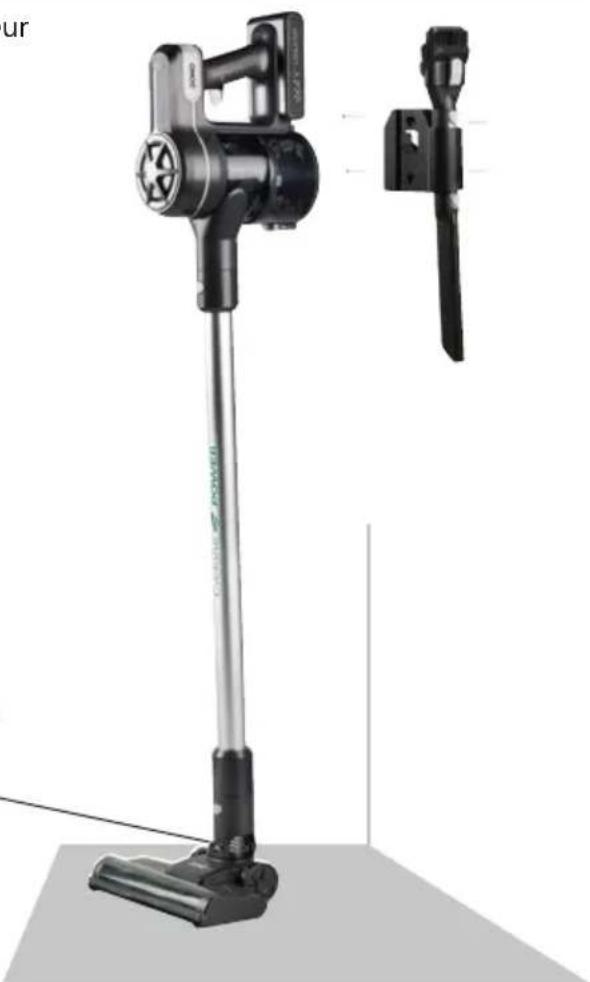
natural_image
Exterior view of a black vacuum cleaner with attached tool holder (no text or symbols visible)CHARGE
natural_image
Close-up of a hand inserting a cable into a black electronic device component (no visible text or symbols)natural_image
Close-up of a black DCMO vacuum cleaner with green LED indicator light (no text or symbols visible)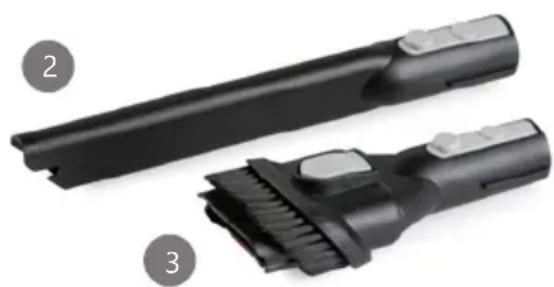
natural_image
Two black hairbrushes with textured surfaces, labeled 2 and 3 (no text or symbols on the brush itself)NETTOYER LA BROSSE DE SOLS
natural_image
Symbol of a trash bin crossed with two crossed lines, no text or numbers presentWANDBEFESTIGUNG
natural_image
Close-up of a hand inserting a small black tool into a black device casing (no visible text or symbols)natural_image
Close-up of a black DCOMD vacuum cleaner with green LED indicator light (no text or symbols visible)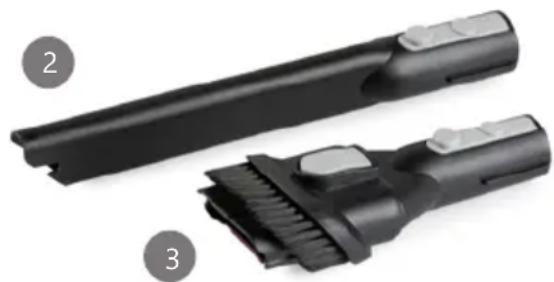
natural_image
Two black vacuum cleaner components with textured surfaces, labeled 2 and 3 (no text or symbols on the main body)natural_image
Symbol of a trash bin crossed with two crossed lines and a solid black rectangle below (no text or labels)Thank you very much for placing your trust in DOMO. We hope you enjoy your new purchase.
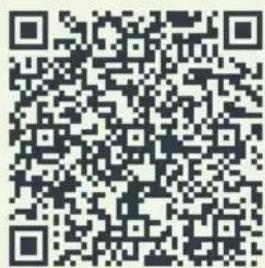
All our products undergo strict quality control before reaching you. If you still experience any problems with your device, we sincerely regret that. We have collected the most frequently asked questions about our devices on our webshop. Scan the QR code and have a look!
If you cannot find a solution to your problem there, do not hesitate to contact our customer service via info@linea2000.be. Our staff will do everything they can to assist you!
This device has a warranty period of 2 years from the date of purchase. During this warranty period, the distributor will assume responsibility for any defects that can be shown to be the result of material, construction or manufacturing errors. Such defects will be remedied by repair or replacement of the device. The 2-year warranty period will be suspended during the repair period and will continue after the repair has taken place for the remaining duration of the warranty period. The warranty will be honoured if proof of purchase clearly showing the date of purchase is provided. If your device becomes defective within the 2-year warranty period, please return it with your proof of purchase to the store you purchased it from or follow the procedure of the relevant webshop if you bought it online.
The warranty does not cover damage to the device, accessories or parts caused by:
• normal wear and tear from use;
• non-compliance with the instructions for use, maintenance and cleaning in the manual;
- incorrect connection, e.g. electrical voltage too high;
- incorrect, heavy-handed or abnormal use;
• repairs or alterations carried out by the consumer or unauthorised third parties;
- use of parts or accessories not recommended nor supplied by the distributor.
SAFETY INSTRUCTIONS
When using electrical appliances, basic safety precautions should always be taken, including the following. Any injury or damage caused by failure to comply with these rules are at your own risk. Neither the manufacturer, importer, or the supplier may be held liable.
- Read all instructions carefully.
• Make sure all packaging materials and promotional stickers have been removed before using the appliance for the first time. Make sure children cannot play with the packaging materials. -
This appliance is only suitable for use in domestic and similar environments, such as:
-
staff kitchen areas in shops, offices and other working environments;
- farm houses;
- by clients in hotels, motels and other residential type environments;
• bed and breakfast type environments.
• Children should be supervised to ensure that they do not play with the appliance.
- This appliance can be used by children aged from 16 years and above and persons with reduced physical, sensory or mental capabilities or lack of experience and knowledge if they have been given supervision or instruction concerning use of the appliance in a safe way and understand the hazards involved.
• Children shall not play with the appliance.
- Cleaning and user maintenance shall not be made by children unless they are older than 16 or supervised.
- Keep the appliance and its cord out of reach of children younger than 16 years.
- All repairs should be carried out by the manufacturer or its aftersales service.
▲ELECTRICAL WARNINGS
- In order to avoid a hazard this appliance must not be supplied through an external switching device, such as a timer or a separate remote control, or connected to a circuit that is regularly switched on and off by the utility.
- The appliance must be disconnected from its power source when not in use, during service and when replacing parts. If present, first turn all the buttons to the 'off' position, then pull the plug out of the socket by grasping the plug itself. Never pull the cord or appliance to remove the plug from the socket.
- Before use, check carefully that the electric tension and frequency of the power net at your home match the indications on the rating label of the appliance.
- The appliance must be plugged into an appropriate outlet that is installed in accordance with local installation regulations.
- Do not let the power supply cord hang over the edge of a counter, or touch hot surfaces.
- Keep the power cord away from hot parts and don't cover the appliance.
- Unwrap the cord completely to prevent overheating of the cord. Do not allow the power cord supply to run underneath or around the unit.
- For safety reasons, never use the appliance if the cord, plug, or appliance itself is damaged, or after a malfunction of the appliance. Return the appliance to the DOMO Service Department or its service agent for examination, repair, or electrical or mechanical adjustment. Do not try to repair the appliance yourself.
⚠️INSTALLATION
- Do not place near flammable materials, gases or explosives.
- Do not use or store this appliance outdoors.
• Always use the appliance on a steady, dry and level surface.
- Never place this appliance near a gas stove or electrical stove or in a place where it may come into contact with a warm appliance.
⚠ USE
- Do not use this appliance for other than intended use.
- Never leave the appliance unattended while it is functioning.
- Do not operate the appliance with wet hands.
- The use of accessories that are not recommended or sold by the manufacturer can cause fire, electrical shock or injuries. Only use the utensils delivered with the appliance.
⚠ CLEANING AND MAINTENANCE
- To protect against electrical shock or burns, do not immerse unit, cord, or plug in water or other liquid.
- Failure to maintain this appliance in a clean condition could adversely affect the life of the appliance and possibly result in a hazardous situation.
⚠️PRODUCTSPECIFIC WARNINGS
- Do not use the vacuum cleaner to vacuum up detergents, liquids, needles, matches and other similar liquids, sharp objects or flammable objects.
- Do not use the vacuum cleaner to vacuum up cement, powder and other small particles. Avoid vacuuming large objects and items that could become entangled in the brush (long hair, plastic bags, string, etc.). Also avoid vacuuming up large objects. The vacuum cleaner could be clogged, the motor could overheat or other damage may occur.
- Make sure that the air intake or the floor suction opening do not become blocked.
- Make sure that the machine does not come into contact with liquids.
- First charge a new battery up completely.
- Only charge the battery using the supplied adapter.
- Pull the plug from the outlet when the vacuum cleaner is fully charged.
- This product contains a rechargeable battery. Batteries should be recycled. Do not drill into the battery or expose it to high temperatures; the battery could explode.
- Under extreme circumstances, there could be leakage of the battery. If the liquid from the battery comes into contact with the skin, wash it off immediately with water and soap or neutralize it with a mild acid such as lemon juice or vinegar. If the liquid comes into contact with the eyes, rinse them liberally with water for at least 10 minutes and contact a doctor.
- Do not place foreign objects in the openings of your machine. Do not use the machine if an opening is blocked. Keep the machine free from dust, dirt, hair or anything that could reduce the air supply.
- Remove large and sharp objects from the floor to prevent damage to the plastic components, the brushes and the motor.
- Keep hair, loose clothing, fingers and other body parts away from openings and moving parts.
- Never use the appliance without filters. This will damage the motor and render it unusable.
SAVE THESE INSTRUCTIONS FOR FUTURE REFERENCE
All images and descriptions in this manual are purely indicative and may differ slightly from the actual device.
PARTS
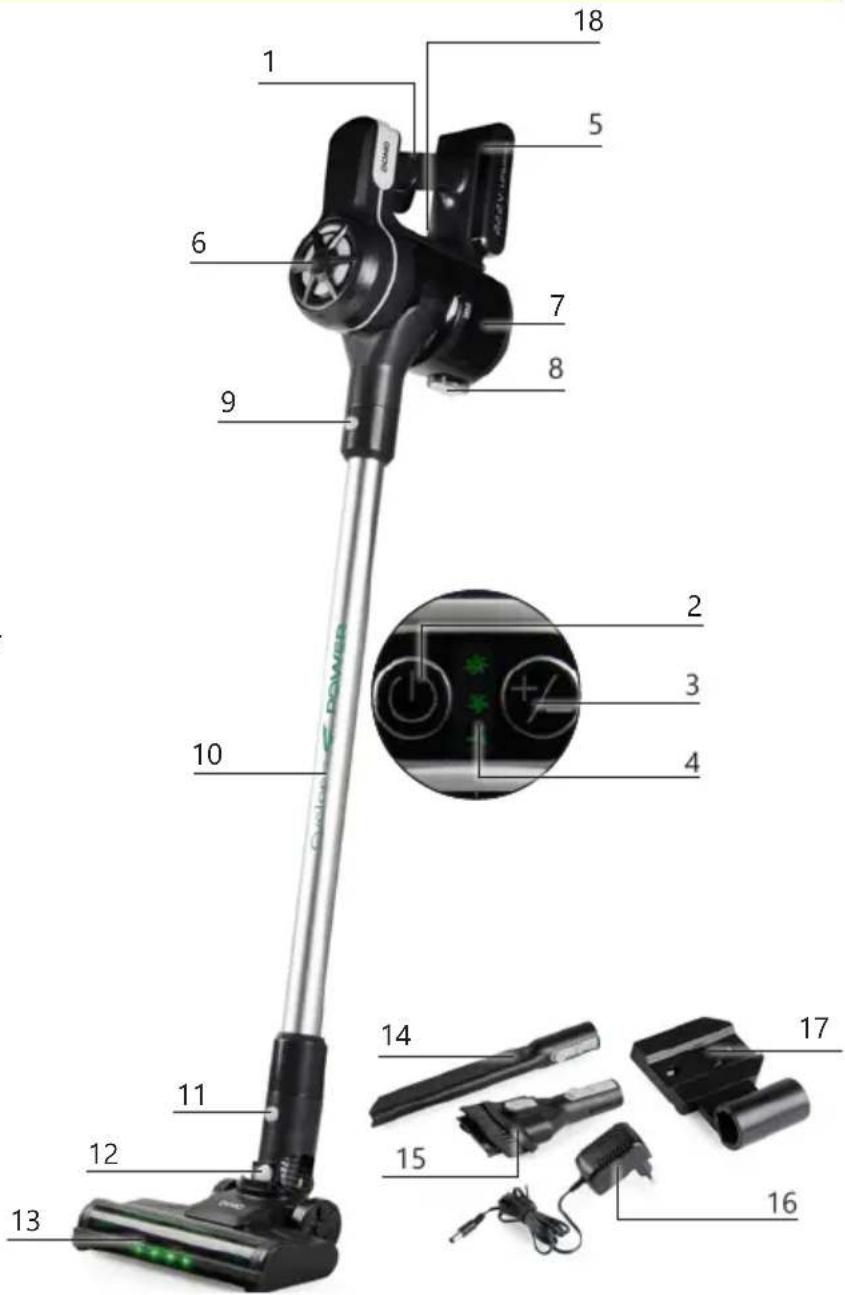
- Ergonomic handle
- On/off button
- Mode button
- Indicator lights suction power levels
- Battery level indicator lights
- Motor compartment
- Dust container
- Dust container release button
- Metal tube release button
- Metal tube
- Release button floor nozzle
- Parking lock
- Floor nozzle with rotating floor brush
- Long crevice tool
- 2-in-1 fabric brush
- Adapter
- Wall fixing (screws and plugs included)
- Adapter connection
BEFORE THE FIRST USE
- Remove all packaging materials and any promotional stickers.
- Prior to first use, charge the machine for 24 hours in order to be able to utilize the full capacity of the battery.
- Assemble all the parts:
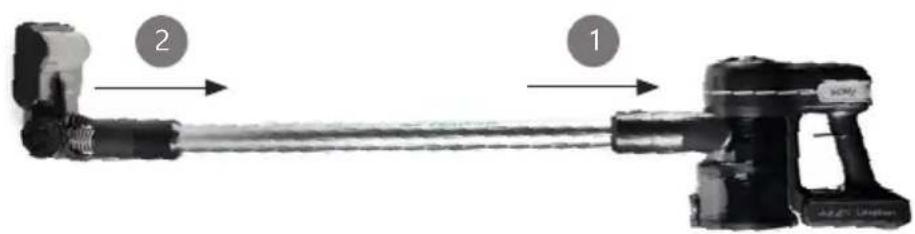
- Slide the wand assembly into the motor part until it clicks into place. Make sure the power pins slide into the intended holes properly.
- Slide the floor attachment on to the tube assembly until it clicks into place. Make sure the power pins slide into the intended holes properly.
WALL MOUNT
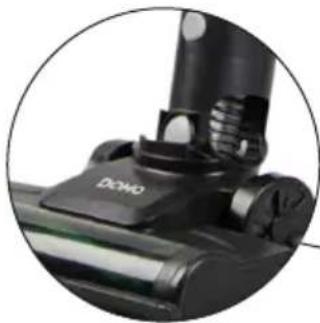
⚠️The wall mount serves to keep the stick vacuum cleaner upright and to store accessories. It is not intended to hang the vacuum cleaner on. The stick vacuum cleaner must always rest on the ground when clicked into the wall mount.
To mount the wall mount to the wall, please follow these steps:
- Snap the stick vacuum cleaner with the battery section into the wall mount and hold it where the wall mount will be attached. Make sure that the stick vacuum cleaner rests completely on the ground when doing so.
- Mark the two points on the wall where you will attach the mount.
- Drill 2 holes in the wall corresponding to these attachment points.
- Insert the supplied plugs into the wall.
- Fix the wall mount using the supplied screws.
- To store the appliance, place it flat on the ground until the floor nozzle clicks into the tube (parking lock) and click the appliance into the wall mount.
natural_image
Close-up of a black DCMO vacuum cleaner's head and lever (no visible text or symbols)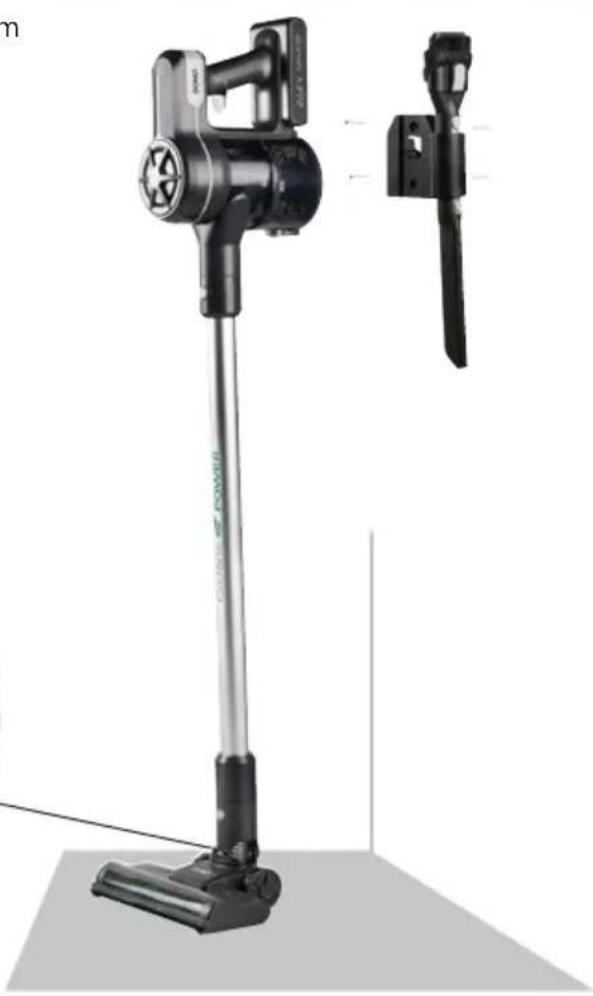
natural_image
Exterior view of a black vacuum cleaner with attached tool, shown from front and side (no text or symbols visible)CHARGING
- If the last light on the battery flashes, then the battery is almost empty. Turn off the vacuum cleaner and put it on charge.
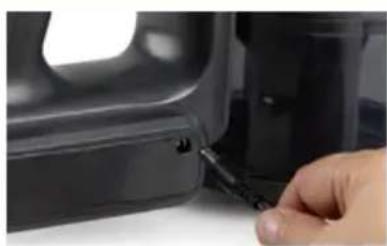
- Connect the adapter via the provided connection, and then plug the adapter into the wall socket.
- The battery level indicator lights will flash. The battery is fully charged when all three lights are on.
• The machine cannot be started during charging.
- Prior to first use, charge the machine for 24 hours in order to be able to utilize the full capacity of the battery.
- It is recommended that the battery be fully charged for the first three charges.
natural_image
Close-up of a hand inserting a black cable into a black device component (no visible text or symbols)NOTES:
- It is recommended that the vacuum cleaner be charged after each use regardless of the duration of the use.
- Do not charge the battery for extended periods. This can damage the battery. Disconnect the adapter once the battery is fully charged.
- The battery and adapter may become hot during charging. Take the necessary precautions to avoid coming into contact with it during this time.
- The temperature while charging should be between 15^ and 25^ . Higher or lower temperatures reduce battery life.
USE
-
Choose the correct accessory for the cleaning task you want to carry out:
-
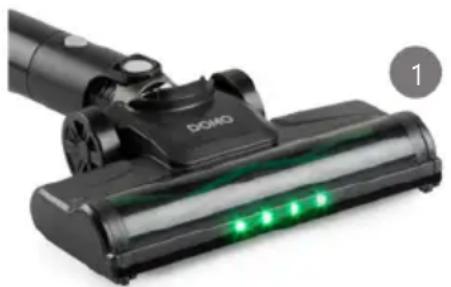
Floor attachment with rotating floor brush: suitable for floors and carpets. When you switch on the machine, the rotating floor brush at the bottom of the floor nozzle will begin to turn. This will cause the dirt in the opening to be shifted and thereby vacuumed up.
- Long crevice tool: for corners, cracks, skirting board edges and hard-to-reach places.
- 2-in-1 fabric brush: use on upholstered surfaces, keyboards, lamps, curtains, blinds, ventilation openings, etc. The brush offers extra friction to make it easier to loosen hair and dust stuck on fabric. Use the short crevice tool for regular cleaning of small surfaces. To switch between brush and crevice tool, press the button to unlock the brush and slide it up or down.
natural_image
Close-up of a black DCMO vacuum cleaner with green LED indicator (no text or symbols visible)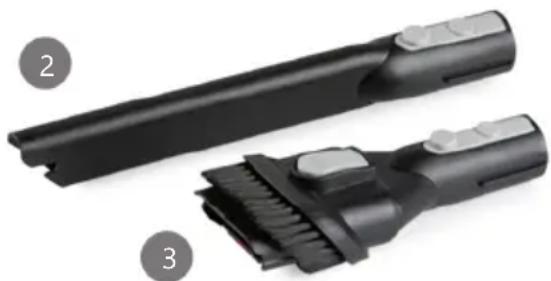
natural_image
Two black hairbrushes with textured surfaces, labeled 2 and 3 (no text or symbols on the brush itself)- Press the on/off button. The vacuum cleaner starts working. Press again to stop.
- Press the mode button to switch between the 3 suction power levels.

low,

edium,

NOTE:
The various accessories can be clicked onto the wand assembly (stick vacuum cleaner) or directly onto the motor part, without the handle (hand vacuum cleaner).
CLEANING AND MAINTENANCE
CLEANING THE APPLIANCE
Clean the appliance with a slightly moist soft cloth. Dry the machine off well. Never submerge the appliance in water!
CLEANING THE DUST RESERVOIR
Empty the dust container after each cleaning session. Clean the dust container and filters at least once a month to maintain optimal performance. We advise replacing the filters regularly to ensure an optimal operation of the machine.
- Disconnect the wand assembly from the motor part.
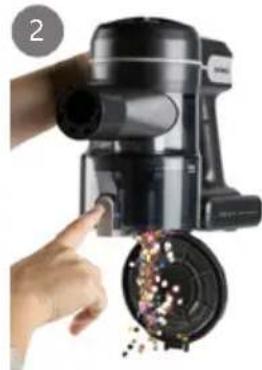
- Hold the dust container over a rubbish bin and press the release button to open the cover. Empty the dust container.
- Remove the coarse filter (a) from the dust container by turning it clockwise. You can use the crevice cleaner as a tool.
- Turn the HEPA filter (b) clockwise and remove the HEPA filter from the outer coarse filter (a).
- Close the dirt receptacle and unscrew it from the motor section.
- Wash all the parts under cold running water.
- Allow all the parts to dry completely before reassembling them.
- Make sure all the parts fit together nicely when assembling, before using the machine again.
natural_image
Hand inserting a device into a circular component, showing internal components and powder (no text or symbols visible)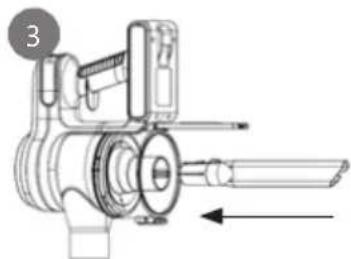
natural_image
Technical line drawing of a mechanical device with no visible text or symbols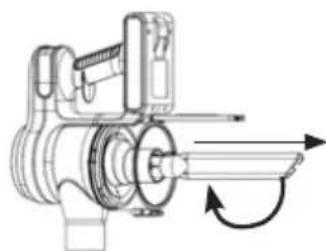
natural_image
Technical line drawing of a mechanical device with directional arrows indicating motion (no text or symbols)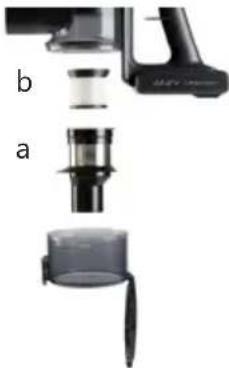
natural_image
Close-up of a mechanical device with labeled parts (a and b), showing internal components like a funnel, base, and motor handle (no text or symbols beyond labels)CLEANING THE FLOOR BRUSH
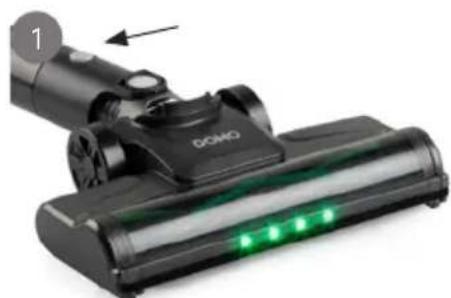
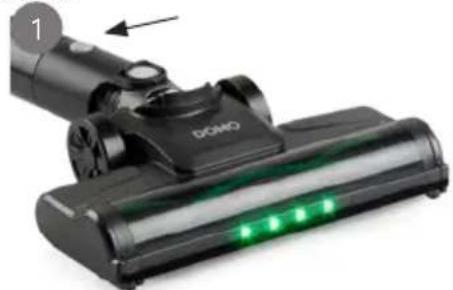
- Remove the floor nozzle from the upright vacuum cleaner. Press the release button at the back of the floor nozzle and remove it from the machine.
- Slide the switch backwards to unlock the floor brush.
- Gently remove any hair and dirt from around the brush; do this by hand or carefully with a knife. Rinse the brush under cold running water.
- Allow the brush to dry completely before reassembling it.
- To refit the brush, place the right side of the brush against the gear (a) and push the left side (b) until it clicks into place.
- Push the nozzle back onto the stick. The machine is now again ready for use.
natural_image
Close-up of a black DCOMO vacuum cleaner with green LED indicator light (no text or symbols visible)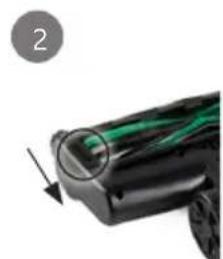
natural_image
Close-up of a car's front wheel and side panel, showing green lane markings (no text or symbols)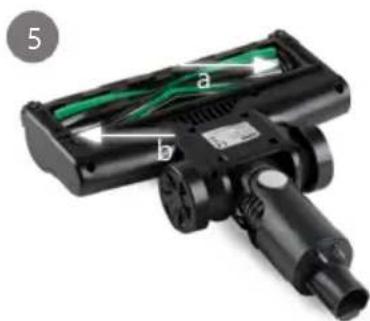
natural_image
Close-up of a black handheld vacuum cleaner with green internal components (no visible text or symbols)Do not immerse unit, cord, or plug in water or other liquid.
⚠️ Never use aggressive or abrasive cleaning agents.
PROBLEMS AND SOLUTIONS
| PROBLEMS SOLUTIONS | |
| The machine does not start up. • The battery is | empty. Charge the machine. |
| Loss of suction power. • The filters are dirty/the | dust reservoir is full.• The floor nozzle is clogged/the floor brush is blocked.• Clean the machine as described in this manual. |
| The rotating floor brush is not rotating. | • The floor brush is blocked. Turn off the vacuum cleaner and remove the object blocking the floor brush.• The floor brush is assembled incorrectly. Follow the instructions to correctly assemble the floor brush as described in this manual. |
| The three suction power level indicator lights will flash on and off simultaneously. | • The rotating floor brush is blocked. Turn off the vacuum cleaner and remove the object blocking the floor brush. |
| The last light on the battery is flashing. | • The battery is almost empty. Turn off the vacuum cleaner and put it on charge. |
GUIDELINES
natural_image
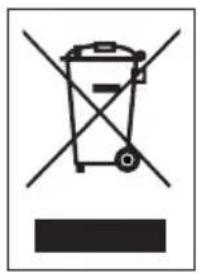
Symbol of a trash bin crossed with two crossed lines and a solid black rectangle below (no text or labels)This symbol on the product or on its packaging indicates that this product may not be treated as household waste. Instead it must be brought to the applicable collection point for recycling of electrical and electronic equipment. By ensuring this product is disposed of correctly, you will help prevent potential negative consequences for the environment and human health, which could otherwise be caused by inappropriate waste handling of this product. For more detailed information about recycling of this product, please contact your local city office, your household waste disposal service or the shop where you purchased the product.

The packaging is recyclable. Please treat the packaging ecologically.
NON-REMOVABLE BATTERY
The appliance is battery-operated, and the battery must not be disposed of with household waste, even after use. You can take the appliance to a collection point for discarded electrical appliances (Recupel) in your neighbourhood (container park, specialist shop, etc.). Batteries contain substances that are dangerous to human health and to the environment.

This appliance conforms to all European requirements in the areas of safety, health, and environmental protection.
The EU declaration concerning this appliance can be requested at any time from info@linea2000.be
GARANTIA
Estimado cliente,
SOPORTE MURAL
natural_image
Close-up of a black DCMO vacuum cleaner's head and lever (no visible text or symbols)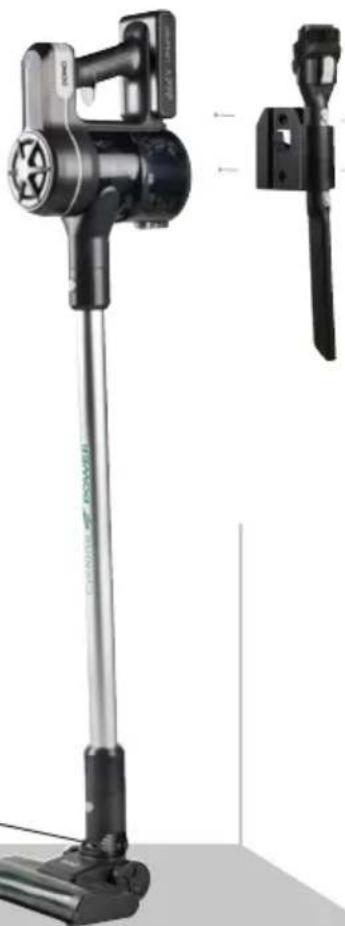
natural_image
Product photo of a vacuum cleaner with attached black plastic clip and side view (no visible text or symbols)CARGA
natural_image
Close-up of a hand inserting a black cable into a black device component (no visible text or symbols)natural_image
Close-up of a black DCAD vacuum cleaner with green LED indicator light (no text or symbols visible)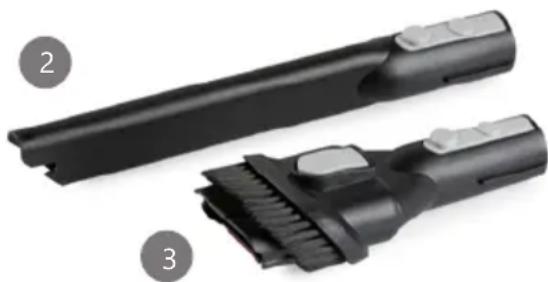
natural_image
Two black vacuum cleaner components with textured surfaces, labeled 2 and 3 (no text or symbols on the main body)LIMPIAR EL CEPILLO DE SUELO
natural_image
Close-up of a black DOMO vacuum cleaner with green LED indicator light (no text or symbols visible)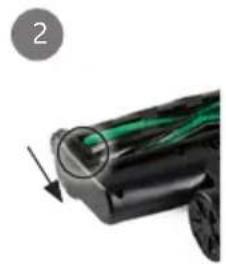
natural_image
Close-up of a car's front wheel and side arm, showing green lane markings (no text or symbols)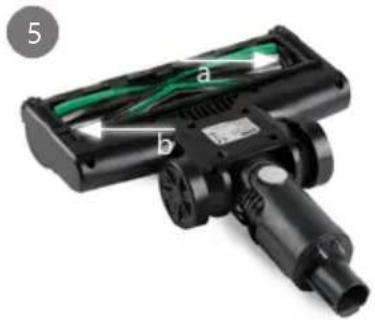
natural_image
Close-up of a black vacuum cleaner with green internal components, labeled parts a and b (no text or symbols on body)SOSTEGNO A PARETE
natural_image
Close-up of a black DCMO vacuum cleaner's head and lever (no visible text or symbols)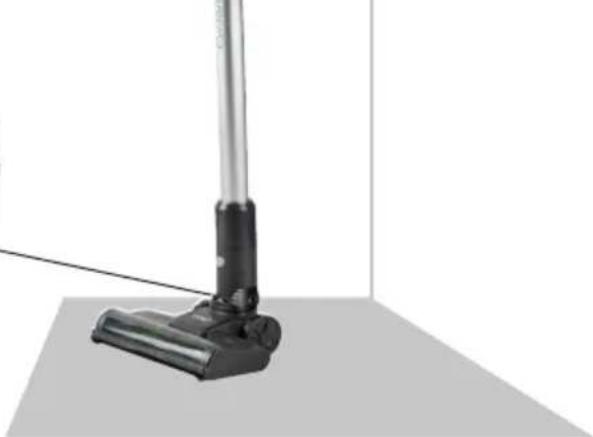
natural_image
3D rendering of a black vacuum cleaner on a gray surface (no text or symbols visible)CARICARE
natural_image
Close-up of a hand inserting a black cable into a dark plastic device (no visible text or symbols)natural_image
Close-up of a black DCOMD vacuum cleaner with green LED indicator (no text or symbols visible)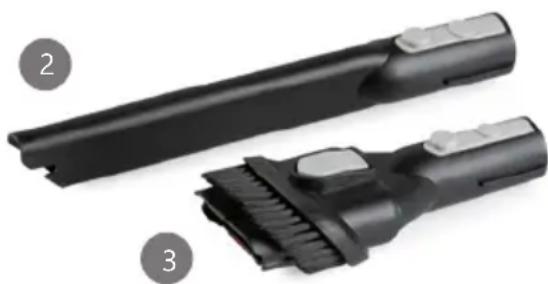
natural_image
Two black hairbrushes with textured surfaces, labeled 2 and 3 (no text or symbols on the brush itself)PULIRE LA SPAZZOLA PER I PAVIMENTI
natural_image
Close-up of a black DOMO vacuum cleaner with green LED indicator light (no text or symbols visible)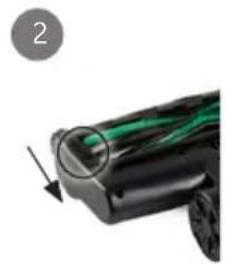
natural_image
Close-up of a car's front wheel and headline with green cable, no visible text or symbols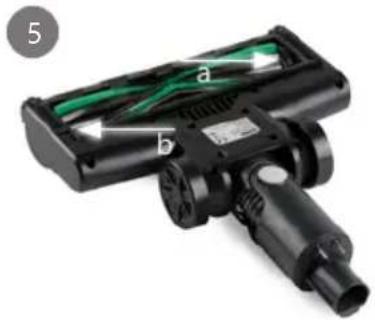
natural_image
Close-up of a black vacuum cleaner with green internal components, labeled parts a and b (no text or symbols on the device itself)natural_image
Symbol of a trash bin with crossed lines indicating no waste or discharge (no text or labels)DRŽÁK NA STĚNU
natural_image
Close-up of a black DCMO vacuum cleaner head assembly (no visible text or symbols)NABÍJENÍ
natural_image
Close-up of a hand inserting a small black cable into a black rectangular device (no visible text or symbols)POZNÁMKA
natural_image
Close-up of a black DOMO vacuum cleaner with green LED indicator (no text or symbols visible)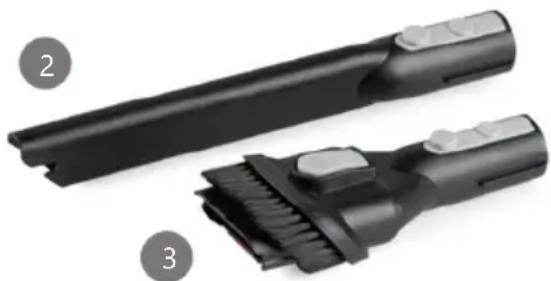
natural_image
Close-up of a black vacuum cleaner blade and handle assembly (no text or symbols visible)ČIŠTĚNÍ PODLAHOVÉ HUBICE
natural_image
Close-up of a black DCOMO vacuum cleaner with green LED indicator light (no text or symbols visible)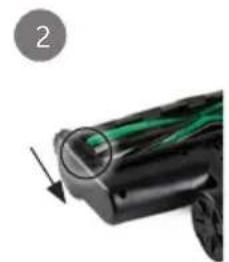
natural_image
Close-up of a car's front wheel and body panel with green cable, no visible text or symbols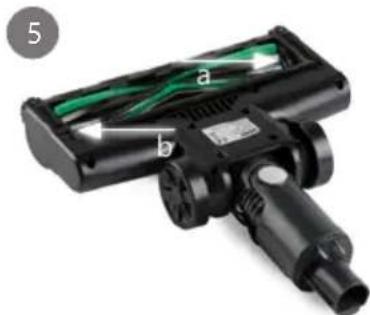
natural_image
Close-up of a black handheld vacuum cleaner with green internal components (no visible text or symbols)natural_image
Symbol of a trash bin crossed with two crossed lines and a black rectangle below (no text or labels)DRŽIAK NA STENU
natural_image
Close-up of a hand inserting a black cable into a black plastic housing (no text or symbols visible)natural_image
Close-up of a black Domo vacuum cleaner with green LED indicator light (no text or symbols visible)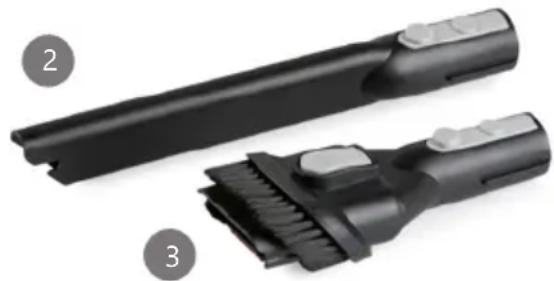
natural_image
Two black hairbrushes with textured surfaces, labeled 2 and 3 (no text or symbols on the brush itself)ČISTENIE PODLAHOVÉ HUBICA
- Vysávač obrátte a vysuňte podlahovú hubicu. Najskôr musíte stlačit' uvolňovacie tlačidlo v zadnej časti hubice, a následne hubicu odňat'.
- Posunutím spínača dozadu odblokujte podlahovú kefu.
- Rukou alebo nožom jemne odstráňte všetky vlasy a nečistoty z okolia kefy. Umyte kefu pod tečúcou studenou vodou.
- Pred opätovnou montážou nechajte kefu úplne vyschnút.
- Pri výmene kefy priložte pravú stranu kefy k ozubenému koliesku (a) a zatlačte l'avú stranu (b) na miesto, kým nezapadne na miesto.
- Oba dva klipy po strane podlahovej hubice zacvaknite opät' dole, tak aby sa podlahová hubica zaistila.
natural_image
Close-up of a black DCAMO vacuum cleaner with green LED indicator lights (no text or symbols visible)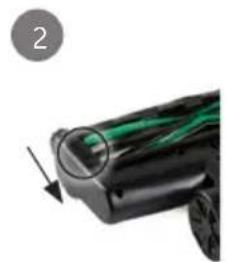
natural_image
Close-up of a black robotic arm with green handle and arrow indicator (no text or symbols)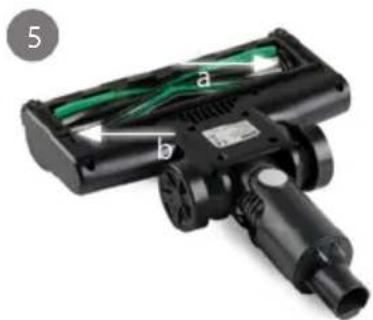
natural_image
Close-up of a black handheld vacuum cleaner with green internal components (no visible text or symbols)natural_image
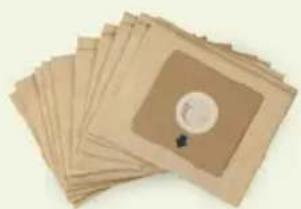
Symbol of a trash bin crossed with two crossed lines, no text or numbers presentLooking for extra accessories or you have a broken piece?
ORDER the original DOMO accessories and parts on our webshop.
Webshop

natural_image
Stack of sheets of paper with a circular inset showing a small object, no visible text or symbols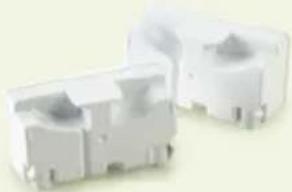
natural_image
Two white plastic electrical connectors with ports and mounting brackets (no visible text or symbols)
natural_image
White rectangular container with black interior, no visible text or symbols
natural_image
Clear glass coffee maker with black handle and lid (no text or symbols visible)
- ⚠PRODUCTSPECIFIEKE WAARSCHUWINGEN
- OPLADEN
- DE VLOERBORSTEL SCHOONMAKEN
- ⚠AVERTISSEMENTS SPÉCIFIQUES AU PRODUIT
- SUPPORT MURAL
- CHARGE
- NETTOYER LA BROSSE DE SOLS
- WANDBEFESTIGUNG
- SAFETY INSTRUCTIONS
- ▲ELECTRICAL WARNINGS
- ⚠️INSTALLATION
- ⚠ USE
- ⚠ CLEANING AND MAINTENANCE
- ⚠️PRODUCTSPECIFIC WARNINGS
- SAVE THESE INSTRUCTIONS FOR FUTURE REFERENCE
- PARTS
- BEFORE THE FIRST USE
- WALL MOUNT
- CHARGING
- NOTES:
- USE
- NOTE:
- CLEANING AND MAINTENANCE
- CLEANING THE APPLIANCE
- CLEANING THE DUST RESERVOIR
- CLEANING THE FLOOR BRUSH
- GUIDELINES
- NON-REMOVABLE BATTERY
- GARANTIA
- SOPORTE MURAL
- CARGA
- LIMPIAR EL CEPILLO DE SUELO
- SOSTEGNO A PARETE
- CARICARE
- PULIRE LA SPAZZOLA PER I PAVIMENTI
- DRŽÁK NA STĚNU
- NABÍJENÍ
- POZNÁMKA
- ČIŠTĚNÍ PODLAHOVÉ HUBICE
- DRŽIAK NA STENU
- ČISTENIE PODLAHOVÉ HUBICA
Brand : DOMO
Model : DO1190SV
Category : Vacuum Cleaner