
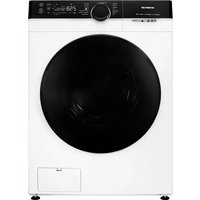
VDW9030W - Washing machine INVENTUM - Free user manual and instructions
Find the device manual for free VDW9030W INVENTUM in PDF.

| Product type | Heat pump dryer |
| Brand | Inventum |
| Model | VDW9030W |
| Rated capacity | 9.0 kg |
| Dimensions (W × D × H) | 675 × 595 × 850 mm |
| Weight | 48 kg |
| Electrical supply | 220-240 V~ / 50 Hz |
| Rated input power | 750 W |
| Refrigerant | R290 (flammable) |
| Programming type | Automatic programs and timer |
| Number of programs | 13 (Cotton Extra Dry, Cotton ECO, Cotton Easy Iron, Mix, Wool, Quick 30 min, Synthetics Ready to Wear, Refresh, Drying Time, Sports, Shirts, Allergy, Bed Linen) |
| Additional functions | Turbo, Signal, Anti-crease, Delay start (0-12h), Lamp, Silent, Hygiene (UV), Extra dry |
| UV-C light | Yes, integrated for sterilization after drying |
| Noise level (ECO program) | 64 dB(A) at full load |
| Child safety | Child lock (press DELAY START and LAMP simultaneously for 3 seconds) |
| Maintenance | Clean door filter after each cycle, empty condensation tank after each cycle, clean condensation unit every 3 months |
| Alarm indications | Indicators for filter to be cleaned and condensation tank full |
| Permitted ambient temperature | +2 °C to +35 °C |
| Warranty | 5 years warranty Inventum (domestic use in the Netherlands) |
| Spare parts and repairability | Repairs by authorized technicians only; approved spare parts |
Frequently Asked Questions - VDW9030W INVENTUM
User questions about VDW9030W INVENTUM
0 question about this device. Answer the ones you know or ask your own.
Ask a new question about this device
Download the instructions for your Washing machine in PDF format for free! Find your manual VDW9030W - INVENTUM and take your electronic device back in hand. On this page are published all the documents necessary for the use of your device. VDW9030W by INVENTUM.
USER MANUAL VDW9030W INVENTUM
natural_image
Front view of a white washing machine with a black circular vent and control panel (no visible text or symbols)Symbols used in this document
- Safety instructions page 22
- Product description page 28
- Installation and connection page 28
- Operation page 30
- Maintenance page 35
general terms and conditions of service and warranty page 77
Deutsch
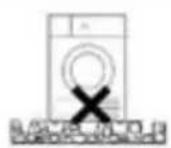
INSTALLATIELOCATIE EN OMGEVING
natural_image
Simple line drawing of a washing machine placed on a textured surface with a black X mark (no text or symbols)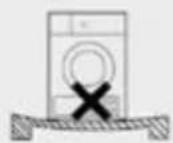

WAARSCHUWING!
flowchart
graph LR
    A["3D cube"] --> B["3D box with base"]
    B --> C["Washing machine"]
EXTERNE AFVOERSLANG INSTALLEREN
HET APPARAAT WATERPAS ZETTEN

WAARSCHUWING!
natural_image
Diagram of a washing machine with a close-up view showing internal components and mounting base (no text or labels)

natural_image
Line drawing of a hand cleaning a washing machine with a cloth (no text or symbols)Condensaattank leegmaken
natural_image
Illustration showing a kitchen sink and a hand holding a pipe fitting with an arrow indicating direction (no text or symbols)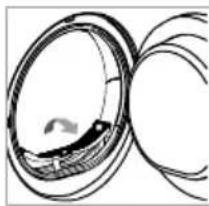
natural_image
Abstract line drawing of overlapping circular shapes with no text or symbols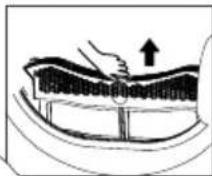
natural_image
Technical line drawing of a mechanical component with cross-sectional view (no text or symbols)
LET OP!
natural_image
Line drawing of a refrigerator interior showing ventilation grilles and doorways (no text or symbols)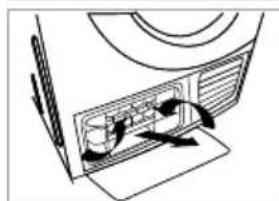
natural_image
Diagram of a computer monitor with ventilation slots and airflow arrows (no text or symbols)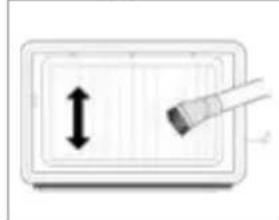
natural_image
Simple line drawing of a device with an arrow and a brush, no text or symbols present.
safety instructions1

Please read these instructions before operating the appliance and store them for future use.
Please, do not use the appliance without reading the instructions for use first.
- Check for any damage to the packaging or the appliance that may have occurred during transportation. Never use a damaged appliance, but contact your supplier.
- Failure to observe the instructions for use or inappropriate use of the appliance may result in damage to the laundry or the appliance, or injury to the user. Keep the instruction manual in a convenient location, near the appliance.
INSTALLATION LOCATION AND SURROUNDING AREA
- WARNING: Keep the ventilation openings in the housing of the appliance or in the built-in construction clear of obstruction.
• This appliance is for indoor use only. - Keep the appliance clear from heat sources and direct sunlight to prevent plastic and rubber parts from corroding.
- The appliance must not be installed behind a lockable door, a sliding door or a door with a hinge on the opposite side to that of the dryer, in such a way that a full opening of the dryer door is restricted.
- Place the appliance in a well-ventilated room, as this appliance may generate heat and humidity during use.
- Do not install the appliance in a room where the temperature can drop below 5°C, as the parts of the appliance may become damaged when water freezes.

Do not install the appliance in humid environments or rooms containing explosive or caustic gas. In case of water leakage or water splashes, allow the appliance to dry in the open air.
- Never use flammable sprays or substances in the immediate proximity of the appliance.
INSTALLATION
- Place the appliance on a solid (concrete) base that is level and stable.
-
Adjust the adjustable feet of the appliance to ensure the appliance is standing level and balanced.
-
After installation, let the dryer rest still for 24 hours before using it. Failure to do so may result in a heat pump failure which shall not be covered by the warranty.
- If the dryer has to be laid down on one of its sides during transport or servicing, place it on its left side downwards as seen from the appliance front.
- Before connecting the appliance to the power mains, wait at least 2 hours to allow it to reach room temperature.
- Dispose the packaging materials according to local regulations. Keep the material out of reach of children. Danger of suffocation.
ELECTRICAL INSTALLATION
- Connect the appliance to an earthed power socket protected by a fuse that complies with the values on the rating plate.
• Particularly make sure that the appliance is not placed on the power cord.

To avoid danger, a damaged power cord may only be replaced by the manufacturer, its service agent or similarly qualified persons.

If the appliance is damaged, it must not be operated until it is repaired by the manufacturer, service agent or similarly qualified persons.
- The appliance may not be connected to the power mains using an extension cord.

Do not connect the appliance to the power mains using an external switch device such as a programme timer, or connect it to a power mains that is regularly switched on and off by the power supply provider.
- Do not connect the appliance to an electrical outlet intended for an electric shaver or hair dryer.
- The mains plug must be accessible after installation.

Never use an extension cord or multiple plugs for making a connection.

Do not pull the plug out of the power socket if there is flammable gas around.

Never pull out the plug with wet hands.

Always unplug the appliance when it is not being used.
- Connection to the power supply has to be executed by an adequately trained technician or expert.
-
Any repair and maintenance pertaining to safety or performance should be done by trained experts.
-
In case of a defect, only use approved spare parts by authorised manufacturers.
- In case of incorrect appliance connection, incorrect use, or servicing by an unauthorised person, Inventum will not be responsible for any damage, as such damage will not be covered by warranty.

EXPLOSION AND FIRE HAZARD
- WARNING: Do not damage the refrigerant circuit.
- Please do not dry clothes with any flammable substances such as kerosene or alcohol. Otherwise, there may be an explosion.
- The appliance contains an environmentally friendly but flammable R290 refrigerant. Keep away from open flame and other sources of ignition.
- The tumble dryer is not to be used if industrial chemicals have been used for cleaning.
- Do not dry unwashed items in the tumble dryer.
- Items that have been soiled with substances such as cooking oil, acetone, alcohol, petrol, kerosene, spot removers, turpentine, waxes and wax removers should be washed in hot water with an extra amount of detergent before being dried in the tumble dryer.
- Items such as foam rubber (latex foam), shower caps, waterproof textiles, rubber backed articles and clothes or pillows fitted with foam rubber pads should not be dried in the tumble dryer.
- Oil-affected items can ignite spontaneously, especially when exposed to heat sources such as in a tumble dryer. The items become warm, causing an oxidation reaction in the oil. Oxidation creates heat. If the heat cannot escape, the items can become hot enough to catch fire. Piling, stacking or storing oil-affected items can prevent heat from escaping and so create a fire hazard.
- Remove all objects from pockets such as lighters and matches.
- If it is unavoidable that fabrics containing vegetable or cooking oil or having been contaminated by hair care products are placed in a tumble dryer, these items should first be washed in hot water with extra detergent. This will reduce, but not eliminate, the hazard.
- WARNING: Never stop a tumble dryer before the end of the drying cycle, unless all items are quickly removed and spread out so that the heat is dissipated.
- Openings must not be obstructed.
- The dryer filter has to be cleaned frequently.
- Lint must not to be allowed to accumulate around the tumble dryer.
CHILD SAFETY
- Before closing the appliance door and running the programme, make sure there is nothing except laundry in the drum (e.g. check if a child or animal climbed into the drum of the appliance).
- Children of less than 3 years should be kept away unless continuously supervised.
- This appliance may be used by children aged 8 years and above and by persons with reduced physical, sensory or mental capabilities or lack of experience and knowledge, provided they are supervised or have been given instructions concerning the use of the appliance in a safe way and understand the hazards of inappropriate use.
• Children are not allowed to play with the appliance. - The appliance may not be cleaned or maintained by children, unless this is done under supervision.
- Children should be supervised, to prevent them from playing with the appliance.
- Do not climb or sit on the appliance.
- The appliance is made in compliance with all relevant safety standards.
- Remove the door or deactivate the lock when disposing of the appliance. Children are known to have gotten themselves locked in old appliances. To prevent such a situation, break the door lock of your appliance and tear off the electrical cables.
Only use the appliance for drying laundry as described in the instruction manual. The machine is not intended for dry cleaning.
- The dryer uses a heat pump system to heat the air.
The system consists of a compressor and a heat exchanger. When the dryer is started, compressor operation (the sound of flowing liquid) or flow of refrigerant may be louder as long as the compressor operates. This is not a sign of malfunction and it will not affect useful life of the dryer. In time and with use of the dryer this noise will become quieter.
- This device contains a lamp that emits antibacterial UV-C light. Do not look directly into the lamp when it is switched on.
- Do not remove the UV-C lamp from the device and never use the lamp in another device.
- Do not touch the UV-C lamp.
• Using this device for purposes other than those for which it is intended or damaging the UV-C protective glass may result in the
release of dangerous UV-C radiation. Even at low doses, UV-C radiation can damage the eyes and skin. Do not use the device if it is damaged!
- Do not remove the UV-C protective glass and never use the device without it.
- The UV-C lamp and related components, such as the UV-C protective glass, may only be replaced or repaired by a trained technician or specialist.
- Ensure that children cannot access the device when a programme involving UV-C light is active.
- Only use products specifically designed for drying laundry. Inventum will not be responsible for any damages or discolouration of gaskets and plastic parts resulting from incorrect use of bleaching or colouring agents.
- In case of a defect, only use approved spare parts by authorised manufacturers.
- Make sure that all pockets are emptied. Sharp and rigid items such as coins, brooches, nails, screws, stones etc. may cause serious damages to this machine.
- Remove all objects from pockets such as lighters and matches before using the appliance.
- Please do not close the door with excessive force. If it is found difficult to close the door, please check if the clothes are properly inserted and distributed.
- In case of incorrect connection of the appliance, incorrect use, or servicing by an unauthorised person, the user shall bear the cost of any damage, as such damage shall not be covered by warranty.
- When cleaning the appliance, only use non-corrosive cleaning agents.
- The warranty does not cover consumables, minor deviations in colour, increased noise that results from appliance age and which does not affect the functionality of the appliance, and aesthetic defects on components, which do not affect the functionality and safety of the appliance.
TRANSPORT/RELOCATION AFTER INSTALLATION
- Accumulated water must be drained out of the appliance.
- If the dryer cannot be transported in the upright position, tilt it on its left side as seen from the front of the appliance.
- The appliance is heavy. Transport with care. Never hold any protruding part of the appliance when lifting. The door of the appliance cannot be used as a handle.
INTENDED USE
- The appliance is intended solely for household use. If the appliance is used for professional, commercial purposes or purposes exceeding normal use in a household, or if the appliance is used by a person who is not a consumer, the warranty period shall be equal to the shortest warranty period required by relevant legislation.
-
This appliance is intended to be used in households and similar applications such as:
-
staff kitchen areas in shops, offices or residential type environments;
- farm houses;
- by clients in hotels, motels and other residential type environments;
- bed & breakfast type environments;
- areas for communal use in blocks of flats or in launderettes.
- The appliance is not intended for use by persons (including children) with physical or mental impairments, or persons lacking experience and knowledge. These persons should be instructed about the use of the appliance by a person responsible for their safety.
OLD APPLIANCE
- Remove the door or deactivate the lock when disposing of the appliance. Children are known to have gotten themselves locked in old appliances. To prevent such a situation, break the door lock of your appliance and tear off the electrical cables.

This product is labelled with this crossed out wheel bin symbol in accordance with European Directive 2012/19/EC to indicate that it must not be disposed of with your other household waste. Due to the presence of hazardous substances, mixtures or components, electrical and electronic devices that are not subject to selective sorting are potentially dangerous to the environment and human health. Please check your local city office or waste disposal service for the return and recycling of this product.
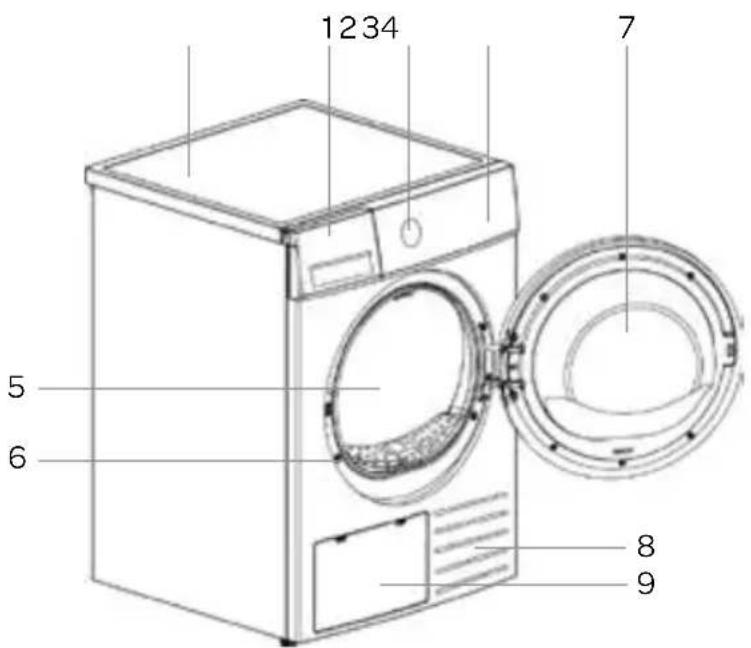
2 product description
- Condensate tank
- Programme selector knob
- Control panel
- Top board
- Drum
- Door filter
- Door
- Air inlet
- Maintenance cover
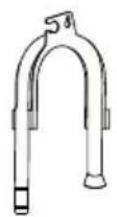
1 x user manual1 x hose holder
3 installation and connection
REQUIRED SPACE FOR INSTALLING

WARNING!
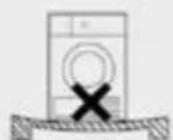
- Stability is important to prevent the product from moving across the installation site! Make sure to level the appliance and install it on a stable base in longitudinal and traverse direction by screwing the adjustable feet up or down.
• Make sure the appliance is not standing on the power cord. - Make sure to observe the minimum required clearances from the walls as indicated in the figure.
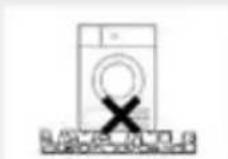
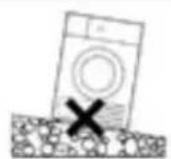
- Do not place the appliance on a carpet with long fibres, as this may impede air circulation.

The room in which the appliance is placed must meet the following requirements:
- Dry, level and stable solid base
- Avoid direct sunlight
- A clean location, where dirt does not accumulate. Air must be able to circulate freely around the appliance. Do not obstruct the front air inlet or the air intake grills at the back of the machine.
- Room temperature is between 10^ C and 25^ C
- Place the appliance in a well-ventilated room, as the use of this appliance may generate heat and humidity. Keep far away from heat sources such as coal, gas or wood burning appliances
- Do not stack this dryer on a washing machine without a stacking kit.
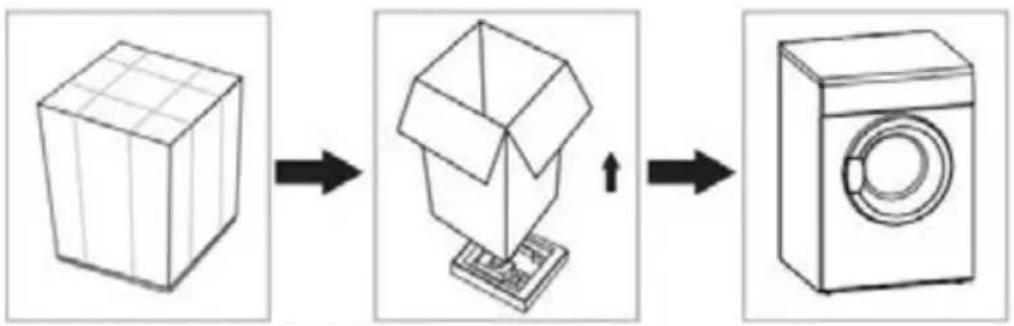
UNPACKING THE APPLIANCE

WARNING!
- Move the appliance with at least two people and wear protective clothing, such as sturdy gloves.
- Packaging material (e.g. films, Styrofoam) can be dangerous for children.
- There is a risk of suffocation! Keep all packaging away from children.
flowchart
graph LR
    A["Grid cube"] --> B["Box with arrow"]
    B --> C["Water washing machine"]
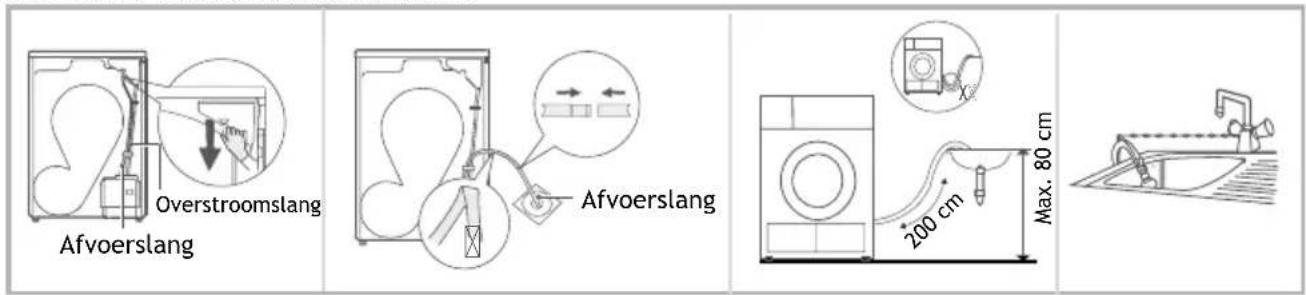
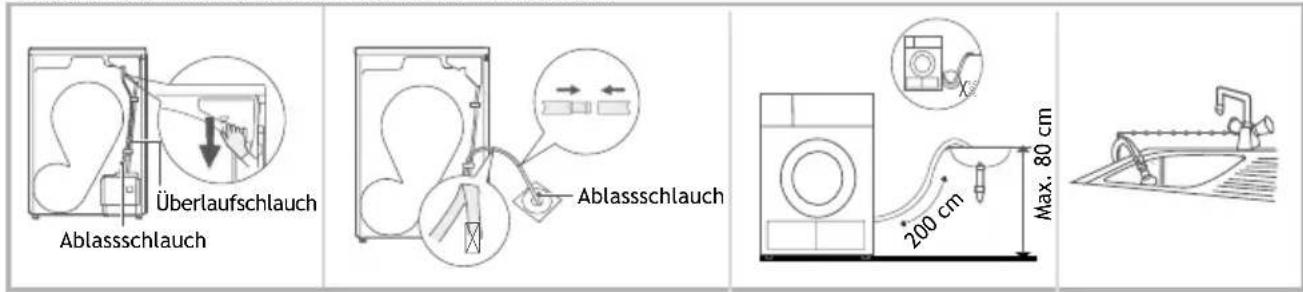
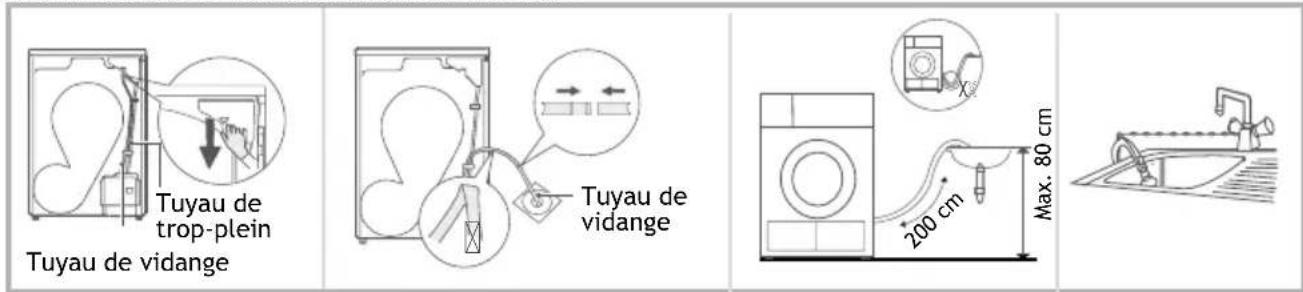
INSTALLING THE EXTERNAL DRAINAGE HOSE
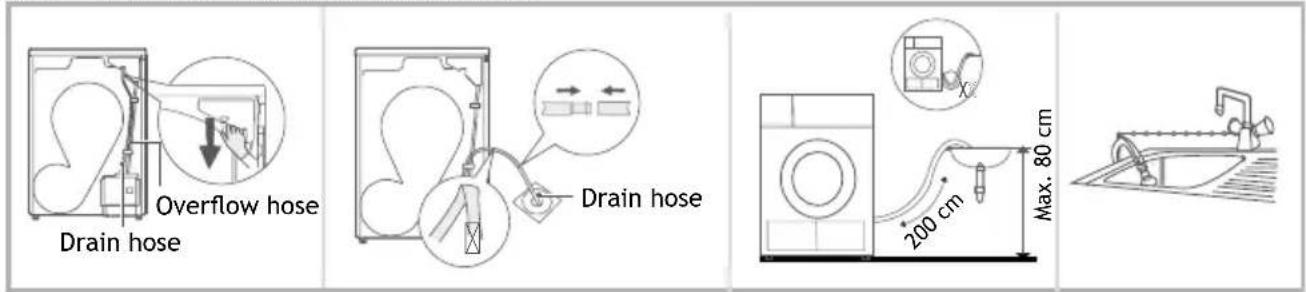
Pull up the upper drain hose
Put the external drain hose into the floor drain (be careful not to bend the external drain hose)
Put the hose holder in the washing basin or any other sink
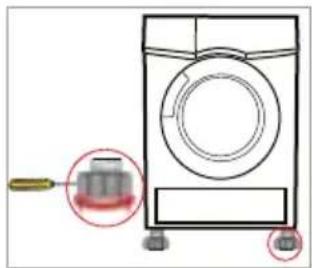
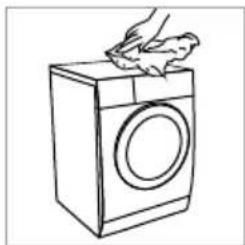
LEVELLING THE APPLIANCE

WARNING!
- Incorrect levelling of the appliance with the adjustable feet may cause vibration, appliance moving across the room, and loud operation.
Use a level and a spanner to level the appliance.
- Rotate the adjustable feet with a spanner.
- Level the appliance in longitudinal and traverse direction.
natural_image
Diagram of a washing machine with a close-up view showing internal components and mounting base (no text or labels)CONNECTING THE APPLIANCE TO THE POWER MAINS

WARNING!
• Before connecting the appliance to the power mains, wait for at least 2 hours until room temperature has been reached.
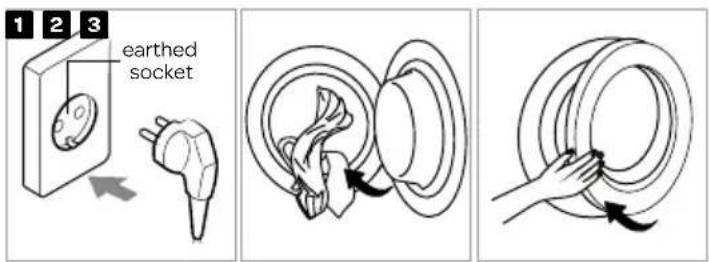
- Connect the appliance to an earthed power outlet. After installation, the wall socket must be freely accessible. The socket must be fitted with an earth contact (in compliance with the relevant regulations).
• Information about your appliance is indicated on the rating plate.

WARNING!
• Using an over-voltage protection to protect the appliance in case of a lightning strike, is recommended.

WARNING!
- Do not connect the appliance to the power mains using an extension cord.

CAUTION!
- Do not connect the appliance to an electrical outlet intended for an electric shaver or hair dryer.
- Any repair and maintenance pertaining to safety or performance must be done by trained experts.
- A damaged power cord may only be replaced by a person authorised by the manufacturer.
4 operation
BEFORE FIRST USE
i CAUTION!
- Before first use, clean the inside of the drum with a soft damp cloth.
- Put some clean rags into the drum.
- Insert the mains plug into the power socket and press the ON/OFF button ⏻
- Select the REFRESH programme and press the START/PAUSE button to start the appliance.
- When the programme is finished, please follow the CLEANING and CARE instructions to clean the dryer filter.
- During drying, the airflow and the pump will generate some noise, which is entirely normal.
BEFORE EACH DRYING CYCLE
- Before each drying cycle, sort your laundry by reading the care labels.
- Thoroughly spinning the laundry in the washing machine, shortens the drying time and saves energy.
- For uniform drying results, sort the laundry according to fabric type and select the appropriate drying programme.
- Before drying, please close buttons and zips, hooks and eyelets, tie any ribbons and turn the pockets inside out.
- Leave jackets open and undo any long zips so that textiles dry evenly.
- Sew in or remove underwiring from bras.
- Close duvet covers and pillow cases to prevent small items from getting rolled up inside them.
- Drying laundry made of particularly delicate fabrics that may be deformed is not
recommended. The following types of laundry may not be dried in the appliance as this may cause your garments to deform:
• leather garments and other leather products;
• garments that are waxed or treated in any other way;
• garments with major wooden, plastic or metal parts;
• garments with spangles;
• garments with metal parts subject to rusting.
- Do not over-dry the clothes, because over-dried clothes can easily get creases.
i CAUTION!
- Do not put more load than rated in the appliance.
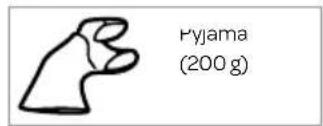
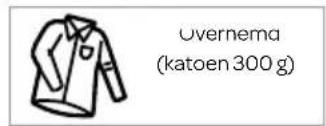
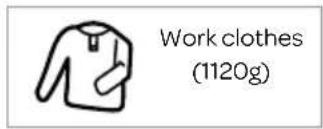
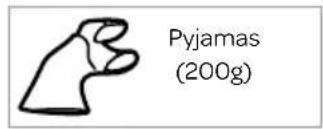
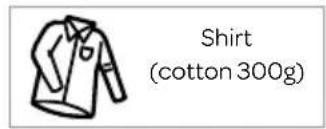
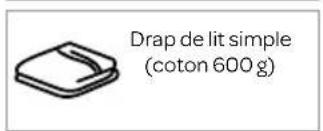
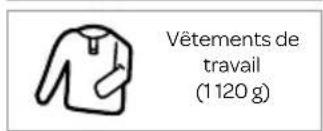
• See below for the reference weight of dry clothes (weight per item) - Do not dry dripping wet laundry. The appliance might get damaged.
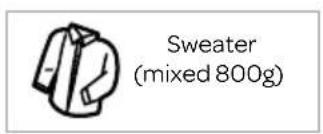
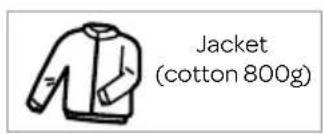
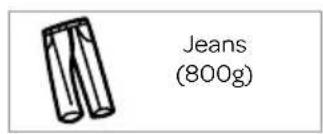
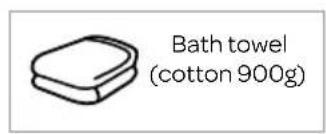
Only dry laundry suitable for tumble drying. Regard the laundry care labels:

Suitable for tumble drying

Normal drying process: drying in the appliance is possible with normal programmes and temperature of 80°.

Mild drying process: caution is appropriate when tumble drying. Select a mild process with reduced thermal action.

Do not tumble dry: the garment is not suitable for drying in the appliance.
PREPARING BEFORE DRYING
Plug in Close the door Open the door and load
DRYING

Press ON/OFF to start the appliance
Select a programme
Select settings and/or additional functions *
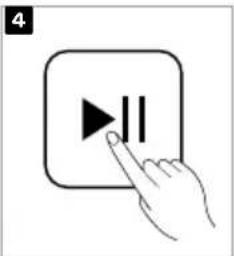
Press START/PAUSE to start the program
* Select TIME, SIGNAL, ANTI-CREASE, START DELAY, LAMP, SILENCE, DRY, HYGIENE or INTENSITY for additional options.
AFTER DRYING
When the programme is finished and the appliance is ready, a buzzer will sound and [0:00] appears on the display. The dryer automatically starts the anti-crease phase if the laundry is not removed from the drum.
flowchart
graph LR
    A["1: Cable winding"] --> B["2: Cable assembly"]
    B --> C["3: Cable connection"]
    C --> D["4: Cable switch"]
    D --> E["5: Terminal plug with plug"]
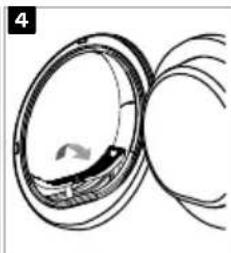
Open the door and take out the laundry
Pull out the condensate tank

natural_image
Technical line drawing of a mechanical component or bracket (no text or symbols)Pour out the condensate water
natural_image
Diagram of a mechanical component with curved lines and a central circular feature (no text or symbols)Clean the dryer filter
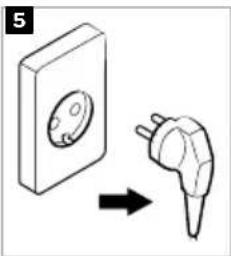
natural_image
Diagram showing a device with a circular component and a plug, both pointing to it (no text or symbols present)Press the on/off button and unplug the appliance
When the door of the appliance is opened, the interior light switches on. Do not forget to press the on/off button before unplugging the appliance.
| Nr. | Symbol Button | or indicator | Description | |
| 1. | Programmes | Available programmes (see the table with programmes for more information). | ||
| 2. |  | Programme selector knob | Turn the programme selector knob left or right to select the desired programme. | |
| 3. |  | Time Press | the time button to adjust the drying time in 10 minute steps. | |
| 4. | Turbo | Turbo Press | the button to turn the Turbo function on or off. | |
| 5. | Signal kit | button to deactivate | or activate the buzzer. | |
| 6. | Anti-kreuk / ♥ | Anti-crease | At the end of the drying cycle, the default anti-crease time is 60 minutes, or when selected, 30 or 90 minutes. | |
| 7. | Startuitstel | Start delay | Use this function to start the drying cycle after a certain amount of time has elapsed. | |
| 8. | Lamp | Lamp | Press the lamp button to activate the drum light for 3 minutes when the door is open. | |
| 9. | Silent dry press the | button to activate | the silent dry option. | |
| 10. | Hygiene | Hygiene Press | the button to activate the hygiene function. | |
| 11. |  | Start/pause button | Press the button to start or pause the drying process.Opening the door also pauses the appliance. When closing the door, press the button again to resume the drying process. | |
| 12. |  | On/off Press | the on/off button to start the appliance or to turn it off. | |
| 13. | Extra Droog | Extra dry The | extra dry option allows you to adjust the dryness level of the laundry. | |
| 14. | Display | 8:88 | Display | The display shows the settings, estimated time remaining, options and status messages for your appliance. The display will remain on during the cycle. |
| Child lock | When this indicator lights up, the child lock is activated. | |||
| UV | UV | The built-in UV light ensures a sterilization results after the drying cycle.UV light is added automatically to certain programmes - see the control panel. | ||
| Anti-crease | When this indicator lights up, the anti-crease function is added. | |||
| Intensity (dry level) | When this indicator lights up, the extra dry function is added. | |||
| Clean filter | Warning: when this indicator lights up, the dryer filter needs to be cleaned. | |||
| Full condensate tank | Warning: when this indicator lights up, the condensate tank is full and needs to be emptied. | |||
Tijd Ⓛ
Time
When the [Time Dry] or [Refresh] programme is selected, the [Time] button can be used to adjust the drying time in 10 min. steps.
Turbo
Turbo
Use this function to speed up the drying programme. Depending on the selected programme, the drying time will be reduced by 20 to 35 minutes. This function is available on all programmes, except: [wool], [Allergy], [Time programme], [Shirts], [Sport], [Fast 30 min.] and [Refresh].
Turbo


Signaal uit
Signal
Set the buzzer on or off. In default condition, the buzzer is on. When the buzzer is on:
- The dryer will affirm pressed function button by a sound.
- If the programme knob is rotated during the dryer is running, the buzzer will remind the user that this is an invalid operation.
- When the drying programme is done, the buzzer will beep.
To activate the 'Signal off' function, press the TURBO and ANTI-CREASE / FAVOURITE buttons simultaneously.
Anti- kreuk

Anti-crease
At the end of the drying cycle, the anti-crease time is 30 minutes (default) or 60 minutes and 90 minutes (selected).
This function prevents the laundry from forming creases. The laundry can be removed during the anti-crease phase. Except [Wool] and [Refresh], all the other programmes have this function.
Startuitstel
Startdelay
Use this function to start the drying process after a certain amount of time has elapsed. When the set delay time expires, the selected drying programme will start automatically. The time starts to countdown on the display and the indicator blinks. To set the START DELAY proceed as follows:
- Load your laundry and make sure the door of the appliance is closed.
- Press the ON/OFF button, then turn the programme selector knob and select the desired programme.
- Select the ANTI-CREASE function if needed.
- Press the START DELAY button. Set the hours by repeatedly pressing or holding the START DELAY button. It can be set from 0 up to 12 hours.
- Press the START/PAUSE button to activate the programme with delayed start.
i CAUTION!
- If you press the START/ PAUSE button again, the delay function will be paused. Press the START/ PAUSE button again to resume the START DELAY.
• To cancel the START DELAY function, press the ON/OFF button.
Lamp
Lamp
The drum light will be on for 3 minutes when the button is pressed or 3 minutes when the door is open.
Stil
SilenceDry
The rotating speed of the drum will drop to reduce the noise of the dryer. Note: this will cause the drying time to extend.
Hygiène
Hygiene with UV light
After selecting the program, you can choose the HYGIENE with UV light function according to your needs. Press HYGIENE to select this function. Press it again to cancel.
After selecting the HYGIENE function, there will be 20 to 60 minutes added to the programme duration depending on the specific cycle.
The laundry is sterilized at the final stage of the drying process, making clothes cleaner and safer. Use this function with caution for light, thin or delicate laundry.
Extra Droog
Extra dry
The EXTRA DRY option allows you to adjust the dryness level of the laundry. It adds more time to the drying process. Choose this option before starting the drying process. The EXTRA DRY option is not available for the programmes: Wool, Time dry and Refresh.


Childlock
This function is a safety feature and prevents children from misusing the control panel.
To activate the child lock, proceed as follows:
- When the drying process is active, press and hold the buttons START DELAY and LAMP at the same time for 3 seconds to activate the child lock. The child lock indicator lights up in the display.
Deactivating the child lock - Press the START DELAY and LAMP buttons and hold for 3 seconds to deactivate the child lock. The child lock indicator disappears from the display.
i CAUTION!
The child lock deactivates the function of all buttons except the on/off knob and the child lock button combination! Only the simultaneous pressing of the two buttons START DELAY and LAMP can deactivate the child lock. Please deactivate the child lock before selecting a new program!
❤️ Favoriet
Favorite
The FAVORITE option allows you to set your favourite programme with the extra options as you desire. To set your favourite programme, proceed as follows:
- Select your favourite programme with the programme selector knob and any extra options you want to add.
- Press and hold the ANTI-CREASE button for 3 seconds until the buzzer sounds. Your favourite programme has been saved.
- Turn the programme selector knob to the FAVORITE position and press START to start the drying process.
- If you want to change the settings of FAVORITE, repeat steps 1 and 2.
PROGRAMMES
| Programme Default time | Programme description Max. | load | |
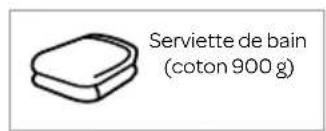
| Cotton extra dry | 3:20 | For single or multi-layer cotton laundry to be dried completely for direct storage. | 9,0 kg |
| Cotton ECO 3:20 | |||
| Cotton Iron | 2:40 | For single layer cotton laundry to remain damp for ironing. | |
| Mix 2:30 | Use this programme to dry laundry made of mixed fabrics from cotton and synthetics. After the drying process, the laundry will be dry. | 6,0 kg | |
| Wool 3:00 | Gentle drying for machine washable wool items. The final moisture content will depend on the load size and the moisture content after spinning. | 1,0 kg | |
| Fast 30 min. | 0:30 | Suitable for drying 1 to 3 items made of synthetic or thin cotton fabric with a low moisture content. | 0,6 kg |
| Cupboard-dry synthetics | 1:30 Suitable for drying items made of thin synthetic fabric that do not require ironing, such as non-iron shirts, baby clothes or socks. | 4,0 kg | |
| Refresh | 0:30 | To refresh clothes or to remove odors.Min. 20 minutes to max. 180 minutes (in 10 minute steps). | 2,0 kg |
| Time dry | 0:10 | To dry individual items or complete the drying process of multi-layer fabrics with different drying behavior, such as jackets, pillows or voluminous items. Min 10 minutes to max. 150 minutes (in 10 minute steps) | -- |
| Sports | 1:40 | To dry sportswear and thin fabrics from polyester, which are not ironed. | 3,0 kg |
| Shirts | 1:20 | For easy care laundry, such as shirts and blouses equipped with anti-crease functionality to minimize the ironing effort. Place clothes loosely in the dryer.Once dried, remove quickly and hang it on a clothes hanger | 1,0 kg |
| Allergy | 2:25 | To dry a small amount of clothing that require special care, such as clothes for people with highly sensitive skin or skin allergies or baby clothing. | 3,0 kg |
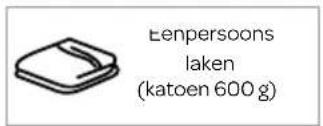
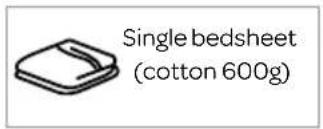
| Bed linen | 2:30 | To dry bed linen, bed sheets or other large items. | 5,0 kg |
| Favorite | ECO programme is set by default. Define and save your favourite programme. | ||
i CAUTION!
- Thick or multi-layered fabrics, e.g. bedlinen, jeans, jackets etc., are not easy to dry. It would be better to choose the Cotton Extra programme or add the Extra dry option.
- As uneven material, thick and multi-layered clothes are not easy to dry, it is better to choose the appropriate time drying programme to dry them if some parts of the clothes are still damp after the programme has finished.
- Loading the tumble dryer up to the maximum capacity for the respective programme will contribute to energy savings.

All data are measured in accordance with EN 61121.
The values given for programmes other than the eco programme are indicative. The actual consumption may differ from the values listed in the table, depending on the amount of laundry, the type of fabric, the residual moisture and any additional functions selected.
SELECTING ADDITIONAL FUNCTIONS
An additional function can be added to the drying programme before pressing START.
| Programma Start | delay | Time $ilent | Hygiene (Duration UV light) | Extra dry | Anti-crease | Turbo (time saving) | |
| Cotton extra dry | ● | ● | ● (60 min) | ● | ● | ● (-30 min) | |
| Cotton ECO | ● | ● | ● (60 min) | ● | ● (-35 min) | ||
| Cotton Iron | ● | ||||||
| Mix | ● | ● | ● (40 min) | ● | ● | ● (-20 min) | |
| Wool | ● | ||||||
| Fast 30 min. | ● | ● | |||||
| Cupboard-dry synthetics | ● | ● | ● (20 min) | ● | ● | ● (-20 min) | |
| Refresh | ● | ● | ● | ||||
| Time dry | ● | ● | ● | ||||
| Sports | ● | ● | ● (30 min) | ● | ● | ● (-20 min) | |
| Shirts | ● | ● | ● (20 min) | ● | ● | ● (-10 min) | |
| Allergy | ● | ● | ● (40 min) | ● | ● | ● (-20 min) | |
| Bed linen | ● | ● (60 min) | ● | ● | ● (-25 min) | ||
| Favorite | Depending on the programme selected. | ||||||
5
maintenance

WARNING! Always unplug the appliance before cleaning and maintenance.
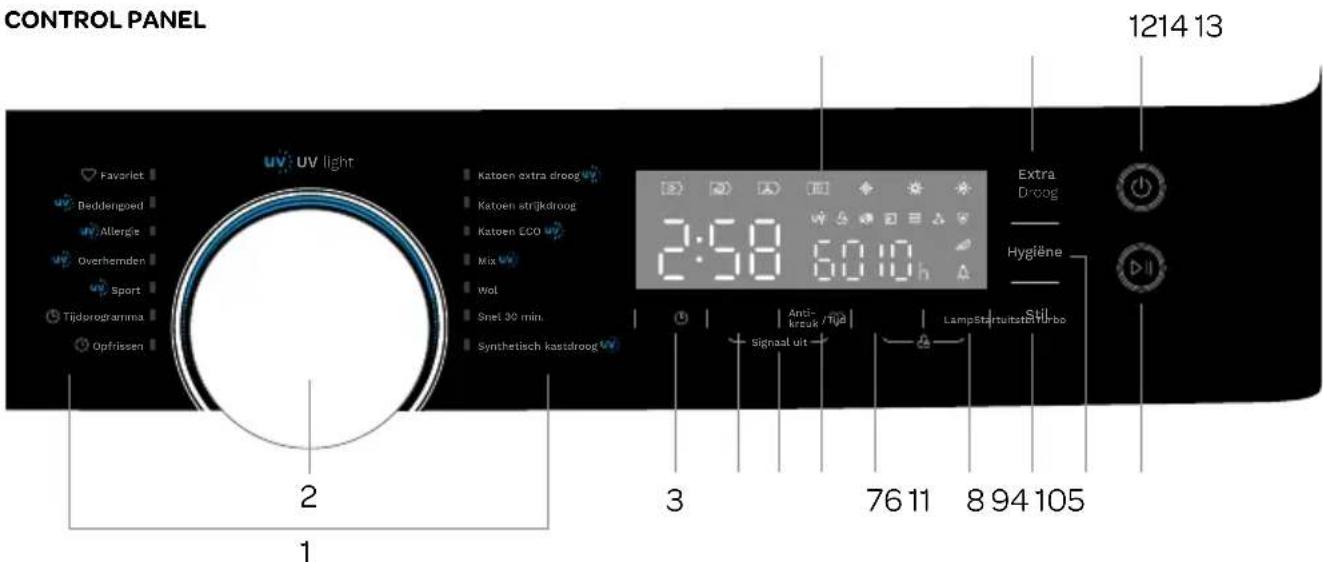
Cleaning the exterior of the appliance
Proper maintenance of the appliance can extend its useful life. Clean the exterior of the appliance and control panel using a soft, damp cloth and water.
Clean the door regularly, especially the inside of the glass, the door seal and the moisture sensor in the drum.
If necessary, a diluted, non-abrasive neutral cleaning agent can be used to clean the appliance.
Emptying the condensate tank
- Pull out and hold the condensate tank with two hands.
- Tilt the condensate tank and pour out the condensate water into the basin.
- Install the condensate tank.

WARNING!
- Empty the condensate tank after each use. Should the condensate tank fill up completely, the programme will be paused and the symbol "will light up. Once the tank is emptied, the dryer can be restarted by pressing the START/PAUSE button.
- Do not drink the condensate water.
- Do not use the dryer without the condensate tank.
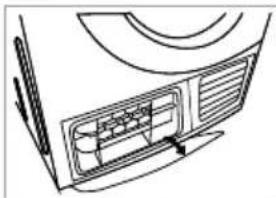
Clean the filters
This dryer has a primary door lint filter.
Make sure you clean the door filter after each cycle.

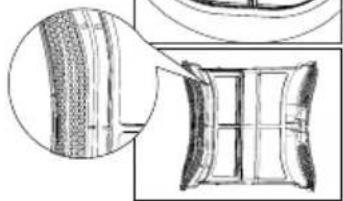
NOTE!
- To ensure the double-layer filter can be closed smoothly, the arrows at both ends need to be aligned, and the middle slot and the rib need to be aligned.
Cleaning the dryer filter
- Open the door.
- Take out the filter.
- Open the filter and remove the fluff. You can clean it with water. Throw the removed fluff away in the rubbish bin. Do not wash it down the sink to prevent micro plastics from getting in the waste water.
- Dry the filter thoroughly before installing it again, or let it air dry for a few hours before installing it again.

NOTE!
- The lint accumulated on the dryer filter will block the air circulation, which will result in a longer drying time and increased energy consumption. Therefore, the dryer filter must be cleaned after each use.
• Take notice of the correct orientation before inserting the dryer filter. - Do not operate the dryer without the dryer filter!
- Clean the dryer filter after each use to prevent lint accumulation inside the dryer.
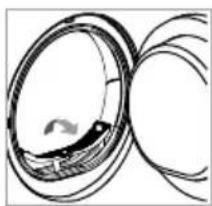
Cleaning the condenser unit
Please clean the condenser unit approximately once every 3 months if it is frequently used. Do not damage the condenser unit!
- Leave the dryer to cool down.
- Residual water may leak out, place an absorbent cloth under the maintenance cover.
- Unlock the maintenance cover.
- Completely open the maintenance cover.
- Remove lint and fluff from the condenser unit using a vacuum cleaner with a dusting brush attached. Do not apply any pressure. Otherwise, the condenser unit could be damaged. The dryer will not dry if the cooling fins are damaged or bent.
- Clean the seals.
- Close the maintenance cover until it locks into position.
Foreign objects removal
If foreign objects fall inside the compartment below the filter, remove the filter, open the heat exchanger area compartment and remove the foreign object. Make sure not to touch the heat exchanger with bare hands to avoid injuries.
natural_image
Line drawing of a hand washing a washing machine with a cloth (no text or symbols)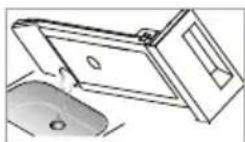
natural_image
Abstract line drawing of overlapping curved lines with a small arrow icon (no text or symbols)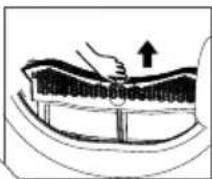

natural_image
Technical line drawing of a mechanical component with cross-sectional view (no text or symbols)
natural_image
Line drawing of a refrigerator interior showing vent and door (no text or symbols)
natural_image
Diagram of a computer monitor with ventilation slots and airflow arrows (no text or symbols)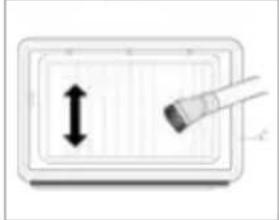
natural_image
Simple diagram showing a rectangle with an upward arrow and a brush, no text or symbols present.
WARNING! Do not use hard/sharp-edged objects!
Do not operate the dryer without the condenser unit!
Troubleshooting
Many malfunctions and faults that might occur in daily operation can be easily remedied.
Time and money will be saved because a service call will not be needed.
The following guide may help you find the reason for a malfunction and correct it.
| Display Reason | Solutions | |
| Condensate tank is full Empty the condensate tank. | ||
| Water pump failure or water level sensor failure | Please contact the customer service if the problem persists. | |
| E32 | Humidity sensor error | |
| E33 | Temperature sensor error | |
| E64 | BLDC motor communication error | |
| E82 | PCB communication error | |
- Only authorized technicians can carry out repairs.

WARNING!
Repairing the appliance yourself or non-professionally can cause danger and the guarantee to expire.
- If the display shows a different error code and the dryer does not work, please call the customer service.
- Before you call the customer service, please check if you can resolve the problems yourself by consulting the user instructions.
- Before you call the customer service, please check if you can resolve the problems yourself by consulting the user instructions.
| Problem Solution | |
| Display is not on • Check if the power | supply works.• Check if the mains plug is inserted.• Check the selected programme.• Press the ON/OFF button. |
| “” lights up | • Empty the condensate tank.• If the light still remains on, please call the service center. |
| “” lights up | • Clean the dryer filter. |
| Dryer does not start • Connect the t | tumble dryer to the mains.• Turn on the tumble dryer.• Check if the door is closed.• Check if the programme is set.• Press the START/PAUSE button. |
| Degree of dryness was not reached or drying time too long | • Clean dryer filter and condenser unit.• Empty the condensate tank.• Check the drain hose.• Check if installation place is appropriate.• Keep the air inlet clean.• Use a higher drying intensity level programme or time programme. |
| There are humming noises • The com | pressor is operating. These noises are quite normal and do not indicate a fault. |
| The dryer switches off at the end of the programme | • The dryer switches off automatically in order to save energy. This is not an error, but a normal function. |
If you cannot resolve the problems yourself and need help:
- Press the ON/OFF button.
- Pull out the mains plug and call the customer service.
Technical specifications
| Model | VDW9030W /01 |
| Dimension(L*W*H) | 675x595x850 mm |
| Ambient temperature | +2 °C - +35 °C |
| Rated input power | 750 W |
| Rated voltage | 220-240 V~ |
| Rated frequency | 50 Hz |
| Refrigerant | R290 |
| Weight of product | 48 kg |
| Rated capacity | 9,0 kg |

NOTE!
- The rated capacity is the maximum capacity, make sure that the dry clothes loaded into the appliance do not exceed the rated capacity.
- Do not install the tumble dryer in a room with a risk of frost. At temperatures around freezing point, the tumble dryer may not be able to operate properly.
- There is a risk of damage if the condensate water is allowed to freeze in the pump, hoses and / or condensate tank.
Consumption details
| Programme Capacity Moisture | percentage after drying | Drying time [h:min] | Energy consumption | Spin speed | |
| ECO 9,0kg 0% 4:40 1.41kWh | 1000rpm | ||||
| 4,5kg 0% 2:50 0.77kWh 1000rpm | |||||
| Cotton extra dry 9,0kg -3% 4: | 50 1.80kWh 1000rpm | ||||
| 4,5kg | -3% 3:00 1.30kWh 1000rpm | ||||
| Cotton iron dry | 9,0kg | 12% | 3:05 | 1.40kWh | 1000rpm |
| 4,5kg | 12% 1:30 | 0.75kWh | 1000rpm | ||
| Synthetics extra: Synth. cupboard dry + ⚙ | 4,0kg 0% | 1:20 | 0.65kWh | 800rpm | |
| Synthetics cupboard dry | 4,0kg | 2% | 1:10 | 0.60kWh | 800rpm |
| Synthetics iron dry: Synth. cupboard dry + ⚙ | 4,0kg | 12% 0:50 | 0.40kWh | 800rpm | |
| Wool | 1,0kg 6% 3:00 | 1.35kWh | / | ||
The acoustic airborne noise emission of the ECO programme at full load is 64 dB.

How to find energy related information on the public database of the European Commission EPREL.
-
Open the EPREL-database homepage
https://eprel.ec.europa.eu/screen/product/tumbledriers -
Search for the model
Model ID: VDW9030W
Sicherheitshinweise

natural_image
Three identical line drawings of a washing machine with a cross mark, placed on a textured surface (no text or symbols)
WARNUNG!
flowchart
graph LR
    A["3D Cube"] --> B["Box with Box"]
    B --> C["Washing Machine"]
DEN EXTERNEN ABLASSSCHLAUCH ANSCHLIESSEN
natural_image
Diagram of a washing machine with a red indicator light and mounting base (no text or symbols)
natural_image
Line drawing of a hand washing a washing machine with a cloth (no text or symbols)natural_image
Illustration showing a kitchen sink and a hand holding a door handle, with an arrow indicating direction (no text or symbols)Die Filter reinigen
natural_image
Abstract line drawing of overlapping circular shapes with internal lines (no text or symbols)

natural_image
Line drawing of a refrigerator front panel with ventilation grilles (no text or symbols)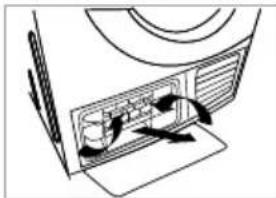
natural_image
Diagram of a computer monitor with an open screen showing internal components and arrows indicating flow (no text or symbols)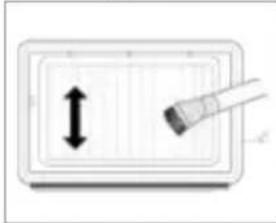
natural_image
Simple diagram showing a double-headed arrow and a pen tip, no text or symbols presentnatural_image
Three identical line drawings of a washing machine with a cross mark, placed on a textured surface (no text or symbols)
AVERTISSEMENT!
flowchart
graph LR
    A["3D cube"] --> B["Box device"]
    B --> C["Washing machine"]
INSTALLATION DU TUYAU DE VIDANGE EXTERNE
natural_image
Diagram of a washing machine with a close-up view of the front panel and base, showing no text or symbols.BRANCHEMENT DE L'APPAREIL SUR LE SECTEUR

AVERTISSEMENT!
natural_image
Line drawing of a hand cleaning a washing machine (no text or symbols)natural_image
Technical illustration showing three stages of a mechanical component: rolling, pressing into a slot, and cutting through a grid (no text or symbols)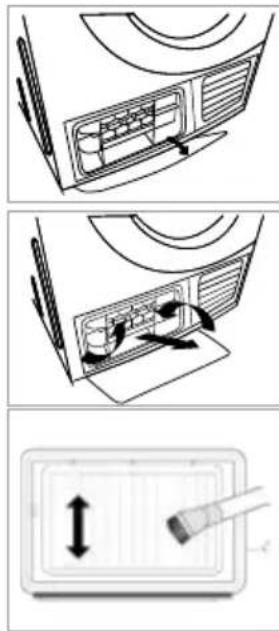

General terms and conditions of service and warranty
5-year Inventum warranty!
- Customers enjoy a 5-year full manufacturer's warranty on all Inventum products.
- Within this period, a defective product or part, which makes normal functioning of the product or part impossible, will always be repaired free of charge or, if repair is not possible and/or does not provide a solution, replaced (by the same or equivalent product). The assessment of this lies with Inventum.
- In order to make a claim under the 5-year Inventum warranty you must, within two months after discovering the fault or defect, either return the product to the shop where you bought it, or contact the Inventum customer service department by using the form at www.inventum.eu/service.
- The warranty period starts from the date stated on the product's original sales receipt.
- To invoke the warranty, you must always send a copy of the original proof of purchase with the service request and present the original proof of purchase to the service technician.
- The 5-year warranty applies only to normal domestic use of Inventum products within the Netherlands.
Warranty exclusions
- The 5-year Inventum guarantee does not apply in case of: normal wear and tear, consumables, improper use, insufficient or incorrect maintenance, incorrect and/or inexpert assembly and installation of the appliance, repairs by unauthorised third parties, business or commercial use, missing serial number, damage caused by an external cause. This enumeration is not exhaustive.
- B-choice products and products that have been built-in in a showroom are not covered by the 5-year Inventum warranty. All optical damage such as dents, scratches and slight traces of use are excluded from any warranty.
Reporting malfunctions on Inventum products
- Faults or defects on Inventum products can be reported by using the service request form on the website www.inventum.eu/service or through the seller of the product.
- A copy of the original proof of purchase must be included with the request.
- Inventum's service department determines whether the product will be repaired or replaced, based on the request and the sales receipt.
Important to know
- Products sent without prior notification will not be accepted. Further to the notification you will be informed by Inventum whether a warranty applies and whether you must return the product.
- The replacement or repair of a defective product, or a part thereof, does not lead to an extension of the original warranty period.
- Products eligible for replacement or repair must be emptied and clean.
For a detailed explanation of the warranty conditions and items excluded from them, please visit Inventum's website www.inventum.eu/algemene-voorwaarden
These general warranty and service conditions apply to Inventum brand products purchased after 27 April 2022 and intended for use within the Netherlands.
For Inventum products used outside the Netherlands, but within a EU Member State, the warranty rules of that country apply. Inventum provides warranty and service by a white goods technician only in the Netherlands.
As a consumer, you are entitled by law to a properly working product. Does the product break down sooner than you might expect? This means that the product is not in conformity. In that case, the law offers you, the buyer, with a number of legal remedies for your protection. This legal protection is not affected by the above commercial warranty given by Inventum on Inventum products used within the Netherlands.
Modifications and errors reserved
facebook.com/inventum1908
pinterest.com/inventum1908
youtube.com/inventum1908
instagram.com/inventum1908


- Deutsch
- INSTALLATIELOCATIE EN OMGEVING
- WAARSCHUWING!
- EXTERNE AFVOERSLANG INSTALLEREN
- HET APPARAAT WATERPAS ZETTEN
- Condensaattank leegmaken
- LET OP!
- safety instructions1
- Please read these instructions before operating the appliance and store them for future use.
- Please, do not use the appliance without reading the instructions for use first.
- INSTALLATION LOCATION AND SURROUNDING AREA
- INSTALLATION
- ELECTRICAL INSTALLATION
- EXPLOSION AND FIRE HAZARD
- CHILD SAFETY
- TRANSPORT/RELOCATION AFTER INSTALLATION
- INTENDED USE
- OLD APPLIANCE
- product description
- installation and connection
- REQUIRED SPACE FOR INSTALLING
- WARNING!
- UNPACKING THE APPLIANCE
- INSTALLING THE EXTERNAL DRAINAGE HOSE
- LEVELLING THE APPLIANCE
- CONNECTING THE APPLIANCE TO THE POWER MAINS
- CAUTION!
- operation
- BEFORE FIRST USE
- i CAUTION!
- BEFORE EACH DRYING CYCLE
- PREPARING BEFORE DRYING
- DRYING
- AFTER DRYING
- Tijd Ⓛ
- Time
- Turbo
- Signal
- Anti- kreuk
- Anti-crease
- Startuitstel
- Startdelay
- Lamp
- Stil
- SilenceDry
- Hygiène
- Hygiene with UV light
- Extra Droog
- Extra dry
- Childlock
- ❤️ Favoriet
- Favorite
- 5
- maintenance
- WARNING! Always unplug the appliance before cleaning and maintenance.
- Cleaning the exterior of the appliance
- Emptying the condensate tank
- Clean the filters
- NOTE!
- Cleaning the dryer filter
- Cleaning the condenser unit
- Foreign objects removal
- WARNING! Do not use hard/sharp-edged objects!
- Do not operate the dryer without the condenser unit!
- Troubleshooting
- Sicherheitshinweise
- WARNUNG!
- DEN EXTERNEN ABLASSSCHLAUCH ANSCHLIESSEN
- Die Filter reinigen
- AVERTISSEMENT!
- INSTALLATION DU TUYAU DE VIDANGE EXTERNE
- BRANCHEMENT DE L'APPAREIL SUR LE SECTEUR
- General terms and conditions of service and warranty
- 5-year Inventum warranty!
- Warranty exclusions
- Reporting malfunctions on Inventum products
- Important to know
Brand : INVENTUM
Model : VDW9030W
Category : Washing machine