VENTRIX S2SD - Lighting WAC Lighting - Free user manual and instructions
Find the device manual for free VENTRIX S2SD WAC Lighting in PDF.


User questions about VENTRIX S2SD WAC Lighting
0 question about this device. Answer the ones you know or ask your own.
Ask a new question about this device
Download the instructions for your Lighting in PDF format for free! Find your manual VENTRIX S2SD - WAC Lighting and take your electronic device back in hand. On this page are published all the documents necessary for the use of your device. VENTRIX S2SD by WAC Lighting.
USER MANUAL VENTRIX S2SD WAC Lighting
CAUTION: TO PREVENT ELECTRICAL SHOCK, ENSURE ELECTRICITY HAS BEEN TURNED OFF AT THE CIRCUIT BREAKER BEFORE BEGINNING.
- Read all instructions before installing.
- System is intended for installation by a licensed electrician in accordance with the National Electrical Code (NEC) and local regulations.
- When handling the fixture, do not apply pressure to the LEDs. Hold the fixture by the base only.
- Retain installation instructions for future maintenance reference.
- VENTRIX fixtures and channels feature separate data and power conductor systems. During installation and use, do not short the data or power conductors together by any means or damage may occur.
WARNING: All parts must be used as indicated in these instructions. This product is designed for use only with the supplied parts and/or accessories designated for use by WAC Lighting. Substitution of parts or accessories not designated for use with this product by WAC Lighting could result in personal injury or property damage, and will void the warranty. Contact an authorized dealer or the manufacturer if any parts are damaged or missing.
MISE EN GARDE: POUR ÉVITER TOUT CHOC ÉLECTRIQUE, ASSUREZ-VOUS QUE LE DISJONCTEUR SOIT MIS HORS TENSION AVANT DE COMMENCER.
OVERALL FIXTURE DIMENSIONS
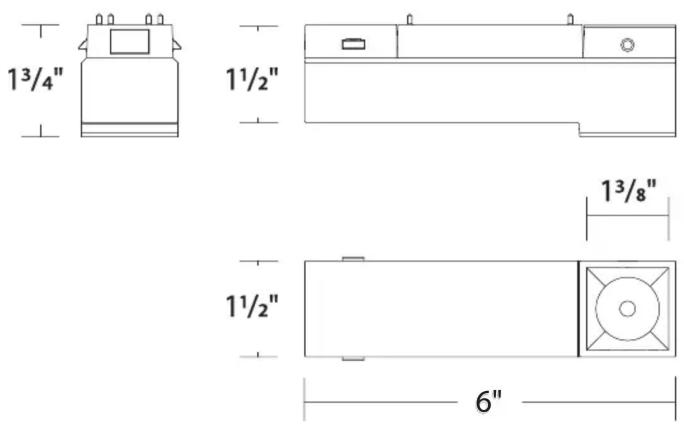
text_image
1³/4" 1½" 1³/8" 1½" 6"FIXTURE OVERVIEW
VENTRIX Stealth Downlights are intended for use on WAC Lighting's VENTRIX Channel systems.
| LED LUMINAIRE | VENTRIX SYSTEM |
| S2SD 48VDC VENTRIX System |
| SPECIFICATIONS | |
| Input: 48VDC | |
| Installation: VENTRIX System | |
| Dimming: Via VENTRIX Connected Power Unit.Refer to CPU Specifications. | |
PREPARATION:
- Shut off the power at the circuit breaker and ensure adequate room to install the new fixture on the VENTRIX Channel system.
- Carefully unpack your new fixture and lay out all the parts on a clear area. Be careful not to lose any parts necessary for installation.
FIXTURE INSTALLATION TO VENTRIX SYSTEM:
The fixture features a VENTRIX adapter for power and mechanical connection to the installed VENTRIX channel system.
- FIGHT fixture may be installed into horizontally or vertically mounted VENTRIX channel systems. (See
- Fixtures are polarity agnostic, and may be installed in VENTRIX channel in either orientation. (See FIG. 2).
- Insert the fixture into the channel slot. Ensure the fixture is parallel to the channel during installation. Push the fixture into the channel until you hear a click and fixture is fully secured. NOTE: FIGU8&4apters also feature magnets to aid in fixture locating. (See
CAUTION: Prior to installation in channel, clear any debris from channel bus bar and fixture, particularly on magnetic surfaces.
Any conductive elements have potential to cause electrical shorting resulting in damage. - Review connection, be the fixture body's set sure the locking tabs AND ball bearings are secured in channel prior to finishing installation.
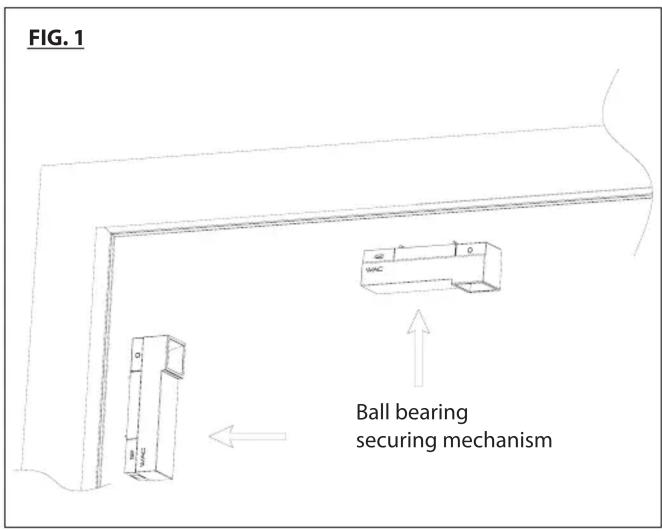
text_image
FIG. 1 Ball bearing securing mechanism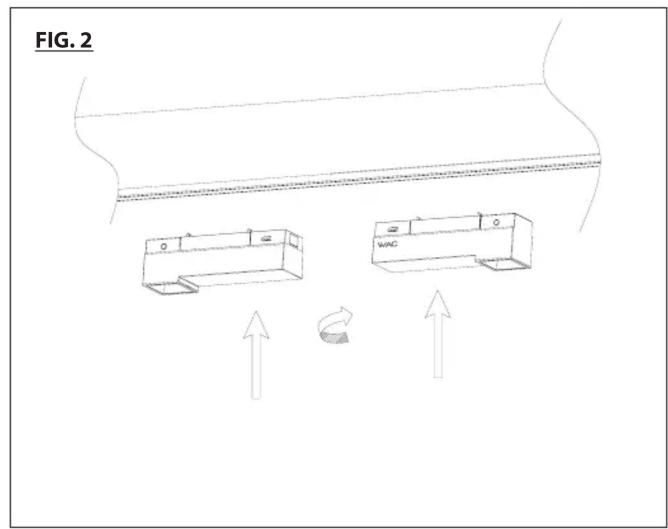
text_image
FIG. 2 WAC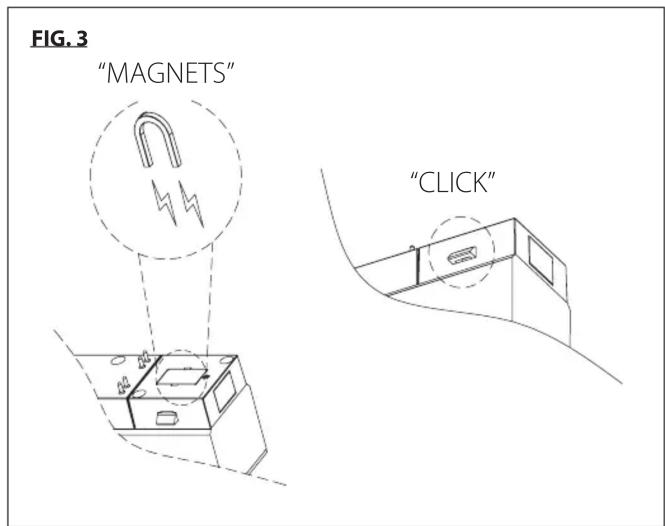
text_image
FIG. 3 "MAGNETS" "CLICK"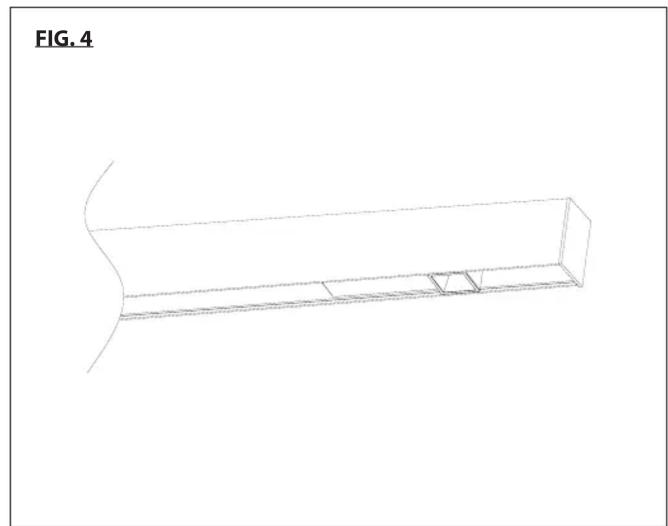
natural_image
3D wireframe diagram of a rectangular prism with a curved base and internal cutout (no text or symbols)RELOCATING THE FIXTURE IN CHANNEL:
While installed to the VENTRIX system, the fixture may be relocated.
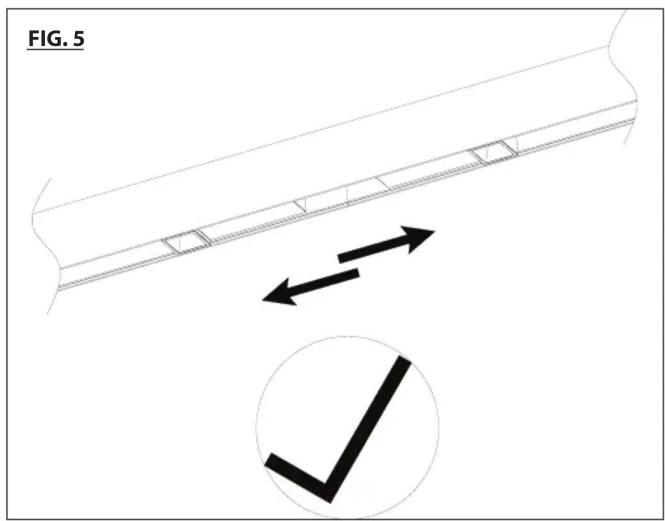
- FIGy 5 and, relocate the fixture within a channel by pushing the adapter in the desired direction. (See
- Fixtures cannot be relocated between channels. It must be removed, repositioned, and then installed from one channel to another. (See FIG. 6).
NOTE: Ensure fixture element remains secure in channel during and after adjustments.
text_image
FIG. 5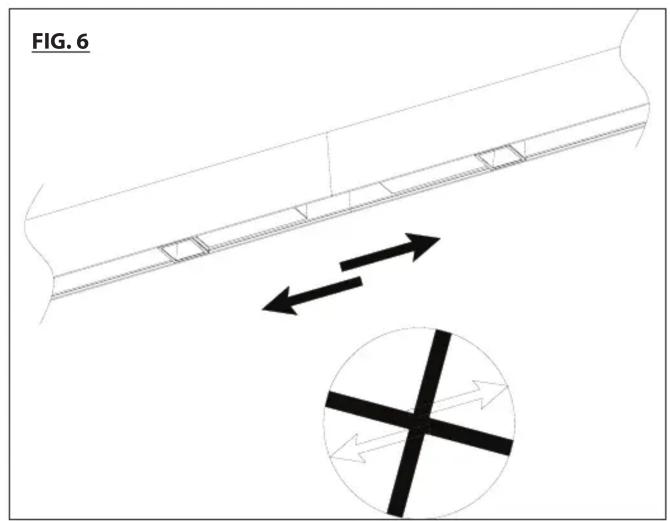
text_image
FIG. 6REMOVING THE FIXTURE FROM THE CHANNEL:
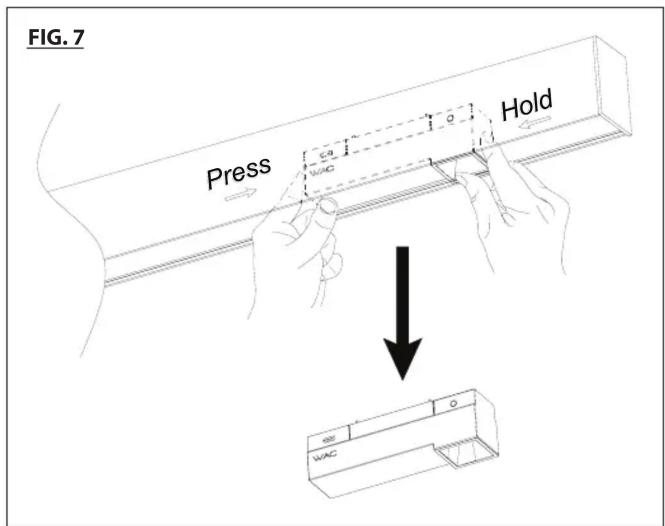
- By hand, engage and press the push button on the adapter, while holding the other end of the fixture. With push button pressed, pull the fixture away from the channel, until it is clear of the channel (See FIG. 7).
NOTE: Ensure the adapter is parallel to the channel during removal. Removing the fixture at an angle may result in damage. (See FIG. 8). - To enable fixture removal from channel, maintain free channel space of 1.5" on each side of adapter to enable access to releasing locking tabs.
text_image
FIG. 7 Press WAC Hold WAC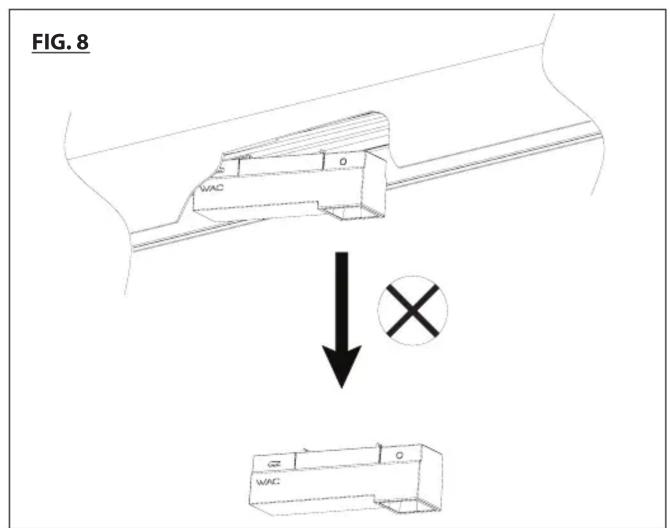
text_image
FIG. 8 WAC WACREPLACING THE TRIM AND TIR LENS :
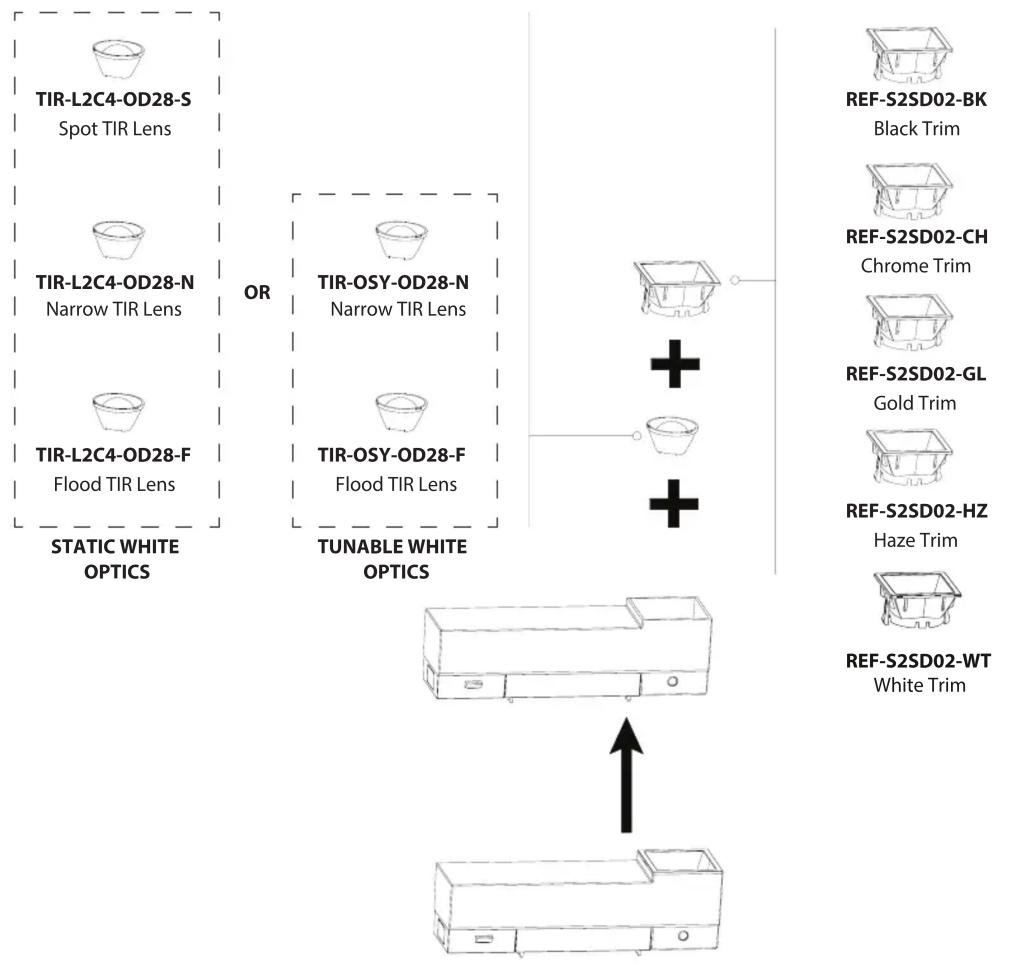
The Stealth Downlight trims may be replaced in field to change the decorative appearance of the fixture. Its TIR lens may be replaced to change its optical performance.
- Power off the fixture and allow it to cool down.
- Using a fingernail or small prying tool, separate the trim with TIR lens from the fixture housing.
- By hand, separate the trim and TIR lens. Select the appropriate replacement components using model numbers. (See FIG. 9).
- Reassemble the trim with TIR lens, and then install to the fixture housing.
FIG. 9
flowchart
graph TD
    A["TIR-L2C4-OD28-S Spot TIR Lens"] --> B["OR"]
    C["TIR-L2C4-OD28-N Narrow TIR Lens"] --> B
    D["TIR-L2C4-OD28-F Flood TIR Lens"] --> B
    E["STATIC WHITE OPTICS"] --> B
    F["TURABLE WHITE OPTICS"] --> G["+"]
    H["REF-S2SD02-BK Black Trim"] --> I["+"]
    J["REF-S2SD02-CH Chrome Trim"] --> I
    K["REF-S2SD02-GL Gold Trim"] --> I
    L["REF-S2SD02-HZ Haze Trim"] --> I
    M["REF-S2SD02-WT White Trim"] --> N["↑"]