Biorit ICD CS LED - Microscope BRESSER - Free user manual and instructions
Find the device manual for free Biorit ICD CS LED BRESSER in PDF.


| Product type | Binocular microscope (stereomicroscope) with interchangeable objectives |
| Brand | Bresser |
| Model | Biorit ICD CS LED |
| Article numbers | 5802520 (fixed magnification 10x) / 5802530 (variable magnification 5x/10x/20x) |
| Magnification | 10x (Item 5802520); 5x/10x/20x (Item 5802530) |
| Working distance | 230 mm (10x); 250 mm (5x) / 230 mm (10x) / 80 mm (20x) |
| Light source | Integrated LED lighting, long-life, non-replaceable |
| Power supply | 230 V / 50 Hz via power cable |
| Electrical protection | Fine fuse type F2AL250V (spare fuse included) |
| Eyepieces | Pair of eyepieces, barrel diameter 30.5 mm |
| Interpupillary adjustment | Yes, by spreading the eyepieces |
| Diopter adjustment | Yes, on left eyepiece |
| Interchangeable objectives | Yes, additional objectives available as option (for Item 5802530, objectives 0.5x/1.0x/2.0x included) |
| Delivery contents | Stereomicroscope, objectives, eyepieces, rubber eyecups, power cable, spare fuse, dust cover, instruction manual |
| Maintenance and cleaning | Clean optical surfaces with a soft cloth without products; store with dust cover after use |
| Safety | Keep out of reach of children; use on a stable surface; unplug before maintenance |
| Warranty | 2 years (extension possible after online registration) |
| Customer service | BRESSER France SARL, email: sav@bresser.fr, phone: 00 800 6343 7000 |
Frequently Asked Questions - Biorit ICD CS LED BRESSER
User questions about Biorit ICD CS LED BRESSER
0 question about this device. Answer the ones you know or ask your own.
Ask a new question about this device
Download the instructions for your Microscope in PDF format for free! Find your manual Biorit ICD CS LED - BRESSER and take your electronic device back in hand. On this page are published all the documents necessary for the use of your device. Biorit ICD CS LED by BRESSER.
USER MANUAL Biorit ICD CS LED BRESSER
natural_image
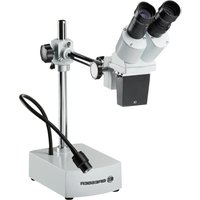
Laboratory microscope setup with mounted binoculars and a Bresser base (no visible text or symbols on the main subject)DE Bedienungsanleitung
GB Instruction manual
FR Mode d'emploi
ES Manual de instrucciones

Visit our website via the following QR Code or web link to find further information on this product or the available translations of these instructions.

natural_image
Laboratory microscope setup with labeled component A, no visible text or symbols on the device itself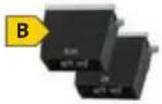
natural_image
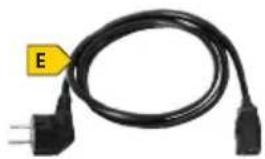
Black cable with two terminal connectors and a yellow label marked 'E' (no text or symbols on the cable itself)
To work with this microscope, sharp and pointed aids are being used. Please take care that this microscope and its accessories are stored at a place out of reach of children. Let children only work with this microscope under an adult's supervision!
Keep packing material (plastic bags etc.) away from children!
1. Scope of delivery
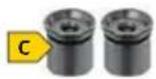
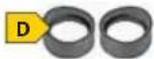
Stereo microscope (A), interchangeable objectives (B): 1.0x (Art. No. 5802520) or 0.5x/1.0x/2.0x (Art. No. 5802530), 1 pair of WF10x eyepieces (C), 1 pair of rubber eyecups (D), power cable (E), spare fuse (F), dust cover (G), Instruction manual (H)
Also required (not included):
small Philipps screwdriver, small flathead screwdriver
2. Parts overview
① Eyepieces
② Diopter adjustment ring
3 Objective with clamping screw (3a)
4 Front microscope arm
⑤ Microscope pole
6 Rear microscope arm
⑦ Locking ring
8 Microscope base
⑨ Connecting screw
10 Lock nut
11 Focusing wheel
⑫ Illumination
13 Power socket
14 Fuse holder
15 On/Off switch
16 Rubber eyecup
⑰ replacement fuse (F2AL250V)
3. Finding the right location for observation
Dry and dust free, room temperature between -5 and +40°C.
Position your device so that it can be disconnected from the power supply at any time. The wall socket should always be located near the device and be easily accessible, since the plug on the power cord serves as a disconnecting device for the power supply.
4. Assembly
- Place the base (8) on a stable surface.
- Attach the rear microscope arm (6) to the pole of the microscope base.
- Use the locking ring (7) to secure the microscope arm.
-
Connect the front part of the microscope arm (4) to the rear arm. Insert the connecting screw (9) through the hole in the rear microscope arm. Take care that the flattened edge shows backwards. Now attach the front microscope arm to the screw. Tighten the lock nut (10) with the lever until the front microscope arm does not tilt down.
-
Connect the power cable to the power connector (13) of the microscope and a free power outlet.
5. Observation
Turn on the microscope using the power switch (15).
Now, look through the eyepieces (1) of the binocular viewing and change the spacing between the eyepieces so that you get a round, clear field of view. The definition is adjusted by slowly turning the focusing wheel (11).
If you have to observe a very large or very small object, you can adjust the microscope. Loosen the holding screw on the side and move appropriately the microscope head on its guidance. If you have found the correct position (distance of 22 cm from the object), tighten the holding screw again.
6. Diopter adjustment
Turn the left diopter adjustment ring (2) on the left eyepiece to the central position (silver marking). Shut your left eye and look with the right eye through the right eyepiece. Now focus with the focusing wheel (11), focus correctly for your right eye. Now, look with your left eye through the left eyepiece. If the image isn't sharp, adjust the focus for your left eye by turning the diopter adjustment ring. Now, the microscope is correctly adjusted.
7. Replacing the objective
Note: The objective of this stereo microscope can be replaced. Depending on the model, additional interchangeable objectives are included or can be purchased as optional accessories.
Hold the mounted objective (3) firmly with one hand and use a small flathead screw-driver to loosen the slotted screw (3a). Remove the objective from the holder. Place the desired interchangeable objective on the holder and screw it on with the slotted screw as well.
8. Replacing the eyepieces
Note: The eyepieces of this stereo microscope can be replaced. Depending on the model, additional eyepieces are included or can be purchased as optional accessories.
Use a small Phillips screwdriver to unscrew the cross screws on the two eyepiece holders. Remove the eyepieces from the holders and insert others. Screw them on with the cross screws as well.
9. Exchange of the fuse
Switch off the microscope and pull out the plug of the power outlet. Grip with a small screwdriver under the lug of the fuse holder (14) and pull it carefully forward. Take out the fuse and change it into a new one (17). Install the fuse holder and plug again.
10. Care and maintenance
10.1. Cleaning the lenses
Sweep the lens with a lens tissue or soft fabric immersed with a small amount of alcohol (e.g. isopropanol).
10.2. Cleaning the painted parts
The dust on the painted parts can be removed by cleaning cloth. For the grease spots, the gauze immersed slightly with aviation gasoline is recommended. Do not use organic solvents such as alcohol, ether or other thinner etc. for cleaning the painted parts or plastic components. Your microscope is a high-quality optical instrument. Avoid disassembling the microscope. Improper disassembling affects the high utility of the microscope. Moreover, the warranty expires.Cover the microscope with the dust protective cover and place it there, where it is dry and dust-free. We suggest the storage of all objectives and eyepieces in a closed container with drying agent.
11. Technical data
| Art. No. 5802520 Art. No. 5802530 | ||
| Magnification: 10x 5x/10x/20x | ||
| Working distance: | 230 mm 250 mm (5x)/230 mm (10x)/80 mm (20x) | |
| Power supply: 230V / 50HZ via power cable | ||
| Surge protection: with fine fuse, type F2AL250V | ||
| Illumination: LED, long-life, not exchangeable | ||
| Eyepiece holder: 30.5 mm | ||
12. Disposal

Dispose of the packaging materials properly, according to their type, such as paper or cardboard. Contact your local waste-disposal service or environmental authority for information on the proper disposal.
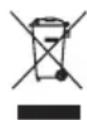
Do not dispose of electric equipment together with household waste material! In observance of European Directive 2012/19/EC on waste electrical and electronic equipment (WEEE) and its implementation in accordance with natiaw, electric equipment that have reached the end of its life must be collected lately and returned to an environmentally compatible recycling facility.
13. Declaration of Conformity
13.1. CE Declaration of Conformity
CE Bresser GmbH has formed a „CE Conformity Declaration“ in line with the applicable directive. This declaration is available for review under https://www.bresser.de/download/5802520/CE/5802520_CE.pdf https://www.bresser.de/download/5802530/CE/5802530_CE.pdf
13.2. UKCA Declaration of Conformity
UK CA Bresser UK Ltd. has formed a „UKCA Declaration of Conformity“ in line with the applicable directive. This declaration is available for review under https://www.bresser.de/download/5802520/UKCA/5802520_UKCA.pdf https://www.bresser.de/download/5802530/UKCA/5802530_UKCA.pdf
14. Warranty & Service
The regular warranty period is 2 years and begins on the day of purchase. To benefit from an extended voluntary guarantee period as stated on the gift box, registration on our website is required.
You can consult the full warranty terms as well as information on extending the warranty period and details of our services at www.bresser.de/warranty_terms.
ATTENTION!
Please contact the service centre first for any questions regarding the product or claims, preferably by e-mail.
E-Mail: service@bresseruk.com
Telephone*: +44 1342 837 098
BRESSER UK Ltd.
Suite 3G, Eden House
Enterprise Way
Edenbridge, Kent TN8 6HF
Great Britain
*Number charged at local rates in the UK (the amount you will be charged per phone call will depend on the tariff of your phone provider); calls from abroad will involve higher costs.
FR BE

- Scope of delivery
- Also required (not included):
- Parts overview
- Finding the right location for observation
- Assembly
- Observation
- Diopter adjustment
- Replacing the objective
- Replacing the eyepieces
- Exchange of the fuse
- Care and maintenance
- Cleaning the lenses
- Cleaning the painted parts
- Technical data
- Disposal
- Declaration of Conformity
- CE Declaration of Conformity
- UKCA Declaration of Conformity
- Warranty & Service
- ATTENTION!
- BRESSER UK Ltd.
- FR BE
Brand : BRESSER
Model : Biorit ICD CS LED
Category : Microscope