
Tapo C840 - Surveillance Camera TP-LINK - Free user manual and instructions
Find the device manual for free Tapo C840 TP-LINK in PDF.
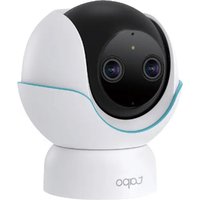


| Product type | Baby monitor camera |
| Brand | TP-Link |
| Model | Tapo C840 |
| Dimensions (approx.) | 8 × 8 × 12 cm |
| Weight (approx.) | 250 g |
| Power supply | USB Type-C, AC adapter included |
| Operating temperature | 0 °C to 40 °C |
| Usage | Indoor only |
| Installation | On crib (clamp) or wall/ceiling mount (L-shaped bracket) |
| Mobile app | Tapo (iOS and Android) |
| Field of view | Wide angle (camera adjustable via gooseneck) |
| Night vision | Yes, infrared |
| Audio communication | Built-in microphone and speaker (two-way audio) |
| Motion detection | Yes, push notifications on the app |
| Connectivity | Wi-Fi 2.4 GHz |
| Compatibility | Alexa, Google Assistant |
| Security | Data encryption, CE and RoHS compliance |
| Backup battery | Button cell (CR2032) for timekeeping |
| Maintenance and cleaning | Clean with a soft, dry cloth, avoid moisture |
| Spare parts and repairability | Contact TP-Link support, no user repair |
| Warranty | 2 years (depending on country) |
Frequently Asked Questions - Tapo C840 TP-LINK
User questions about Tapo C840 TP-LINK
0 question about this device. Answer the ones you know or ask your own.
Ask a new question about this device
Download the instructions for your Surveillance Camera in PDF format for free! Find your manual Tapo C840 - TP-LINK and take your electronic device back in hand. On this page are published all the documents necessary for the use of your device. Tapo C840 by TP-LINK.
USER MANUAL Tapo C840 TP-LINK
For technical support, the user guide, FAQs, warranty & more

CE UK CA
tapo
Quick Start Guide
Dual-Lens Smart Baby Camera
*Images may differ from actual products. 7100001374 REV1.0.0 @2025 TP-Link
CONTENTS
1 / English 9 / Deutsch 17 / Español 25 / Français 33 / Italiano 41 / Português 49 / Ελληνικά 50 / Suomi 51 / Nederlands 52 / Svenska 53 / Norsk 54 / Dansk
English
01 / Set Up the Baby Camera
1. Download App
Get the Tapo app from the App Store or Google Play, and log in.

2. Set Up the Camera
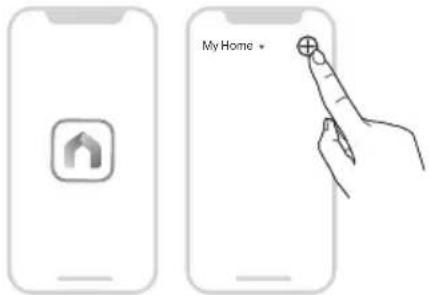
Tap the ⊕ button > Add Device in the app and select your model. Follow the app instructions to set up your baby camera.
Note: For the installation guide and video, please visit https://www.tp-link.com/support/faq/4260/
02 / Install the Baby Camera
Note: Choose your preferred installation method and follow the guidance. For Toddlers & Travel, you can place the camera on a flat surface like a table or shelf.
Option 1: Install on the Crib (Best for Newborns & Infants)
1. Find the Right Position
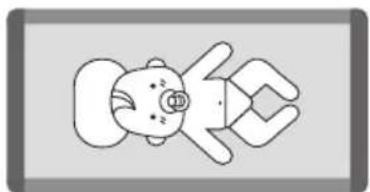
- Avoid installing the camera at the head or foot of the crib. The long sides of the crib are recommended.

Recommended

Not Recommended
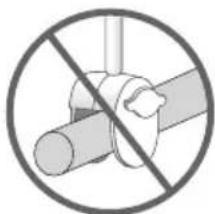
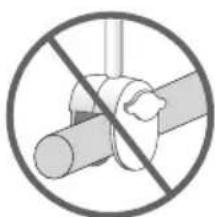
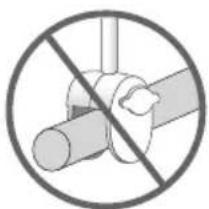
- Install the clamp mount on a regular plane, such as the edge of the bed board. Please do not install it on irregular shapes, including handrails, cylindrical railings, and similar objects.
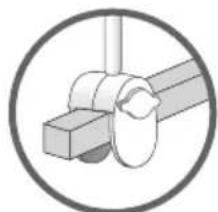
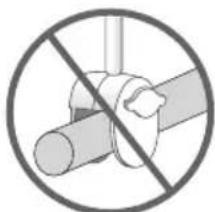
- Unstable installation may cause the device to fall over, endangering your baby's safety.
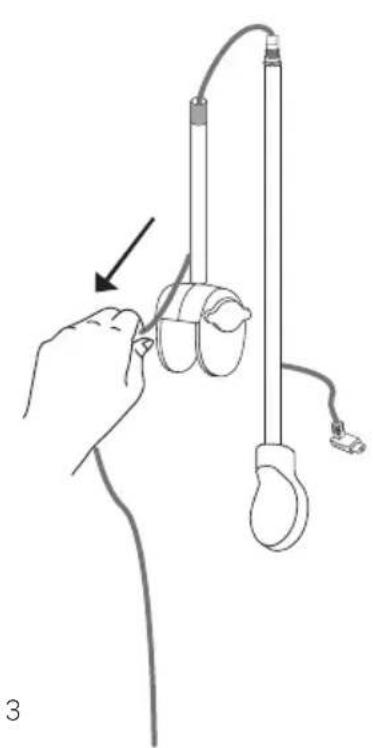
2. Assemble the Tube
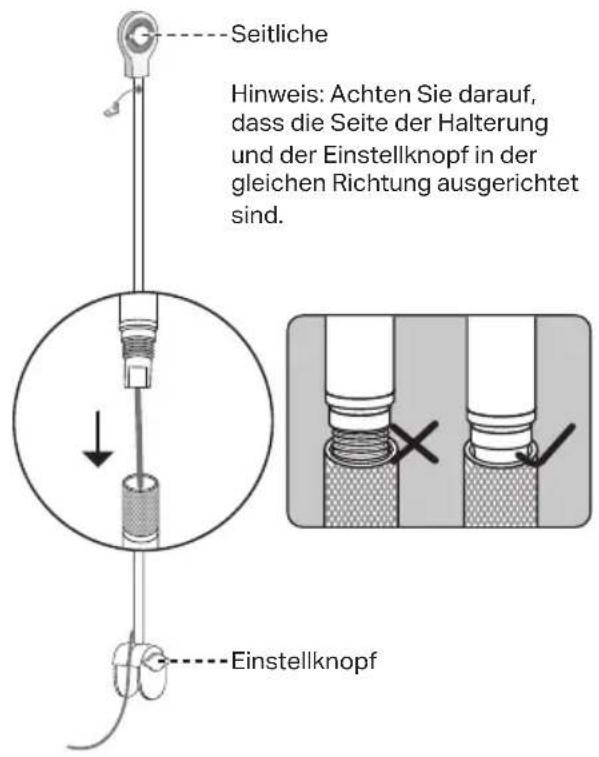
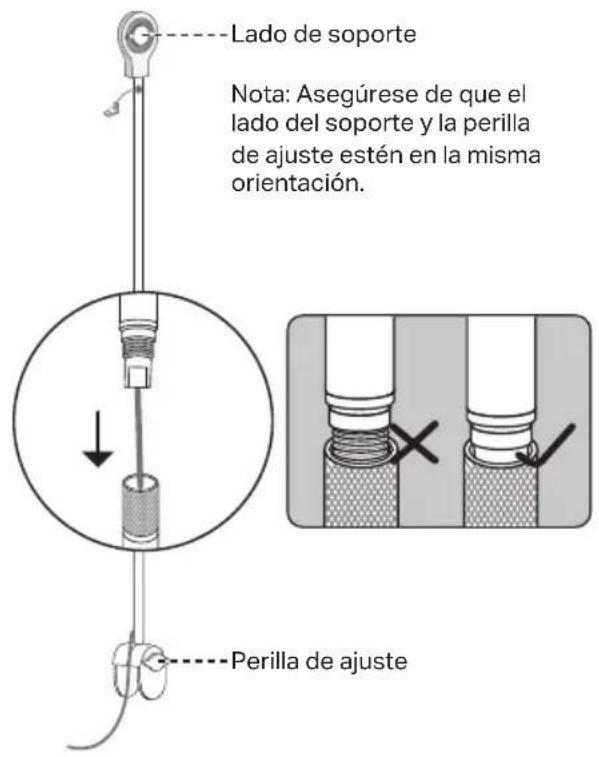
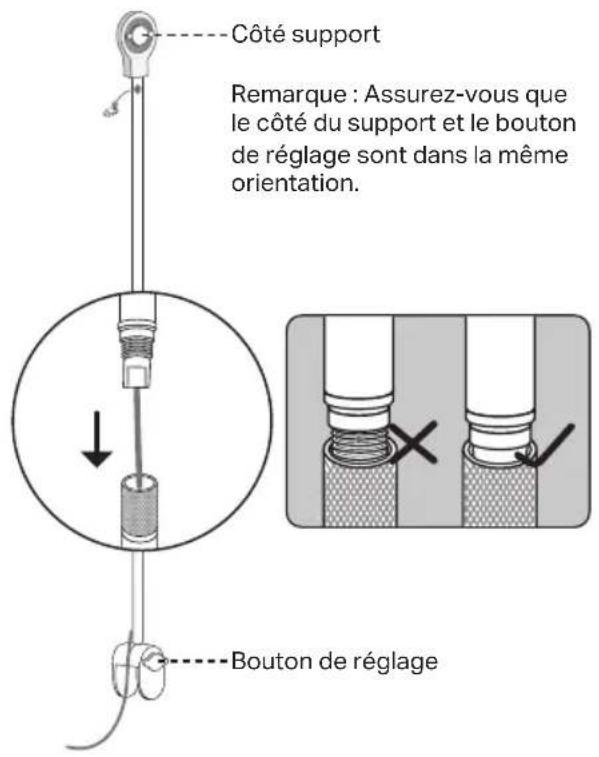
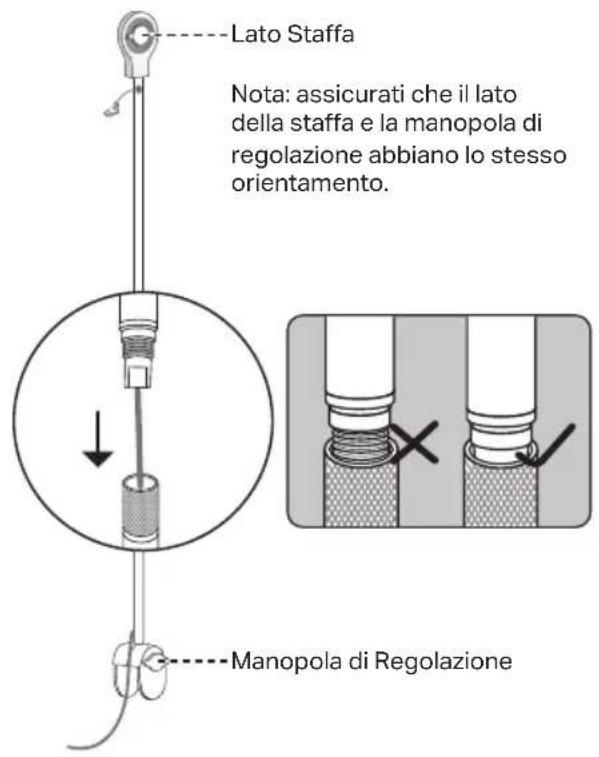
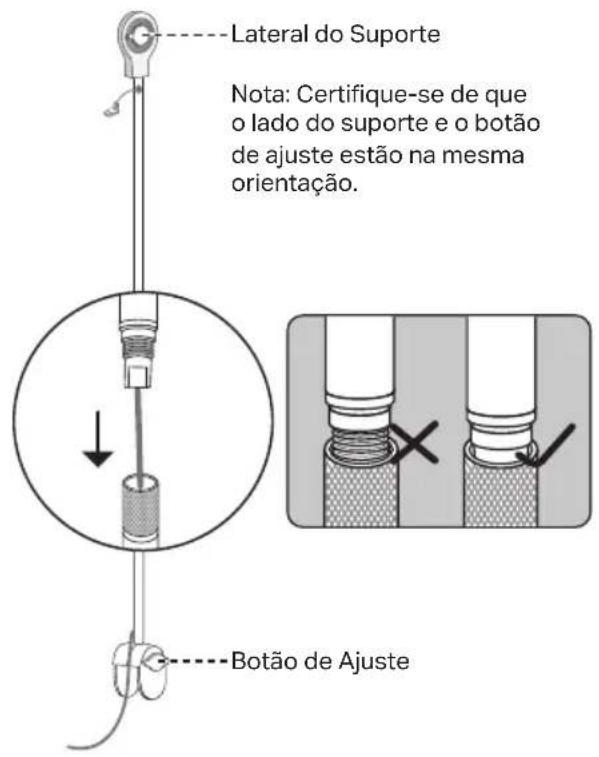
1) Pull out the excess cord from the clamp side of the tube.
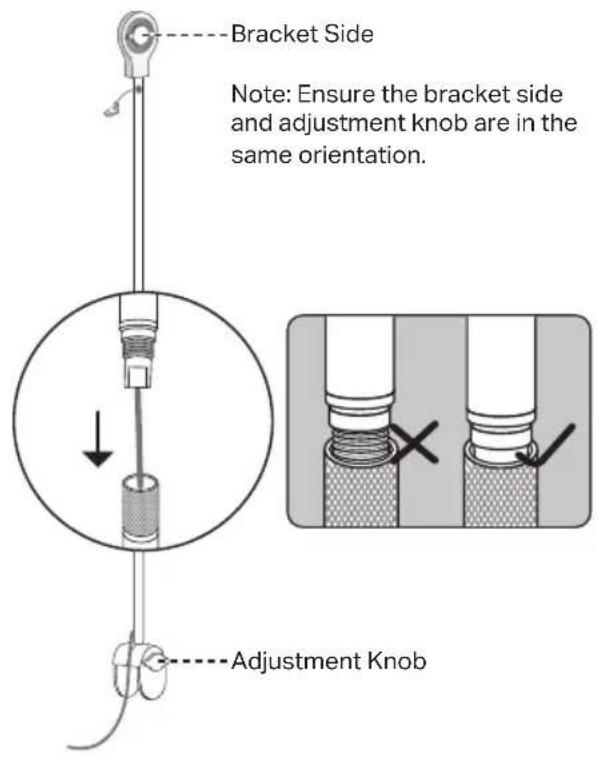
2) Insert the gooseneck in the correct orientation, then align the inner and outer tube joints.
3) Rotate the connector outside anticlockwise until tightened.

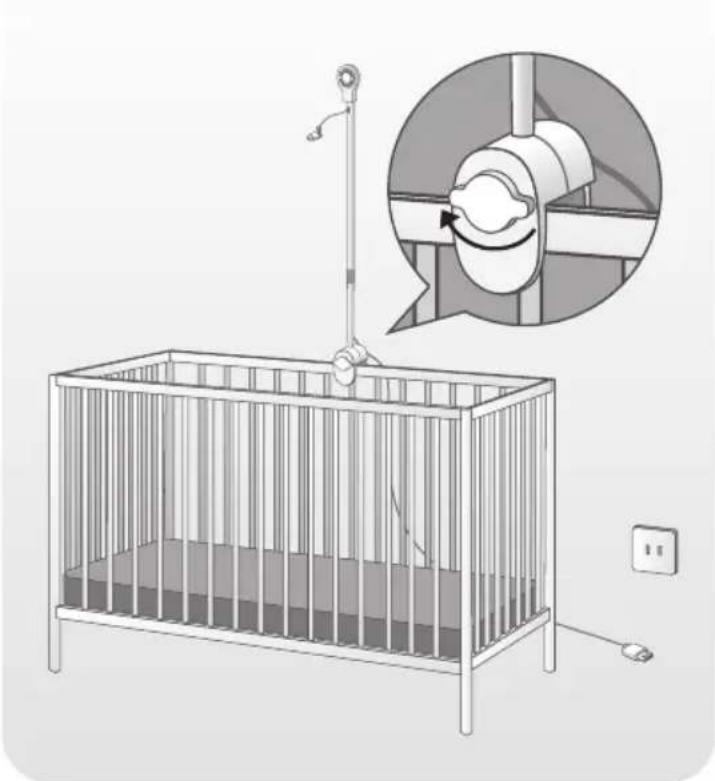
3. Install the Gooseneck Clamp Mount
1) Rotate the adjustment knob anticlockwise to loosen the clamp mount.
Note: To ensure stability, the thickness of the crib railing should be 5 mm (0.2 in.) - 40 mm (1.5 in.).
2) Attach the clamp mount to the center of the long sides of the crib.
3) Rotate the adjustment knob clockwise until tightened as much as possible.
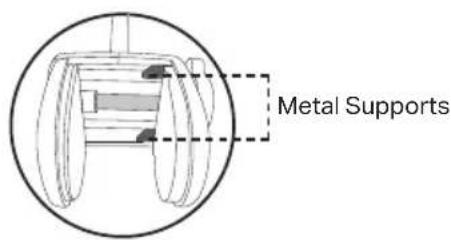
Note: Keep the metal supports of the clamp mount in tight contact with the top surface of the crib railing while rotating the knob.
4. Secure the Baby Camera
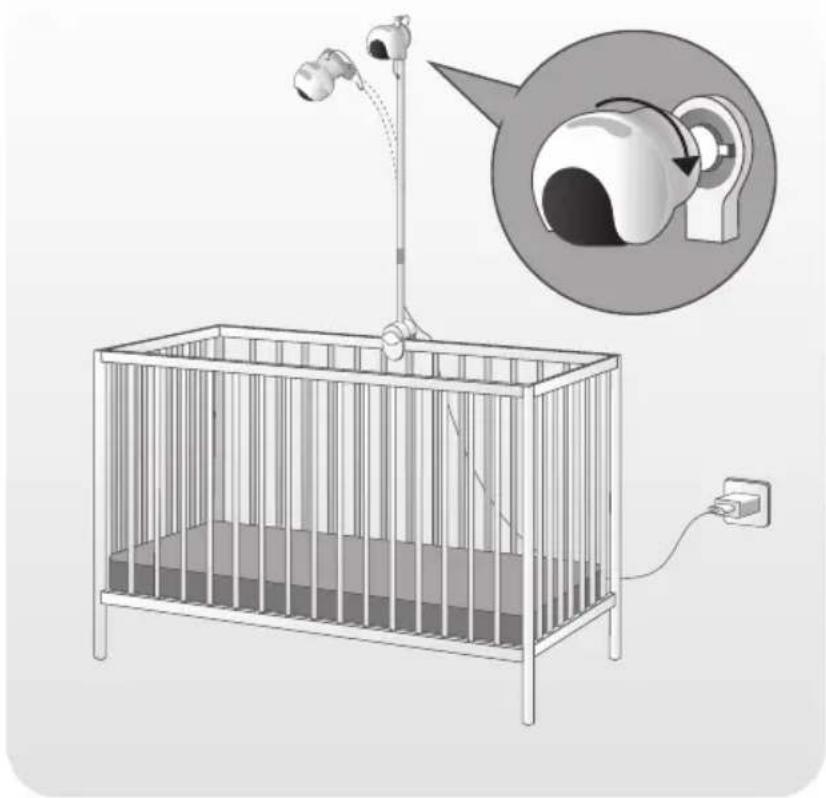
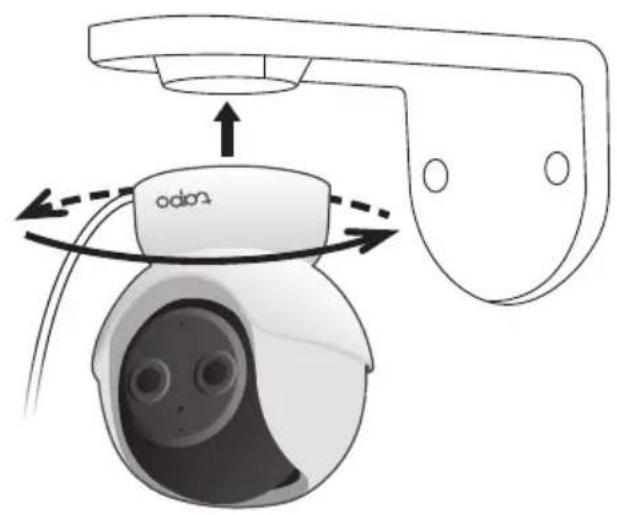
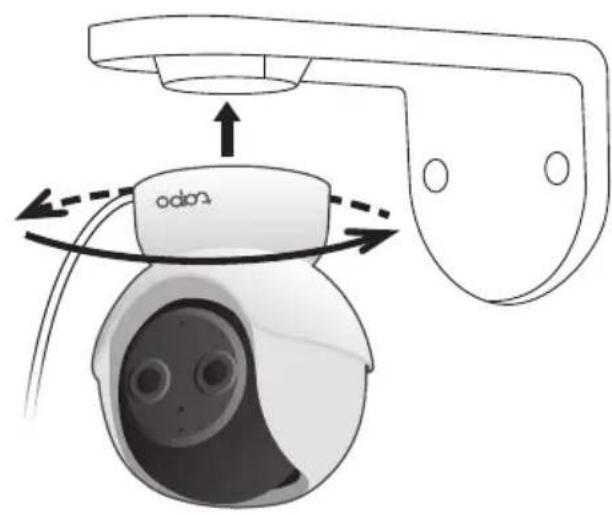
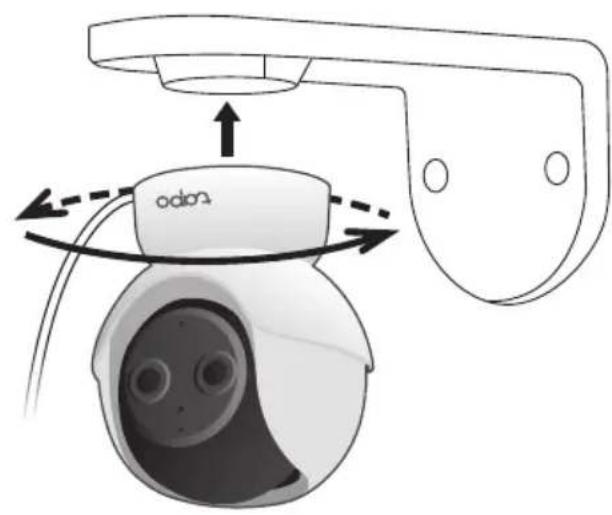
Firmly plug the power cord into the Type-C port of the camera. Then attach the camera to the bracket and rotate clockwise to secure.
5. Adjust the Gooseneck
Power up the camera and preview the video on the Tapo app. Bend the gooseneck to adjust the installation height for the best viewing angle.
Note: The maximum installation height is 88 cm (2.89 ft).
Avoid the gooseneck contact with oily substances to keep it firm.
Refrain from overbending the gooseneck to prevent deformation and rebounds.
Option 2: Mount on a Wall/Ceiling (Best for Toddlers & Children/Suitable for Newborns & Infants)
1. Mark Mounting Position
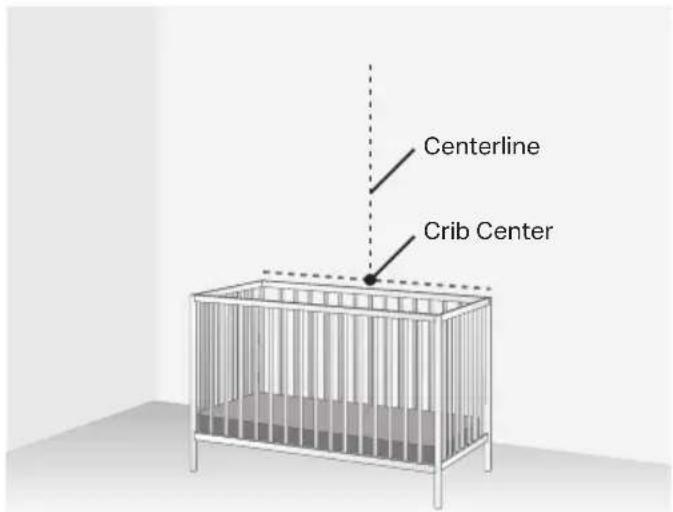
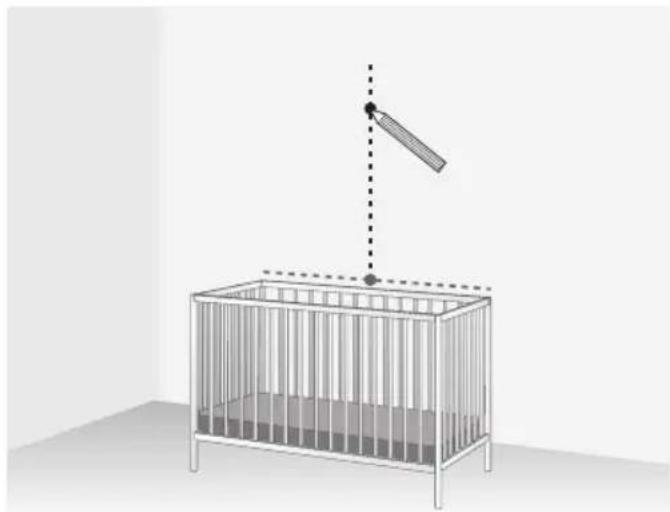
1) Place your crib against the wall where you will mount the camera. Find the crib center and mark the centerline on the wall.
Note: Ensure no studs are in the crib center and the power outlet is out of your baby's reach.
2) Power up your camera. Move it along the centerline and preview the video on the Tapo app. When the entire crib is within the camera's wide-angle view, make a mark on the wall.
2. Mount the L-Shaped Mounting Bracket
1) Stick the mounting template to the marked position. Drill two holes according to the template.
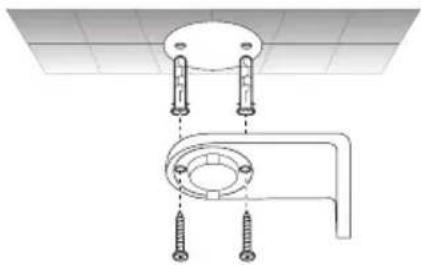
2) Insert two mounting anchors into the holes, then use the mounting screws to affix the bracket over the anchors.
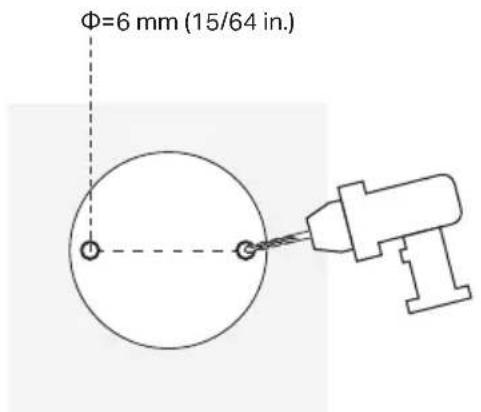
Note: Affix the bracket through the corresponding screw holes as instructed to ensure stability when you mount it on a wall or ceiling.
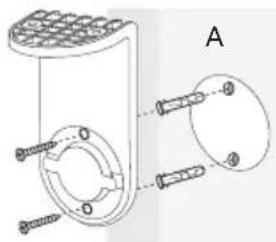
A: Better for monitoring the crib area
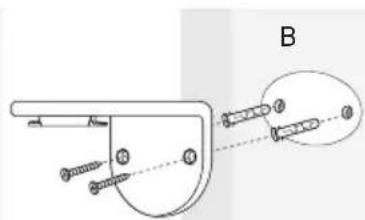
B: Better for monitoring the baby's activity areas
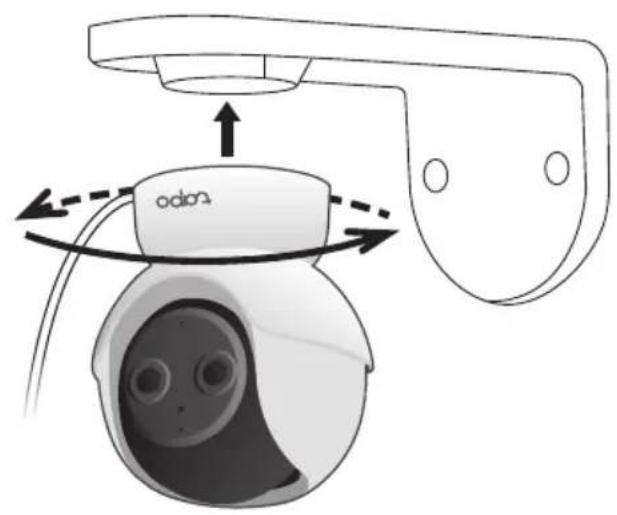
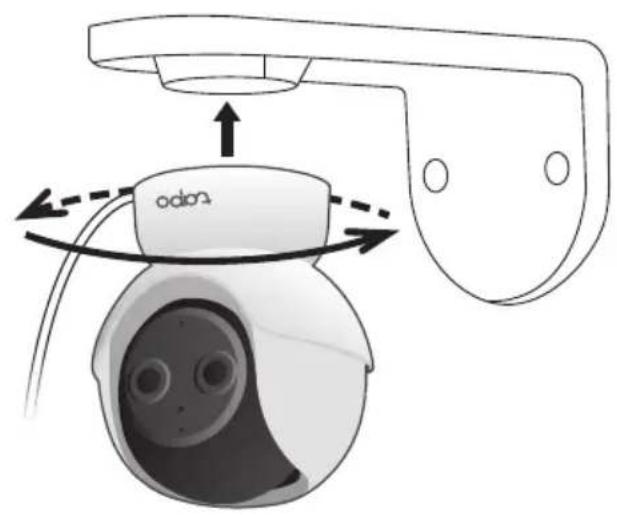
3. Secure the Baby Camera
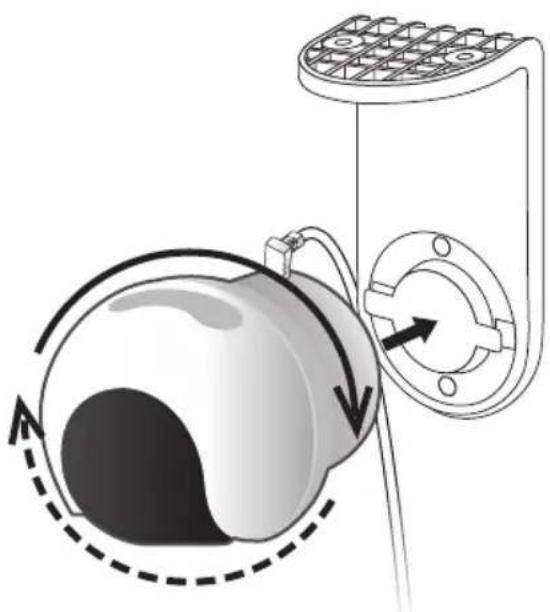
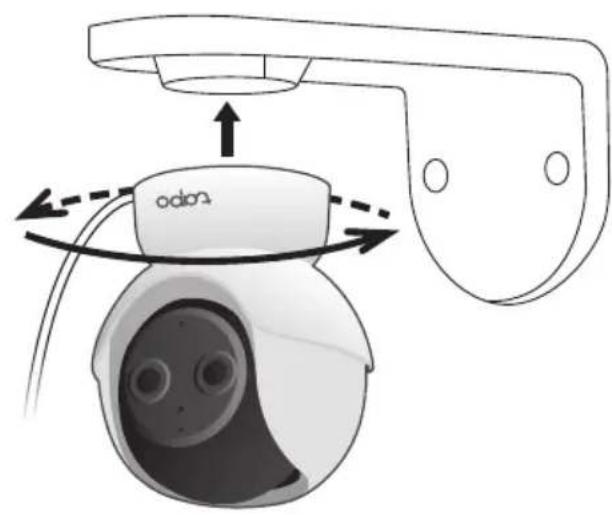
Firmly plug the power cord into the Type-C port of the camera. Attach the camera to the bracket and rotate to secure the camera.

Recommended

Not recommended
3. Attach the baby camera

Recommended

Not recommended
01 / Set up the Baby Camera
1. Download App
Download the Tapo app from the App Store or Google Play, and log in.


Recommended

Not Recommended
Italian
4. Make the Baby Camera Stable
Italian
3. Secure the Baby Camera
Portuguese
Portuguese
Portuguese
Greek




2. Setting up the camera


2. Setting up the camera
TP-Link hereby declares that the baby camera is in compliance with the essential requirements and other relevant provisions of directives 2014/53/EU, 2009/125/EC, 2011/65/EU and (EU)2015/863.
The original EU Declaration of Conformity may be found at https://www.tapo.com/support/ce/.
TP-Link hereby declares that the baby camera is in compliance with the essential requirements and other relevant provisions of the Radio Equipment Regulations 2017.
The original UK Declaration of Conformity may be found at https://www.tapo.com/support/ukca/.
TP-Link hereby declares that the dimmer button is in compliance with the essential requirements and other relevant provisions of directives 2014/53/EU, 2011/65/EU and (EU)2015/863.
The original EU Declaration of Conformity may be found at https://www.tapo.com/support/ce/.
TP-Link hereby declares that the dimmer button is in compliance with the essential requirements and other relevant provisions of the Radio Equipment Regulations 2017.
The original UK Declaration of Conformity may be found at https://www.tapo.com/support/ukca/.
Deutsch:
English: Safety Information
- For indoor use only.
- Operating Temperature: 0°C ~ 40°C (32°F ~ 104°F)
- Do not use any other chargers than those recommended.
- Do not use damaged charger or USB cable to charge the device.
- Adapter shall be installed near the equipment and shall be easily accessible.
- Use only power supplies which are provided by manufacturer and in the original packing of this product. If you have any questions, please don't hesitate to contact us.
- Product should be kept away from heat sources such as radiators, cookers etc. - it should not be placed in rooms where the temperature is less than 0 degrees or greater than 40 degrees. Damp basements should also be avoided.
- Keep the device away from water, fire, humidity or hot environments.
- Do not attempt to disassemble, repair, or modify the device. If you need service, please contact us.
- Do not use the device where wireless devices are not allowed.
CAUTION!
Avoid replacement of a battery with an incorrect type that can defeat a safeguard.
Avoid disposal of a battery into fire or a hot oven, or mechanically crushing or cutting of a battery, that can result in an explosion.
Do not leave a battery in an extremely high temperature surrounding environment that can result in an explosion or the leakage of flammable liquid or gas; Do not leave a battery subjected to extremely low air pressure that may result in an explosion or the leakage of flammable liquid or gas.
CAUTION: Do not ingest battery, Chemical Burn Hazard
This product contains a coin / button cell battery. If the coin / button cell battery is swallowed, it can cause severe internal burns in just 2 hours and can lead to death.
Keep new and used batteries away from children.
If the battery compartment does not close securely, stop using the product and keep it away from children.
If you think batteries might have been swallowed or placed inside any part of the body, seek immediate medical attention.
CAUTION!
Risk of explosion if the battery is replaced by an incorrect type.
Please read and follow the above safety information when operating the device. We cannot guarantee that no accidents or damage will occur due to improper use of the device. Please use this product with care and operate at your own risk.
CAUTION: Do not ingest battery, Chemical Burn Hazard


- QUICK START GUIDE
- CONTENTS
- SET UP THE BABY CAMERA
- DOWNLOAD APP
- SET UP THE CAMERA
- INSTALL THE BABY CAMERA
- OPTION 1: INSTALL ON THE CRIB (BEST FOR NEWBORNS & INFANTS)
- FIND THE RIGHT POSITION
- ASSEMBLE THE TUBE
- INSTALL THE GOOSENECK CLAMP MOUNT
- SECURE THE BABY CAMERA
- ADJUST THE GOOSENECK
- OPTION 2: MOUNT ON A WALL/CEILING (BEST FOR TODDLERS & CHILDREN/SUITABLE FOR NEWBORNS & INFANTS)
- MARK MOUNTING POSITION
- MOUNT THE L-SHAPED MOUNTING BRACKET
- ATTACH THE BABY CAMERA
- ITALIAN
- MAKE THE BABY CAMERA STABLE
- PORTUGUESE
- SETTING UP THE CAMERA
- DEUTSCH
- ENGLISH: SAFETY INFORMATION
- CAUTION
- CAUTION: DO NOT INGEST BATTERY, CHEMICAL BURN HAZARD
Brand : TP-LINK
Model : Tapo C840
Category : Surveillance Camera