
FFA8130 - Deep fryer Vollrath - Free user manual and instructions
Find the device manual for free FFA8130 Vollrath in PDF.

| Product Type | Electric countertop fryer, professional use |
| Oil Capacity | 15 lb (6.8 kg) |
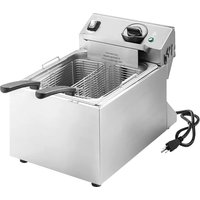
| Number of Fry Baskets | Single (Model FFA8130) |
| Temperature Range | Adjustable up to 375°F (190°C) for fries |
| Thermostat | Adjustment dial with preheat indicator light |
| Standby Mode | Yes, cuts power to heating element |
| Drain | Metal drain valve, requires minimum 3 gal (11.7 L) container |
| Fry Baskets Included | Yes, with draining hook |
| Night Cover | Optional (sold separately) |
| Electrical Supply | Each head requires a dedicated circuit (voltage per nameplate) |
| Exterior Material | Stainless steel (probable) |
| Safety | Safety thermal cutoff (trips at 446°F/230°C), magnetic safety switch, overheat shutdown |
| Cleaning | Daily, hand wash, do not use abrasive products or dishwasher |
| Recommended Oil | Corn or peanut oil, filtered daily |
| Oil Levels | Min and max marks in the tank |
| Spare Parts | Available at vollrathfoodservice.com |
| Warranty | Manufacturer's warranty, details at vollrathfoodservice.com |
| Usage | Commercial food service, not for home use |
Frequently Asked Questions - FFA8130 Vollrath
User questions about FFA8130 Vollrath
0 question about this device. Answer the ones you know or ask your own.
Ask a new question about this device
Download the instructions for your Deep fryer in PDF format for free! Find your manual FFA8130 - Vollrath and take your electronic device back in hand. On this page are published all the documents necessary for the use of your device. FFA8130 by Vollrath.
USER MANUAL FFA8130 Vollrath
Medium-Duty 15 Lb. Electric Countertop Fryers with Drain

WARNING
Fire, Injury, Death Hazard
Correct precautions, procedures and regulations for usage must be followed. Operation and safety training is necessary for all users of this equipment.
Thank you for purchasing this Vollrath equipment. Before operating the equipment, read and familiarize yourself with the following operating and safety instructions. SAVE THESE INSTRUCTIONS FOR FUTURE REFERENCE. Save the original box and packaging. Use this packaging to ship the equipment if repairs are needed.
Safety Precautions
To ensure safe operation, read the following statements and understand their meaning. This manual contains safety precautions which are explained below. Please read carefully.
WARNING
Warning is used to indicate the presence of a hazard that will or can cause severe personal injury or death.
CAUTION
Caution is used to indicate the presence of a hazard that will or can cause minor or major personal injury if the caution is ignored.
NOTICE: Notice is used to note information that is important but not hazard-related.
To reduce risk of injury or damage to the equipment:
- Do not operate unattended.
- Unit must be only used in a flat, level position.
- Change oil regularly or as necessary. Old or dirty oil has a lower flash point than clean oil.
• Fill oil to correct level. Do not over fill. - Do not overfill basket. Do not fill basket more than half full.
- Hot oil is flammable - keep open flames away from hot oil and oil vapors.
• The unit and oil may be hot even though the ready light is not on. - Do not operate unit in public areas and/or around children.
- Do not operate if unit has been damaged or is malfunctioning in any way.
- Do not tamper with the Safe Operation Switch or Over Temperature Protection Switch.
- Unplug the unit, turn off and let it cool before cleaning or moving.
- Do not spray controls or outside of unit with liquids or cleaning agents.
- Do not clean the unit with steel wool.
- Dispose of oil in an environmentally responsible manner.
natural_image
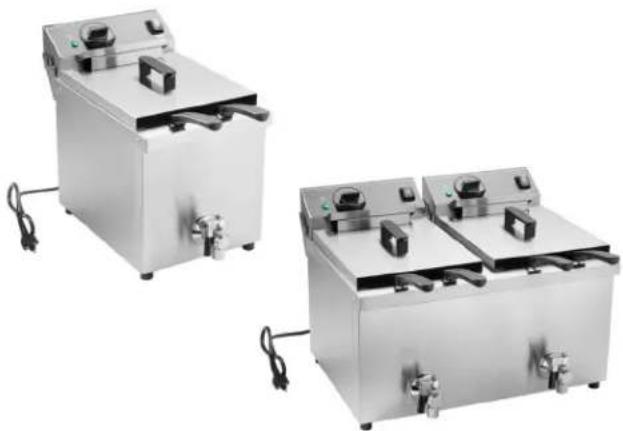
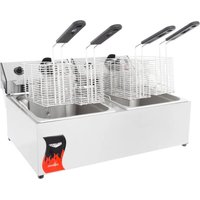
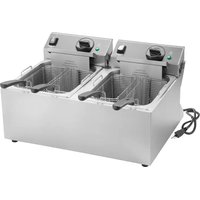
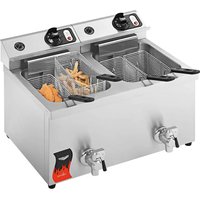
Three stainless steel kitchen cabinets with control knobs and side outlets, shown from different angles (no visible text or labels)| Item No. | Model No. | Description | Watts Volts | ||
| CF4-3600 | FFA8115 | Countertop | Fryer, 15 lb. | 2700-3600 | 208-240 |
| CF4-3600-C | FFA8115-C | ||||
| CF4-3600DUAL | FFA8130 | Dual C | countertop Fryer, 2 x 1 5 lb. | 2700-3600 | 208-240 |
| CF4-3600DUAL-C | FFA8130-C |
Note: Each fryer head requires a dedicated circuit and the electrical ratings are per circuit.
FUNCTION AND PURPOSE
This equipment is intended to be used for deep frying foods in commercial foodservice operations only. It is not intended for household, industrial or laboratory use.
Table of Contents
Codes and Requirements ...... page 2
Features and Controls ...... page 2
Before First Use ...... page 2
Operation ...... page 3
Cleaning ...... page 5
Troubleshooting ...... page 6
CODES AND REQUIREMENTS


WARNING
Fire, Injury, Death Hazard
This equipment must installed by a qualified installer in accordance with all federal, state and local codes. Failure to install this equipment properly can result in injury or death.
Applicable Codes and Standards
United States
Vollrath recommends all commercial cooking equipment be provided with a ventilation system in compliance with NFPA96.
- Cooking equipment that uses or produces grease (e.g. fryer, griddle), must be provided with hoods that are designed to capture grease and provide fire protection.
- Equipment must be installed in accordance with the requirements and approval of the AHJ "Authority Having Jurisdiction."
Clearance Requirements
- Minimum clearance from combustible construction: 6' (15 cm) from the sides and back of the fryer
- Minimum clearance from surface flames from adjacent equipment: 16" (40.6 cm)
Environment Requirements
- Do not install under combustible materials.
- Should be installed under a hood in accordance with the latest edition of the Standard for Ventilation Control and Fire Protection of Commercial Cooking Operations, NFPA 96.
- Locate the fryer in a place where it cannot be pushed off the countertop.
- Keep the area surrounding the fryer clear of combustible materials.
- Keep the area at the front of the fryer clear for unobstructed access during operation.
- Do not place adjacent to a heat-producing appliance.
Electrical Requirements
- Each fryer head requires a dedicated circuit. Some models are supplied with two individual power cords. Each cord must be plugged into a dedicated circuit that matches the rating on the nameplate found on the back of the fryer.
BEFORE FIRST USE
Clean the Equipment
This equipment must be cleaned prior to use. Failure to clean surfaces before using the unit could cause food contamination. See "Cleaning" in this manual.
FEATURES AND CONTROLS
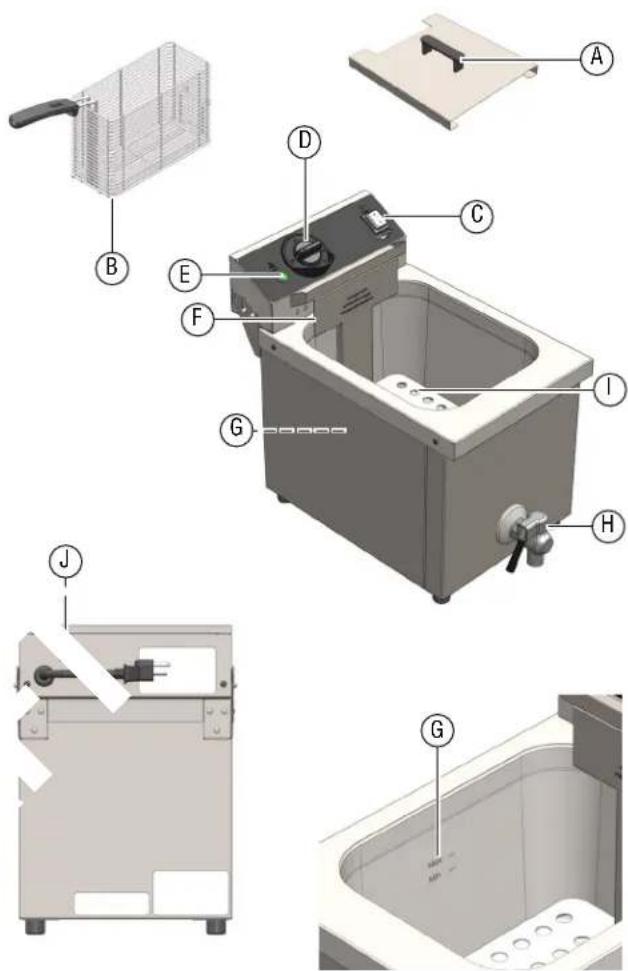
A Night Cover. Covers the well and oil when the fryer is not in use.
B Baskets. Hold the food to be fried.
C On/Off Switch. Illuminates when the switch is on the ON position.
D Temperature Control Dial. Sets the temperature of the oil.
Standby Mode. Turns off the heating element. Note: In this mode the ready light will also illuminate.
E Ready Light. Illuminates when oil has reached the set temperature.
F Basket Hook. Holds the basket to allow excess oil to drain from food.
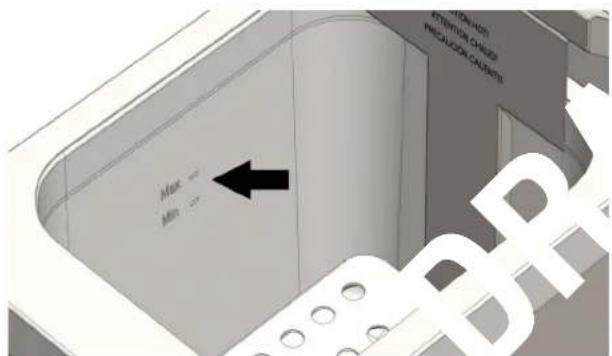
G Maximum Oil Level. Do not fill with oil above this mark because this may cause oil to overflow the well after the basket of food has been added.
Minimum Oil Level. Do not operate with oil below this level as the oil may overheat and could ignite, causing a fire.
H Drain Valve. Drains the oil.
I Heating Element. Heats the oil.
J Over-Temperature Reset Switch. Refer to the Troubleshooting section.
OPERATION

WARNING
Fire Hazard
Overheated oil or oil vapors can ignite causing a fire. Monitor oil temperature, quality and level.
Heat oil carefully. If oil smokes, reduce heat. Do not leave unit unattended. If fire occurs, turn unit off, cover until cool. Do not put water on hot or flaming oil. Do not operate with oil below low oil mark. Dirty oil has a lower flash point. Replace oil on a regular basis. Maintain correct oil level. Use an oil vapor removal system (hood) to reduce oil and grease buildup on wall or ceiling surfaces.
NOTICE: Do not operate the fryer with the night cover(s) over the well(s).
Add Oil to the Wells
NOTICE: Do not pour oil into an empty well when the fryer is hot.
Tips:
- Use a high quality oil that does not break down quickly. For example corn or peanut oil.
- Strain oil daily.
- Add fresh oil as necessary to maintain the oil level.
- Before each use, check the oil level in each well to make sure it is between the minimum and maximum fill lines.
- Verify the drain valve(s) are in the closed position.
- If oil needs to be added, remove baskets from well. Add oil or shortening to well until the oil is between the minimum and maximum fill lines. DO NOT overfill the well.
NOTICE: Melt shortening at 125 °F. Melting shortening at temperatures above 125°F may trip the high limit control. After shortening has melted, set the dial to the frying temperature.
Pre-Heat the Oil
For dual fryers, each well operates independently and may be set to different temperatures.
Note: The fryer head must be in the down position. If it is not, the fryer will not heat.
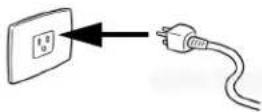
- Plug the fryer into a grounded electrical outlet that matches the rating on the nameplate found on the back of the fryer.
NOTICE: Using a voltage other than the nameplate rated voltage will cause damage to the unit. Incorrect voltage, modification to the power cord or electrical components can damage unit and will void the warranty.
-
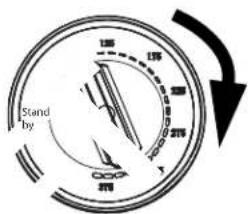
Press ☐ to turn on the fryer. The switch will illuminate.
-
Rotate the dial to desired temperature.
| Food Suggested | Temperature |
| French fries | 375 ^ |
| Waffle fries | |
| Potato chips | |
| Tater Tots ^ | |
| Onion rings | |
| Chicken wings | 350 ^ Breaded fish |
| Shrimp |
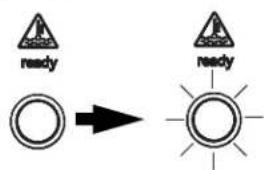
- The ready light will illuminate when the oil reaches the set temperature.
Place Food into the Basket
| CAUTION | |
| Burn HazardHot oil and parts can cause burns. Use caution when operating this equipment. Do not overfill baskets which could cause hot oil to overflow. Some foods may cause oil to spatter. Use caution when adding food to hot oil and lowering baskets into the fryers. |
For Best Results
| Food Tips | |
| All Foods | Fill baskets 1/3 to 1/2 full. Do not over fill.Place food so that it can circulate in the boiling oilSelect pieces of food that are the same shape and size.Skim the oil often.Shake the basket often while frying. |
| Frozen Foods | Remove ice crystals from frozen food. Ice crystals may cause oil to splatter.Dry or drain wet food before placing into the basket. |
| Batter Dipped Foods | Lower the basket into the oil, then use tongs to place individual pieces into the oil |
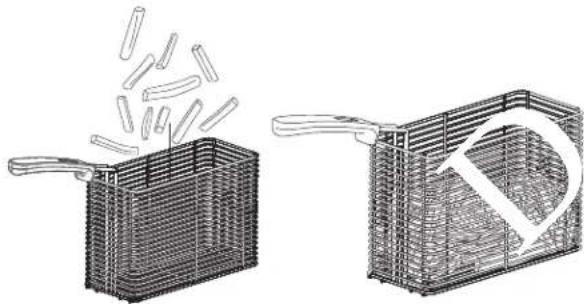
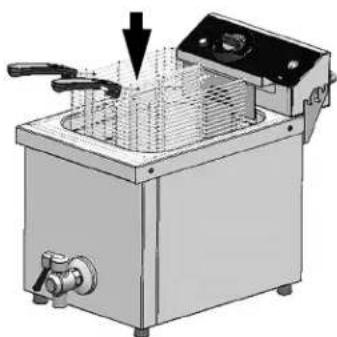
1. Place food into the basket(s).
natural_image
Two wire mesh plastic crates, one emitting a bundle of sticks and the other with a circular arrow indicating a cut or removal (no text or symbols)• Fill the basket 1/3 to 1/2 full
• Distribute the food evenly in the basket
NOTICE: Overfilling baskets could cause hot oil to overflow.
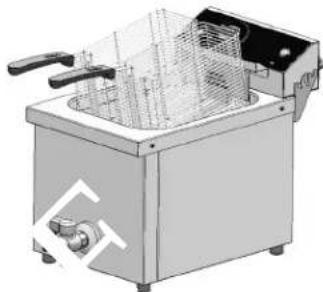
- Carefully lower the basket(s) into the cooking oil.
natural_image
3D rendering of a kitchen electric oven with handle and cooling unit (no text or symbols visible)- When frying is complete, remove the basket(s) from the oil and set on the basket hook to allow excess oil to drain from the food.
natural_image
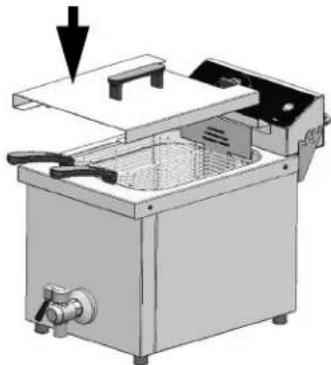
Illustration of a stainless steel two-fried flat-screen kitchen with handlebars and grating (no text or symbols)-
Allow the excess oil to drain back into the well before transferring the food to a serving dish or holding area.
-
Press (10) to turn off the fryer.
-
Place the night covers over the fryer wells when the fryer is not in use.
natural_image
3D rendering of a stainless steel kitchen with a downward arrow indicating a component (no text or symbols present)©
| Problem | Might Be Caused By | Course of Action |
| Ready light does not illuminate when the temperature control is set to standby. | The fryer is not plugged in. | Plug in the fryer. |
| The temperature safety switch is tripped. | Reset temperature safety switch. See the Temperature Safety Reset section of this manual. | |
| The fryer head is not positioned correctly. | Ensure the fryer head is positioned correctly in the hinges and lowered into the oil. The fryer head must be in the down position to engage the magnetic interlock switch.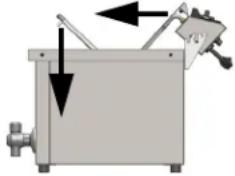 | |
| Ready light malfunction. | Replace the ready light. | |
| Oil gets too hot. | The oil level may be too low. | Check the level of oil in the well. It should be between the minimum and maximum fill lines. If is not, turn off the fryer and allow it to cool. Add oil to proper level. |
| Thermostat control malfunction. | Contact Vollrath Technical Services. | |
| Oil does not get hot enough. | Not allowing sufficient time for fryer to recover. | Wait for the ready light to illuminate before placing food into the fryer. |
| Thermostat control malfunction. | Contact Vollrath Technical Services. | |
| Oil heats slowly. | The fryer may be plugged into an electrical outlet with incorrect voltage. | Verify the voltage at the outlet matches the voltage rating the label on the fryer. If not, plug the fryer into an outlet with the correct voltage. |
| Oil does not heat. | Fryer head is not positioned correctly. | Ensure the fryer head is positioned correctly in the hinges and lowered into the oil. The fryer head must be in the down position to engage the magnetic interlock switch.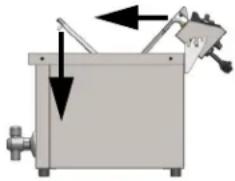 |
| The temperature safety switch may have activated. | See the instructions in the Temperature Safety Reset section of this manual. | |
| The magnetic safety switch, thermostat, or heating element may have malfunctioned. | Contact Vollrath Technical Services. | |
| Oil boils over top when frying | Too much oil in the well. | Reduce the amount of oil in the well. |
| Too much food in the basket. | Reduce the amount of food in the basket. | |
| Too much water in the food. | Remove extra liquid or ice crystals from food prior to frying. | |
| Fryer suddenly stops working | The oil may be too hot and the over-temperature safety feature may have activated. | See the instructions in Temperature Safety Reset section of this manual. |
| Food quality issues | ||
| Overcooked food. | Food is cooked too long. | Lower the temperature or adjust the cooking time. |
| Undercooked food or food is not crisp. | Oil is not hot enough, not cooked long enough or there is too much food in the basket. | Raise the temperature or adjust the time. Use uniform sized pieces of food. Do not overload the basket. Shake the basket while the food is cooking. |
| Food is overcooked on outside, undercooked on inside. | Oil is too hot. | Lower the temperature of the oil. |
TEMPERATURE SAFETY RESET SWITCH
This fryer is equipped with a safety feature that shuts off power to the fryer if the oil temperature reaches 446 °F (260 °C). If the switch is activated, the condition that caused the activation needs to be corrected and the switch needs to be reset.
- Determine what caused the safety switch to activate and correct it. Possible causes include; dirty oil, low oil level and fryer head not properly submerged in oil.
- Allow the oil to cool to 300 °F (149 °C) or lower.
- Press and release the reset button on the back of the fryer.
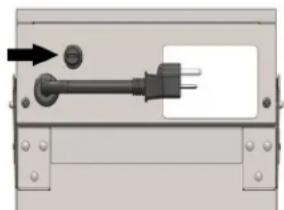
natural_image
Mechanical assembly diagram showing a connector with two pins and a power outlet (no text or symbols)- Contact Vollrath Technical Service if the switch continues to activate.
SERVICE AND REPAIR
Serviceable parts are available on vollrathfoodservice.com.
To avoid serious injury or damage, never attempt to repair the unit or replace a damaged power cord yourself. Do not send units directly to The Vollrath Company LLC. Please contact Vollrath Technical Services for instructions.
When contacting Vollrath Technical Services, please be ready with the item number, model number (if applicable), serial number, and proof of purchase showing the date the unit was purchased.
WARRANTY STATEMENT FOR THE VOLLRATH CO. L.L.C.
This warranty does not apply to products purchased for personal, family or household use, and The Vollrath Company LLC does not offer a written warranty to purchasers for such uses.
The Vollrath Company LLC warrants the products it manufactures or distributes against defects in materials and workmanship as specifically described in our full warranty statement. In all cases, the warranty runs from the date of the end user's original purchase date found on the receipt. Any damages from improper use, abuse, modification or damage resulting from improper packaging during return shipment for warranty repair will not be covered under warranty.
For complete warranty information, product registration and new product announcement, visit vollrathfoodservice.com.

vollrathfoodservice.com
The Vollrath Company, L.L.C.
1236 North 18th Street
Sheboygan, WI 53081-3201 U.S.A.
Main Tel: 800.624.2051 or 920.457.4851
Main Fax: 800.752.5620 or 920.459.6573
Customer Service: 800.628.0830
Canada Customer Service: 800.695.8560
Technical Services
techservicereps@vollrathco.com
Induction Products: 800.825.6036
Countertop Warming Products: 800.354.1970
Toasters: 800-309-2250
All Other Products: 800.628.0832
© 2023 The Vollrath Company L.L.C.
Part No. 352186-1 ml
9/18/2023
natural_image
Three stainless steel kitchen cabinets with control knobs and side fans, shown from different angles (no visible text or labels)| Num. d'article No | modèle Description | Puisance(W) Volts | |
| CF4-3600 | FFA8115 Friteuse surcomptoir,15 lb.(4,5 kg) | 2700-3600 | 208-240 |
| CF4-3600-C FFA8115-C | |||
| CF4-3600DUAL FFA8130 Friteuse surcomptoir double,2 x 15 lb.(4,5 kg) | 2700-3600 | 208-240 | |
| CF4-3600DUAL-C FFA8130-C | |||
natural_image
Two wire mesh crates with handles, one emitting a fan of food from the other (no text or symbols visible)natural_image
3D rendering of a kitchen electric oven with handle and outlet (no text or symbols visible)natural_image
Illustration of a single-family kitchen grater with inlet and outlet pipes (no text or symbols)natural_image
3D diagram of a stainless steel kitchen with a downward arrow indicating a component (no text or symbols present)NETTOYAGE

ATTENTION
Risque de brûlure
natural_image
Two mechanical components with arrows indicating transformation (no text or symbols visible)natural_image
Two views of a mechanical valve component with a right-pointing arrow indicating direction (no text or symbols present)natural_image
Mechanical assembly diagram showing a lever mechanism interacting with a component, with an inset close-up of the mechanical component (no text or symbols present)natural_image
Diagram of a mechanical or electrical component with a black plug and two pins, no visible text or symbols1236 North 18th Street
natural_image
Three stainless steel kitchen cabinets with control knobs and side fans, shown from different angles (no visible text or labels)| Núm. art. | Núm. modelo | Descripción | Vatios | Voltios |
| CF4-3600 FFA8115 Freidora deCF4-3600-C FFA8115-C | 5 Freidora de | mostrador, 15 lb (6,8 kg) | 2700-3600 | 208-240 |
| CF4-3600DUAL FFA8130 Freidora de doble de | 2700-3600 | 208-240 | ||
| CF4-3600DUAL-C FFA8130-C | ||||
| Alimento | Temperatura sugerida |
| Papas fritas | 375°F (190°C) |
| Papas rejilla | |
| Papas fritas envasadas | |
| Tater Tots® | |
| Aros de cebolla | |
| Alitas de pollo | 350°F (175°C) |
| Pescado apanado | |
| Camarón |
natural_image
Two wire mesh crates with handles, one emitting a bundle of sticks (no text or symbols)natural_image
3D rendering of a kitchen stainless steel oven with a handle and control panel (no text or symbols visible)natural_image
Illustration of a stainless steel two-fried kitchen<|im_start|> Puerto Rico electric stove (no text or symbols visible)natural_image
3D rendering of a stainless steel kitchen with a downward arrow indicating a component (no text or symbols present)LIMPIEZA
6

ablllthltn.

PRECAUCIÓN
natural_image
Mechanical assembly diagram showing a cutting tool interacting with a workpiece, with an inset close-up of the machining process (no text or symbols present)natural_image
Diagram of a device panel with an electrical plug and terminal blocks, no text or symbols present1236 North 18th Street

- Medium-Duty 15 Lb. Electric Countertop Fryers with Drain
- WARNING
- Fire, Injury, Death Hazard
- Safety Precautions
- CAUTION
- NOTICE: Notice is used to note information that is important but not hazard-related.
- To reduce risk of injury or damage to the equipment:
- FUNCTION AND PURPOSE
- Table of Contents
- CODES AND REQUIREMENTS
- Applicable Codes and Standards
- United States
- Clearance Requirements
- Environment Requirements
- Electrical Requirements
- BEFORE FIRST USE
- Clean the Equipment
- FEATURES AND CONTROLS
- OPERATION
- Fire Hazard
- Add Oil to the Wells
- Tips:
- Pre-Heat the Oil
- Place Food into the Basket
- For Best Results
- Place food into the basket(s).
- TEMPERATURE SAFETY RESET SWITCH
- SERVICE AND REPAIR
- WARRANTY STATEMENT FOR THE VOLLRATH CO. L.L.C.
- NETTOYAGE
- ATTENTION
- Risque de brûlure
- LIMPIEZA
- PRECAUCIÓN
Brand : Vollrath
Model : FFA8130
Category : Deep fryer