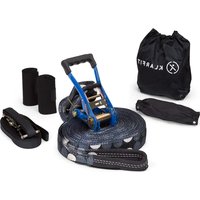
Antero - Sports Equipment Klarfit - Free user manual and instructions
Find the device manual for free Antero Klarfit in PDF.


| Product type | Slackline (balance webbing) |
| Brand | Klarfit |
| Model | Antero |
| Width | 5 cm |
| Webbing length (free end) | 15 m |
| Fixed end length | 2.5 m |
| Maximum installation height | 90 cm |
| Maximum user load | 150 kg |
| Maximum clamping force | 400 N |
| Maximum anchor point load | 5,850 N |
| Maximum service life | 4 years |
| Number of simultaneous users | 1 |
| Package contents | 1 webbing with ratchet and fittings, 1 safety rope, 2 tree protectors, 1 shoulder bag, 1 instruction manual |
| Material | Polypropylene (PP) and polyamide (PA) for tree protectors |
| Care | Clean with lukewarm water; avoid solvents; store dry and ventilated |
| Safety | Check regularly for wear; do not tension above 90 cm; use only between solid anchor points; supervise children; do not use force extension |
Frequently Asked Questions - Antero Klarfit
User questions about Antero Klarfit
0 question about this device. Answer the ones you know or ask your own.
Ask a new question about this device
Download the instructions for your Sports Equipment in PDF format for free! Find your manual Antero - Klarfit and take your electronic device back in hand. On this page are published all the documents necessary for the use of your device. Antero by Klarfit.
USER MANUAL Antero Klarfit
INHALTSVERZEICHNIS
Technische Daten 4
Unit 6 Riverside Business Centre
Brighton Road
Shoreham-by-Sea
BN43 6RE
United Kingdom
TECHNISCHE DATEN
Wichtige Hinweise
VORSICHT
Congratulations on the purchase of your device. Please read the following instructions carefully and follow them to prevent potential damage. We accept no liability for damage caused by disregarding the instructions and improper use. Please scan the QR code to access the latest operating instructions and further information about the product.

CONTENTS
Technical Information 10
Safety Instructions 10
Assembly of the Slackline 12
Disassembly of the Slackline 14
Cleaning and Storage 14
MANUFACTURER & IMPORTER (UK)
Manufacturer:
Chal-Tec GmbH, Wallstraße 16, 10179 Berlin, Germany.
Importer for Great Britain:
Chal-Tec UK limited
Unit 6 Riverside Business Centre
Brighton Road
Shoreham-by-Sea
BN43 6RE
United Kingdom
TECHNICAL INFORMATION
| Product code 10040221, 10040222 | |
| Max. useful height 90 cm | |
| Max. number of persons | 1 |
| Max. user weight | 150 kg |
| Max. clamping element operating force | 400 N |
| Max. anchor point load | 5850 N |
| Width | 5 cm |
| LGF (length of the fixed end, measured from the supporting point of the end fitting to the outer turning radius of the connection of the webbing to the tensioning element) | 2.5 m |
| LGL (length of the loose end, measured from the free end of the webbing to the supporting point of the end fitting) | 15 m |
| Max. lifetime 4 years | |
| Package contents:1 x webbing with ratchet and end fittings1 x safety holding line2 x tree protectors made of PP and PA1 x shoulder bag1 x operating Instructions | |
SAFETY INSTRUCTIONS
Intended use
SLACKLININGis balancing on a line stretched between two fixed points. Balancing or performing tricks can be done on the low tensioned webbing (about knee to hip height above the ground). The slackline can be set up anywhere where there are two fixed points. The fixing point should withstand a load of at least 2000 kg. Trees, poles or columns are particularly suitable. The surface should be as soft as possible (e.g. grass or sand) and ideally covered with mats to avoid injuries in case of a fall.
Note: This product is a piece of sports equipment, not a toy.
Safety Instructions
- The slackline may only be installed and used as described in these operating instructions.
- The slackline may only be fixed over solid ground and never set up over flowing or standing water.
- The fall area must be free of obstacles. There must be no sharp or pointed edges in the immediate vicinity.
- The assembly and dismantling of the slackline may only be carried out by adults over the age of 18.
- If you set up the slackline in public areas, always keep an eye on the slackline so that strangers do not use it and possibly injure themselves.
- Children may only use the slackline under supervision. Always keep an eye on the slackline so that children do not use the slackline unsupervised and possibly injure themselves.
- Install the enclosed safety holding line for additional safety for inexperienced persons. Attach it approx. 1.50 m above and parallel to the slackline between the holding points.
- The slackline may only be tensioned by hand. Extensions or other aids must not be used.
- Never tension the slackline between cars or by means of other aids, as the pre-tension can become uncontrollably high.
- The slackline may only be used by one person at a time.
- Check the slackline regularly for wear. The slackline may no longer be used in the event of tears, cuts of more than 10% of the yarns or in the event of indentations and breaks in load-bearing fi bres and seams.
- The end fittings and the ratchet must no longer be used if they are deformed, cracked or show strong signs of wear and corrosion.
- Always dismantle the slackline and the safety holding line after use, as they can cause tripping hazards and endanger other people.
- All wearing parts must be checked and serviced regularly. The properties of the slackline can be reduced by poor maintenance.
CAUTION
Risk of injury! The slackline is a dangerous piece of equipment that must be handled with the utmost care. By tensioning the slackline, a force of up to 1,000 kg can be applied. Under this tension, the line can cause extreme injuries!
Before use
The following points should be checked before each use:
• Is the line straight and not twisted?
- Are the end fittings firmly fixed and closed?
- Are the fixed points anchored strongly enough?
- Is the floor underneath the tensioned line free of sharp or hard objects, such as stones or broken glass?
- Is the line stretched lower than 90 cm (knee height) above the ground?
- Check that no sharp edges can damage the slackline and injure you.
- Is the safety holding line correctly installed (approx. 1.50 m above and parallel to the slackline)?
ASSEMBLY OF THE SLACKLINE
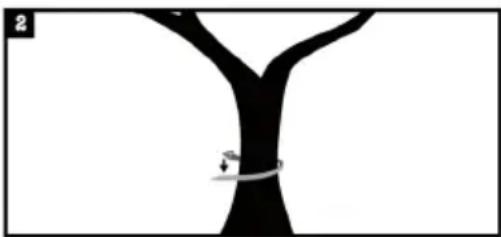
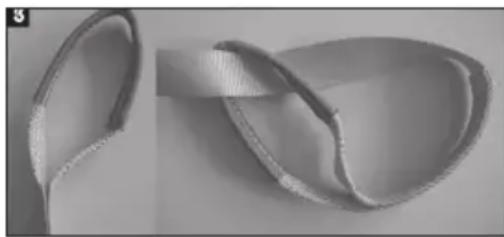
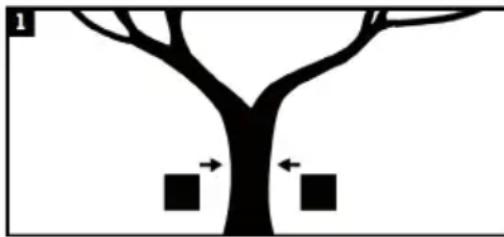
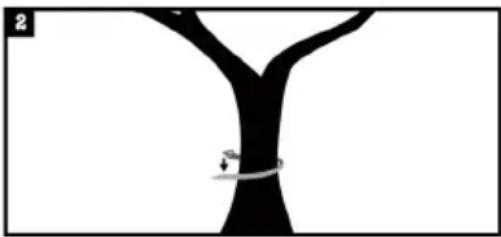
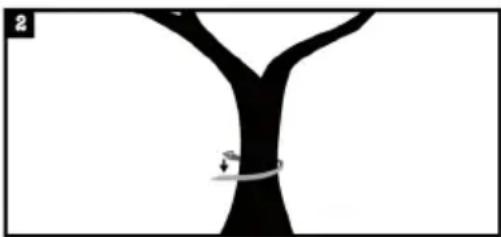
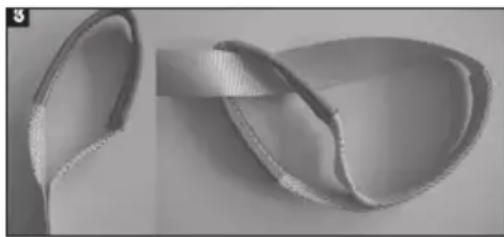
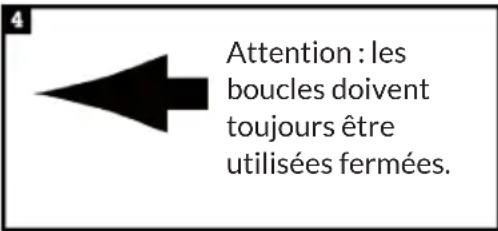
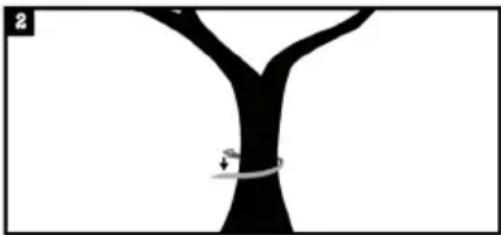
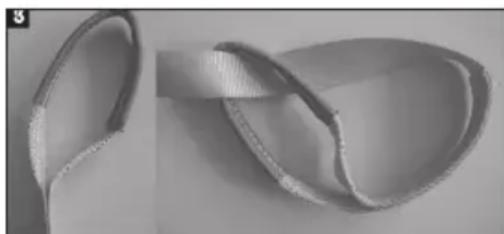
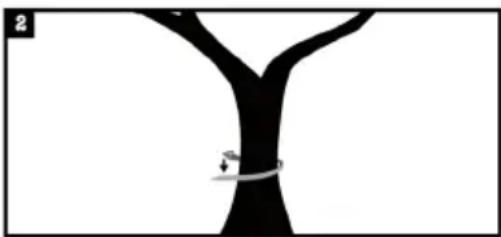
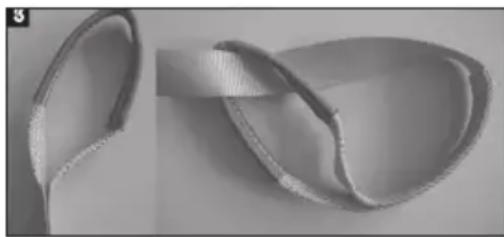
The slackline is stretched between two fixed points of the same height. Trees with a circumference of 100 cm or more are particularly suitable. Place the two ends of the ribbons around one tree each (see figure 2). Support the slackline with the supplied tree protectors on the side of the tree facing away from the slackline (see figure 1). Pull one end of the slackline through the loop (see figure 3).
Important instructions

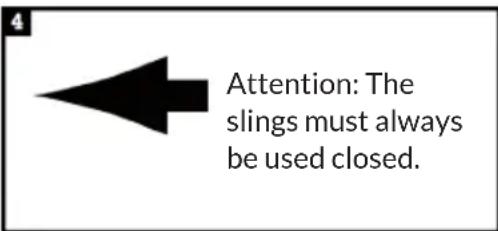
In case of frequent use of the same areas or high traffic density:
• Measures are taken against the compaction of the soil.
- Measures should be taken to protect the roots, especially in the case of exposed shallow roots.
Tensioning the slackline
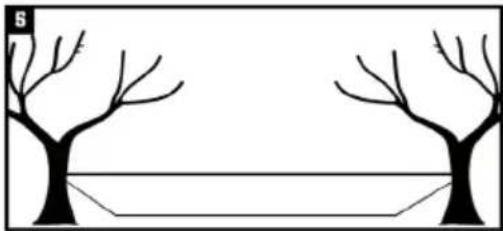
The slackline should be laid smoothly on the ground between the two fixed points(see figure 5).
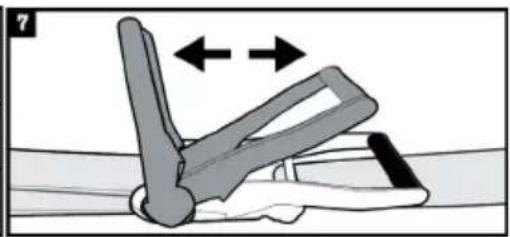
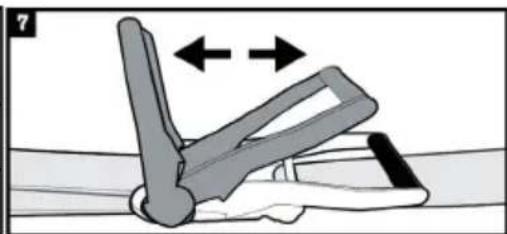
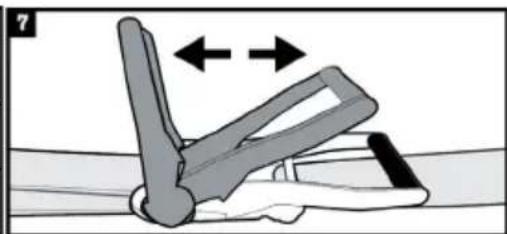
Then thread the slackline through the slotted shaft of the ratchet and pull it as tight as possible(see figure 6). Only then should the slackline be tensioned with the ratchet movement(see figure 7).
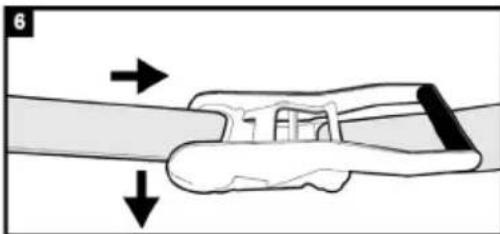
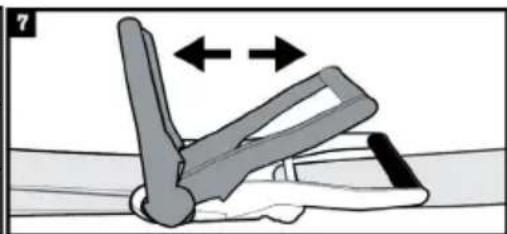
You can tension the line as far as you can with your body strength using the ratchet. Under no circumstances should a force amplifier, such as a lever extension, be used. When you have reached the maximum tension, fold the ratchet to close it.
As the slackline stretches slightly, it can be re-tensioned several times. A greater stretch is possible during first use. You can walk more easily on the line the tighter it is. With lower tension, balancing is more difficult because greater oscillations occur.
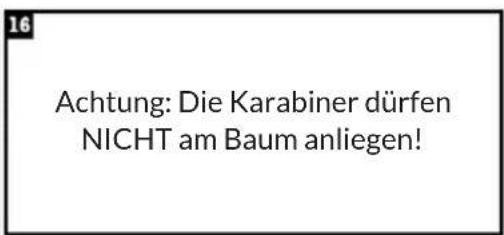
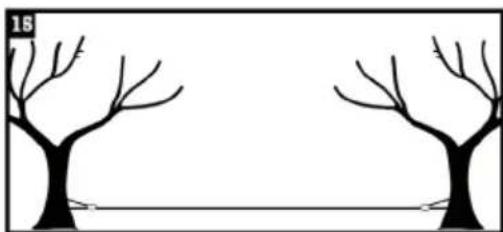
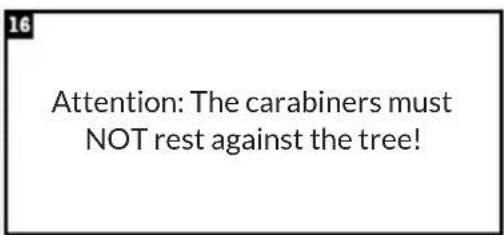
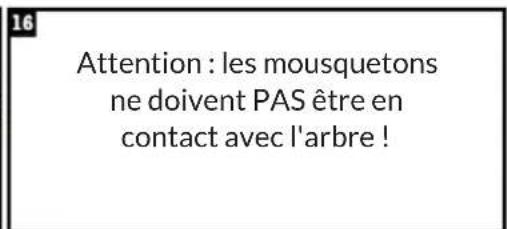
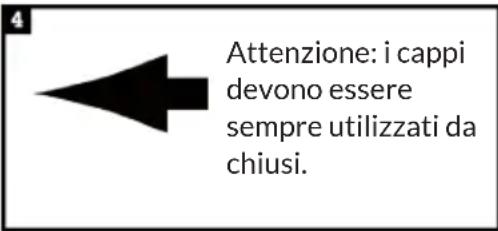
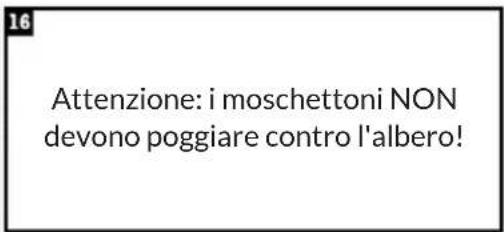
Note: The carabiners must not be attached tightly to the tree(see figure 15 and 16).
Maximum height of the line
The tensioned slackline must not be placed higher than 90 cm above the ground. Higher tensioned slacklines must be additionally secured with fall protection or fall arrest (not included in the scope of delivery).
WARNING
Danger of injury! Do not stretch the slackline higher than 90 cm, as there is a fatal risk of injury here. An ideal height for the line is knee height. This has the advantage of being easy to get on and off and has a low risk of injury.
DISASSEMBLY OF THE SLACKLINE
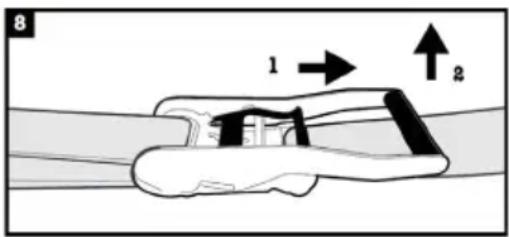
To release the line, pull the function slider of the ratchet and carefully flip the ratchet lever up to approx. 180° until the lock pops open(see figure 8).
CAUTION
Risk of injury! When the latch is released, there may be a violent shock which can be painfully transmitted to the fingers and hand.
After releasing the lock, you can pull the webbing out of the shaft. Roll up the slackline without twisting it. Detach the fastening straps again and put all the components, including the tree protectors, neatly together.
CLEANING AND STORAGE
- If necessary, the slackline can be cleaned with lukewarm water.
- Avoid aggressive chemical agents (e.g. solvents).
- The slackline should be stored in dry and well-ventilated rooms.
Cher client, chère cliente,
SOMMAIRE
Fiche technique 16
Unit 6 Riverside Business Centre
Brighton Road
Shoreham-by-Sea
BN43 6RE
Royaume-Uni
FICHE TECHNIQUE
Remarques importantes
ATTENTION
ÍNDICE
Datos técnicos 22
Chal-Tec UK limited.
Unit 6 Riverside Business Centre
Brighton Road
Shoreham-by-Sea
BN43 6RE
Reino Unido
DATOS TÉCNICOS
Notas importantes

ATENCIÓN
INDICE
Dati tecnici 28
PRODUTTORE E IMPORTATORE (UK)
Produttore:
Chal-Tec GmbH, Wallstraße 16, 10179 Berlino, Germania.
Unit 6 Riverside Business Centre
Brighton Road
Shoreham-by-Sea
BN43 6RE
Regno Unito
DATI TECNICI
Note importanti

ATTENZIONE


- INHALTSVERZEICHNIS
- WICHTIGE HINWEISE
- VORSICHT
- CONTENTS
- MANUFACTURER & IMPORTER (UK)
- MANUFACTURER
- IMPORTER FOR GREAT BRITAIN
- SAFETY INSTRUCTIONS
- INTENDED USE
- CAUTION
- BEFORE USE
- ASSEMBLY OF THE SLACKLINE
- IMPORTANT INSTRUCTIONS
- TENSIONING THE SLACKLINE
- MAXIMUM HEIGHT OF THE LINE
- WARNING
- DISASSEMBLY OF THE SLACKLINE
- CLEANING AND STORAGE
- CHER CLIENT, CHÈRE CLIENTE
- SOMMAIRE
- REMARQUES IMPORTANTES
- ATTENTION
- ÍNDICE
- NOTAS IMPORTANTES
- ATENCIÓN
- INDICE
- PRODUTTORE E IMPORTATORE (UK)
- PRODUTTORE
- NOTE IMPORTANTI
- ATTENZIONE
Brand : Klarfit
Model : Antero
Category : Sports Equipment