Steam Train - Electric toy Rollplay - Free user manual and instructions
Find the device manual for free Steam Train Rollplay in PDF.


| Product Type | Electric toy for children (steam train) |
| Brand | Rollplay |
| Model | Steam Train (No. 7221, 7721) |
| Recommended Age | 2 to 5 years |
| Maximum User Weight | 20.5 kg (45 lbs) |
| Product Dimensions | 92 cm × 34 cm × 40 cm (36.2 × 13.4 × 15.7 in) |
| Battery | 6 V, 4 Ah (lead-acid) |
| Motor | 6 V, 9 W |
| Charging Time | 8 to 12 hours (first charge: 18 hours) |
| Usage Time | 1 to 2 hours per charge |
| Included Track Pieces | 12 curves, 10 straights |
| Steam Tank Capacity | 60 ml purified water |
| Main Features | Forward, steam with sound, 3 train sounds |
| Power Supply | Built-in rechargeable battery, 120 V AC charger |
| Maintenance and Cleaning | Damp cloth and mild soap; do not immerse |
| Safety | Helmet required, adult supervision, do not use on roads/slopes/water |
| Warranty | 1 year vehicle, 6 months battery |
| Customer Service | 1-888-982-9309 (Mon-Fri 9am-5pm ET) / customerservice@rollplay.com |
Frequently Asked Questions - Steam Train Rollplay
User questions about Steam Train Rollplay
0 question about this device. Answer the ones you know or ask your own.
Ask a new question about this device
Download the instructions for your Electric toy in PDF format for free! Find your manual Steam Train - Rollplay and take your electronic device back in hand. On this page are published all the documents necessary for the use of your device. Steam Train by Rollplay.
USER MANUAL Steam Train Rollplay
natural_image
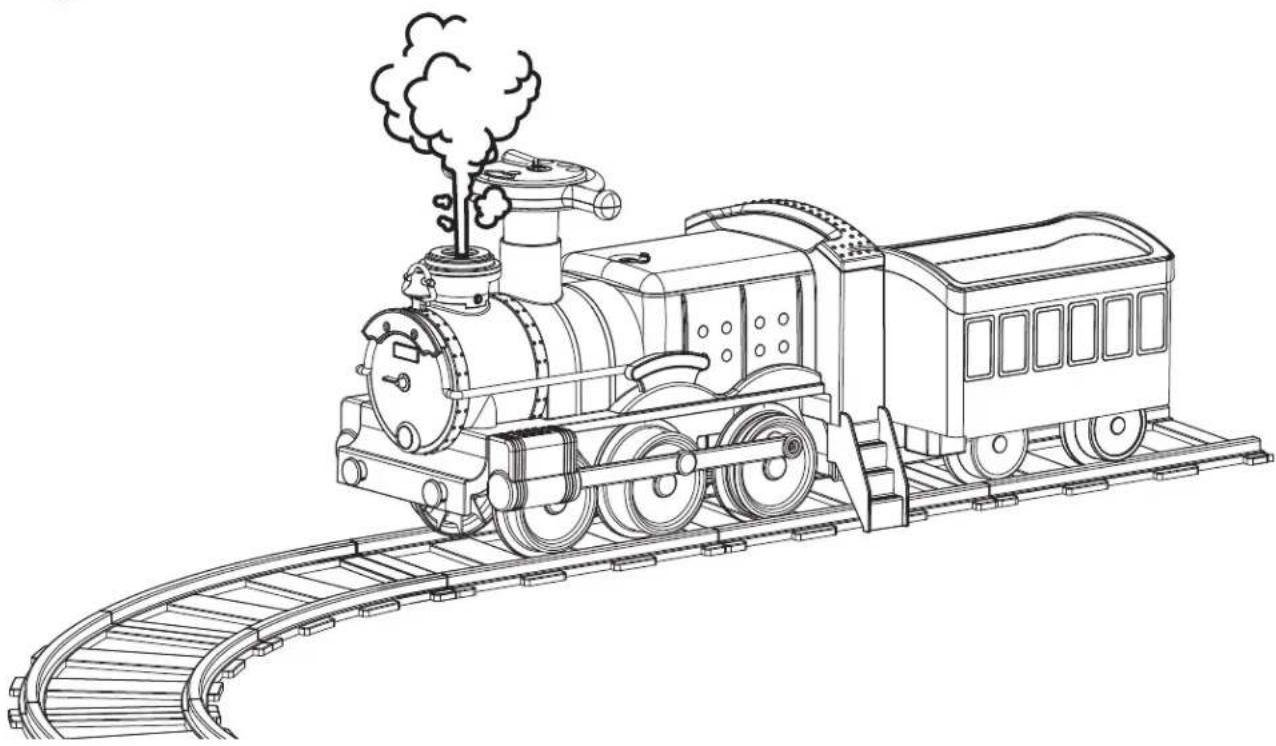
Line drawing of a vintage steam locomotive on railway tracks, emitting smoke and exhaust (no text or symbols)Owner's Manual and Assembly Instructions
Model 7221, 7721
Read and understand the entire manual before assembly and operation. The vehicle must be assembled by an adult who has read and understands the instructions.
Made in China.
Styles and colors may vary. Do not return to store. Call 1-888-982-9309 for assistance and replacement parts.
IMPORTANT:
Save this manual with your sales receipt.
Introduction
Thank you for purchasing the Steam Train from Rollplay. We hope the rider enjoys it for miles to come. Please read this instruction guide carefully before assembling and operating the vehicle. Please have your model number and serial number ready before calling. Please have proof of purchase. Keep your sales receipt or register your product at www.rollplay.com.
Please contact Rollplay Customer Service with any questions.
Hours: 8 AM - 5 PM (EST), Monday - Friday
Phone: 1-888-982-9309
Email: customerservice@rollplay.com
Web: www.rollplay.com
Specifications:
| BATTERY | 6V 4AH |
| MOTOR | 6V 9W |
| AGE | 2 - 5 Years |
| MAX WEIGHT | 20.5 kg (45 lb) |
| PRODUCT SIZE | 92.0 cm x 34.0 cm x 40.0 cm (36.2 x 13.4 x 15.7 in) |
| RECHARGE TIME | 8-12 Hours |
| TYPICAL RUN TIME | 1-2 Hours |
| CHARGER OUTPUT | DC 7.0V |
IMPORTANT!
YOU MUST CHARGE THE BATTERY FOR 18 HOURS BEFORE FIRST USE!
Charge the battery after each use. Charge the battery at least once a month, even if the vehicle is not in use.
DO NOT RETURN THIS ITEM TO THE STORE!
Email or call Customer Service if you need assistance or replacement parts. Please have your model number and serial number ready before calling. Please have proof of purchase. Keep your sales receipt or register your product at www.rollplay.com as we may require proof of purchase.
www.rollplay.com
1-888-982-9309
Read this entire manual to ensure proper assembly and safe operation of the vehicle.

natural_image
Blank gray image with no visible content, text, or symbolsTable of Contents
Safety 6
Parts 8
Charging Instructions 9
Assemble the Oval Track 10
Assemble the Circle Track.... 11
Step and Caboose Assembly 12
Activate the Steam Function 13
Steering Wheel Use 14
Troubleshooting & Battery Maintenance 15
General Care & FCC Information ...... 16
Warranty Information 17
Product Registration 19
6
Safety

WARNING: SAFETY RIDING RULES
The user must follow all safety rules and guidelines, or serious injury or death may occur to the user.
- Always use common sense and safe practices when using the vehicle. The user must be at least 2 years old and weigh no more than 20.5 kgs (45 lbs).
- This product contains small parts that are for adult assembly only. Keep small children away when assembling. Remove and dispose of all protective material and plastic bags before assembly.
- Riders must always wear a fitted helmet that complies with U.S. Consumer Product Safety Commission (CPSC) Standard 16 CFR 1203.
- Only sit on the seat in the vehicle.
- Do not allow more than one rider.
- Do not overload the vehicle. Do not remove the weight restriction decals.
- Do not pull the vehicle with another vehicle or similar device.
- Keep body parts such as hands, legs, hair and clothing away from moving parts. Moving parts can cause serious injury.
• Always wear shoes in the vehicle. - Do not operate near streets or motor vehicles.
- Do not operate near drop-offs such as steps, steep inclines or hills. Operate on relatively level ground.
- Do not operate near water, swimming pools or other bodies of water.
- Do not operate in dangerous weather conditions such as rain or snow.
- Do not operate near loose dirt, mud, sand or fine gravel.
- Do not operate near flammable vapors (gasoline, paint thinner, acetone, etc.).
- Always use the vehicle in a safe, secure environment with adult supervision.
- Risk of fire. Do not bybass.
- Adult assembly only.
• To reduce the risk of injury, adult supervision is required. - Never use in road ways, near motor vehicles, on or near steep inclines or steps, swimming pools or other bodies of water.

WARNING: BATTERY SAFETY
- Battery posts, terminals and related accessories contain lead and lead compound (asic) chemicals known to the state of California to cause cancer, reproductive harm, and are toxic and corrosive. DO NOT open the battery.

- Contact exposure to battery leakage (lead acid) may cause serious injury. Immediately contact your doctor if exposure occurs. If the chemical is on the skin, flush immediately with cool water for 15 minutes. If the chemical is swallowed, immediately give the person water or milk. Do not give water or milk if the person is vomiting or has decreased alertness. Do not induce vomiting.
- Tampering with or modifying the electric circuit system may cause shock, fire or explosion. It could permanently damage the system. Keep the charger housing closed to prevent exposed wiring, which may cause electric shock.
IMPORTANT: Before using the vehicle for the first time, the battery must be charged for a full 18 hours (no more than 20 hours).

WARNING: ADULT SUPERVISION REQUIRED
- Before using the vehicle, the rider must understand the vehicle controls and safety issues.
- It is the responsibility of the adult to educate the child and to determine if the child is capable of understanding the vehicle controls.
- An adult must ALWAYS directly supervise the use of this vehicle.
- NEVER leave a child unsupervised in the vehicle.
8 Parts
natural_image
Line drawing of a vintage steam locomotive with visible wheels and cabin (no text or symbols)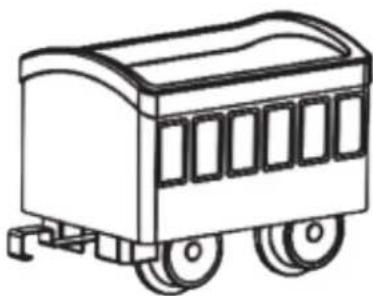
natural_image
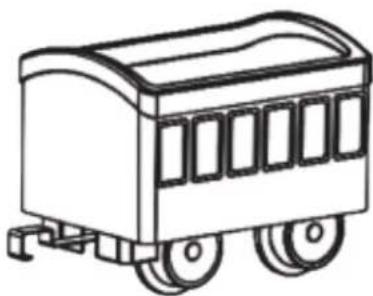
Line drawing of a toy train car with wheels and cabin (no text or symbols)- Caboose x 1
-
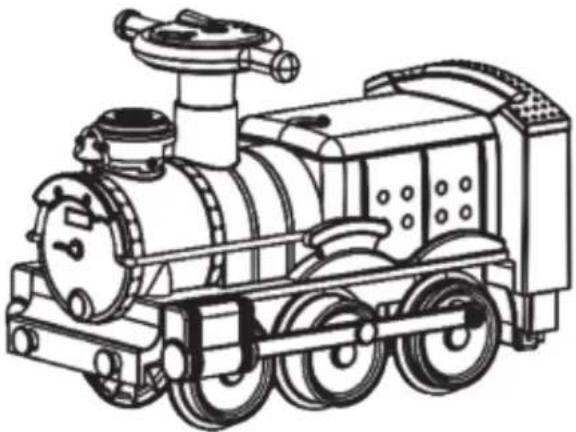
Train Body x 1
-
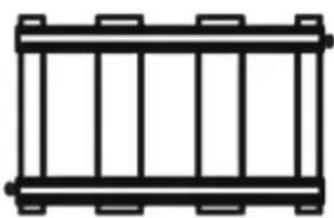
Straight Track x 10
natural_image
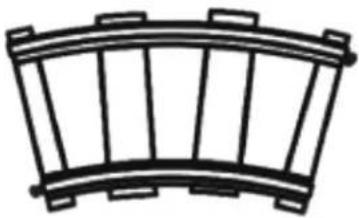
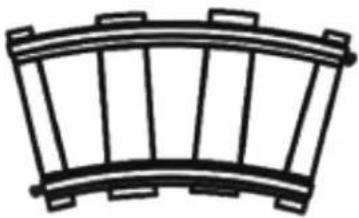
Simple line drawing of a rectangular frame with vertical bars (no text or symbols)- Curved Track x 12
natural_image
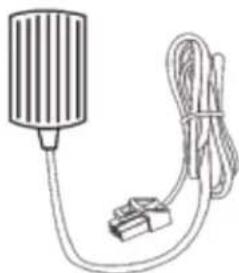
Simple line drawing of a curved, segmented structure with vertical supports (no text or symbols)- Charger x 1
natural_image
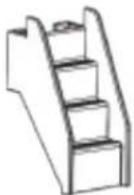
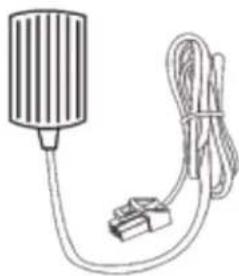
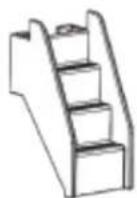
Simple line drawing of a microphone with a cable and connector (no text or symbols)- Train steps x 2
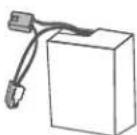
- Battery x 1 (preinstalled inside battery compartment)
Not Included:
- Hex Screwdriver (Needed for battery removal). Note: It is not necessary to remove battery for charging.
YOU MUST CHARGE THE BATTERY FOR 18 HOURS BEFORE THE FIRST USE!
ONLY AN ADULT SHOULD HANDLE THE BATTERY AND CHARGER.
To Charge the Battery:
- Ensure the train is stopped and turned off.
- Using a flat head screwdriver, turn the screw on the seat lid to the unlock position and lift lid.
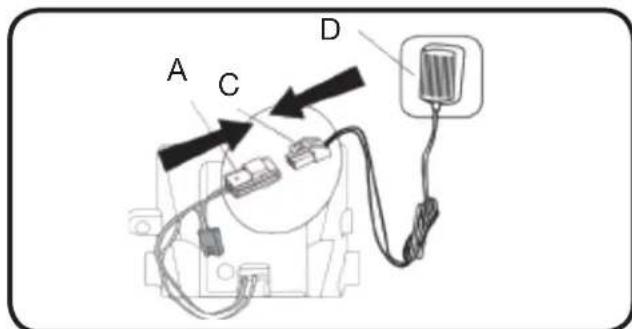
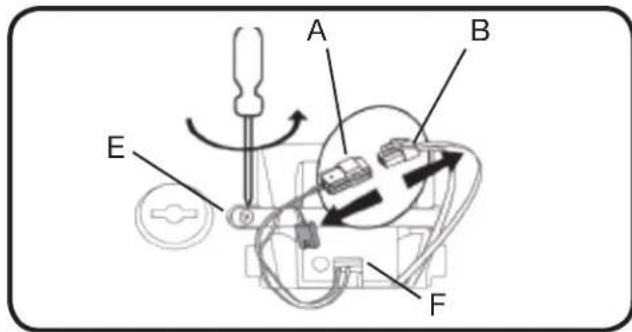
- Unplug the red battery connector (A) from the red engine connector (B).
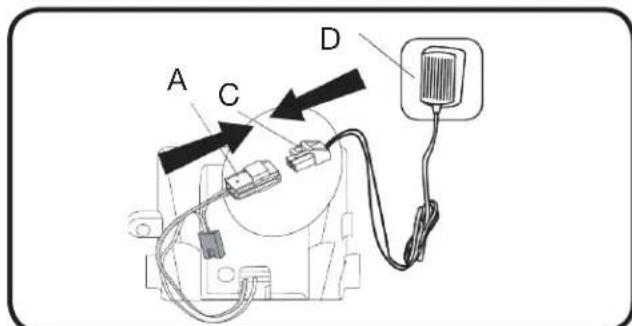
- Connect the red battery connector (A) to the red battery charger connector (C) and plug (D) into a 120 V outlet.
- Once done charging, unplug the charger connector (C) from the red battery connector (A).
- Reconnect the red battery connector (A) to the red engine connector (B).
To Remove the Battery:
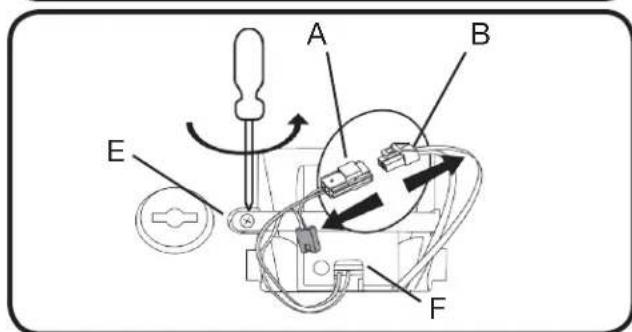
- Using a hex screwdriver, unscrew the hex screw on the battery strap.
- Slide the battery strap (E) out. Disconnect the red battery connector (A) from the red engine connector (B).
- Remove the battery (F) from the compartment.
Note: It is not necessary to remove the battery for charging. However, if the battery does not reach the outlet, it can be removed for charging.

natural_image
Line drawing of a steam locomotive with valve and gear assembly, showing mechanical components and motion direction (no text or symbols)
10 Assemble the Oval track
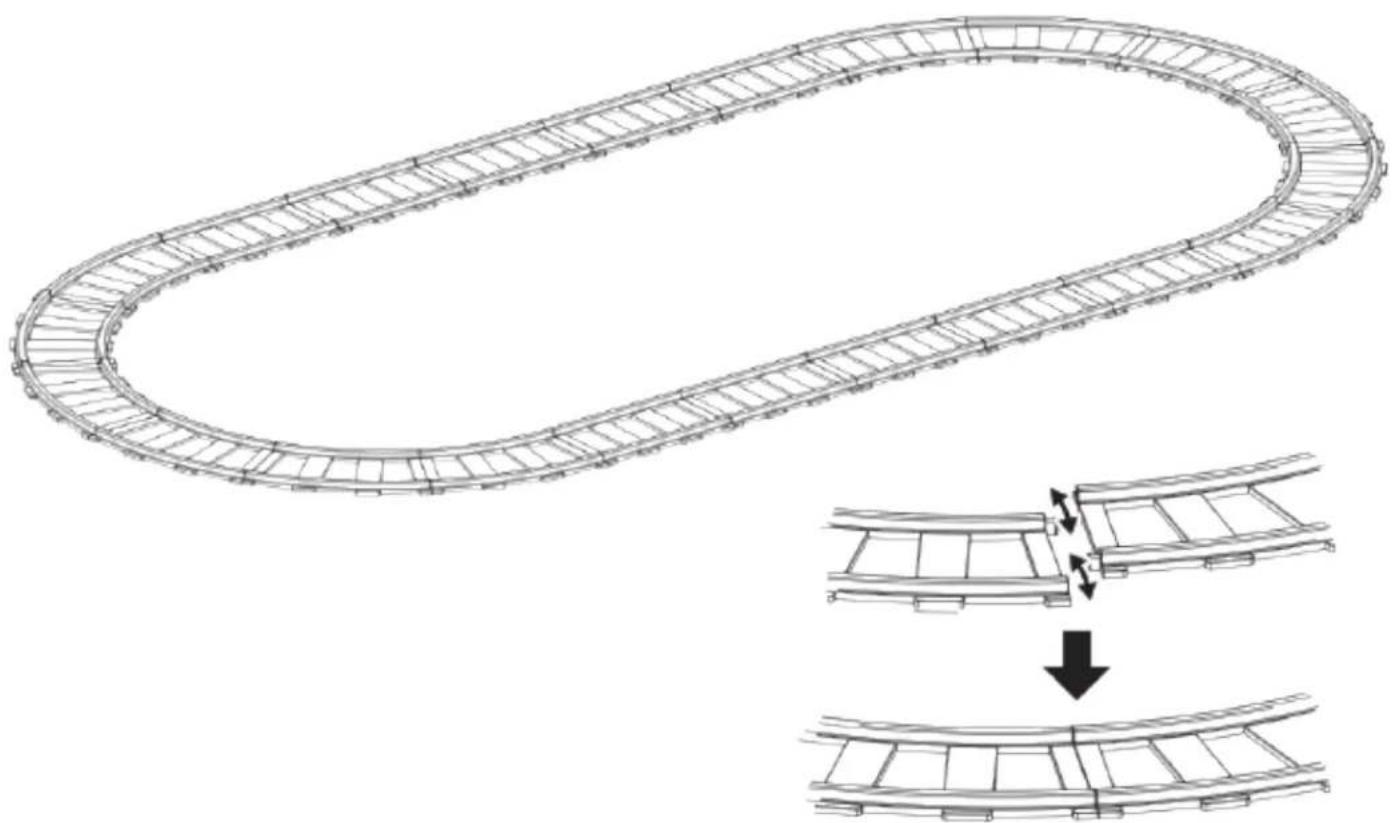
The train track can be assembled in either an oval or a circle. To assemble the track in the oval shape follow the below steps.
natural_image
Diagram of a train track with an oval track and two curved rail segments, showing structural changes (no text or symbols)- Always assemble the track on a flat, smooth surface
- Connect 5 pieces of straight track together by snapping one straight piece on top of another piece until firmly connected
- Connect 6 pieces of curved track together to form a half circle
- Connect the 5 pieces of straight track to 6 pieces of curved track
- Connect the track set to the remaining 5 pieces of straight track
- Connect the remaining 6 pieces of curved track to complete the oval
Assemble the Circle Track
natural_image
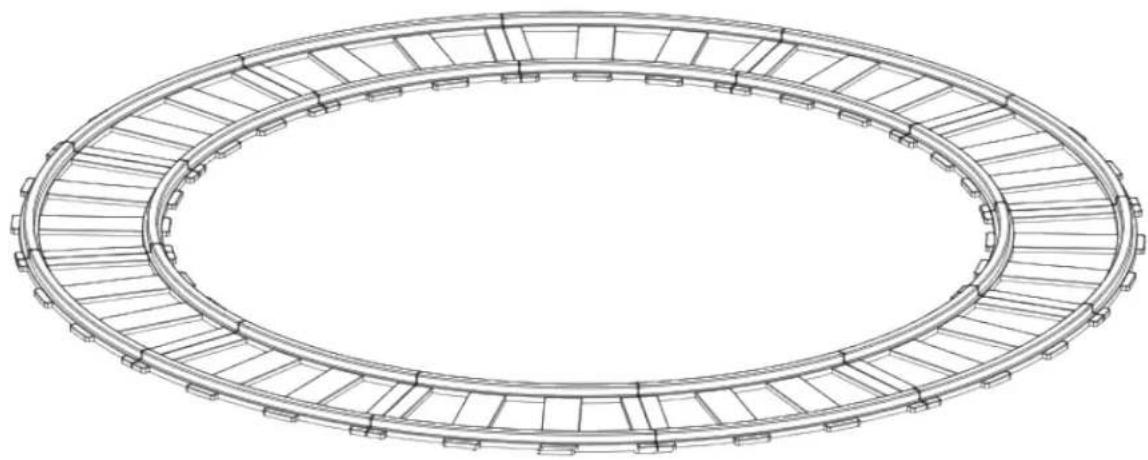
Technical line drawing of a circular mechanical component with evenly spaced slots and railings (no text or symbols)- Always assemble the track on a flat, smooth surface
- Connect all 12 pieces of the curved track together to form a complete circle by snapping one curved piece on top of another until firmly connected
Note: Additional straight and curved track pieces are available for purchase at www.rollplay.com
12 Step & Caboose Assembly
natural_image
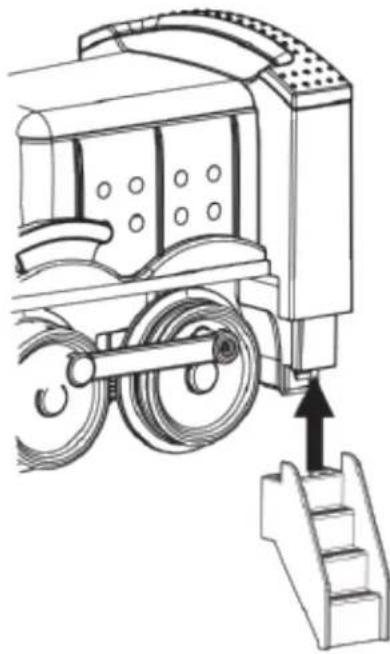
Technical line drawing of a mechanical assembly with a guide lever and stairs (no text or symbols)Step Assembly:
- Assemble the steps on the left and right side of the train
natural_image
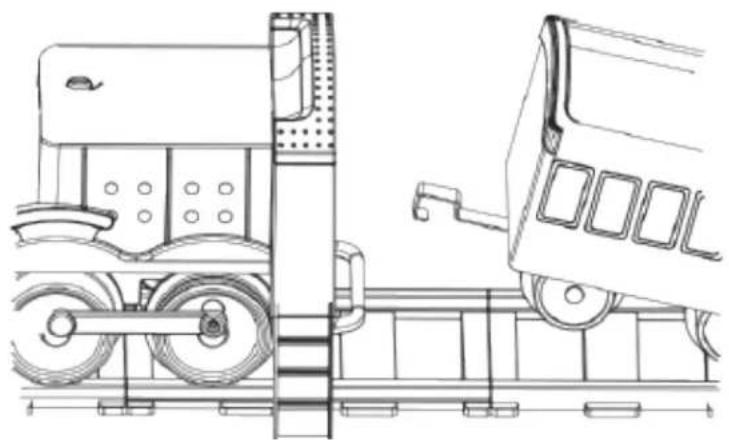
Technical line drawing of a truck cab with side-mounted wheels and structural components (no text or symbols)Caboose Assembly
- Connect the hook on the caboose to the handle on the back of the steam train
To Activate Steam Function
natural_image
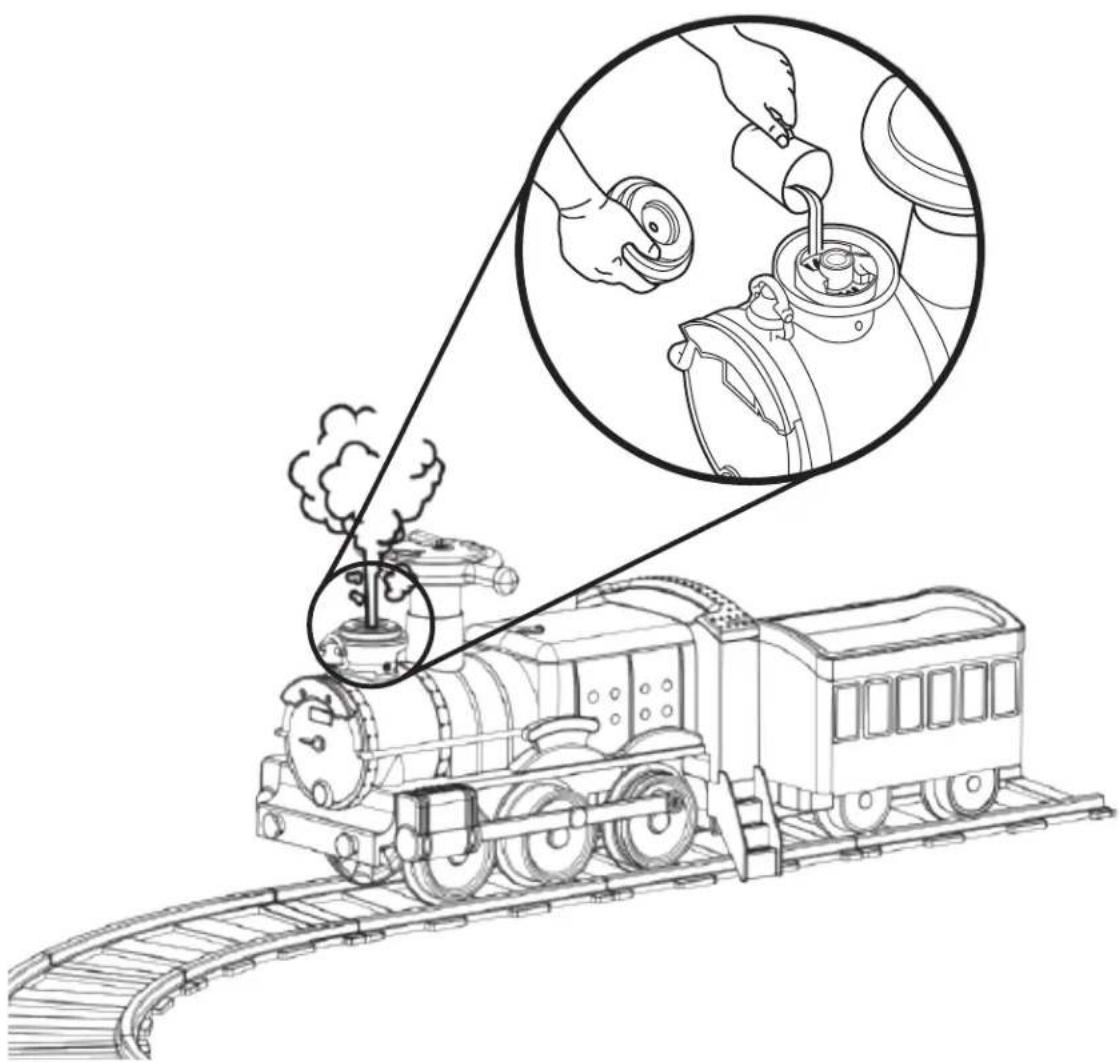
Line drawing of a steam locomotive emitting smoke, with an inset showing hands performing maintenance or cleaning the engine (no text or symbols present)- Twist off pour spout cover, pour purified water into steam tank as shown above, then replace pour spout cover.
- The maximum capacity of the tank is 60 ml (2 oz) of purified water, which works for hours. The water will overflow if the water exceeds the tank capacity. The train will automatically power off steam if water becomes used up. If the train is turned on the side, the water may overflow.
- Turn the train on by pushing the power switch on the steering wheel to the forward position. After a minute press any button on the steering wheel, and the steam will come out along with a fun train sound!
- Each button produces steam as well as a different sound.
14 Steering Wheel
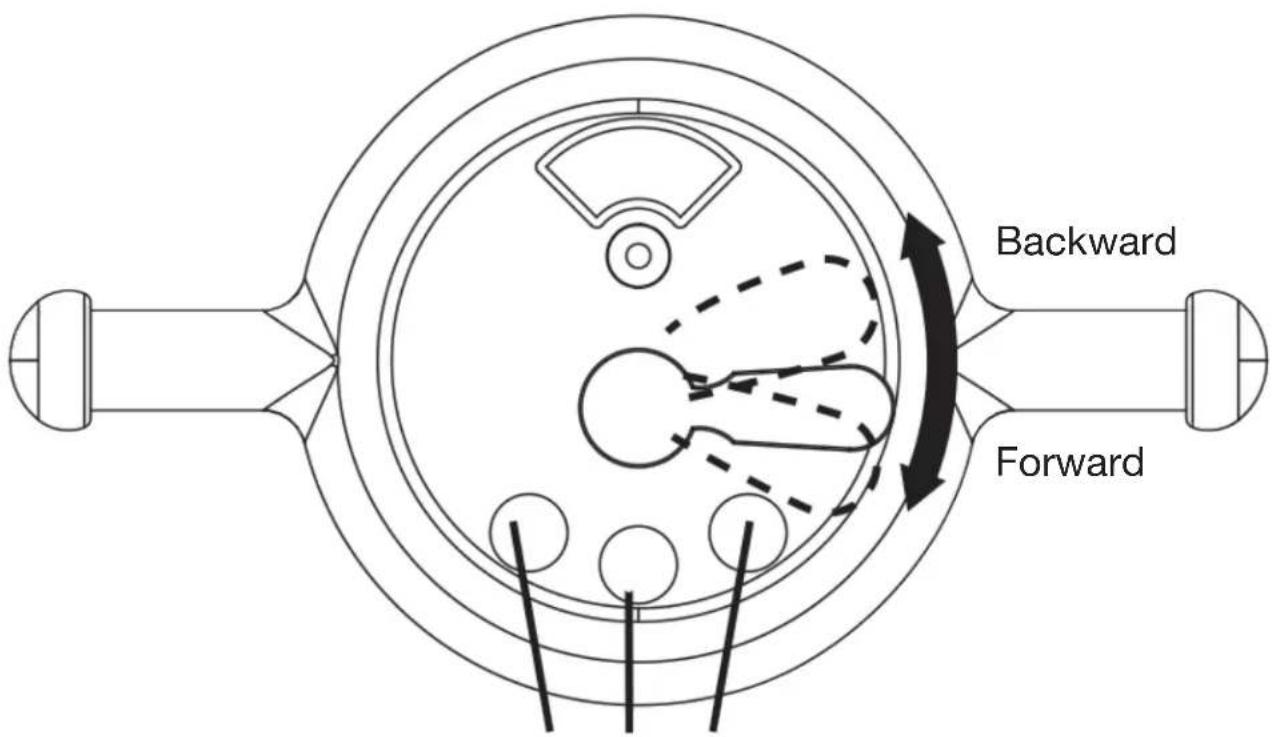
Three unique and fun train sounds! Buttons also activate steam function when water is poured into the steam tank. (See page 13).
Troubleshooting & Battery Info
Troubleshooting Information
- If the switch does not work this may be due to poor connections or the fuse needs replacing. Please check the wire connections. If this does not solve the problem, then please contact customer service. If the motor slows down or stops this may be due to a low battery. Please recharge the battery for approximately 10 hours. If the battery is not charging, this may be due to a damaged charger, a problem with the fuse plug, or the battery has come to the end of its battery life. For more information, call customer service (page 17).
Important Battery and Charger Information
- Only an adult who has read and understands the safety warnings may handle and operate the battery and battery charger. Keep away from children.
- Charge the battery for 18 hours before using the vehicle for the first time.
- Charge the battery immediately after each use. Charge for at least 8-12 hours, but no more than 20 hours.
- Charge the battery at least once a month, even if the vehicle is not used or stored.
- Never leave the battery in a discharged condition.
- Connect the terminal of the battery and charger, then plug the charger into a 120V AC outlet.
- It is normal for the charger to heat slightly. If the charger rises above 71^ C / 160^ F, disconnect the charger and call Customer Service for assistance.
- Keep the charger away from water or excessive moisture to prevent short-circuiting.
- Don't change the battery purified with the original item. with any other charger.
- Do not attempt to recharge non-rechargeable batteries with the original charger.
- Do not replace the battery with any other battery, or the warranty will be voided.
- Remove damaged batteries from the vehicle immediately. Recycle or dispose of the used batteries responsibly.
- Do not short circuit the supply terminals.
- Do not leave the battery connected in the vehicle for extended periods of time when the vehicle is not being used. Disconnect the battery connector from the engine connector before storing.
- The vehicle is equipped with a thermal fuse to protect the electric circuit. If the vehicle cuts out, turn the vehicle off and on to reset.
16 General Care & FCC Information
General Care
- Regularly inspect all vehicle parts to ensure they are in good working condition.
- Regularly inspect the charger, cord, plug, and other related parts for damage.
- Remove any damaged parts and immediately contact Customer Service for replacement parts.
- DO NOT operate the vehicle if there are any damaged parts.
- Carefully clean the vehicle with a damp cloth and mild soap. Do not get water in or near any electrical parts. Do not wash the vehicle with a hose.
- Store the vehicle indoors or use a tarp to cover it. Keep away from stoves, heaters, or other sources of heat.
FCC Information
This device complies with part 15 of the FCC Rules. Operation is subject to the following two conditions: (1) this device may not cause harmful interference, and (2) this device must accept any interference received, including interference that may cause undesired operation.
This equipment has been tested and found to comply with the limits for a Class B digital device, pursuant to Part 15 of the FCC Rules. These limits are designed to provide reasonable protection against harmful interference in a residential installation.
This equipment generates, uses and can radiate radio frequency energy and, if not installed and used in accordance with the instructions, may cause harmful interference to radio communications. However, there is no guarantee that interference will not occur in a particular installation. If this equipment does cause harmful interference to radio or television reception, which can be determined by turning the equipment off and on, the user is encouraged to try to correct the interference by one or more of the following measures:
- Reorient or relocate the receiving antenna.
- Increase the distance between the equipment and the receiver.
- Consult dealer or an experienced radio/TV technician for help.
- Connect the equipment into an outlet on a circuit different from that to which the receiver is connected.
- Check the state or local requirements for the product before using the product.
Caution: Changes or modifications not expressly approved by the party responsible for compliance could void the user's authority to operate the equipment.
Rollplay 6-Volt Limited Warranty
- One-year limited warranty from the date of purchase with proof of purchase from a Rollplay certified retailer.
- Six-month limited warranty on the 6-Volt battery with proof of purchase from a Rollplay certified retailer.
- This one-year limited warranty covers the ride-on vehicle against defects in materials and workmanship to the original purchaser. Proof of purchase receipt from a Rollplay certified retailer is required.
- Rollplay ensures the original 6-Volt battery is warranted for 6 months from initial purchase of the vehicle from a certified retailer. Proof of purchase receipt required.
- This warranty covers normal use and does not cover the Rollplay vehicle or battery if deemed damaged by unreasonable use, modification, neglect, accident, abuse, misuse, improper service or other causes not arising out of defects in materials or workmanship. Evidence of any attempt at consumer repair will void this warranty.
- This warranty does not cover, and is not intended to exclude any liability on the part of Rollplay, whether under this warranty or implied by law for any indirect or consequential damages for breach of warranty. Some states may not allow the exclusion or limitation so this limitation may not apply to you.
Should you need service or assistance with your vehicle during the warranty period:
- Please do not return vehicle to the store.
- Consult the troubleshooting guide in this manual and online at www.rollplay.com or
• Call Rollplay at 1-888-982-9309 - Note: Please have your model number and serial number ready before calling. Please have proof of purchase as well.
Note: This warranty gives you specific legal rights. You may also have other rights that may vary from state to state.
Please save your original sales receipt.
Product Registration
Fill out the form below and mail it to:
Rollplay Products
1801 Commerce Dr.
Piqua, OH 45356
OR fill out the form online at www.rollplay.com
We will use the information provided only for your warranty. We will not sell, rent or share your personal information.
Product Registration
First Name: Last Name: Title:
A ddress: ____
City: ____ State or Province: ____ Zip/Postal Code: ____
Email: Phone:
Date of Purchase: ____
Fill in the information about your product:
Product Name: ____ Model Number: ____
Serial Number: ____ Retailer Place of Purchase: ____

TRAIN À VAPEUR
JOUET PORTEUR DE 6 V
natural_image
Line drawing of a vintage steam locomotive on railway tracks, emitting smoke and exhaust (no text or symbols)natural_image
Line drawing of a vintage steam locomotive with visible wheels and cabin (no text or symbols)- Carrosserie (1)
natural_image
Line drawing of a toy train car with wheels and cabin (no text or symbols)natural_image
Simple line drawing of a rectangular frame with vertical bars (no text or symbols)- Piste courbée (12)
natural_image
Simple line drawing of a curved, segmented structure with vertical supports (no text or symbols)- Chargeur (1)
natural_image
Simple line drawing of a cylindrical device connected to a cable with a connector (no text or symbols)- Marches de train (2)
natural_image
Technical line drawing of a steam locomotive showing the side and front views (no text or symbols)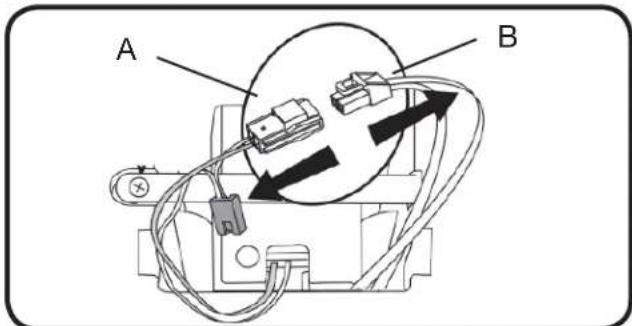
10
natural_image
Diagram of a curved track with structural elements, showing a step-by-step assembly from top to bottom (no text or symbols)natural_image
Technical line drawing of a circular mechanical component with evenly spaced slots and railings (no text or symbols)natural_image
Technical line drawing of a mechanical device with a stair and lever mechanism (no text or symbols)natural_image
Technical line drawing of a front-end truck with side-mounted wheels and structural components (no text or symbols)natural_image
Line drawing of a steam locomotive emitting smoke, with an inset showing hands performing maintenance or inspection (no text or symbols)Piqua, OH 45356, É.U.
- Owner's Manual and Assembly Instructions
- Introduction
- IMPORTANT!
- YOU MUST CHARGE THE BATTERY FOR 18 HOURS BEFORE FIRST USE!
- DO NOT RETURN THIS ITEM TO THE STORE!
- Read this entire manual to ensure proper assembly and safe operation of the vehicle.
- Table of Contents
- 6
- Safety
- WARNING: SAFETY RIDING RULES
- WARNING: BATTERY SAFETY
- WARNING: ADULT SUPERVISION REQUIRED
- Parts
- Not Included:
- YOU MUST CHARGE THE BATTERY FOR 18 HOURS BEFORE THE FIRST USE!
- To Charge the Battery:
- To Remove the Battery:
- Assemble the Oval track
- Assemble the Circle Track
- Step & Caboose Assembly
- Step Assembly:
- Caboose Assembly
- To Activate Steam Function
- Steering Wheel
- Troubleshooting & Battery Info
- Troubleshooting Information
- Important Battery and Charger Information
- General Care & FCC Information
- General Care
- FCC Information
- Rollplay 6-Volt Limited Warranty
- Product Registration
- TRAIN À VAPEUR
- JOUET PORTEUR DE 6 V
- 10
Brand : Rollplay
Model : Steam Train
Category : Electric toy