
118495 - Flat screen mount HAMA - Free user manual and instructions
Find the device manual for free 118495 HAMA in PDF.

| Product type | Flat screen mount |
| Brand | Hama |
| Model | 118495 |
| Maximum load | 7 kg |
| Compatible screen diagonal | 33 - 69 cm (13" - 27") |
| Rotation | 360° |
| Tilt | -25° to +25° (depending on device) |
| Swivel | Up to 180° with 3 joints (depending on device) |
| VESA standard | Up to 100 x 100 mm |
| Recommended table thickness | 1 to 8.8 cm |
| Usage | Indoor only |
| Material | Steel |
| Height adjustment | Yes (with assistance) |
| Cleaning | Slightly damp lint-free cloth, no harsh detergents |
| Recommended safety check | At least every 3 months |
| Warranty | Liability exclusion for improper installation |
Frequently Asked Questions - 118495 HAMA
User questions about 118495 HAMA
0 question about this device. Answer the ones you know or ask your own.
Ask a new question about this device
Download the instructions for your Flat screen mount in PDF format for free! Find your manual 118495 - HAMA and take your electronic device back in hand. On this page are published all the documents necessary for the use of your device. 118495 by HAMA.
USER MANUAL 118495 HAMA
natural_image
Mechanical assembly diagram showing a linkage mechanism with mounting flanges and a central shaft (no text or symbols)OperatingInstructions
Bedienungsanleitung
Moded'emploi
Instruccionesdeuso
Gebruiksaanwijzing
Istruzioniperl'uso
Instrukcjaobsługi
Használatiútmutató
Manualdeutilizare
Návodkpoužití
Návodnapoužitie
Manualdeinstruções
Bruksanvisning


flowchart
graph TD
    A["Start"] --> B["Actuator"]
    B --> C{Check}
    C -->|Yes| D["Return to Tractor"]
    C -->|No| E["End"]
ThankyouforchoosingaHamaproduct.
Takeyourtimeandreadthefollowinginstructionsandinformationcompletely.Please keeptheseinstructionsinasafeplaceforfuturereference.Ifyousellthedevice,please passthesoperatinginstructionsontothenewowner.
1. Explanationofwarningsymbolsandnotes
Warning
This symbol is used to indicate safety instructions to draw your attention to specific hazards and risks.

Note
This symbol is used to indicate additional information or important notes.

2.Packagecontents
• MonitorArm
- Mountingkit(seeFig.1forcontents)
• Theseoperatinginstructions
Note
Please check them mounting kit for completeness before installing the product and ensure that there are no faulty or damaged parts.

3. Safetyinstructions
Warning
- Given them multitude of terminal devices available on the market, the supplied mountingkit is unable to cover every option.
- Thescrewsforattachingtheterminaldevicetotheproductmayoccasionallybe toolong.
- Read the operating instructions for your terminal device before attempting to mount it. The instructions provide information about the type and measurements of suitable fastening materials.
- If the supplied mounting kit does not contain suitable fastening materials for mounting the terminal device, purchase these from as specialised dealer.
- Neverapplyforceduringassembly. This candamageyourdeviceortheproduct.
- If in doubt, have this product mounted by a qualified technician - do not attempt to mount it yourself!

Note-Commercialuse
- If the device is used commercially, increased duty of carerequirements apply.
- Therefore, please observe the accident prevention regulations of the German employer's liability insurance association for electrical systems and equipment. Please also observe all accident prevention regulations from other applicable employer's liability insurance associations and accident insurance companies, as well as any legal regulations applicable to the particular industry and/or location.
• The bracket must be installed by trained personnel or by as special technician, especially when installed in schools, educational institutions, hobby/self-service workshops or other publicly accessible institutions. - Have trained personnel carry out regular inspection to ensure that the product is securely installed, properly functioning and in acceptable condition (we recommend inspections at least every 6 months, or more frequently if required for the particular location) and then document these inspections.

- Once you have mounted the product and the attached load, check that they are sufficiently secure and safetouse.
- You should repeat this check at regular intervals (at least every three months).
- Ensure that the product does not exceed its maximum permitted carrying capacity and that no load exceeds them as maximum permitted dimensions is attached.
- Makesurethattheproductisloadedsymmetrically.
- During adjustment, ensure that the product is loaded symmetrically and that the maximum permitted carrying capacity is not exceeded.
- Intheeventofdamagetotheproduct,removetheattachedloadandstopusing theproduct.
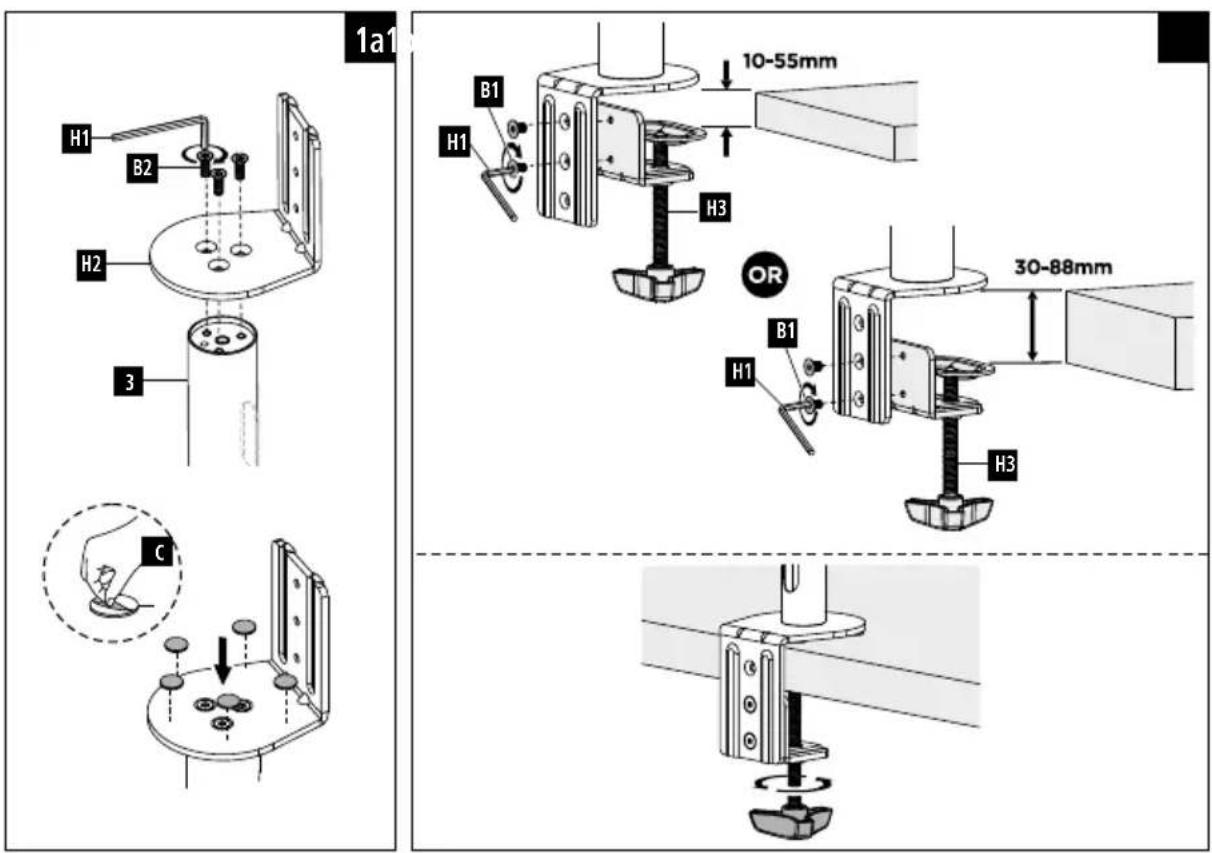
- Mount the product only on tabletops with a sufficient load-bearing capacity and stability for the product and the device attached to it.
- Ensure that the thickness of the tabletopis 1-8.8cm.
- Donotattachanyadditionalobjectstotheproduct.
- Keep the packaging material out of thereach of child renduet other risk of suffocation.
- Disposeofpackagingmaterialimmediatelyinaccordancewiththelocallyapplicable regulations.
- Notethatheproductcancausepressureremarksonthesurfaceofthetable. This dependsontheweightloadingandonthestabilityofthesurfaceattheplaceof installation.
4. Application and specifications
• The product is intended only for use inside buildings.
• Usetheproductonlyfortheintendedpurpose.
Maximumload:7kg
Screendiagonal:33-69cm(13"-27")
Rotation:360°
Tilt:-/+25°(device-dependent)
Swivelrange: upto 180° on 3 joints (device-dependent)
Holder: upto100x100, according to VESA standards
5.Preparationandassembly
Note
• The product must be mounted by two people. Seek assistance and help!
- Differentenddeviceshavedifferentconnectionsforcablingandotherdevices. Beforecommencingtheinstallation, checkwhetherthenecessaryconnections canstillbereachedaftermounting.
- Depending on the product and mounting method, you may not need all part of themounting kit. It is therefore possible that unneeded screws and others small part will be left over even after correct mounting. Keep these in a safe place together with the instructions for use for later reference (sale of the product, moving house).

- Observetheotherwarningsandsafetyinstructions.
- Proceedstep-for-stepinaccordancewiththeillustratedinstallationinstructions(Fig. 1aetseq.).
Note
- Given them multitudeofterminaldevicesstructuresavailableonthemarket, we cannotdescribeallpossiblemountingoptionshere.
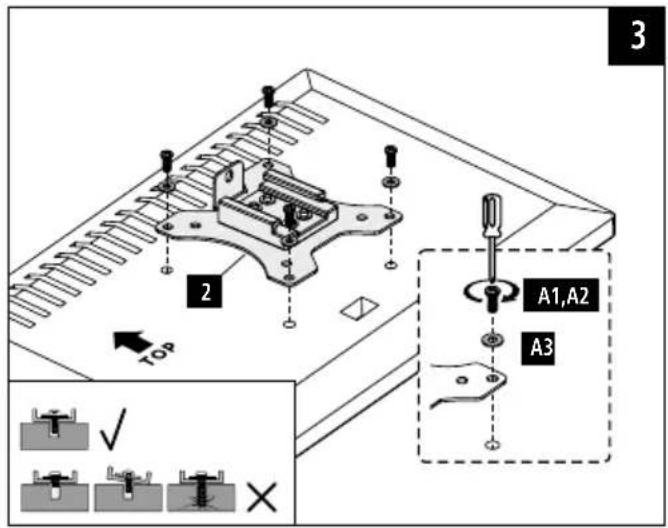
- Please ensure that the bracket lays flat and evenly on the back of the monitor.
- Ensure that all screw shavethe proper length hand can be mounted until they are hand-tight (see Fig.3).

6. Adjustment & maintenance
Note-Heightadjustment
• The bracket must be adjusted by two people! Seek assistance and help!
- During adjustment, ensure that the product is loaded symmetrically and that the maximum permitted carrying capacity is not exceeded.

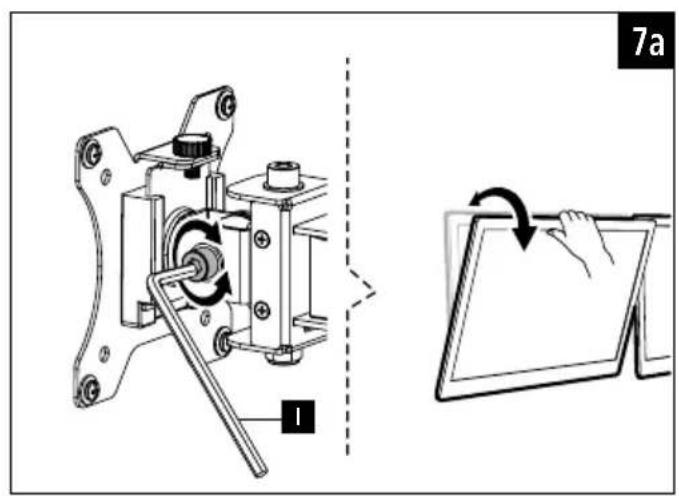
Note—Setting/adjustingthetiltangle
- Topermanentlysetthetiltangle, loosenthefasteningscrewsattheside, setthe desiredtiltangleandthentightenthescrewsagain(seeFig.7a).
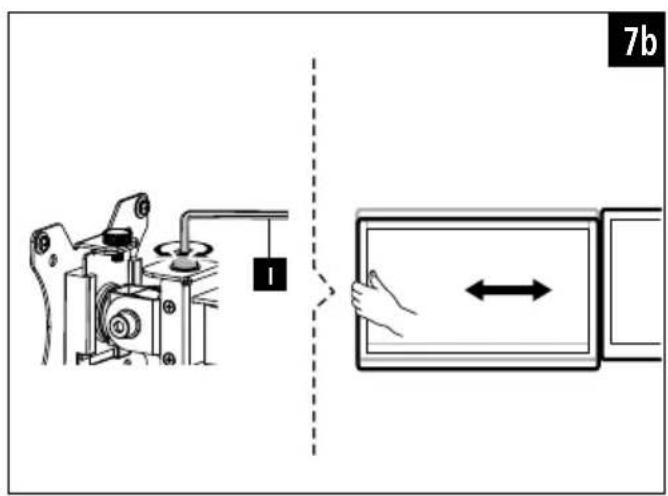
- In order to be able to flexibly adjust the tilt angle, turn the screws hand-tight only. In this way, the screencanbeadjustedatanytime.

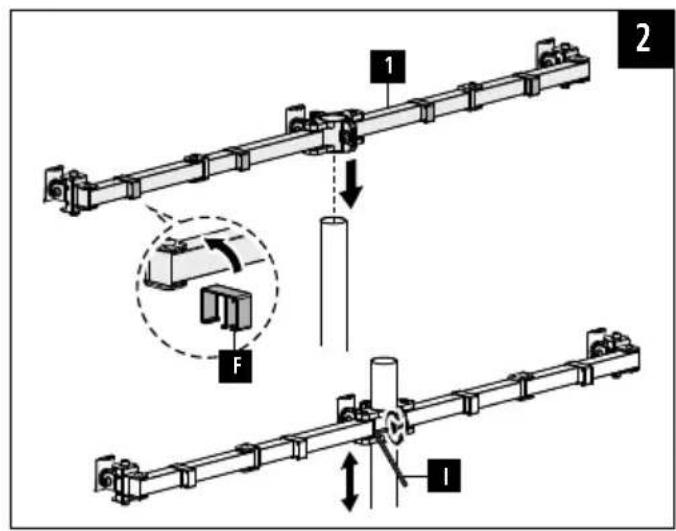
- Noscrewsneedtobeloosenedforthesidewaysmovement.
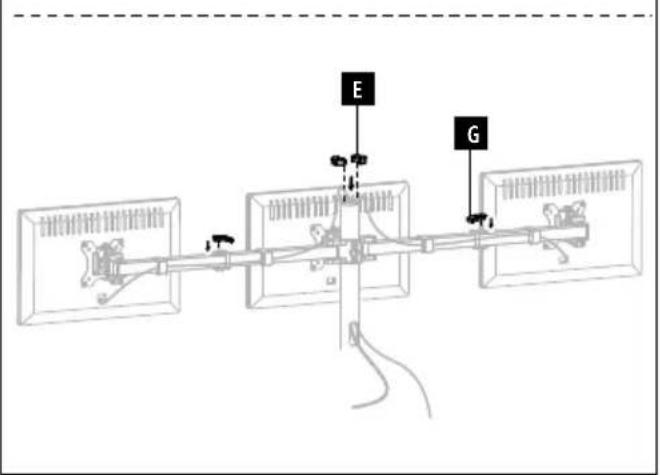
- Pleaseonlyswivelthemonitorarmwithintherangeindicated(Fig.6).
- Once you have mounted the product and the attached load, check that they are sufficiently secure and safetouse.
- You should repeat this check at regular intervals (at least every three months).
- Onlycleanthisproductwithaslightlydamp, lint-freeclothanddonotuseaggressive cleaningagents.
7.Warrantydisclaimer
HamaGmbH&CoKGassumesnoliabilityandprovidesnowarrantyfordamage resultingfromimproperinstallation/mounting,improperuseoftheproductorfromfailuretoobservetheoperatinginstructionsand/orsafetynotes.
Fixarea: ConformstandardelorVESApânăla100x100
86652Monheim/Germany
Service&Support

www.hama.com

+499091502-0
D GB

- Explanationofwarningsymbolsandnotes
- Warning
- Note
- 2.Packagecontents
- Safetyinstructions
- Note-Commercialuse
- Application and specifications
- 5.Preparationandassembly
- Adjustment & maintenance
- Note-Heightadjustment
- Note—Setting/adjustingthetiltangle
- 7.Warrantydisclaimer
- 86652Monheim/Germany
- Service&Support
Brand : HAMA
Model : 118495
Category : Flat screen mount