TS-228DS - Toaster Brentwood - Free user manual and instructions
Find the device manual for free TS-228DS Brentwood in PDF.

User questions about TS-228DS Brentwood
0 question about this device. Answer the ones you know or ask your own.
Ask a new question about this device
Download the instructions for your Toaster in PDF format for free! Find your manual TS-228DS - Brentwood and take your electronic device back in hand. On this page are published all the documents necessary for the use of your device. TS-228DS by Brentwood.
USER MANUAL TS-228DS Brentwood
© 2025 Brentwood Appliances, Inc.
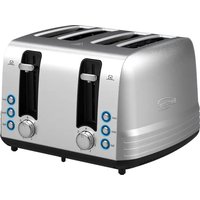
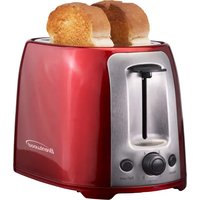
DIGITAL TOASTER
natural_image
Exterior view of a modern silver toaster with dual-tier display and control buttons (no visible text or symbols)Operating and Safety Instructions
FOR INDOOR HOUSEHOLD USE ONLY
When using this or any other electrical appliance, always follow these basic safety precautions, especially when children are present.
READ ALL THE INSTRUCTIONS BEFORE USE.
WARNING: To reduce the risk of fire, electric shock, serious personal injury and property damage, please note the following:
- Before each use, inspect the toaster for any visible damage. If any parts are broken or damaged, do not use the toaster and refer to the warranty policy on page 8 for guidance.
- Ensure the toaster is plugged into a properly grounded electrical outlet with the correct voltage.
- Place the toaster on a flat, dry, and heat-resistant surface during use.
• Use the toaster in a well-ventilated area to prevent overheating.
- Always supervise children and pets when the toaster is in use and keep them away from the appliance.
- Do not operate the toaster with wet hands to prevent the risk of electric shock.
- Upon initial use, a smoky smell may occur as protective coatings or films on the toaster's parts burn off. This process is normal and ensures proper appliance function and safety.
- Do not overload the toaster with more bread slices than it can handle, as this can cause malfunction or overheating.
- Avoid placing the toaster near flammable materials like paper towels, napkins, or dishcloths.
- Do not leave the toaster unattended while it is operating.
- The toaster is designed for toasting bread and similar items. Do not use it for other purposes.
- Do not insert utensils or other foreign objects into the toaster to avoid electrical shock or damage.
- Do not force the toaster's lever or try to eject the toast manually.
- The exterior of the toaster may become hot during use. Do not touch any hot surfaces to avoid burns.
• After use, allow the toaster to cool down before cleaning or storing it.
- Regularly check the crumb tray and toaster slots for breadcrumbs or debris. Clean them regularly to prevent fire hazards.
- Always unplug the toaster when not in use to avoid overheating or electrical hazards.
- Always unplug the toaster before cleaning. Use a dry cloth or a damp cloth with mild detergent. Do not submerge the toaster in water.
- Do not immerse the toaster in water or any other liquid. Ensure the toaster is dry before use.
- When not in use, store the toaster in a safe, dry location, away from moisture and direct sunlight.
SPECIAL INSTRUCTIONS: A short power supply cord is provided to reduce the risk of becoming entangled in or tripping over a longer cord. Using an extension cord with the toaster is not recommended. However, if one must be used:
- The marked electrical rating of the extension cord must be at least as great as that of the toaster.
- Arrange the extension cord so that it does not drape over the countertop or tabletop where it can be tripped over or pulled.
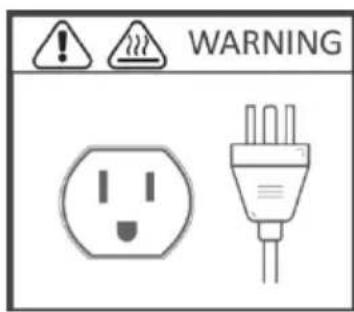
WARNING: The toaster is equipped with a 3-prong grounding plug as a safety feature. The plug will fit into an outlet in only one orientation. Never use the plug with an extension cord unless you can fully insert the plug into the extension cord and the extension cord must be a 3-wire grounding-type cord. Do not attempt to bypass the safety purpose of the plug.
text_image
WARNINGFOR HOUSEHOLD USE ONLY! PLEASE READ INSTRUCTIONS BEFORE USE & SAVE FOR FUTURE REFERENCE.
text_image
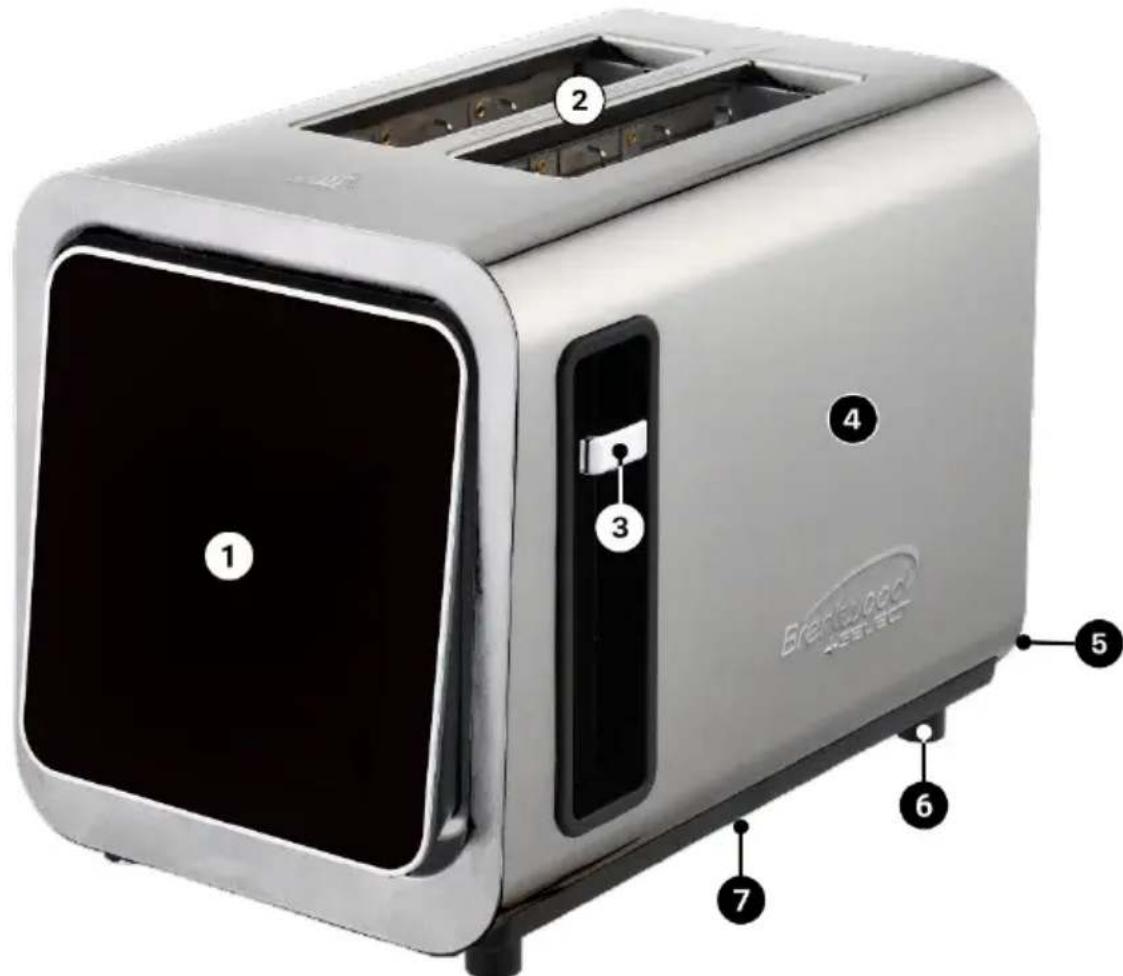
Brettyzer ® ASFERER ① ② ③ ④ ⑤ ⑥ ⑦| 1 | Digital Display | 5 | Crumb Tray (Rear) |
| 2 | Extra-Wide Slots (x2) | 6 | Anti-Slip Feet |
| 3 | Lever | 7 | Cord Storage (Bottom) |
| 4 | Body |
| Digital Display | ||
 | Shade & Time Display: Shows the current toast shade setting and remaining toasting time. | |
 |   | Shade Setting Buttons: Allow you to adjust the browning level of your toast, from light to dark, with 6 available options. |
 |   | |
 Bagel Bagel | Bagel Button: Toasts the cut side of the bagel while warming the outer side, ideal for bagels. | |
 Defrost Defrost | Defrost Button: Quickly defrosts frozen bread before toasting it. | |
 Reheat Reheat | Reheat Button: Warms previously toasted bread without further browning it. | |
 +10sec +10sec | Additional 10-Second Button: Adds an extra 10 seconds of toasting time if needed. A maximum of 30 extra seconds can be added to the original time. | |
 On/Off On/Off | Power Button: Turns the toaster on or off. | |
 Cancel Cancel | Cancel Button: Stops the toasting cycle and ejects the toast immediately.If you just want to check the toasting progress without canceling the process, pull down the lever within 5 seconds after pressing the “Cancel” button.If you want to mute or unmute the beeping sound from the toaster, hold the “Cancel” button for 5 seconds. | |
BEFORE USING THE DIGITAL TOASTER
- Inspect the toaster for any visible damage, such as cracks or frayed wires, to ensure it is safe to use.
- Use a clean, damp cloth to wipe the exterior of the toaster, removing any dust or dirt.
WARNING: Do not immerse the toaster in water or any other liquid.
- After wiping, make sure the toaster is completely dry with a clean, dry cloth to prevent any electrical issues.
-
Set the toaster on a stable, flat countertop to ensure it stays secure during use.
-
Plug the toaster's power cord into an outlet. A beep will confirm the connection, and the screen will light up with options to adjust the settings.
TOASTING BREAD
IMPORTANT: Upon initial use, a smoky smell may occur as protective coatings or films on the toaster's parts burn off. This process is normal and ensures proper appliance function and safety.
- Insert the slices of bread into the toaster's slots and select your preferred shading setting.
NOTE: Press the “+10sec” button to add more toasting time if needed, either before or during the toasting process.
-
Gently pull down the lever to start the toasting process. The toaster will begin heating the bread.
-
Allow the bread to toast until the lever automatically pops up, indicating that the bread is ready.
-
Use tongs to carefully remove the hot, toasted bread from the toaster.
-
Your toasted bread is ready to enjoy! Add your favorite toppings or enjoy it plain.
TOASTING BAGELS
IMPORTANT: Upon initial use, a smoky smell may occur as protective coatings or films on the toaster's parts burn off. This process is normal and ensures proper appliance function and safety.
-
Insert the bagel halves into the toaster slots with the cut side facing inward.
-
Press the "Bagel" button to activate the special bagel toasting setting, then select your preferred shading setting.
NOTE: Press the “+10sec” button to add more toasting time if needed, either before or during the toasting process.
-
Gently pull down the lever to start the toasting process.
-
Allow the toaster to complete the toasting cycle. The lever will automatically pop up when the bagels are ready.
-
Use tongs to carefully remove the hot, toasted bagels from the toaster.
-
Your toasted bagels are ready to enjoy! Add your favorite toppings and dig in.
TOASTING FROZEN BREAD
IMPORTANT: Upon initial use, a smoky smell may occur as protective coatings or films on the toaster's parts burn off. This process is normal and ensures proper appliance function and safety.
-
Insert the frozen slices of bread into the toaster slots.
-
Press the "Defrost" button to activate the defrosting setting for frozen bread, then select your preferred shading setting.
NOTE: Press the “+10sec” button to add more defrosting time if needed, either before or during the defrosting process.
-
Gently pull down the lever to begin the defrosting and toasting process.
-
Allow the toaster to defrost and toast the bread. The toaster will automatically pop up the lever when the bread is ready.
-
Use tongs to carefully remove the hot, toasted bread from the toaster.
-
Your toasted bread is ready to enjoy! Add your favorite toppings or enjoy it as is.
REHEATING BREAD
IMPORTANT: Upon initial use, a smoky smell may occur as protective coatings or films on the toaster's parts burn off. This process is normal and ensures proper appliance function and safety.
-
Insert the toasted slices of bread into the toaster slots.
-
Press the "Reheat" button on the toaster. There is no need to select the shading setting.
NOTE: Press the “+10sec” button to add more reheating time if needed, either before or during the reheating process.
-
Gently pull down the lever to start the reheating process.
-
Allow the toaster to reheat the toasted bread for the set time, and the lever will automatically rise when the cycle is complete.
-
Use tongs to carefully remove the reheated bread from the toaster.
-
Serve and enjoy your warm, toasted bread!
CLEANING AND MAINTENANCE
-
Turn off the toaster by pressing the "On/Off" button, then disconnect it from the electrical outlet.
-
Allow the toaster to cool down before handling it.
-
Remove the crumb tray, dispose of the crumbs and rinse the tray with water to clean it.
-
Use a cloth or sponge to clean the exterior of the toaster.
WARNING: Do not immerse the toaster in water or any other liquid.
-
Let both the toaster and crumb tray dry completely.
-
Once dry, put the crumb tray back into its original place.
-
Store the toaster in a safe, dry place until next use.
ONE YEAR LIMITED WARRANTY
Write down the following information about this appliance to better help you obtain assistance or service if you ever need it.
CUSTOMER RECORD
Date of Purchase: ____ Store/Dealer: ____
Model/Item No: ____
THIS WARRANTY APPLIES TO THE APPLIANCES PURCHASED AND USED IN THE CONTINENTAL U.S. AND CANADA ONLY. This is the only express warranty for this appliance and is in lieu of any other warranty or condition. This appliance is warranted to be free from defects in material and workmanship for a period of one (1) year from the date of original purchase. During this period, your exclusive remedy is repair or replacement of this appliance, at our option. However, you are responsible for all costs associated with returning this appliance or part to us under this warranty to you. If this appliance or part is no longer available, we will replace it with a similar one of equal or greater value. This warranty does not cover glass, filters, wear from normal use, use not in conformity with the printed directions or damage to this appliance resulting from accident, alteration, abuse or misuse. THIS WARRANTY EXTENDS ONLY TO THE ORIGINAL CONSUMER PURCHASER. KEEP THE ORIGINAL SALES RECEIPT, AS PROOF OF PURCHASE IS REQUIRED TO MAKE A WARRANTY CLAIM. This warranty is void if this appliance is used for other than single-family household use or subjected to any voltage and waveform other than what is specified on the rating label (e.g., 120V 60Hz). We exclude all claims for special, incidental and consequential damages caused by breach of express or implied warranty. All liability is limited to the amount of the purchase price. Every implied warranty, including any statutory warranty or condition of merchantability or fitness for a particular purpose, is disclaimed except to the extent prohibited by law, in which case such warranty or condition is limited to the duration of this written warranty. This warranty gives you specific legal rights. You may have other legal rights that vary depending on where you live. Some states do not allow limitations on implied warranties or special, incidental or consequential damages, so the foregoing limitations may not apply to you. To make a warranty claim, do not return this appliance to the store.
TO OBTAIN WARRANTY SERVICE AND/OR TROUBLESHOOTING INFORMATION:
Call Customer Service at 1-888-903-0060 in the U.S.
Monday through Friday: 9:00am – 5:00pm PST.
U.S. Customers Please Email: warranty@brentwoodus.com
Canadian Customers Please Email: canada.warranty@brentwoodus.com
Go Online at www.brentwoodus.com
PRECAUCIONES IMPORTANTES

text_image
Bretcher's 400mm flat-screen ① ② ③ ④ ⑤ ⑥ ⑦© 2025 Brentwood Appliances, Inc.