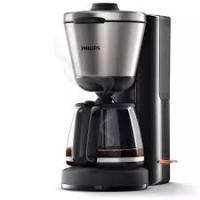
HD7695/90 - Coffee maker PHILIPS - Free user manual and instructions
Find the device manual for free HD7695/90 PHILIPS in PDF.


User questions about HD7695/90 PHILIPS
0 question about this device. Answer the ones you know or ask your own.
Ask a new question about this device
Download the instructions for your Coffee maker in PDF format for free! Find your manual HD7695/90 - PHILIPS and take your electronic device back in hand. On this page are published all the documents necessary for the use of your device. HD7695/90 by PHILIPS.
USER MANUAL HD7695/90 PHILIPS
Always here to help you
Register your product and get support at
www.philips.com/welcome

HD7699
HD7697
HD7695
HD7685
User manual
9
13
12
ENGLISH 6
DANSK 13
DEUTsCH 20
SUOMI 28
FRANÇAIS 35
NEDERLANDS 43
NORSK 50
SVENSKA 57
Introduction
Congratulations on your purchase and welcome to Philips! To fully benefit from the support that Philips offers, register your product at www.philips.com/welcome.
Important
Read this user manual carefully before you use the appliance and save it for future reference.
Danger
- Never immerse the appliance in water or any other liquid.
Warning
- Check if the voltage indicated on the appliance corresponds to the local mains voltage before you connect the appliance.
- Do not use the appliance if the plug, the mains cord or the appliance itself is damaged.
- If the mains cord is damaged, you must have it replaced by Philips, a service centre authorized by Philips or similarly qualified persons in order to avoid a hazard.
- This appliance can be used by children aged from 8 years and above and by persons with reduced physical, sensory or mental capabilities or lack of experience and knowledge if they have been given supervision or instruction concerning use of the appliance in a safe way and if they understand the hazards involved. Cleaning and user maintenance shall not be made by children unless they are older than 8 and supervised.
- Keep the appliance and its cord out of reach of children aged less than 8 years.
- Children shall not play with the appliance.
- Do not let the mains cord hang over the edge of the table or worktop on which the appliance stands.
Caution
- Do not place the appliance on a hot surface and prevent the mains cord from coming into contact with hot surfaces.
- Unplug the appliance before you clean it and if problems occur during brewing.
- Do not disassemble the insulated jug.
- Never immerse the insulated jug in water or any other liquid, as this could cause water to enter between the walls of the jug.
- The insulated jug is not dishwasher-proof.
-
When the jug is filled with coffee, keep it in upright position to prevent leakage.
-
During brewing and until you switch off the appliance, the filter holder, the lower part of the appliance, the hotplate and the jug filled with coffee are hot.
- This appliance is intended to be used in household and similar applications such as farm houses, bed and breakfast type environments, staff kitchen areas in shops, offices and other working environments, and by clients in hotels, motels and other residential type environments.
- Always return the machine to a service centre authorised by Philips for examination or repair. Do not attempt to repair the machine yourself, otherwise your guarantee becomes invalid.
- Do not use the machine in combination with a transformer, as this could cause hazardous situations.
Electromagnetic fields (EMF)
This Philips appliance complies with all applicable standards and regulations regarding exposure to electromagnetic fields.
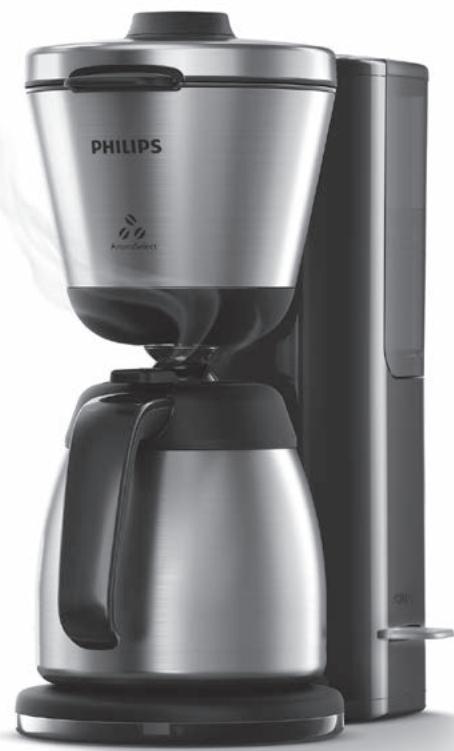
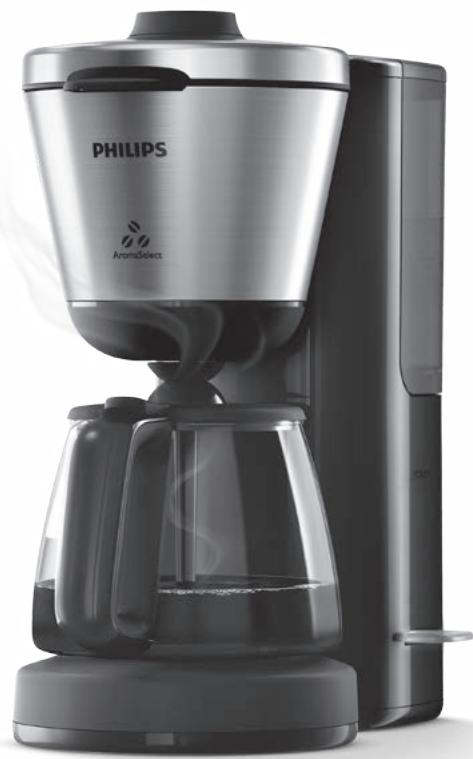
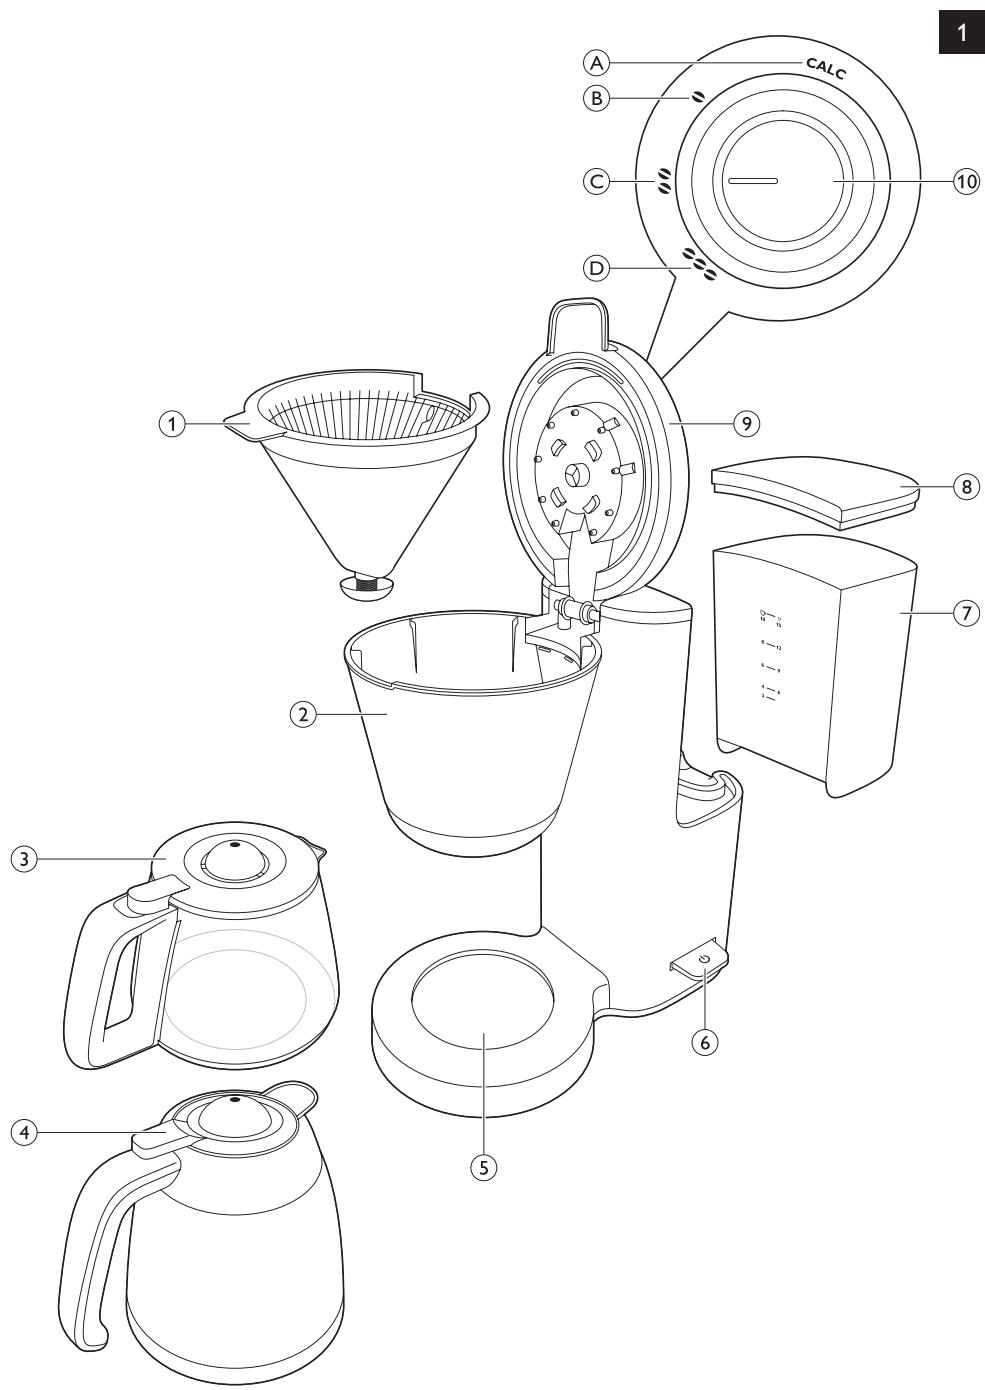
General description (Fig.1)
1 Filter basket
2 Filter basket holder
3 Glass jug (HD7695/HD7685 only)
4 Insulated jug (HD7699/HD7697 only)
5 Hotplate (HD7695/HD7685 only)
6 On/off switch
7 Detachable water tank
8 Lid of detachable water tank
9 Lid
10 AromaSelect knob
A CALC setting
B Mild coffee setting
C Regular coffee setting
D Intense coffee setting
Preparing for use
1 Place the appliance on a flat and stable surface.
Put the plug in an earthed wall socket.
3 You can store excess cord by pushing it into the opening in the back of the coffee maker.
Adjustable keep-warm time and freshness indicator (HD7695/HD7685 only)
You can adjust the time during which the appliance keeps the coffee warm on the hotplate to a maximum of 120 minutes. The default keep-warm time is 30 minutes.
Press and hold the on/off switch until the light starts to flash slowly, then release.
Press the on/off switch to adjust the keep-warm time. Every press of the on/off switch adds 30 minutes. You can press the on/off switch to a maximum of 4 times which equals 120 minutes.
3 The appliance automatically saves the set keep-warm time. and flashes once for 30 minutes, twice for 60 minutes, three times for 90 minutes and four times for 120 minutes.
Freshness indicator
To switch off the freshness indicator, follow below steps.
1 Unplug the appliance.
Press and hold the on/off switch and put the plug back in the wall socket.
The on/off switch lights up continuously for 2 seconds to confirm the freshness indicator is switched off.
To switch on the freshness indicator, follow below steps.
1 Unplug the appliance.
Press and hold the on/off switch and put the plug back in the wall socket.
The on/off switch flashes rapidly to confirm the freshness indicator is switched on.
Flushing the appliance before first use
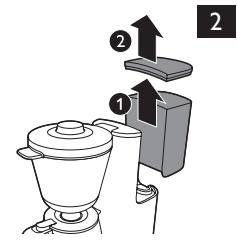
1 Remove the water tank from the appliance (1) and remove the lid of the water tank (2) (Fig. 2).
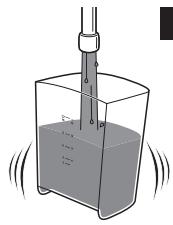
2 Fill the water tank with fresh, cold tap water (Fig. 3).
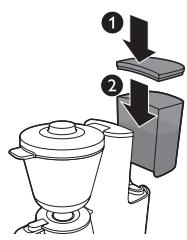
3 Put the lid on the water tank (1) and put the water tank back onto the appliance (2) (Fig. 4).
Do not put a filter and ground coffee in the filter holder.
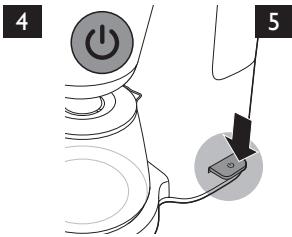
4 Press the on/off switch downwards to switch on the appliance (Fig. 5).
5 Let the appliance operate until the water tank is empty.
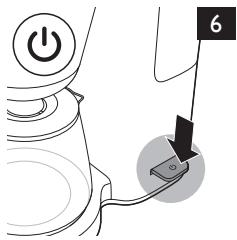
6 Press the on/off switch downwards to switch off the appliance (Fig. 6).
Note: HD7699/HD7697 shuts off automatically.
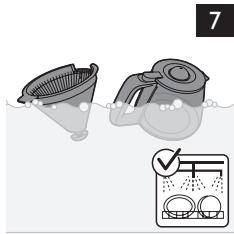
7 Clean the glass jug and the filter holder (see chapter 'Cleaning'). (Fig. 7)
8 Let the appliance cool down for at least 3 minutes before you start brewing coffee.
Do not clean the insulated jug in the dishwasher.
Insulated jug (HD7699/HD7697 only)
Note:We advise you to preheat the insulated jug with hot tap water before you start brewing coffee to ensure your coffee is hotter.
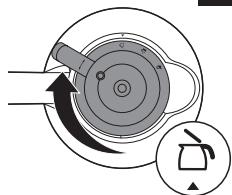
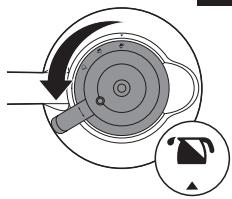
1 To remove the lid from the insulated jug, turn it clockwise by its fin until the arrow on the jug points towards the 'remove lid' symbol on the lid (Fig. 8).
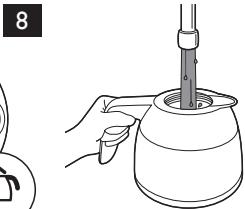
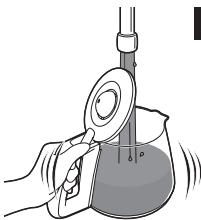
2 Rinse the insulated jug with hot tap water to preheat it (Fig. 9).
To obtain the tastiest and hottest coffee, brew at least half a jug of coffee.
3 To pour out coffee, turn the lid anticlockwise by its fin until the arrow on the jug points towards the 'pour' symbol on the lid. Always close the lid after pouring coffee to keep the coffee hot (Fig. 10).
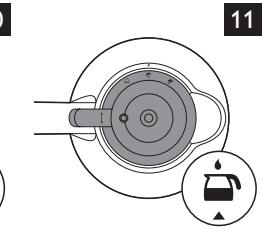
4 To close the lid, turn it to the left by its fin until the arrow on the jug points towards the 'closed/brewing' symbol on the lid (Fig. 11).
Using the appliance
Brewing coffee
This appliance is equipped with an AromaSelect knob which allows you to adjust the strength of the coffee to your own taste. You can experiment with the AromaSelect to find the strength that you like best.
1 Make sure the plug is in an earthed wall socket.
2 Make sure the glass jug or insulated jug (with the lid in the 'closed/brewing' position) is placed under the filter holder.
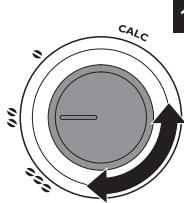
3 Set the coffee strength you prefer with the AromaSelect knob. (Fig. 12) To choose the coffee strength, turn the knob to the preferred position: mild, regular or intense.
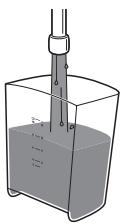
4 Remove the water tank and fill it with fresh, cold tap water (Fig. 13). The level indications correspond to small cups of 80ml and large cups of 120ml .
5 Put the lid on the water tank (1) and put the water tank back onto the appliance properly (2) (Fig. 2).
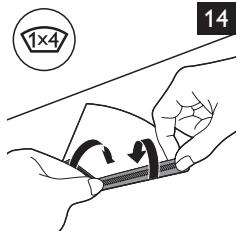
6 Take a paper filter (type 1x4 or no. 4) and fold the sealed edges to prevent tearing and folding (Fig. 14).
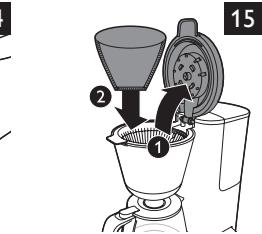
7 Open the filter holder lid (1) and put a paper filter in the filter holder (2) (Fig. 15).
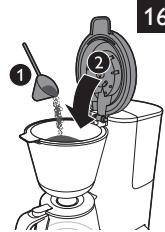
8 Put pre-ground coffee (filter-fine grind) in the filter (1) and close the filter holder lid (2) (Fig. 16).
Tip: Experiment with the amount of coffee and water to find out the perfect coffee-to-water ratio for you.
9 Press the on/off switch downwards to switch on the appliance (Fig. 6).
10 When all the water has passed through the filter, you can remove the jug from the appliance.
If you remove the jug for more than 20 seconds before all the water has passed through the filter, the filter may overflow.
HD7699/HD7697: the appliance switches off automatically after brewing. The insulated jug keeps the coffee hot.
- HD7695/HD7685: the coffee is kept hot on the hotplate until you switch off the appliance or until the appliance switches of automatically after the set keep-warm time.
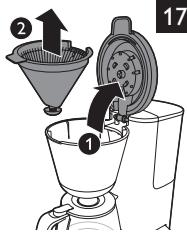
11 Open the filter holder lid (1) and remove the filter holder (2) (Fig. 17).
12 Throw away the paper filter. (Fig. 18)
13 Let the appliance cool down for at least 3 minutes before you start brewing coffee again.
Note: If you set a keep-warm time of 60 minutes or more, the light in the on/off switch starts to flash after 30 minutes to indicate that the freshness of your coffee is declining.
Cleaning
Never immerse the appliance in water.
1 Unplug the appliance.
2 Clean the outside of the appliance with a moist cloth (Fig. 19).
3 Open the filter holder lid (1) and remove the filter holder (2) (Fig. 17)
Note: Make sure you place the filter holder back into the appliance properly.
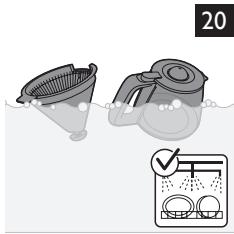
4 Clean the glass jug (HD7695/HD7685 only) and the filter holder in hot water with some washing-up liquid or in the dishwasher (Fig. 20).
To clean the insulated jug, see section 'Insulated jug (HD7699/HD7697 only)' in this chapter.
Do not immerse the insulated jug in water or any other liquid and do not clean it in the dishwasher as this will cause damage to the jug.
5 After cleaning, rinse the glass jug with fresh hot water (Fig. 21).
Water tank
1 Remove the water tank from the appliance (1) and remove the lid of the water tank (2) (Fig. 2).
2 Clean the water tank in hot water, if necessary with some washing-up liquid or in the dishwasher (Fig. 22).
Note: If you use a washing-up brush, be careful not to damage the valve in the bottom of the water tank.
Do not use an object with sharp edges to clean the water inlet on the appliance.
3 Rinse the water tank with fresh water after cleaning and put it back onto the appliance (Fig. 3).
Insulated jug (HD7699/HD7697 only)
Do not immerse the insulated jug in water or any other liquid and do not clean it in the dishwasher as this will cause damage to the jug.
1 Remove the lid of the insulated jug (Fig. 8).
Turn the lid clockwise by its fin until the arrow on the jug points towards the 'remove lid' symbol.
2 Clean the inside of the insulated jug with a soft brush, hot water and some washing-up liquid (Fig. 23).
Tip: To remove stubborn brown deposits, fill the jug with hot water and add a spoonful of baking soda. Let the baking soda do its work for some time.
3 After cleaning, rinse the insulated jug with fresh, hot water (Fig. 24).
Put the lid back onto the insulated jug.
Dscaling
Regular descending prolongs the life of the appliance and guarantees optimal brewing results for a long time. In case of normal use (two full jugs of coffee every day), descale the appliance:
- 2 or 3 times a year if you use soft water (up to 18dH
- 4 or 5 times a year if you use hard water (over 18dH).
You can use white vinegar with 4 % acetic acid. You can also use an appropriate liquid descaler.
In this case, follow the instructions on the package of the descaler.
Do not use a descending powder.
1 Set the AromaSelect knob to the CALC position (Fig. 25).
Note: Use of the Calc position is preferred to get optimal descending results. You can also descale without setting the AromaSelect knob to the Calc position.
2 Fill the water tank with white vinegar (4% acetic acid). (Fig. 26)
3 Put a paper filter in the filter holder to collect the scale (Fig. 27).
4 Press the on/off switch downwards to switch on the appliance (Fig. 5).
5 Once the appliance is finished, let it cool down for 3 minutes and remove the paper filter.
6 Repeat step 2-5 once more. Re-use the vinegar in the jug to fill the water tank again.
7 Switch off the appliance (Fig. 28).
8 Remove the paper filter.
9 Let the appliance cool down for 3 minutes.
10 Fill the water tank with fresh cold water. (Fig. 13)
11 Switch on the appliance and let the it brew until the water tank is empty.
12 Repeat step 9 to 11 once more.
Note: Repeat step 12 until the water in the jug no longer tastes or smells like vinegar.
13 Clean the separate parts (see chapter 'Cleaning').
Ordering accessories
To buy accessories or spare parts, visit www.shop.philips.com/service or go to your Philips dealer. You can also contact the Philips Consumer Care Centre in your country (see the worldwide guarantee leaflet for contact details).
Environment
- Do not throw away the appliance with the normal household waste at the end of its life, but hand it in at an official collection point for recycling. By doing this, you help to preserve the environment (Fig. 29).
Guarantee and support
If you need information or support, please visit www.philips.com/support or read the separate worldwide guarantee leaflet.
Troubleshooting
This chapter summarises the most common problems you could encounter with the appliance. If you are unable to solve the problem with the information below, visit www.philips.com/support for a list of frequently asked questions or contact the Consumer Care Centre in your country.
| Problem | Solution |
| The appliance does not work. | Make sure that the voltage indicated on the appliance corresponds to the local mains voltage. |
| Make sure that: | |
| The appliance is plugged in and switched on. | |
| The water tank is filled with water. | |
| In all other cases, contact the Philips Consumer Care Centre. | |
| The appliance continues to drip long after the brewing cycle has finished. | Some dripping is normal. This is caused by steam that condenses inside the appliance. If more than 3 to 5 drops of coffee fall on the hotplate after you remove the jug, the drip stop is dirty. Push the drip stop to open it and rinse it under a running tap. |
| If you remove the jug from the appliance for more than 20 seconds, the filter holder starts to overflow. | |
| If the above solutions do not solve the problem, please contact the Philips Consumer Care Centre. | |
| The filter overflows while the appliance is brewing coffee. | Check if you placed the filter holder into the appliance properly. If the filter holder is not in the correct position, the drip stop does not work, which may cause the filter holder to overflow. |
| If you remove the jug from the appliance for more than 20 seconds during the brewing process, the filter holder starts to overflow. | |
| The coffee is too weak. | Set the AromaSelect knob to intense. |
| Put more ground coffee in the filter holder to get the coffee-to-water ratio right. | |
| Make sure that the paper filter does not collapse. | |
| Use the right size of paper filter (1x4 or no.4). | |
| Make sure that there is no water in the jug before you start to brew coffee. | |
| The coffee is too strong. | Set the AromaSelect knob to mild. |
| Use less ground coffee or more water. | |
| The appliance takes a long time to brew coffee. | Descale the appliance (see chapter 'Descaling'). |
| The appliance produces a lot of noise and steam during the brewing process. | Descale the appliance (see chapter 'Descaling'). |
| The coffee is not hot enough. | Insulated jug: Rinse the jug with hot water before brewing. |
| Insulated jug:We advise you to brew at least half a jug of coffee. | |
| Glass jug:Make sure you place the jug onto the hotplate properly. | |
| Use thin-walled cups.Thin-walled cups will absorb less heat from the coffee than thick-walled cups. | |
| Descale the appliance regularly (see chapter 'Descaling'). | |
| The appliance does not keep the coffee warm long enough. | (HD7695/HD7685 only):You can adjust the keep-warm time (see chapter 'Preparing for use', "Adjustable keep-warm and freshness indicator'). |
| HD7695/HD7485 only):The on/off switch flashes. | (HD7695/HD7685 only):If you select an adjustable keep-warm time over 30 minutes, the built-in freshness indicator in the on/off switch starts to flash after 30 minutes to remind you that the freshness of the coffee is declining. |