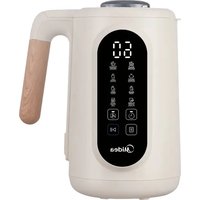
MNM802TCTC - Blender MIDEA - Free user manual and instructions
Find the device manual for free MNM802TCTC MIDEA in PDF.


| Product Type | Soy milk blender and multifunction cooker |
| Model | MNM802TCTC |
| Brand | Midea |
| Power Supply | 120 V~, 60 Hz |
| Rated Power | 800 W |
| Mixing Power | 180 W |
| Heating Power | 800 W |
| Container Capacity | 1.0 L |
| Main Functions | Soy milk, soup, oat paste, thick soup, oat milk, fragrant rice, nut soy milk, purees, smoothies, high-temperature cleaning, altitude adaptation, delayed programming |
| Control Panel | LED, function selection button, on/off, delayed programming |
| Container Material | Stainless steel (estimated) |
| Safety | Lid lock, lid position detection, automatic shutdown on error, overheat protection |
| Care and Cleaning | Built-in high-temperature cleaning, do not immerse base, use a brush for stubborn residues |
| Included Accessories | Power cord, measuring cup, strainer |
| Repairability | Limited 1-year warranty, authorized service center required for repairs |
| Intended Use | Household only, for preparing soy milk, soups, purees, smoothies |
| Dimensions (estimated) | Approximately 20 x 20 x 35 cm |
| Weight (estimated) | Approximately 3 kg |
Frequently Asked Questions - MNM802TCTC MIDEA
User questions about MNM802TCTC MIDEA
0 question about this device. Answer the ones you know or ask your own.
Ask a new question about this device
Download the instructions for your Blender in PDF format for free! Find your manual MNM802TCTC - MIDEA and take your electronic device back in hand. On this page are published all the documents necessary for the use of your device. MNM802TCTC by MIDEA.
USER MANUAL MNM802TCTC MIDEA
natural_image
Line drawing of a modern kettle with handle and lid (no text or symbols)1 L/1,06 QT 8 IN 1
HEATING NUT MILK MAKER
USER MANUAL
MNM802TCTC
Warning notices: Before using this product, please read this manual carefully and keep it for future reference. The design and specifications are subject to change without prior notice for product improvement. Consult with your dealer or manufacturer for details. The diagram above is just for reference. Please take the appearance of the actual product as the standard.
LANGUAGES
EN English
FR French
THANK YOU LETTER
Thank you for choosing Midea! Before using your new Midea product, please read this manual thoroughly to ensure that you know how to operate the features and functions that your new appliance offers in a safe way.
CONTENTS
THANK YOU LETTER 01
SAFETY INSTRUCTIONS 02
SPECIFICATIONS 05
PRODUCT OVERVIEW 06
OPERATION INSTRUCTIONS 07
CLEANING AND MAINTENANCE 12
TROUBLESHOOTING 13
TRADEMARKS, COPYRIGHTS AND LEGAL STATEMENT 15
DATA PROTECTION NOTICE 16
1 YEAR LIMITED WARRANTY 16
SAFETY INSTRUCTIONS
Intended Use
The following safety guidelines are intended to prevent unforeseen risks or damage from unsafe or incorrect operation of the appliance. Please check the packaging and appliance on arrival to make sure everything is intact to ensure safe operation. If you find a damage, please contact the retailer or dealer. Please noteations for alterations to the appliance are not allowed for your safety concern. Unintended use may cause hazards and loss of warranty claims.
Explanation of Symbols


Danger
This symbol indicates that there are dangers to the life and health of persons due to extremely flammable gas.

Warning of electrical voltage
This symbol indicates that there is a danger to life and health of persons due to voltage.

Warning
The signal word indicates a hazard with a medium level of risk which, if not avoided, may result in death or serious injury.

Caution
The signal word indicates a hazard with a low degree of risk which, if not avoided, may result in minor or moderate injury.

Attention
The signal word indicates important information (e.g. damage to property), but not danger.

Observe instructions
This symbol indicates that a service technician should only operate and maintain this appliance in accordance with the operating instructions.
Read these operating instructions carefully and attentively before using/commissioning the unit and keep them in the immediate vicinity of the installation site or unit for later use!
IMPORTANT SAFEGUARDS
When using electrical appliances, basic safety precautions should always be followed, including the following:
- Read all Instructions.
- Do not touch hot surfaces. Use handles or knobs.
- To protect against fire, electric shock and injury to persons do not immerse cord, plugs, or container in water or other liquid.
- This appliance is not intended for use by persons (including children) with reduced physical, sensory or mental capabilities, or lack of experience and knowledge, unless they have been given supervision or instruction concerning use of the appliance by a person responsible for their safety. Children should be supervised to ensure that they do not play with the appliance.
- Turn the appliance OFF, then unplug from the outlet when not in use, before assembling or disassembling parts and before cleaning. To unplug, grasp the plug and pull from the outlet. Never pull from the power cord.
- Do not operate any appliance with a damaged cord or plug or after the appliance malfunctions, or has been damaged in any manner. Return appliance to the nearest authorized service facility for examination, repair or adjustment.
- The use of attachments, including canning jars, not recommended by the manufacturer may cause a risk of injury to persons.
- Household use only. Do not use outdoors.
- Do not let cord hang over edge of table or counter, or touch hot surfaces.
- Do not place on or near a hot gas or electric burner, or in a heated oven.
-
Always attach plug to appliance first, then plug cord into the wall outlet. To disconnect, turn any control to "off," then remove plug from wall outlet.
-
Do not use appliance for other than intended use.
- Avoid contacting moving parts. Do not attempt to defeat any safety interlock mechanisms.
- Do not operate any appliance with a damaged cord or plug or after the appliance malfunctions, or is dropped or damaged in any manner. Contact the manufacturer at their customer service telephone number for information on examination, repair, or adjustment.
- Keep hands and utensils out of container while blending to reduce the risk of severe injury to persons or damage to the blender. A scraper may be used but must be used only when the blender is not running.
- Blades are sharp. Handle carefully.
- Always operate blender with cup lid in place.
- Keep vented lid in place when blending hot liquids.
- Allow to cool before assembling or disassembling parts and before cleaning the appliance.
- A short detachable power-supply cord is provided to reduce risks resulting from becoming entangled inor tripping over a longer cord.
- Longer detachable power-supply cords are available and may be used if care is exercised in their use.
- If a long detachable power-supply cord is used:
1) The marked electrical rating of the detachable power-supply cord or extension cord should be at least as great as the electrical rating of the appliance;
2) The extension cord should be a grounding-type 3-wire cord;
3) The longer cord should be arranged so that it will not drape over the counter top or table top where it can be pulled on by children or tripped over.
SAVE THESE INSTRUCTIONS
SPECIFICATIONS
| MNM802TCTCProduct Model | |
| Power Supply | 120V~ 60Hz |
| Capacity | 1.0L/1.06QT |
| Stirring Power | 180W |
| Heating Power | 800W |
| Rated Power | 800W |
EN
PRODUCT OVERVIEW
Part Name
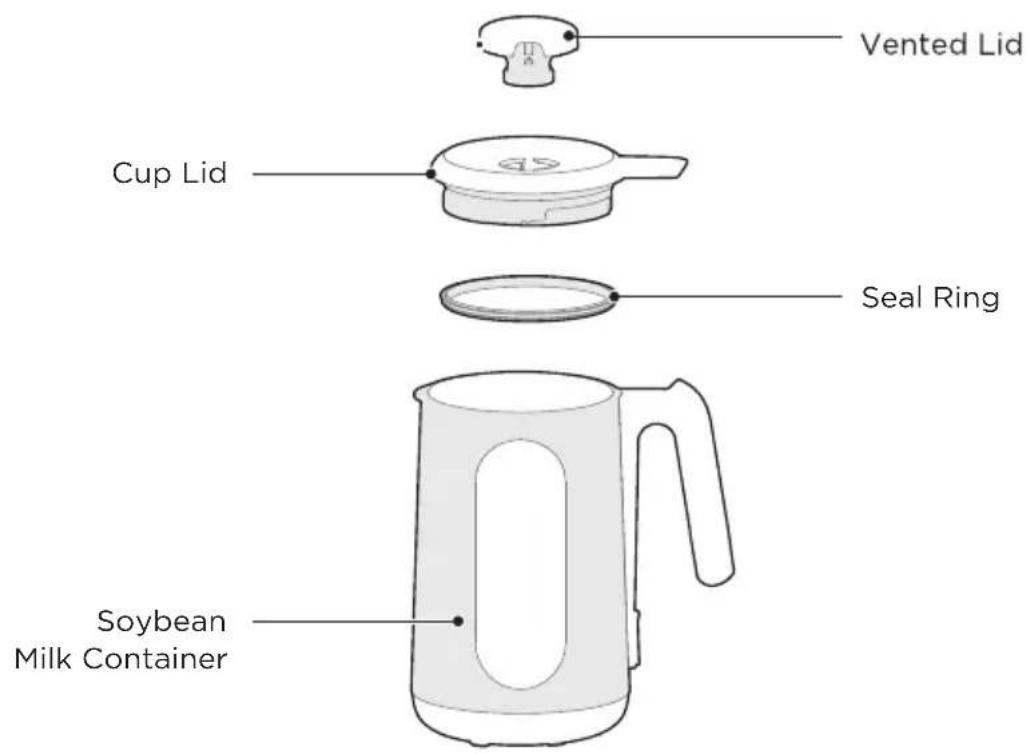
Part List

natural_image
Three simple line drawings of household appliances: a battery, a bulb, and a cup with a spoon (no text or symbols)Power Cord x 1 Measure Cup x 1 Screen assembly x 1
For adding ingredients (e.g. beans, etc.)
For filtering soybean milk after making

NOTE
- The illustrations provided are for reference only and may vary in appearance. Please refer to the actual product inside the packaging box for accurate representation.
- Due to differences in appearance and functionality among different models, please refer to the actual product for accurate information.
OPERATION INSTRUCTIONS
Precautions Before Use
- The Midea Soybean Milk Maker utilizes dry bean pulping technology, and there is no need to soak the ingredients beforehand.
- Before operating the product, please ensure that the cup lid is placed vertically into the soy milk container in the correct direction and pressed downward. Failure to do so may result in poor contact and the product not functioning properly.
- If the power is accidentally cut off or if the product is restarted during operation, the following phenomena may occur:
- Impact on pulping effectiveness;
- Juice splattering and continuous alarm sound from the product;
- If making baby food, there may be sticking at the bottom of the container.
- During the operation of the product, it is strictly prohibited to add any more ingredients or lift the cup lid as it may cause harm to individuals and result in product malfunctions.
- It is recommended not to use ingredients that are not specified in the instruction manual, as it may result in staining the machine or causing the bottom to stick or failure to pulverize.
- Do not reheat or re-stir the soybean milk after it has been prepared, as this may cause it to stick to the bottom of the cup or overflow.
- Fresh soy milk is recommended to be consumed within 6 hours at room temperature.
- Do not use the machine to heat cold milk, cold paste, or boil water.
- If sticking occurs, normal use is possible after cleaning.
- Discoloration at the bottom of the soybean milk maker after prolonged use is a normal phenomenon and does not affect its normal operation.
- Operate the product strictly according to its functions, and avoid using the function buttons incorrectly, as it may result in sticking, overflow, failure to pulverize, or undercooked outcomes.
- When using the product, strictly follow the instructions regarding the amount of food and water to ensure a good taste and prevent sticking. Use the provided measuring cup to measure the ingredients accurately during operation.
- During use, steam is emitted from the exhaust vents, and the surface temperature is high. Take caution when lifting the cup lid to avoid scalding.
- Ingredients other than those specified in the recipes may pose a risk of failure to pulverize, and it is not recommended to use them.
- It is strictly prohibited to pulp without installing the cup lid seal ring.

NOTE
All information has been carefully checked and any typographical errors or misunderstandings are subject to consultation with the company. Any technical improvements to the products will be included in the new version of the manual without prior notice. If there are any changes to the appearance or color of the product, the actual product shall prevail.
Control Panel





EN
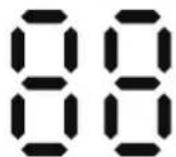
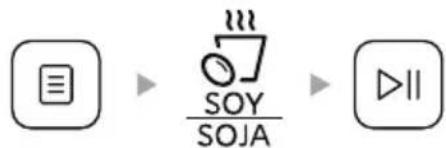
- Press the “☐” button while the machine is in standby mode to cycle through the available functions.
- The corresponding function LED will flash. Press the “ ▷” button to begin operation.
• After the work is finished, the buzzer will sound for approximately 1 minute, and the LED will continue to flash. - Reservation function: After selecting the menu function, click 📊 to display the default reservation time "6h". Every time you press 📊 to increase by 1h, you can adjust the cycle; Reservation time range 2-12h
Operating Instructions

NOTE
- When adding water to the soy milk container, the water temperature should not exceed 50^ .
- When making fruit and vegetable juice, ensure that the ingredients are washed, pitted, and cut into small pieces (about the size of peanuts), following the recipe provided. Use yogurt according to the recipe when making yogurt-based juice.
- Please allow an interval of 8 minutes before using the machine again.
- Use the Recipe button for ingredient suggestions.
- When selecting a function, the corresponding LED will flash. During operation, the corresponding LED will stay on.
- Press the “ ▷II ” button to interrupt the operation if needed.
- Make sure the cup lid's sealing ring is properly installed before use.
- Make sure the cup lid is securely closed before starting.
- Please don't add ice.
Soy Operation Steps
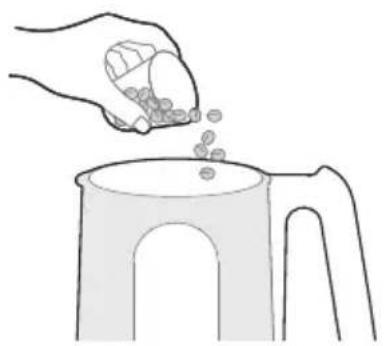
1 Wash the ingredients and pour them into the soy milk container. Add water according to the recommended quantity in the recipe.
natural_image
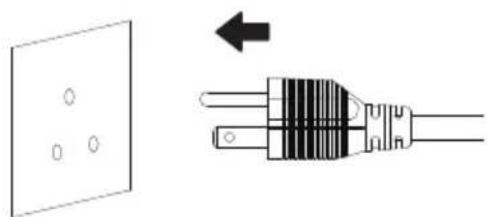
Line drawing of a hand pouring small objects into a mug (no text or symbols)3 Plug in the power cord.
NOTE
When the power is turned on, you will hear a "beep" sound, and the machine will enter standby mode.
natural_image
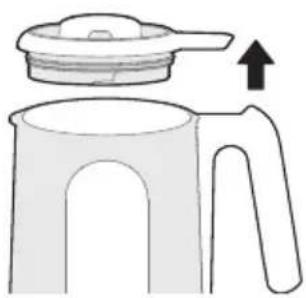
Pure electrical circuit lines without any symbols5 Once the process is complete, unplug the power cord and unscrew the cup lid.
NOTE
Be cautious of the steam released to avoid burns. Do not open the cup lid during operation.
natural_image
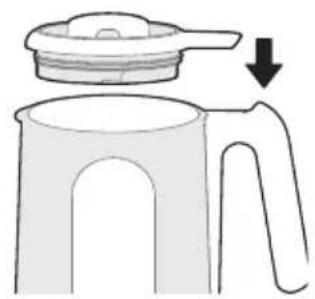
Illustration of a kettle with a lid and handle, showing an upward arrow (no text or symbols)2 Screw on the cup lid, ensuring that the handle aligns with the handle recess and that the corresponding time for the selected function is displayed, indicating proper installation.
natural_image
Illustration of a kettle with a lid and handle, showing a downward arrow indicating compression or cooling (no text or symbols)4 After selecting the desired function, press the " " button to begin operation.
flowchart
graph LR
    A["目"] --> B["SOY/SOJA"]
    B --> C["▷II"]
Taking the "SOY" function as an example
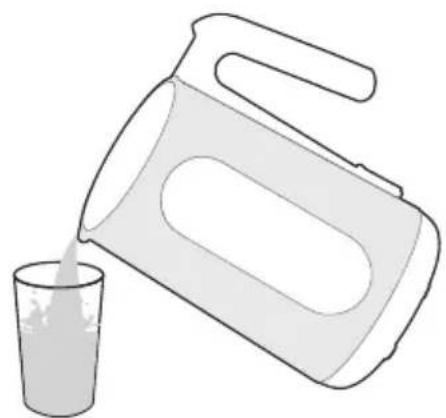
6 Pour the prepared soy milk into a separate container.
natural_image
Simple line drawing of a hand pouring liquid into a glass (no text or symbols)Recipe

NOTE
- Please refer to the actual operating interface of the product for specific functions.
- Ingredients in the following recipes are measured by our Measure cup.
| Recipe Ingredient Function | ||
| [5x6y] | Thick Soup | 100g corn (cut into 6 pieces), 100g pork ribs, 100g carrots (diced), 3 slices of ginger, salt to taste, add water up to the 1.0L mark. |
 | Oat Paste | 55g of raw oats (about 1 cup), add water to the 1.0L mark. |
 | French thick soup | 200g chestnut (shell removed, cut into peanut sized small pieces), 30g diced onion (cut into peanut sized small pieces), 30g light cream, 30g butter, add water to the 1.0L mark. |
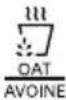 | Oat Milk | 30g raw oats and 30g walnut kernels, add water to the 1.0L mark. |
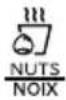 | Rice Fragrance Soy Milk | 2/3 cup of soybeans, 1/3 cup of rice, add water up to the 1.0L mark. |
| Peanut, Walnut and Soybean Milk | 1/3 cup of soybeans, 1/3 cup of peanuts, 3 walnuts (broken into size of peanuts), 1/3 cup of rice, add water up to the 1.0L mark. | |
| Millet Wolfberry Soybean Milk | 2/3 cup of soybeans, 1/3 cup of millet, 10 wolfberries, add water up to the 1.0L mark. | |
 | Quick Soybean Milk | 1 cup + 1/3 cup of soybeans, add water up to the 1.0L mark. |
 | apple puree | 280g apple (peeled and pitted, cut into peanut sized small pieces), add water to the 0.5L mark. |
| Strawberry puree | 300g strawberries (cut into peanut sized small pieces), add water to the 0.5L mark. | |
| Banana puree | Three bananas weighing approximately 270g (peeled and sliced), add water to the 0.5L mark. | |
 | Mango Smoothie | 300g mango (peeled, pitted, and cut into small pieces of peanut size), add yogurt up to the 1L mark. Please don't add ice. |
| Strawberry Smoothie | 8 strawberries (cut into small pieces of peanut size), add yogurt up to the 1L mark. Please don't add ice. | |
| Banana Smoothie | 2 bananas (peeled and sliced), add yogurt up to the 1L mark. Please don't add ice. | |

Tips
- The soybean milk machine automatically ADAPTS to the water temperature and the altitude and voltage of the region in real time during the working process, and adjusts the soybean milk production procedure to the best state to ensure the full release of soybean milk nutrition, and prevent the problems such as uncooked soybean milk, overflow and paste bottom caused by changes in altitude and voltage.
- In order to fully ensure the altitude adaptation effect, when the soybean milk machine is moved to the area with a large altitude change (altitude difference of more than 1000 meters) after use, please follow the following steps.
- There is large steam in the process of boiling water, please pay attention to anti-hot.
- Press the " ▷||" button during the boiling process to cancel the altitude adaptive program.
-
After the intelligent altitude recognition is completed, the soy milk machine has been adjusted to the optimal production procedure under the local environment, and has been maintained in this state.
-
Add water to the maximum and minimum water level, do not add any ingredients, and cover the cup.
- Power on within 30 seconds, long press the "☐" button for 5 seconds to enter the altitude adaptive program.
- After the intelligent altitude recognition is completed, the first function light flashes, and there is a "beep" and "beep" prompt tone.
EN
CLEANING AND MAINTENANCE

NOTE
- Before cleaning, make sure to unplug the power.
- When cleaning the soybean milk container, please be careful of the sharp blades to avoid any cuts.
- DO NOT use chemical substances such as alcohol for wiping.
- DO NOT directly rinse the outer shell of the cup with water to prevent water from entering the interior.
- If there are stubborn residues inside the cup that are difficult to clean, you can first soak them in cold water (not exceeding 50°C), then use the cleaning function or brush counterclockwise (avoid brushing clockwise), and finally rinse with clean water. Do not add detergent when using the high-temperature cleaning function.
- Please wait for the cup to cool down before cleaning to prevent scalding from residual heat.
1 Open the cup lid.
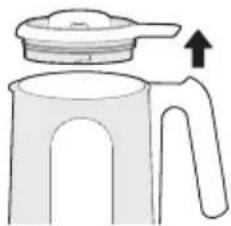
natural_image
Simple line drawing of a kettle with a lid and handle, no text or symbols present2 Clean the interior of the cup.
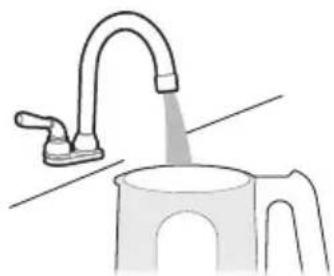
natural_image
Illustration of a kitchen sink with a pipe pouring liquid into a cup (no text or symbols)3 Add water to the scale of 0.8L-1L, select the " function, and press the " button for high-temperature cleaning.
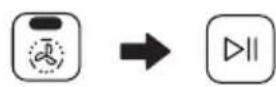
High-temperature cleaning
4 After cleaning, dry it thoroughly and keep it for future use.
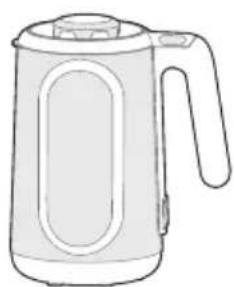
natural_image
Line drawing of a modern water heater with handle and lid (no text or symbols)TROUBLESHOOTING
Operation of your appliance can lead to errors and malfunctions. The following tables contain possible causes and notes for resolving an error message or malfunction. It is recommended to read the table below carefully in order to save your time and money that may cost for calling to the service center.
| Cause SolutionFault | ||
| Display E1 | • Send for repair• NTC open circuit | |
| Display E2 | • NTC short circuit | • Send for repair |
| Display E0 | • Send for repair• Abnormal zero-crossing | |
| Display “---” by flicking | • Send for repair• Reed switch open circuit | |
| • Cup cover not closed properly | • Close the cup lid and reconnect the power. | |
| Cause SolutionFault | ||
| Overflow | Excessive or insufficient amount of ingredients. | Add ingredient based on quantity specified by the instructions. |
| Insufficient or excessive water level. | Add water according to instructions. | |
| Incorrect function selection. | Select the appropriate function according to the instructions. | |
| Residue at the bottom | Excessive amount of ingredients. | Add ingredient based on quantity specified by the instructions. |
| Insufficient water level. | Add water according to instructions. | |
| Cup not cleaned properly. | Clean thoroughly before use. | |
| Blending failure of ingredients | Excessive amount of ingredients. | Add ingredient based on quantity specified by the instructions. |
| Insufficient water level. | Add water according to instructions. | |
| Incorrect function selection. | Select the appropriate function according to the instructions. | |
| Insufficient cooking | Excessive amount of ingredients. | Add ingredient based on quantity specified by the instructions. |
| Excessive amount of water. | Add water according to instructions. | |
| Food not hot after completion | Incorrect function selection. This function only blends without heating. | Select the appropriate function according to the instructions. |
| Noise during operation | Motor noise during blending. | Normal phenomena. |
| Unusual sounds or motor abnormalities. | Contact local customer service for repairs. | |
| No response from the buttons | ·The machine is working, but cannot operate. | ·This is a normal phenomenon. |
| Machine not blending | ·Incorrect function selection. This function is for heating without blending. | ·Select the appropriate function according to the instructions. |
| ·Heating in progress, not yet in the stirring stage. | ·Wait for a few minutes. | |
| LED is ON, but the machine is not working | ·Not pressing the Start button. | ·Select the function again and press the Start button. |
| LED does not illuminate | ·Power cord not fully inserted. | ·Ensure the power cord is fully inserted. |
| Long working time | ·Use warm water.·Water temperature | |
| ·Excessive amount of ingredients and water. | ·Follow the instructions for ingredient and water quantity. | |
EN
TRADEMARKS, COPYRIGHTS AND LEGAL STATEMENT
Midea logo, word marks, trade name, trade dress and all versions there of are valuable assets of Midea Group and/or its affiliates (“Midea”), to which Midea owns trademarks, copyrights and other intellectual property rights, and all goodwill derived from using any part of an Midea trademark. Use of Midea trademark for commercial purposes without the prior written consent of Midea may constitute trademark infringement or unfair competition in violation of relevant laws.
This manual is created by Midea and Midea reserves all copyrights thereof. No entity or individual may use, duplicate, modify, distribute in whole or in part this manual, or bundle or sell with other products without the prior written consent of Midea.
All the described functions and instructions were up to date at the time of printing this manual. However, the actual product may vary due to improved functions and designs.
DATA PROTECTION NOTICE
For the provision of the services agreed with the customer,
we agree to comply without restriction with all stipulations of applicable data protection law, in line with agreed countries within which services to the customer will be delivered, as well as, where applicable, the EU General Data Protection Regulation (GDPR).
Generally, our data processing is to fulfil our obligation under contract with you and for product safety reasons, to safeguard your rights in connection with warranty and product registration questions. In some cases, but only if appropriate data protection is ensured, personal data might be transferred to recipients located outside of the European Economic Area.
Further information are provided on request. You can contact our Data Protection Officer via MideaDPO@midea.com. To exercise your rights such as right to object your personal date being processed for direct marketing purposes, please contact us via MideaDPO@midea.com. To find further information, please follow the QR Code.
EN 1 YEAR LIMITED WARRANTY
This is the only express warranty for this product and is in lieu of any other warranty or condition. This product is warranted to be (1) year from the date of original purchase. During this period, your exclusive remedy is repair or replacement of this product or any component found to be defective, at our option; however, you are responsible for all costs associated with returning the product to us and our returning the product or component under this warranty to you. If the product or component is no longer available, we will replace with a similar one of equal or greater value. This warranty does not cover wear from normal use, and damages to the product resulting from accident, alteration, abuse, or misuse. This warranty extends only to the original consumer purchaser or gift recipient. Keep the original sales. This warranty is void if products is used for other than single family household use or subjected to any voltage and waveform. We exclude all claims for special, incidental, and consequential damages by breach of express or implied warranty. All liability is limited to amount of the purchase price. Every implied warranty, including any statutory warranty or condition of merchantability prohibited by law, in which case such warranty or condition is limited to the duration of this written warranty. Legal rights that vary depending on where you live. Some states or provinces do not allow limitations on implied warranties or special, incidental consequential damages, so the foregoing limitations may not apply to you. Please note that failure to complete and submit this form does not diminish your warranty.
In the event of a warranty period claim, question, comments or if service is required for this product, please contact us at the following:
CanadaSupport@midea.com
1-888-365-2230
LETTRE DE REMERCIEMENT
natural_image
Line drawing of a hand pouring seeds from a cup into a mug (no text or symbols)natural_image
Pure electrical plug diagram showing a socket and its internal structure without any text or symbolsnatural_image
Diagram of a kettle with a lid and handle, showing an upward arrow indicating motion (no text or symbols)natural_image
Diagram of a kettle with a lid and handle, showing a downward arrow indicating compression or disassembly (no text or symbols present)flowchart
graph LR
    A["目"] --> B["→"]
    B --> C["→"]
    C --> D["→"]
natural_image
Line drawing of a hand pouring liquid into a glass (no text or symbols)Recettes

REMARQUE
natural_image
Simple line drawing of a kettle with a lid and handle, no text or symbols presentnatural_image
Line drawing of a kitchen sink with a faucet pouring liquid into a cup (no text or symbols)natural_image
Line drawing of a modern kettle with handle and lid (no text or symbols)DÉPANNAGE
CanadaSupport@midea.com
1-888-365-2230

make yourself at home


- USER MANUAL
- LANGUAGES
- THANK YOU LETTER
- CONTENTS
- SAFETY INSTRUCTIONS
- Intended Use
- Explanation of Symbols
- Danger
- Warning of electrical voltage
- Warning
- Caution
- Attention
- Observe instructions
- IMPORTANT SAFEGUARDS
- SAVE THESE INSTRUCTIONS
- SPECIFICATIONS
- PRODUCT OVERVIEW
- NOTE
- OPERATION INSTRUCTIONS
- Precautions Before Use
- Control Panel
- EN
- Operating Instructions
- Soy Operation Steps
- Recipe
- Tips
- CLEANING AND MAINTENANCE
- TROUBLESHOOTING
- TRADEMARKS, COPYRIGHTS AND LEGAL STATEMENT
- DATA PROTECTION NOTICE
- EN 1 YEAR LIMITED WARRANTY
- LETTRE DE REMERCIEMENT
- Recettes
- REMARQUE
- DÉPANNAGE
Brand : MIDEA
Model : MNM802TCTC
Category : Blender