
YFB1003W - Safety gate Vevor - Free user manual and instructions
Find the device manual for free YFB1003W Vevor in PDF.


| Product Type | Child Safety Gate |
| Brand | Vevor |
| Model | YFB1003W (white) / YFB1003B (black) |
| Passage Width | 65 to 101.6 cm (26-40 inches) |
| Height | 91.4 cm (36 inches) |
| Approximate Weight | 4 kg |
| Power Supply | None (manual) |
| Opening Mechanism | Swing door with release button |
| Mounting | Wall-mounted with cups and screws (included) |
| Recommended Age | 8 to 24 months |
| Usage | Indoor only |
| Number of included extensions | 2 (B*2) |
| Main Material | Reinforced plastic and metal |
| Color | White (W) or Black (B) |
| Care and Cleaning | Clean with a soft cloth and soapy water |
| Safety | Double locking, mandatory wall cups, stability test |
| Spare parts and repairability | Available parts: cups, screws, extensions. Repair possible by replacement |
| General Information | Complies with safety standards, adult assembly required |
Frequently Asked Questions - YFB1003W Vevor
User questions about YFB1003W Vevor
0 question about this device. Answer the ones you know or ask your own.
Ask a new question about this device
Download the instructions for your Safety gate in PDF format for free! Find your manual YFB1003W - Vevor and take your electronic device back in hand. On this page are published all the documents necessary for the use of your device. YFB1003W by Vevor.
USER MANUAL YFB1003W Vevor
Technical Support and E-Warranty Certificate www.vevor.com/support
Safety gate
YFB1002W / YFB1002B
YFB1003W / YFB1003B
YFB1004W / YFB1004B
We continue to be committed to provide you tools with competitive price.
"Save Half", "Half Price" or any other similar expressions used by us only represents an estimate of savings you might benefit from buying certain tools with us compared to the major brands and does not necessarily mean to cover all categories of tools offered by us. You are kindly reminded to verify carefully when you are placing an order with us if you are actually a half in comparison with the top major brands.
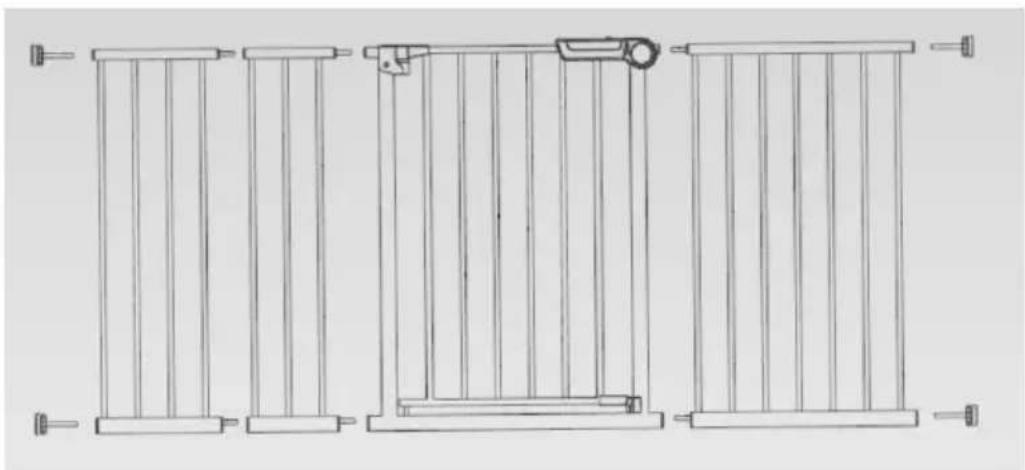
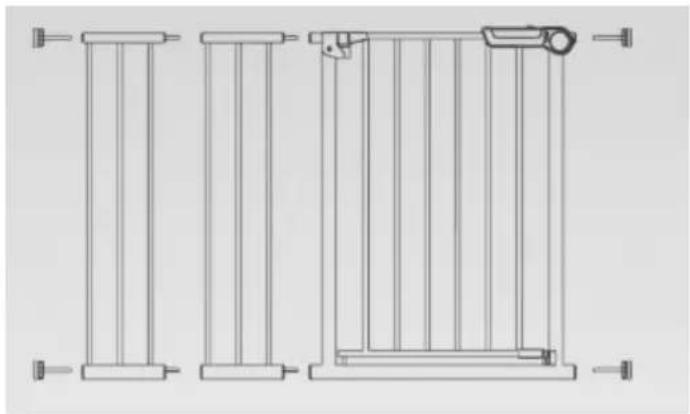
YFB1002W / YFB1002B
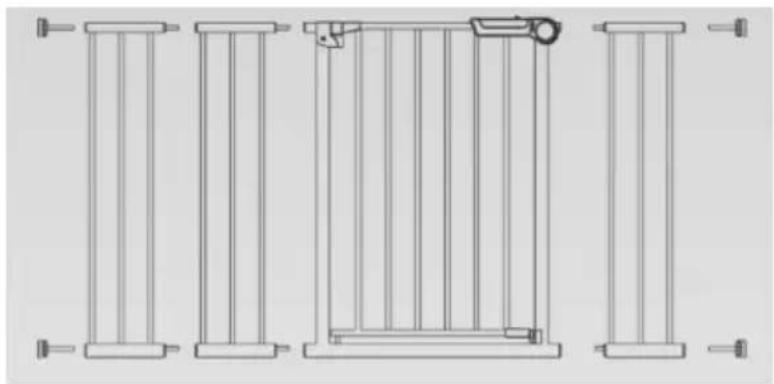
YFB1003W / YFB1003B
YFB1004W / YFB1004B
NEED HELP? CONTACT US!
Have product questions? Need technical support? Please feel free to contact us: Technical Support and E-Warranty Certificate www.vevor.com/support
This is the original instruction, please read all manual instructions carefully before operating. VEVOR reserves a clear interpretation of our user manual. The appearance of the product shall be subject to the product you received. Please forgive us that we won't inform you again if there are any technology or software updates on our product.
INSTRUCTIONS
Thank you very much for choosing this Safety gate .
Please read all of the instructions before using it.
The information will help you achieve the best possible results.
Model and Parameters
| Model | YFB1002W | YFB1002B | YFB1003W | YFB1003B | YFB1004W | YFB1004B |
| Width | 60.6-63.3inch(154-161cm | 26-40inch (65-101.6cm | 26-48inch (65-121.9cm | |||
| Height | 30inch (76.2cm) | 36inch (91.4cm) | ||||
| Colour | White | Black | White | Black | White | Black |
ASSEMBLY AND USE

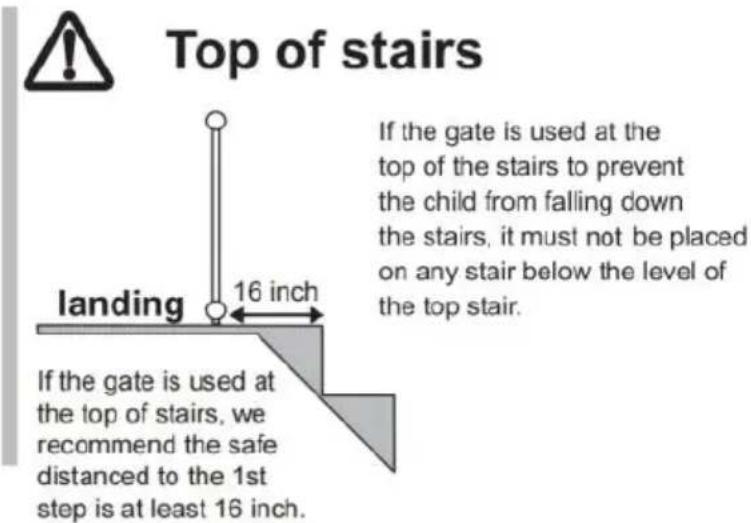
Notice: screw in Mounting Cups when using gate on stairs
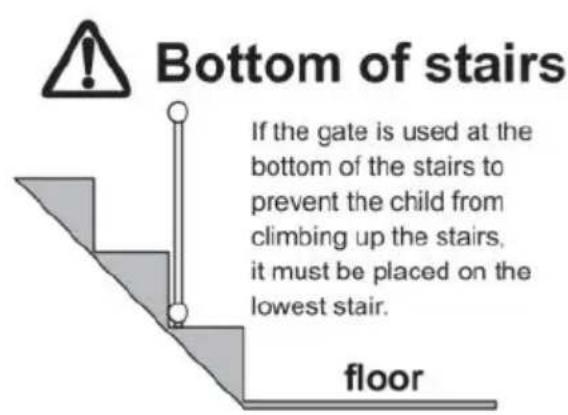
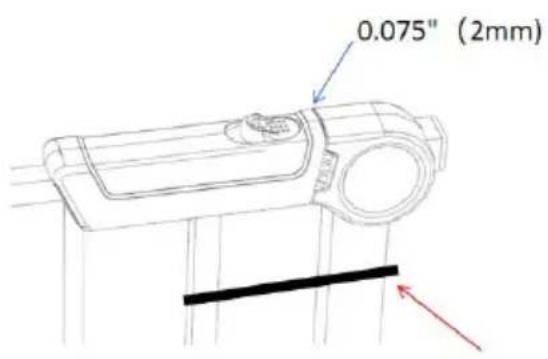
The door gap is NOT a defect! after installation, it will be shortened to 0.075" (2mm)

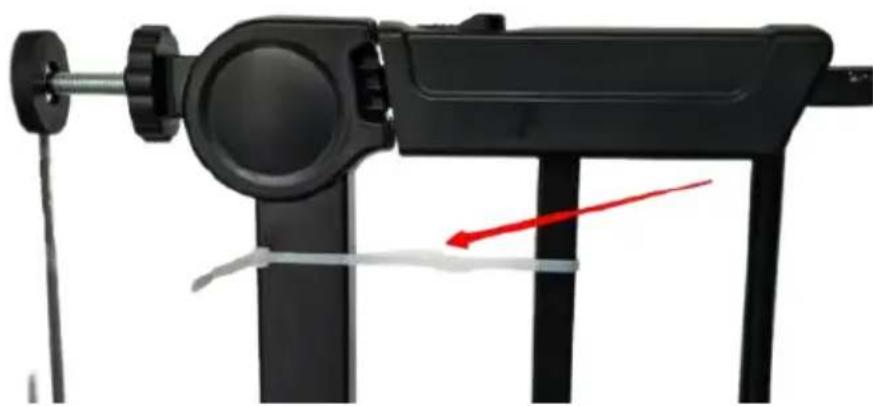
DO NOT CUT THE BELT before
the installation is completed.
Before Using Product
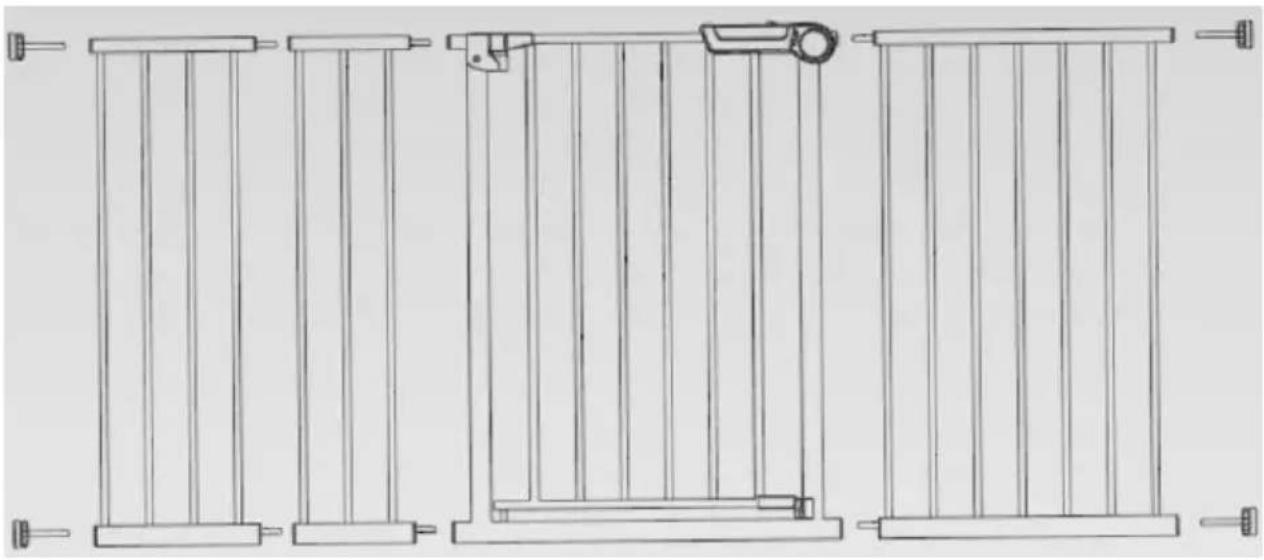
- Component Diagram
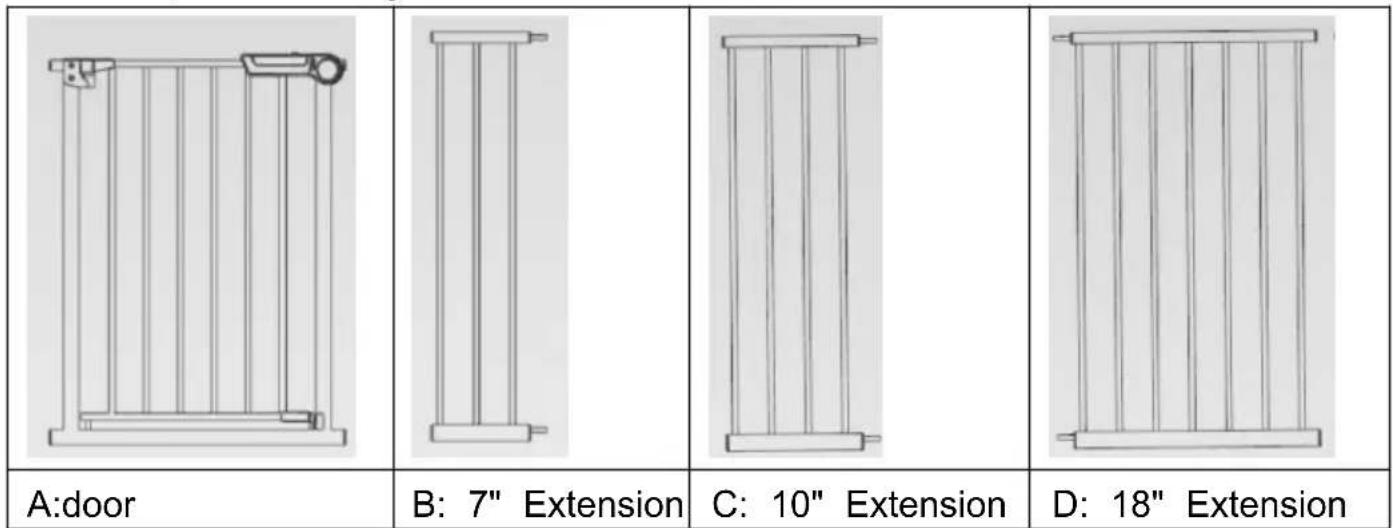
| E: Screw Rod | F: Wall Cup | G: 1" Screw | H: Fixing |
- Please check whether the components of the purchased product mode are complete according to the following table.
| Model No. | Components |
| YFB1002W | A*1+B*1+C*1+D*1+E*4+F*4+G*4+H*3 |
| YFB1002B | A*1+B*1+C*1+D*1+E*4+F*4+G*4+H*3 |
| YFB1003W | A*1+B*2+E*4+F*4+G*4+H*2 |
| YFB1003B | A*1+B*2+E*4+F*4+G*4+H*2 |
| YFB1004W | A*1+B*3+E*4+F*4+G*4+H*3 |
| YFB1004B | A*1+B*3+E*4+F*4+G*4+H*3 |
Installation Steps
- Do not cut the cable ties before installation.
-
Measure the width of the door, select appropriately sized extension for combined installation, and ensure that the total length of extension installed on the same side of the door does not exceed 20".
-
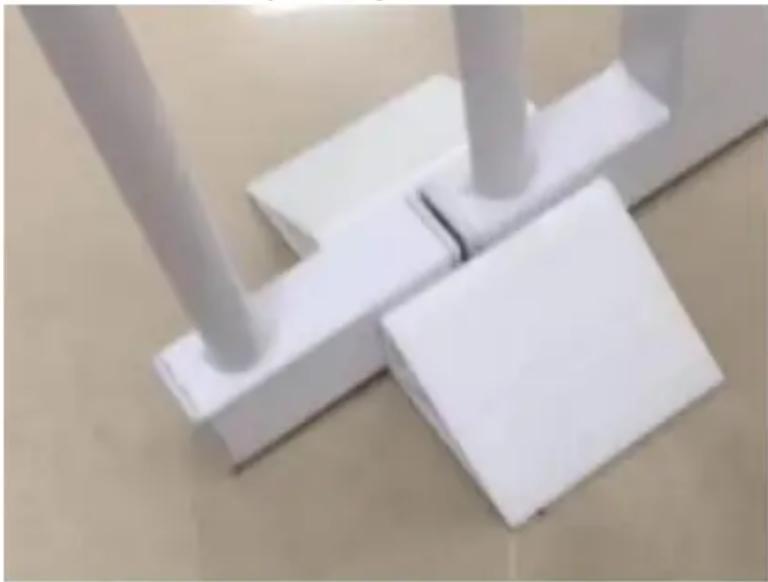
To reduce sway of the door frame, at the lower end of the connection between the door and the extension, please stick the adhesive paper on the fixing bracket to the ground. Using glue to adhere the fixing bracket the ground will yield better results. You will need to purchase the glue according to the material of your ground surface.
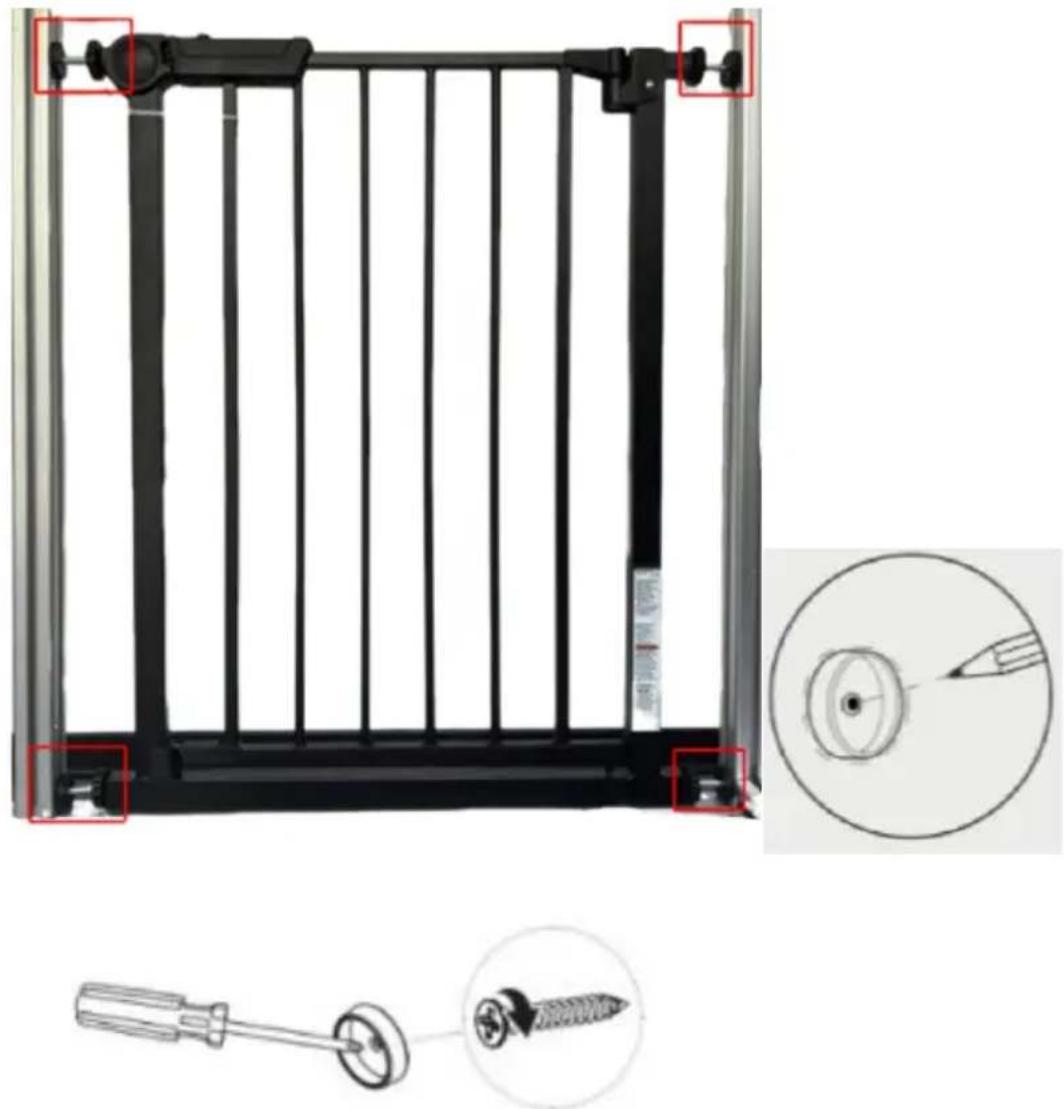
- When pre-installing the security door, mark the position for the wall cup using a pencil to indicate where to drill the holes. The recommended hold diameter is approximately 2.2" (55mm). If you are concerned about damaging the wall during drilling, you may skip this step. For pressure-fit installation, you can push the wall cups directly against the wall and place the screws inside the wall cups.
Note: The door should be placed on the ground, and the clearance between the door and the ground should be more than 1 centimeter.
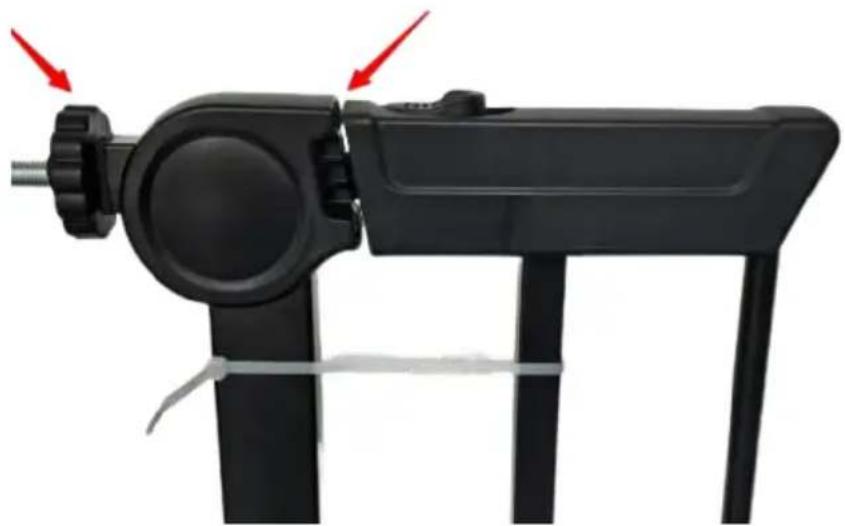
- Tighten the bolts clockwise until fully secured. Note: Ensure that the bottom of the door frame is level with the ground. Then, tighten the bolts to the bottom fully by turning them clockwise as well. Rotate the bolts until gap of approximately 0.07'' is achieved (the optimal gap is 0.075'' , or 2m
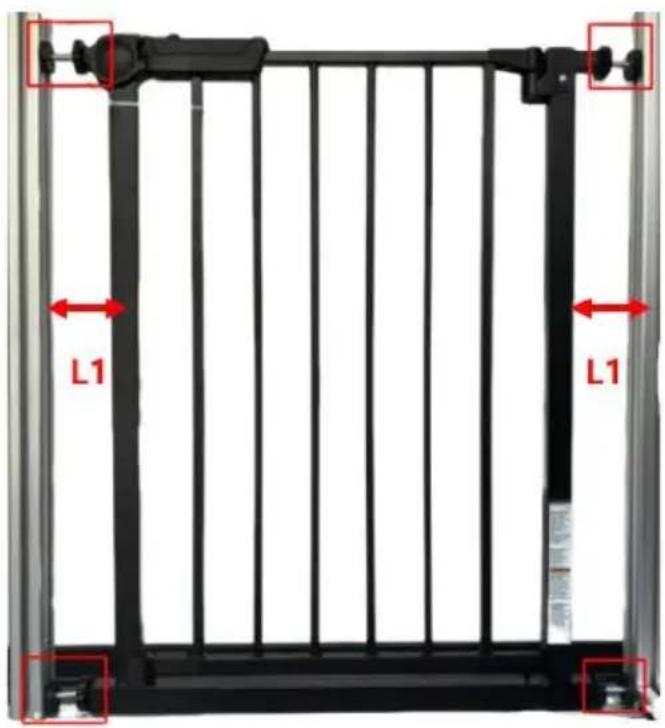
Pay attention to adjusting the size of the left and right door frames to ensure that the gaps on both sides are consistent.
L 1 = L 2 ≤ 2. 6 in
- After installation is complete, cut the cable ties.
Test
a. Push the door to check its stability.
b. Open and close the door.
c. Pull the button backward, then lift the gate plate up to open it.

Add Door Threshold Extensions
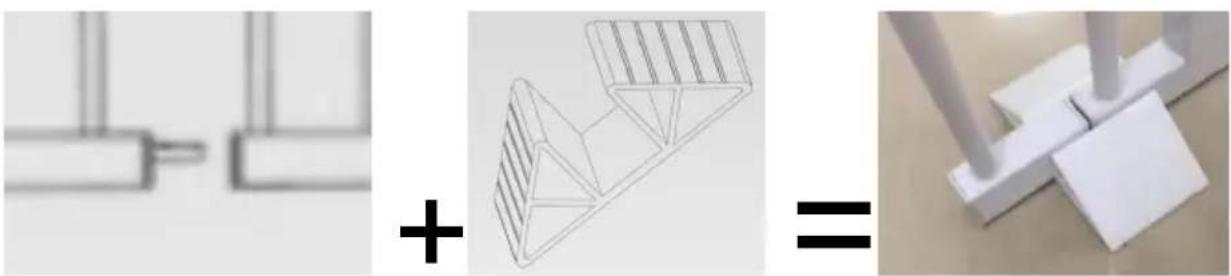
- Remove the screws at the top and bottom, assemble the door threshc and extensions as shown in the diagram, and reposition the door threshc for proper fit according to the installation requirements. Do not install mor than 2 extensions or extensions exceeding 20'' on the same side of the door.
- At the bottom connection of the extensions, use an H-shaped stabilizer bracket to enhance stability and prevent swaying. The bottom of the stabilizing bracket has adhesive, which can also be bonded to the ground (for optimal bonding, the ground should be flat and clean).
WARNING
- To prevent serious injury or death, securely install the gate or enclosure and use it according to the manufacturer's instructions.
- Never use with a child able to climb over or dislodge the gate or enclo-sure.
-
This product will not necessarily prevent all accidents.
-
Never leave children unattended.
- Use only with the locking mechanism securely engaged
- Intended for use with children from 8 months through 24 months of age.
- Stop using the gate if any parts are missing or become damaged.
- Children may die or been seriously injured when gates are not securely installe
- ALWAYS install and use gates as directed using all required parts.
- Periodically check all fasteners to be sure they are tight and secure.
- Adult Assembly Required.
- The surfaces that the gate is to be fixed to must be suitable for the purpose must be structurally sound.
- Indoor use only. It is not to be exposed to outdoor elements.
- Install this gate away from heaters and other sources of heat.
- STOP using it when a child can climb over or dislodge the gate.
- You MUST install [wall cups] to keep the gate in place. Without [wall cups], the child can push out and escape.
- NEVER use it to keep the child away from a pool.
AVENTISSEMENT!
-Thanks for purchasing VEVOR product!
VEVOR
TOUGH TOOLS, HALF PRICE
Technical Support and E-Warranty Certificate www.vevor.com/support
VEVOR®
TOUGH TOOLS, HALF PRICE
De installment is voltooid.

Brand : Vevor
Model : YFB1003W
Category : Safety gate