BQL-9200STA - Ice machine Vevor - Free user manual and instructions
Find the device manual for free BQL-9200STA Vevor in PDF.

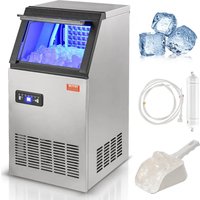
| Product Type | Soft serve ice cream machine |
| Brand | Vevor |
| Model | BQL-9200STA |
| Power Supply | 220 V, 50/60 Hz (according to nameplate) |
| Rated Power | Approx. 1500 W (estimated) |
| Refrigerant Type | R290 or similar (not specified, estimated) |
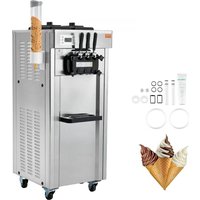
| Number of Cylinders | 2 |
| Tank Capacity | Approx. 3 liters per tank |
| Main Functions | Refrigeration, fresh preservation, cleaning, hardness adjustment (soft/hard), timer, auto shut-off |
| Display | LCD or touch screen depending on version |
| Exterior Material | Stainless steel (estimated) |
| Net Weight | Approx. 30 kg (estimated) |
| Dimensions (W x D x H) | Approx. 530 x 650 x 850 mm (estimated) |
| Included Accessories | Torx nut, bellows, O-rings (2), check valves (2), petroleum jelly, manual, warranty card |
| Maintenance and Cleaning | Regular cleaning with food-grade detergent; disassemble parts every two weeks; clean condenser every 3 months |
| Safety | Mandatory grounding; do not use with wet hands; do not block ventilation; shut down in case of abnormality |
| Spare Parts and Repairability | Seals (O-ring, D-ring, wave ring), stirrer, valve stem, fan, compressor; replacement recommended every 1 to 6 months depending on part |
| Warranty | Manufacturer warranty (card included) |
| General Information | Manufactured by Shanghai Muxinmuyeyouxiangongsi (China); imported in Australia by SIHAO PTY LTD; in the United States by Sanven Technology Ltd. |
Frequently Asked Questions - BQL-9200STA Vevor
User questions about BQL-9200STA Vevor
0 question about this device. Answer the ones you know or ask your own.
Ask a new question about this device
Download the instructions for your Ice machine in PDF format for free! Find your manual BQL-9200STA - Vevor and take your electronic device back in hand. On this page are published all the documents necessary for the use of your device. BQL-9200STA by Vevor.
USER MANUAL BQL-9200STA Vevor
Affordable. Reliable. Home Improvement.
ICE CREAM MACHINE
MODEL:BQL-9200ST/BQL-9200STA
MODEL:BQL-9200ST/BQL-9200STA

natural_image
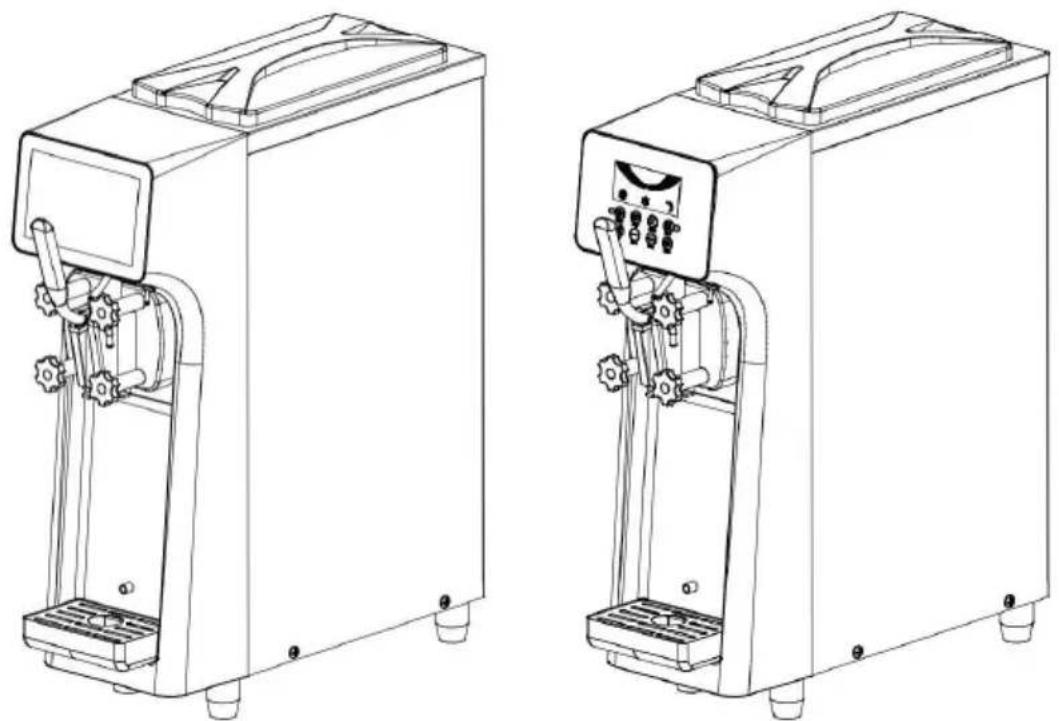
Line drawings of two industrial machines with control panel and piping (no text or symbols)(Photos are for reference only)
This is the original instruction, please read all manual instructions carefully before operating. VEVOR reserves a clear interpretation of o user manual. The appearance of the product shall be subject to the product you received. Please forgive us that we won't inform you ag there are any technology or software updates on our product.
Precautions for Safe Use
Warning Description:

Warn
Content that may cause death or serious injury if used incorrectly.

Attention
If used incorrectly, it may cause personal injury or damage to the cc
Precautions before use:

Warn
◆ In case of gas leakage, do not touch the machine or the leakage breaker, and open the window for ventilation. Otherwise, it may cause explosion.
◆ Do not use combustible items near this machine, otherwise it may a fire.
◆ Do not step on, hang or place heavy objects on the machine, or it may damage the machine and cause injury to people.
◆ Do not insert fingers or rods into the heat dissipation port, otherwise may cause personnel injury and affect the heat dissipation effect.
◆ Do not touch electrical parts or switches with wet hands, otherwise may cause electric shock.
◆ Children should be supervised to guarantee that they do not play machines.
Electrical safety issues:

Warn
It is necessary to entrust the electrical construction unit to connect ground wire. Otherwise, an electric shock accident may occur when a failure or leakage occurs.
◆ Please keep the power supply consistent with the name plate. If with other appliances, it may cause fire accidents.
◆ Do not damage or break the power cord, process it, bundle it, s force it to bend or twist it. Otherwise, the power cord may be dama causing electric
shock or fire accident.
◆ Do not spill water directly on the machine, otherwise it may cause electric shock.
Precautions:

Warn
◆ Turn off the control power switch when assembling and disassem components.
Otherwise, it may accidentally touch the starting machine and cause in
◆ Please disinfect your hands and fingers during operation. Otherwise may endanger human health.
Use environment (condition):

Warn
◆ To be placed on a level and firm ground. Otherwise, it may cau dumping, noise and excessive vibration.
◆ Don't use it in situations where it is moist or will get wet by water in a place wet with water, it may cause a short circuit of the machine
- Don't use it in places with a lot of sulfuric acid content such as springs and places with a lot of salt such as near bays. Otherwise, cause internal corrosion of the machine and lead to machine failure.

Attention
◆ Please install in a well ventilated area. Do not place articles on cover of this machine, otherwise it will cause noise. The left and right and the back sides of this machine must ensure a space of more than otherwise it will affect heat dissipation and the production capacity of machine.
◆ Please do not install in direct sunlight or close to heat-generating appliances. Please use this machine within the ambient temperature range of 5 \~ 38 °C.

Warn
When not in use for a long time, unplug the power plug. Failure may reduce the service life of the power cord.

Attention
When the machine is abnormal or malfunctioning, turn off the power switch. Failure to do so may cause machine failure.
◆ Please pay attention to drainage in places where the temperature be lower than 0 °C. Otherwise, water leakage may be caused.
◆ Please carefully dry the moisture in the feed basin and freezing make it dry, cover the feed basin cover and store it.
◆ Please disassemble the parts to the smallest unit and keep them clean place, which will also help to prolong the service life of the pa
Product Summary
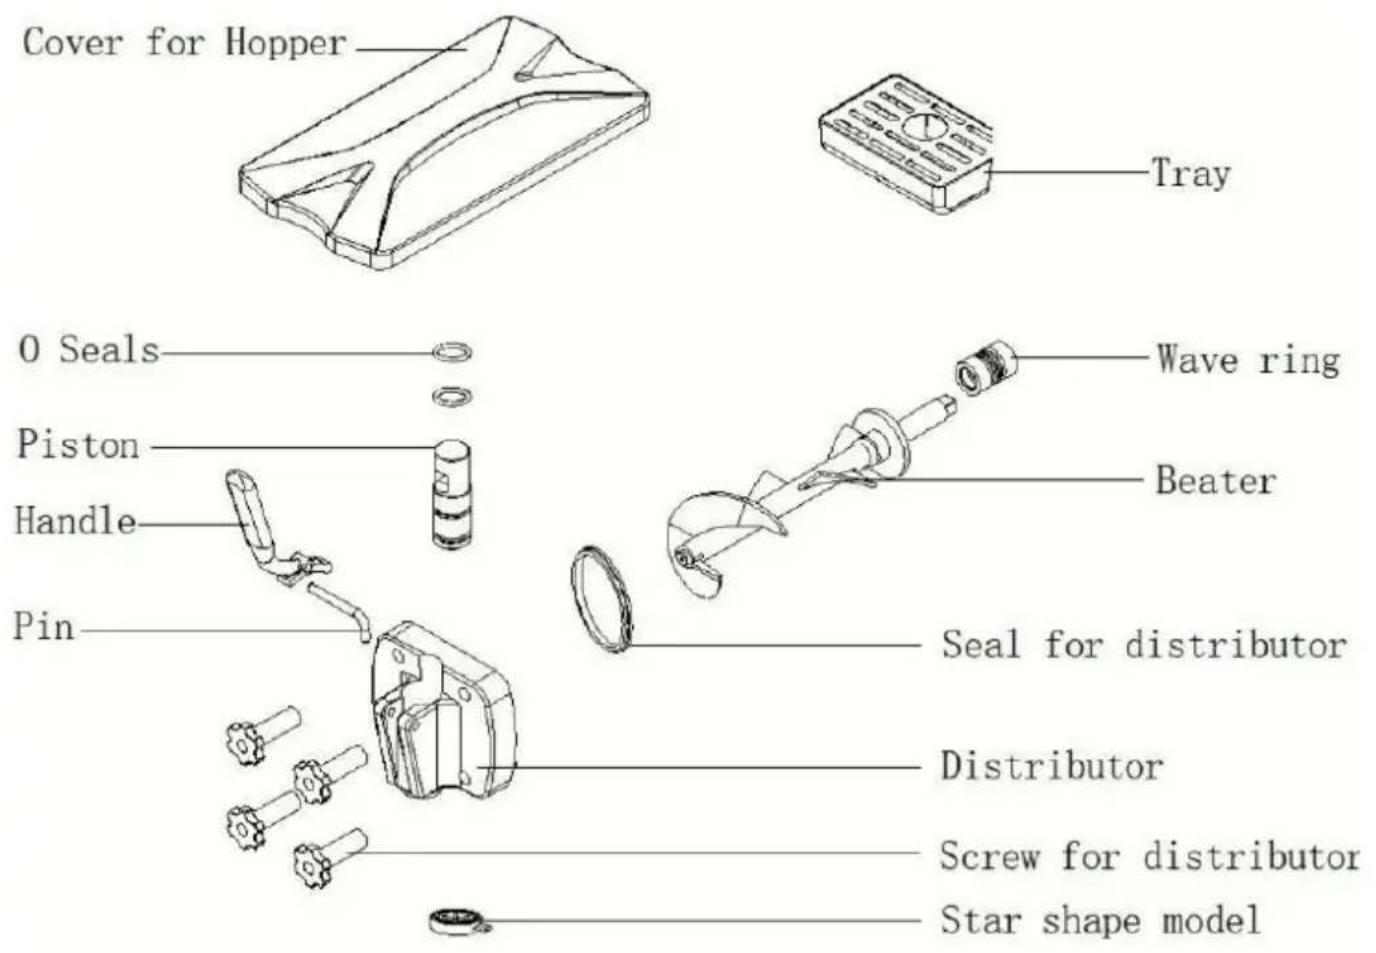
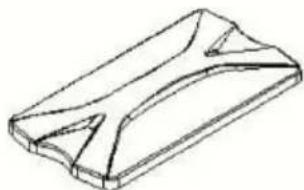
Product diagram:
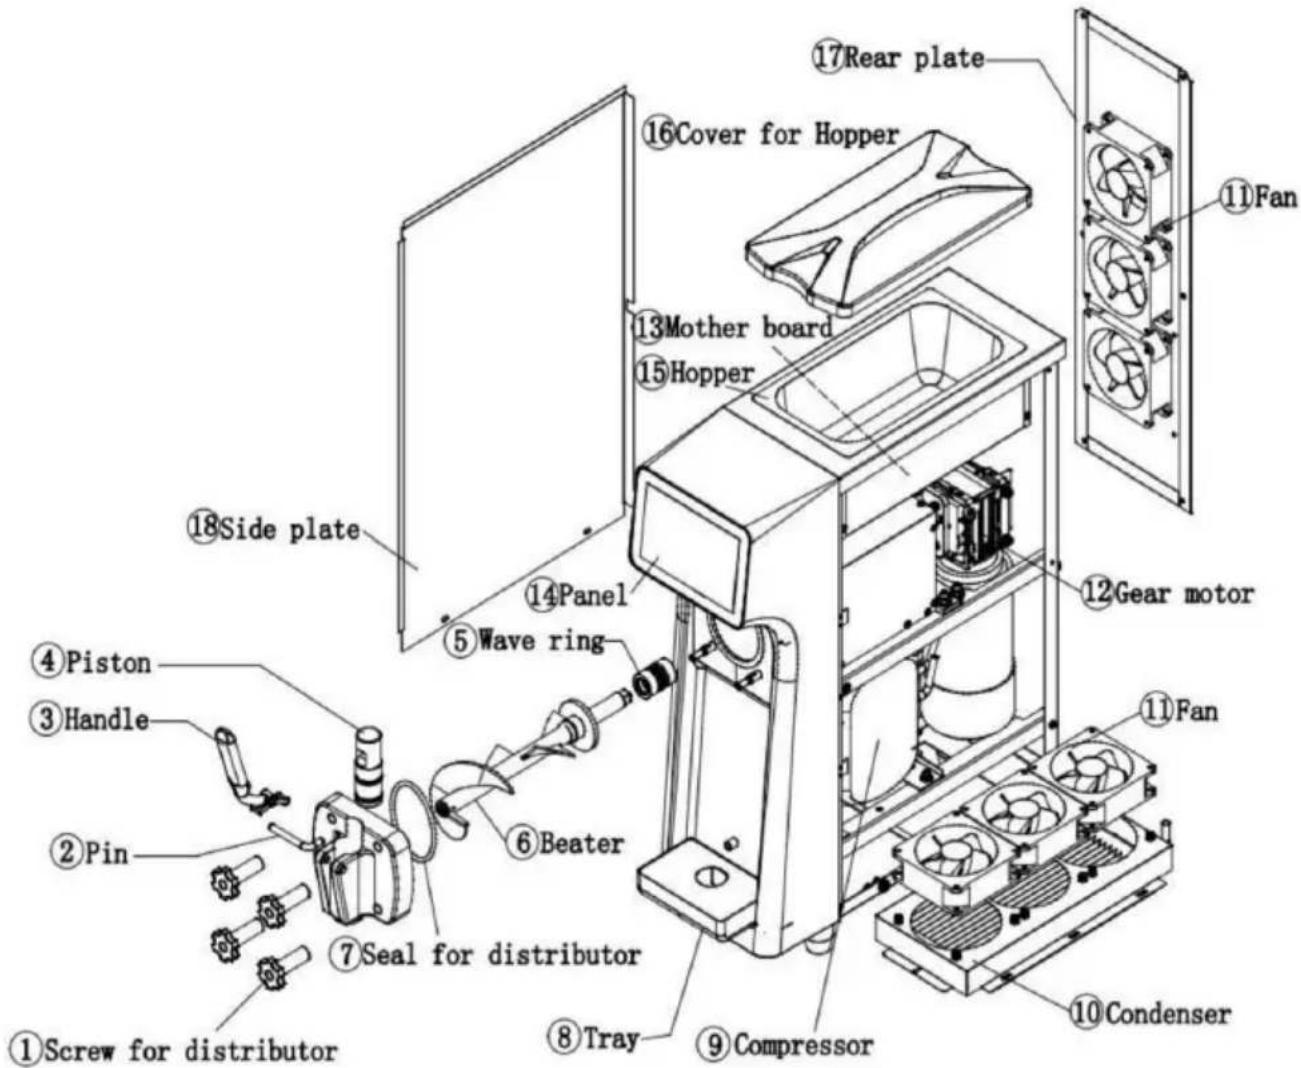
Product accessories:
Torx nut X1, bellows X1, plunger O-ring X2, intake check valve X2, petrolatum X1 ,manual ,One warranty card
Technical parameters:
Specific technical parameters and refrigerant performance shall be subject to nameplate.
The pictures in the manual are for reference only, please refer to the Product.
Electrical schematic diagram:
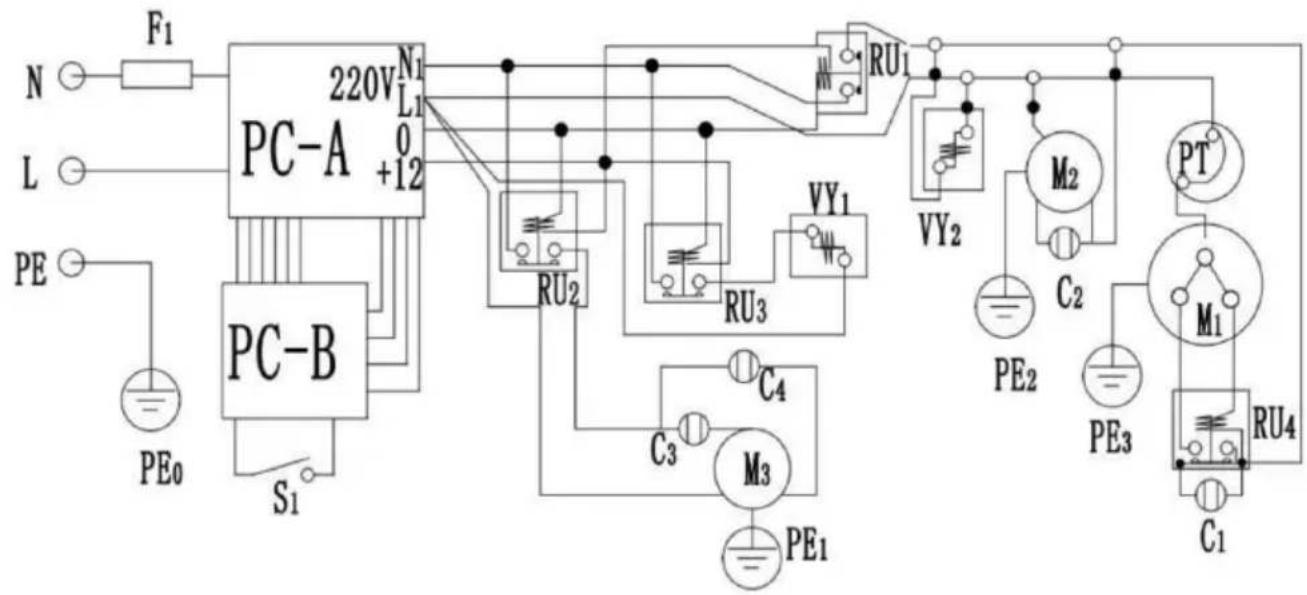
PC-A、PC-B: Motherboard;
YV1、YV2:Solenoid valve;
C1、C2、C3、C4:Capacitor;
M1-Compressor;
S1:Travel switch;
PT: Thermal protector.
M2-Fan motor;
F1:Fuse wire;
M3-Agitating motor;
Installation instructions
Please refer to "Cleaning Method of Parts" to clean the parts before installation
- Cut and disassemble the packing straps and wooden boards that in the cartons, Remove the carton and foam board and remove the packaging bag to check whether the appearance of the machine is damaged. (Note: During handling the machine, the machine shall not tilted more than 45 °)
- Open the cylinder cover and check whether the accessories are complete according to the packing list.
- Disassemble the upper and lower panels at the rear of the machi check whether the internal motor, belt, compressor and other component are loose due to transportation, and contact the supplier in time to say any abnormality.(Note: When installing or removing each panel, use an Allen wrench or Phillips screwdriver to insert into the screw slot on t panel, apply a little pressure and rotate to loosen or lock)
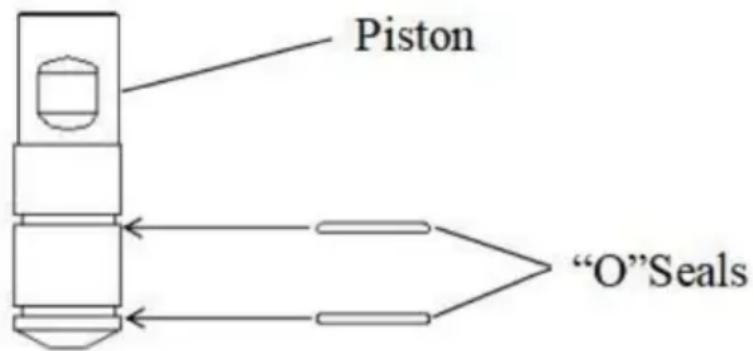
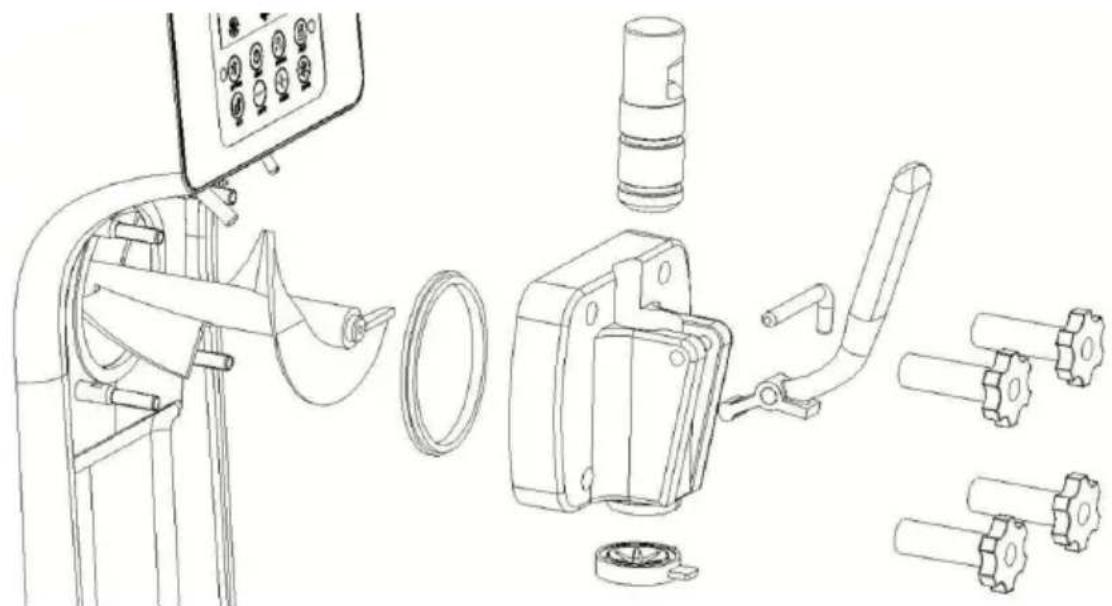
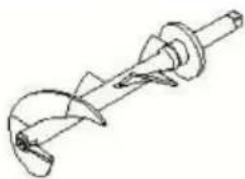
Assembly of valve stem:
Install the O-ring on the valve stem and assemble as shown. When assembling the sealing ring, you can apply a little food lubricant to the of the sealing ring.
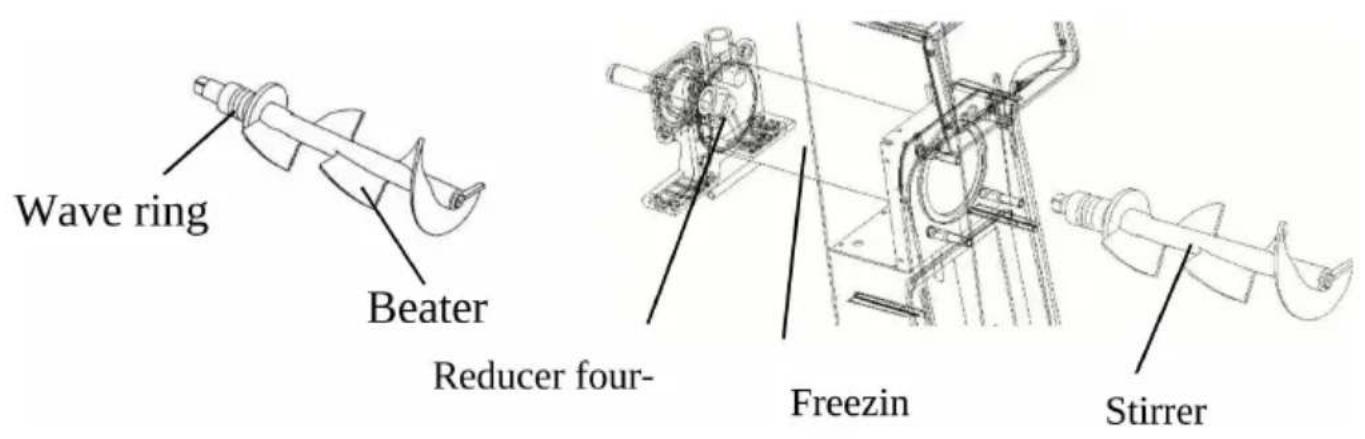
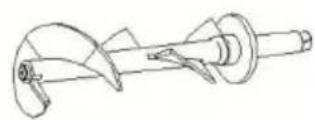
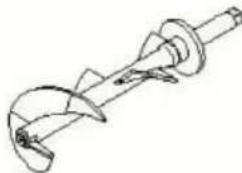
Assembly of stirrer:
- Apply lubricant to both ends of the wavy seal ring.
- The corrugated seal ring can be directly installed at the rear end stirrer.
- Insert the stirrer into the freezer cylinder, and slowly rotate the sti square head into the square interface of the reducer by hand.
Assembly of outlet valve:
- The valve stem is installed in the chute corresponding to the liquid valve.
The star-shaped molding head is installed in the slot below the chute can apply a little food-grade lubricant to the front end of the valve s when installing the valve stem). - After the stem is installed, insert the boss at the front end of the into the stem groove. Then pass the handle cross pin along with the through the cross pin hole on the outlet valve.
- Just install the D-type sealing ring of the liquid outlet valve in the corresponding groove.
- Lifting the beating ejector rod, passing the liquid discharge valve the four.
Fixing bolts, and tightening the four fixing plastic screws of the liquid discharge valve diagonally evenly.
natural_image
Technical line drawing of mechanical components including a control panel, coiled spring, and various gears (no text or symbols)- Warning: Please turn off the control power switch when assembling and disassembling components. Otherwise, you may accidentally touch the start.
2.Moving the machine caused injuries.
-
Please disinfect your hands and fingers during operation.
-
Otherwise, it may endanger human health. Always ensure that the control power switch is turned off.
-
Verify that the display is off.
-
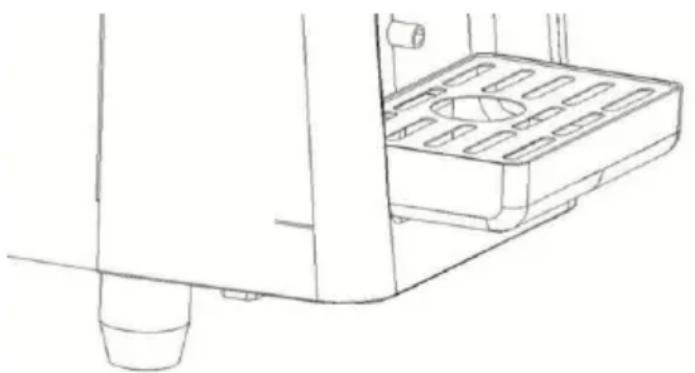
Clip the slot on the back of the water receiving box on the fixing the water receiving box
natural_image
Technical line drawing of a mechanical assembly with no visible text or symbolsOperational guidelines
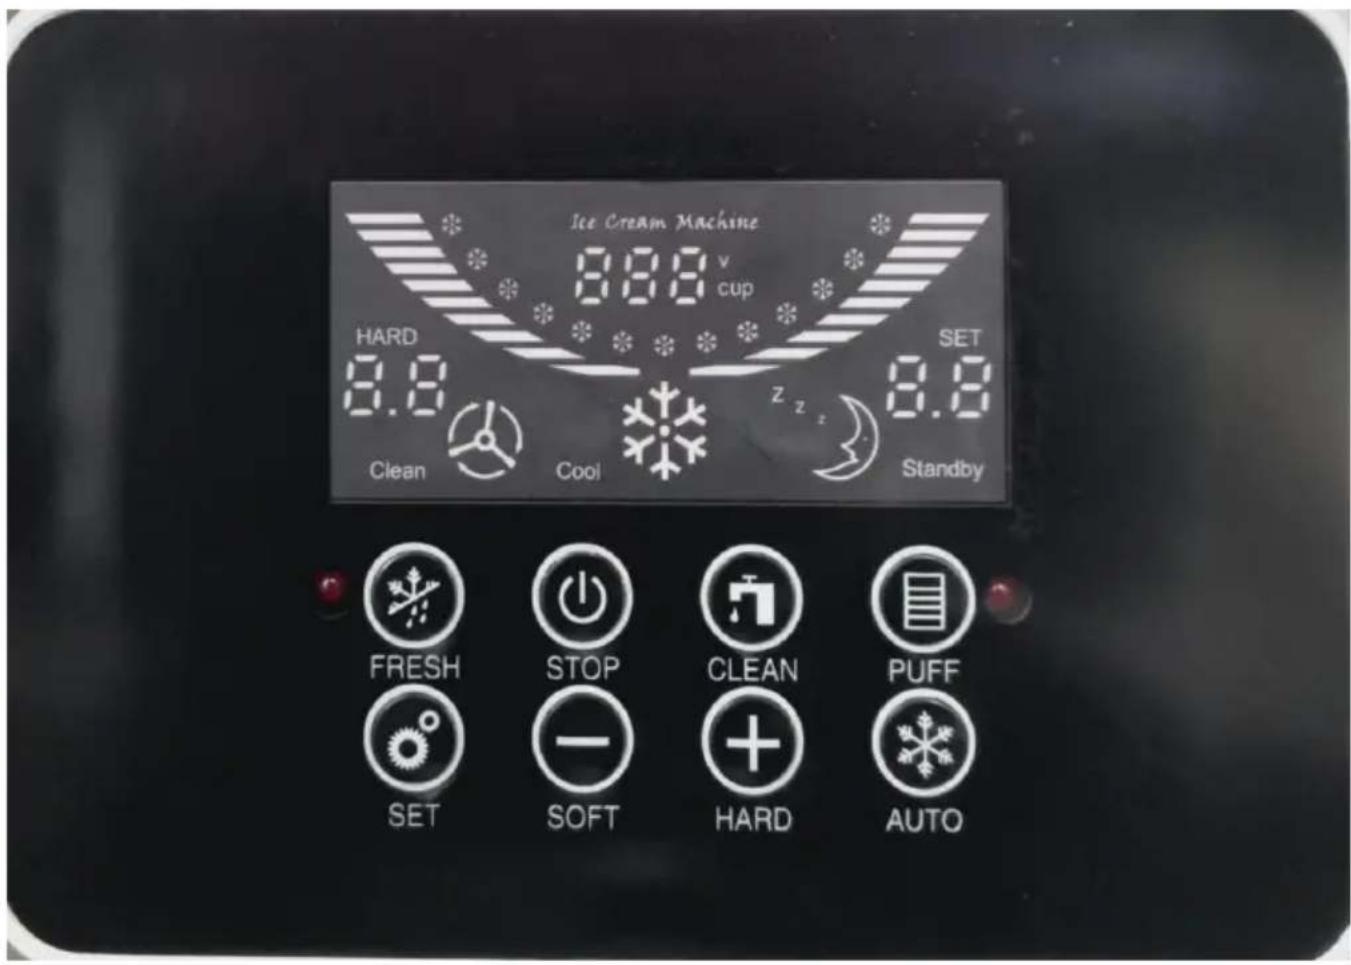
LCD screen operation panel and function introduction
- Click AUTO to enter cooling mode, and then press AUTO to turn cooling mode.
- In refrigeration mode, click PUFF to enhance the puffing function, then click PUFF to turn off the function.
- Click FRESH to enter the FRESH-keeping mode, and then press FRESH to turn off the FRESH-keeping mode.
- Click CLEAN to enter the cleaning mode, and then press CLEAN off the cleaning mode.
- Press and hold SOFT or HARD until the SET number on the scr flashes, then click SOFT/HARD to adjust the hardness.
- Click SET, and then click SET to SET the cooling cycle stop and cycle time.
-
Press and hold SET for 10 seconds to clear the number of cups
-
Click STOP to turn off all functions.
Detailed explanation of LCD display
| Display display | Contents | |
| CLEAN |  | Indicates that the machine is in a clea state.At this time, only the stirrer in the refrigeration cylinder is rotating. Add wa to the feed basin to clean the machin Cold cylinder. |
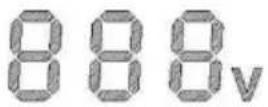 | Represents the real-time voltage status the machine. Use the correct voltage against the rated voltage on the machine nameplate. |
 | Indicates how many times this machine punched in totalPull the handle up the punching plate touch the internal micro switch once, a the micro switch will make a ticking so when touched. |
 | During normal refrigeration operation, the forming state of the material in the refrigeration cylinder of the machine is displayed. When the last ice cream is reached, it means that the material has been formed, and the machine will automatically stop if it continues to run period of time. |
 | Indicates that the machine is cooled.When the last ice cream is reached, i means that the material has been form and the machine will automatically stop continues to run for a period of time. |
 | Indicates that the machine is in the preservation state.At this time, the refrigeration cylinder v cooled and kept fresh. |
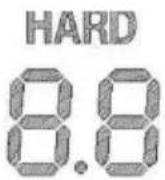 | Indicates ice cream hardness.The greater the hardness value, the ha the ice cream, and the smaller the ha value, the softer the ice cream. |
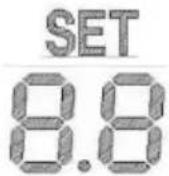 | Indicates the setting hardness paramete setting status.The greater the hardness value, the ha the ice cream, and the smaller the ha value, the softer the ice cream. |
Touch screen operation panel and function introduction

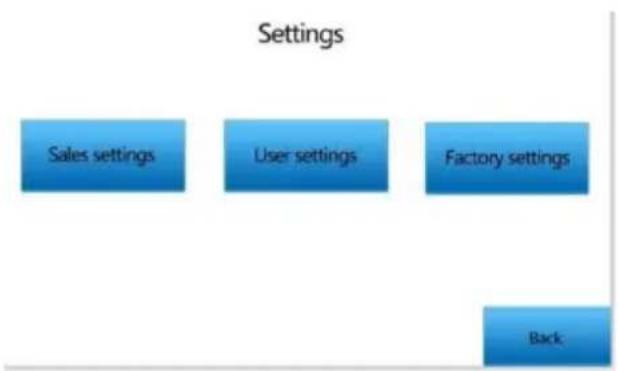
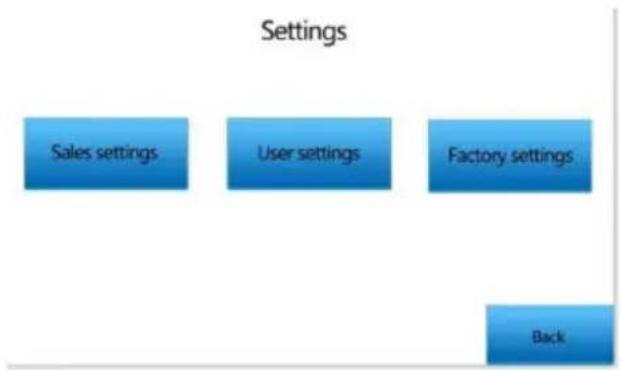
Main interface
flowchart
graph TD
    A["Sales settings"] --> B["User settings"]
    B --> C["Factory settings"]
    D["Back"]
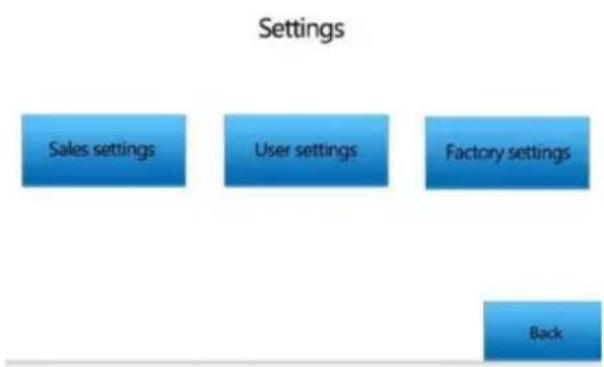
Settings interface
- The boot interface is shown in the figure "Main Interface". The lower corner shows that the box is short of materials, and the red icon fla 2. After feeding, the red icon turns white, click "Set" on the main inte jump to "Setting Interface", and click "Back" to return to the main int

Cleaning interface

Refrigeration interface
- Click "Wash" on the main interface to enter the cleaning interface.
- Click the "Auto" system on the main interface to enter the refrigeration
interface and then press the "Stop" key to return to the standby state. 3.Enter cycle restart state after refrigeration is finished.

Fresh-keeping interface
Click "Fresh" on the main interface to enter the Fresh-keeping interface and then press the "Stop" key to return to the standby state.
Operation process
1. Raw material preparation
The ice cream machine must use special ice cream powder or slurry materials. When using ice cream powder, please blend it strictly accor to the blending ratio on the ice cream packaging bag (generally, 1 kg ingredient is blended with 2.5 \~ 3 kg of purified water). Please stir adding water, let the water and ice cream powder mix well, and let for 5 minutes.
2. Raw material filling
Note: Before adding raw materials, try to ensure that there is no res moisture in the freezer cylinder during cleaning
- Please pour about 3 liters of ice cream raw materials into the tub press the cleaning button.
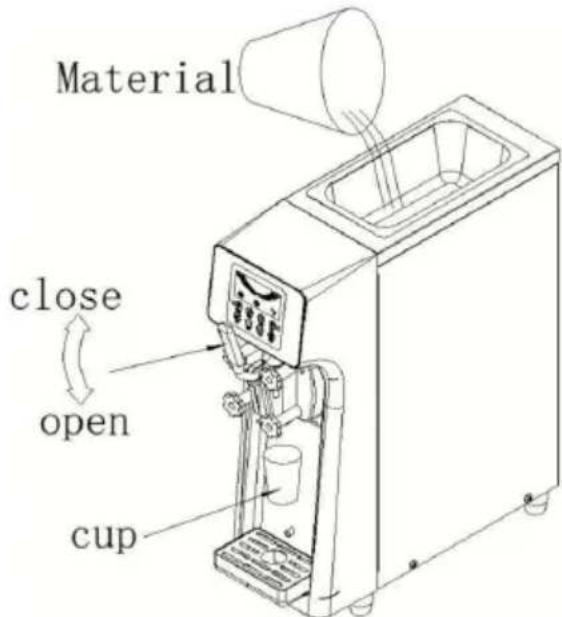
-
Pull down the handle (the valve stem rises), and water will flow discharge port. Until the raw materials flow out, please pull the hand upward and the valve stem will slide down.
-
Please confirm whether the plastic screw fixing the outlet valve is
User Notes
-
Please be sure to confirm whether the fixing screw of the outlet va loose. If it is loose, it may cause leakage of raw materials. Please (material basin properly.
-
Please do not remove the handle during cooling. Otherwise, the raw materials may leak out from the discharge port of the plastic head. E to turn off the power switch when the unit is not in use.
3. Parameter settings
LCD Screen Setup
- In the standby state, press and hold the "up key or down key" for second, and the digital tube at the gear flashes and displays "", this is the hardness adjustment state, and then click the" plus key or mir to adjust the hardness of the ice cream. The greater the hardness of the harder the ice cream, and the softer the ice cream is when the hardness value is small. If the hardness is adjusted too much and the cream is too hard, sometimes the ingredients may not come out. Please
careful.
- Press and hold the "SET" button for 10 seconds to clear the cup value.
- Click the "SET" key, and then click "SET" to adjust the refrigeration interval. After the machine refrigeration automatically stops, stop the corresponding time and start the refrigeration again.
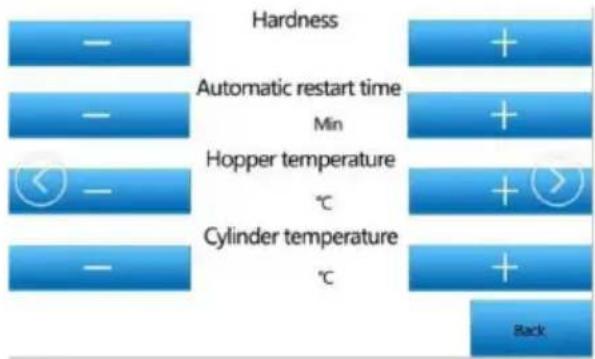
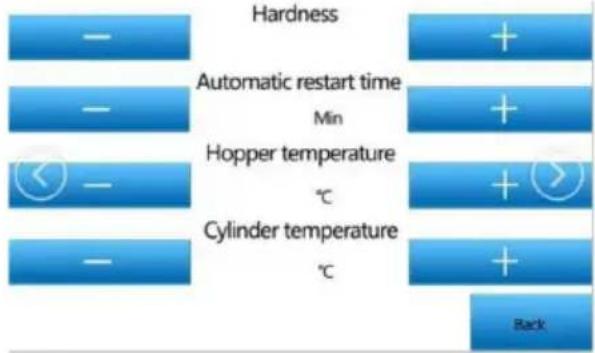
Touch screen settings

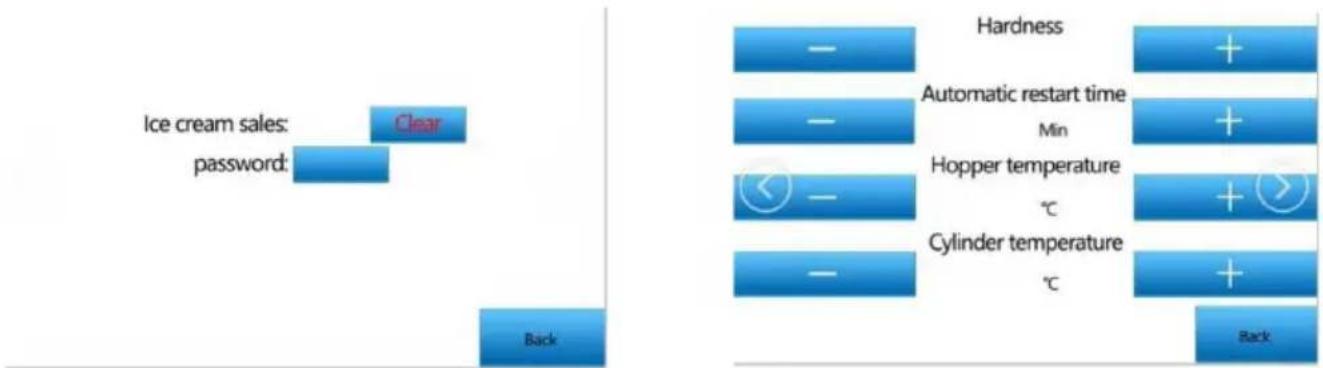
Click "Set" on the main interface and jump to "Settings"
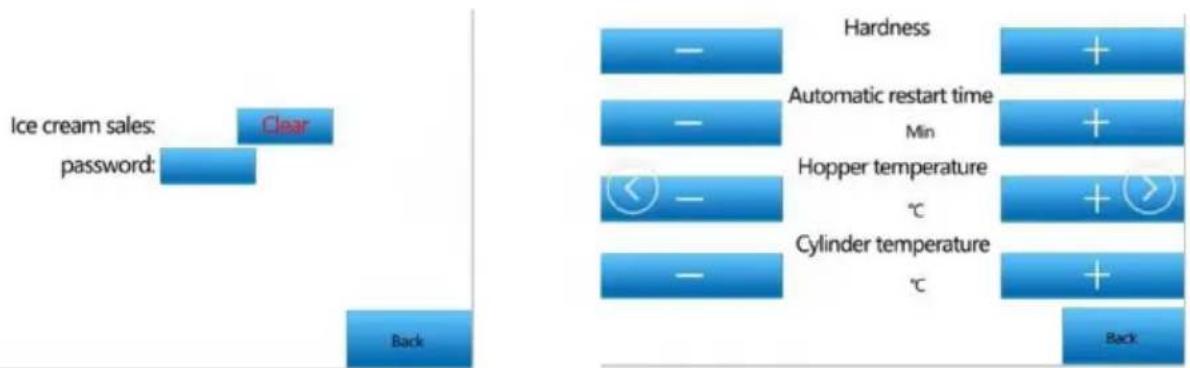
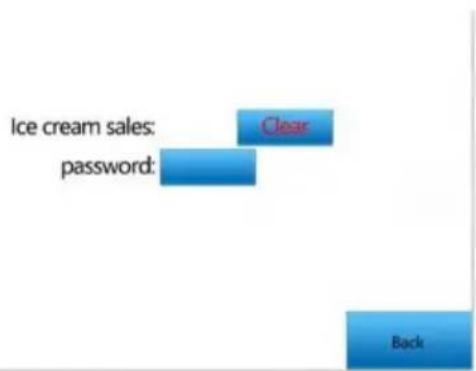
Click "Sales settings": default password 8888;
Clear setting of jump cup number
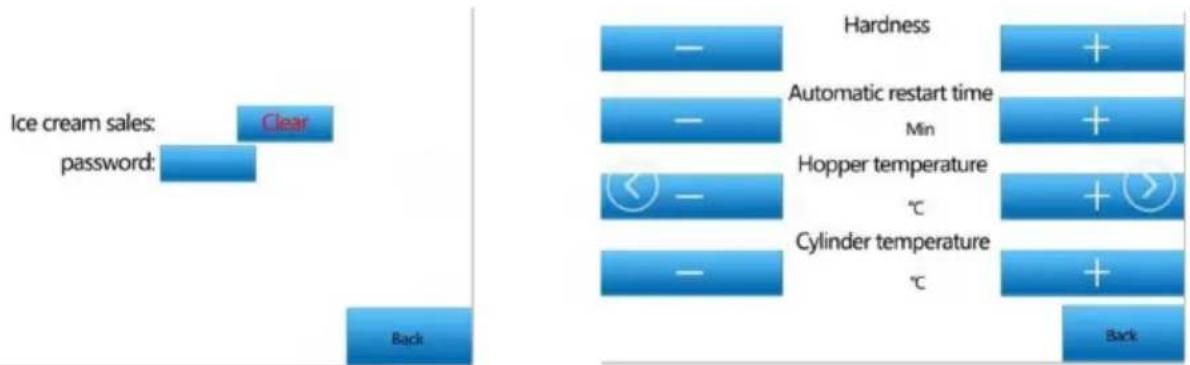
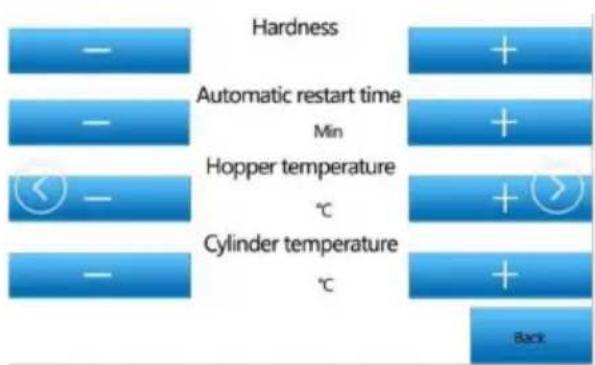
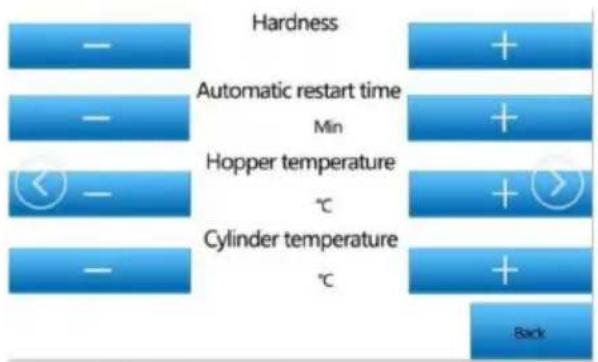
Click "User settings": You can change the parameters in the above figure
Click "Clear" to Clear the number of cups.
Click "Back" to return;
Click the blue box behind "password" to modify the clear password.
Click "Back" to return.
"Hardness": Hardness regulation.
"Automatic restart time": refrigeration restart time adjustment.
"Hopper temperature": trough preservation/precooling temperature adjustment.
"Cylinder temperature": refrigeration cylinder preservation temperature adjustment.
4. Make ice cream
-
Connect the machine to the power supply, turn on the power switch the machine, fill the tank with drinking water (boiling water can be used when using the machine for the first time, which can play a sterilizing role), and press the cleaning button to work for about two minutes. The machine is cleaned, directly press the handle to remove the water Drain, repeatedly clean the machine 2-3 times until the water discharge from the discharge port is clean.
-
At present, the market generally uses ice cream milk slurry (which be used directly) or ice cream powder added with water. If ice cream powder is used, please strictly blend according to the blending ratio of ice cream powder packaging bag (the general blending ratio is 1Kg of powder with 2.5-3 kg of purified water), please stir evenly after adding water, let the water and ice cream powder fully mix.
And let it sit for about 30 minutes. Note that please add water strict according to the mixing ratio of ice cream powder. It is very important and stand still after mixing, which will directly affect the output and to ice cream.
- Make sure that the cleaning water is thoroughly drained again, and the prepared ice cream ingredients into the ingredient basin at the to the ice cream machine(Note that the material cannot agglomerate). After pressing the cleaning key (the ice cream machine stirs the ice cream material again to make the raw materials more uniform) for about 1 press the refrigeration key to enter the refrigeration mode (pay attention) ensure that the two cylinders are full under any circumstances, and the minimum should not be lower than the position of the discharge port,
otherwise it will cause the machine to lack material alarm and even damage the machine).
During the production process, the display screen displays the refrigeration mode. Generally, the molding ratio reaches more than 80%. The ice has been molded and can be beaten. When the molding ratio is 100 machine will automatically stop.
Make ice cream: Take a cone or cup, put it under the discharge poplastic head, press the handle with your hand, and rotate the cone v hand of the cone at the same time.
Push back the handle after the ice cream is finished.
5. Preservation of remaining materials
- If there are still unused raw materials in the material basin after the machine is used, it is recommended to take out the remaining material and put them in the freezer or refrigerator for storage. You can also the "Fresh" button after use to start the Fresh-keeping function of the machine.
Cleaning and maintenance
Cleaning method of parts
When used for the first time or not used for a long time, please clear parts before using
Please use food detergent and cleaning brush to clean the disassembled parts.
Note:
- Do not damage or lose parts during operation.
- Do not use hot water or dishwasher to clean resin parts, otherwise cause deformation.
- Please do not soak the parts in detergent or sterilizing solution fo than 30 minutes.
otherwise it may cause deterioration.
Second, especially the following parts that are easy to accumulate res materials, please clean them carefully with a soft bristle brush.
Note:
- Some parts have sharp edges, please be careful not to scratch your hands.
- Use a cleaning brush to carefully clean the mixer, including the m part.
Cleaning method of ice
- Please clean the parts with food detergent. Please read "Cleaning Methods of Parts" carefully for details.
- Please install the cleaned parts on the ice cream machine. Please the "Installation Instructions" carefully for details. 3. Please turn on the cream machine control power switch. At this time, the ice cream mac enters the standby state of the ice cream machine.
Note:
After completion of assembly, do not press any switch without water materials added to the bowl, otherwise it may cause machine failure. 4. Please inject an appropriate amount of food detergent into the basin then inject an appropriate amount of water into the basin, press the cleaning button, and the mixer starts to rotate, Wash for 3 5 minutes

natural_image
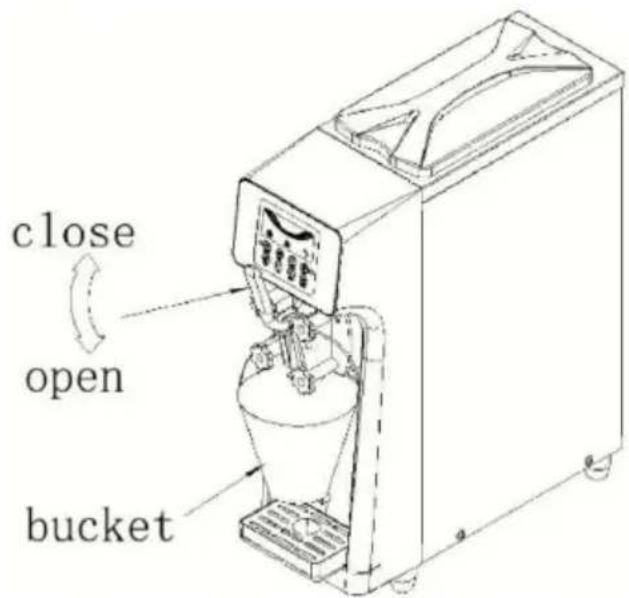
Technical line drawing of a mechanical assembly with no visible text or symbols- Please drain the cleaning water. After cleaning for 3 to 5 minutes the handle down, then catch the water with a bucket, and repeat the cleaning for 2 to 4 times. (Do not use the water from the previous to wash again).
Caution: Do not place the bucket on the water receiving box, it may damage the water receiving box.
Important matters about ice:
1. Liquid outlet valve discharge port.
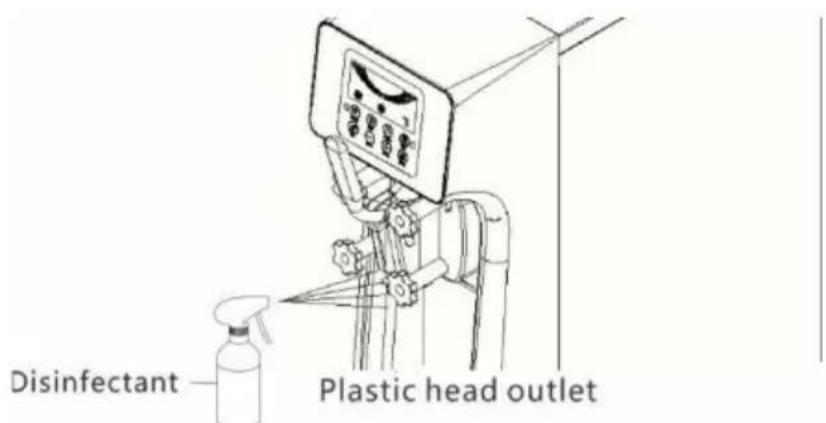
Please carefully wipe the ice cream adhered to the discharge port of plastic head clean and fully sterilize it with disinfectant.
-
Please spray disinfectant to the discharge port of the plastic head times to wash off the adhered ice cream.
-
Please wipe the ice cream adhered to the discharge port of the head clean with a paper towel sprinkled with disinfectant.
-
Visually verify whether there is any residual material in the discharge port of the plastic head, and if so, repeat all previous cleaning operation
-
Finally, please spray disinfectant to the discharge port of the plastic 3-5 times again.
2. Ice cream machine body
- Please be sure to disassemble and clean every two weeks. When disassembling and cleaning, please discard all the raw materials left in the machine.
- After disassembly and cleaning, assemble the accessories and wash them with hot water for five minutes to ensure sterilization.
- Please wipe it with a dry and soft cloth. If the contamination is I add food detergent to warm water and wipe the remaining detergent ingredients clean after wiping the dirt clean.
Note:
- Please do not use polishing powder, gasoline, tiana water, hot water. Otherwise, it will damage the outer packaging of the machine.
- Please absolutely do not spill water directly on the machine. Other leakage or accident may be caused
- Please check 1 \~ 2 times a month to confirm whether the power damaged or damaged
3. Raw materials
- Please spray disinfectant on the opening part of the raw material and the scissors edge.
- Please wipe clean the disinfectant on the scissors edge and raw m bag with paper towels.

4. Consumable parts
- There may be scars invisible to the naked eye on the sealing ring, may also cause problems such as "ice cream leakage" and "poor
sterilization". Therefore, please take three months as the approximate replacement period, and please replace the new product regularly. Eve within the replacement period, if there are problems such as scars, p replace them in time.
-
If the stirrer is worn too much, the material in the refrigeration cylinder be softer and hard, and some materials will not be produced. So ple take six months as an approximate period.
-
Replacement period, please replace new products regularly.
-
If severe wear occurs during the replacement period, please replace time.


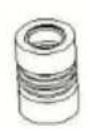
0 Seals
D Seals
Wave ring
Beater
Maintenance of ice cream machine:
-
Please turn off the control power switch during maintenance. Otherwise you may, accidentally touch the switch and cause the machine to state cause personal injury
-
Do not spill water directly on the machine. Otherwise, electric shock be caused.
-
Do not use the power cord if it is damaged. Otherwise, the short may cause fire or electricshock.
About drain pipe
The drain pipe comes out from above the water receiving box. If raw materials are discharged from the drain pipe, it may be that the corr sealing ring needs to be replaced, so please replace it yourself. If you any questions, please contact the sales store or repair personnel when you purchased the product.
1. Maintenance of external surface
Please wipe with a dry soft cloth. If the contamination is heavy, add detergent to warm water and wipe the remaining detergent ingredients clean after wiping the dirt clean.
The lower part and base of this machine are also easily contaminated, please clean them.
User Notes
Please do not use polishing powder, gasoline,tiana water, hot water.
Otherwise, it will damage the outer packaging of the machine.
Please absolutely do not spill water directly on the machine. Otherwise leakage or accident may be caused.
Please check 1 \~ 2 times a month to confirm whether the power cc damaged or broken.
2. Consumable parts
Faults such as "ice cream is too soft", "ice cream machine penetrates" "cleaning is not thorough enough" may be caused by consumable parts. Therefore, please replace new products regularly according to the replacement period in the table below.
| Part Name | Required quantity | Replacement period |
| Gasket Kit | Three months | |
| Plunger O-ring | 2 | |
| DischargeValve D-ring | 2 | |
| Corrugated sealing ring | 1 |
3. Clean the condenser
After working for a period of time, the condenser will be covered with which will affect heat dissipation, and the cooling effect will become v (manifested as: the output of ice cream decreases or is difficult to fo the same time). Please clean it once every three months (if the use
environment is poor, please clean it once a month). It's best to ask professional cleaner to clean it. Turn off the power before cleaning, a careful not to damage the fins of the condenser.

natural_image
Technical line drawing of a rectangular electronic component with three circular cutouts and mounting holes (no text or symbols)Precautions for long-term non to use:
-
When not in use for a long time, unplug the power plug. Failure to may reduce the service life of the power cord.
-
When not in use for a long time, should the machine body be covered with plastic film? Failure to do so may cause the machine to be affected by dust and affect the next use.
-
Please pay attention to drainage in places where the temperature m be lower than 0 . ℃
-
Otherwise, water leakage may be caused. When not in use for a time, please implement the following tasks
-
Please carefully dry the moisture in the feeding basin and freezing cylinder, let them dry and then cover the feeding basin cover for sto
-
Please disassemble the parts to the smallest unit and keep them in clean place, which will also help to prolong the service life of the pa
Precautions before entrusting maintenance:
When the machine is abnormal or malfunctioning, turn off the power failure to do so may cause machine failure. Non-maintenance personnel are not allowed to disassemble and repair. Otherwise, it may cause machine failure. The power cord must be repaired by a professional in damaged.
If any abnormality occurs during use, please stop using it and investigate common troubleshooting instructions.
Safety precautions
FCC Warning
This device complies with Part 15 of the FCC Rules.Operation is sub the following two conditions:
(1) This device may not cause harmful interference.
(2) this device must accept any interference received, including interference that may cause undesired operation.
Troubleshooting instructions
Common faults and treatment
| Serial number | Fault phenomenon | Causes | Exclusion Method |
| 1 | The machine does not sta | 1. The power cord not connected properly | 1. Check the power cord and connect |
| 2. The neutral line not connected | 2. Check the neutral line and connect i | ||
| 3. The control pow switch is not turned | 3. Turn on the con power switch | ||
| 4. Control power switch connection problem | 4. Check connectors and wiring | ||
| 5. There is a prob with the PCB boar | 5. Replace PCB board | ||
| 2 | Cleaning function not working | 1. Loose wiring | 1. Reconnect the broken part |
| 2. The motor or capacitor is broken | 2. Repair or replace the motor or capaci | ||
| 3. The contactor is broken | 3. Replace the contactor | ||
| 3 | Compressor not running | 1. Low voltage | 1. Check the supp voltage |
| 2. The contactor is broken | 2. Replace the contactor | ||
| 3. There is a prob with the PCB boar | 3. Replace PCB board | ||
| 4. Capacitor failure (220V series) | 4. Replace the capacitor | ||
| 5. Compressor is broken | 5. Replace the compressor | ||
| 4 | Compressor not running | 1. Function switch wiring is loose | 1. Reconnect the function switch connecting wire |
| 2. There is a prob with the PCB boar | 2. Replace PCB board | ||
| 5 | No refrigeration | 1. Refrigerant Leakage | 1. Fix the leak po and vacuum it to charge the refrigerator |
| 2. Condenser blockage | 2. Clean the condenser | ||
| 3. The fan does rotate | 3. Repair or replac the fan | ||
| 6 | Can't make ice cream | 1. No material in t cylinder | 1. Add slurry in t cylinder |
| 2. The blanking expansion tube is blocked | 2. Pull out the expansion tube and clean it up | ||
| 3. The slurry ratio wrong and too thi | 3. Reconstitute the qualified slurry | ||
| 4. The panel travel switch is damaged wired open circuit | 4. Reconnect the wiring or replace the travel switch | ||
| 5. There is a prob with the reducer | 5. Repair or replac the reducer | ||
| 8 | Poor puffing | 1. The expansion tu is not inserted | 1. Re-insert the bulking tube |
| 2. No puffing switch turned on | 2. Turn on the expansion switch | ||
| 9 | The ice cream is too soft | 1. The slurry ratio wrong | 1. Reconstitute the qualified slurry |
| 2. Improper hardnes setting | 2. Reset the hardness | ||
| 3. The motor curre is large and there short circuit phenomenon | 3. Repair or replac the motor | ||
| 10 | The ice cream is too hard | 1. Too much water the ingredients | 1. Reconstitute the qualified slurry |
| 2. Improper hardnes setting | 2. Reset the hardness | ||
| 11 | Material leakage | 1. Discharge valve leakage | 1. Replace the sealing ring of the discharge valve |
| 2. Leakage at the valve stem | 2. Replace the valve stem seal | ||
| 3. There is material leakage at the leakage place | 3. Replace the sealing ring of the outlet valve | ||
| 4. The seal ring of stirring shaft is brok | 4. Replace the sealing ring | ||
| 12 | Compressor stops after cake is made Machine, motor does not stop | 1. The travel switch not reset | 1. Repair or replace the travel switch |
| 13 | The motor does not rotate when making cakes. No cake | 1. Travel switch is damaged | 1. Repair or replace the travel switch |
| 14 | Stirring shaft cracking | Doesn't happen under normal circumstances, not positiveThe usual situation is follows: | Replacement of stirring shaft |
| 1. The slurry contains lot of water and free the tank | |||
| 2. Press the refrigeration button by mistake during cleanin and bring water Refrigeration | |||
| 3. When one cylinder has material and the other cylinder has no material Refrigeration | |||
| 4. Empty cylinder refrigeration | |||
| 5. Use one jar too n when making ice crea | |||
| 6. Pour the hot slur into the cylinder and cool it quickly | |||
| 7. Refrigeration with material when the mo direction is reversed |
LCD screen fault display
| Serial number | Fault phenomenon | Causes | Exclusion Method |
| 1 | LCD screen does not displa | 1. There is a prob with PCB board | 1. Replace PCB board |
| 2. Loose plug | 2. Check the wirir plug | ||
| 2 | LCD missing words | 1. LCD damage | 1. Replace the monitor |
| 3 | "CL" alarm | Trough is short of material | Please add materia to the chute immediately |
| 4 | "UH" alarm | Over-voltage alarm | Adjust the voltage increase 6KW Voltage regulator |
| 5 | "UL" alarm | Low voltage alarm | Adjust the voltage increase 6KW Voltage regulator |
| 6 | "RL" alarm | Temperature sensor open circuit fault | Rewire or replace the temperature transmission Sensor |
| 7 | "RH" alarm | Temperature sensor short circuit fault | Rewire Replacement Temperature Senso Device |
| 8 | "JJ" alarm | 1. Mixing cylinder a freezing cylinder | Reduce the proportion or gear water |
| 2. Reducer does n rotate | Reducer damage | ||
| 3. The motor does rotate or the moto idles slowly | Call the service number or send mailParts are handled by professionals |
Touch screen fault display
| Serial number | Fault phenomenon | Causes | Exclusion Method |
| 1 | Handle malfunction | Travel switch not reset or travel or Close damage | Reset handle or replace travel swit |
| 2 | No speed signa | 1. Speed measurin magnet displacement or reverse installation | The reset magnet position causes the speed switch;The light is always or |
| 2. The speed measuring switch wire is loose or disconnected | Check the wiring plug | ||
| 3. The speed measuring switch damaged | Replace the speed switch | ||
| 4. The reduction motor does not rotate | Check motor wiring plugs or replace them Geared moto | ||
| 3 | Motor belt slippin | 1. Mixing cylinder and freezing cylinder | Reduce the proportion or gear water |
| 2. Reducer does r rotate | Reducer damage | ||
| 3. The motor doe not rotate or the motor is idling Speed slow | Call service or se an email Handled a professional | ||
| 4 | Refrigeration timeout | 1. Refrigerant Leakage | 1. Repair the leakage point and vacuum fill Refrigerant |
| 2. Condenser blockage | 2. Clean the condenser | ||
| 3. The fan does rotate | 3. Repair or repla the fan | ||
| 5 | High voltage protection | Over-voltage alarm | Adjust the voltage increase 6KW to stabilize Compressor |
| 6 | Low voltage protection | Low voltage alarm | Adjust the voltage increase 6KW to stabilize Compressor |
Manufacturer: Shanghaimuxinmuyeyouxiangongsi
Address: Shuangchenglu 803nong11hao1602A-1609shi, baoshanqu, shanghai 200000 CN.
Imported to AUS: SIHAO PTY LTD. 1 ROKEVA STREETEASTWOOD NSW 2122 Australia
Imported to USA: Sanven Technology Ltd. Suite 250, 9166 Anaheim Place, Rancho Cucamonga, CA 91730
| UK | REP |
YH CONSULTING LIMITED. C/O YH Consultin Limited Office 147, Centurion House, London Road, Staines-upon-Thames, Surrey, TW18 4A>
| EC | REP |
Affordable. Reliable. Home Improvement.
MACHINE À GLACE
MODÈLE: BQL-9200ST / BQL-9200STA
MODÈLE: BQL-9200ST / BQL-9200STA
natural_image
Line drawings of two industrial machines with control panel and piping (no text or symbols)natural_image
Technical line drawing of mechanical components including a control panel, wheel assembly, and multiple gears (no text or labels)natural_image
Technical line drawing of a mechanical component with no visible text or symbolsMain interface

flowchart
graph TD
    A["Sales settings"] --> B["Back"]
    C["User settings"] --> D["Back"]
    E["Factory settings"] --> F["Back"]
Settings interface
Cleaning interface

Refrigeration interface
Fresh-keeping interface
Click "Set" on the main interface and jump to "Settings"
Click "Sales settings": default password 8888;
Clear setting of jump cup number


Click "User settings": You can change the parameters in the above figure
natural_image
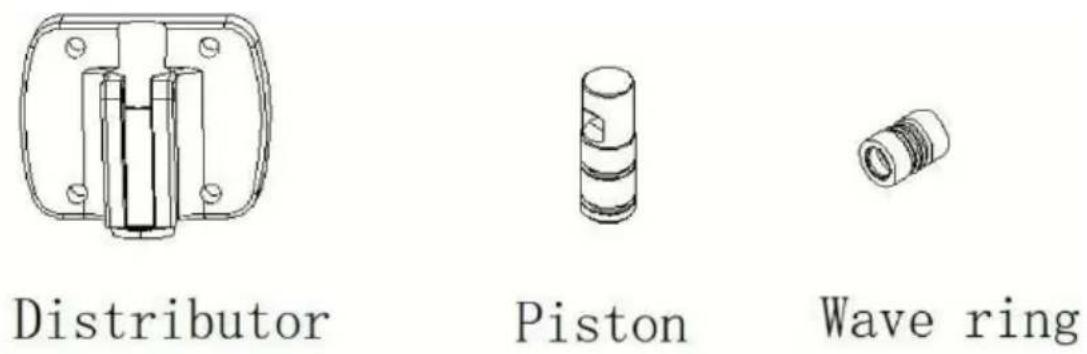
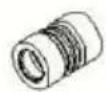
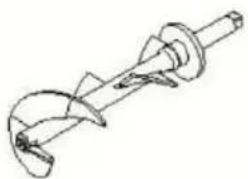
Technical line drawing of a mechanical component with mounting holes and internal channels (no text or symbols)Distributor
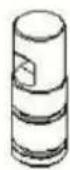
Piston

Wave ring
natural_image
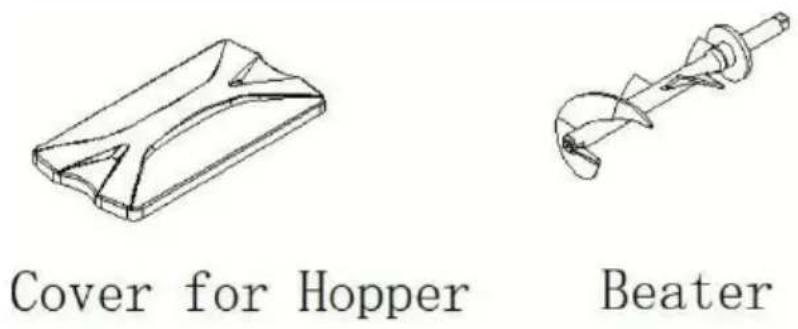
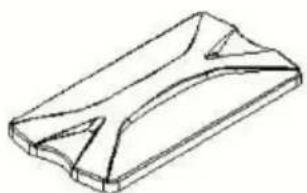
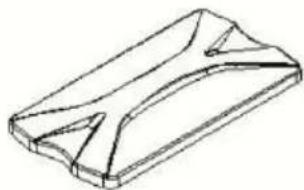
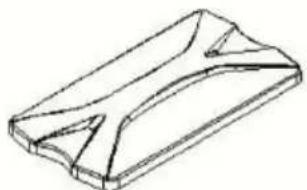
Isometric line drawing of a rectangular mechanical part with cutouts (no text or symbols)Cover for Hopper
natural_image
Technical line drawing of a mechanical component with no visible text or symbolsBeater
natural_image
Technical line drawing of a mechanical assembly with no visible text or symbols| Part Name | Required quantity | Replacement period |
| Gasket Kit | Three months | |
| Plunger O-ring | 2 | |
| DischargeValve D-ring | 2 | |
| Corrugated sealing ring | 1 |
natural_image
Technical line drawing of a rectangular industrial housing with three circular cutouts and mounting holes (no text or symbols)Lieu, Rancho Cucamonga, CA 91730
| UK | REP |
YH CONSULTING LIMITED. C/O YH Consultin Limited Office 147, Centurion House, London Road, Staines-upon-Thames, Surrey, TW18 4A>
| EC | REP |
Affordable. Reliable. Home Improvement.
EISMASCHINE
MODELL: BQL-9200ST / BQL-9200STA
MODELL: BQL-9200ST / BQL-9200STA

natural_image
Line drawings of two industrial machines with control panel and piping (no text or symbols)Produktzubehör:
Montage des Rührers:
Montage des Auslassventils:
natural_image
Technical line drawing of mechanical components including a control panel, coiled spring, and various gears (no text or symbols)Main interface

flowchart
graph TD
    A["Sales settings"] --> B["Back"]
    C["User settings"] --> D["Back"]
    E["Factory settings"] --> F["Back"]
Settings interface
Cleaning interface

Refrigeration interface
Fresh-keeping interface

flowchart
graph TD
    A["Sales settings"] --> B["User settings"]
    B --> C["Factory settings"]
    D["Back"] --> E["End"]
Click "Set" on the main interface and jump to "Settings"
Click "Sales settings": default password 8888;
Clear setting of jump cup number


Click "User settings": You can change the parameters in the above figure
natural_image
Technical line drawing of a mechanical device with internal gears and shafts (no text or symbols)natural_image
Technical line drawings of four mechanical components: washer, bolt, spring, and drill bit (no text or labels)0 Seals D Seals Wave ring Beater
| Part Name | Required quantity | Replacement period |
| Gasket Kit | Three months | |
| Plunger O-ring | 2 | |
| DischargeValve D-ring | 2 | |
| Corrugated sealing ring | 1 |
natural_image
Technical line drawing of a rectangular industrial housing with three circular cutouts and mounting holes (no text or symbols)YH CONSULTING LIMITED. C/O YH Consultin Limited Office 147, Centurion House, London Road, Staines-upon-Thames, Surrey, TW18 4A>
| EC | REP |
Affordable. Reliable. Home Improvement.
MACCHINA PER IL GELATO
MODELLO:BQL-9200ST / BQL-9200STA
MODELLO:BQL-9200ST / BQL-9200STA

natural_image
Line drawings of two industrial machines with control panel and piping (no text or symbols)natural_image
Technical line drawing of mechanical components including a control panel, gear assembly, and motor (no text or labels)natural_image
Technical line drawing of a mechanical component with no visible text or symbolsLinee guida operative
Main interface

flowchart
graph TD
    A["Sales settings"] --> B["User settings"]
    B --> C["Factory settings"]
    D["Back"] --> E["End"]
Settings interface
Cleaning interface

Refrigeration interface
Fresh-keeping interface
Click "Set" on the main interface and jump to "Settings"

flowchart
graph TD
    A["Sales settings"] --> B["User settings"]
    B --> C["Factory settings"]
    D["Back"] --> E["End"]
Click "Sales settings": default password 8888;
Clear setting of jump cup number

Click "User settings": You can change the parameters in the above figure
natural_image
Technical line drawing of a mechanical device with internal gears and shafts (no text or symbols)| Part Name | Required quantity | Replacement period |
| Gasket Kit | Three months | |
| Plunger O-ring | 2 | |
| DischargeValve D-ring | 2 | |
| Corrugated sealing ring | 1 |
natural_image
Technical line drawing of a rectangular industrial fan or vent with three circular cutouts and mounting holes (no text or symbols)YH CONSULTING LIMITED. C/O YH Consultin Limited Office 147, Centurion House, London Road, Staines-upon-Thames, Surrey, TW18 4A>
| EC | REP |
Affordable. Reliable. Home Improvement.
MÁQUINA DE HELADOS
MODELO: BQL-9200ST / BQL-9200STA
MODELO: BQL-9200ST / BQL-9200STA

natural_image
Line drawings of two industrial machines with control panel and piping (no text or symbols)natural_image
Technical line drawing of mechanical components including a control panel, gear assembly, and motor housing (no text or labels)natural_image
Technical line drawing of a mechanical component with no visible text or symbolsDirectrices operativas
Main interface

flowchart
graph TD
    A["Sales settings"] --> B["Back"]
    C["User settings"] --> D["Back"]
    E["Factory settings"] --> F["Back"]
Settings interface
Cleaning interface

Refrigeration interface
Fresh-keeping interface
Click "Set" on the main interface and jump to "Settings"
Click "Sales settings": default password 8888;
Clear setting of jump cup number
Click "User settings": You can change the parameters in the above figure
natural_image
Technical line drawing of a mechanical component with mounting holes and internal channels (no text or symbols)Distributor

Piston

Wave ring
natural_image
Line drawing of a 3D mechanical part with cutouts and flanges (no text or symbols)Cover for Hopper

natural_image
Technical line drawing of a mechanical component with no visible text or symbolsBeater
natural_image
Technical line drawing of a mechanical assembly with no visible text or symbolsnatural_image
Technical line drawings of four mechanical components: washer, coiled spring, drill bit, and end cap (no text or labels)0 Seals D Seals Wave ring Beater
| Part Name | Required quantity | Replacement period |
| Gasket Kit | Three months | |
| Plunger O-ring | 2 | |
| DischargeValve D-ring | 2 | |
| Corrugated sealing ring | 1 |
natural_image
Technical line drawing of a rectangular industrial housing with three circular cutouts and mounting holes (no text or symbols)YH CONSULTING LIMITED. C/O YH Consultin Limited Office 147, Centurion House, London Road, Staines-upon-Thames, Surrey, TW18 4A>
| EC | REP |
Affordable. Reliable. Home Improvement.
MASZYNA DO LODÓW
MODEL: BQL-9200ST / BQL-9200STA
MODEL: BQL-9200ST / BQL-9200STA

natural_image
Line drawings of two industrial machines with control panel and piping (no text or symbols)Akcesoria produktu:
Montaż mieszadła:
natural_image
Technical line drawing of mechanical components including a control panel, gear assembly, and motor (no text or symbols)natural_image
Technical line drawing of a mechanical assembly with no visible text or symbolsWytyczne operacyjne
Main interface

flowchart
graph TD
    A["Sales settings"] --> B["Back"]
    C["User settings"] --> D["Back"]
    E["Factory settings"] --> F["Back"]
Settings interface
Cleaning interface

Refrigeration interface
Fresh-keeping interface

flowchart
graph TD
    A["Sales settings"] --> B["User settings"]
    B --> C["Factory settings"]
    D["Back"] --> E["End"]
Click "Set" on the main interface and jump to "Settings"
Click "Sales settings": default password 8888;
Clear setting of jump cup number

Click "User settings": You can change the parameters in the above figure
natural_image
Technical line drawing of a mechanical component with mounting holes and internal channels (no text or symbols)Distributor
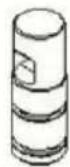
Piston

Wave ring
natural_image
Isometric line drawing of a rectangular mechanical part with cutouts (no text or symbols)Cover for Hopper
natural_image
Technical line drawing of a mechanical component with curved and straight ends (no text or symbols)Beater
natural_image
Technical line drawing of a mechanical assembly with no visible text or symbolsnatural_image
Technical line drawings of four mechanical components: washer, coiled spring, drill bit, and end cap (no text or labels)0 Seals D Seals Wave ring Beater
| Part Name | Required quantity | Replacement period |
| Gasket Kit | Three months | |
| Plunger O-ring | 2 | |
| DischargeValve D-ring | 2 | |
| Corrugated sealing ring | 1 |
natural_image
Technical line drawing of a rectangular industrial housing with three circular cutouts and mounting holes (no text or symbols)YH CONSULTING LIMITED. C/O YH Consultin Limited Office 147, Centurion House, London Road, Staines-upon-Thames, Surrey, TW18 4A>
| EC | REP |
Affordable. Reliable. Home Improvement.
IJS MACHINE
MODEL: BQL-9200ST / BQL-9200STA
MODEL: BQL-9200ST / BQL-9200STA

natural_image
Line drawings of two industrial machines with control panel and piping (no text or symbols)schok of brandongeval.
Productaccessoires:
natural_image
Technical line drawing of mechanical components including a control panel, gear assembly, and motor housing (no text or labels)natural_image
Technical line drawing of a mechanical component with no visible text or symbolsMain interface

flowchart
graph TD
    A["Sales settings"] --> B["Back"]
    C["User settings"] --> B
    D["Factory settings"] --> B
Settings interface
Cleaning interface

Refrigeration interface
Fresh-keeping interface
Click "Set" on the main interface and jump to "Settings"
Click "Sales settings": default password 8888;
Clear setting of jump cup number
Click "User settings": You can change the parameters in the above figure
natural_image
Technical line drawing of a mechanical component with mounting holes and internal channels (no text or symbols)Distributor
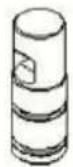
Piston
Wave ring
natural_image
Line drawing of a 3D rectangular object with internal cutouts (no text or symbols)Cover for Hopper
natural_image
Technical line drawing of a mechanical component with no visible text or symbolsBeater
natural_image
Technical line drawing of a mechanical device with internal gears and shafts (no text or symbols)natural_image
Line drawings of four different mechanical components: a washer, a ring, a threaded cylindrical part, and a drill bit (no text or symbols present)0 Seals D Seals Wave ring Beater
| Part Name | Required quantity | Replacement period |
| Gasket Kit | Three months | |
| Plunger O-ring | 2 | |
| DischargeValve D-ring | 2 | |
| Corrugated sealing ring | 1 |
3. Reinig de condensor
natural_image
Technical line drawing of a rectangular industrial component with three circular cutouts and mounting holes (no text or symbols)YH CONSULTING LIMITED. C/O YH Consultin Limited Office 147, Centurion House, London Road, Staines-upon-Thames, Surrey, TW18 4A>
| EC | REP |
Affordable. Reliable. Home Improvement.
GLASSMASKIN
MODELL: BQL-9200ST / BQL-9200STA
MODELL: BQL-9200ST / BQL-9200STA

natural_image
Line drawings of two industrial machines with control panel and piping (no text or symbols)Produkttillbehör:
Torxmutter X1, bälg X1, kolv O-ring X2, insugningsventil X2, vaselin X manuell , ett garantikort
Tekniska parametrar:
natural_image
Technical line drawing of mechanical components including a control panel, fan, and gear assembly (no text or labels)natural_image
Technical line drawing of a mechanical component with mounting base and internal cavities (no text or symbols)Main interface
flowchart
graph TD
    A["Sales settings"] --> B["Back"]
    C["User settings"] --> B
    D["Factory settings"] --> B
Settings interface
Cleaning interface

Refrigeration interface
Fresh-keeping interface
Click "Set" on the main interface and jump to "Settings"
flowchart
graph TD
    A["Sales settings"] --> B["User settings"]
    B --> C["Factory settings"]
    D["Back"] --> E["End"]
Click "Sales settings": default password 8888;
Clear setting of jump cup number
Click "User settings": You can change the parameters in the above figure
natural_image
Technical line drawing of a mechanical assembly with no visible text or symbols2. Glassmaskinens kropp
natural_image
Technical line drawings of four mechanical components: washer, ring, threaded bolt, and drill bit (no text or labels)0 Seals
D Seals
Wave ring
Beater
| Part Name | Required quantity | Replacement period |
| Gasket Kit | Three months | |
| Plunger O-ring | 2 | |
| DischargeValve D-ring | 2 | |
| Corrugated sealing ring | 1 |
natural_image
Technical line drawing of a rectangular electronic component with three circular cutouts and mounting holes (no text or symbols)YH CONSULTING LIMITED. C/O YH Consultin Limited Office 147, Centurion House, London Road, Staines-upon-Thames, Surrey, TW18 4A>
| EC | REP |