DS50Pro - Safe Vevor - Free user manual and instructions
Find the device manual for free DS50Pro Vevor in PDF.

| Product Type | Electronic Safe |
| Brand | Vevor |
| Model | DS50Pro (also compatible with 22L, 48L, 60L) |
| Dimensions (W x D x H) | 350 x 300 x 470 mm (60L model) |
| Power Supply | 4 AA 1.5V batteries (not included) |
| Operating Voltage | 4.2 to 6.0 V DC |
| Working Current | ≤ 380 mA |
| Opening Modes | Emergency key, numeric code (3-8 digits), fingerprint |
| Fingerprint Capacity | Up to 30 fingerprints |
| Number of Codes | 2 codes: user code and management code |
| Default Code | 1234 (user) and 123456 (management) |
| Error Tolerance (code) | 3 attempts, then lockout for 5 minutes |
| Error Tolerance (fingerprint) | 10 attempts, then lockout for 5 minutes |
| Silent Mode | Available (enable/disable via #0#) |
| Factory Reset | Long press on the setup key (>5 sec) |
| Low Battery Indicator | Yellow light |
| Material | Steel (not specified precisely) |
| Emergency Keys Included | 2 keys |
| Anchoring Bolts | 4 M6x80 expansion bolts |
| Maintenance | Clean with a soft, dry cloth. Avoid chemical products. |
| Warranty | 90 days refund or exchange for no reason |
Frequently Asked Questions - DS50Pro Vevor
User questions about DS50Pro Vevor
0 question about this device. Answer the ones you know or ask your own.
Ask a new question about this device
Download the instructions for your Safe in PDF format for free! Find your manual DS50Pro - Vevor and take your electronic device back in hand. On this page are published all the documents necessary for the use of your device. DS50Pro by Vevor.
USER MANUAL DS50Pro Vevor
Technical Support and E-Warranty Certificate www.vevor.com/support
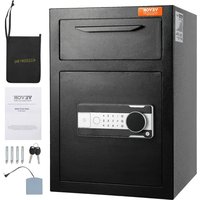
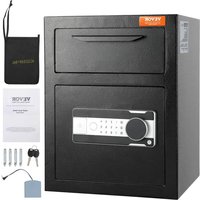
SAFE BOX
USER MANUAL
We continue to be committed to provide you tools with competitive price. "Save Half", "Half Price" or any other similar expressions used by us only represent of savings you might benefit from buying certain tools with us compared top brands and doses not necessarily mean to cover all categories of tools offered are kindly reminded to verify carefully when you are placing an order with us actually saving half in comparison with the top major brands.
VEVOR®
TOUGH TOOLS, HALF PRICE
SAFE BOX
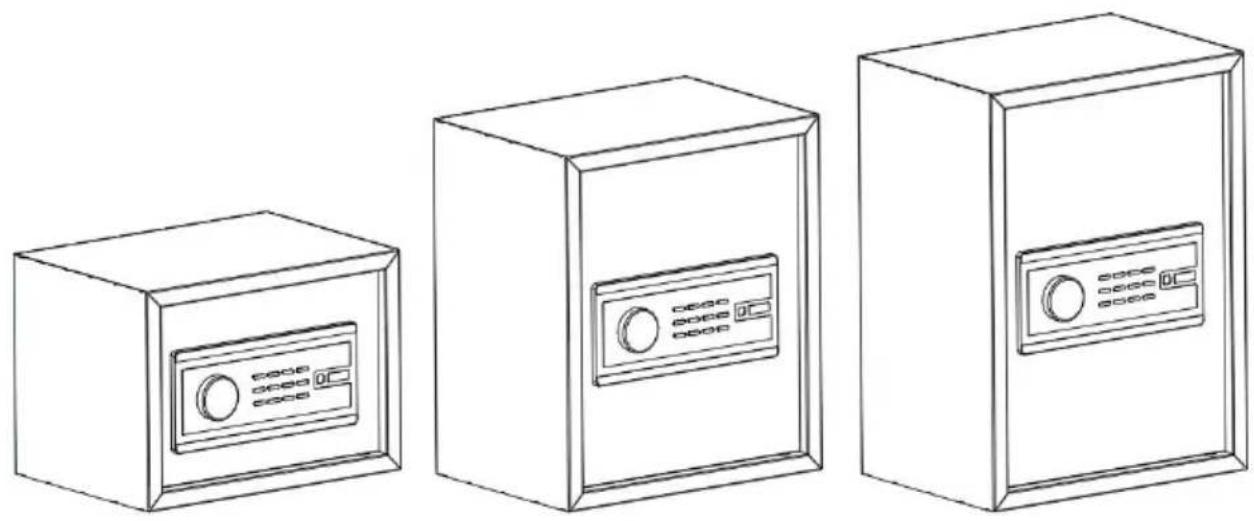
MODEL:22L,48L,60L
natural_image
Line drawings of three different types of industrial storage cabinets with control panels (no text or symbols)NEED HELP? CONTACT US!
Have product questions? Need technical support? Please feel fr contact us:

CustomerService@vevor.com
This is the original instruction, please read all manual instruction carefully before operating. VEVOR reserves a clear interpretation user manual. The appearance of the product shall be subject to product you received. Please forgive us that we won't inform you there are any technology or software updates on our product.
INSTRUCTIONS

Thank you very much for choosing this product. Please read all instructions before using it. The information will help you achieve the b possible results.

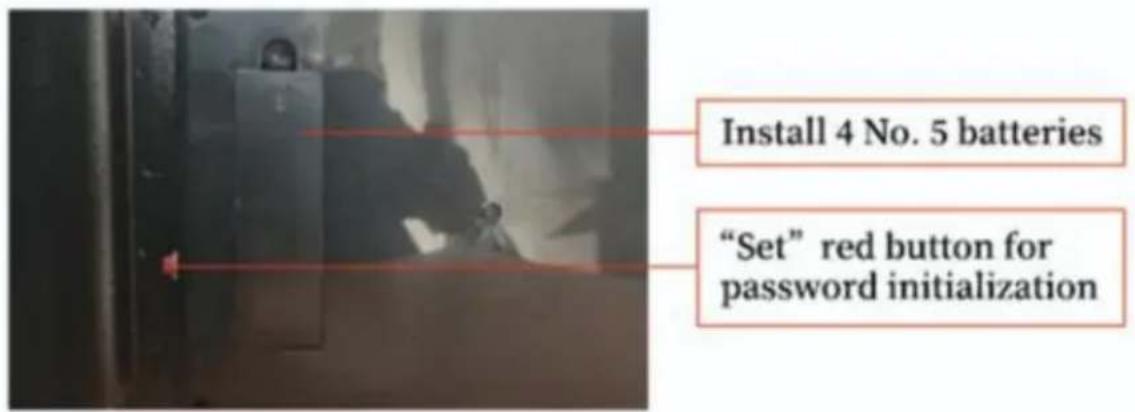
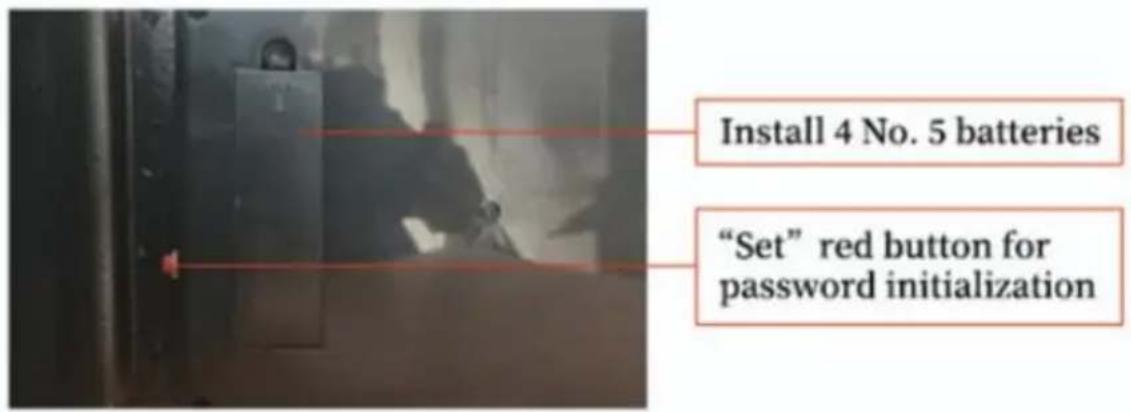
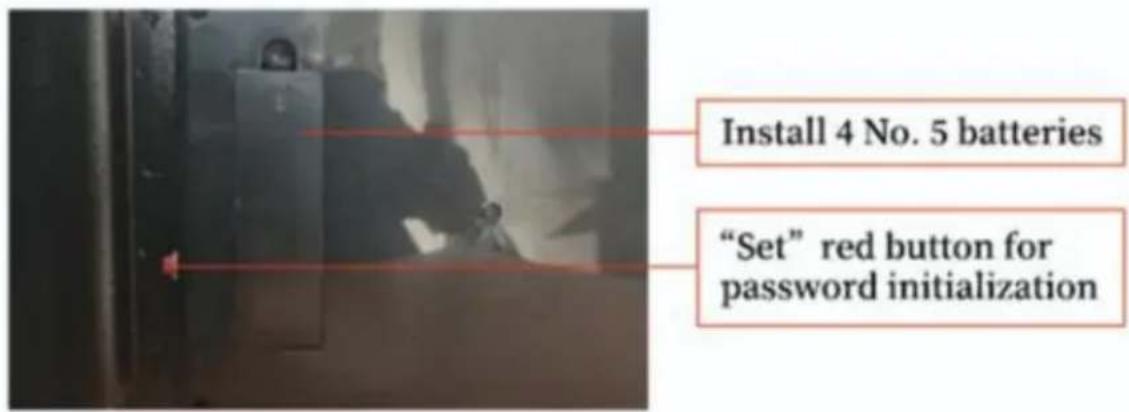
Figure 2. Back of Panel:
TECHNICAL PARAMETERS
| Model | 20L,48L,60L |
| Working Voltage Range | 4.2~6.0V dc |
| Working Under voltage Poi | 4.8 V ± 0.2 V |
| Working Current | ≤ 380 mA |
| Product Size(mm) | 350*250*250-20L350*300*400-48L350*300*470-60L |
| Working Power | 4 x AA(1.5V) batteries |
| FCC STATEMENT:This device complies with Part 15 of the FCC Rules. Operation to the following two conditions:(1)This device may not cause ha interference, and (2)this device must accept any interference rec including interference that may cause undesired operation. | |
PARTS LIST
| English Manual*1 |  |
| Emergency Key*2 |  |
| Expansion Bolt*4 (M6*80) | 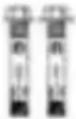 |
After receiving the safe, please use the key to open the door for the time (remember not to put the key into the safe, take good care of not to lose).
This product can have two sets of passwords:
factory password # 1234 # and management password # 123456 # (Figure 1)
(1) The first password to open the door: Enter # 1234 # or # 1234 turn the knob (see Figure 1).
(2) Change the password: short press the setting key (see Figure 2 inside side of the door), hear Didi twice, the green light is on, entdigit password, press #, Buzzer Didi twice to indicate that the change successful. If the red light is on, the buzzer “Di di Di di di Di di Di” five times, indicating the failure to change the secret. Need to be changed again.
(3) Manage password changes: Press #, then short-press the settings the green light will turn on, enter 3-8 password, press #, Buzzer D sound, indicating that the password has been successfully set. Buzzer di di di di di di di" five-tone and red light, setting failure, need changed again.
(4) The number of password fault-tolerant times is 3, the system lock is 5 minutes. Lock then input, three lights flash at the same time.
(5) Use the password to open the notice and Skills: the password en after the key is valid, enter the password after the end of the confir of the password press # verification password; use the password to c the password input interval of 10 seconds do not operate, the panel automatically enter hibernation, the need to re-operate.
(6) If the input is incorrect for many times, the battery can be removed power will be cut off for five minutes and then reinstalled, and the c can be redone according to the instruction.
(1) When the fingerprint is empty at the time of production, it needs entered before it can be used to open the lock with the fingerprint
(2) To enter the fingerprint:
press the setting button and hear the sound of Didi twice, repeat 4 green light on the buzzer a long honk, indicating that the finger input success. The same method can enter 30 fingerprints.
(3) Fingerprint opening method:
Put your finger in the fingerprint window, identify the successful green at the same time the buzzer “Beep Beep” two, turn the knob to oq door. Wrong operation, red light at the same time buzzer ring “Di di di” five.
(4) The number of fingerprint fault tolerant times is 10, and the syst lock time is 5 minutes. Lock then input, three lights flash at the sar the prompt sound gives out “Di di di di di di” sound.
Use fingerprint opening skills:
When entering fingerprints, the fingertips touch the fingerprint window, fingertips at the same time touch the window's metal frame, a little hear the "Tick" sound, green light to open the door. Sometimes you need to try a few more times with your fingertips. If necessary, you can same finger several times, typing fingerprints. When entering a finger, the finger changes the angle of entry, can be divided into around be and after the entry.
Reasons for influencing fingerprint opening:
If there is dirt on your fingers, please wipe them dry after washing hands and try again; if there are calluses on your fingers, please ch your fingers and try again; if your fingers are wet, try again after w them dry; if some fingers are too dry, you can use your mouth to and try again; if some fingers are not clear, please change your fing
and try again; if the input is incorrect for many times, you can remove battery and install the battery after a power cut for five minutes, the re-operate according to the instructions.
(1) when the fingerprint is empty at the time of production, it needs entered before it can be used to open the lock with the fingerprint
(2) to enter the fingerprint: press the setting button and hear the soil. Didi twice, repeat 4 times, green light on the buzzer a long honk, ir that the finger input success. The same method can enter 30 fingerp
(3) fingerprint opening method: put your finger in the fingerprint window identify the successful green light at the same time the buzzer “Beep Beep” two, turn the knob to open the door. Wrong operation, red I the same time buzzer ring “Di di di di di di” five.
(7) the number of fingerprint fault tolerant times is 10, and the system time is 5 minutes. Lock then input, three lights flash at the same time prompt sound gives out “Di di di di di di” sound. Use fingerprint opening
skills: when entering fingerprints, the fingertips touch the fingerprint wir fingertips at the same time touch the window's metal frame, a little s hear the "Tick" sound, green light to open the door. Sometimes you need to try a few more times with your fingertips. If necessary, you can u same finger several times, typing fingerprints. When entering a fingerp the finger changes the angle of entry, can be divided into around be and after the entry. Reasons for influencing fingerprint opening: if ther dirt on your fingers, please wipe them dry after washing your hands again; if there are calluses on your fingers, please change your fingetry again; if your fingers are wet, try again after wiping them dry; if fingers are too dry, you can use your mouth to breathe and try aga some fingers are not clear, please change your fingers and try again input is incorrect for many times, you can remove the battery and in battery after a power cut for five minutes, then re-operate according t instructions.
About dry batteries:
This product is suitable for 4 No. 5 dry batteries. (This product not deliver batteries)
(1) Please use batteries produced by regular manufacturers; Dry battery suitable for intermittent discharge, if in a short period of time, multiple continuous discharge time is longer, the newly bought battery will not long, it is recommended to replace the new battery, found that the light is on, please replace the new battery as soon as possible. AA/alkaline batteries are recommended to prevent battery leakage.
(2) When the power is insufficient, the yellow light will turn on, indic the need to replace the new battery as soon as possible.
(4) Please install the battery correctly: pay attention to the positive and negative electrodes do not put them wrong (on the battery + align the battery compartment + direction); Let the two poles of the battery fully contact the electrodes in the battery compartment. The last battery is installed, and two drops are heard, indicating that the installation is c
About the settings key:
The settings key is hidden behind the door on the inside side (see 2), red or green, etc. . Short Press, Didi twice, enter mode. Long change code key more than 5 seconds, hear a long sound, the syst resumes the factory settings.
Turn on or off mute:
Type # 0 # to turn on mute, then Type # 0 # to turn off mute.
The tone and red, green and yellow lights:
Enter the correct green light at the same time “Tick” two sounds. Operation Error, red light at the same time ring “Di di di di di di Di” five sound. When the power is insufficient, the yellow light will come on.
Resume factory settings:
Long pressed the setting key, heard a long SOB, and the system re the factory settings.
WARMLY REMINDER
- Because it is handmade, inside solder joints or rust stains are non
- Please keep emergency keys, secret cabinet keys.
- The emergency key cannot open the safe of other brands or the brand, which is unique.
(Please do not try, to avoid damage to the safe and the unmatched cannot be taken out)
AFTER-SALES SERVICE
- If the product you received has other problems such as usage pro please feel free to contact us and reply to online customer service w hours to serve you.
- Our products support 90 days for no reason to return or exchange
- I wish you a happy online shopping.
CORRET DISPOSAL
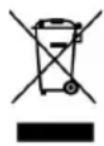
This product is subject to the provision of European Directive 2012/19/EC. The symbol showing a wheelie bin crossed through indicate that the product requires separate refuse collection in the European U This applies to the product and all accessories marked with this syml Products marked as such may not be discarded with normal domestic waste, but must be taken to a collection point for recycling electrical electronic devices.
Made in China
VEVOR®
TOUGH TOOLS, HALF PRICE
Technical Support and E-Warranty Certificate www.vevor.com/support
VEVOR®
TOUGH TOOLS, HALF PRICE
natural_image
Line drawings of three different types of industrial storage cabinets with control panels (no text or symbols)BESOIN D'AIDE? CONTACTEZ-NOUS!
Figure 2. Back of Panel:
natural_image
Line drawings of three different types of industrial storage cabinets with control panels (no text or symbols)Kundenservice@vevor.com
Figure 2. Back of Panel:

natural_image
Line drawings of three different types of industrial storage cabinets with control panels (no text or symbols)Figure 2. Back of Panel:

PARAMETRI TECNICI
natural_image
Line drawings of three different types of industrial storage cabinets with control panels (no text or symbols)Figure 2. Back of Panel:

PARÁMETROS TÉCNICOS
natural_image
Line drawings of three different types of industrial storage cabinets with control panels (no text or symbols)POTRZEBUJESZ POMOCY? SKONTAKTUJ SIĘ Z NAMI!
Figure 2. Back of Panel:

PARAMETRY TECHNICZNE
natural_image
Line drawings of three different types of industrial storage cabinets with control panels (no text or symbols)HULP NODIG? NEEM CONTACT MET ONS OP!
Klantenservice@vevor.com
Figure 2. Back of Panel:

natural_image
Line drawings of three different types of industrial storage cabinets with control panels (no text or symbols)BEHÖVER HJÄLP? KONTAKTA OSS!
Figure 2. Back of Panel: