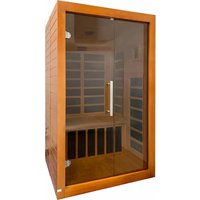
WES43-1700 - Sauna WESTINGHOUSE - Free user manual and instructions
Find the device manual for free WES43-1700 WESTINGHOUSE in PDF.


| Product Type | Infrared Sauna |
| Brand | Westinghouse |
| Model | WES43-1700 |
| Power Supply | 120 VAC, 15 A, dedicated circuit |
| Heating Type | Infrared emitters |
| Maximum Temperature | Approximately 66°C (adjustable) |
| Timer | Up to 90 minutes, adjustable |
| Main Material | Wood panels (type not specified) |
| Dimensions (W x D x H) | 104 x 104 x 190 cm (estimated) |
| Weight | Approximately 100 kg (estimated) |
| Capacity | 1 person |
| Lighting | Reading lamp and chromotherapy (remote control) |
| Connectivity | Bluetooth, MP3 input (3.5 mm jack) |
| Control Panel | Digital display, on/off buttons, time/temperature settings |
| Assembly | Requires two adults, Phillips screwdriver, and ladder |
| Usage | Indoor use only, flat dry surface |
| Maintenance | Wipe with a soft damp cloth, no chemicals |
| Warranty | 1 year limited (parts and labor) |
| Customer Service | 1-866-967-7333 ext. 227 |
Frequently Asked Questions - WES43-1700 WESTINGHOUSE
User questions about WES43-1700 WESTINGHOUSE
0 question about this device. Answer the ones you know or ask your own.
Ask a new question about this device
Download the instructions for your Sauna in PDF format for free! Find your manual WES43-1700 - WESTINGHOUSE and take your electronic device back in hand. On this page are published all the documents necessary for the use of your device. WES43-1700 by WESTINGHOUSE.
USER MANUAL WES43-1700 WESTINGHOUSE
Westinghouse
WES43-1700 INFRARED SAUNA SAUNA INFRAROUGE
Owner's Manual
FOR INDOOR USE ONLY
120VAC 15AMP Dedicated Circuit Required
Carefully and thoroughly read this Owner's Manual before using/operating the sauna.
DANGER - Immediate hazards which WILL result in severe personal injury or death
WARNING
WARNING - Hazards or unsafe practices which COULD result in severe personal injury or death
CAUTION
CAUTION - Hazards or unsafe practices which COULD result in minor personal injury
WARNING
When using electrical appliances, basic safety precautions should be followed, including the following
IMPORTANT SAFEGUARDS
To reduce the risk of burns, fire, electric shock, or injury:
- Connect the power cord to a properly grounded outlet only.
- Use this appliance only for its intended use as described in this manual. Do not use attachments not recommended by the manufacturer.
• Always unplug this appliance from the electrical outlet immediately after use. - Keep the electrical cord away from heated surfaces.
- This appliance shall not be subjected to water spray. Shower heads cannot be installed inside the sauna.
- If the temperature limiting control reset switch trips frequently, a qualified service person should be contacted.
- Never operate this appliance if it has a damaged cord or plug, if it is not working properly or if it has fallen or is damaged.
WARNING
If you have any health problems or conditions, consult your physician for permission to use the sauna room. (Health problems include but are not limited to acute diseases, malignant tumours, high blood pressure, heart disease, allergic dermatitis, pregnancy, etc.)
• The sauna room should not be used by children.
- Should you have any abnormal feeling with your body while using the
sauna, immediately exit the sauna.
- If you feel uncomfortable while using the sauna, stop immediately and consult your doctor.
- The use of alcohol, drugs, or medication is capable of greatly increasing the risk of fatal hyperthermia.
- Discontinue use if nervousness, tremors, headaches, feeling of sickness or nausea occurs.
hyperthermia
Prolonged exposure of the user in the sauna room is capable of inducing hyperthermia. Hyperthermia occurs when the internal temperature of the body reaches a level several degrees above the normal body temperature of 98.6° F. The symptoms of hyperthermia include an increase in the internal temperature of the body, dizziness, lethargy, drowsiness, and fainting. The effects of hyperthermia include:
Failure to perceive heat
Failure to recognize the need to exit the room
Unawareness of impending heat
Fetal damage in pregnant women
Physical inability to exit the room
Unconsciousness
- When assembling and using the electrical equipment, safety precautions should always be followed.
- To reduce the risk of injury, do not allow children to use the sauna unless they are closely supervised by an adult. Children should not use the sauna unless prescribed or advised by their physician.
- Do not use the sauna immediately following strenuous exercises. Wait at least 30 minutes to allow the body to cool down.
- Pregnant women should contact and confirm with their medical physician if sauna use is permitted.
- Never sleep inside the sauna.
- Do not stack or store any objects on top of or inside the sauna.
- If the power supply cord becomes damaged, please contact customer support. If you find the power cord is too hot (normally it will become warm), please contact customer support immediately to avoid hazardous situations.
- Make sure that the electrical outlet is in good working order. A common
problem with electrical outlets is loose wiring on the connection points of the terminals of the outlet. A loose wire will also make for a bad connection and cause an unusual amount of heat buildup. Loose connections can also cause sparking in the junction box that can result in arcing. You'll likely see burn marks around the terminals if this occurs. If this happens, do not use the sauna and have the outlet replaced by a certified electrician. If the power cord is damaged, please contact customer support.
-
Do not use the sauna during an electrical storm to avoid risk of shock or injury.
-
Do not continuously switch the power on and off excessively as it will compromise the life of the electrical components.
-
Your hands must be dry and free of moisture before plugging and unplugging cords and wiring harnesses from the power supply. Never operate the sauna with wet hands or wet feet to avoid the risk of electrical shock or injury. Never touch the metal prongs of the plug.
-
Do not attempt to make any repairs yourself. Please contact customer support to avoid safety risks. Unauthorized repair attempts will void the manufacturer's warranty.
-
Please make sure the outlet power supply meets the specifications required. Failure to meet the requirements may cause safety risks.
-
Because the Color lamp becomes very hot once activated wait at least 20 minutes or until it cools down completely before touching it.
-
Do not pour water or any other liquids onto the infrared heat emitters. Do not bump, hit, or break the heating elements as it may cause an electrical short and pose a safety risk.
-
Do not make any modifications to the sauna, the sauna structure, or the sauna components.
-
Prior to each sauna session, the sauna is to be inspected for correct operation. If for any reason your sauna does not seem to be operating properly, discontinue use and contact customer service.
-
Do not install the sauna near water, near a bathtub (water could splash on the sauna), near a shower (water could splash on the sauna), in a wet or very humid basement, or near a swimming pool (water could splash on the sauna).
-
The power supply cord should be routed so that it is not walked on or pinched by any object that may be placed against it.
-
When replacement parts are required, be sure they meet the specified requirements of the manufacturer. Unauthorized substitutes may result in a fire,
electrical shock, or other hazardous situations. After any repairs, please ask the service technician to perform a safety check to determine that the sauna is in good working order.
- If an extension cord must be used, please have a certified electrician make one that is as short as possible. Make sure it is routed so not to cause a safety issue, such as tripping over it.
Components
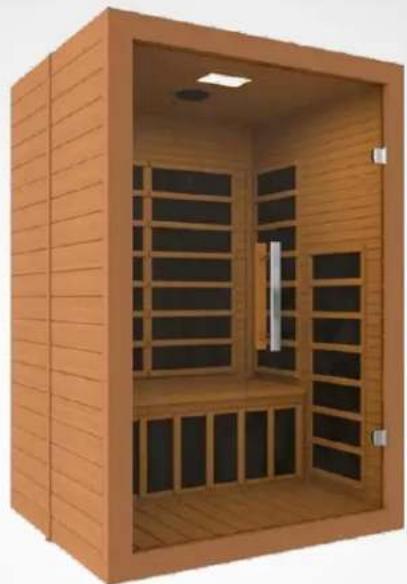
The infrared sauna is composed of wood panels, infrared heat emitters, and a control system. The wood panels are the following: front panel, rear panel, left side panel, right side panel, bench, bench emitter panel, floor panel, roof panel and roof cover panel.
The infrared sauna comes with a control panel, an MP3 shelf, a colour light, and infrared heat emitters.
NOTE: Your sauna has been completely assembled and tested prior to packaging. The rear wall panel is intentionally warped as part of the overall design.
IMPORTANT: Two adults will be needed to assemble the sauna room.
Assembly
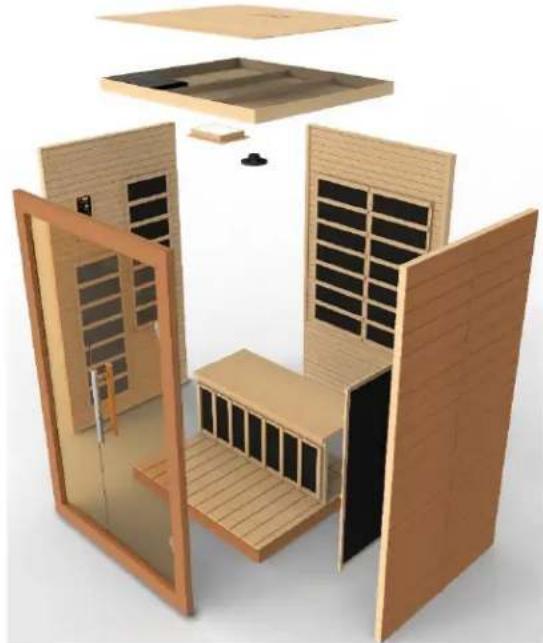
- Choose a good location to assembly the sauna
a. The location must be dry and level.
b. A dedicated AC wall outlet must be easily accessible from where the sauna will be used.
c. A Philips screwdriver and ladder are necessary for installation.
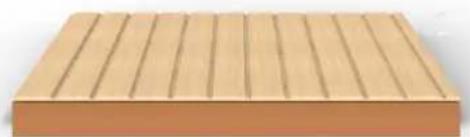
- Floor panel
Place the floor panel on the floor where the sauna is to be assembled.
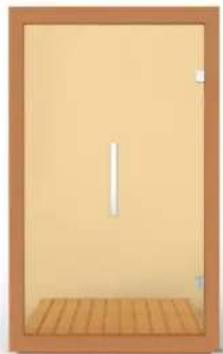
- Front panel
Place the front panel (with the glass door) against the floor panel. One adult will need to hold the front panel stationary up against the floor panel. While the other adult needs to position the left side panel against the floor panel.
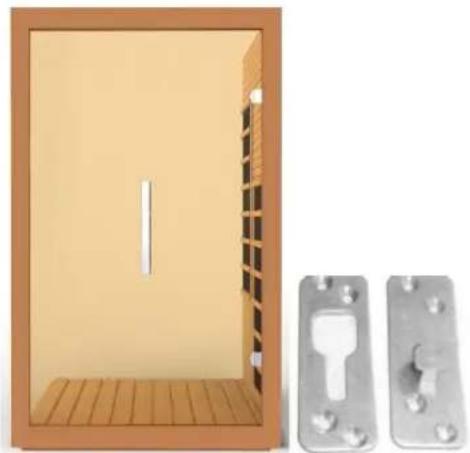
- Right-side panel
Lift the right-side panel so the insert brackets are connected. Once inserted, you will need to pull down the right-side panel, so it is flush with the front panel.
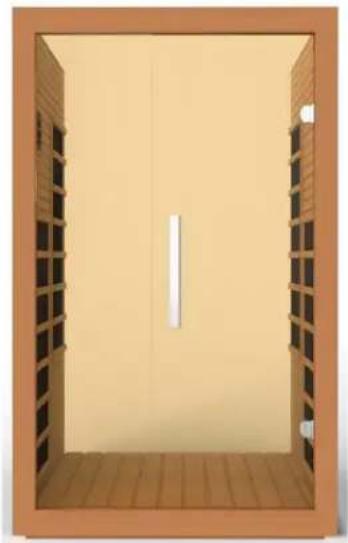
5. Left-side panel
Lift the left-side panel so the insert brackets are connected. Once inserted, you will need to pull down the left-side panel, so it is flush with the front panel.
6. Rear panel
Place the rear panel up against the floor panel. You may need to open up the right and rear side panels for the rear panel to fit correctly. Buckle both the right and left side panels to the rear panel.

7. Bench heat emitter panel and bench
Slide the bench emitter panel on the floor panel at an angle as per picture.
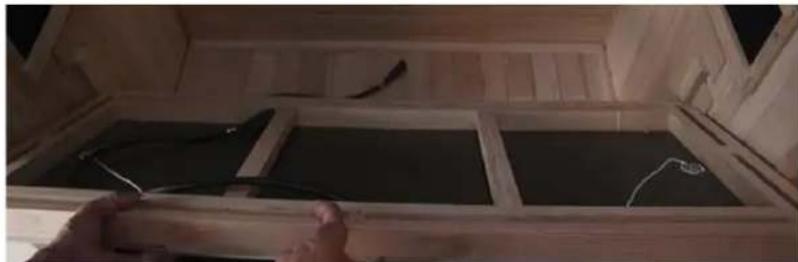
Once installed vertically, connect the bench heat emitter panel AC power
cord into the identified cord coming out of the control box. Slide the bench panel horizontally over the bench heat emitter panel. Make sure to slide the bench panel all the way back.
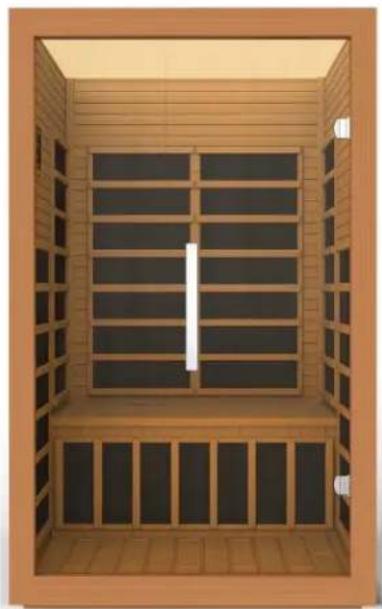
8. Front glass door handles
The wooden door handle is the interior door handle and the stainless-steel door handle is the exterior door handle. Use the provided screws to mount the door handles to the glass door.
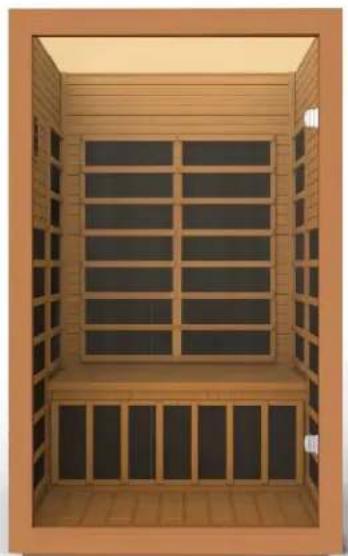
9. Installing the roof panel
The side of the roof panel with the ceiling vents must be situated towards the rear of the sauna. Two adults can carefully lift the roof panel up and onto the top of the sauna. Be careful when setting the roof panel into place
as the cords and wires will need to be fed to the topside of the roof panel.
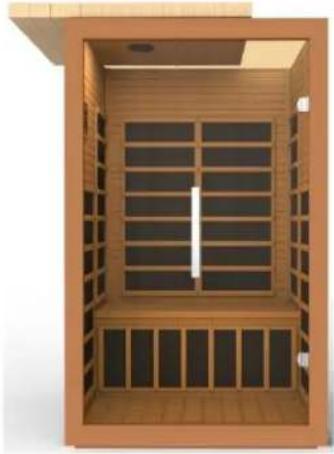
- Connecting the wires on the roof panel
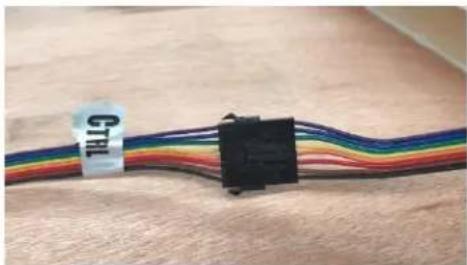
A. Connect the cords together according to their respective labels.
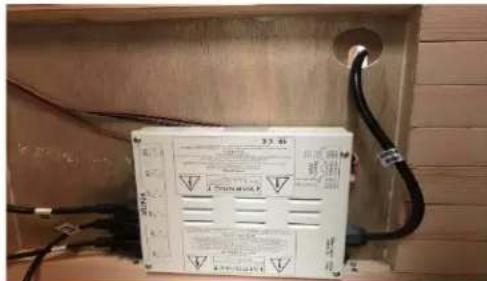
B. Connect and screw the 'CTRL' connectors together to provide power to the control panel.
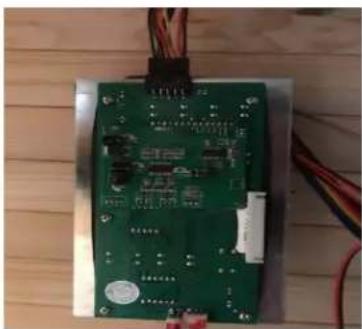
C. Connect the control panel.
11. Temperature sensor
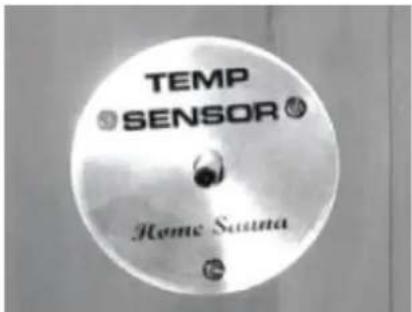
Enter the sauna and remove the protective covering (tape) from the temperature sensor. Position the temperature sensor so it is vertical and pointing downward.
12. Roof dust cover
Place the roof dust cover on top of the roof panel. When the edges are aligned, screw the roof dust cover into place.
13. Shelf
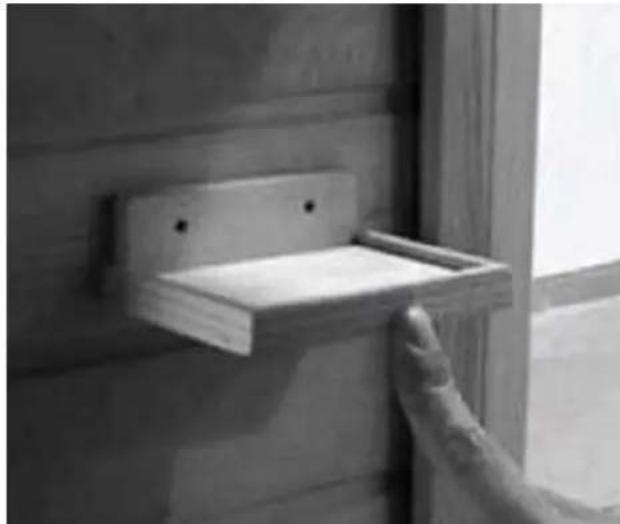
You can mount the shelf inside the sauna on either interior side wall panels. You can use this shelf for your personal MP3 music player.
Sauna operation
IMPORTANT NOTE: Before you activate the sauna, remove the plastic protective film covering the control panel and the black plastic corners on the glass door. Please check and confirm all the connections to the control box (including the power cord). The heat emitters and temperature sensor must also be connected properly.
The AC wall outlet for the sauna can be either a standard120V, 15A outlet or a 120 V 20 A dedicated wall outlet.
Minimal clothing is recommended for maximum infrared heat effectiveness. The infrared sauna emitters are designed to heat you but not the air inside the sauna unlike a traditional sauna.
It is recommended that you drink water before, during, and after sauna use to prevent dehydration.
CAUTION: Exit the Sauna Immediately If you feel any discomfort.
Control Panel
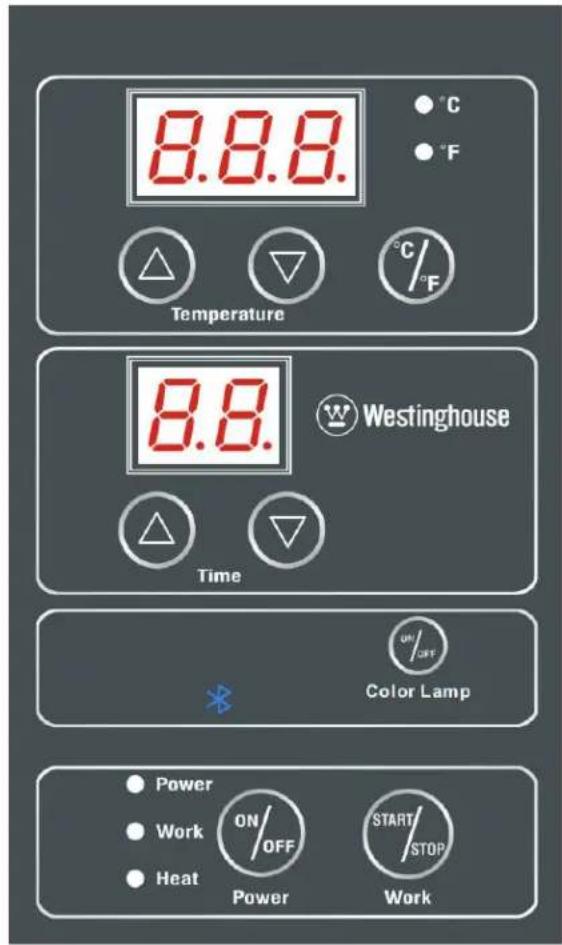
Power
Press this button to activate or deactivate the sauna.
The LED light indicates sauna's main power activation.
Work Start/Stop
Press to control the sauna's working functions.
The LED light will confirm the sauna's work status.
Heat Indicator
The LED light indicates heat activation.
Light (Color Lamp)
Press to activate the lighting function
Time Display
Displays the heating time of the sauna in minutes
Press the up or down arrows to adjust the preferred timer setting.
Temperature Display
Displays the actual interior temperature of the sauna in either Celsius or
Fahrenheit.
Press the up or down arrows to adjust the preferred temperature setting in
either Celsius or Fahrenheit.
Bluetooth

The control panel can be connected to a Bluetooth device to play music.
-
Connect the sauna into the AC wall outlet.
-
Press the power button. The LED light will come on and the time display will show 90 (minutes), the temperature display will show 66 (Celsius), and the control panel will flash.
-
Press the up/down arrows under the time display to adjust the prefers sauna session time. Press the C/F if you prefer the temperature to be displayed in Fahrenheit.
-
Press the up/down arrows under the temperature display to adjust the desired temperature inside the sauna. Then, press the start/work button. If you do not press this button in less than 5 seconds, the control panel will stop flashing and the set-up values will be memorized for your next sauna usage. The work and heat LED lights are now on and the emitters will start generating heat. You can either preheat the sauna to the set temperature before entering or sit inside the sauna as the temperature rises to the set temperature. Please keep in mind that you will increase the time it takes for the sauna to reach the set temperature if you enter the sauna before it has reached the set temperature.
-
Once the sauna is activated, you can use the up/down arrows to change the time. The control panel will flash, and the emitters will stop generating heat. Once you set the new desired time, press the start/work button twice. The control panel will stop flashing and the heat emitters will once again be activated.
- Please note heating times can vary greatly depending on the temperature outside the sauna. Generally, it will take approximately twenty to thirty minutes to preheat the sauna to 48 degrees Celsius (118 degrees Fahrenheit). As you become more comfortable and familiar with the sauna, you can increase the temperature and time according to your preference.
- When the sauna reaches the temperature set value, the work light will remain on and the heat light will turn off. The emitters will stop generating heat. Once the temperature inside the sauna drops by approximately 4° F, the heat light will turn back on and heat will again be generated by the emitters.
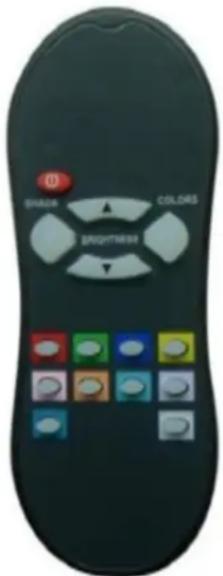
- The colour therapy lamps are operated by pressing the Color lamp button located on the control panel.
- For the colour therapy lamps to activate, you must first install the battery in the provided remote control. Then, press the Color lamp button on the control panel. While pointing the remote at the ceiling light, you can press any of the colours on the remote. You can use the 'shade' button on the remote to go through a sequence of colours. If you want to turn the light off during your sauna session, you can press the power button on the remote. Please note: You must be inside the sauna room for the remote to work.
- To play your favourite music using Bluetooth you need to pair your music device with the sauna. Open your MP3 device's Settings Menu and then locate
and open Bluetooth. You will find a Bluetooth signal from the sauna on your device. Press to activate. You will hear a vocal confirmation when a successful pairing has been made. If you prefer, you can also connect your music device to the sauna MP3 input on the sauna's ceiling. A 1/8" Aux. wire connector between the sauna and some but not all music device is provided.
Sauna Maintenance
Since infrared saunas do not require hot rocks, water, or steam to operate, they require very little maintenance. You can simply wipe it down with a damp, soft, and clean clothes. Do not use any chemical based cleaning agents as they can be absorbed by the sauna panels.
Troubleshooting
Before any troubleshooting of the sauna, make sure to unplug the sauna's power cord from the wall outlet. If the sauna is hard wired straight to the breaker in the electric panel, turn the breaker to the "OFF" position.
No Heat Coming From Some of the Heat Emitters
Solution: Check to make sure all the heat emitter cords are properly connected, including the cord to the heat emitter underneath the bench.
Also check that the heat emitter cords on the roof are properly connected and are properly plugged into the power supply (snug and tight).
Solution: If some of the heat emitters are working, then the ones which are not working may have been damaged or are not properly connected. Check that the heat emitter cords are properly connected snug and tight. If the issue persists, the heat emitter may be damaged. Do not continue to operate. Please contact customer support.
Solution: If the heat emitters are not working but the control panel displays the time and temperature, then the temperature sensor may not be plugged in properly or it may be damaged, or the power supply is defective then please contact our customer service.
Intentional Rear Wall Warp
Solution: The rear wall panel is intentionally warped as part of the sauna design. This adds strength to the sauna structure once the unit is assembled. Please try the following in assembling the sauna. With one
person inside the sauna room and pushing on the rear wall panel outward, a second person should be able to latch the buckles. Make sure that the wall is fitting together like a puzzle as one wall panel fits into the other.
Work your way down from top to bottom.
Warranty
LIMITED ONE (1) YEAR WARRANTY
This product is guaranteed against all manufactured faults and defects for a period of one (1) year from the date of purchase.
For repairs or product defects, please call our customer service department. Please have your proof of purchase on hand. If we are not able to replace your defective part, we will send you a service technician for repairs.
Important notes: Any damages caused by an accident or an abusive usage are NOT covered under warranty. We also decline all responsibility concerning indirect or consecutive damages. In certain Canadian provinces, it is not permitted to limit indirect or consecutive damages.
Therefore, it is possible these limitations are not applicable to you. This warranty gives you specific legal rights. You may also have other legal rights which vary from one province to another.
CUSTOMER SERVICE: 1-866-967-7333 ext 227
It will be our pleasure to help you!
Contenu
Santé-sécurité
Composants
- Panneau avant
6. Panneau arrière
Fonctionnement
Lumière (Color Lamp)
- WESTINGHOUSE
- WES43-1700 INFRARED SAUNA SAUNA INFRAROUGE
- WARNING
- CAUTION
- IMPORTANT SAFEGUARDS
- HYPERTHERMIA
- COMPONENTS
- LEFT-SIDE PANEL
- REAR PANEL
- BENCH HEAT EMITTER PANEL AND BENCH
- FRONT GLASS DOOR HANDLES
- INSTALLING THE ROOF PANEL
- TEMPERATURE SENSOR
- ROOF DUST COVER
- SHELF
- SAUNA OPERATION
- CAUTION: EXIT THE SAUNA IMMEDIATELY IF YOU FEEL ANY DISCOMFORT
- POWER
- WORK START/STOP
- HEAT INDICATOR
- LIGHT (COLOR LAMP)
- TIME DISPLAY
- TEMPERATURE DISPLAY
- FAHRENHEIT
- BLUETOOTH
- SAUNA MAINTENANCE
- TROUBLESHOOTING
- WARRANTY
- LIMITED ONE (1) YEAR WARRANTY
- CONTENU
- PANNEAU ARRIÈRE
- FONCTIONNEMENT
Brand : WESTINGHOUSE
Model : WES43-1700
Category : Sauna