07670 - Mosquito net Hoberg - Free user manual and instructions
Find the device manual for free 07670 Hoberg in PDF.


User questions about 07670 Hoberg
0 question about this device. Answer the ones you know or ask your own.
Ask a new question about this device
Download the instructions for your Mosquito net in PDF format for free! Find your manual 07670 - Hoberg and take your electronic device back in hand. On this page are published all the documents necessary for the use of your device. 07670 by Hoberg.
USER MANUAL 07670 Hoberg
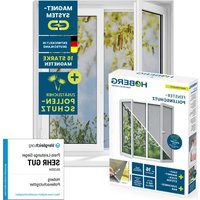
We are delighted that you have chosen our Hoberg pollen protector.
Before using the product for the first time, please read through the operating instructions carefully and keep them for future reference and other users.
They form an integral part of the product. The manufacturer and importer will not accept liability if the instructions are not observed.
Please Note: The illustrations in these operating instructions may differ slightly from the actual product.
If you have any questions about the product, please contact our customer service department via the website:
www.hoberg-shop.de
Items Supplied
(Picture A)
1 Locking piece (16 x)
2 Magnet holder with studs (16 x)
3 Small metal plates with adhesive back (16 x)
Not shown:
- Pollen protection screen (150 x 130 cm, 1 x)
- Operating instructions (1 x)
Check the items supplied for completeness and the components for transport damage. If the product is damaged, do not use it but contact our customer service department.
Explanation of the Symbols and Signal Words
Danger symbol: Read through the associated safety notices carefully and follow them.
Supplementary information
Signal words indicate hazards if the associated notices are not followed.
WARNING medium risk, may result in serious injury or death
NOTICE may result in risk of damage to material
Intended Use
- The product is suitable for attachment to windows as pollen and insect protection. It is not suitable for attaching to doors.
- The product is suitable for windows with a maximum size of 150 × 130 ~cm .
- The product is for personal use only and is not intended for commercial applications.
- The product should only be used as described in the operating instructions. Any other use is deemed to be improper.
- The warranty does not cover faults caused by incorrect handling, damage or attempted repairs. The same applies to normal wear and tear.
Safety Notices

WARNING – Danger of Injury!
- Keep children and animals away from the product and packaging material. There is a danger of suffocation.
■ Pregnant women and people with a pacemaker or electronic implant should only use the product after consulting their doctor owing to the magnets.
The product is not a toy! Children must be supervised to ensure that they do not play with the product.
NOTICE – Risk of Damage to Material and Property
■ Magnetism can impair or damage the functions of electronic devices, data storage media and watches as well as credit cards and other similar items. Keep them away from the magnets.
- Keep the product away from heat sources, naked flames as well as sharp and pointed objects.
- Check the product for any damage on a regular basis. The protection from pollen and insects is compromised if the product is damaged.
- Do not use any corrosive or abrasive cleaning agents to clean the product. These may cause damage to the product.
Cutting to Size and Attaching the Pollen Protection Screen
- Measure out the inside dimension of the frame (!) of the window on which the pollen protector is to be attached (Picture B).
- Cut the pollen protection screen to size according to the inside dimension of the frame.
- Attach the small metal plates (3) inside the window frame (Picture C):
- stick 2 small metal plates in each of the corners of the frame;
- depending on the size of the window, also stick up to 3 small metal plates in the middle of the window frame.
- Place the magnet holders (2) with the magnets on the small metal plates fixed in the window frame (Picture D).
- Hold the pollen protection screen against a magnet holder and press the studs through the mesh of the screen (Picture E).
EN
- Repeat this process for all magnet holders.

Start firmly attaching the pollen protection screen to the top corners of the frame. The pollen protector should fit inside the frame. Make sure that the pollen protection screen fits on all magnet holders, is taut and does not have any creases.
- Place the locking pieces (1) on the magnet holders and press them on firmly (Picture F). You must hear them engage. Make sure that the pollen protection screen does not lose its shape.

You can retighten the pollen protection screen a little by moving the magnet holders on the small metal plates slightly.
You can now simply take off the pollen protection screen using the magnets and insert it back inside the window frame (Picture G).
Cleaning and Storage
- If necessary, wipe the pollen protection screen with a damp cloth and mild cleaning agent if required.
- When the product is not being used, store it in a dry place that is protected from children and animals.
Product Data
Article number: 07670 ID: Z 07670 M HO V1 1220 dk
Disposal

Please make sure that the packaging materials are recycled in an environmentally friendly manner. If at some point you no longer wish to use our product, please give it to somebody else who would like to carry on using it. If it is no longer usable, please also make sure that you dispose of it in an environmentally friendly manner.
All rights reserved.
Chère cliente, cher client,