
H50K85FUX - Television HAIER - Free user manual and instructions
Find the device manual for free H50K85FUX HAIER in PDF.
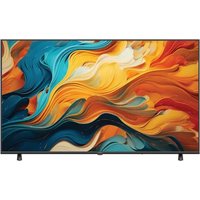


| Product type | LED TV |
| Screen size | 50 inches (diagonal) |
| Resolution | 3840 x 2160 pixels (4K UHD) |
| Operating system | Google TV |
| Connectivity | 4 HDMI inputs (including 1 eARC/ARC), 1 USB port, LAN port, built-in Wi-Fi, Bluetooth |
| Audio | Dolby Audio, built-in stereo speakers |
| Power supply | 100-240 V ~ 50/60 Hz |
| Power consumption | Approximately 120 W (typical) |
| Weight (without stand) | Approximately 12 kg |
| Dimensions (without stand) | Approximately 112 x 65 x 8 cm (W x H x D) |
| Safety | Child lock function, auto-off (timer) |
| Cleaning | Soft dry cloth, unplug before cleaning |
| Included accessories | Remote control, AAA batteries (2), stand, mounting screws, warranty card |
| Repairability | Call a qualified technician for any repair |
| Standards and certifications | EU energy label (EPREL: 2233381), HDMI, Dolby Audio |
Frequently Asked Questions - H50K85FUX HAIER
User questions about H50K85FUX HAIER
0 question about this device. Answer the ones you know or ask your own.
Ask a new question about this device
Download the instructions for your Television in PDF format for free! Find your manual H50K85FUX - HAIER and take your electronic device back in hand. On this page are published all the documents necessary for the use of your device. H50K85FUX by HAIER.
USER MANUAL H50K85FUX HAIER
Illustrations in this guide are provided for reference only and may differ from the actual product appearance. Product design and specifications may be changed without notice.
1) Read these instructions. 2) Keep these instructions. 3) Heed all warnings. 4) Follow all instructions. 5) Do not use this product near water. 6) Clean only with a dry cloth. 7) Do not block any ventilation openings; install in accordance with the instructions. 8) Do not install near any heat sources such as radiators, heat registers, stoves, or other apparatus (including amplifiers) that produce heat. 9) If the provided plug does not fit into your outlet, consult an electrician for replacement of the obsolete outlet. 10) Protect the power cord from being walked on or pinched, particularly at plugs, convenience receptacles, and the point where they exit from the apparatus. 11) Only use attachments/accessories specified by the manufacturer. 12) Unplug this apparatus during lightning storms or when unused for long periods of time. 13) Refer all servicing to qualified service personnel. Servicing is required when the apparatus has been damaged in any way, such as power-supply cord or plug is damaged, liquid has been spilled or objects have fallen into the apparatus, the apparatus has been exposed to rain or moisture, does not operate normally, or has been dropped. 14) The mains plug is used as the disconnect device; the disconnect device shall remain readily operable. 15) The ventilation should not be impeded by covering the ventilation openings with items such as newspapers, tablecloths, curtains, etc. 16) No naked flame sources, such as lighted candles, should be placed on the apparatus. 17) Attention should be drawn to the environmental aspects of battery disposal. 18) The use of the apparatus in moderate climates. 19) The apparatus shall not be exposed to dripping or splashing, and no objects filled with liquids, such as vases, shall be placed on the apparatus. 20) Warning: To avoid any injury caused by leaning on the product, always ensure the entire product is placed horizontally on the table surface.


CAUTION
TO REDUCE THE RISK OF ELECTRIC SHOCK, DO NOT REMOVE COVER (OR BACK). NO USER-SERVICEABLE PARTS INSIDE. REFER SERVICING TO QUALIFIED SERVICE PERSONNEL.

The symbol indicates that dangerous voltages constituting a risk of electric shock are present within this unit.

The symbol indicates that there are important operating and maintenance instructions provided in the user manual given with this unit.
WARNING:
To reduce the risk of fire or electric shock, do not expose this apparatus to rain or moisture.
WARNING:
The batteries shall not be exposed to excessive heat such as radiators, fire, or the like.

This symbol indicates AC voltage.
This symbol indicates DC voltage.
This symbol indicates that this product incorporates double insulation between hazardous mains voltage and user-accessible parts. When servicing, use only identical replacement parts.
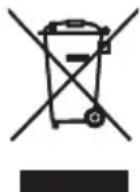
This marking indicates that this product should not be disposed with other household wastes. To prevent possible harm to the environment or human health from uncontrolled waste disposal, recycle it responsibly to promote the sustainable reuse of material resources. To return your used device, please use the return and collection systems or contact the retailer where the product was purchased. They can take this product for environmental safe recycling.
EU Battery Regulation

This symbol on the battery(ies) or on the packaging indicates that the battery(ies) provided with this product shall not be treated as household waste. Instead, please separate battery(ies) from other types of waste and recycle it(them) through your local recycling system to protect environment and health.
The chemical symbol for lead (Pb) is added under this symbol if the battery(ies) contains more than 0.004 % lead. For more detailed information about recycling of this battery(ies), please contact your local authority or the shop where you purchased the product or battery(ies).
Caution:
A display may fall, causing serious personal injury or death. Many injuries, particularly to children, can be avoided by taking simple precautions such as:
• ALWAYS use cabinets or stands or mounting methods recommended by the manufacturer of the television set. • ALWAYS use furniture that can safely support the television set. • ALWAYS ensure the television is not overhanging the edge of the supporting furniture. • ALWAYS educate children about the dangers of climbing on furniture to reach the television or its controls. • ALWAYS route cords and cables connected to your television so they cannot be tripped over, pulled or grabbed. • NEVER place the television set in an unstable location. • NEVER place the television set on tall furniture (for example, cupboards or bookcases) without anchoring both the furniture and the display to a suitable support. • NEVER place the television set on cloth or other materials that may be located between the television set and supporting furniture. • NEVER place items that might tempt children to climb, such as toys and remote controls, on the top of the television set or furniture on which the television set is placed.
If the existing television set is going to be retained and relocated, the same considerations as above should be applied.
Dolby Audio
Manufactured under license from Dolby Laboratories. Dolby, Dolby Audio, and the double-D symbol are trademarks of Dolby Laboratories Licensing Corporation.

The terms HDMI, HDMI High-Definition Multimedia Interface, HDMI Trade dress and the HDMI Logos are trademarks or registered trademarks of HDMI Licensing Administrator, Inc.
H50K85FUX
European Energy Label EPREL registration number: 2233381
https://eprel.ec.europa.eu/qr/2233381
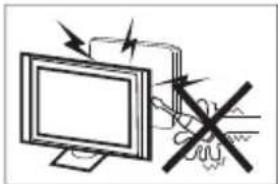
High voltages are used in the operation of this television receiver. Do not remove the cabinet back from your set. Refer servicing to qualified service personnel.
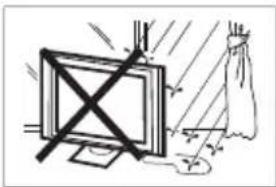
To prevent fire or electrical shock hazard, do not expose the television receiver to rain or moisture.
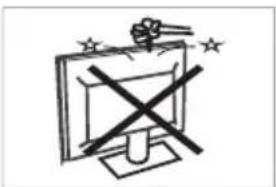
Do not drop or push objects into the television cabinet slots or openings. Never spill any kind of liquid on the television receiver.
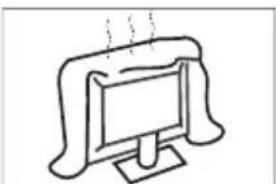
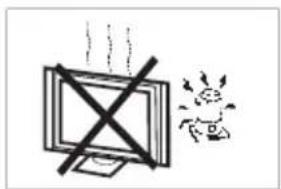
Do not block the ventilation holes in the back cover. Adequate ventilation is essential to prevent failure of electrical components.
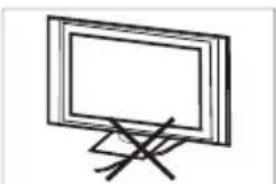
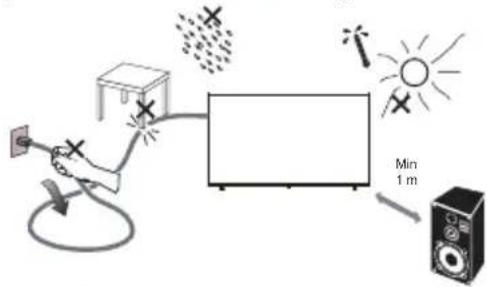
Do not trap the power supply cord under the television receiver.
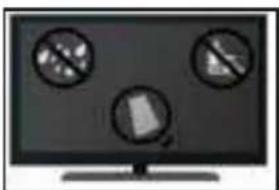
If you are going to clean the product, unplug the TV, use soft fabric, no water, never chemicals.
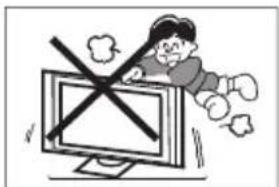
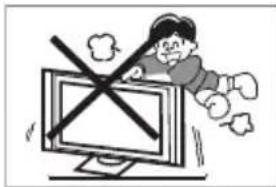
Never stand on, lean on, or suddenly push the television or its stand. You should pay special attention to children. Serious injury may result if it falls.
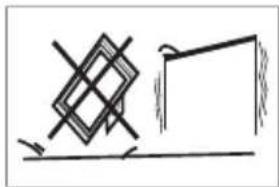
Do not place your television on an unstable cart, stand, shelf or table. Serious injury to an individual, and damage to the television, may result if it falls.
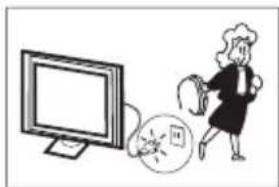
When the television receiver is not used for an extended period of time, it is advisable to disconnect the AC power cord from the AC outlet.
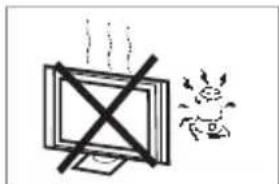
Avoid exposing the television receiver to direct sunlight and other sources of heat. Do not stand the television receiver directly on other products which give off heat, e.g. video cassette players and audio amplifiers. Do not place naked flame sources, such as lighted candles on the television.
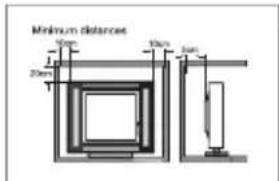
If the television is to be built into a compartment or similar enclosure, the minimum distances must be maintained. Heat build-up can reduce the service life of your television, and can also be dangerous.
Note: the use of apparatus in moderate climates.
Note: This product uses a panel consisting of sub pixels which require sophisticated technology to produce. However, there may by a few bright or dark pixels on the screen. These pixels will have no impact on the performance of the product.
IMPORTANT: Do not apply pressure to the screen display area which may compromise the integrity of the display. The manufacturer's warranty does not cover user abuse or improper installations.
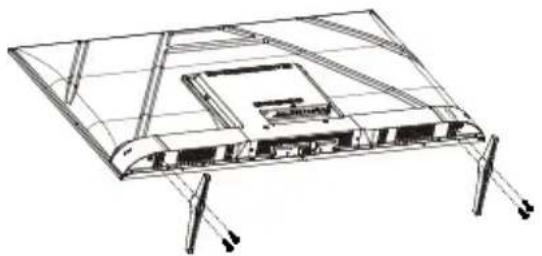
ATTACHING THE STAND
IMPORTANT: The stand of the TV must be assembled prior to usage.
- Place the TV unit face down on a soft and flat surface (blanket, foam, cloth, etc.) to prevent any damage to the TV.
- Fix the stands to the bottom of the TV with 4 screws.
PREPARING YOUR LED TV FOR WALL MOUNTING
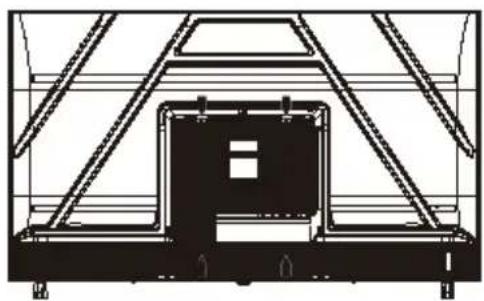
We suggest that you keep your TV at least 2.36 inches (60 mm) from the wall to prevent cable interference. Before mounting your TV on the wall, you need to remove the stand.
For your safety, please use only with a UL listed wall mount bracket with minimum weight of the TV without stand.
To attach a wall mount bracket to your TV:
- Remove the screws holding your TV to the stand.
- Remove the stand from your TV.
- Secure the wall mount bracket to the back of your TV using four screws. Follow the instructions of the user manual that came with the wall mount bracket to install.

NOTE
The wall mount bracket is not included.
- Fix the wall mount screws (M6 x 10mm/4pcs) into the rear side of the LED TV, using a torque of 8kgf·cm.
TURNING ON THE TV
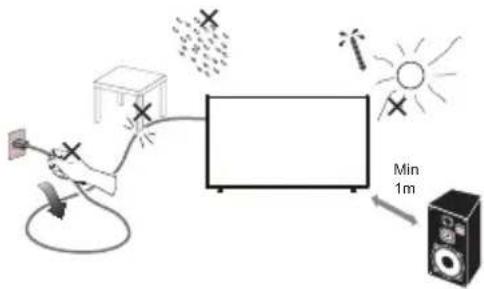
- Install the stand and place the TV on a solid surface.

NOTE
- Ensure that the TV is placed in a position to allow free flow of air. Do not cover the ventilation openings on the back cover. To prevent any unsafe situations, no naked flame sources, such as lighted candles, should be placed on or in the vicinity.
- Avoid heat, direct sunlight and exposure to rain or water. The equipment shall not be exposed to dripping or splashing.
- Connect the antenna cable or cable TV cable to the ANT IN aerial socket on the back of the TV set.
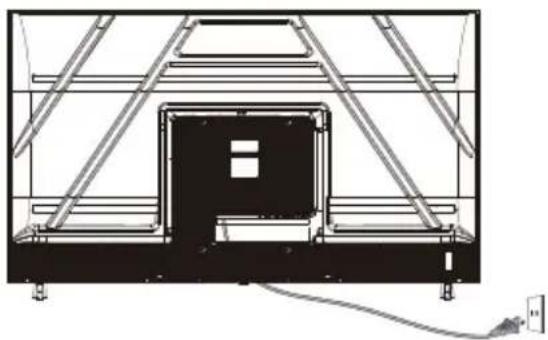
- Power: Plug the cord into a working power outlet.
- Turn the TV on: Press ⏻ on the remote control or POWER button at the bottom of the TV.
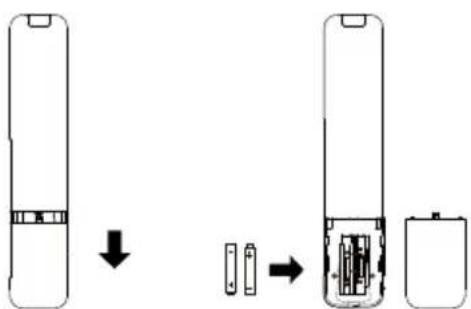
- Battery Remove the cover of the battery compartment. Insert the 2 batteries (Type AAA 1.5V).
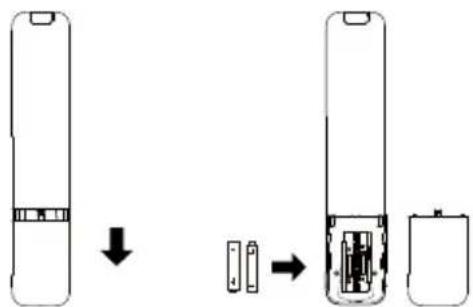
BUTTON CONTROL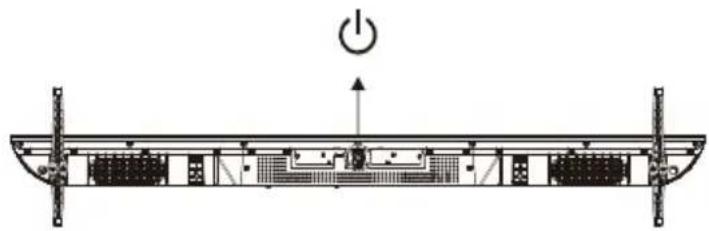
ACCESSORIES
Remote Control - 1 pc
User's Manual - 1 pc
Stand - 2 pcs
Screws - 4 pcs
Warranty Card - 1 pc
REAR AV CONNECTIONS (SIDE)
All the terminals are (from left to right):
HDMI1 (eARC/ARC), SATELLITE, ANT IN (ANTENNA/CABLE), USB, HEADPHONE, COMMON INTERFACE (CI).
REAR AV CONNECTIONS
All the terminals are (from left to right):
LAN, OPTICAL, AV IN adapter, HDMI4, HDMI3, HDMI2.
You can use the input terminals on the TV set rear as follows.
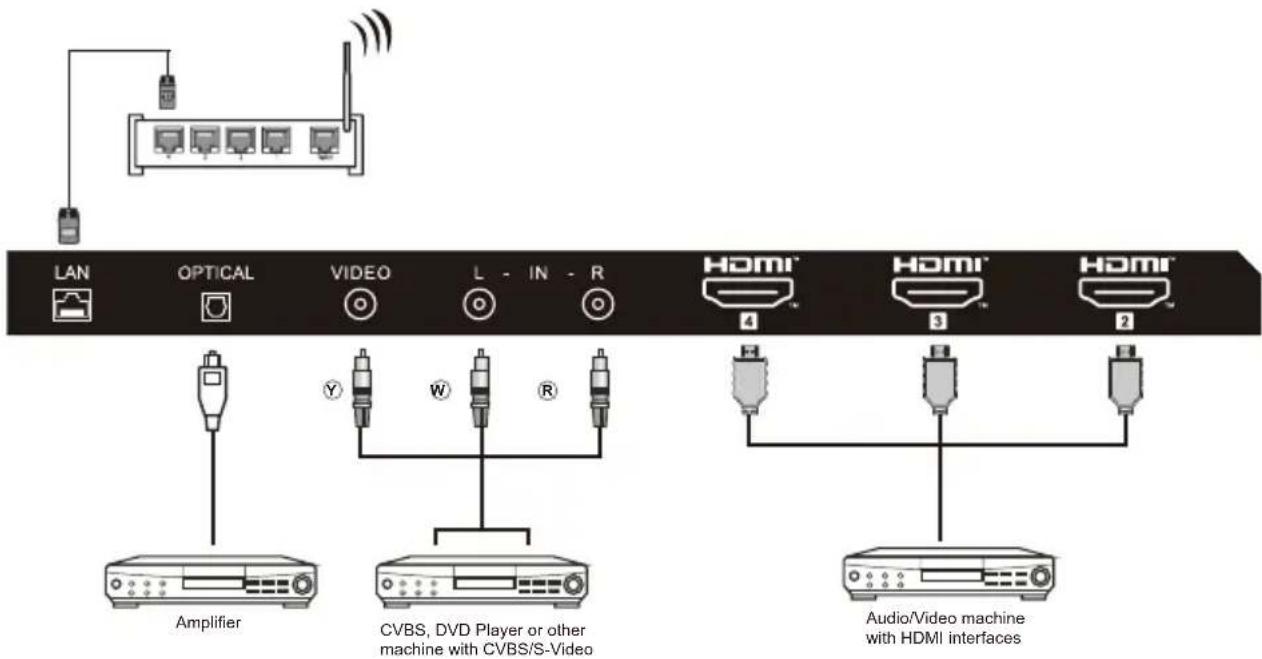
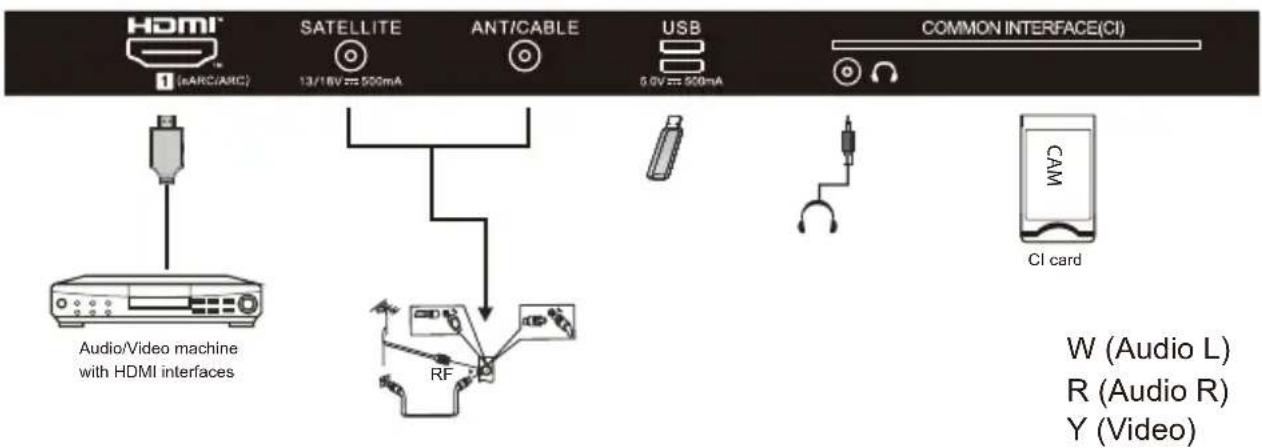
- RF: Antenna/closed circuit TV
- EARPHONE: Earphone output.
- USB: Connect USB device.
- HDMI: Connect to High-definition multimedia signal resource.
- AV INPUT: Video input/Audio input.
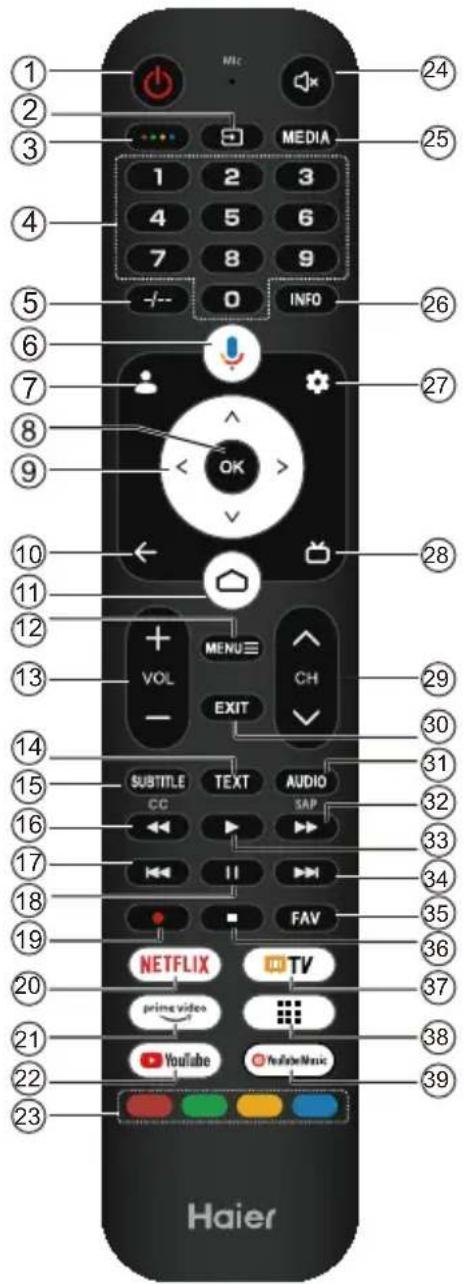
| # | Item | Descriptions |
| 1 | Power | Press to turn the TV on or off. When your TV is off, power still flows through it. To completely disconnect power, unplug the power cord. |
| 2 | Press to open the input source list. | |
| 3 | ●●●● | Press to open Soft Keyboard. |
| 4 | 0~9 number | Press to enter a TV channel number. |
| 5 | -/-- | It is used to enter channel numbers with various digit counts, e.g. 1 – 11 – 111. |
| 6 | Press to open the Google Assistant. | |
| 7 | Press to open user account page. | |
| 8 | OK | Enter the selected option or perform the selected operation. |
| # | Item | Descriptions |
| 9 | ▲▼◀▶ | Press to navigate the on-screen menu. |
| 10 | ← | Return to the previous menu. |
| 11 | Press to open the Home Page. | |
| 12 | MENU≡ | Press to open or close the on-screen menu. |
| 13 | VOL+/VOL- | Press VOL+ or VOL- to adjust volume level. |
| 14 | TEXT | Press to select the teletext mode. |
| 15 | SUBTITLE | Open or close subtitle. |
| 16 | Press to reverse playback in multimedia & Timeshift mode. | |
| 17 | Switch to the previous file when the audio or video is playing. | |
| 18 | II (Pause) | Press to pause in multimedia mode&Timeshift mode. |
| 19 | ●(REC) | Press to record the TV program you are watching in DTV mode. |
| 20 | NETFLIX | Press to open the NETFLIX. |
| 21 | prime video | Press to prime video for viewing online TV shows and films(internet connection required). |
| 22 | YouTube | Press to open the YouTube. |
| 23 | Coloured buttons | Implement the relevant operations according to the prompt at the botton of the menu in the text. |
| 24 | Press to open the mute. | |
| 25 | MEDIA | Press to open multimedia player. |
| 26 | INFO | Press to display the channel information. |
| 27 | Press to open the settings menu. | |
| 28 | Press to display electronic programme guide in TV mode. | |
| 29 | CH-/CH- | Press CH^ or CH▼ to change TV channels. |
| 30 | EXIT | Exit menu or operation. |
| 31 | AUDIO | Press to select Mono, Nicam, Stereo for ATV channel, Audio language for DTV channels. |
| 32 | ▶▶(forward) | Press to fast forward in multimedia &Timeshift mode. |
| 33 | ▶(play) | Press to play in multimedia mode &Timeshift mode. |
| 34 | Switch to the next file when the audio or video is playing. | |
| 35 | FAV | Quickly add the current channel to the favorite Show list or remove it from the favorite list under ATV and DTV. |
| 36 | Press to stop multimedia playback, REC & Timeshift mode. | |
| 37 | Press to open the Live TV. | |
| 38 | Press to open the app list. | |
| 39 | YouTube Music | Press to open the YouTube Music. |
INITIAL SETUP
The first time you turn on your TV, the setup wizard will guide you through setting up basic settings. Please follow the text prompts to complete the initial setup.
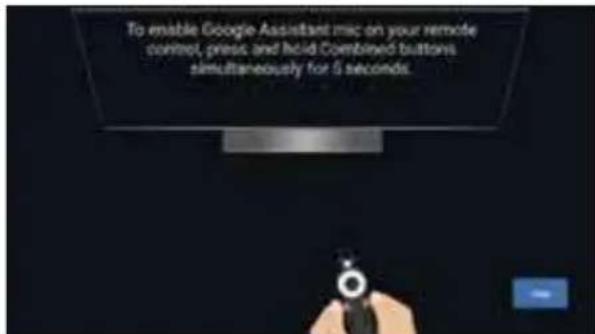
This function is used for the remote control pair code. After the code is successful, you can use the Bluetooth remote control to operate the TV.
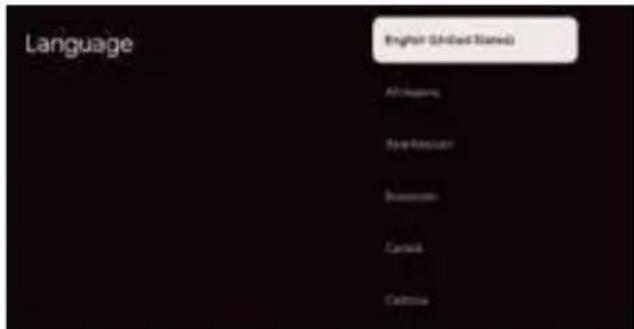
Press ▲/▼ to select the system language and press OK to confirm the language.
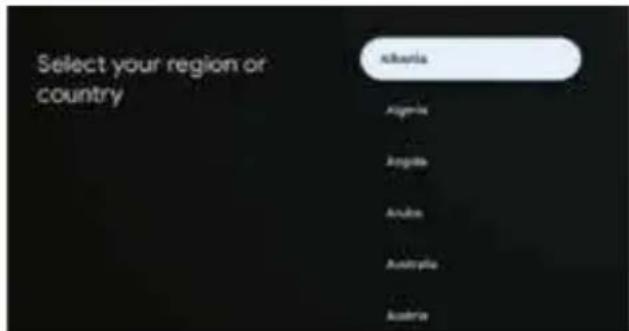
Press ▲/▼ to select the region/country of your device and press OK to confirm. Complete the TV initialization settings according to the guide prompts.
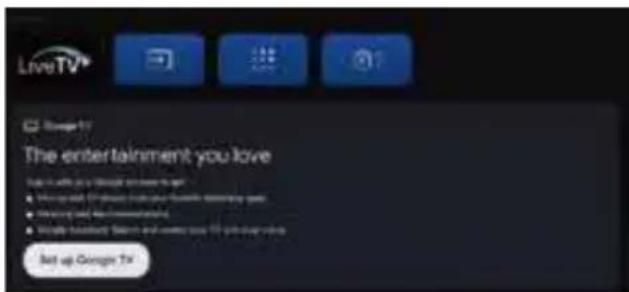
Note: The picture is only for reference.
- Once in the user interface, you can switch from basic TV to Google TV settings
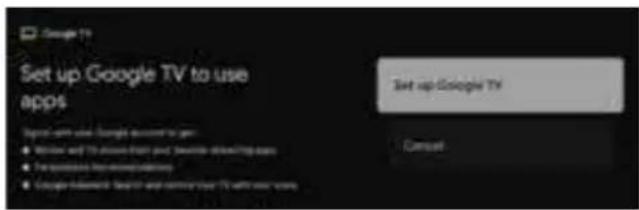
Press ▲/▼ to select "Set up Google TV" for your device and press OK to complete the setup.
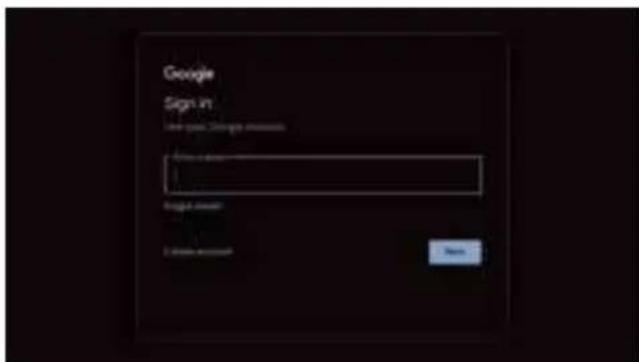
Use your Google Account to sign in. Follow the Google guide.
E-Manual
E-Manual is built into your TV and can be displayed on the screen. To learn more about your TV features, access your E-Manual by referring to the following. E-Manual may be available depending on the region or model.
- Press HOME button to access the home page.
- Press UP/DOWN/LEFT/RIGHT and OK button to select and enter "E-Manual" in "Apps".
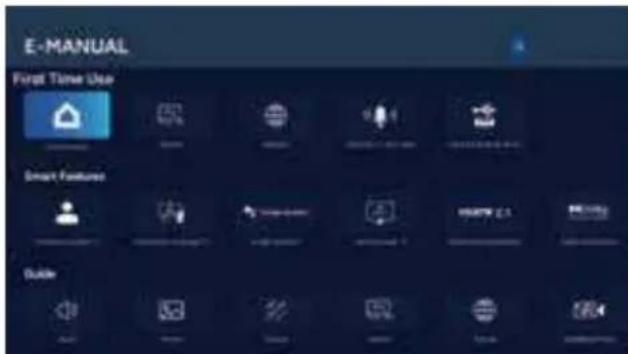
Note: The picture is only for reference.
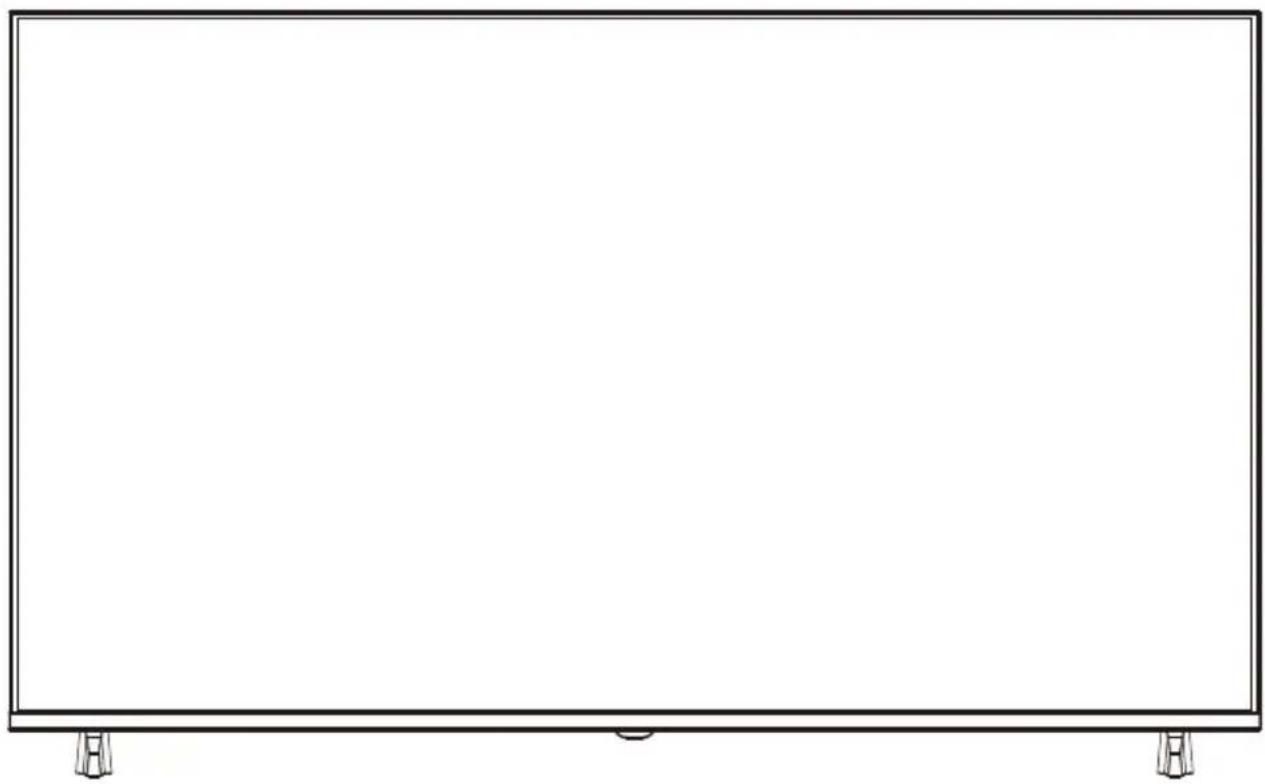
PREPARING THE LED TV FOR WALL MOUNTING

NOTE

NOTE
ACCESSORIES
PREPARING THE LED TV FOR WALL MOUNTING

NOTE
NOTE
BUTTON CONTROL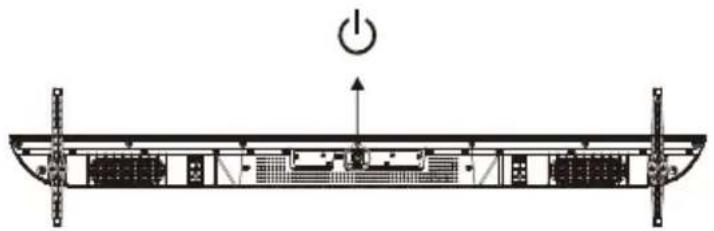
ACCESSORIES
Remote control - 1 unit.

NOTE

NOTE
BUTTON OPERATION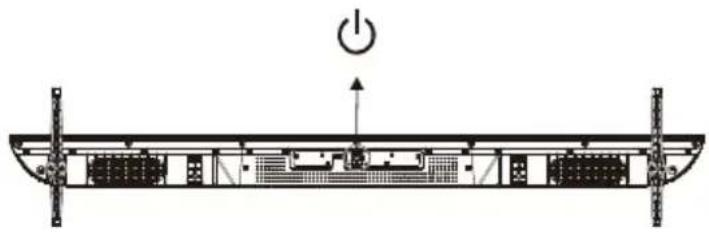
PREPARING YOUR LED TV FOR WALL MOUNTING

NOTE

NOTE
CONTROL BUTTON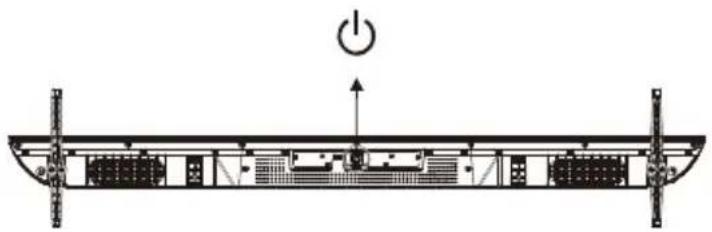
ACCESSORIES
Remote control - 1 pc.
Manual - 1 pc.
Bracket - 2 pcs.
Screws - 4 pcs.
PREPARING YOUR LED TV FOR WALL MOUNTING

NOTE
NOTE
CONTROL BUTTON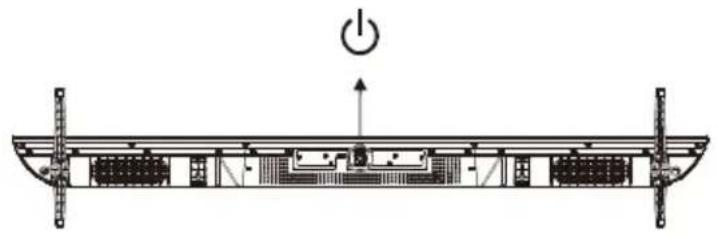
ACCESSORIES

NOTE
BUTTON CONTROL
ACCESSORIES

NOTE
NOTE
BUTTON CONTROL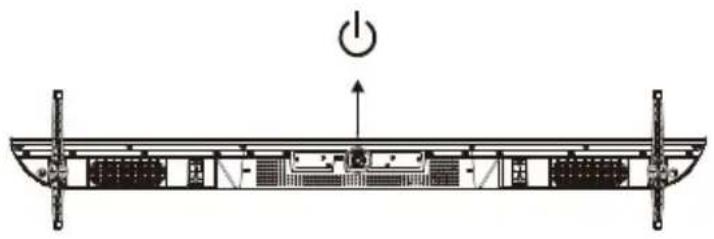
ACCESSORIES

NOTE

NOTE
- Turn on the TV:
BUTTON CONTROL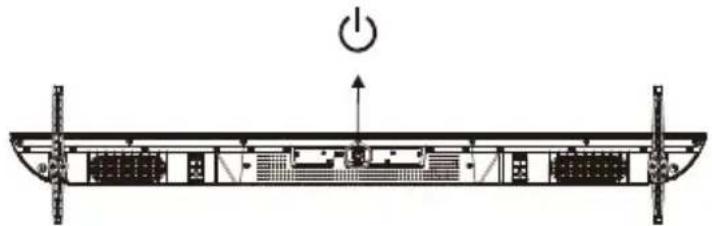
ACCESSORIES
Remote Control - 1 pc
Manual - 1 pc
The illustrations in this guide are for reference only and may differ from the actual product appearance.
Product design and specifications are subject to change without prior notice.
This TV receiver operates with high voltage. Do not remove the back cover. Leave servicing to qualified service personnel.
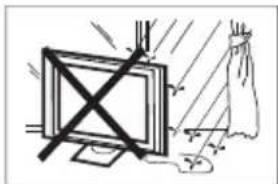
To reduce the risk of fire or electric shock, do not expose the TV to rain or moisture.
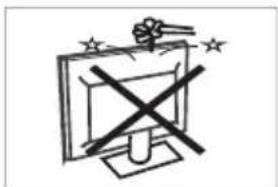
Do not drop or push objects into the slots and openings on the back of the TV. Do not spill liquid on the television.
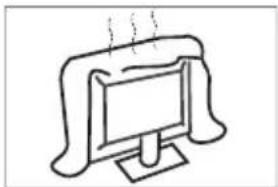
Do not pinch the power cord with the television.
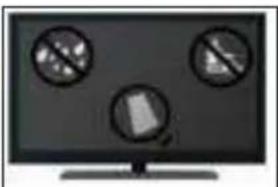
If you want to clean the product, unplug it and use a soft cloth. Do not use water or chemicals.
If you will not use the television for an extended period, we recommend unplugging it from the power outlet.

NOTE

NOTE
The wall mount is not supplied with the TV.
- Tighten the wall mount screws (M6 x 10 mm / 4 pcs) into the back of the TV with a tightening torque of 8 kgf·cm.
TURNING ON THE TV
- Install the stand and place the TV on a stable surface.
NOTE
- Make sure the TV is positioned to allow unobstructed airflow. Do not cover the ventilation openings on the back.
- Turn on the TV: Press 📍 on the remote control or the POWER button on the side control panel of the TV.
- Remote control: Remove the battery compartment cover. Insert 2 batteries (type AAA 1.5 V).
CONTROL VIA BUTTONS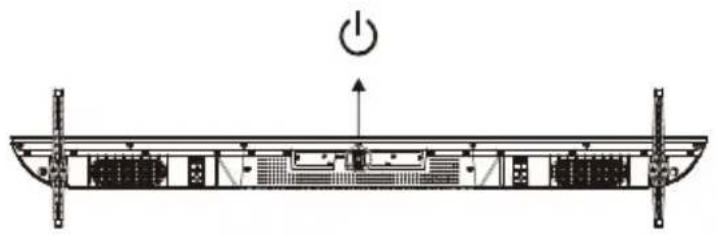
ADDITIONAL ACCESSORIES
This function is used for the remote control pairing code. Once the code is entered, you can use the Bluetooth remote control to operate the TV.
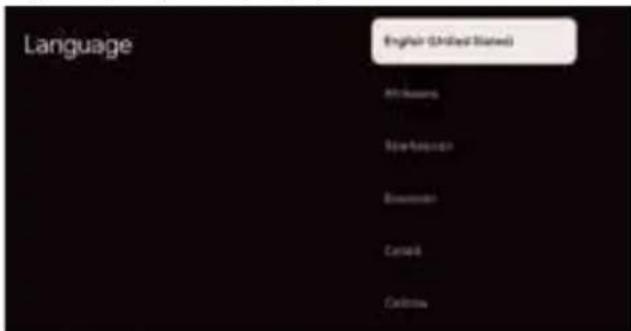
Press the ▲/▼ buttons to select the system language, then press OK to confirm.
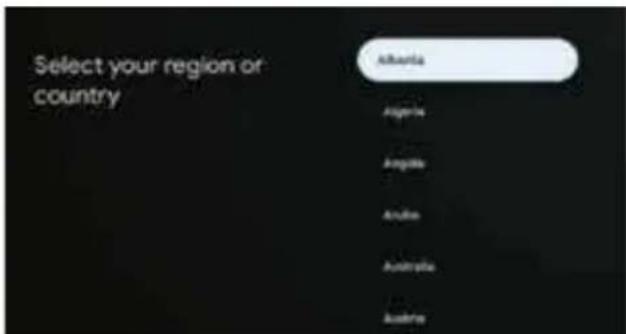
Press ▲/▼ to select the country or region of the device and press OK to confirm.
Note: The image is for reference only.
- When you enter the user interface, you can switch from the basic TV settings to Google TV.
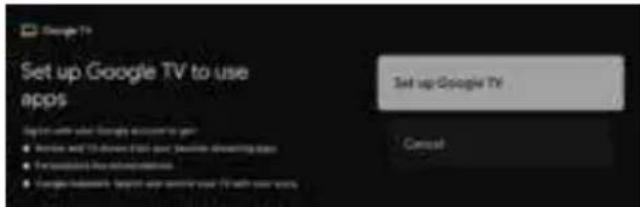
Sign in with your Google account. Follow the Google guide.
E-Manual
The E-Manual is built into the TV and can be displayed on the screen. To learn more about the features of your TV, open the E-Manual as follows.


NOTE

NOTE
BUTTON CONTROL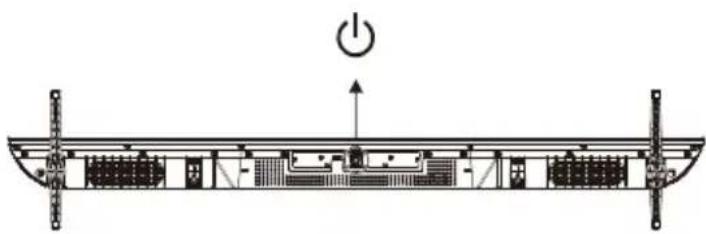
ACCESSORIES

NOTE

NOTE
BUTTON CONTROL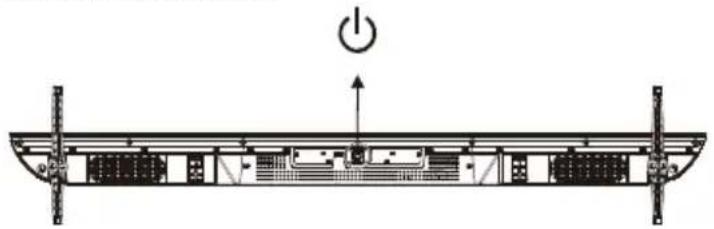
ACCESSORIES:

NOTE
ACCESSORIES
PREPARING THE LED TV FOR WALL MOUNTING

NOTE

NOTES
- Turn on the TV:
BUTTON CONTROL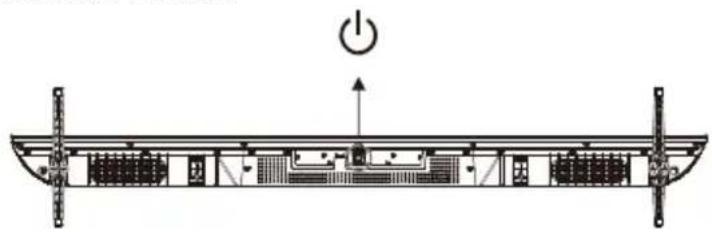
ACCESSORIES
Remote control - 1 pc
Manual - 1 pc
Brand : HAIER
Model : H50K85FUX
Category : Television