USER MANUAL ASTAS3B BRANDT
natural_image
Modern minimalist living room interior with white furniture and hanging pendant lights (no text or symbols visible)
MANUEL D'INSTRUCTION FR
INSTRUCTION MANUAL EN
natural_image
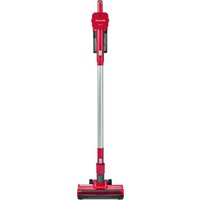
Blue compact vacuum cleaner with black handle and wheels (no visible text or symbols)
Brandt
Chère Cliente, Cher Client,
natural_image
Line drawing of a vacuum cleaner with exhaust pipe emission (no text or symbols)
natural_image
Two identical line drawings of a mechanical component with no text or symbols
natural_image
Simple line drawing of a mechanical component with no text or symbols
natural_image
Technical line drawing of a brand air purifier head (no text or symbols)
natural_image
Line drawing of a hand holding a pen, no text or symbols present
natural_image
Technical line drawing of a brand air purifier device (no text or symbols)
4/ NETTOYAGE ET ENTRETIEN
natural_image
Technical line drawing of a vacuum cleaner (no text or symbols)
natural_image
Line drawing of a vacuum cleaner (no text or symbols)

natural_image
Technical line drawing of a mechanical component with an arrow indicating direction (no text or symbols)
natural_image
Line drawing of a two-hinged vacuum cleaner device with attached hoses and connectors (no text or symbols)
5/ RELATIONS CONSOMMATEURS FRANCE
Thank you for buying a BRANDT product and for your confidence in our company.
This product has been designed and manufactured for you considering your lifestyle and your requirements, so that it meets your expectations in the best way possible. We have invested it with our expertise, spirit of innovation and all the enthusiasm which has driven us for more than 60 years.
So that we are always able to satisfy your requirements as well as possible, our customer service is available, ready to listen and answer all your questions or suggestions
You can also visit our website www.brandt.com where you will find our latest innovations as well as additional useful information.
BRANDT is happy to support you daily and hopes you will enjoy your purchase to the full.

Important: Before starting your machine, please read this guide for installation and use carefully in order to familiarise yourself with how it operates quickly.
CONTENTS
1/NOTICES TO THE USER....21
a) Safety Instructions....22
b) Technical Data....25
c) Environmental Protection....25
2/ APPLIANCE DESCRIPTION....26
3/ USING YOUR APPLIANCE....27
4/ CLEANING AND MAINTENANCE....30
a) Emptying and Replacing the Dust Tank....30
b) Cleaning the outlet filter....31
c) Power Cord Rewinding....31
d) Parking the telescopic tube with the floor brush....31
1/ NOTICES TO THE USER
Keep these instructions with your appliance. If the appliance is ever sold or transferred to another person, ensure that the new owner receives this instruction manual. Please familiarise yourself with these instructions before installing and using your appliance. They have been written for your own safety as well as the safety of others.
- This appliance is intended for domestic household use only and should not be used for any other purpose or in any other application, such as for non-domestic use or in a commercial environment.
- If the supply cord is damaged, it must be replaced by the manufacturer, its service agent or similarly qualified persons in order to avoid a hazard.
- This appliance can be used by children aged from 8 years and above and persons with reduced physical, sensory or mental capabilities or lack of experience and knowledge if they have been given supervision or instruction concerning use of the appliance in a safe way and understand the hazards involved.
Children shall not play with the appliance.
Cleaning and user maintenance shall not be made by children without supervision.
- Children should be supervised to ensure that they do not play with the appliance.
- The plug must be removed from the socket outlet before cleaning or maintaining the appliance.
- Regarding the detailed instructions for the method
and frequency of cleaning and the precautions during user maintenance, refer to the section "CLEANING AND MAINTENANCE" on page 30-32 of the manual.
- Regarding the detailed instructions for the safe use of the appliance, refer to the section "OPERATION".
- This appliance is intended to pick up cold ash from fireplaces, chimneys, ovens, ash-trays, and similar places of ash accumulation.
- Following objects are strictly banned, otherwise the vacuum cleaner will be damaged or fire calamity will be caused, which bring such accidents as human body injuries:
- Don't pick up large or sharp broken objects such as glasses.
- Don't pick up harming or erodent liquids (solvent, corrosive, detergent...).
- Don't pick up inflammable or explosive substance such as gasoline or alcohol.
- Don't pick up/ vacuum burning or glowing objects (cigarettes, matches, hot ashes).
a) Safety Instructions
- Before the first operation, make sure the dust bag is properly
- installed.
- Before turning on, ensure that your electrical voltage and circuit frequency correspond to those indicated on the appliance.
- To reduce the risk of electrocution, never operate
this appliance or handle the plug with wet hands, submerge it under water or spill liquids into the appliance.
- Do not insert any objects into the appliance.
- Do not pull or carry the vacuum cleaner by the cord. Do not use the cord as a handle, close a door on the cord or pull the cord around sharp edges or corners.
- Do not run the vacuum cleaner over the cord. Keep the cord away from heated surfaces.
- Do not vacuum water and inflammable material.
- WARNING: Always switch off and unplug the vacuum cleaner before connecting or disconnecting the vacuum hose and accessories and before emptying or cleaning the dust tank.
- Please change the dust cup/HEPA immediately when it is damaged.
- Do not pull on the cord to disconnect the plug from the power supply. To unplug, grasp the plug, not the cord, and gently pull it out of the power point and then press the cord rewind button to rewind the cord.
- Only use the vacuum cleaner on dry, indoor surfaces, as described in this manual and with the original accessories supplied by the manufacturer/distributor.
- Do not use it for any purpose other than described in this manual.
- Improper installation and use may result in the risk of fire, electric shock and/ or injury to persons. We assume no liability for any eventual damages
caused by improper or faulty use.
- Do not let children use the appliance in case of any danger.
- Never leave the appliance unattended.
- Keep hair, loose clothing, fingers and all parts of the body away from openings and moving parts.
- Keep the end of the hose, wands and other openings away from your face and body.
- Do not point the vacuum cleaner at people or animals when in use.
- Do not use the appliance without the filters in place.
• Take extra care when vacuuming on stairs.
- Keep the vacuum cleaner away from heat sources (radiator, oven etc.), direct sunlight, moisture and sharp edges.
- Keep all openings free of dust, lint, hair or anything that may reduce the airflow.
- Do not use the appliance with any openings blocked or restricted airflow.
- Put the vacuum cleaner away after every use to prevent anyone from tripping over it.
- Never attempt to open the motor base of the vacuum cleaner yourself or to replace the power cord. If the vacuum cleaner is damaged, it must be repaired by the manufacturer or its service agent or an appropriately qualified person in order to avoid a hazard. In case of damage, call the after sales support line for advice.
b) Technical Data
| Model ASTAS3B, ASTAS3BLE | |
| Rated voltage and frequency 220-240V~ 50-60Hz |
| Consumption 700 W | |
| Dimensions H435 x W250 x D305 mm |
| Net weight 5.16 kg | |
c) Environmental Protection
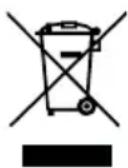
At the end of its life this product must not be discarded with household waste. It must be taken to a recycling centre or to your dealer. This makes it possible to avoid consequences resulting from inappropriate disposal that are harmful to health and the environment, and to recycle materials to save energy and significant resources.
A logo appears on the product reminding you not to discard it with household waste. For further information, contact your council offices or the shop where you bought this product.
2/ APPLIANCE DESCRIPTION

- Lock clip
- Handle
- Front cover
- Dust full indicator
- Speed control button
- ON/OFF button
- Housing
- Cord rewinding button
- Power cord
- Wheel
- Hose connector
- Hose
- Hose handle
- Airflow regulator
- Extending tube
- Floor brush
-
Parquet brush
-
2 in 1 combined brush (Dusting brush and crevice tool)
3/ USING YOUR APPLIANCE
Always disconnect the appliance from the mains socket before assembling or disassembling accessories.
- Connect the hose accessories: insert the hose end into the hose socket at the front cover and then hook it.
To remove the hose accessories: press the adaptors at both side of the hose end and then pull the hose accessories out of the hose socket.
natural_image
Line drawing of a vacuum cleaner with exhaust pipe emission (no text or symbols)
- Connect the tube to the end of the hose.

- Connect different nozzle tools to the tube for different cleaning purpose:
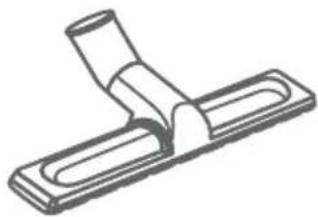
• Floor brush for carpet or floor
Position 1: Bristles extended - For hard floors
Position 2: Bristles retracted - For carpets
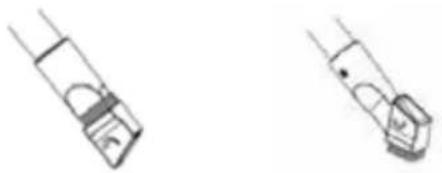
- 2 in 1 combined brush is a dual-purpose tool. Use it as a crevice tool to vacuum down the side of cushions, corners, edges or small spaces. Use it as a dusting brush by turn the head to clean curtains, etc.
natural_image
Two identical line drawings of electronic components or connectors, no text or symbols present.
- Parquet floor brush for hardwood and tile floor
natural_image
Simple line drawing of a mechanical component with no text or symbols
- Operating the vacuum cleaner: Insert the plug of cord into the power socket which conforms to that on the label for power supply, and press the ON/OFF button to start vacuuming.
natural_image
Technical line drawing of a brand air purifier device (no text or symbols)
Adjust the vacuum power : Slide the variable power control to increase or decrease the suction.
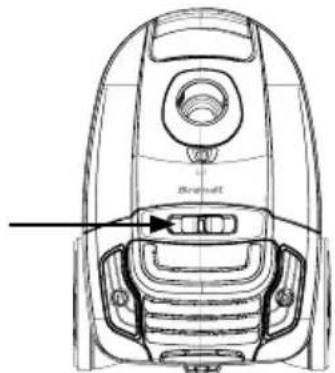
*You can quickly reduce the suction power by pushing the airflow regulator on the hose handle.
- Push it forward, suction power will increase; push it backward, suction power will reduce.
- You can also adjust the suction power by setting the suction power regulator.
natural_image
Line drawing of a hand holding a pen, no text or symbols present
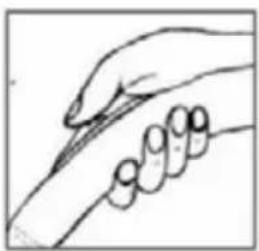
- Cord rewinding: Hold the plug securely in order to guide the power cord while pressing the cable rewind button.
natural_image
Technical line drawing of a brand air purifier device (no text or symbols)
4/ CLEANING AND MAINTENANCE
Always switch off the appliance and unplug from the mains socket before carrying out any maintenance or cleaning. Clean the outside of the appliance with a damp cloth. Dry thoroughly before use.
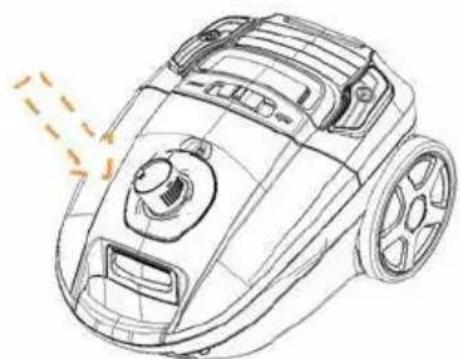
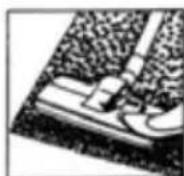
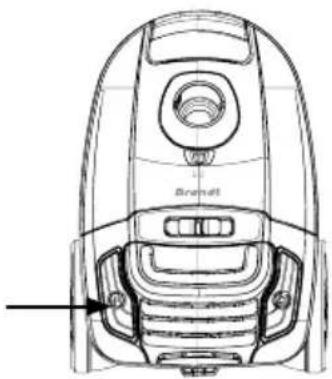
a) Emptying and Replacing the Dust Tank
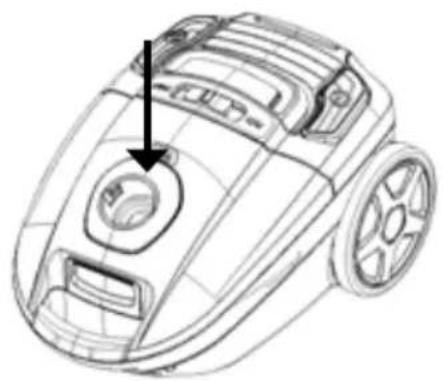
natural_image
Line drawing of a robotic vacuum cleaner with a circular vent and mounting bracket (no text or symbols)
When the dust full indicator shows red, please empty the dust bag or replace with a new bag.

natural_image
Technical line drawing of a vacuum cleaner component, showing top and side views with no text or symbols
- Lift up the front cover clamp to take out the bag.
- Reinsert a new dust bag into the compartment until it locks in place.
b) Cleaning the outlet filter
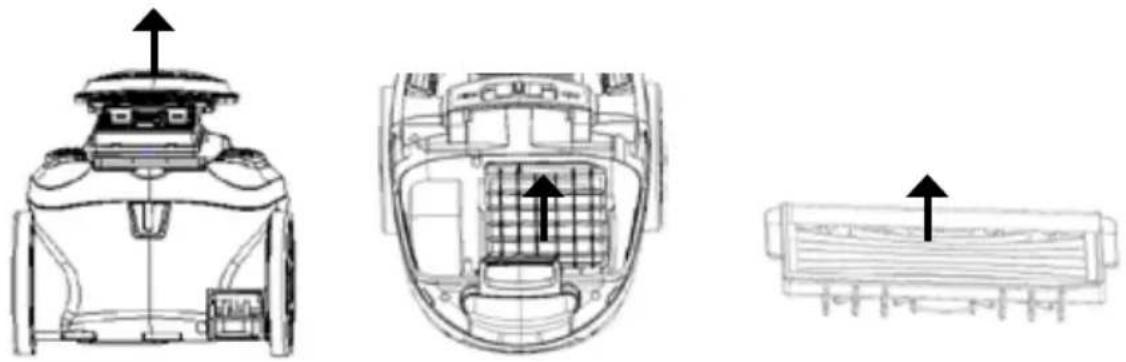
- Remove the outlet cover.
- Remove the outlet filter and wash the cover with filter in clean warm water.
- Do not use any chemical or abrasive cleaning agents.
- Dry the filter and cover completely and replace the filter.
- Attach the cover back to the appliance.
c) Power Cord Rewinding
When not in use, unplug the appliance from the mains socket and then press the cord rewind button to feed back the power cord.
CAUTION: Take special care to rewind the mains cord by holding the plug to avoid injury by a whipping action.
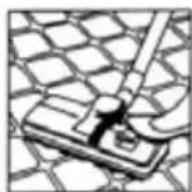
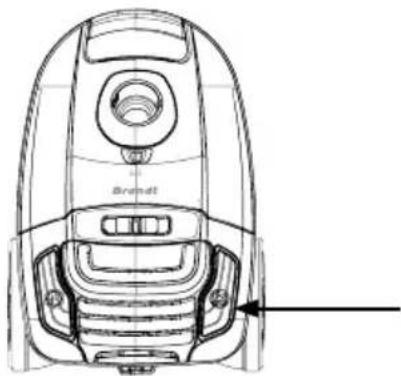
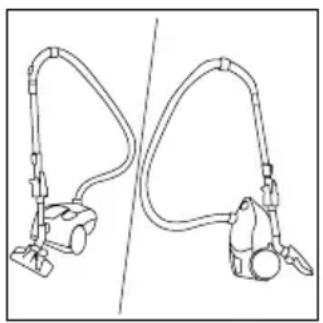
d) Parking the telescopic tube with the floor brush
There are two slots for parking. One located on the bottom of the vacuum cleaner and the other on the back. This feature allows you to park the
telescopic tube with the floor brush in one of the parking positions during pauses or storage.
- Press the Telescopic tube release button to retract the tube before parking.
- Horizontal parking position – Slide the tab on the neck of the floor brush into the parking slot on the back of the vacuum cleaner as illustrated.
- Vertical parking position – Stand the vacuum cleaner upright and slide the tab on the neck of the floor brush into the parking slot on the bottom of the vacuum cleaner as illustrated.
natural_image
Line drawing of a two-hinged vacuum cleaner device with attached hoses and wheels (no text or symbols)