OCEAISH1750W0 - Tumble dryer OCEANIC - Free user manual and instructions
Find the device manual for free OCEAISH1750W0 OCEANIC in PDF.


| Product type | Electric towel radiator |
| Model | HJ8EDF (Ref. OCEAISH1750W0) |
| Brand | Oceanic |
| Nominal power | 1750 W |
| Voltage and frequency | 230 V ~ 50 Hz |
| Protection rating | IP24 |
| Electrical class | II (double insulation) |
| Heating type | Natural convection and fan-assisted (Boost mode) |
| Controls | Wireless remote control with LCD display |
| Operating modes | Comfort, ECO, Frost-free, Boost (bSt1/bSt2/bSt1+/bSt2+), Weekly programmer (P1-P7), Pilot wire (6 orders) |
| Special functions | Automatic airing detection (open window), Key lock, Timer, Temperature setting (5-29°C) |
| Radio communication | 2.4 GHz radio frequency (2412-2472 MHz, power <100 mW) |
| Mounting | Vertical wall mounting, distance from wall 80 mm |
| Minimum installation height | Lowest heating element at ≥600 mm from floor |
| Electrical supply | Fixed connection via wall box (no plug), 30 mA RCD, independent circuit |
| Remote control batteries | 2 x AAA (LR03) 1.5 V (not supplied) |
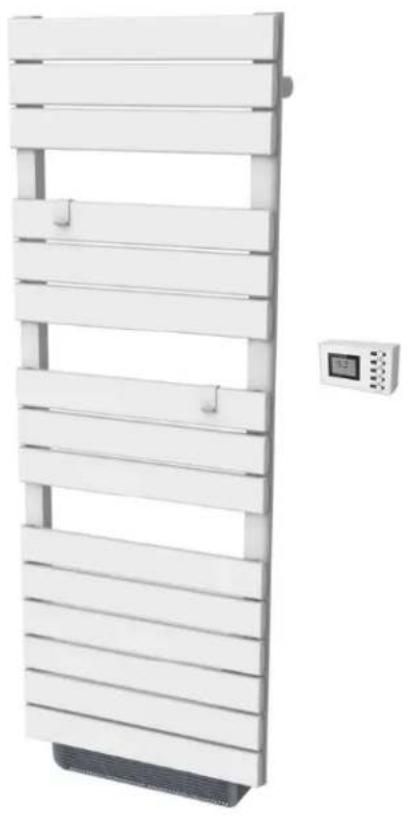
| Included accessories | Remote control, wall brackets, towel holders (2) |
| Maintenance | Clean with a damp cloth, vacuum the grilles |
| Safety | Thermal cut-out, shutdown in case of overheating, ventilation if window open |
| Repairability | Remote control battery replaceable by user; other parts not specified |
| Recommended use | Drying of water-washed textiles (towels, laundry) |
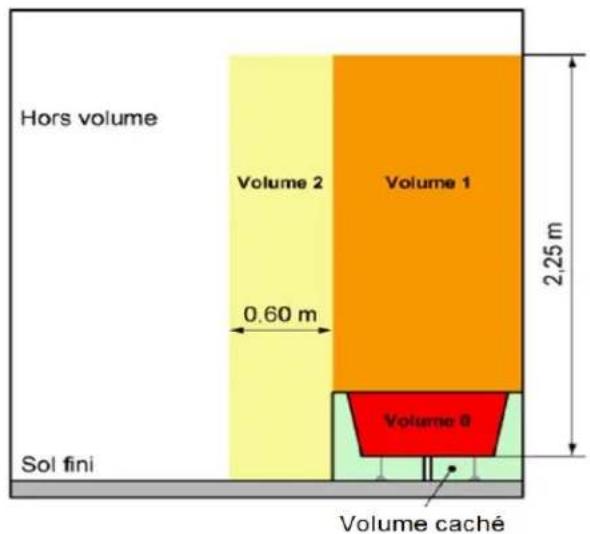
| Installation volume in bathroom | Volume 2 or outside volume according to NF C 15-100 standard |
Frequently Asked Questions - OCEAISH1750W0 OCEANIC
User questions about OCEAISH1750W0 OCEANIC
0 question about this device. Answer the ones you know or ask your own.
Ask a new question about this device
Download the instructions for your Tumble dryer in PDF format for free! Find your manual OCEAISH1750W0 - OCEANIC and take your electronic device back in hand. On this page are published all the documents necessary for the use of your device. OCEAISH1750W0 by OCEANIC.
USER MANUAL OCEAISH1750W0 OCEANIC
RADIATEUR SÈCHE SERVIETTES AVEC SOUFFLERIE
Guide d'utilisation
ELECTRIC TOWEL RACK WITH BLOWER
User manual
OCEAISH1750W0
oceanic
CONSIGNES DE SÉCURITÉ
MERCI DE BIEN VOULOIR LIRE LES CONSIGNES DE SÉCURITÉ ATTENTIVEMENT AVANT D'UTILISER L'APPAREIL.
RECOMMANDATIONS POUR LA FIXATION
MURALE
I. Bouton OK-boost
- This appliance can be used by children aged from 8 years and above and persons with reduced physical, sensory or mental capabilities or lack of experience and knowledge if they have been given supervision or instruction concerning use of the appliance in a safe way and understand the hazards involved. Children shall not play with the appliance. Cleaning and user maintenance shall not be made by children without supervision.
- Children of less than 3 years should be kept away unless continuously supervised.
- Children aged from 3 years and less than 8 years shall only switch on/off the appliance provided that it has been placed or installed in its intended normal operating position and they have been given supervision or instruction concerning use of the appliance in a safe way and understand the hazards involved.
- Children aged from 3 years and less than 8 years shall not plug in, regulate and clean the appliance or perform user maintenance.
-
CAUTION — Some parts of this product can become very hot and cause burns. Particular attention has to be given where children and vulnerable people are present.
-
If the power cord is damaged, it must be replaced by the manufacturer, its service agent or similarly qualified persons in order to avoid a hazard.
- The appliance should not be placed immediately below a socket.

- WARNINGS : In order to avoid overheating, do not cover the air outlet.
- WARNING: This appliance is only intended for drying textiles washed in water.
- WARNING: In order to avoid a hazard for very young children, this appliance should be installed so that the lowest heated rail is at least 600 mm above the floor.
- Do not use this heater with a programmer, timer, separate remote control system or any other device that turns on the heater automatically because there is a risk of fire if the device is covered or placed incorrectly. Use only a remote control device connected by the pilot cable.
- The device must be powered by a Residual Current Device (RCD) with a rated operating differential current of not more than 30 mA.
- The device must be connected to a circuit independent electric protected by a bipolar circuit breaker according to the standard electrical installation NF C 15-100.
- CAUTION: To avoid hazard due to inadvertent resetting of the thermal cutout, this appliance must not be powered via an external switch,
such as a timer, or connected to a circuit that is regularly switched on and off by the electricity supplier.
- The heater must be installed so that switches and other control devices can not be touched by a person in the bath or shower.
- A means of disconnection from the power supply having a contact opening distance of all poles must be included in the fixed wiring in accordance with the installation requirements.
- For your safety, the device is equipped with a thermal circuit breaker. In the event of overheating, the power supply will be cut off.
- With respect to the details of how to install the appliance onto the wall, refer to the "INSTALLATION" section.
- Regarding the detailed information on the connection of the electric cable, refer to the section "ELECTRICAL CONNECTION".
Ref: OCEAISH1750W0
Model: HJ8EDF
Radio frequency bands used by the Transceiver 2412MHz to 2472MHz
Maximum radio frequency power: <100mW
The undersigned, OCEANIC, declares that the radio equipment of the electric towel radiator type Ref: OCEAISH1750W0: Model: HJ8EDF complies with directive 2014/53/EU. The full text of the EU declaration of conformity is available at the following internet address: www.oceanic.eu.
INSTALLATION
RECOMMENDATIONS IMPORTANT READ BEFORE INSTALLATION
- Do not install the unit directly below a socket.
- Do not use the appliance outdoors.
- Do not install the unit in an air current that could disrupt its regulation.
- Do not place the unit near a barrier limiting the airflow around it.
- Attach the heater vertically to the wall as described below.
- Choose screws and plugs suitable for the wall material and weight of the unit.
RECOMMENDATIONS FOR WALL MOUNTING
Do not make any changes to the unit or its mounting bracket on the wall!
Before installing the device, check the condition of the wall on which it will be fixed: the wall must be in good condition, it must not show any damage (cracks, sagging, humidity, ...).
Do not drill holes near old holes, even when they are closed.
It is imperative that you consult a building professional to use the anchoring system (screws, dowels, etc.) appropriate for the material that constitutes your wall, as well as the weight of the appliance. Observe the diameter of the fixing screws indicated in this manual.
Do not modify the holes for securing the unit or its mounting bracket to the wall.
Drill the wall with a drill of the appropriate size for the anchoring system. Remove debris and dust.
Regularly check the mounting points of the device on the wall. Tighten them if necessary.
INSTALLATION IN THE BATHROOM
Warning: this product shall be used in volume 2 and out of volume only according to the national wiring rules (For France NF C 15-100)
Note: The drawing is for reference only.
We suggest that you contact a professional electrician for assistance.
ELECTRICAL CONNECTION
CAUTION: Before working, turn off the electricity at the main circuit breaker.
- The installation must be carried out in the rules of the art and meet the standards in force in the country (NF C 15-100 in France).
- The unit must be connected to a standard wall box placed at least 60 cm from the floor.
- The appliance must not be connected to an outlet with a power plug.
- The appliance must be supplied through a residual current device (RCD) having a rated residual operating current not exceeding 30 mA.
- The appliance must not be connected to the earth wire (yellow and green wire).
ELECTRICAL CONNECTION
Blue or light gray wire connect to Neutral (230V)
Brown or red wire connect to Phase (230V)
Black wire connect to pilot wire. (Optional function to use in case of control by pilot wire box)
- In the absence of pilot wire, insulate the bare end of the black wire to prevent electrical contact with the other wires or ground.
WALL-MOUNTED KITS (not provided)
| Description | Drawing Spec QTY | ||
| Screw |  | 4 x 30 mm | 8 |
| Wall plug | 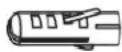 | Φ8 8 | |
INSTALLATION
To hang the heater on the wall:
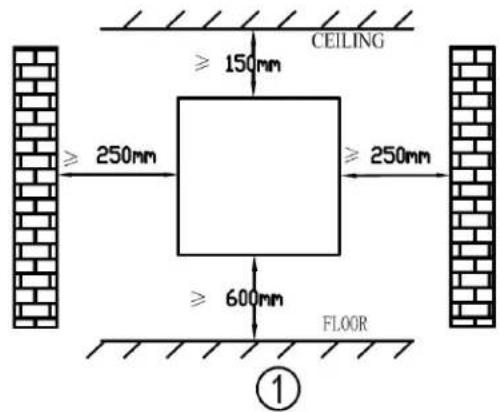 | Choose a suitable installation location for the heater. Observe the minimum distances of obstacles. |
Fix the 2 wall tubes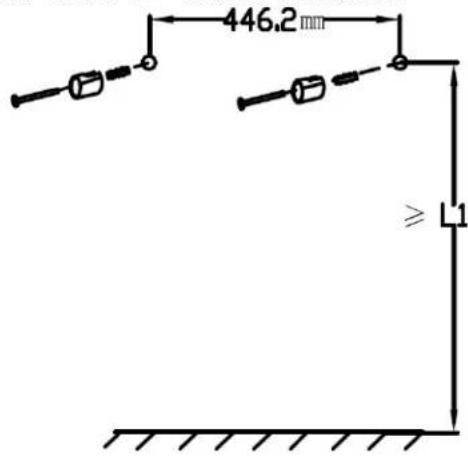 2 2 | (smaller ones) to a strong, flat wall using the appropriate screws and wall plugs according to the dimensions shown in the installation diagram. |
| HJ8EDF |
| L1 >=1937.5mm |
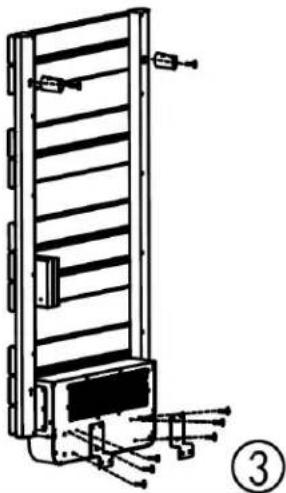 | Then fix the other 2 sleeves (the larger ones) and fix the 2 supports on the device with the 6 screws provided. | |
 | Place the appliance in front of the wall and insert the body pillar to the wall tubes. | |
 | Mark the position of the holes for the lower brackets. | |
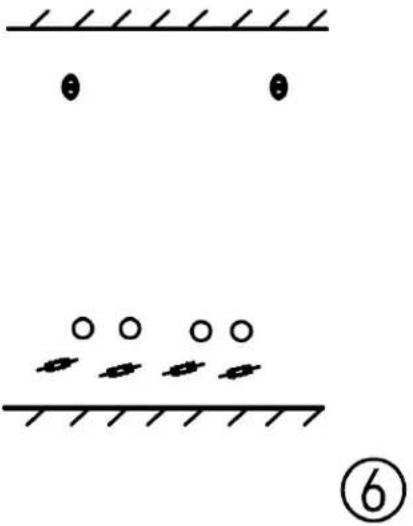 | Drill holes and insert the plastic plugs. | |
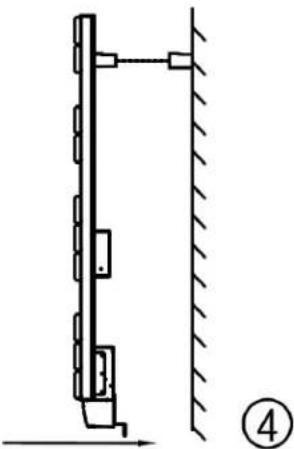
 | Place the appliance in front of the wall and insert the up body pillars to the wall tubes. | |
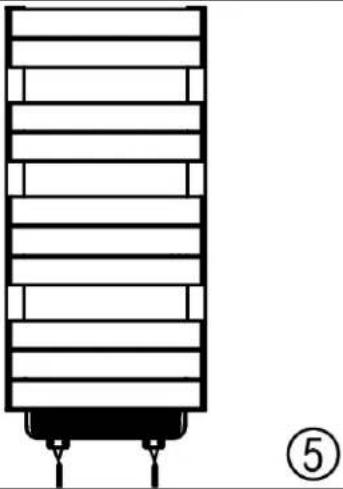
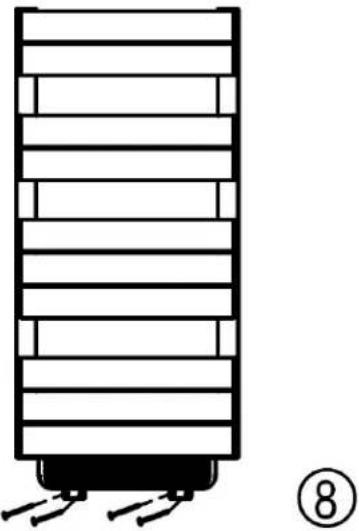 | Screw tightly the bottom bracket to the wall. | |
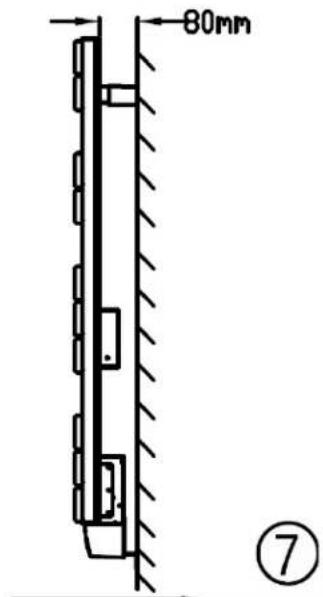
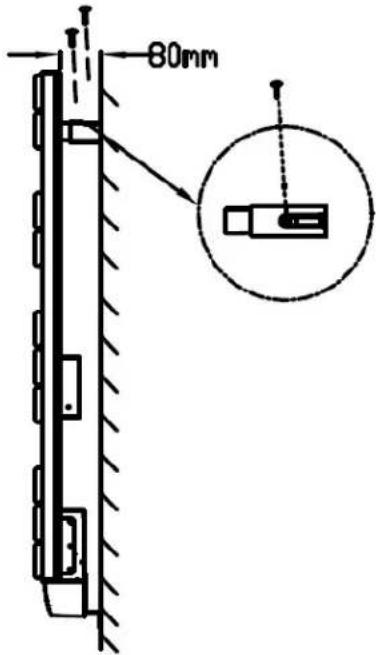 9 9 | Then use the screws provided for this purpose to hold the appliance to the wall tubes attached to the wall. After fixing, the distance between the appliance and the wall is 80mm as shown in the drawing. | |
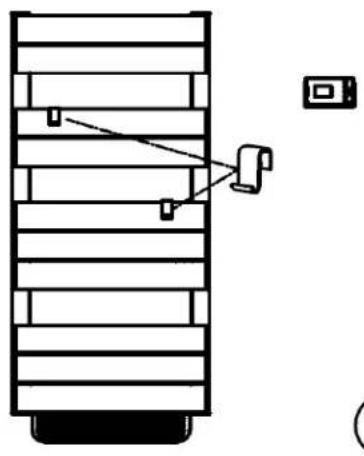 10 10 | You can hang the 2 pads (supplied) at the flat bar if needed. | |
TO HANG THE REMOTE CONTROLLER ONTO
THE WALL
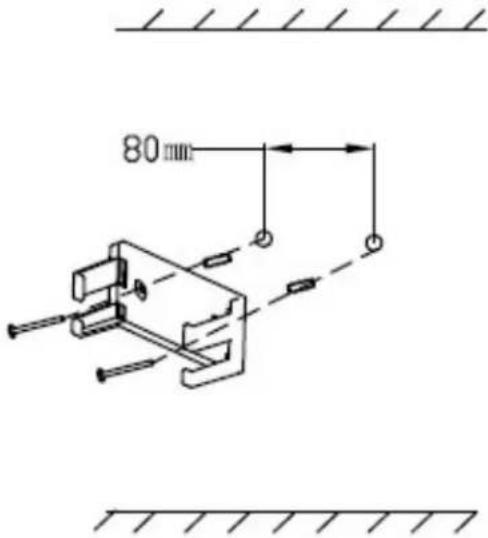 1 1 | Choose an appropriate and make sure the position will not have water spray onto the remote control. Drill the holes and insert the plastic plugs. Fix the remote controller supporter onto the wall with screws. |
 2 2 | Insert the remote controller onto the supporter. |
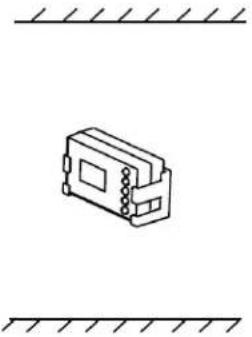 3 3 | Always be sure that the remote controller is correctly fixed and stable after performing the installation. |
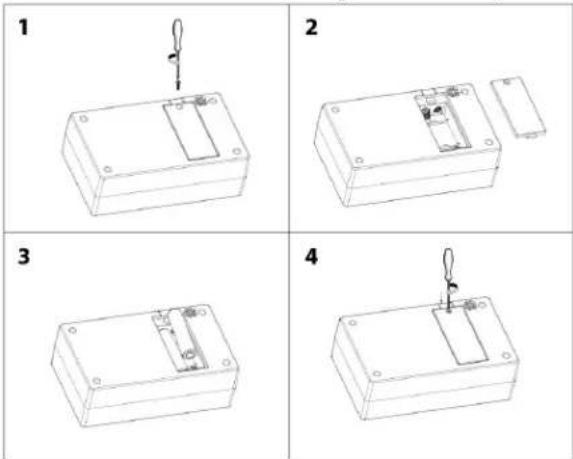
REPLACING THE REMOTE CONTROL BATTERY
The remote control works with two 1.5 V AAA (LR03) batteries (not supplied). If the remote control does not work as expected, replace the batteries.
LCD DISPLAY
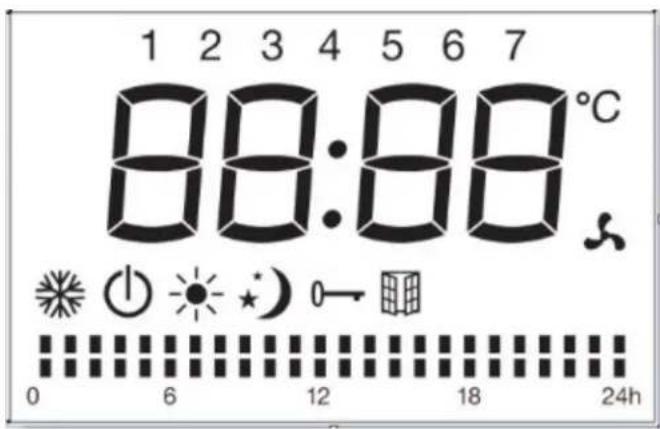
Functions of the icons on the LCD:
| Symbol Function | |
| Mode Standby (the appliance doesn't work but with power on) | |
 | Mode Anti-freeze (the appliance maintains the temperature around 7°C) |
| [5XZS] | Mode Comfort (set the desired temperature) |
| Mode ECO (ECO maintains the temperature that is 3.5 °C lower to comfort temperature.This mode reduces the temperature without disturbing the desired temperature in comfort mode) | |
 | Mode pilote (to set the programs via pilote) |
| [W3BA] | Child lock |
 | Window detector function |
 | Blower activated |
 | Temperature (centigrade) |
| Weekly personalized modes: | |
| Mode Comfort active | |
| Mode ECO active | |
CONTROL PANEL
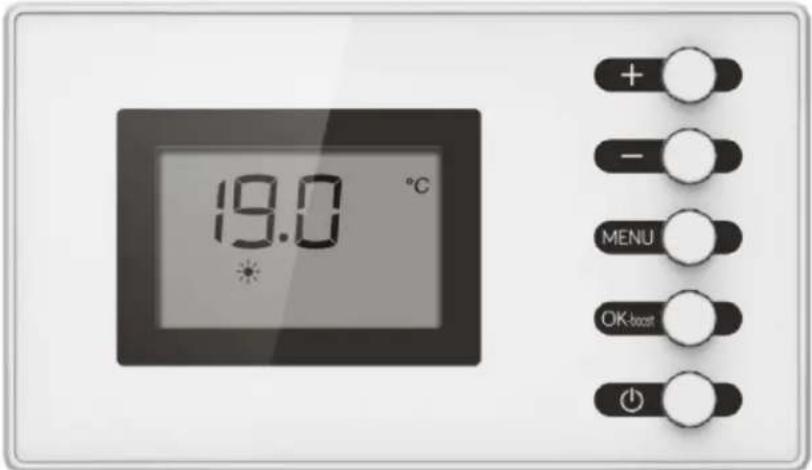
After 30 seconds without operation, in order to save electric consumption of the battery, the remote controller will enter sleep status " "without affecting the normal
working of the appliance.
Press any key to display current operating mode.
I. Mode selection (OK-boost button)
1) For the first time you use the device, after you connect the device to the power supply and install the battery (two AAA (LR03) 1.5 V batteries (not supplied)) on the remote control. Set the time or after 10 seconds it will automatically go into standby mode. You can press the standby button to enter comfort mode.
Notes: If there is no battery, the unit keep in memory only the parameters, temperature and operating mode. When the battery is installed, the clock should be adjusted again to operate the program modes properly.
Press OK-boost to toggle among the modes: comfort / Eco / Program mode
or Fil Pilote P/ Anti-freeze mode.

2) Program mode and Fill pilot are mutually exclusive. When the
appliance is working on Program mode, press and hold MENU button for 3 seconds, the appliance will shift from Program mode to Fil pilote mode.
When the appliance is working on Fil pilote mode, press and hold MENU button for 3 seconds, the appliance will shift from Fil pilote mode to Program mode.
The interface of program mode and Fil pilote mode are as below:
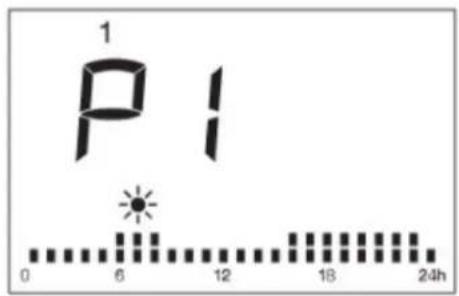
Program mode
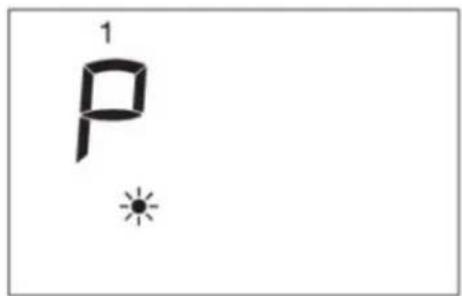
Fil pilote
Note: For the program mode, mode setting and mode selection is separated. If you want to set the program mode, press MENU together to enter setting menu to choose program mode setting and press OK-boost button to enter setting interface. For details, please refer to part 2 « Program mode setting » under section IV « Setting menu ».
Fil-pilote mode
Press OK-boost button to choose Program mode of Fil pilote mode.

Under Fil-pilote mode, choose the mode via the external control (for France only). For other countries except France, if you choose mode Fil pilote P, the appliance will work at comfort mode as default.
If the working interface is at Program mode, press and hold MENU button for 3 seconds, the appliance will shift from Program mode to Fil pilote mode.
When the external controller is programmed, the display shows:
| External Mode Setting | Icon Displayed |
| Comfort mode | P |
| Comfort mode-1 | P-1 |
| Comfort mode-2 | P-2 |
| Economic mode | P |
| Antifreeze mode | P |
| Standby mode | P(1) |
II. Boost Mode
Under all other working modes except Fil pilot mode, press and hold OK-boost button for 3 seconds to activate or inactivate the boost mode. Under boost mode, the temperature is automatically set at 29°C and cannot be adjusted. Press +/- to choose from bSt1 / bSt2 / bSt1
+ /bSt2 + . Short press OK-boost to confirm and activate boost mode, or you can short press MENU to exit or after 30 seconds it will automatically exit and go back to previous working interface.
bSt1: the towel rack work at boost mode for one hour, then returns to previous mode.
bSt2: the towel rack work at boost mode for two hours, then returns to previous mode.
bSt1 + . both towel rack and blower work for one hour, then return to previous mode.
bSt2 + . both towel rack and blower work for two hours, then return to previous mode.

To exit boost mode, press MENU button or hold OK-boost for 3 seconds.
III. Temperature setting
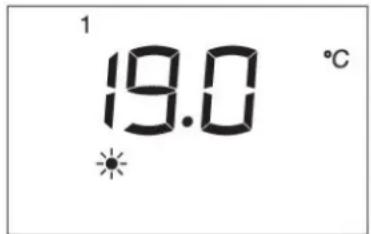
- Under the mode of comfort or Eco (excluding anti-freezing mode), temperature is adjustable.
Press + or - to choose the desired temperature for comfort mode between 5°C and 29°C. The temperature difference between mode ECO and mode comfort is 3.5°C, so the temperature range of mode ECO is between 1.5°C and 25.5°C.
- Press other buttons except +/- to finish the setting, or after 5 seconds it will automatically save.
- When the room temperature is higher than the selected temperature, the heater will stop heating.
IV. Setting menu (MENU)
Press MENU to enter setting menu interface.
Press + / - to choose from time setting , program mode setting ,
Window detection mode , keyboard lock setting . The selected icon will flash while other icons keep on.
Press MENU to exit the setting menu or after 30 seconds it will automatically exit and go back to working interface.
1. Time setting 12:00
Press MENU to enter setting menu interface, and + / - to select the time setting 12:00. When
12:00 is flashing, press OK-boost to enter time setting.
Press + / - to adjust the hour between 00-23.
Press OK-boost to confirm hour setting and move to minute setting (00\~59).
Press OK-boost to confirm minute setting and move to day of week setting (1\~7).
Press OK-boost to confirm or after 30 seconds, it will automatically save and go back to working interface.
2. Program mode setting
Under program mode, you can choose from 7 pre-set 24-hour programs (P1\~P7) for each day of week. The 7 pre-set 24-hour programs (P1\~P7) are programmable. For each hour, you can choose between comfort mode or economic mode.
Under program mode, the default setting for day 1 to 7 of the week are as follows:
day 1 to day 5: work with P1,
day 6 to day 7: work with P3.
The default setting of P1-P7 are as follows:
| P1 |  |
| P2 |  |
| P3 |  |
| P4 |  |
| P5 |  |
| P6 |  |
| P7 |  |
Press MENU to enter setting menu interface and choose Program mode
setting by pressing + / -. Press OK-boost to enter program mode setting interface.
Press + / - to choose from P1 to P7 for day 1 (Monday). Press OK-boost to confirm and choose for next day. After finishing the setting of day 7 (Sunday), press OK-boost to confirm or after 30 seconds, it will automatically go back to working interface.
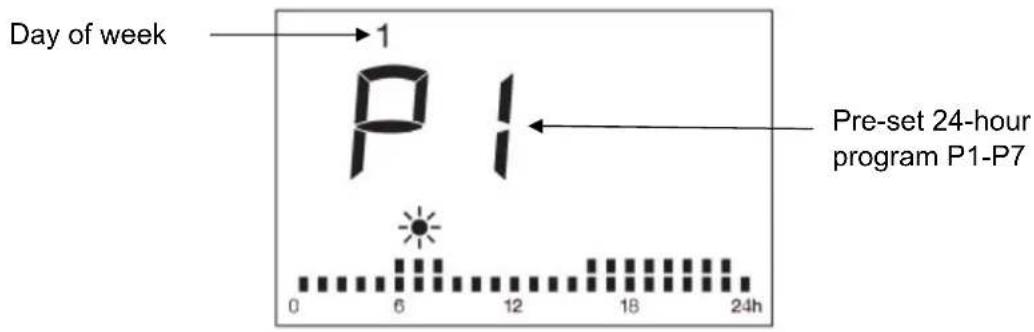
Setting of 7 pre-set 24-hour programs (P1\~P7)
Under program mode setting interface, regardless of which day, when you choose program from P1 to P7, press and hold OK-boost for 3 seconds to enter the setting interface of the mode. The setting will be memorized (in case of power failure, it will also be memorized).
- Select mode for the hour: press + to choose comfort mode, ■to choose ECO mode, or OK-boost to keep previous setting. After on, it will automatically go to setting for next hour.
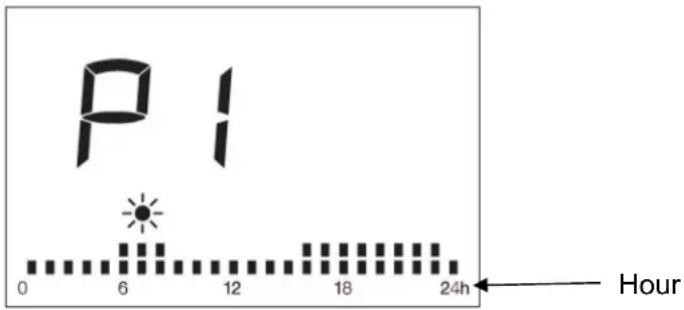
- At the last hour, press + / -, or OK-boost to finish the setting and go back to previous setting interface.
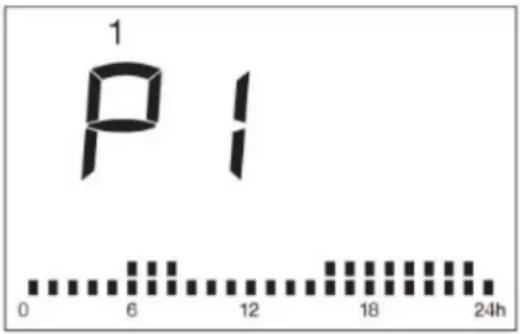
For example, if you enter the P1 setting from below interface (day 1, P1), it will go back to below interface (day 1, P1) after you finish P1 24-hour setting.
Notes:
- If there is no battery, the unit keep in memory only the parameters, temperature and operating mode. When power is restored, the clock should be adjusted again to operate the program modes properly.
- After you finish program mode setting, it will be saved but will not automatically start working at program mode. You need to press OK-boost to choose program mode to make the heater work at this mode.
3. Window detection mode

Press MENU to display the setting menu interface and choose the window detection function by pressing + / -. Then press + / - to choose "ON" or "OFF". If "ON" is selected, the window
detection function is activated and icon will show on the screen. When temperature
decrease detected, the appliance will automatically enter anti-freeze mode with icon
flashing. If temperature rises up, the appliance will go back to previous mode with icon on.
You can choose "OFF" to inactivate the window detection function.
Remarks: the window detector function is not available under anti-freeze mode and boost mode.
4. Keyboard lock setting
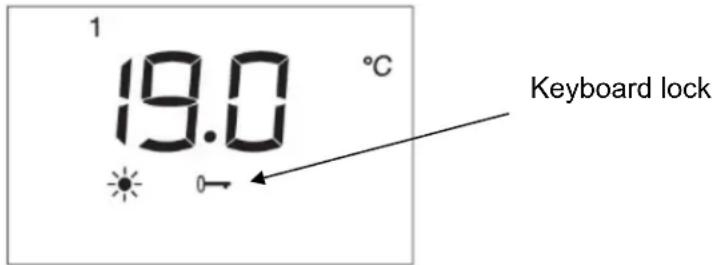
Press MENU to enter setting menu interface, and + / - to choose keyboard lock icon 0→, press OK-boost to activate the keyboard lock function 0and go back to working interface.
In order to unlock, press MENU for three seconds.
Remarks:
- The keyboard lock function doesn't lock the standby button.
- The keyboard lock function will automatically be deactivated under below circumstances.
1) the appliance is put into standby mode by pressing standby button ⏻
2) the appliance suffers power disconnection.
V. If there is no electrical charge on the remote control battery
All the above settings for temperature, time, the date of week and the programs remain valid until the electric power is not cut.
After installing the battery, the device keeps in memory only the parameters, temperature and operating mode.
When switching on again, the date and time must be set in order to operate the various programs correctly.
TECHNICAL CHARACTERISTICS
| Model / Ref HJ8EDF/OCEAISH1750W0 | |
| Nominal voltage | 230 V ~ |
| Rated frequency | 50 Hz |
| Nominal power | 1750 W |
| Class | II |
| IP | IP24 |
| Pilot wire | 6 orders |
Information requirements for electric local space heaters
| Model identifier(s): HJ8EDF/OCEAISH1750W0 | ||||||
| Item Symbol | Value Unit | Item Unit | ||||
| Heat output | Type of heat input, for electric storage local space heaters only (select one) | |||||
| Nominal heat output | Pnom | 1,5 kW | manual heat charge control, with integrated thermostat | NA | ||
| Minimum heat output (indicative) | Pmin | 0.0 kW | manual heat charge control with room and/or outdoor temperature feedback | NA | ||
| Maximum continuous heat output | Pmax,c | 1,5 kW | electronic heat charge control with room and/or outdoor temperature feedback | NA | ||
| Auxiliary electricity consumption | fan assisted heat output | NA | ||||
| At nominal heat output | eImax | 0.000 | kW | Type of heat output/room temperature control (select one) | ||
| At minimum heat output | eImin | 0.000 | kW | single stage heat output and no room temperature control | [no] | |
| In standby mode | eISB | 0.000 | kW | Two or more manual stages, no room temperature control | [no] | |
| with mechanic thermostat room temperature control | [no] | |||||
| with electronic room temperature control | [no] | |||||
| electronic room temperature control plus day timer | [no] | |||||
| electronic room temperature control plus week timer | [yes] | |||||
| Other control options (multiple selections possible) | ||||||
| room temperature control, with presence detection | [no] | |||||
| room temperature control, with open window detection | [yes] | |||||
| with distance control option [no] | ||||||
| with adaptive start control [no] | ||||||
| with working time limitation [no] | ||||||
| with black bulb sensor [no] | ||||||
| Contact details | OCEANIC120-126 quai de BacalanCS 1158433000 BORDEAUX | |||||
IN CASE OF PROBLEMS
| Problem Solution | |
| The appliance does not heat Ensure | that the circuit breakers are switched on the installation, or the shedder did not cut the power supply (if the installation has one). |
| Select the COMFORT mode. | |
| Increase the temperature setting. | |
| Within 10 seconds of connecting the device to electricity, make sure the remote control is in standby mode, then simultaneously press "+" and "OK-boost" for 2 seconds to pair the remote control and the apparatus. You will hear a "Bee" sound when pairing is successful. Now you can start the operation. | |
| The device heats permanently | Ensure that the device is not in a draft. |
| Reduce the temperature setting. |
CARE AND CLEANING
- Before cleaning the appliance, switch off the appliance supply and wait until it is completely cooled.
- Use a damp cloth to clean the housing of the device.
- Clean grilles and air outlet regularly. Never immerse the appliance in water or allow water to enter the appliance.
ENVIRONMENTAL PROTECTION
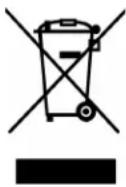
This symbol is known as the 'Crossed-out Wheelie Bin Symbol'. When this symbol is marked on a product or battery, it means that it should not be disposed of with your general household waste. Some chemicals contained within electrical/electronic products or batteries can be harmful to health and the environment. Only dispose of electrical/electronic/battery items in separate collection schemes, which cater for the recovery and recycling of materials contained within. Your co-operation is vital to ensure the success of these schemes and for the protection of the environment.
Oceanic
120-126 Quai de Bacalan
CS 11584
33000 Bordeaux
IMPORTED BY :
A.M.C.
123, QUAI JULES GUESDE
94400 VITRY SUR SEINE
France
oceanic
www.oceanic.eu
CE

- RADIATEUR SÈCHE SERVIETTES AVEC SOUFFLERIE
- GUIDE D'UTILISATION
- ELECTRIC TOWEL RACK WITH BLOWER
- USER MANUAL
- OCEANIC
- CONSIGNES DE SÉCURITÉ
- MERCI DE BIEN VOULOIR LIRE LES CONSIGNES DE SÉCURITÉ ATTENTIVEMENT AVANT D'UTILISER L'APPAREIL
- RECOMMANDATIONS POUR LA FIXATION
- MURALE
- BOUTON OK-BOOST
- INSTALLATION
- RECOMMENDATIONS IMPORTANT READ BEFORE INSTALLATION
- RECOMMENDATIONS FOR WALL MOUNTING
- INSTALLATION IN THE BATHROOM
- ELECTRICAL CONNECTION
- WALL-MOUNTED KITS (NOT PROVIDED)
- TO HANG THE REMOTE CONTROLLER ONTO
- THE WALL
- REPLACING THE REMOTE CONTROL BATTERY
- LCD DISPLAY
- CONTROL PANEL
- MODE SELECTION (OK-BOOST BUTTON)
- FIL-PILOTE MODE
- BOOST MODE
- TEMPERATURE SETTING
- SETTING MENU (MENU)
- TIME SETTING 12:00
- PROGRAM MODE SETTING
- SETTING OF 7 PRE-SET 24-HOUR PROGRAMS (P1\~P7)
- NOTES
- WINDOW DETECTION MODE
- KEYBOARD LOCK SETTING
- REMARKS
- IF THERE IS NO ELECTRICAL CHARGE ON THE REMOTE CONTROL BATTERY
- TECHNICAL CHARACTERISTICS
- IN CASE OF PROBLEMS
- CARE AND CLEANING
- ENVIRONMENTAL PROTECTION
Brand : OCEANIC
Model : OCEAISH1750W0
Category : Tumble dryer