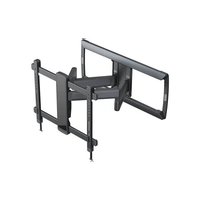
ERMML4-01B - Printer ErgoAV - Free user manual and instructions
Find the device manual for free ERMML4-01B ErgoAV in PDF.


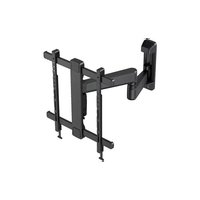
| Product Type | TV Wall Mount |
| Brand | ErgoAV |
| Model | ERMML4-01B |
| VESA Compatibility | 200 mm x 100 mm to 600 mm x 400 mm (width x height) |
| Maximum Recommended Weight | 56.7 kg (125 lb) approximately |
| Compatible Wall Types | Wood studs (with drywall) and solid concrete |
| Adjustable Tilt | Yes, from -15° to +5° with tension adjustment |
| Side Leveling | Yes, via adjustment screw with supplied Allen key |
| Side Shift | Possible by loosening a bolt |
| Cable Management | Yes, with removable cover and integrated routing |
| Materials | Robust steel |
| Package Contents | Wall plate, arm, TV brackets, screws, spacers, concrete anchors, Allen key |
| Required Tools | Drill, drill bits (wood 5.5 mm, concrete 10 mm), level, stud finder, 13 mm socket wrench, Phillips screwdriver |
| Maintenance | Periodically check screw tightness and condition of fasteners |
| Safety | Do not exceed max weight, use on suitable wall, follow instructions |
| Warranty | Not specified, contact technical support |
Frequently Asked Questions - ERMML4-01B ErgoAV
User questions about ERMML4-01B ErgoAV
0 question about this device. Answer the ones you know or ask your own.
Ask a new question about this device
Download the instructions for your Printer in PDF format for free! Find your manual ERMML4-01B - ErgoAV and take your electronic device back in hand. On this page are published all the documents necessary for the use of your device. ERMML4-01B by ErgoAV.
USER MANUAL ERMML4-01B ErgoAV
Motion TV Mount Instruction Manual
(A)
English pages 02–15
Spanish pages 30–43 French pages 16–29
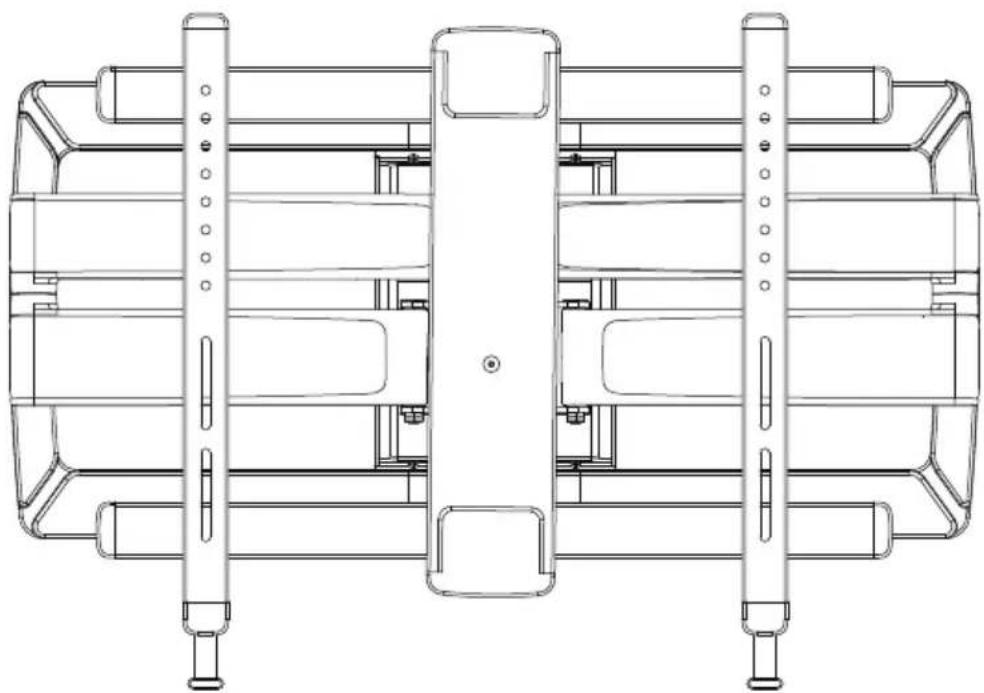
natural_image
Technical line drawing of a dual-panel mechanical assembly with no visible text or symbolsModel: ERMML4-01B
Thank You for Choosing this ErgoAV Product!
At ErgoAV, we want to add value to your AV experience by providing the highest quality products and services in the industry. If you have any concerns or comments, please contact us.
ErgoAV Customer Care
phone (877) 419-7832
email: support@ergoav.com
website: www.ergoav.com
address: 9501 Louisiana Ave N, #200, Brooklyn Park, MN 55445
IMPORTANT SAFETY INFORMATION
▲DANGER! Please carefully read all instructions before attempting installation. If you do not understand the instructions or have any concerns or questions, please contact Technical Support at (877) 419-7832 or Customer Service at support@ergoav.com.
ACAUTION: Use with products heavier than the maximum weights indicated may result in instability causing possible injury.
- DO NOT use this product for any purpose that is not explicitly specified in this manual. DO NOT exceed weight capacity. We are not liable for damage or injury caused by improper mounting, incorrect assembly or inappropriate use.
- This product is designed for use in wood stud or solid concrete walls. — DO NOT install into drywall alone.
- The wall must be capable of supporting four times the weight of the TV and mount combined.
- Use this mounting system only for its intended use as described in these instructions. DO NOT use attachments not recommended by the manufacturer.
• DO NOT use outdoors. - Route cords and cables properly to avoid mechanical damage.
- SAVE THESE INSTRUCTIONS.
Weight Restrictions
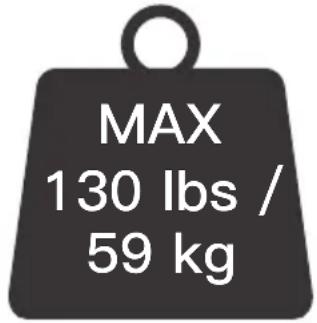
If your TV weighs more, this mount is NOT compatible.
WARNING
DO NOT exceed the maximum weight indicated. This mounting system is intended for use only within the maximum weights indicated. Use with products heavier than the maximum weights indicated may result in failure of the mount and its accessories, causing possible damage and or injury.
Check the VESA Pattern of Your TV before the Installation
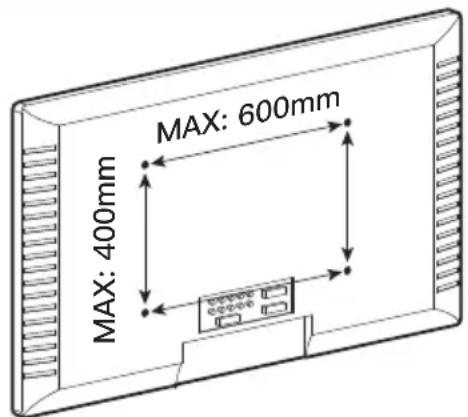
100 mm ≈ 4 pulg
200 mm ≈ 7 7/8 pulg
400 mm ≈ 15 3/4 pulg
600 mm ≈ 23 5/8 pulg
Minimum: 200mm x 100mm / 7 7/8" x 4" (W x H)
Maximum: 600mm x 400mm / 23 5/8" x 15 3/4" (W x H)
If your TV's VESA Pattern is smaller than 200mm x 100mm or greater than 600mm x 400mm, this mount is NOT COMPATIBLE with your TV. Please contact our Technical Support at (877) 419–7832 or Customer Service at support@ergoav.com to find a compatible mount.
Verify Your Wall Construction

CAUTION
DO NOT install into drywall alone.
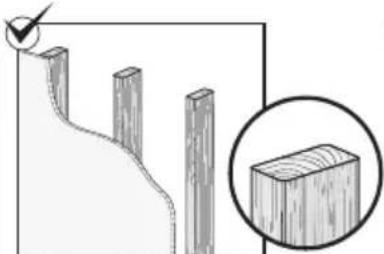
natural_image
Diagram showing a wooden plank with a checkmark and an inset view of a rectangular block (no text or symbols)Wood Studs (with Drywall)
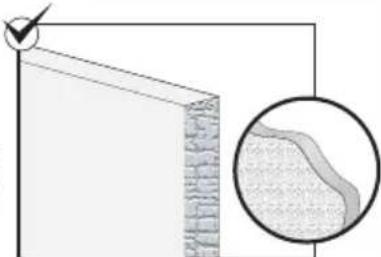
natural_image
Diagram showing a corner joint with a checkmark and an inset close-up of a textured surface (no text or symbols)Solid Concrete Wall
If you are not sure of the wall construction, please contact Technical Support at (877) 419-7832 or Customer Service at support@ergoav.com to find a compatible mount.
Tools Needed (Not Included)
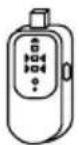
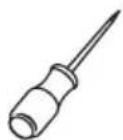
Stud Finder Tape Measure Pencil Electric Drill Level
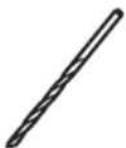
7/32" (5.5mm)
Wood Drill Bit
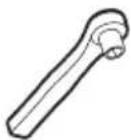
1/2" (13mm)
Socket Wrench
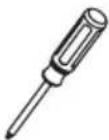
Phillips
Screwdriver
(Needed for concrete installs)
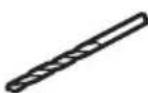
3/8" (10mm)
Concrete Drill Bit
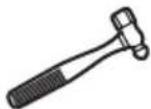
Hammer
Supplied Parts and Hardware
WARNING: This product contains small items that could be a choking hazard if swallowed.
Before starting assembly, verify all parts are included and undamaged. DO NOT use damaged or defective parts. If you need replacement parts, please contact Technical Support at (877) 419-7832 or Customer Service at support@ergoav.com.
- NOTE: Not all hardware included in this package will be used.
Supplied Parts and Hardware for Step 1

natural_image
Technical line drawing of a mechanical device with multiple ports and a handle (no text or symbols)TV Bracket
01 x 2
NOTE: The Washers and Spacers shown are actual size.
Washers
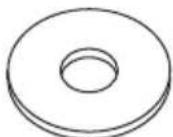
M4 / M5
[B1] × 4
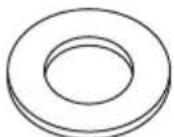
M6 / M8
[B2] × 4
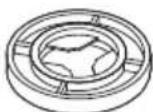
L2.5mm
[F1] × 8
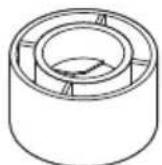
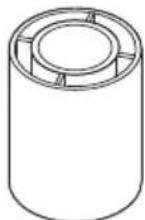
Spacers
[If necessary]
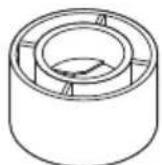
L10mm L22mm
[F2] × 4
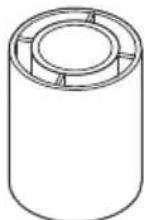
[F3] × 4
| TV Bolts (Only one size bolt will fit your TV) | ||
| NOTE: The bolts shown are actual size. | ||
| M4 | 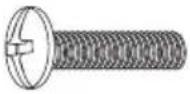 | 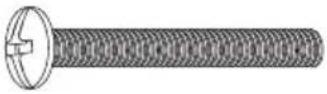 |
| M4 x 12mm | M4 x 30mm | |
| [C1] x 4 | [C2] x 4 | |
| M6 | 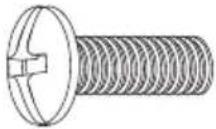 | 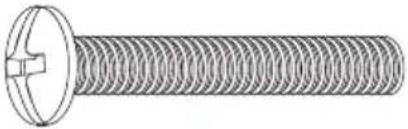 |
| M6 x 15mm | M6 x 35mm | |
| [D1] x 4 | [D2] x 4 | |
| M8 | 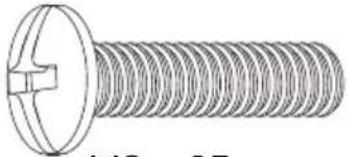 | 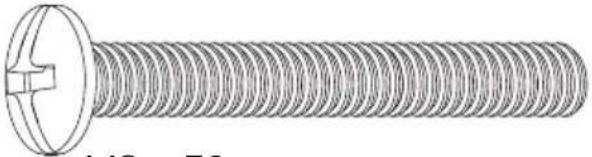 |
| M8 x 25mm | M8 x 50mm | |
| [E1] x 4 | [E2] x 4 | |
Step 1 Secure the TV Brackets to the TV
Select TV Bolts
Only one size bolt fits your TV.
M6M4 M8
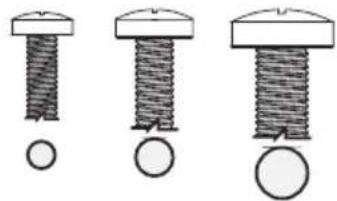
natural_image
Three types of bolts with different end caps and threaded shafts, shown in line drawings without any text or symbols.
natural_image
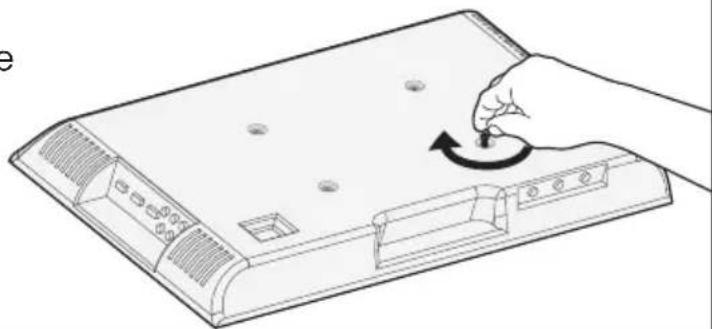
Line drawing of a hand pressing down on a device with a curved arrow indicating rotation (no text or symbols)NOTE: Please DO NOT over tighten the TV bolts to avoid damaging your TV.
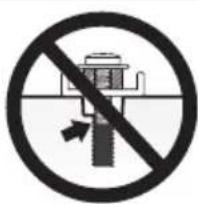
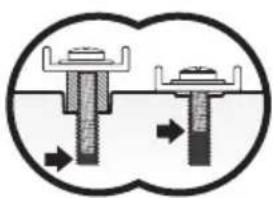
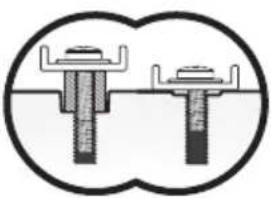
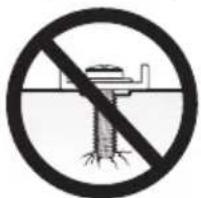
Bolt length: Verify adequate thread engagement with bolts or bolts / spacers combination. We recommend thread engagement by at least 5 turns.
-Too short will not hold the TV.
-Too long will damage the TV.
natural_image
Diagram of two mechanical components with arrows indicating movement or force direction (no text or symbols)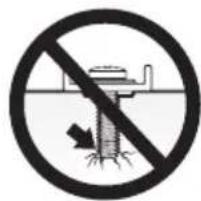
Too Short Correct Too Long
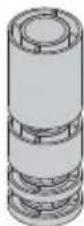
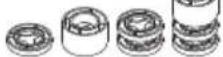
PLEASE NOTE: If spacers are required for your installation, a combination of different spacers can be stacked to obtain a proper length. See examples in the image below. If you have any difficulty understanding how to install the TV bolts or spacers, please contact our Tech Support at (877) 419–7832 or Customer Service at support@ergoav.com.
Parts Needed if You Have a TV as Shown Below.
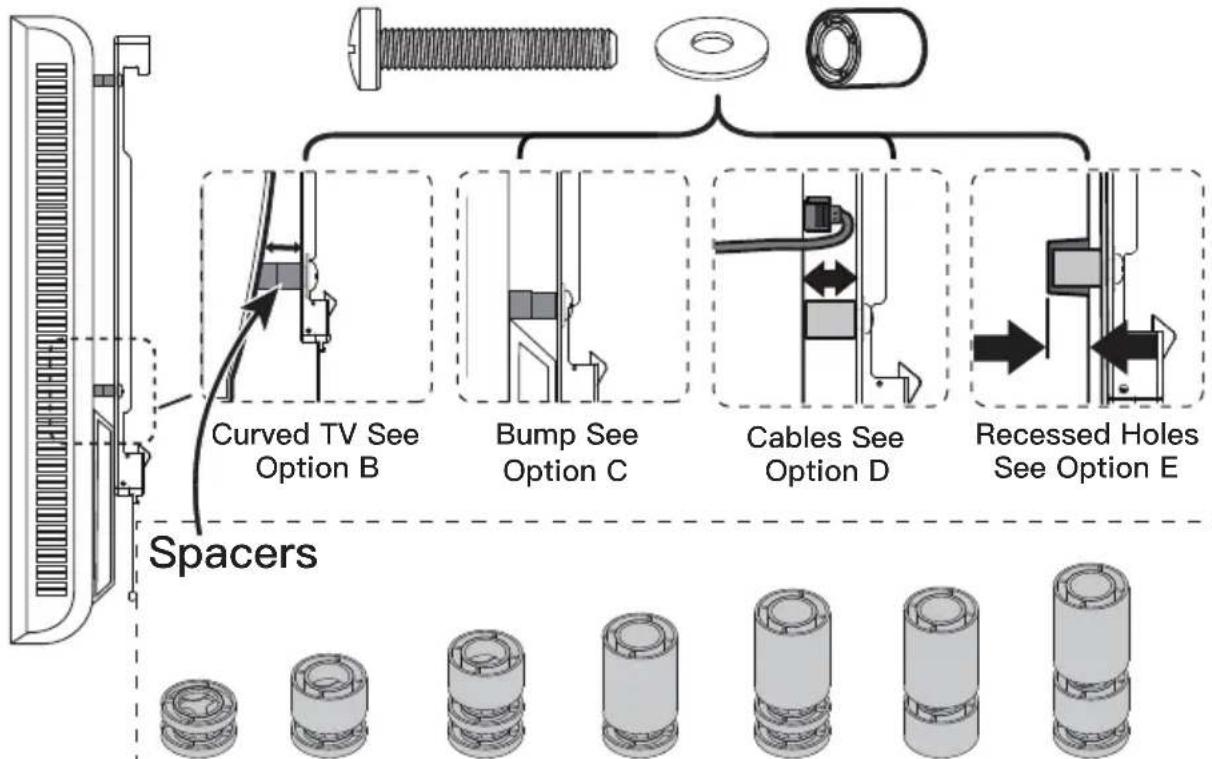
flowchart
graph TD
    A["Spacers"] --> B["Curved TV See Option B"]
    A --> C["Bump See Option C"]
    A --> D["Cables See Option D"]
    A --> E["Recessed Holes See Option E"]

F1+F1 F1+F2 F1+F1+F2 F1+F1+F3 F1+F2+F3F2+F3 F1+F1+F2+F3F1+F3
UP
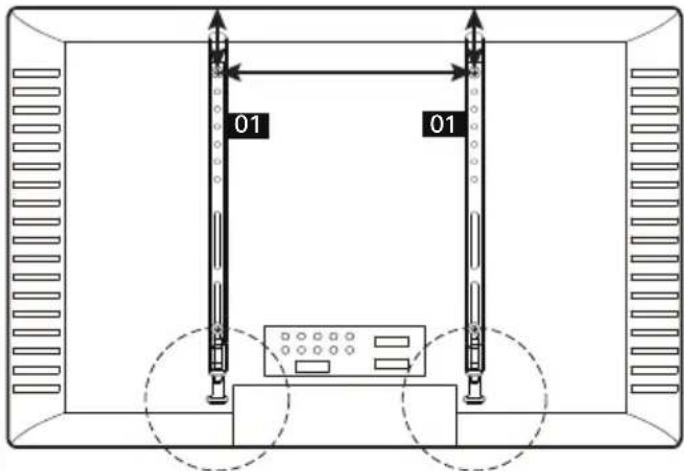
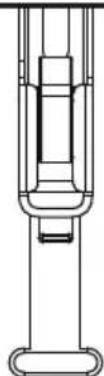
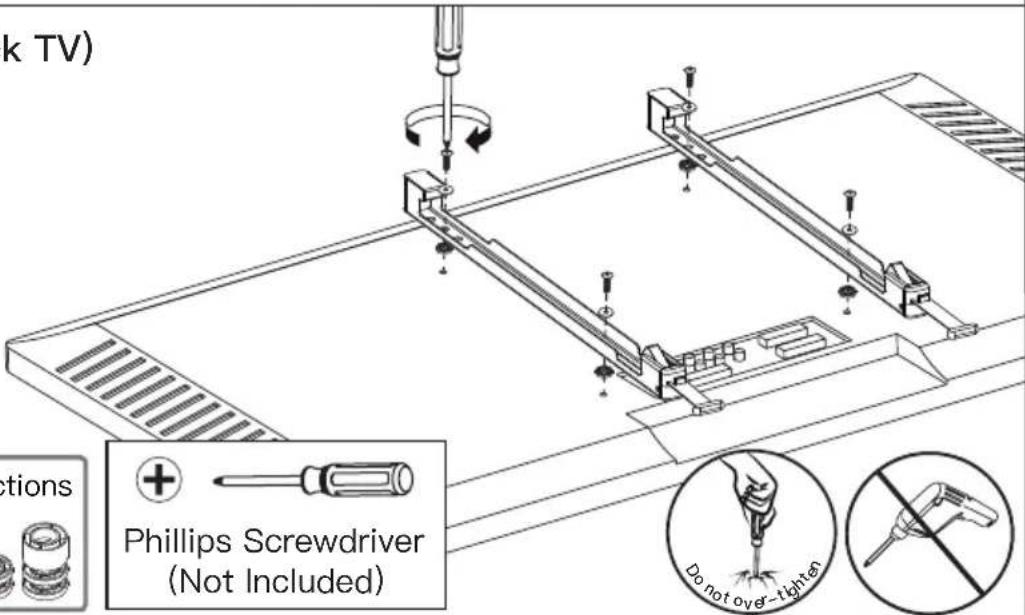
CAUTION: When attaching the TV brackets to the back of the TV, ensure the ends with the drawstring are pointing towards the end of the TV and equally centered on the back of the TV.
PLEASE NOTE: The bolt hole locations on your TV may vary in accordance of the manufacturer's design of the TV. We are only illustrating possible locations of the bolt holes.
Option A (For Flat Back TV)
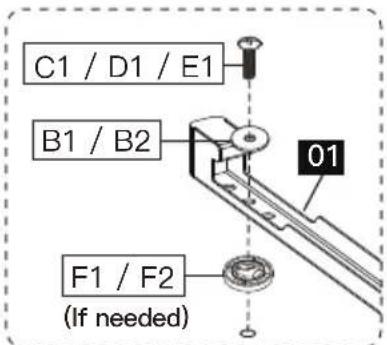
Refer back to Spacer Instructions on Page 05, If needed.
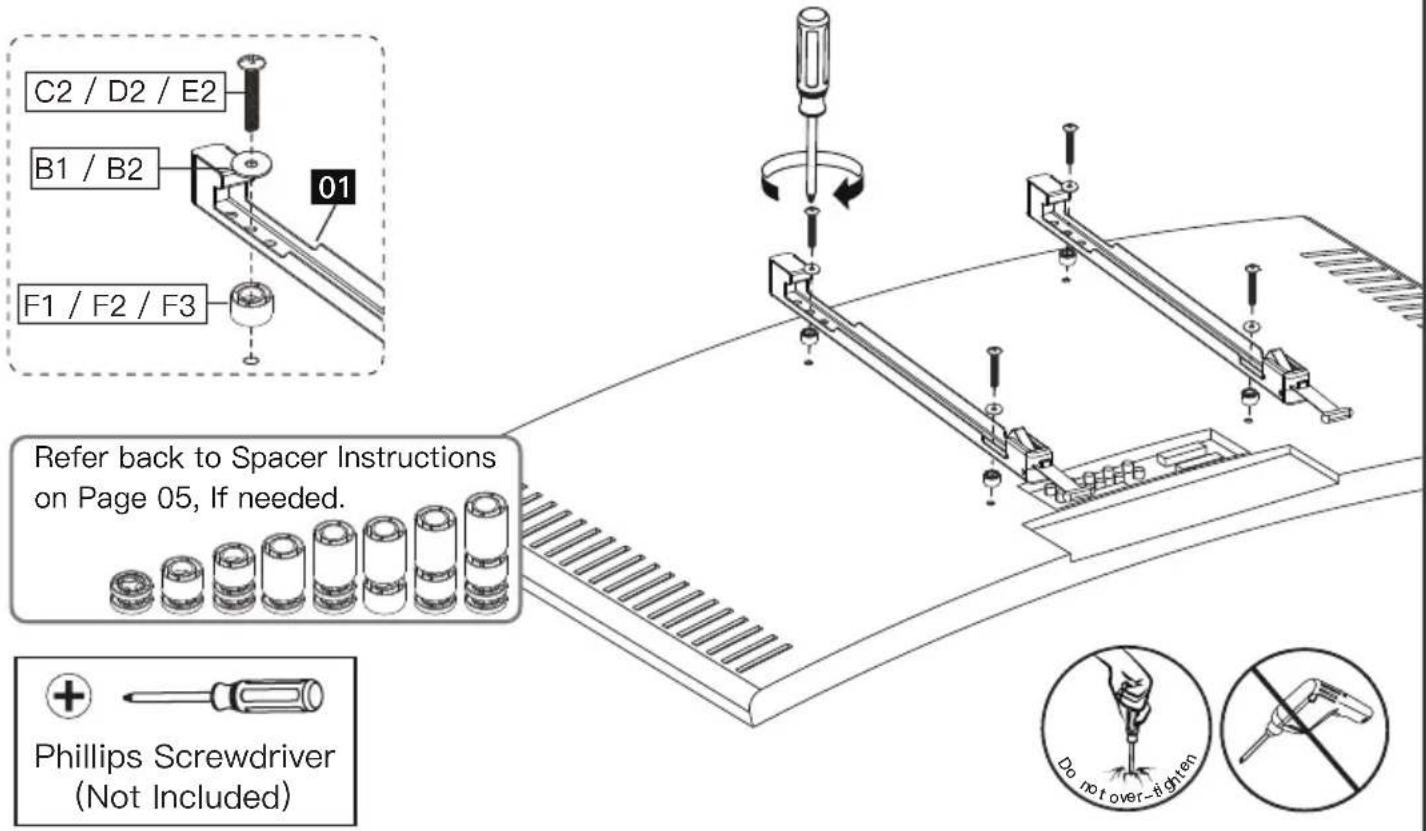
Option B (For Curved Back TV)
Spacers must be tall enough so that the curve on the back of the TV will not interfere with the interface of the Arm Assembly.
Option C (For TV with A "Bump")
Spacers must be tall enough so there is no gap between TV Brackets and bump on the back of the TV.
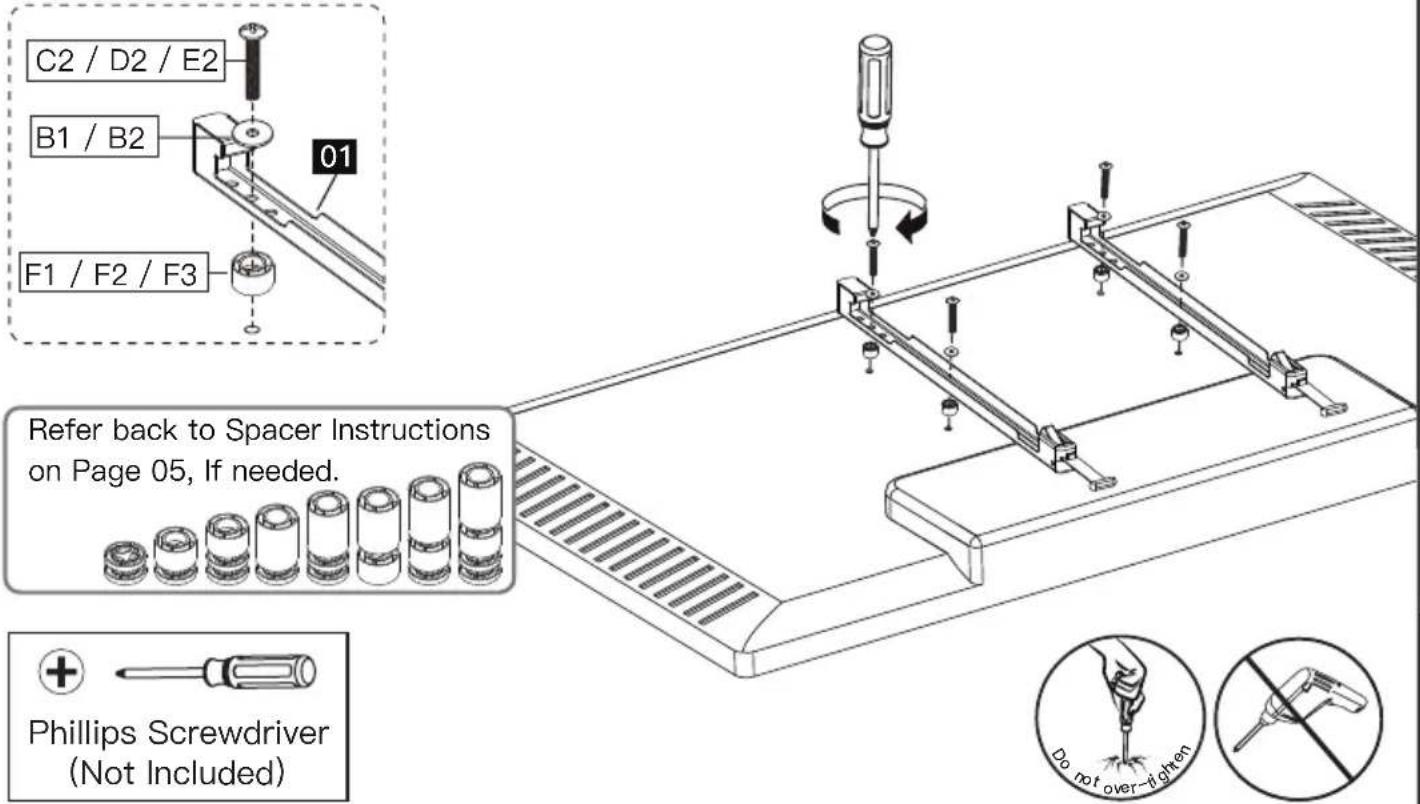
Option D (For TV with Cable Interference)
For cable interference, use spacers to create extra space between the TV and TV Brackets.
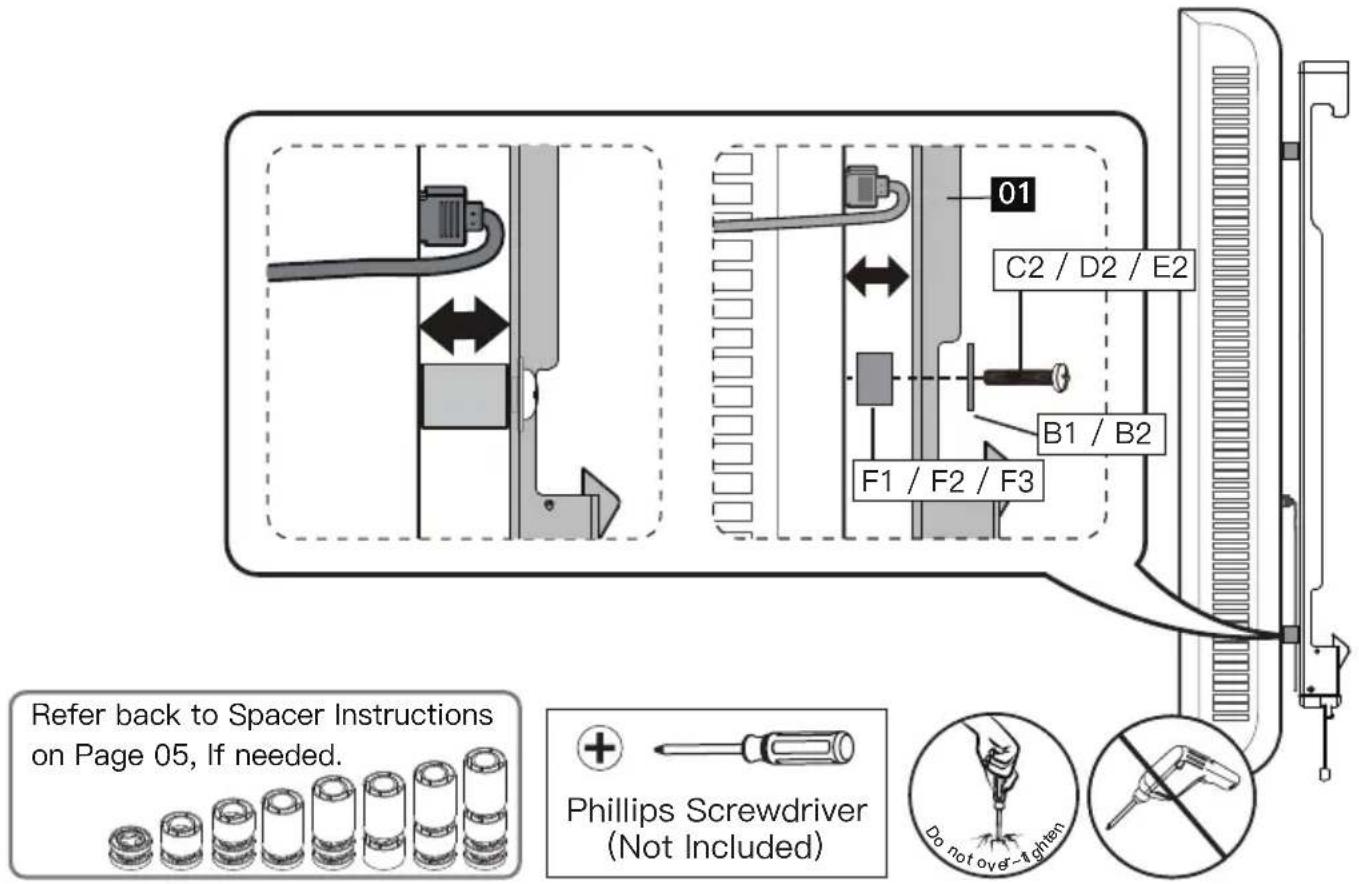
Option E (For Recessed Holes)
The spacers need to fill in the recessed holes on the back of the TV so that the TV Brackets are as close to the TV as possible.

Supplied Parts and Hardware for Step 2
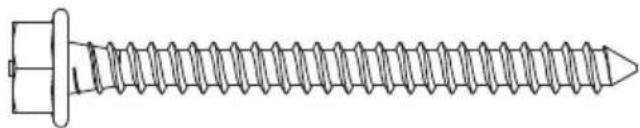
NOTE: The Lag Screw [A1] shown is actual size.
x 4
Lag Screw 5/16" x 2 3/4"
natural_image
Line drawing of a screw with threaded head and mounting bracket (no text or symbols)
x 4
Wall Anchor 10 x 60mm

CAUTION!
This Wall Anchor [A2] is for use in concrete walls only. DO NOT use them in drywall or wood studs.

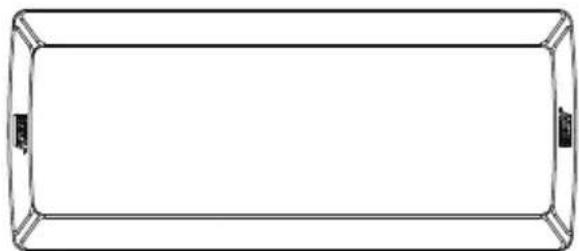
natural_image
Simple line drawing of a rectangular frame with rounded corners and two small square buttons at the bottom (no text or symbols)Wall Plate
02 x 1
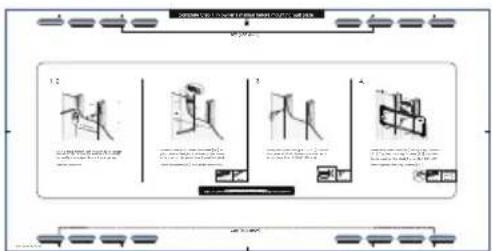
Wall Plate Template
03 x 1
natural_image
Top-down line drawing of a rectangular electronic device with two side connectors (no text or symbols)
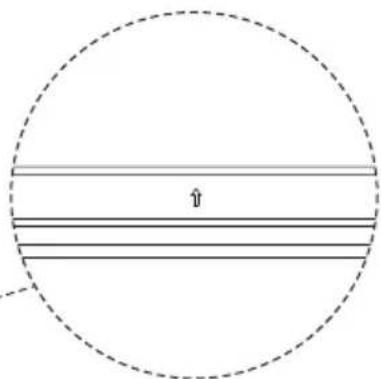
natural_image
Simple geometric diagram showing a circle with horizontal lines and a central vertical line, no text or symbols present.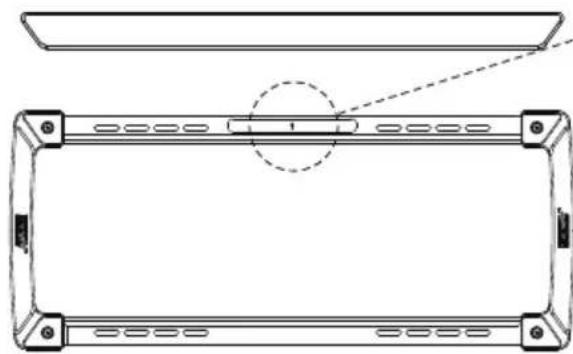
natural_image
Technical line drawing of a rectangular frame with mounting holes and a horizontal bar, no text or symbols present

NOTE:
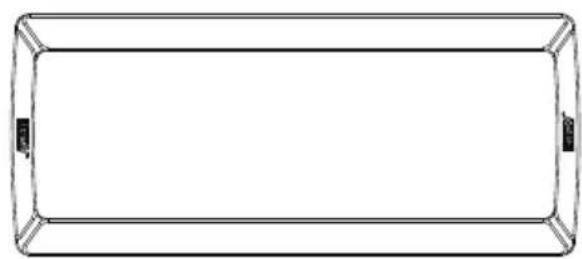
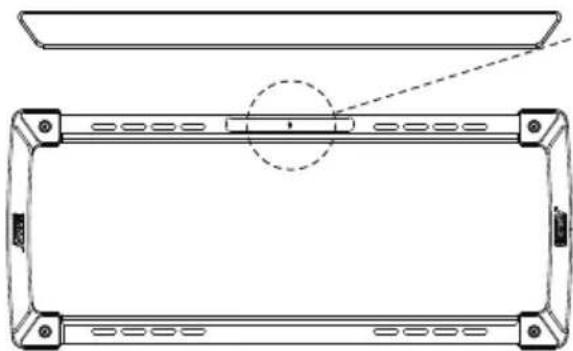
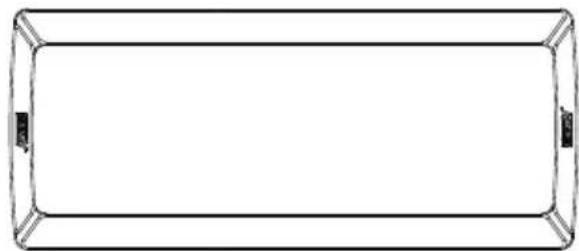
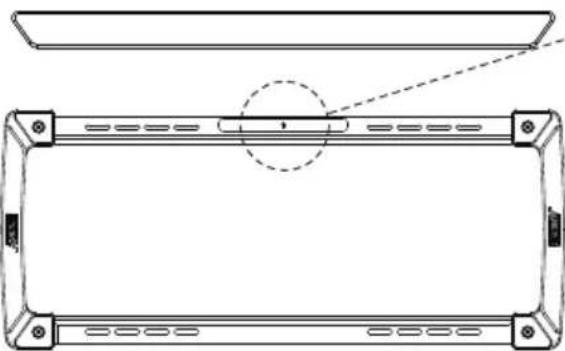
- Before hanging the Wall Plate [02] on the wall, you need to remove the upper and lower covers. Install the cover after the Wall Plate [02] is installed.
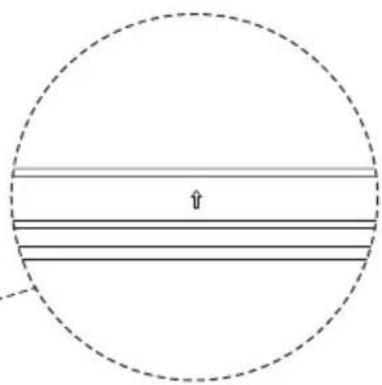
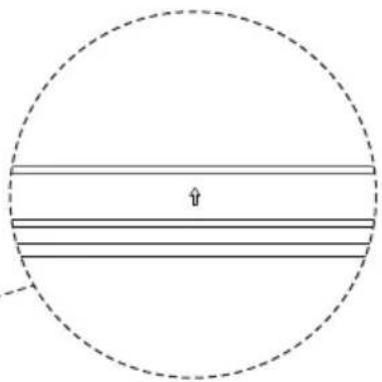
- Pay attention to the upper and lower positions of the wall panels, and reverse installation is prohibited.
Step 2 Attach the Arm Assembly / Wall Plate to the Wall
For wood stud installation, follow STEP 2A.
For concrete installation, follow STEP 2B.
Step 2A Wood Stud Option
WARNING:
● DO NOT use a drill for tightening the Lag Screws [A1]! Only use a Socket Wrench.
- To avoid potential personal injury or property damage, DO NOT over-tighten the Lag Screws [A1]. Tighten the Lag Screws [A1] only until they are pulled firmly against the Wall Plate [02] and the wall.
● DO NOT USE THE ANCHOR [A2] FOR THIS STEP.
- Ensure the Wall Plate [02] is securely fastened to the wall before continuing to the next step.
- Nominal wood stud size: Should be 2" x 4" (51mm x 102mm).
● Stud center must be verified.
A2

Wall Anchor
2A-1
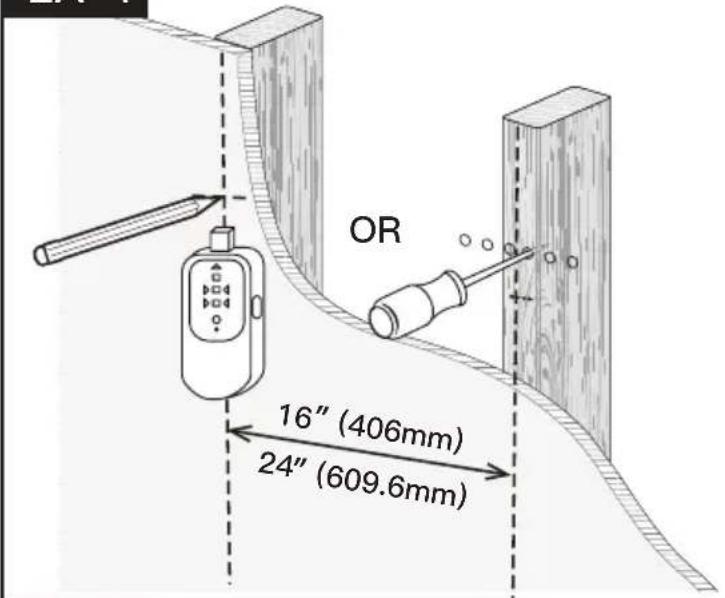
Use a Stud Finder to locate wood studs or use an Awl to verify the edges. Mark the edge and center locations.
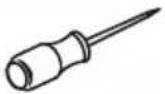 | 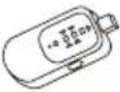 |
| Awl(Not Included) | Stud Finder(Not Included) |
2A-2
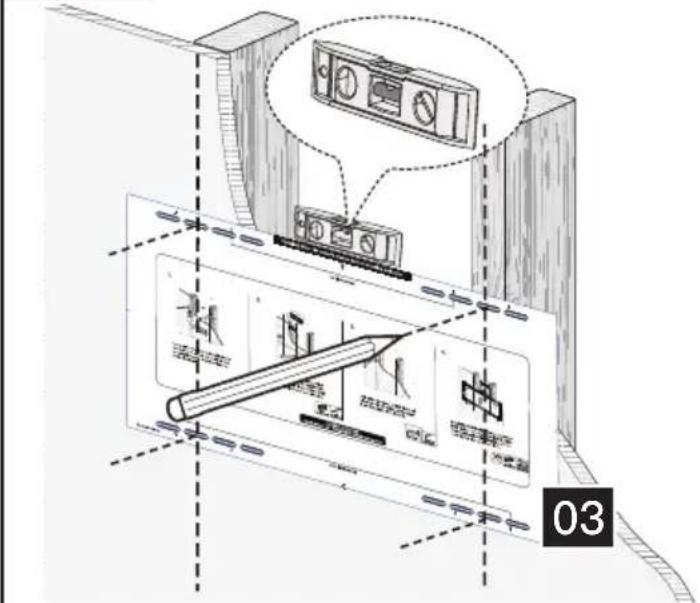
Position the Wall Plate Template [03] at your desired height and line up the holes with your stud center line. Level the Wall Plate Template [03] and mark the holes.
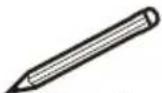 Pencil(Not Included) Pencil(Not Included) | 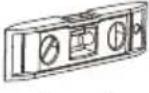 Level(Not Included) Level(Not Included) |
2A-3
natural_image
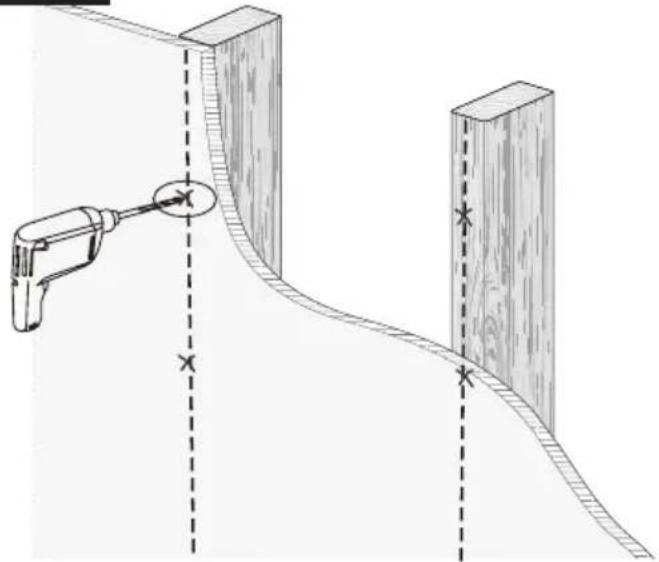
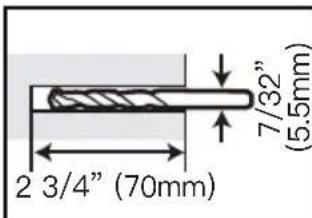
Diagram showing a tool interacting with wooden beams and a curved track, with no text or symbols present.Drill 4 pilot holes using a 7/32" (5.5mm) diameter drill bit. Make sure the depth is not less than 2 3/4" (70mm) deep.
2A-4
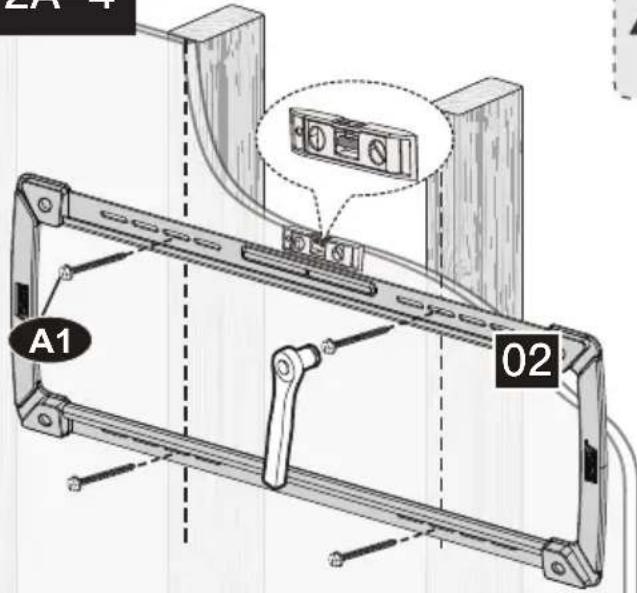
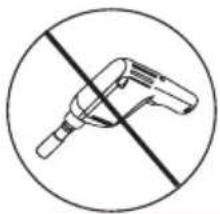
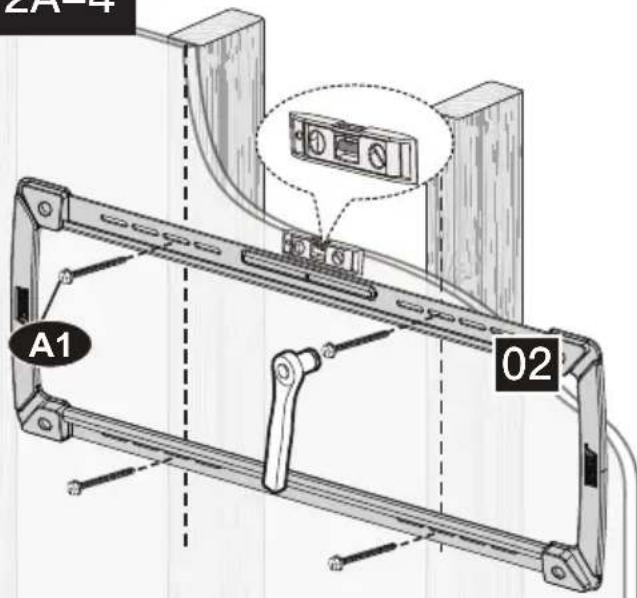
NOTE: DO NOT use a drill to tighten the Lag Screws [A1]. Only use a socket wrench.
Install the Wall Plate [02] using the Lag Screws [A1]. Using self-supplied 1/2" (13mm) socket wrench, tighten the Lag Screws [A1] until the Lag Screws [A1] are pulled firmly against the Wall Plate [02]. DO NOT over-tighten the Lag Screws [A1].
natural_image
Symbol of a crossed tool with a diagonal line crossing through it, enclosed in a circle (no text or labels)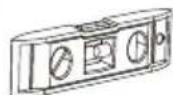
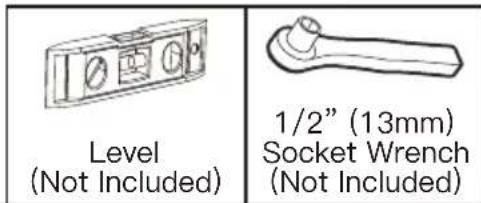
Level (Not Included)
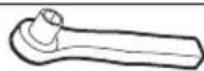
1/2" (13mm) Socket Wrench (Not Included)
Step 2B Solid Concrete Wall Option

WARNING:
● DO NOT use a drill when tightening the Lag Screws [A1]! Only use a socket wrench.
- To avoid potential personal injury or property damage, DO NOT over-tighten the Lag Screws [A1]! Tighten the Lag Screws [A1] only until they are pulled firmly against the Wall Plate [02] and the wall.
- Ensure the Wall Plate [02] is securely fastened to the wall before continuing to the next step.
- Mount the Wall Plate [02] directly onto the concrete surface without any covering.
● The thickness of the concrete wall must exceed 5 1/2" (140mm).
Wall Anchor
A2
2B-1
![Wall Thickness ≥5 1/2" (140mm) Position the V your desired h Template [03] locations. 03](/content/2026/04/727269/images/aadab1011dc8717cf8b990e2511431a2176ce6aaabe4d8869d172a5641f25cff.jpg)
Position the Wall Plate Template [03] at your desired height. Level the Wall Plate Template [03] and mark the pilot hole locations.
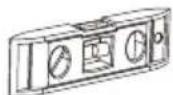
Level
(Not Included)
Pencil
(Not Included)
2B-2
natural_image
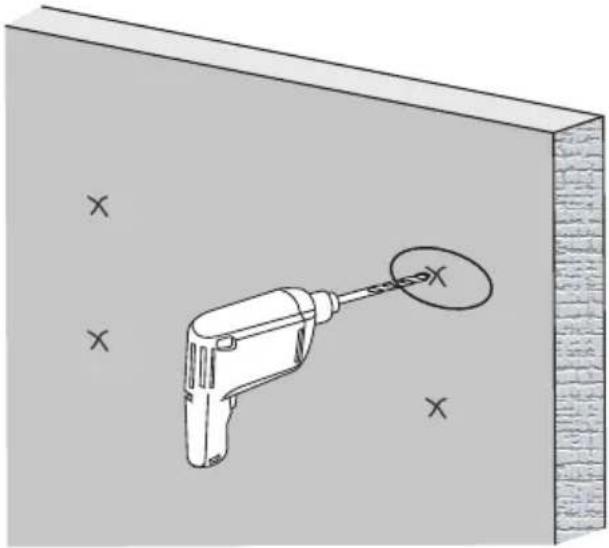
Illustration of a hand tool inserted into a wall, with no text or symbols present.Drill 6 pilot holes using a 3/8" (10mm) diameter drill bit. Make sure the depth of the pilot holes is not less than 3" (75mm).

Electric Drill (Not Included)
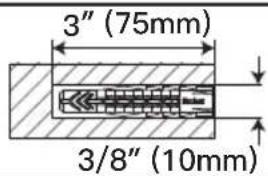
2B-3
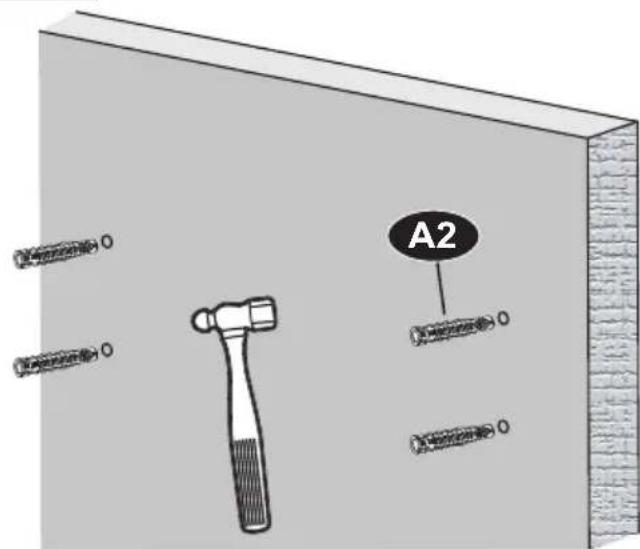
Use the hammer to knock the Wall Anchor [A2] into the wall. Be sure the Wall Anchor [A2] are seated flush with the concrete surface.
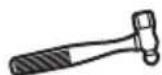
Hammer
(Not Included)
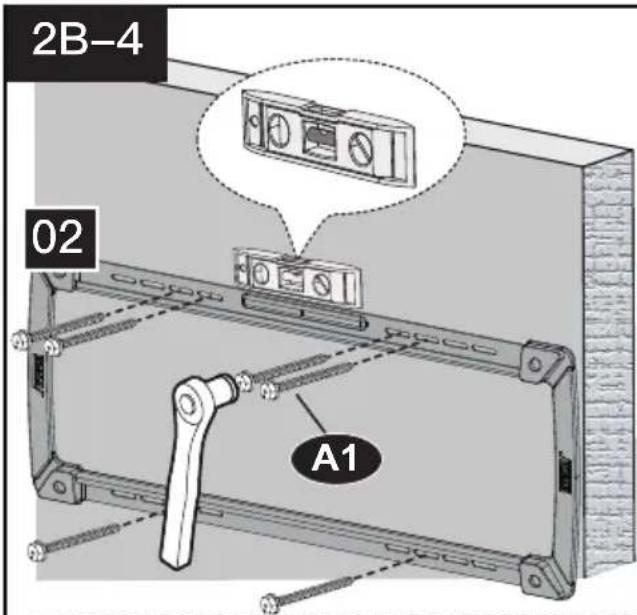
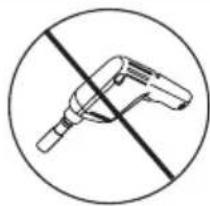
NOTE: DO NOT use a drill to tighten the Lag Screws [A1]. Only use a socket wrench.
natural_image
Symbol of a handheld device crossed out by a diagonal line, enclosed in a circle (no text or labels)Install the Wall Plate [02] using the Lag Screws [A1]. Using a self-supplied 1/2" (13mm) socket wrench, tighten the Lag Screws [A1] until the Lag Screws [A1] are pulled firmly against the Wall Plate [02]. DO NOT over-tighten the Lag Screws [A1].
Supplied Parts and Hardware for Step 3
natural_image
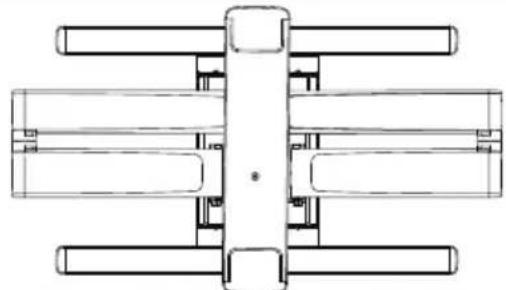
Top-down schematic of a mechanical or architectural component with symmetrical arms and central hub (no text or symbols)Arm Assembly
04 x 1
Step 3 Secure the Arm Assembly to the Wall Plate
- Hang the Arm Assembly [04] to the Wall Plate [02].
- Shift the Arm Assembly [04] along the Wall Plate [02] to your desired position.
- Lock the safety lock clockwise.
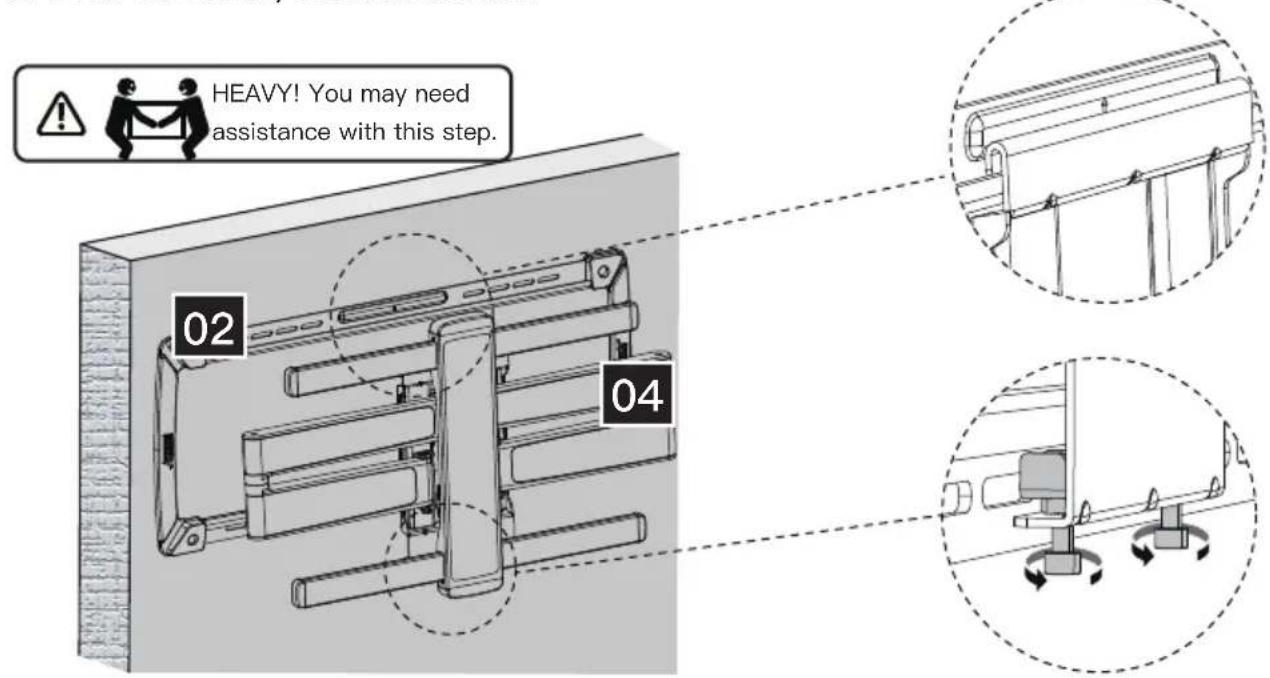
Step 4 Install the cover
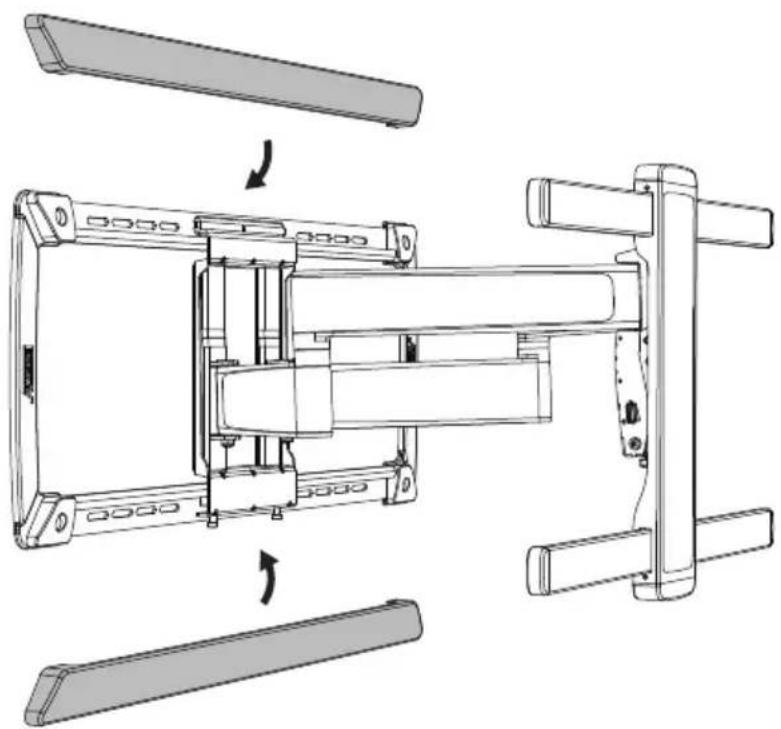
natural_image
Technical line drawing of a mechanical assembly with multiple components and directional arrows indicating motion (no text or symbols)Step 5 Hang the TV with TV Brackets onto the Arm Assembly
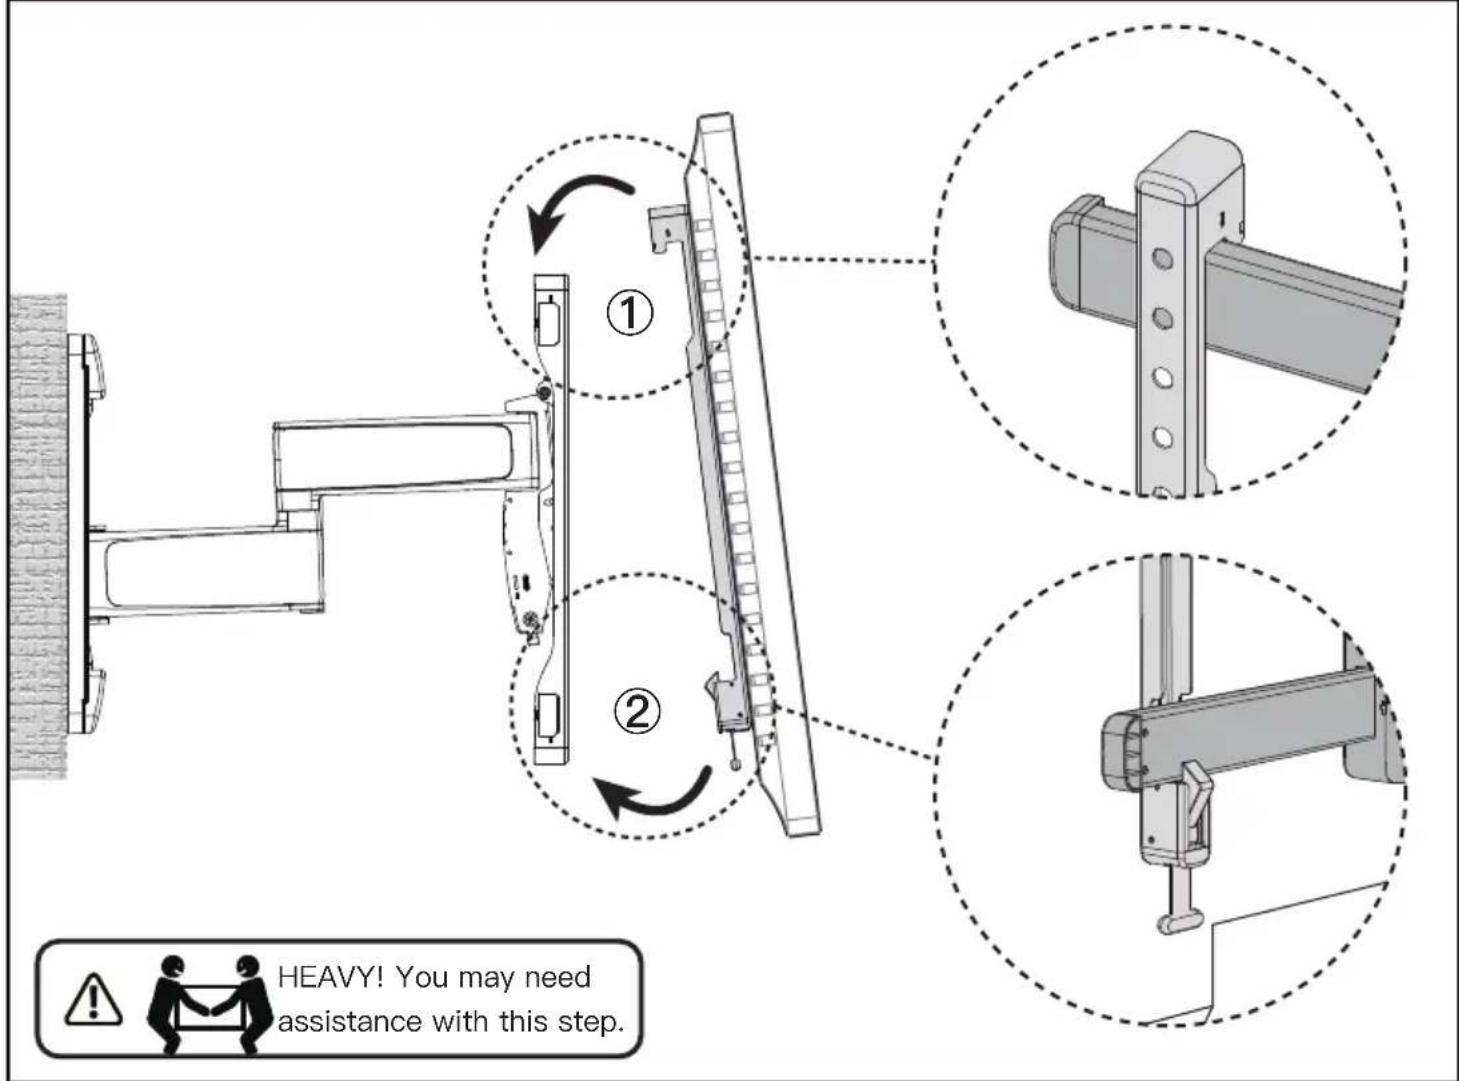
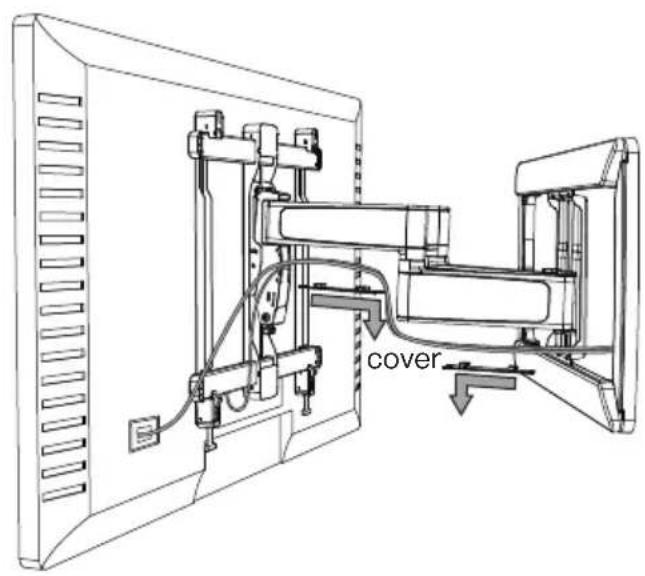
Step 6 Manage Cables
Slide the cover remove. Route cables into arm as shown. Re-attach the cover.
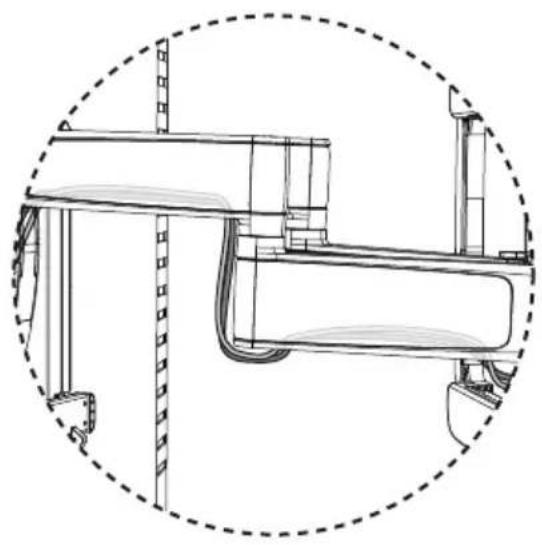
natural_image
Technical line drawing of a mechanical assembly with no visible text or symbolsStep 7 TV Adjustments
Tilt Adjustment
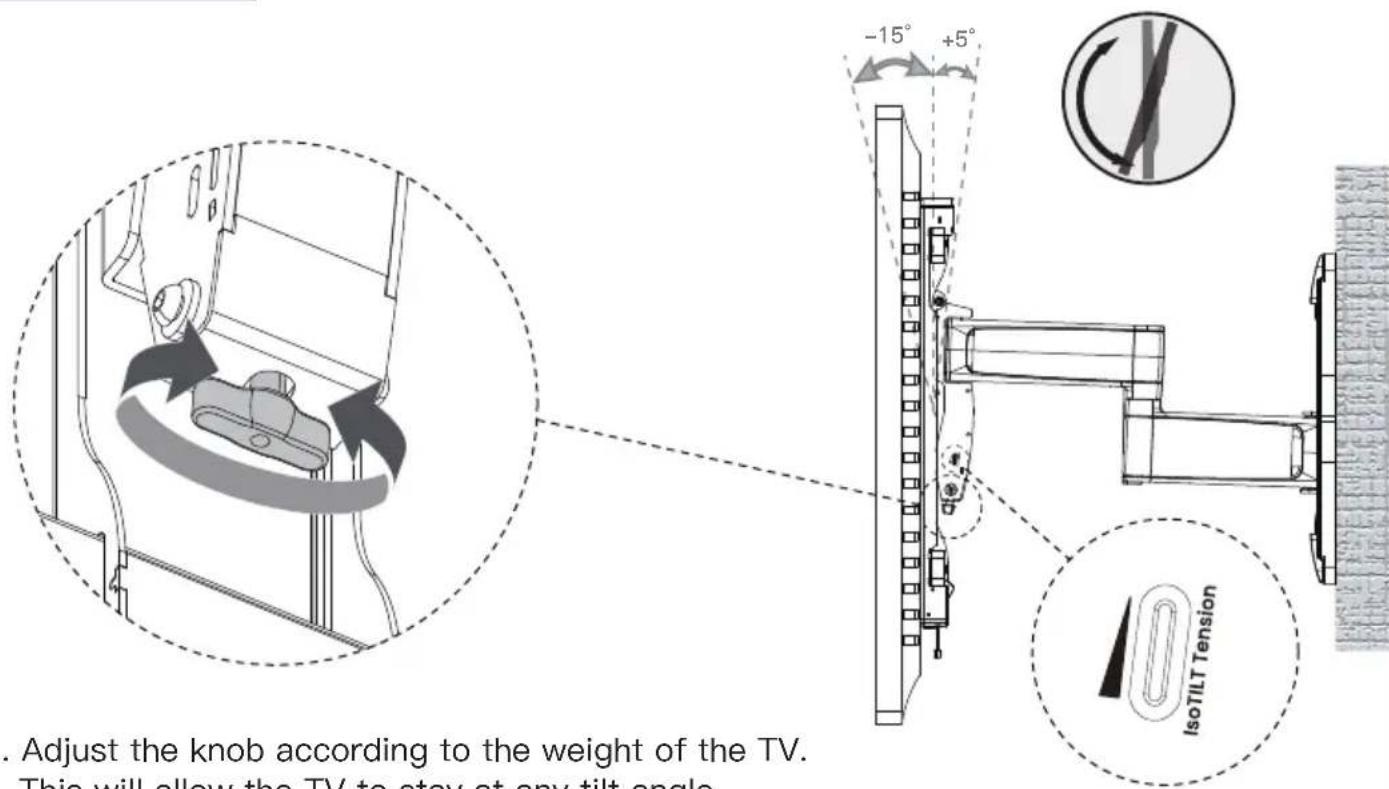
- Adjust the knob according to the weight of the TV. This will allow the TV to stay at any tilt angle.
- Clockwise will increase tension to match heavier TVs, which will move the indicator lower.
- Counterclockwise to reduce tension to match lighter TVs, which will move the indicator higher.
NOTE: For heavier TV's, indicator should be toward the bottom and for lighter TVs, indicator should be toward the top.
Level Adjustment
Adjust the leveling of TV by turning the level screw with the Allen Key [G].
![level screw [G]](/content/2026/04/727269/images/688e646dee83596a93f4bd0d37a9b807a360013d263420e7fb7b09f366fc8561.jpg)
Allen Key
[G]
Lateral Shift
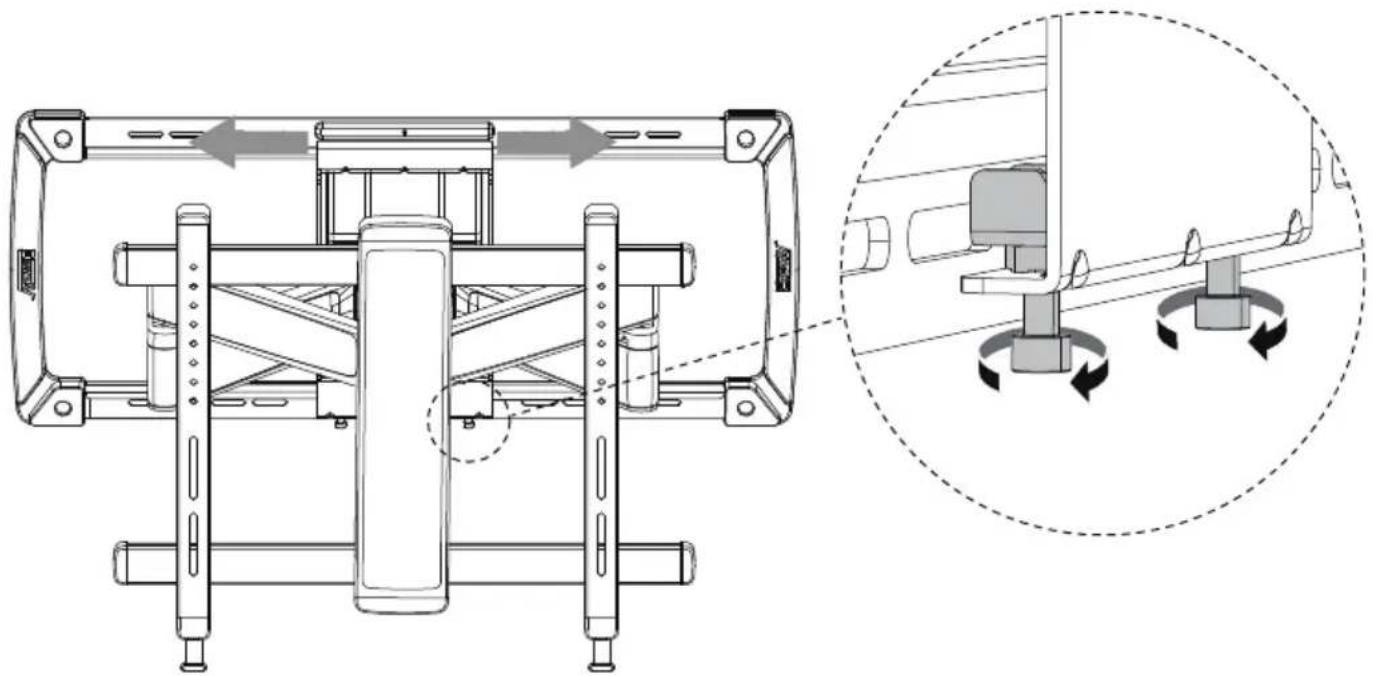
Optional Step: If TV needs to be re-positioned, you can do so by:
natural_image
Technical diagram of a mechanical assembly with an inset showing rotational motion (no text or symbols)- Remove the TV.
- Loosen the bolt anti-clockwise.
- Move the Arm Assembly to your desired position.
- Tighten bolt clockwise.

NOTE: Ensure the bolts are firmly tightened when the adjustment is completed.
natural_image
Technical line drawing of a mechanical device with multiple ports and a handle (no text or symbols)Support TV
01 × 2
natural_image
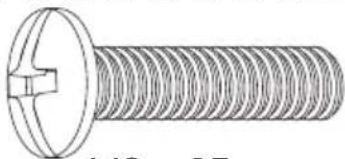
Illustration of a threaded bolt with a flanged head and threaded shaft (no text or symbols)M6 x 35mm
[D2] × 4
M8
natural_image
Technical line drawing of a threaded bolt with a flanged head and threaded shaft (no text or symbols)M8 × 25mm
[E1] × 4
natural_image
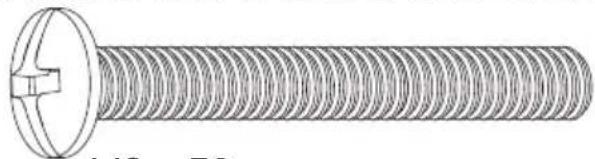
Technical illustration of a threaded bolt with a flanged head and threaded shaft (no text or symbols)M8 × 50mm
[E2] × 4
natural_image
Line drawing of a computer tower with a hand holding a scroll wheel (no text or symbols)Trop court
natural_image
Diagram of two mechanical components with threaded fasteners, enclosed in a circular frame (no text or symbols)Correct
natural_image
Prohibition sign of a mechanical device without any text or symbolsTrop long
natural_image
Technical line drawing of a mechanical component with no visible text or symbolsUP
natural_image
Technical line drawing of a screw with threaded head and mounting bracket (no text or symbols)Tire-fond 5/16 pouce x 2 3/4 pouce
A2 x 4
Ancre de mur 10X60mm
ATTENTION!
natural_image
Simple line drawing of a rectangular frame with rounded corners and no text or symbolsPlaque murale
02 x 1
flowchart
graph TD
    A["Step 1: Furniture Setup"] --> B["Step 2: Equipment Installation"]
    B --> C["Step 3: Structural Design"]
    C --> D["Step 4: Panel Layout"]
    style A fill:#f9f,stroke:#333
    style B fill:#ccf,stroke:#333
    style C fill:#cfc,stroke:#333
    style D fill:#fcc,stroke:#333
Modèle de mur
03 x 1
natural_image
Simple line drawing of a rectangular frame with rounded corners and two side handles (no text or symbols)
natural_image
Technical line drawing of a rectangular frame with mounting holes and a horizontal panel, no text or symbols present
natural_image
Simple geometric diagram showing a circle with a horizontal line and a vertical arrow, no text or symbols present.⚠️ Remarque :
natural_image
Diagram showing a tool interacting with wooden beams and a curved path, with no text or symbols present.2A-4
natural_image
Symbol of a handheld device crossed out by a diagonal line, enclosed in a circle (no text or labels)
Niveau
(Non inclus)
Wall Thickness ≥5.5 in (140mm)
natural_image
Illustration of a drill bit with a magnified view showing the blade (no text or symbols)natural_image
Symbol of a handheld device crossed out by a diagonal line, enclosed in a circle (no text or labels)natural_image
Top-down schematic of a mechanical assembly with multiple cylindrical components (no text or labels)Assemblage de bras
04 x 1
natural_image
Technical line drawing of a mechanical assembly with no visible text or symbolsnatural_image
Technical line drawing of a mechanical assembly with no visible text or symbolsnatural_image
Technical diagram of a mechanical assembly with cross-sectional view and circular motion indicator (no text or symbols)natural_image
Diagram showing a wooden fence with a checkmark and a magnified inset of a rectangular block (no text or symbols)natural_image
Diagram showing a wall corner with a checkmark and an inset close-up of a textured surface (no text or symbols)natural_image
Technical line drawing of a mechanical device with ports and a handle (no text or symbols)Soporte para TV
01 × 2
L10mm L22mm
[F2] x 4
[F3] × 4
natural_image
Technical line drawing of a threaded bolt with a flange (no text or symbols)M6 x 35mm
[D2] × 4
M8
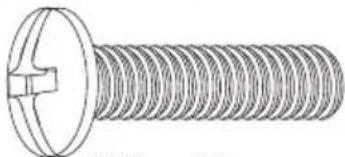
natural_image
Technical line drawing of a bolt with threaded head and mounting hole (no text or symbols)M8 x 25mm
[E1] × 4
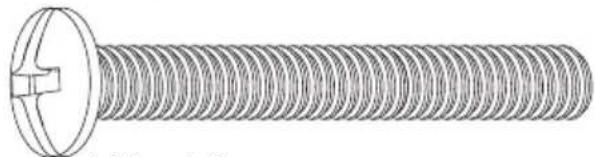
natural_image
Technical line drawing of a threaded screw with a flanged head (no text or symbols)M8 × 50mm
[E2] × 4
natural_image
Diagram of two mechanical components with no visible text or symbolsCorrecto
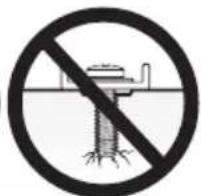
Demasiado largo
natural_image
Technical line drawing of a mechanical component with no visible text or symbolsUP
natural_image
Technical line drawing of a screw with threaded head and mounting bracket (no text or symbols)A1 x 4
Tornillo de retraso
5/16X2 3/4 pulg
A2 x 4
Anclas de pared 10X60mm
PRECAUCIÓN!
natural_image
Simple line drawing of a rectangular frame with rounded corners and two small black buttons at the bottom (no text or symbols)Plaque murale
02 x 1
flowchart
graph TD
    A["Step 1: Initial state"] --> B["Step 2: Process step"]
    B --> C["Step 3: Final state"]
    C --> D["Step 4: Final state"]
Plantilla de pared
03 x 1
natural_image
Empty rectangular frame with corner handles and a small black arrow symbol at the bottom (no text or labels)
natural_image
Technical line drawing of a rectangular frame with mounting holes and a horizontal plate above, showing internal alignment and a dashed circle highlighting a feature (no text or symbols)
natural_image
Simple geometric diagram showing a circle with horizontal lines and a central arrow, no text or symbols present.
Nota:
natural_image
Diagram showing a tool interacting with wooden beams and a curved track, with no text or symbols present.natural_image
Symbol of a handheld device crossed out by a diagonal line, enclosed in a circle (no text or labels)
natural_image
Illustration of a drill bit with a magnified view showing the blade (no text or symbols)natural_image
Symbol of a handheld device crossed out by a diagonal line, enclosed in a circle (no text or labels)natural_image
Top-down schematic of a mechanical or architectural component with symmetrical arms and central hub (no text or symbols)Conjunto de brazo
04 x 1
natural_image
Technical line drawing of a mechanical assembly with no visible text or symbolsnatural_image
Technical line drawing of a mechanical assembly with no visible text or symbolsPaso 7 Ajustes de TV
natural_image
Technical diagram of a mechanical assembly with directional arrows and a circular inset showing rotational motion (no text or symbols)At ErgoAV, we strive to provide the highest value products. We want to support your purchase.
If you have questions, concerns,
or feedback please let us know!
ErgoAV Customer Care
Phone (877) 419-7832
support@ergoav.com
natural_image
Simple line drawing of a two-decker cabinet with four drawers and three legs (no text or symbols)
natural_image
Simple line drawing of a vertical cylindrical platform with two legs and a base, no text or symbols present.
natural_image
Technical line drawing of a Y-shaped mechanical assembly with two connectors and a central shaft (no text or symbols)Computer Monitor MountsSpea
9501 Louisiana Ave N, #200, Brooklyn Park, MN 55445
www.ergoav.com
- Motion TV Mount Instruction Manual
- Model: ERMML4-01B
- IMPORTANT SAFETY INFORMATION
- Weight Restrictions
- WARNING
- Check the VESA Pattern of Your TV before the Installation
- Verify Your Wall Construction
- CAUTION
- Tools Needed (Not Included)
- Supplied Parts and Hardware
- Supplied Parts and Hardware for Step 1
- Washers
- Spacers
- Step 1 Secure the TV Brackets to the TV
- Select TV Bolts
- Option B (For Curved Back TV)
- Option C (For TV with A "Bump")
- Option D (For TV with Cable Interference)
- Option E (For Recessed Holes)
- Supplied Parts and Hardware for Step 2
- CAUTION!
- NOTE:
- Step 2 Attach the Arm Assembly / Wall Plate to the Wall
- Step 2A Wood Stud Option
- WARNING:
- 2A-3
- 2A-4
- Step 2B Solid Concrete Wall Option
- 2B-1
- 2B-2
- 2B-3
- Supplied Parts and Hardware for Step 3
- Step 3 Secure the Arm Assembly to the Wall Plate
- Step 6 Manage Cables
- Step 7 TV Adjustments
- Tilt Adjustment
- Level Adjustment
- Lateral Shift
- ATTENTION!
- ⚠️ Remarque :
- PRECAUCIÓN!
- Nota:
- Paso 7 Ajustes de TV
Brand : ErgoAV
Model : ERMML4-01B
Category : Printer