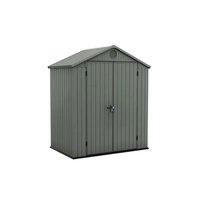
Darwin 6x4 - Garden sheds KETER - Free user manual and instructions
Find the device manual for free Darwin 6x4 KETER in PDF.


| Product Type | Garden Shed |
| Brand | Keter |
| Model | Darwin 6x4 |
| Dimensions (approx.) | 1.83 m x 1.22 m (6 ft x 4 ft) |
| Height (approx.) | 2.0 m |
| Weight (approx.) | 65 kg |
| Material | Recycled Resin |
| Intended Use | Storage only, not habitable |
| Foundation Required | Yes, floor anchoring recommended |
| Door | Lockable, handle closure |
| Warranty | 10-year limited (manufacturing and material defects) |
| Maintenance | Clean with water and non-abrasive detergent |
| Safety Precautions | Do not step on roof, avoid heavy loads against walls, remove snow in winter |
| Country of Manufacture | Israel |
| Recyclability | Recyclable materials |
Frequently Asked Questions - Darwin 6x4 KETER
User questions about Darwin 6x4 KETER
0 question about this device. Answer the ones you know or ask your own.
Ask a new question about this device
Download the instructions for your Garden sheds in PDF format for free! Find your manual Darwin 6x4 - KETER and take your electronic device back in hand. On this page are published all the documents necessary for the use of your device. Darwin 6x4 by KETER.
USER MANUAL Darwin 6x4 KETER
natural_image
Illustration of a simple wooden shed with slatted walls and a vent, no text or symbols present.
natural_image
Simple line drawing of a human figure with arms and question mark above head (no text or symbols)


WWW.KETER.COM
US / Canada: (EN/FR)
Tel: +1-888-374-4262
keter.com/en-us/contact-us.html
Email: NACS@keter.com
UK
Tel: +44-121-506-0008, CSUK@keter.com
Mon - Fri | 8am - 4pm
For other European countries see the last page
natural_image
Diagram of layered electronic components with arrows indicating direction (no text or symbols)natural_image
Illustration of a ladle pouring liquid onto a grid-patterned surface (no text or symbols)For external access during assembly, make sure to leave enough room around the outside of the shed assembly site.
Read the care and safety guidelines at the end of this manual | Check to ensure that there are no missing or damaged parts BEFORE starting or arranging assembly | Remove all parts from the package(s) and spread them out on a clean work surface | Review all assembly instructions | Assemble all the parts according to the directions in this manual. Do not skip any steps.
natural_image
Line drawing of a rectangular grid structure labeled DRLF (x2), no other text or symbols present.WALL PARTS | PIÈCES DES MURS | PARTES DE LAS PAREDES | WANDELEMENTE | MUURONDERDELEN | COMPONENTI DELLA PARETE | PAINÉIS LATERAIS
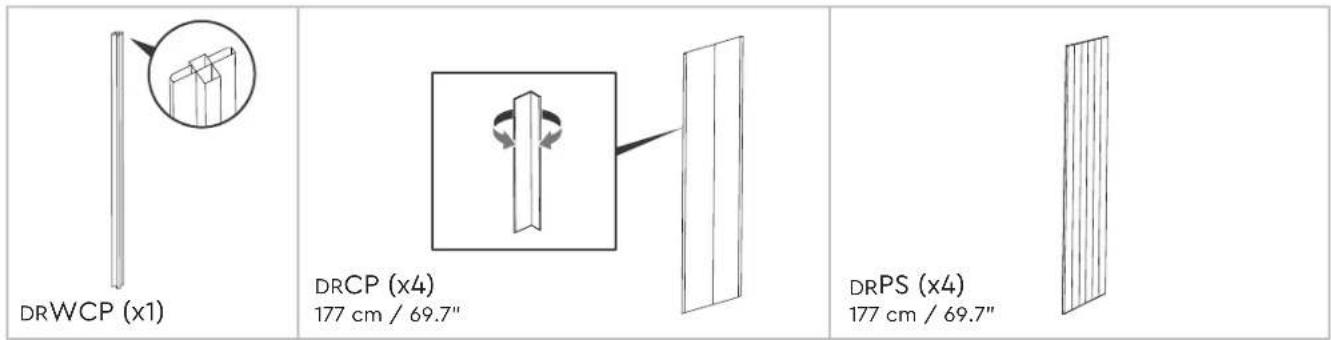
ROOF PARTS | PIÈCES DU TOIT | DACHELEMENTE | PARTES DEL TECHO | DAKONDERDELEN | COMPONENTI DEL TETTO | PEÇAS DO TELHADO
| DRPT (x4) 94 cm / 37" | DRSFG (x1)DRLFG (x1) | DRCB (x1) | |
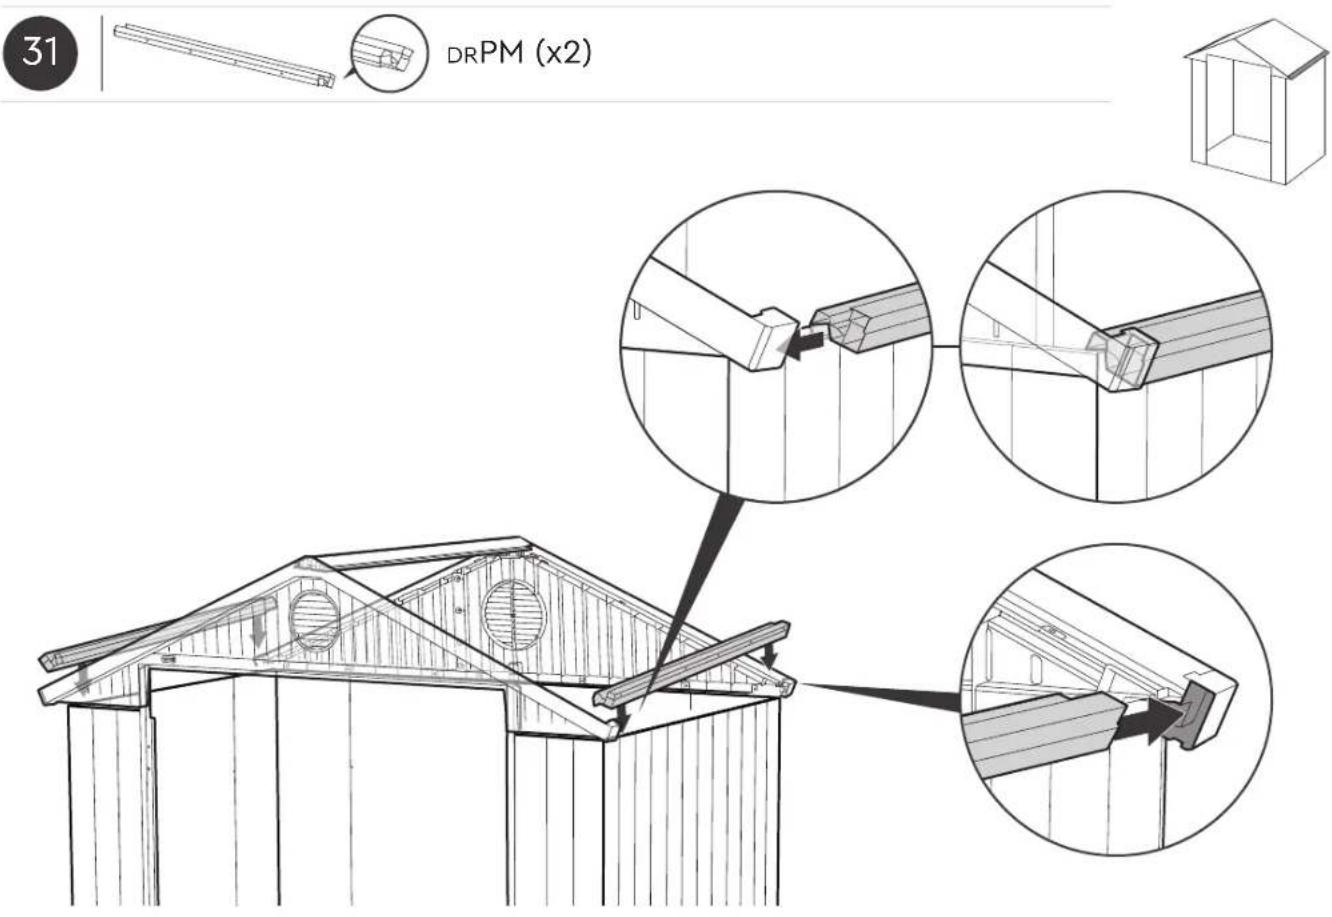
| DRSRG (x1)DRLRG (x1) | DRPM (X2) |
DOOR PARTS | PIÈCES DE LA PORTE | TÜRELEMENTE | PARTES DE LA PUERTA | DEURONDERDELEN | COMPONENTI DELLA PORTA | PEÇAS DAS PORTAS

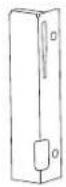 | 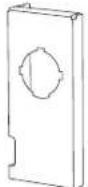 | 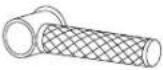 |  | 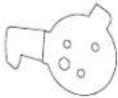 |
| DRHF (x1) DRHLF (x1) | DRHN (x1) | DRHB (x1) | DRHL (x1) |
METAL PARTS | PIÈCES MÉTALLIQUES | PIEZAS METÁLICAS | METALLTEILE | METALEN DELEN | COMPONENTI IN METALLO | PARTES METÁLICAS
 DRDML (x1) DRDML (x1) |  DRMDT (X2) DRMDT (X2) |
 DRUMK (x1) DRUMK (x1) |  DRMA (X3) DRMA (X3) |
 DRMIF (x1) DRMIF (x1) |  DRMW (x1) DRMW (x1) |
 DRWMP (x1) DRWMP (x1) |  D6BP (x1) D6BP (x1) |
SMALL PARTS | PETITES PIÈCES | PARTES PEQUEÑAS | KLEINTEILE | KLEINE ONDERDELEN | MINUTERIA | PEÇAS PEQUENAS
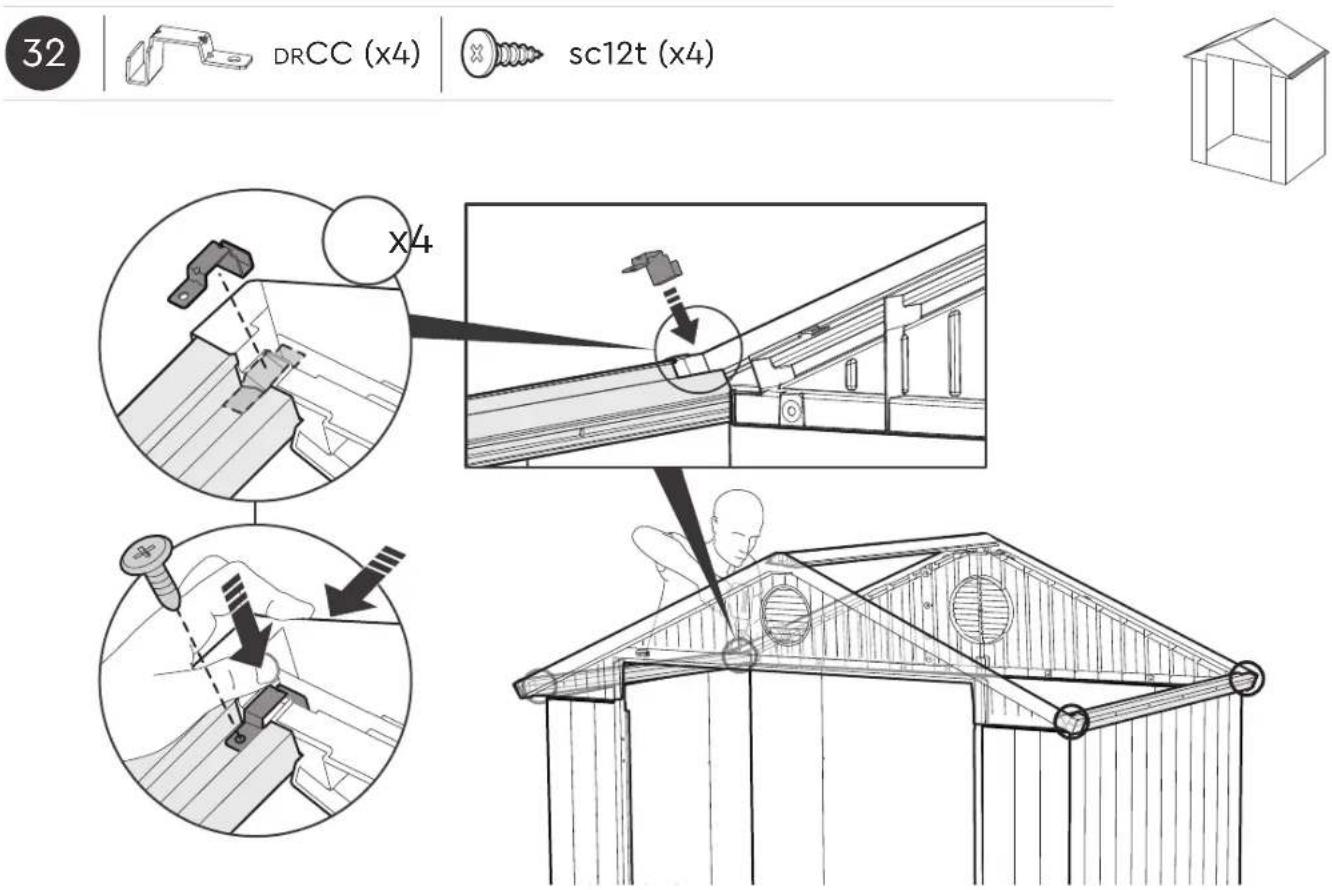
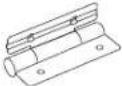 DRHG (x4) D6L (x2) DRHG (x4) D6L (x2) | 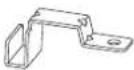 DRCC (x4) DRCC (x4) |
SCREWS | VIS | SCHRAUBEN | TORNILLOS | SCHROEVEN | VITI | PARAFUSOS | ŚRUBY
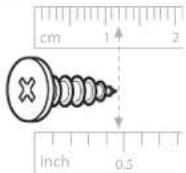 sc12t (x149) 12 mm /0.47" sc12t (x149) 12 mm /0.47" | 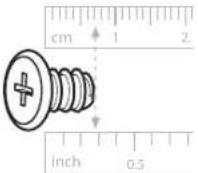 sc7t (x12) 7 mm / 0.28" sc7t (x12) 7 mm / 0.28" | 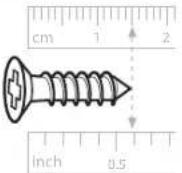 sw15d (x25) 15 mm /0.6" sw15d (x25) 15 mm /0.6" | 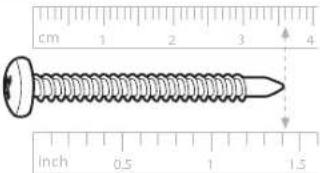  |
FLOOR ASSEMBLY | MONTAGE DU SOL | ARMADO DEL PISO | MONTAGE DER BODENPLATTE | VLOERMONTAGE | ASSEMBLAGGIO DEL PAVIMENTO | MONTAGEM DO PISO

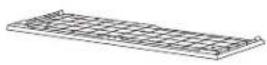
DRLF (x2)
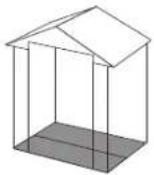
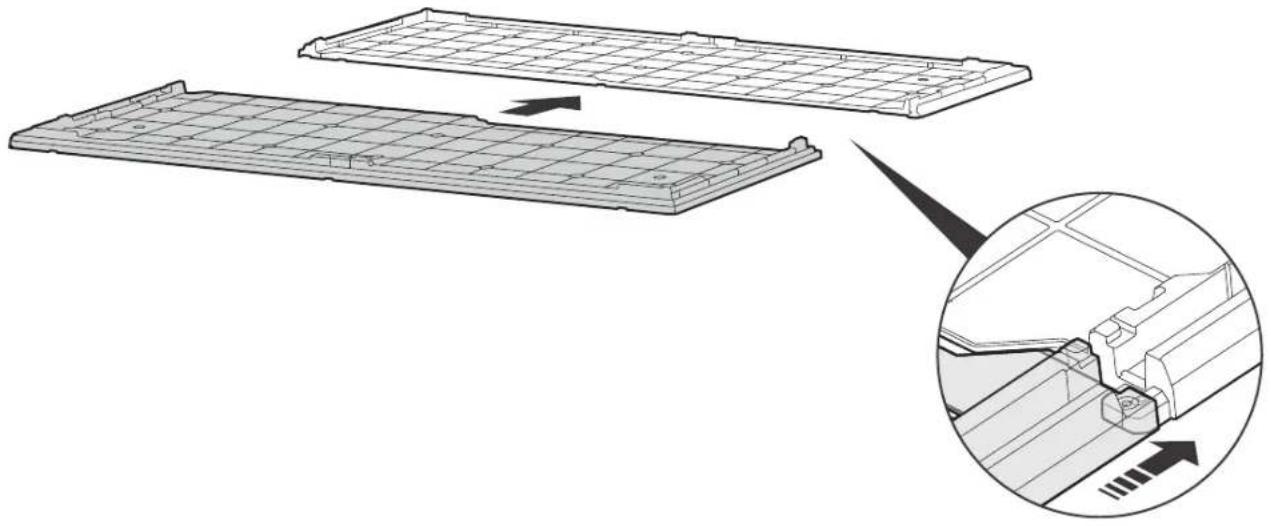
natural_image
Technical illustration of a mechanical component with an inset close-up showing internal structure (no text or symbols)

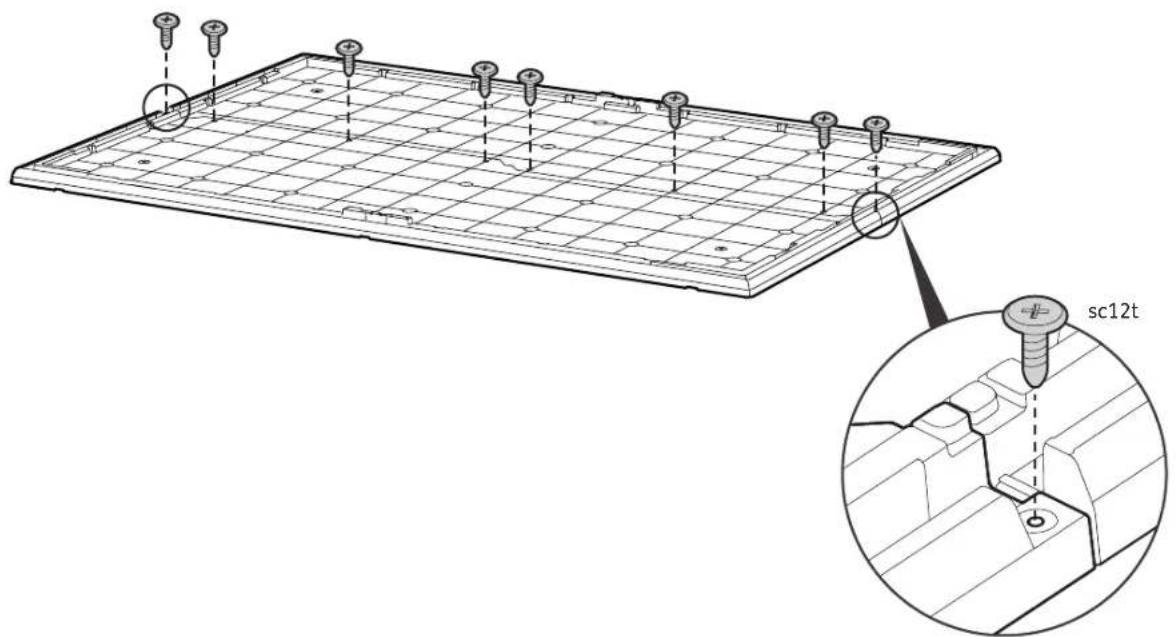
sc12t (x8)
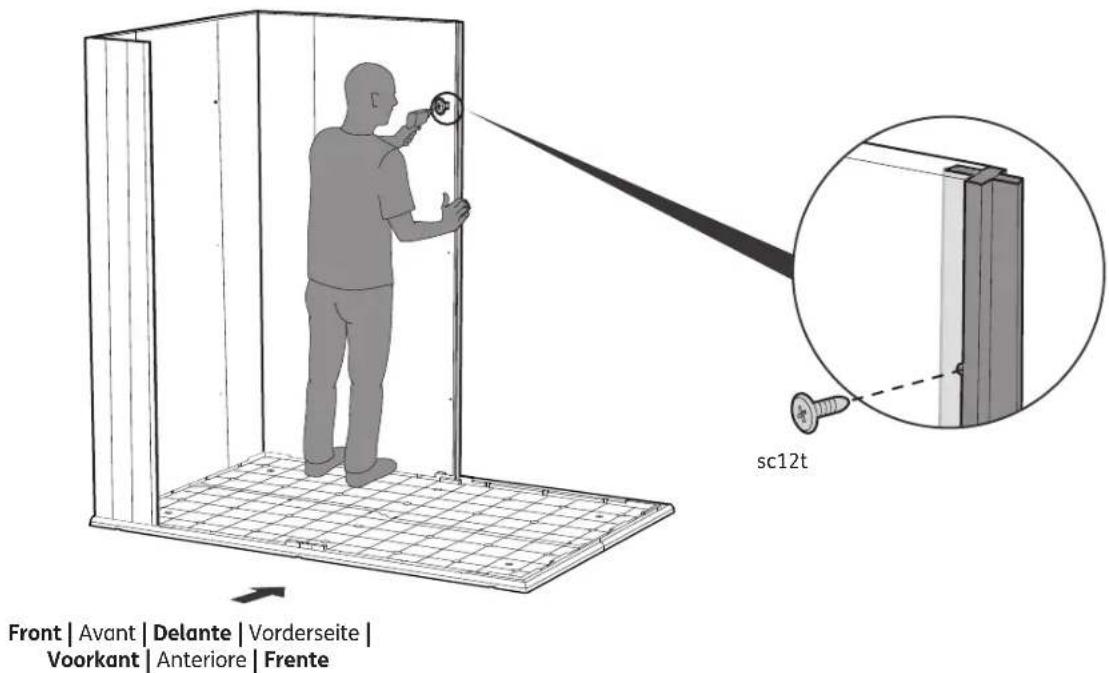
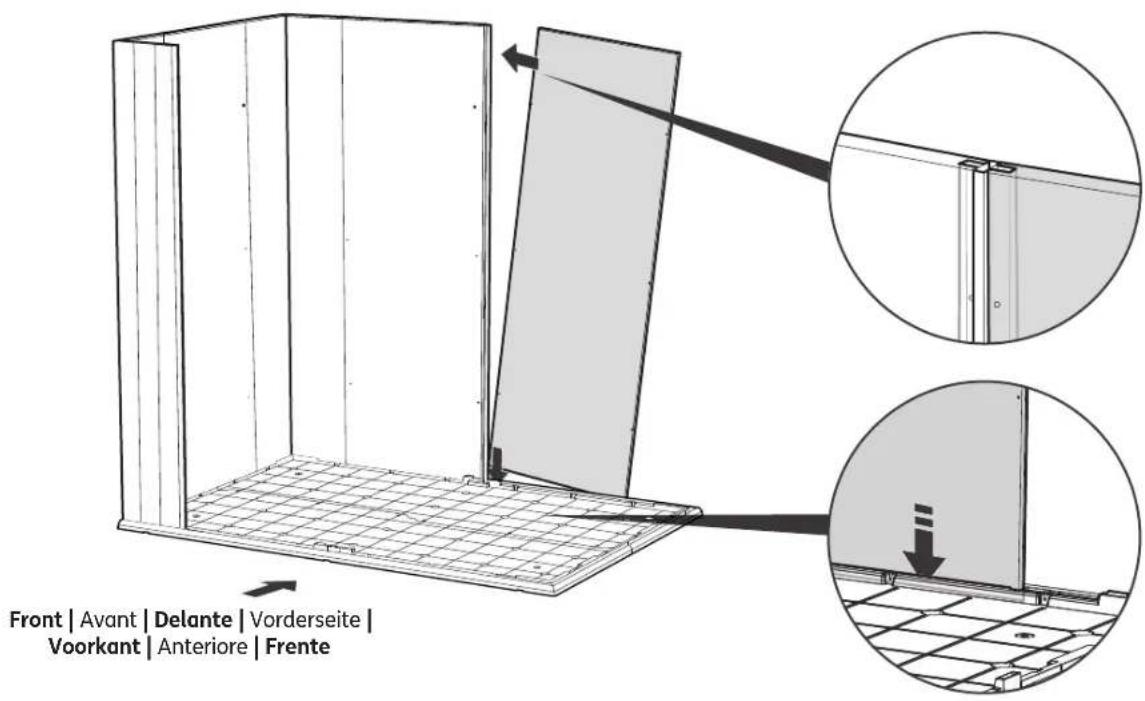
WALL ASSEMBLY | MONTAGE DU MUR | ARMADO DE PAREDES | MONTAGE DER WÄNDE | MONTAGE VAN DE MUREN | ASSEMBLAGGIO DELLE PARETI | MONTAGEM DA PAREDE
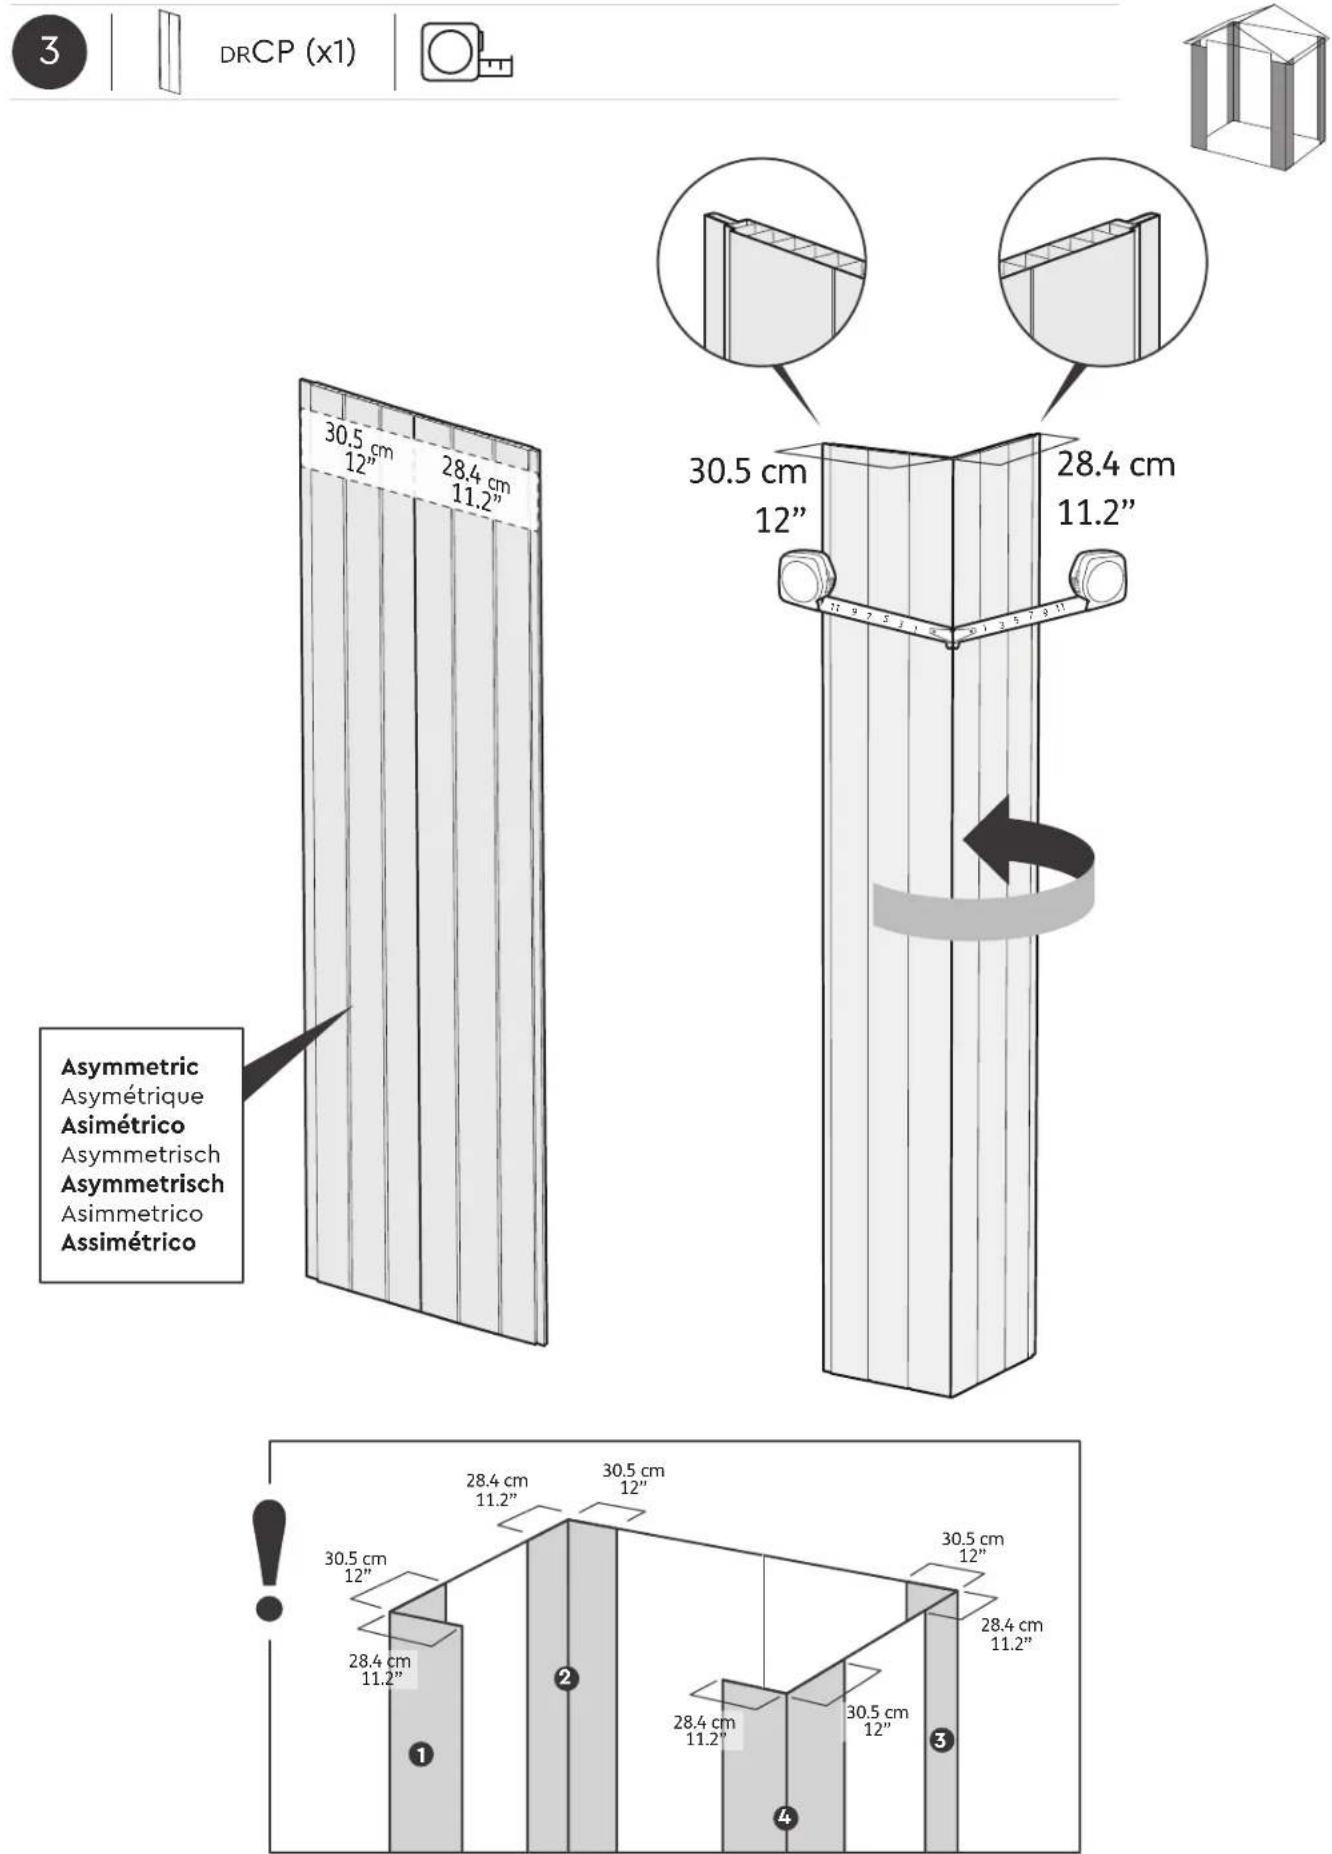
DRCP (x1)
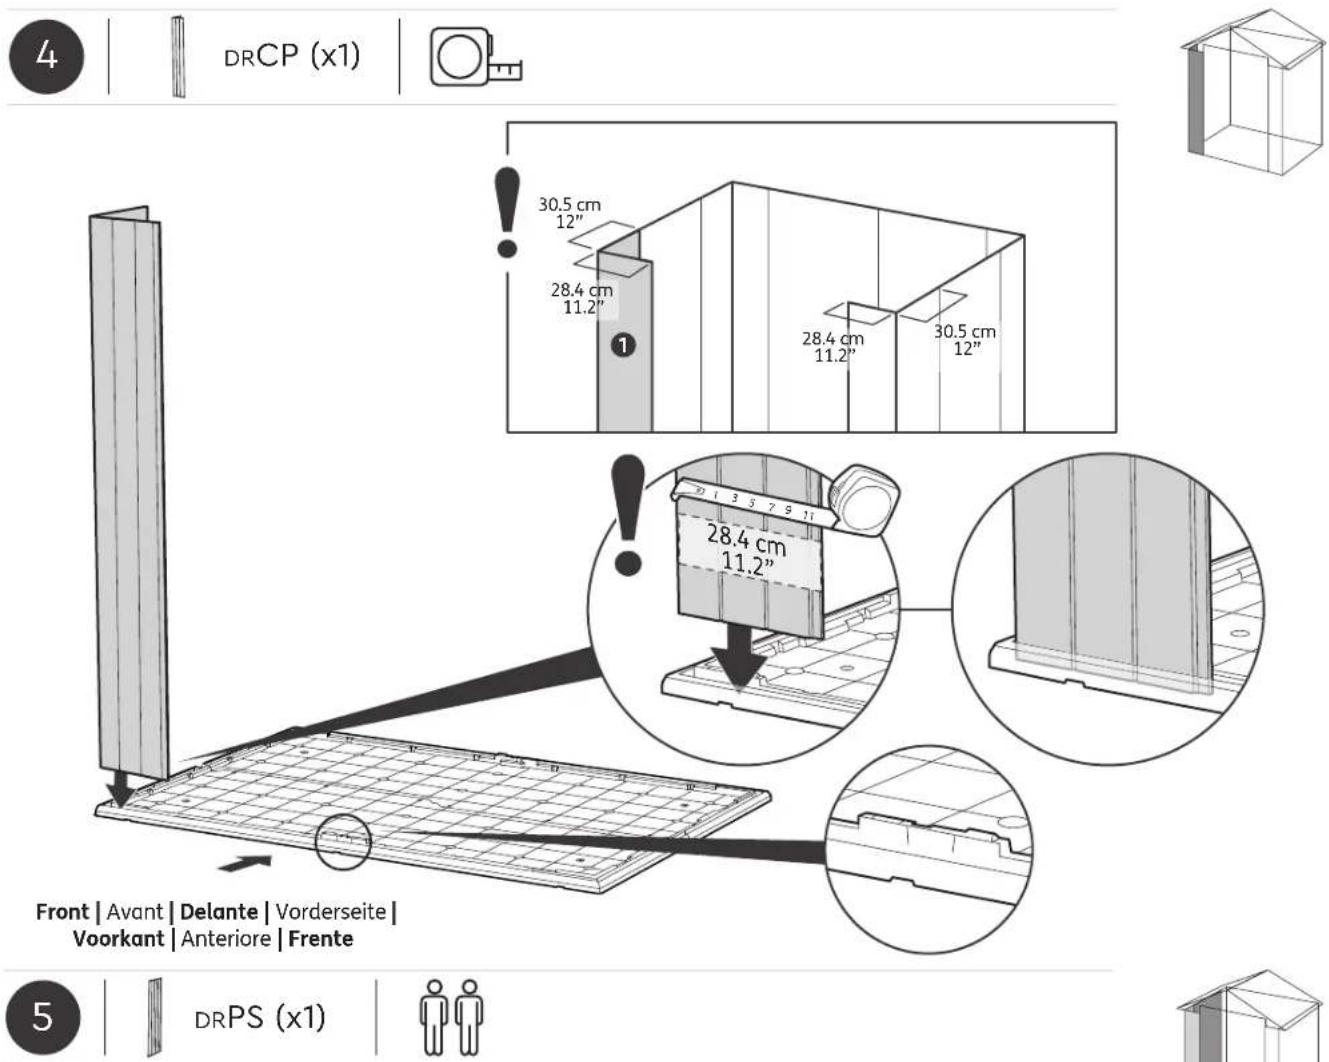
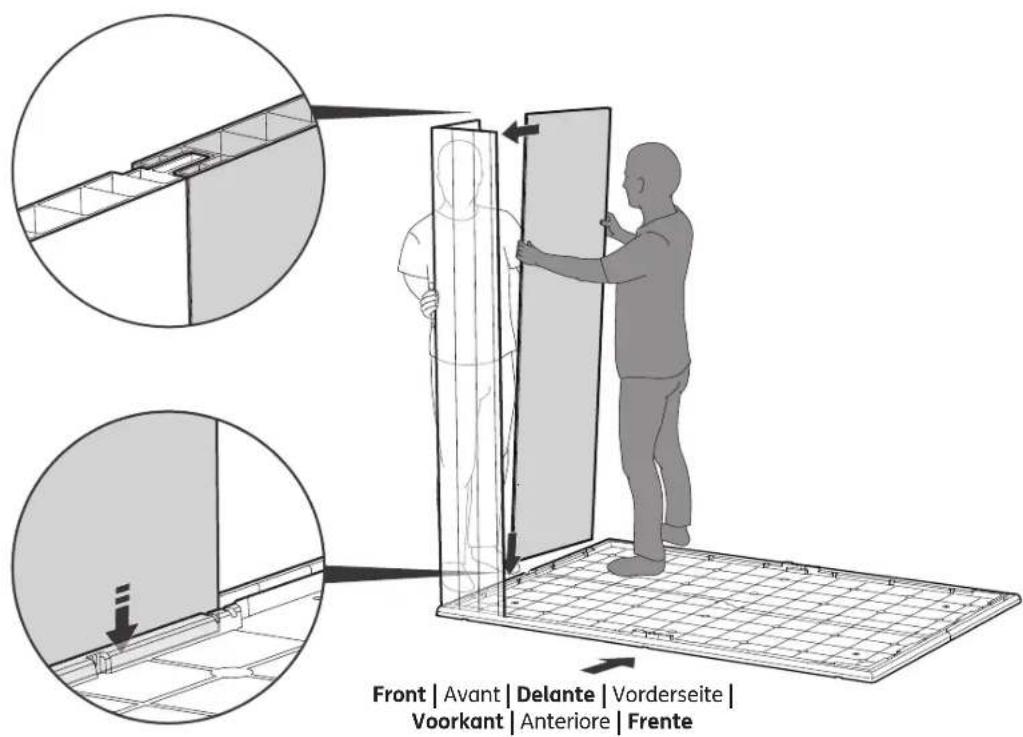


sc12t (x1)
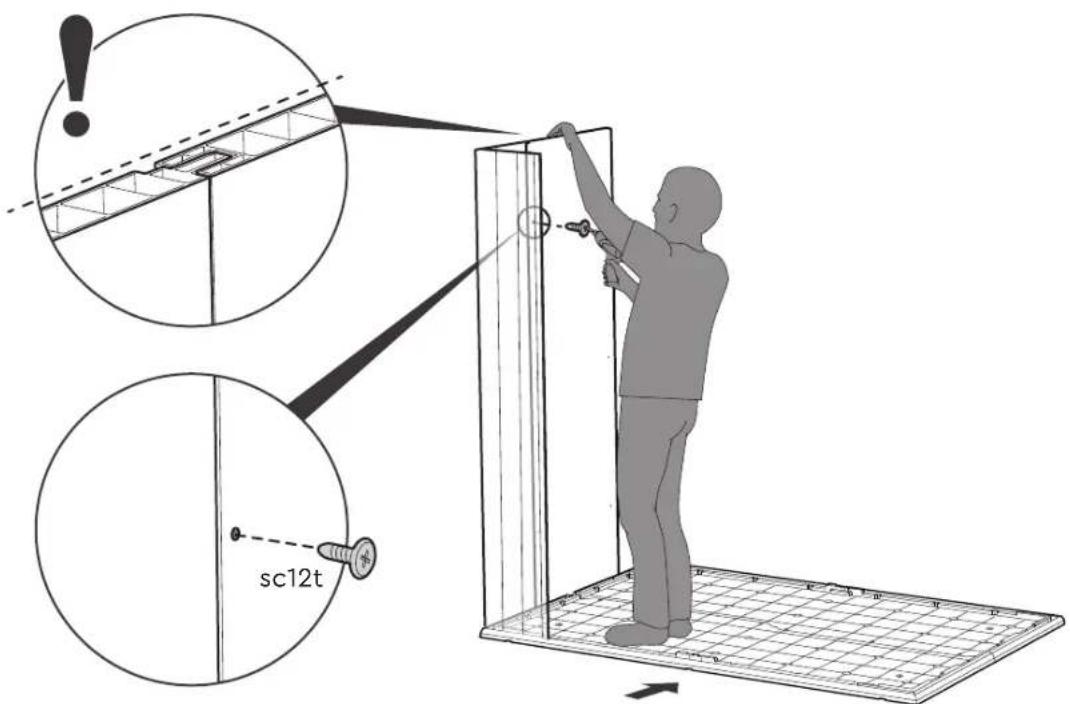
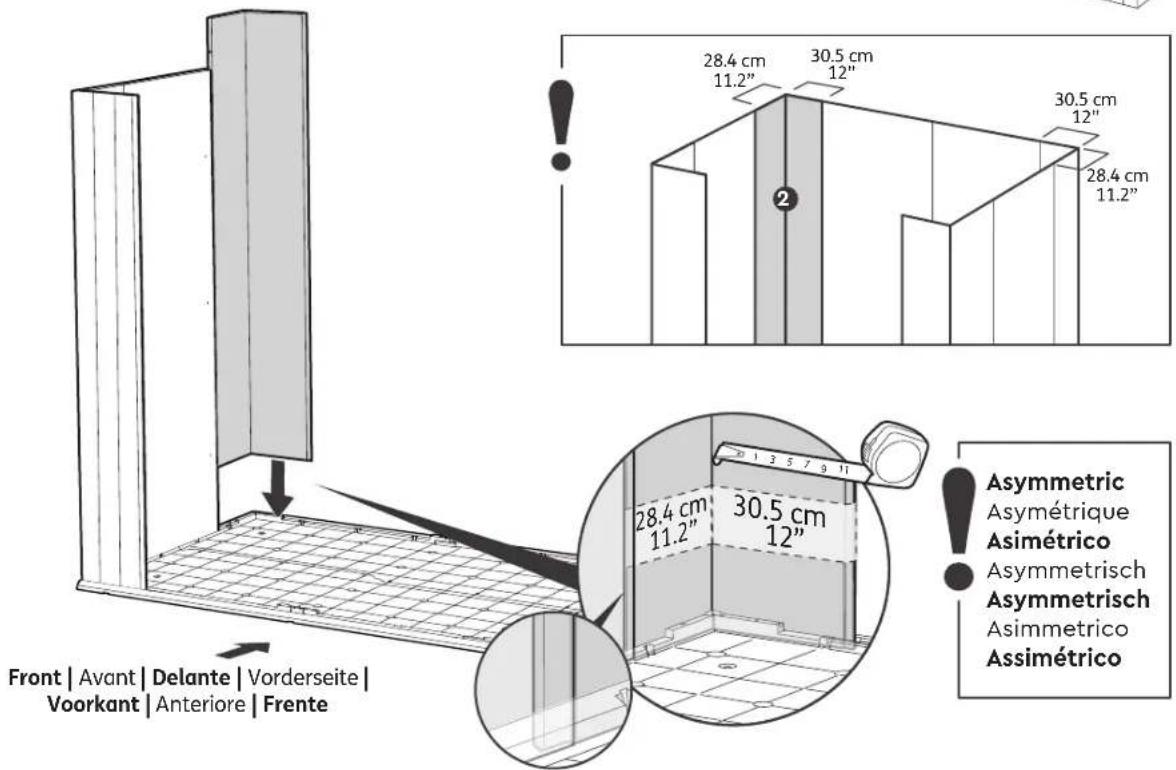
Front | Avant | Delante | Vorderseite | Voorkant | Anteriore | Frente

DRCP (x1)


sc12t (x1)
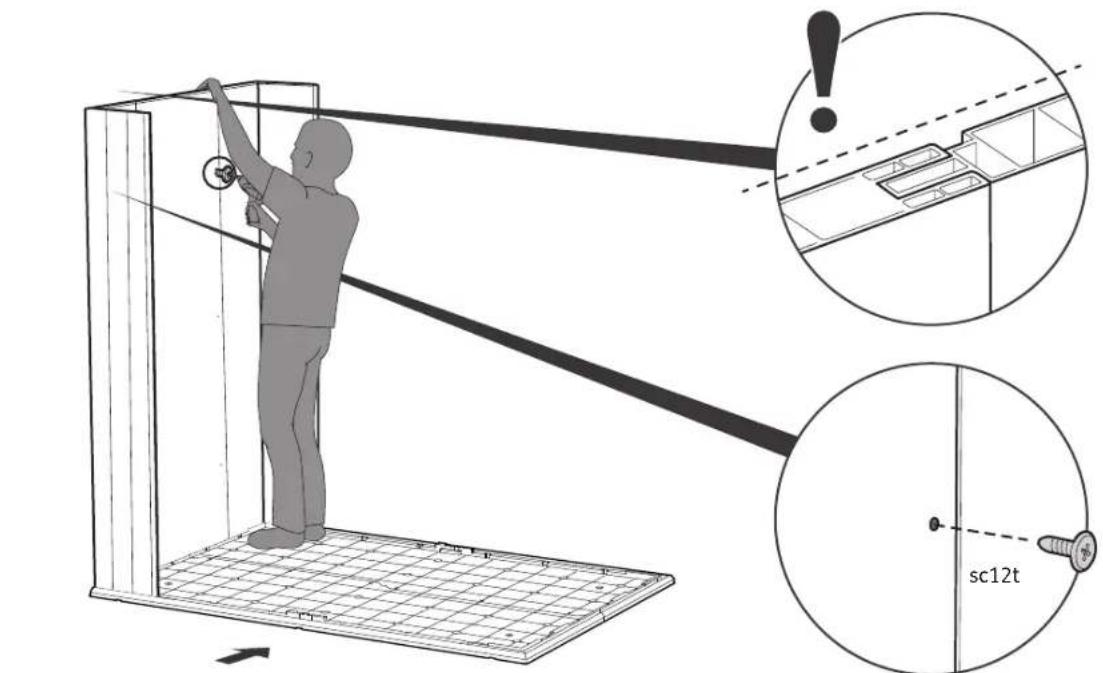
Front | Avant | Delante | Vorderseite | Voorkant | Anteriore | Frente

DRPS (x1)
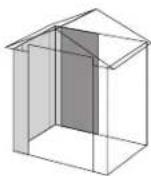
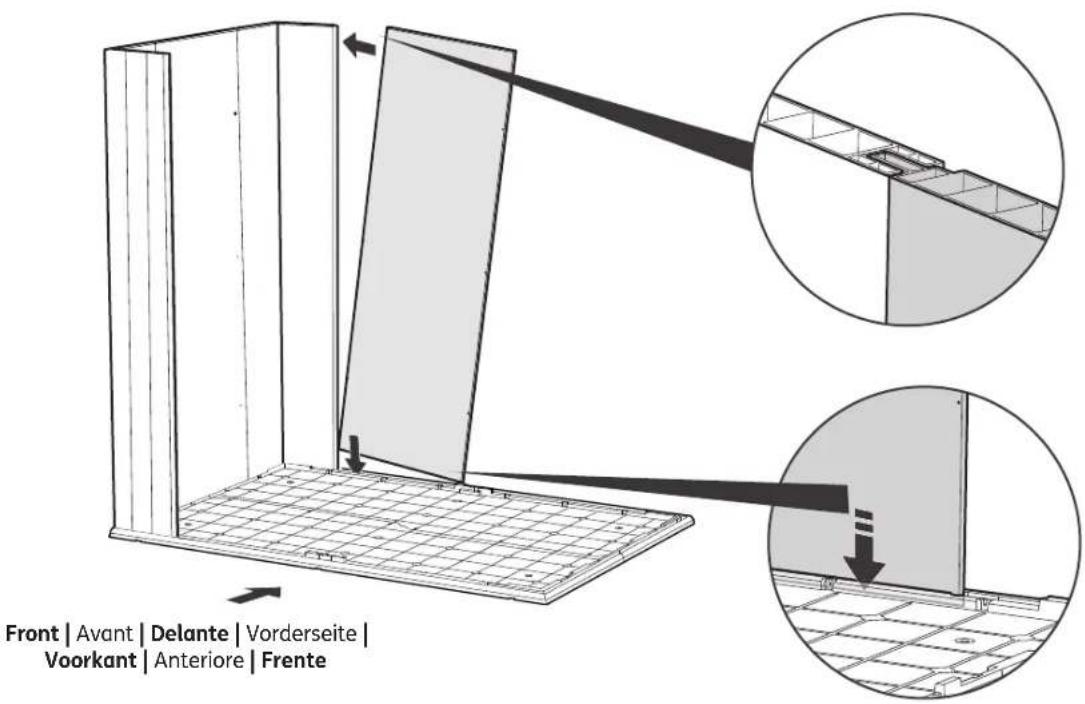
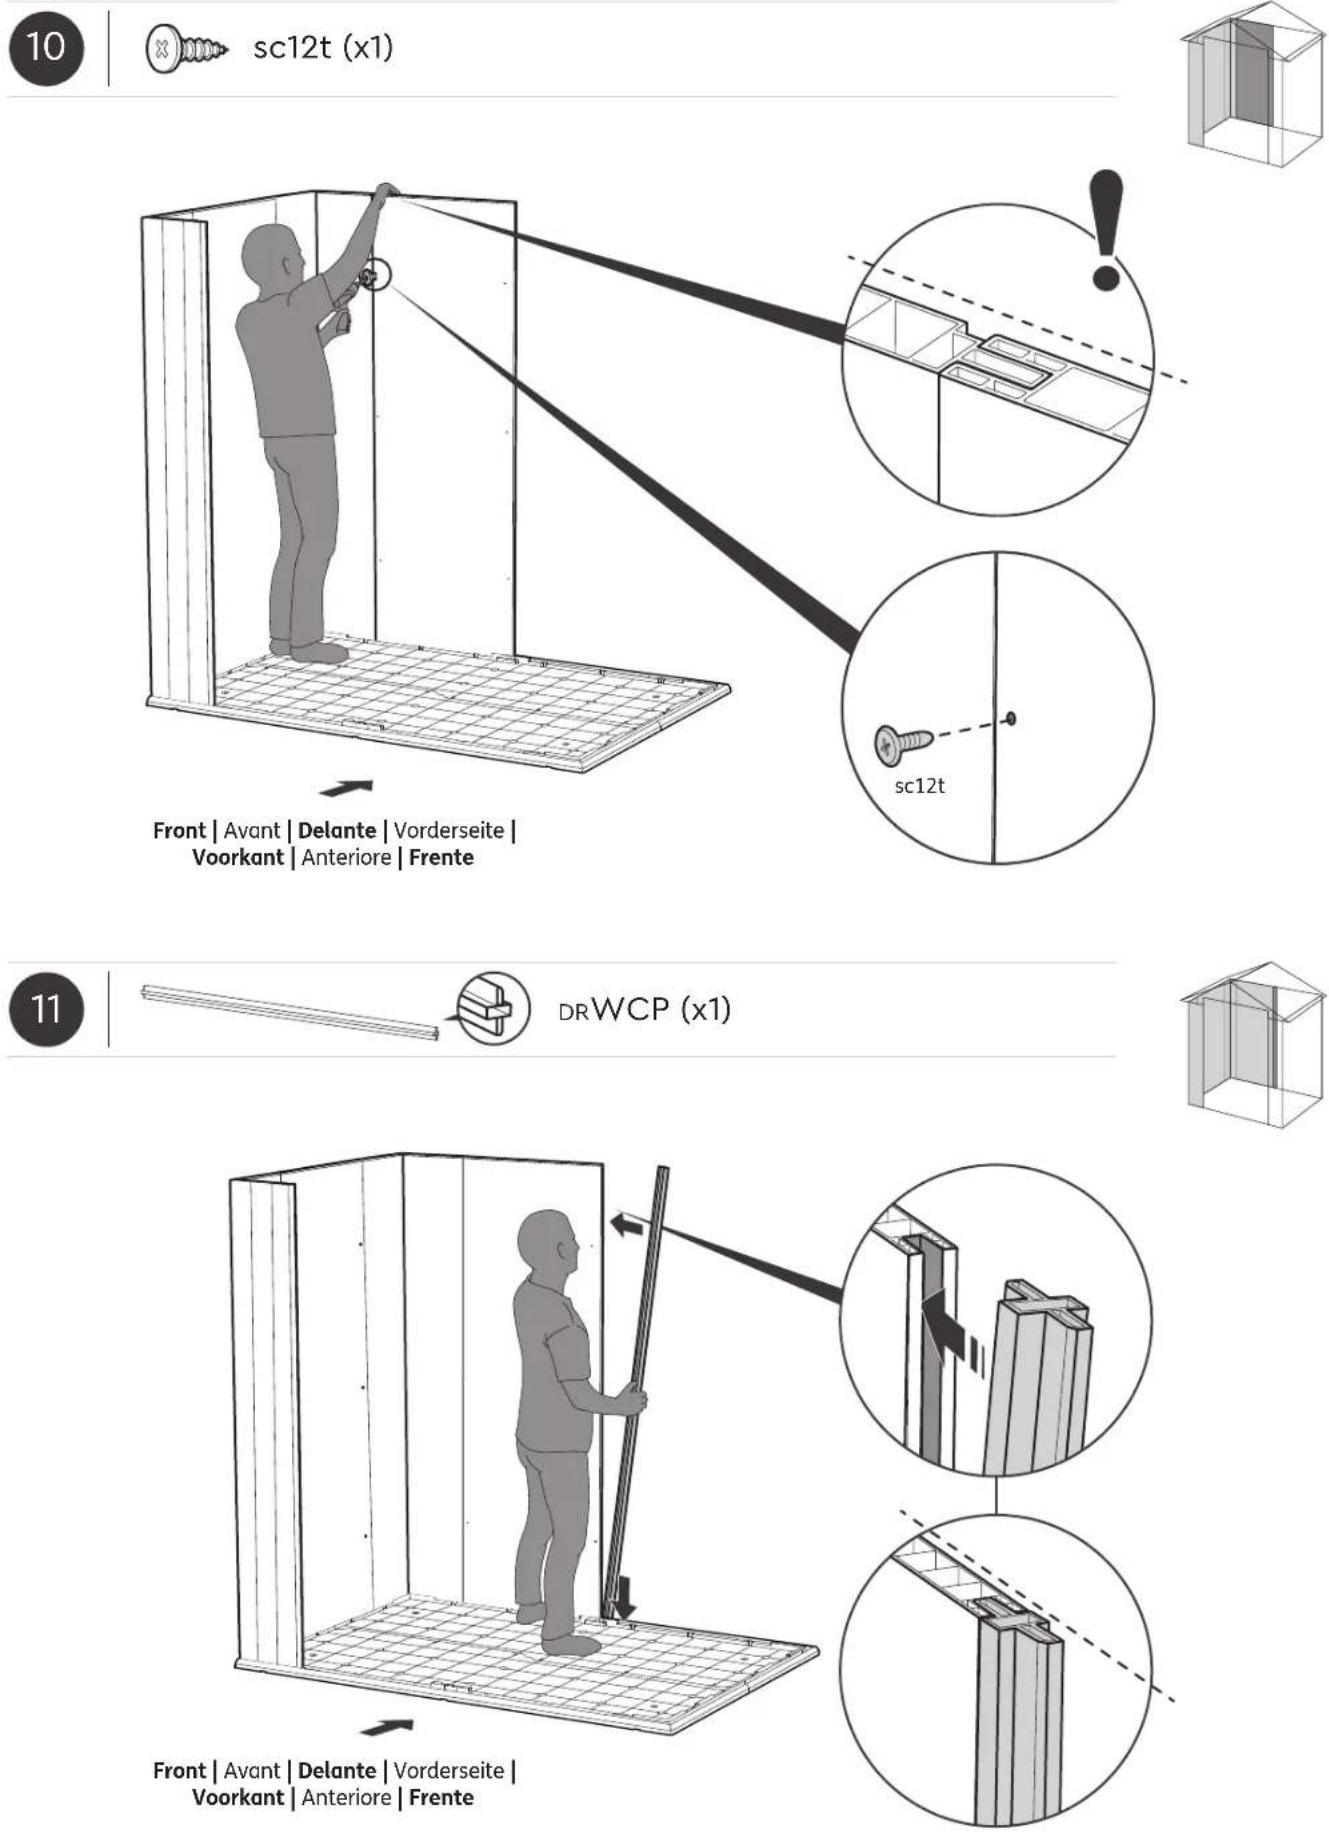
sc12t (x1)
DRWCP (x1)
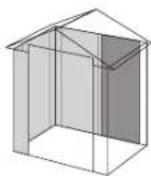
DRPS (x1)


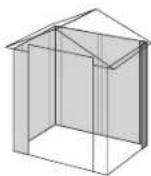
sc12t (x1)


DRCP (x1)

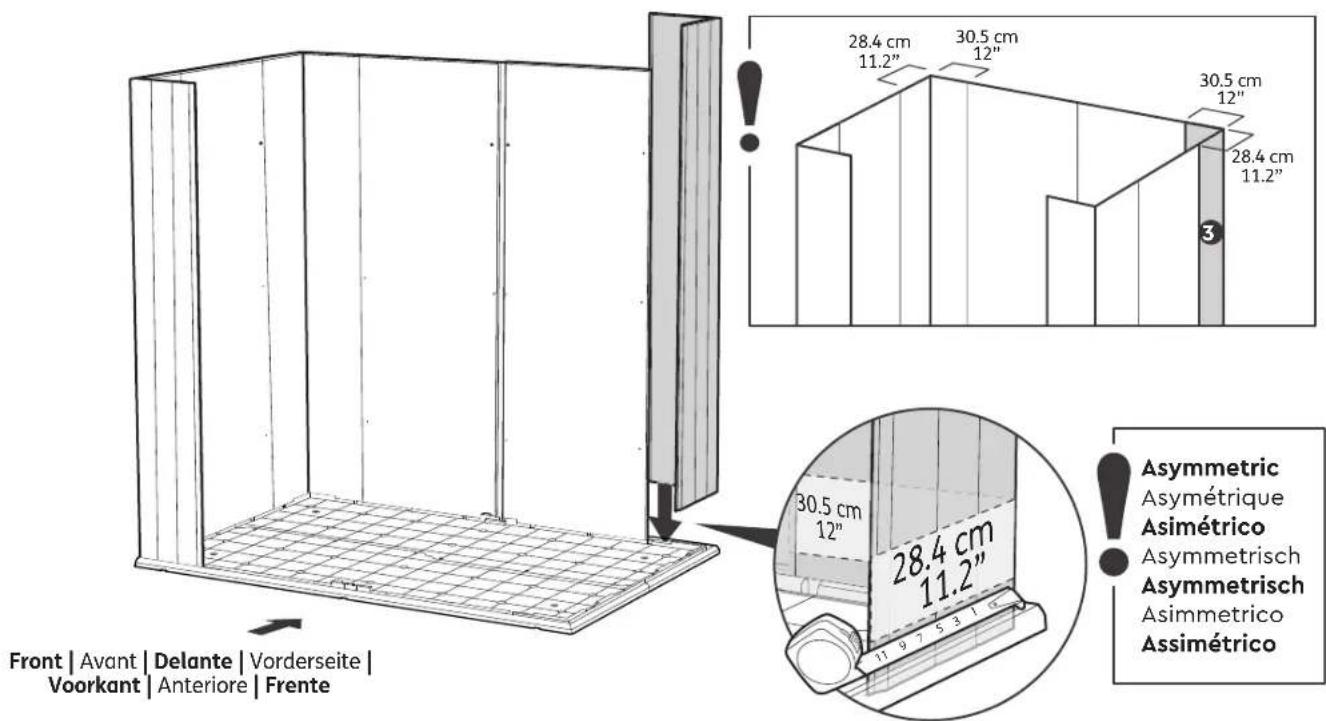
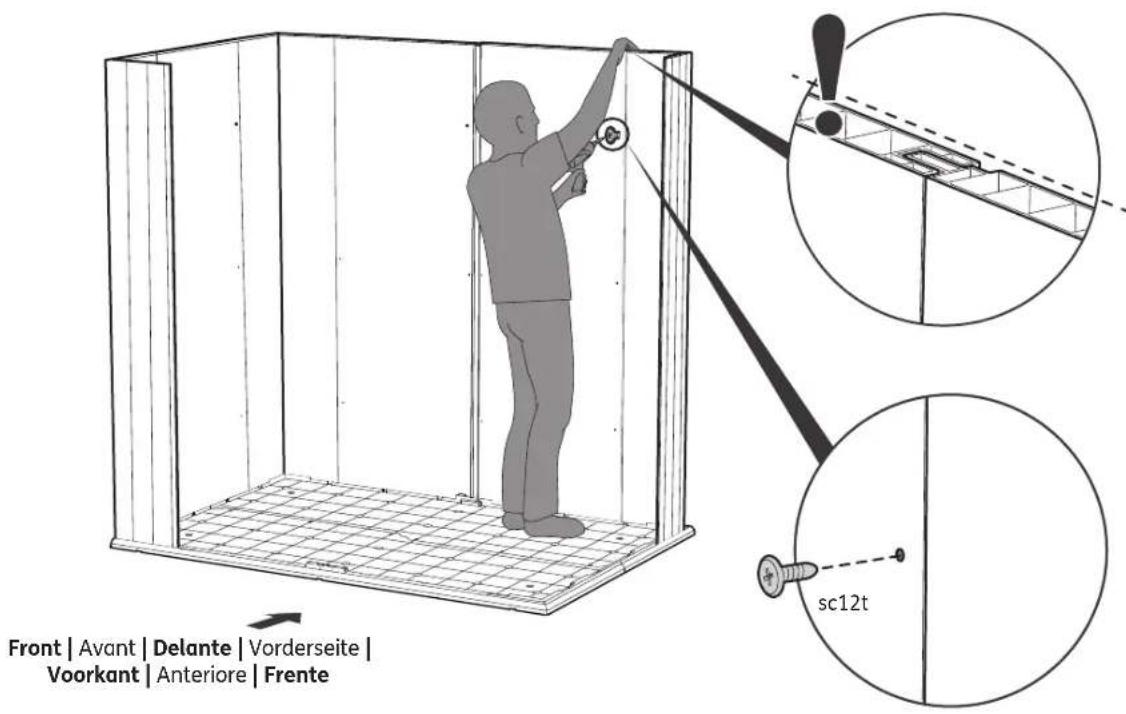
DRPS (x1)
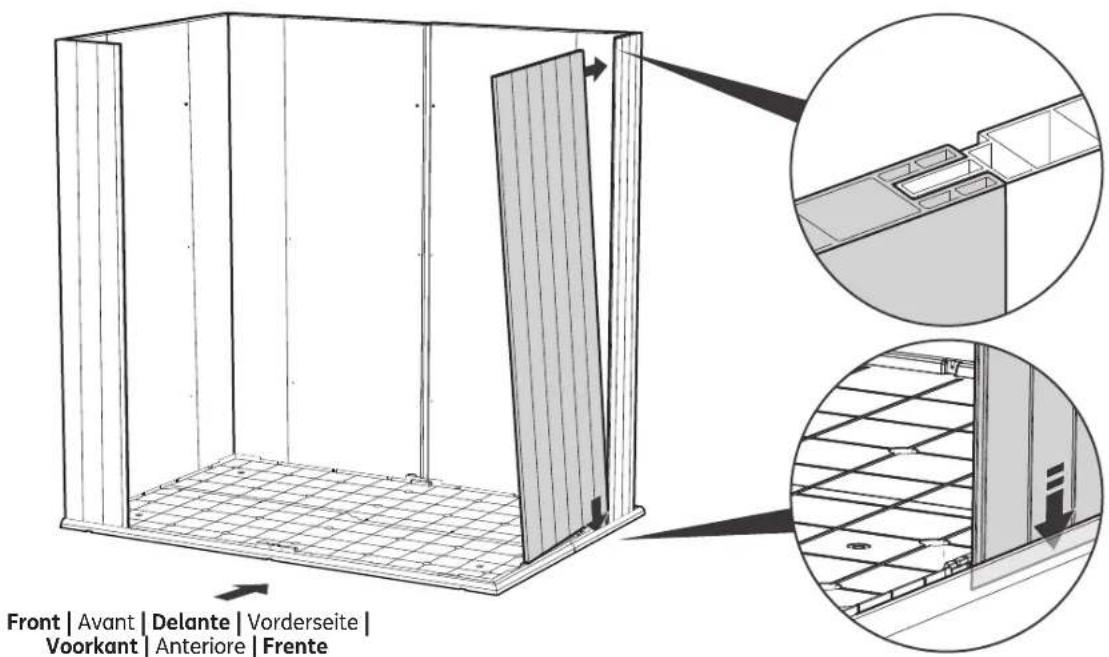
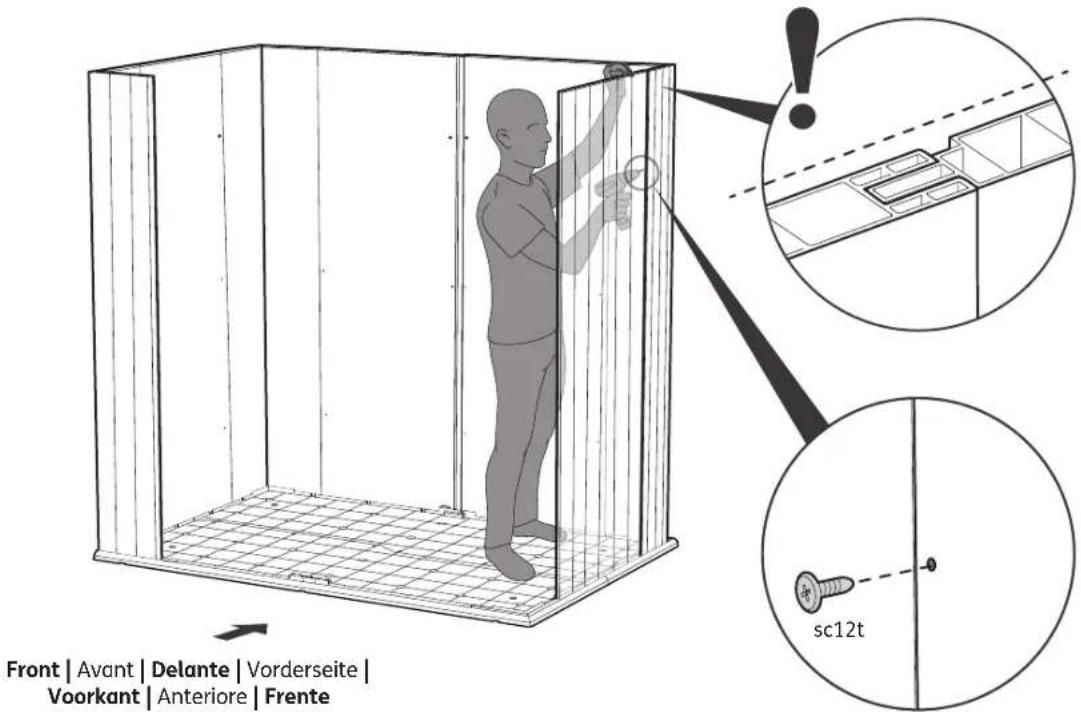
DRCP (x1)

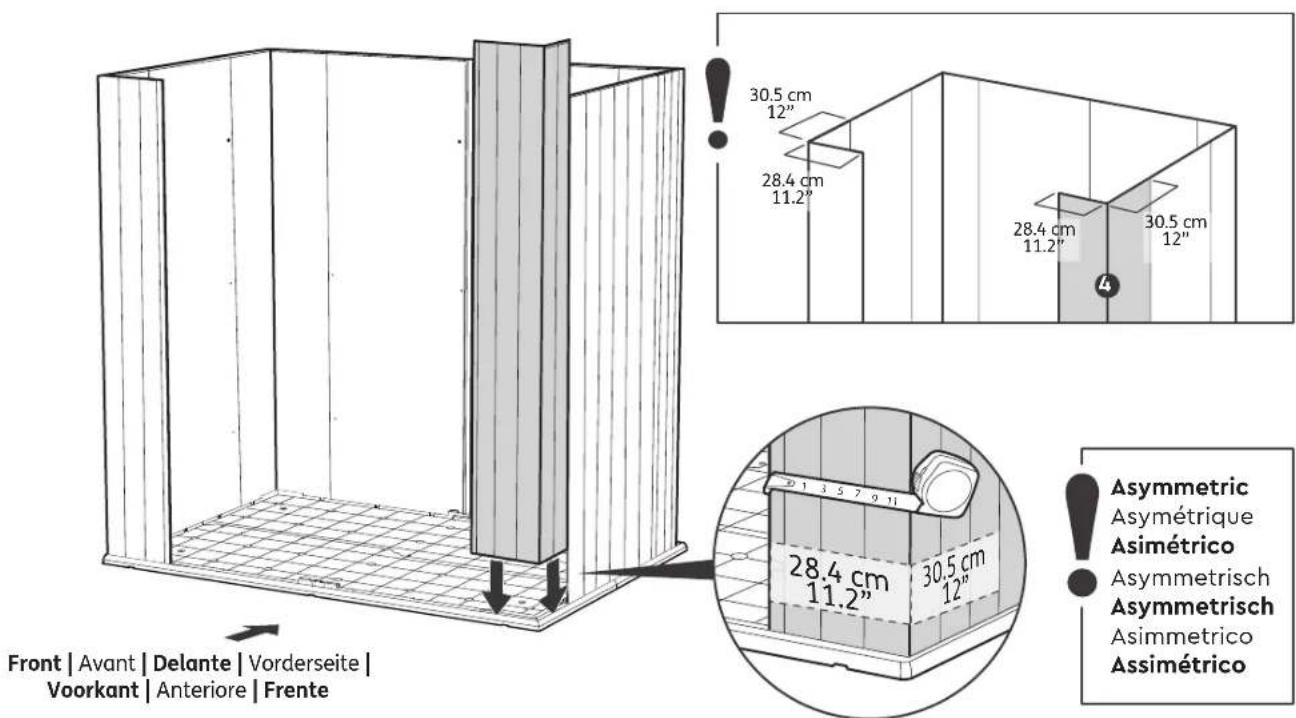


sc12t (x1)
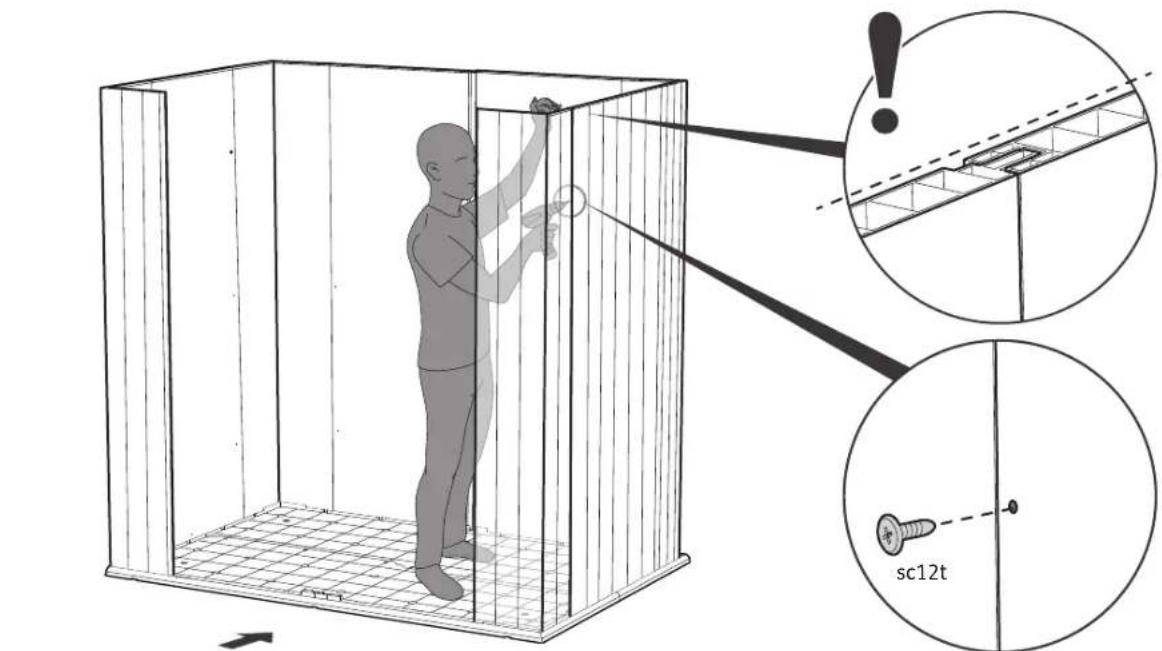
Front | Avant | Delante | Vorderseite | Voorkant | Anteriore | Frente
ROOF ASSEMBLY | MONTAGE DU TOIT | MONTAJE DEL TECHO | DACHMONTAGE | DAKMONTAGE | ASSEMBLAGGIO DEL TETTO | MONTAGEM DO TELHADO
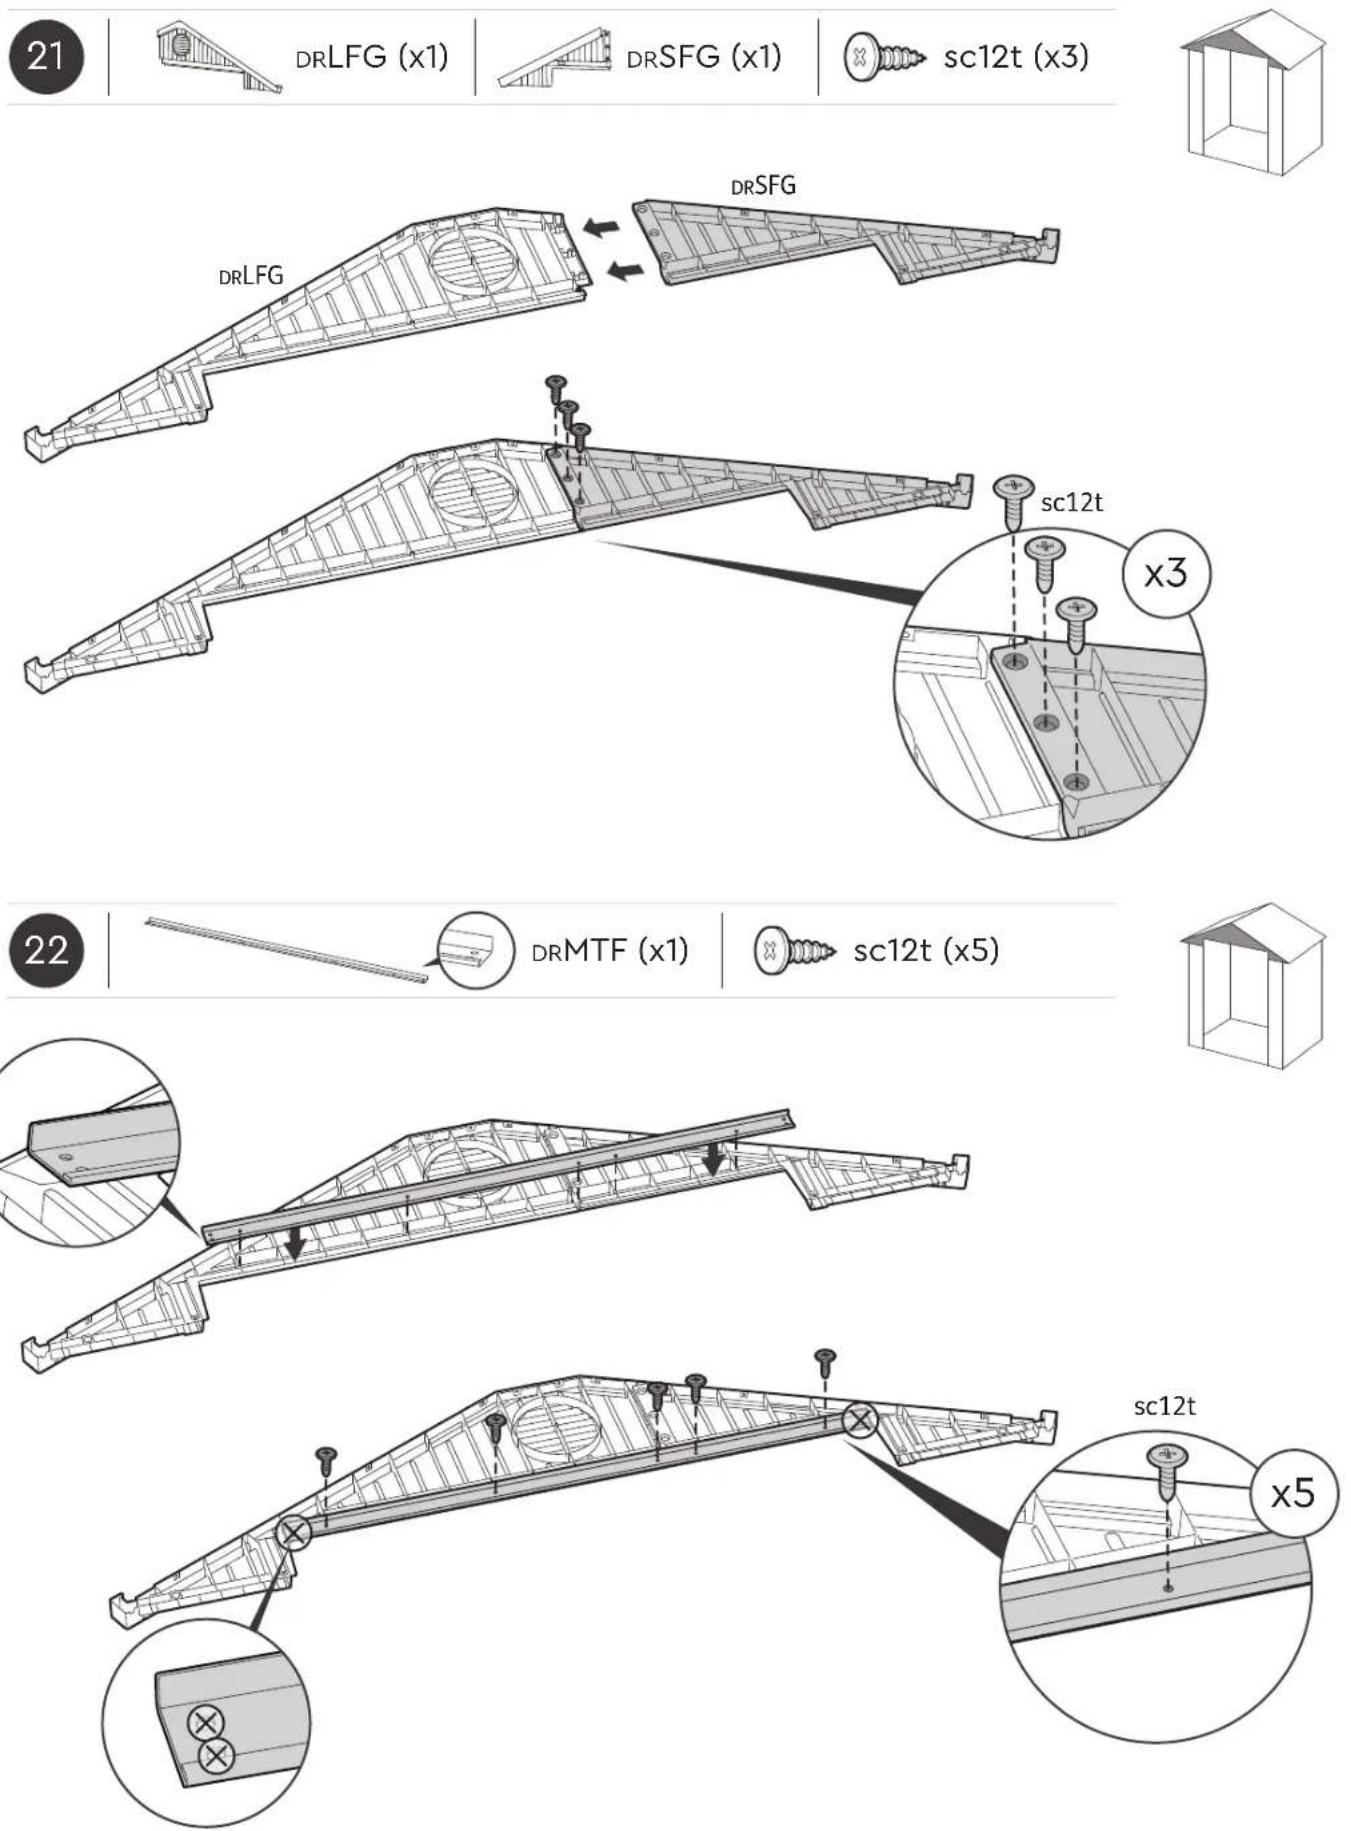



sc12t (x10)


natural_image
Illustration of a hand pressing a button with an arrow and exclamation mark (no text or symbols)
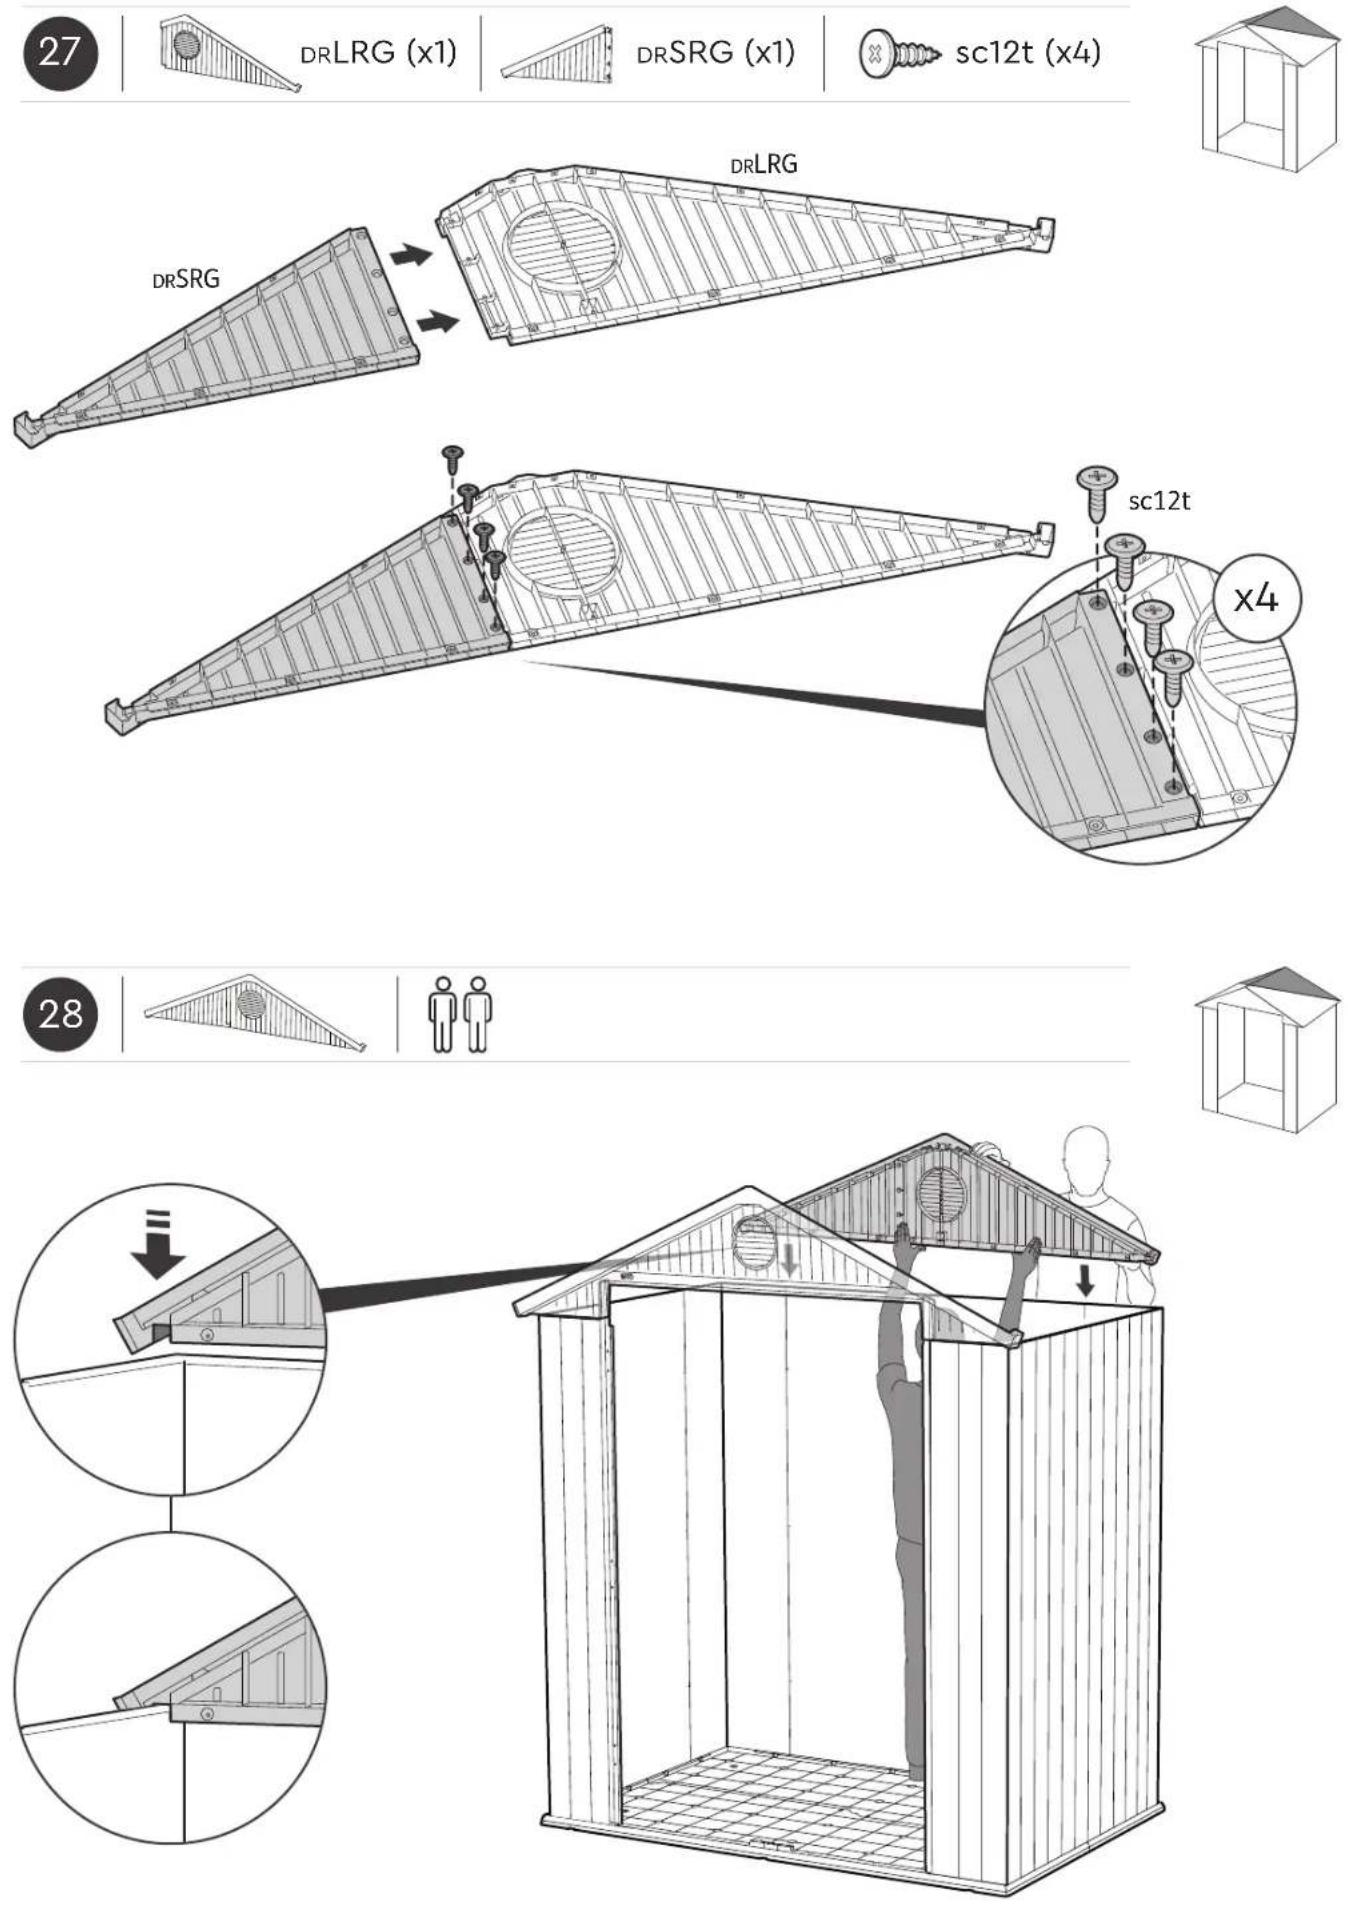


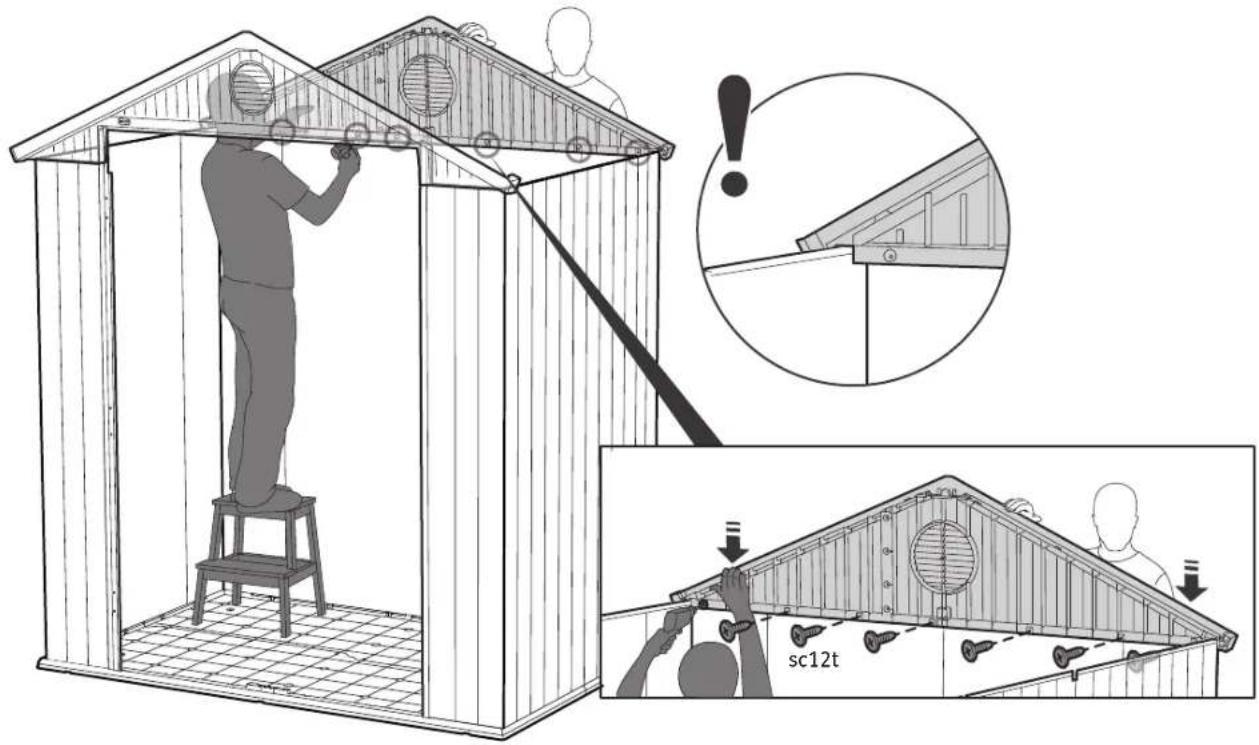
sc12t (x7)


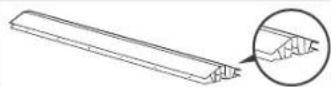
DRCB (x1)

sc12t (x4)
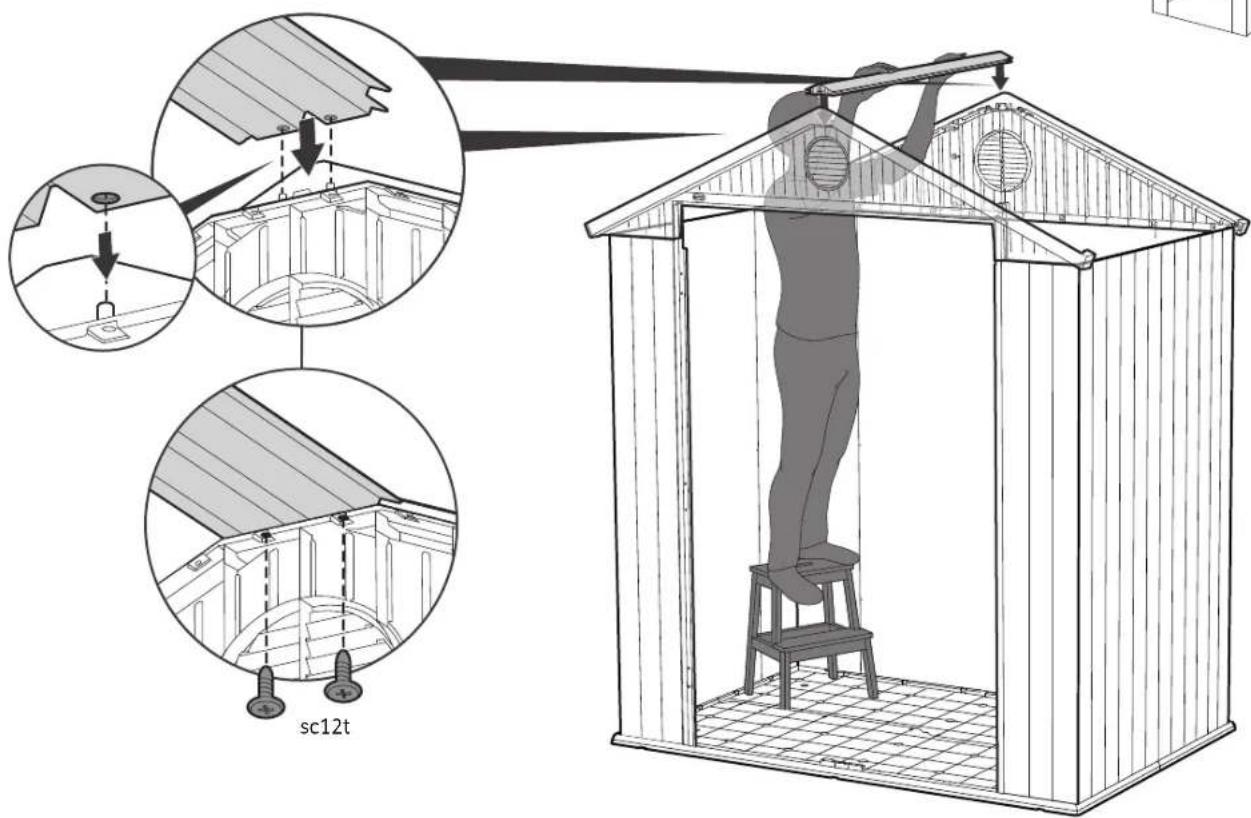


DRPT (x2)

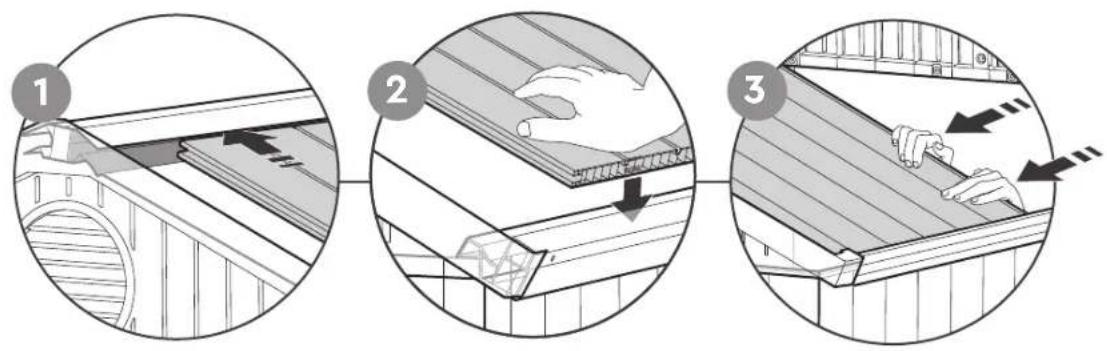
natural_image
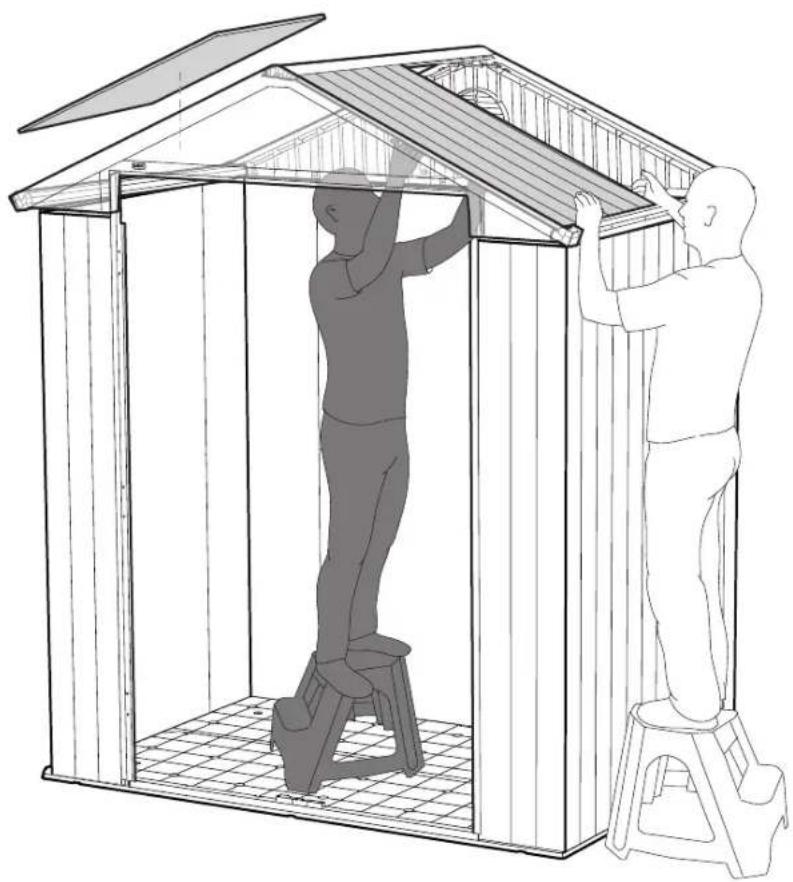
Line drawing of two people assembling a small wooden structure with a tiled floor (no text or symbols)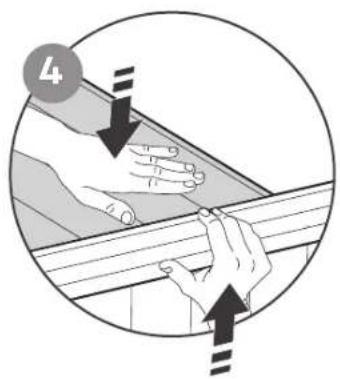
natural_image
Illustration of hands performing a task on a wooden beam, with arrows indicating motion direction (no text or symbols)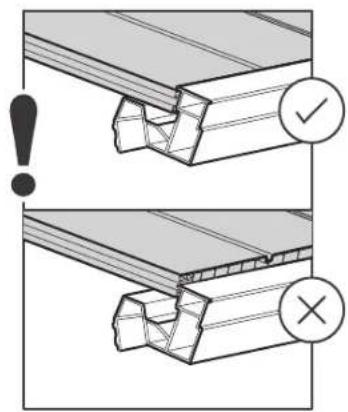


sc12t (x2)

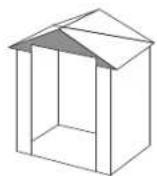
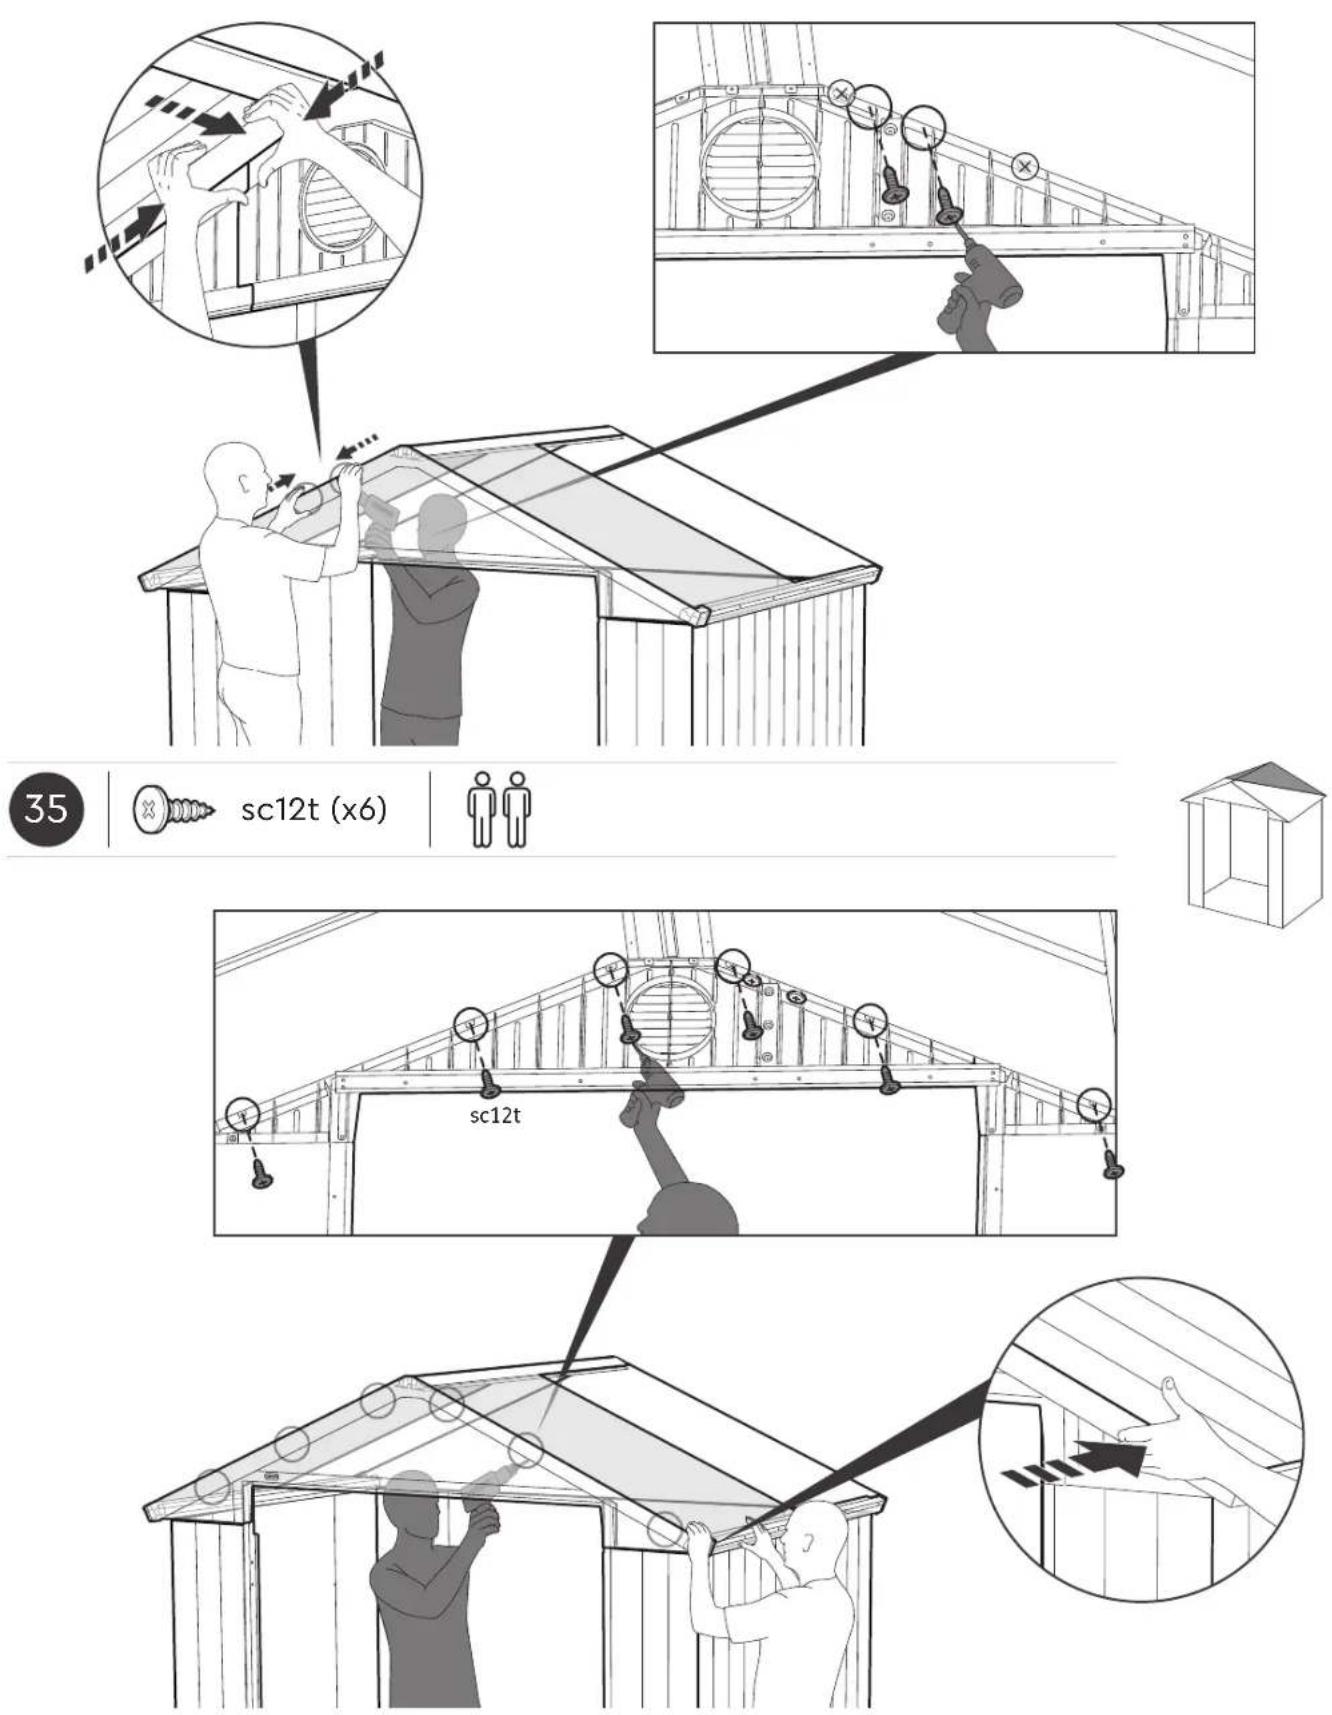
sc12t (x6)

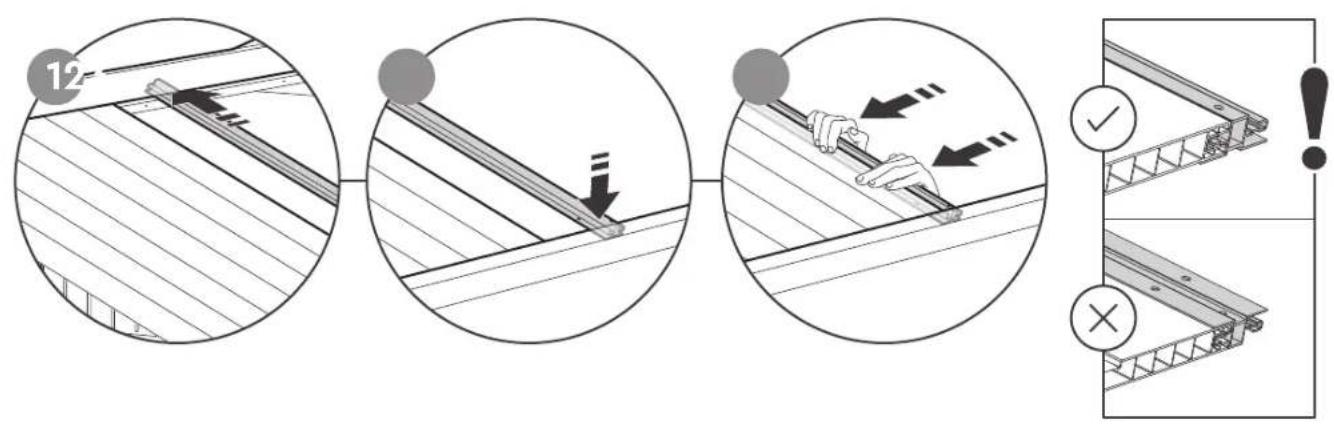
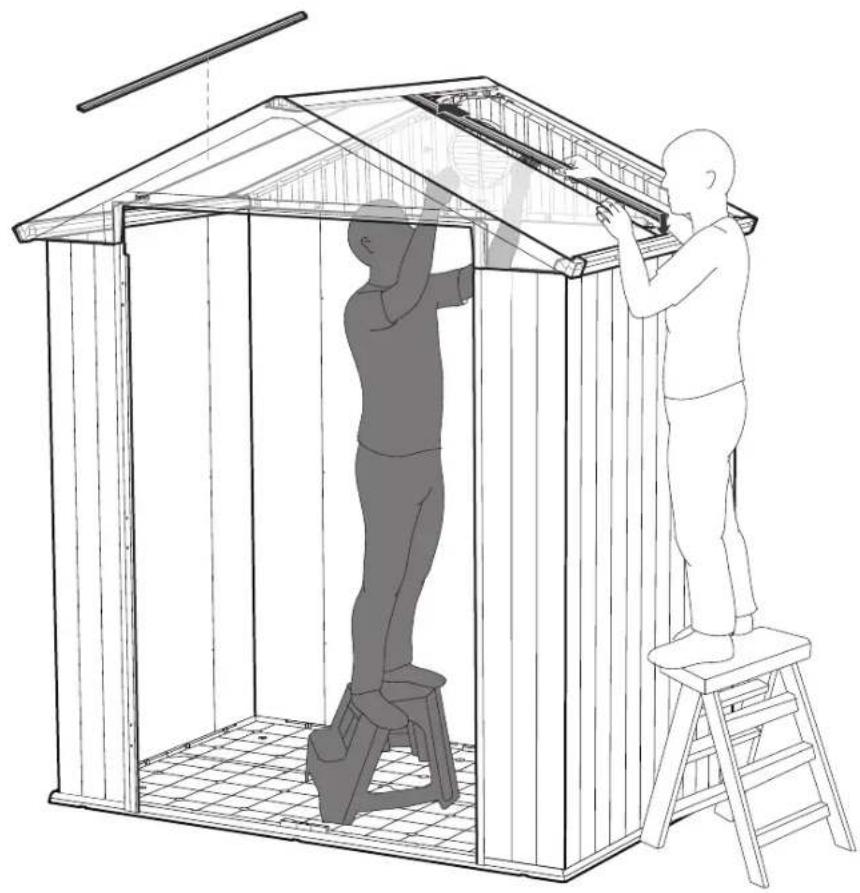
natural_image
Line drawing of two people installing or maintaining a large wooden structure inside a modern shelter (no text or symbols)

DRPT (x2)

natural_image
Architectural diagram showing a person opening a staircase with a hand adjusting the window (no text or symbols)
natural_image
Diagram showing a hand pressing down on a metal panel with an arrow indicating force or movement (no text or symbols present)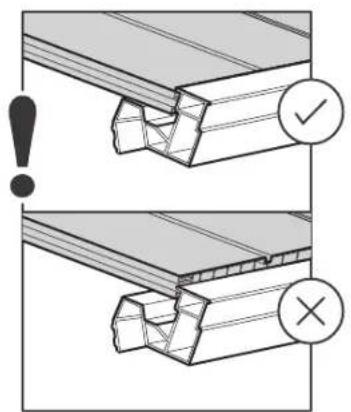
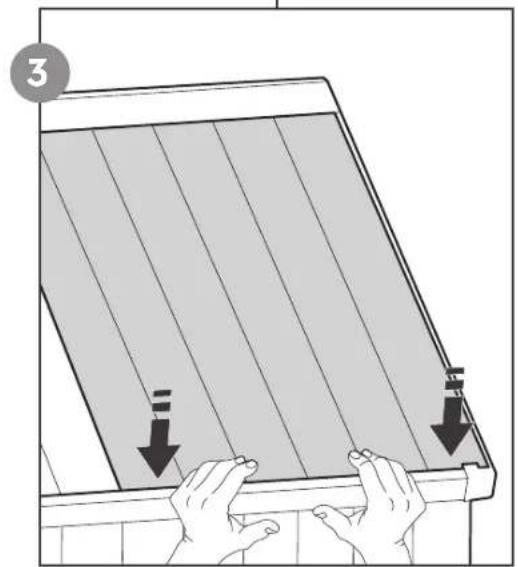
natural_image
Illustration of hands installing or adjusting a wooden panel with arrows indicating downward movement (no text or symbols)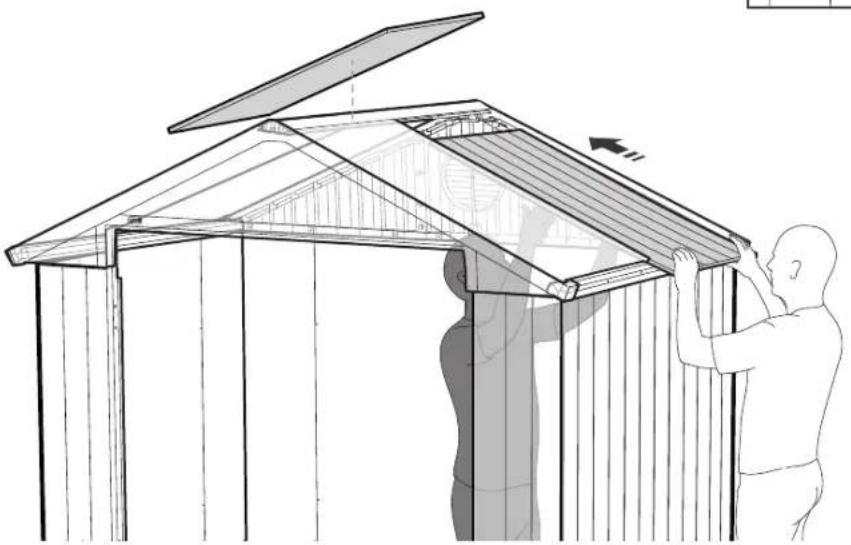
natural_image
Architectural line drawing of a wooden structure with a person installing or adjusting the roof (no text or symbols)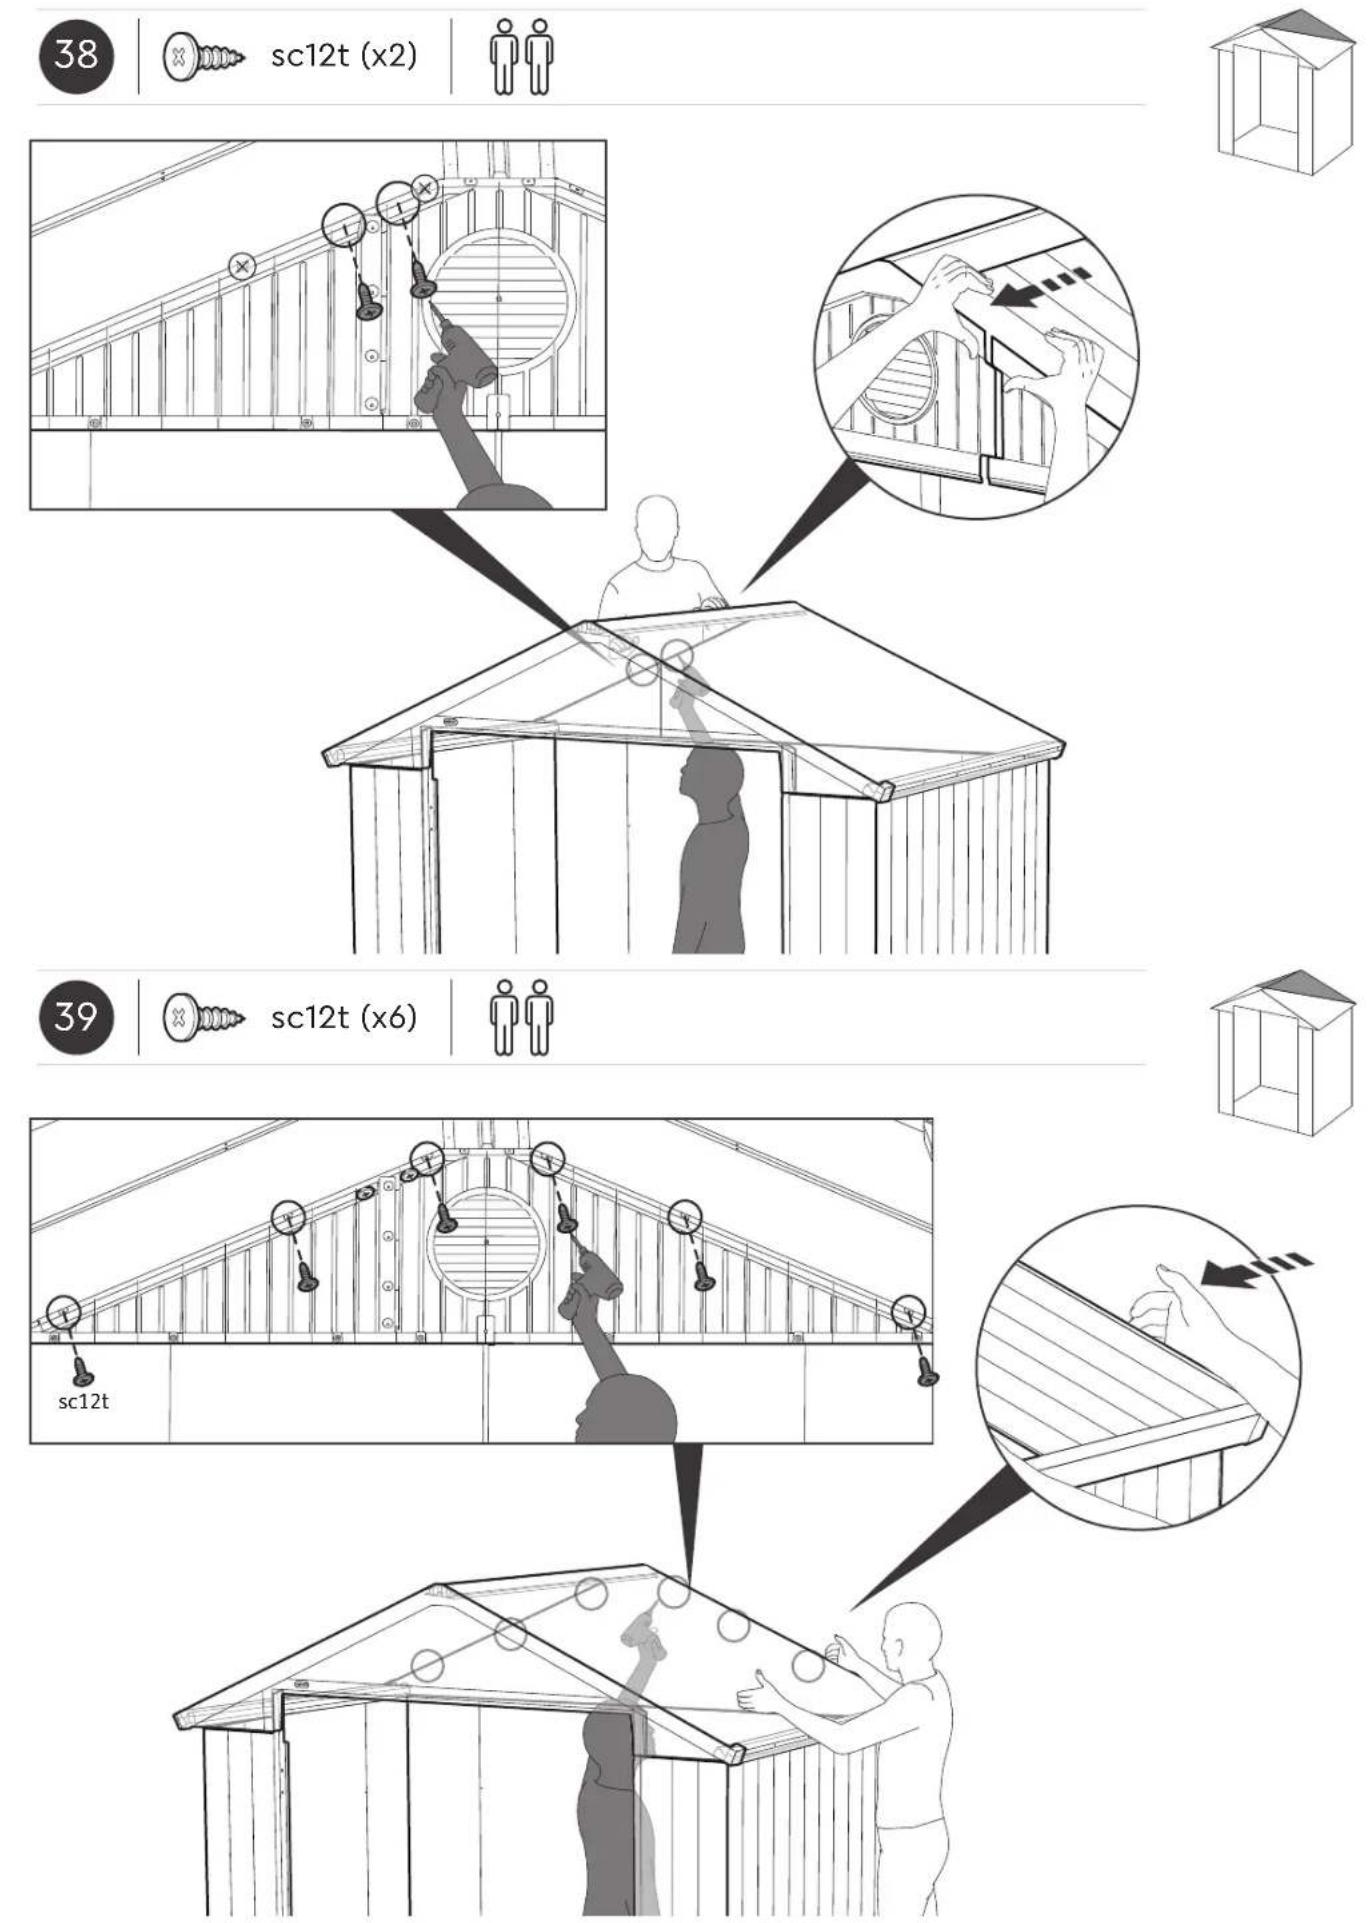
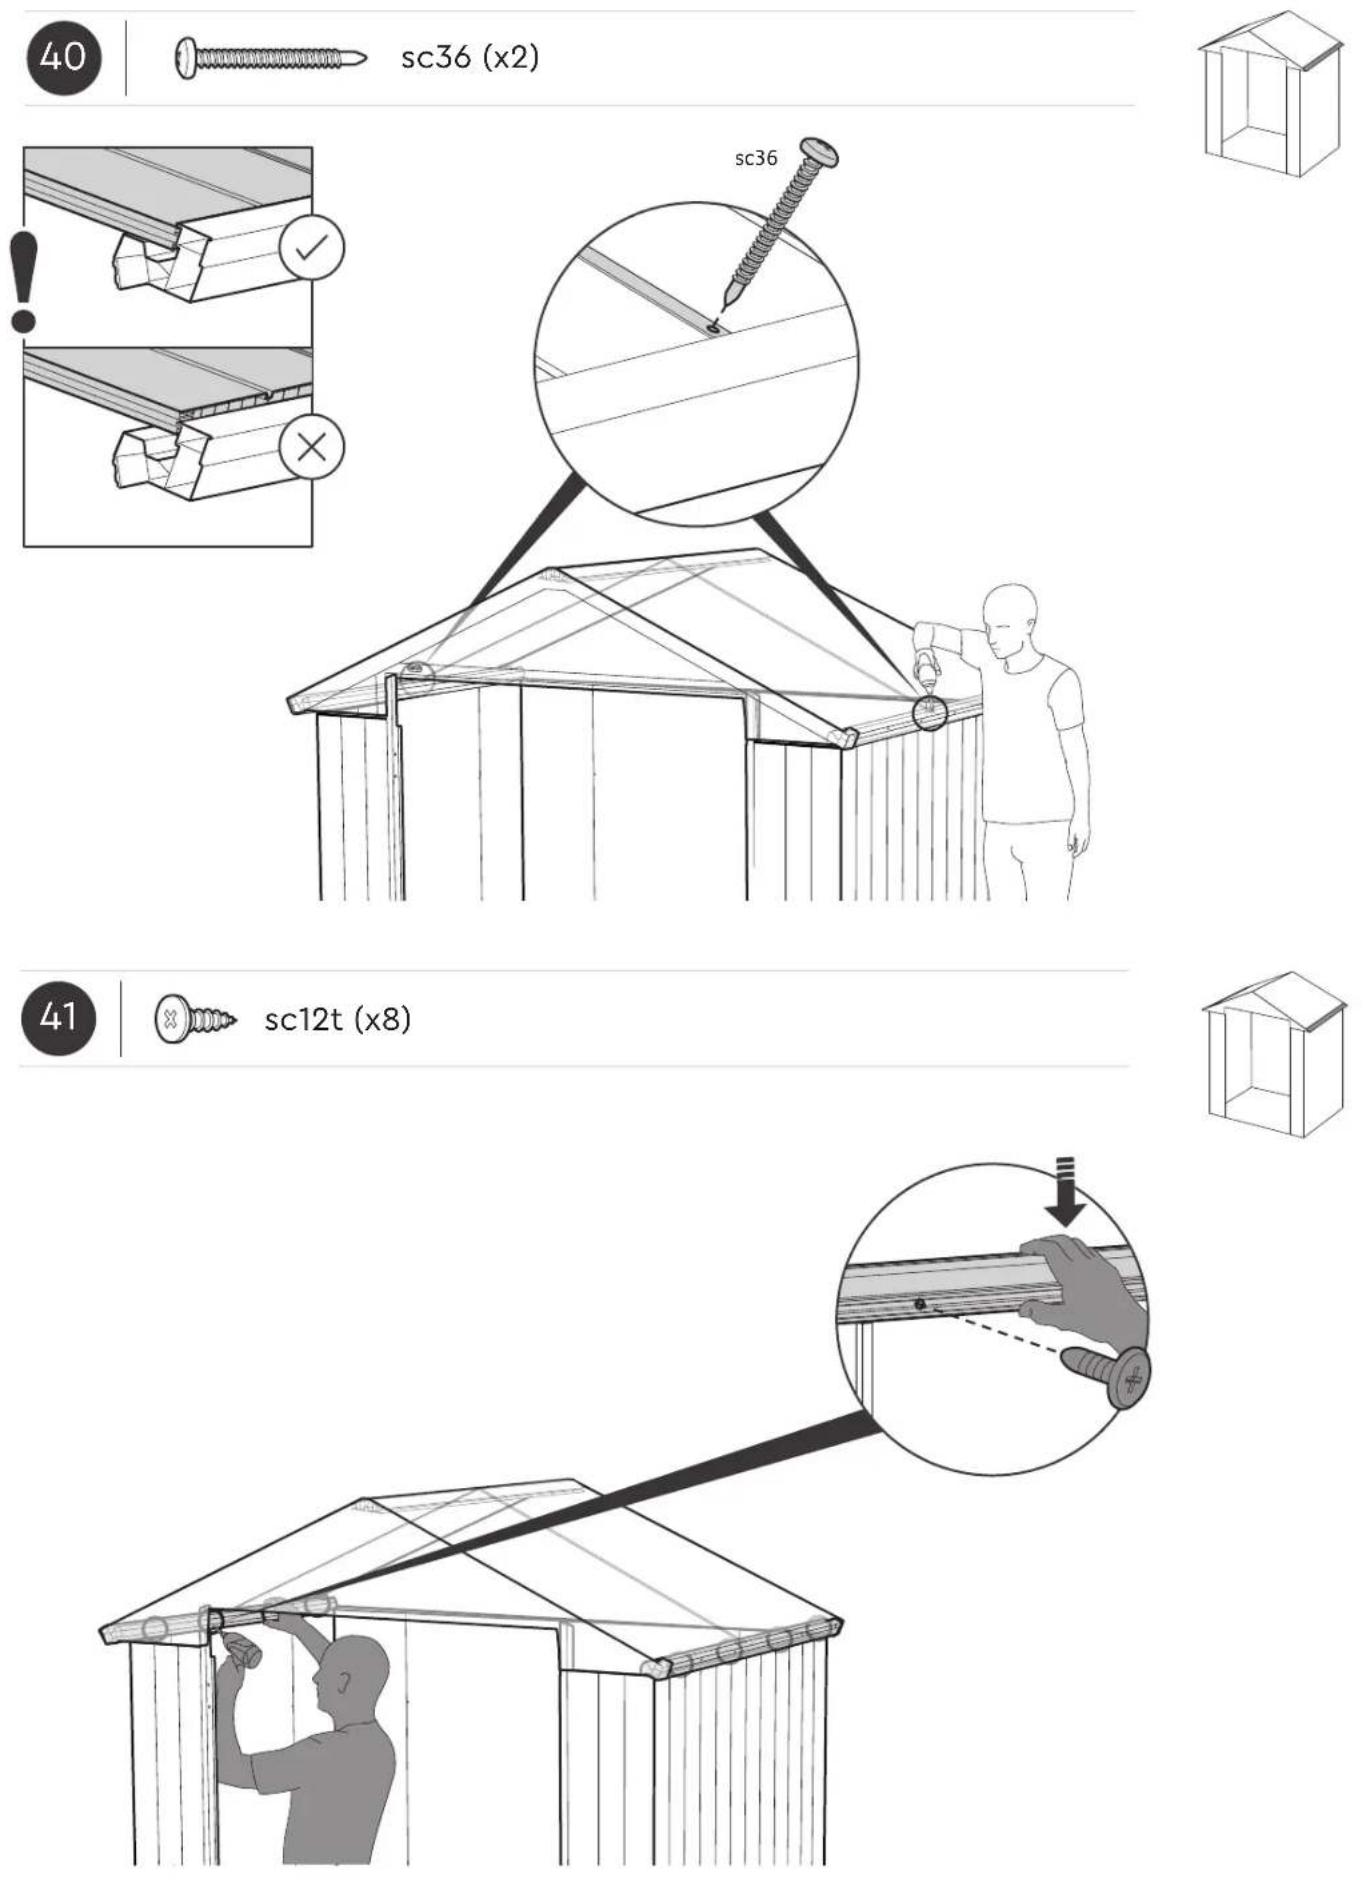
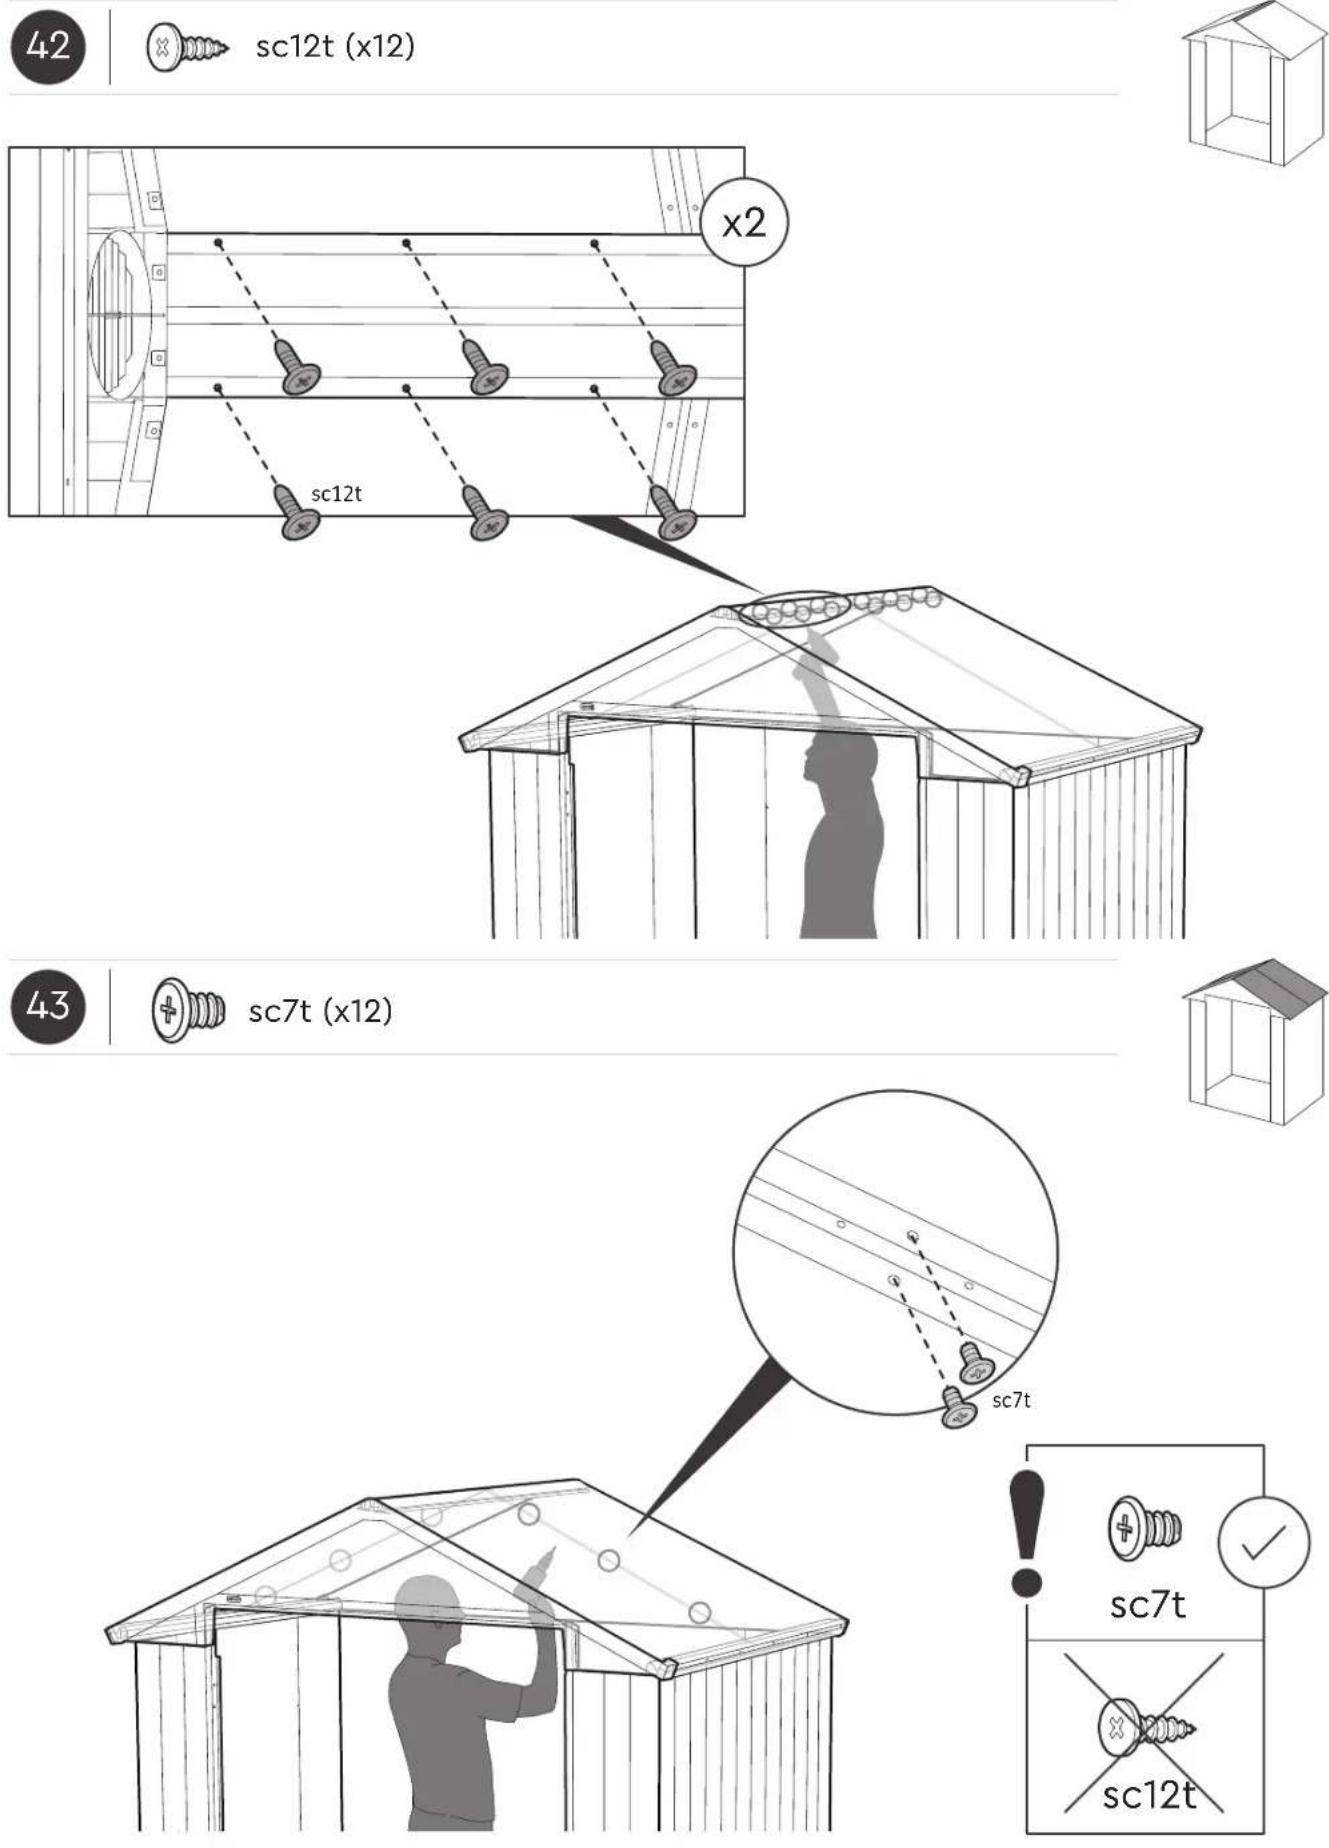
sc12t (x12)
sc7t (x12)
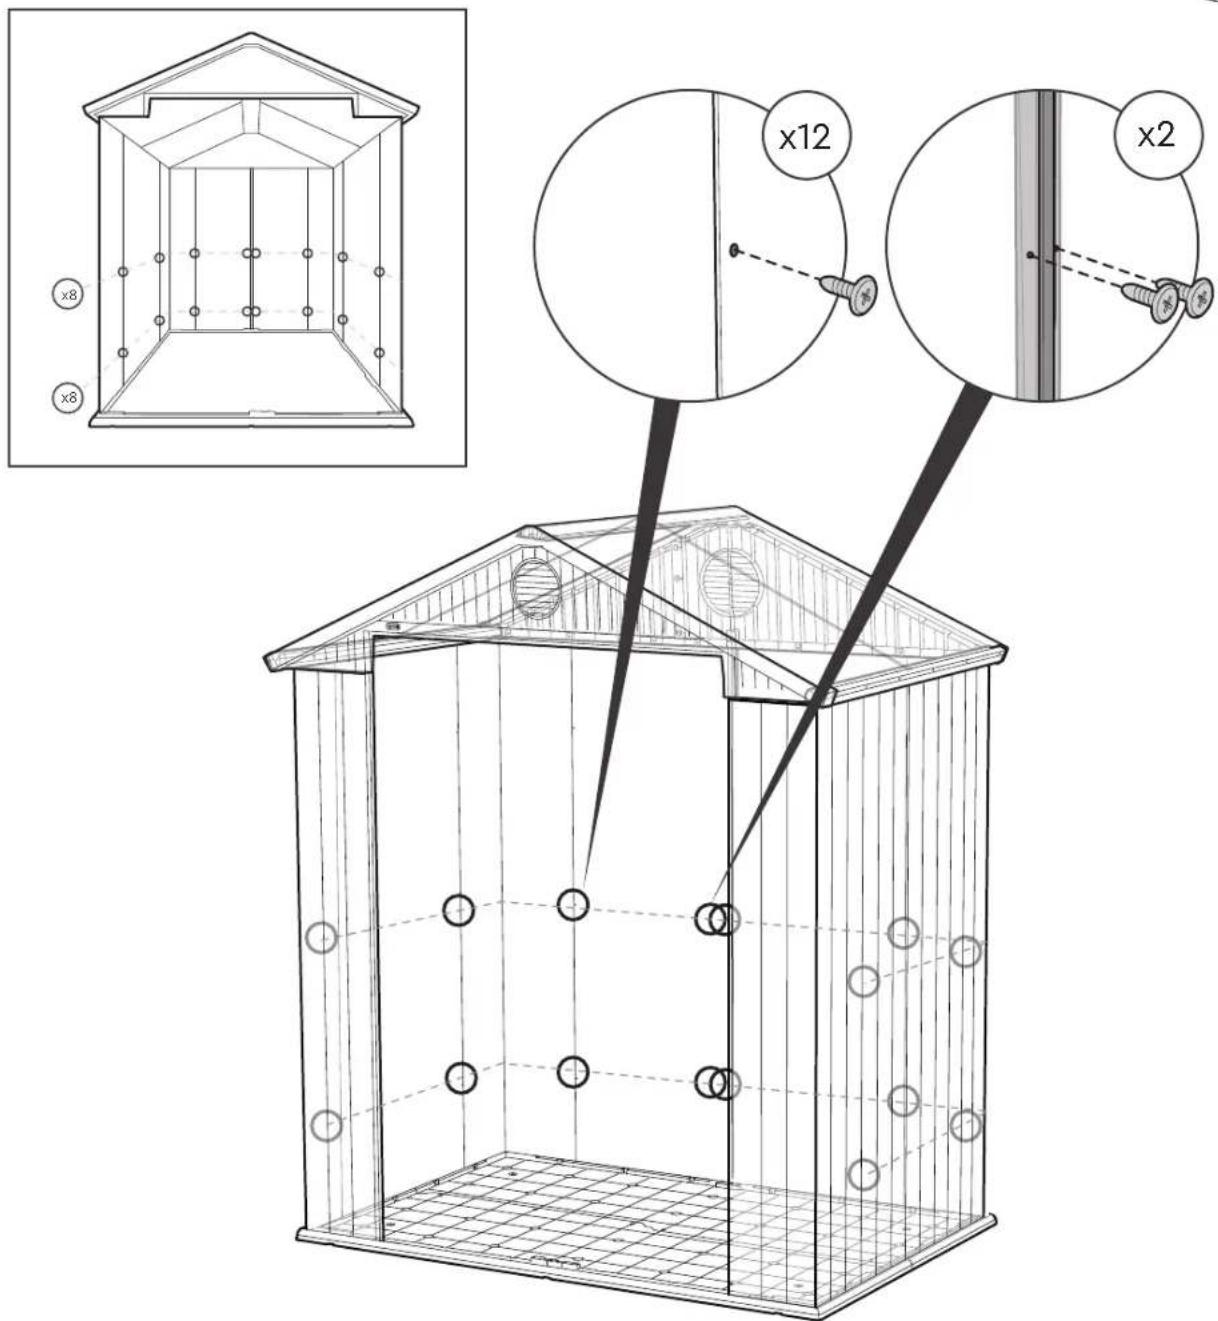
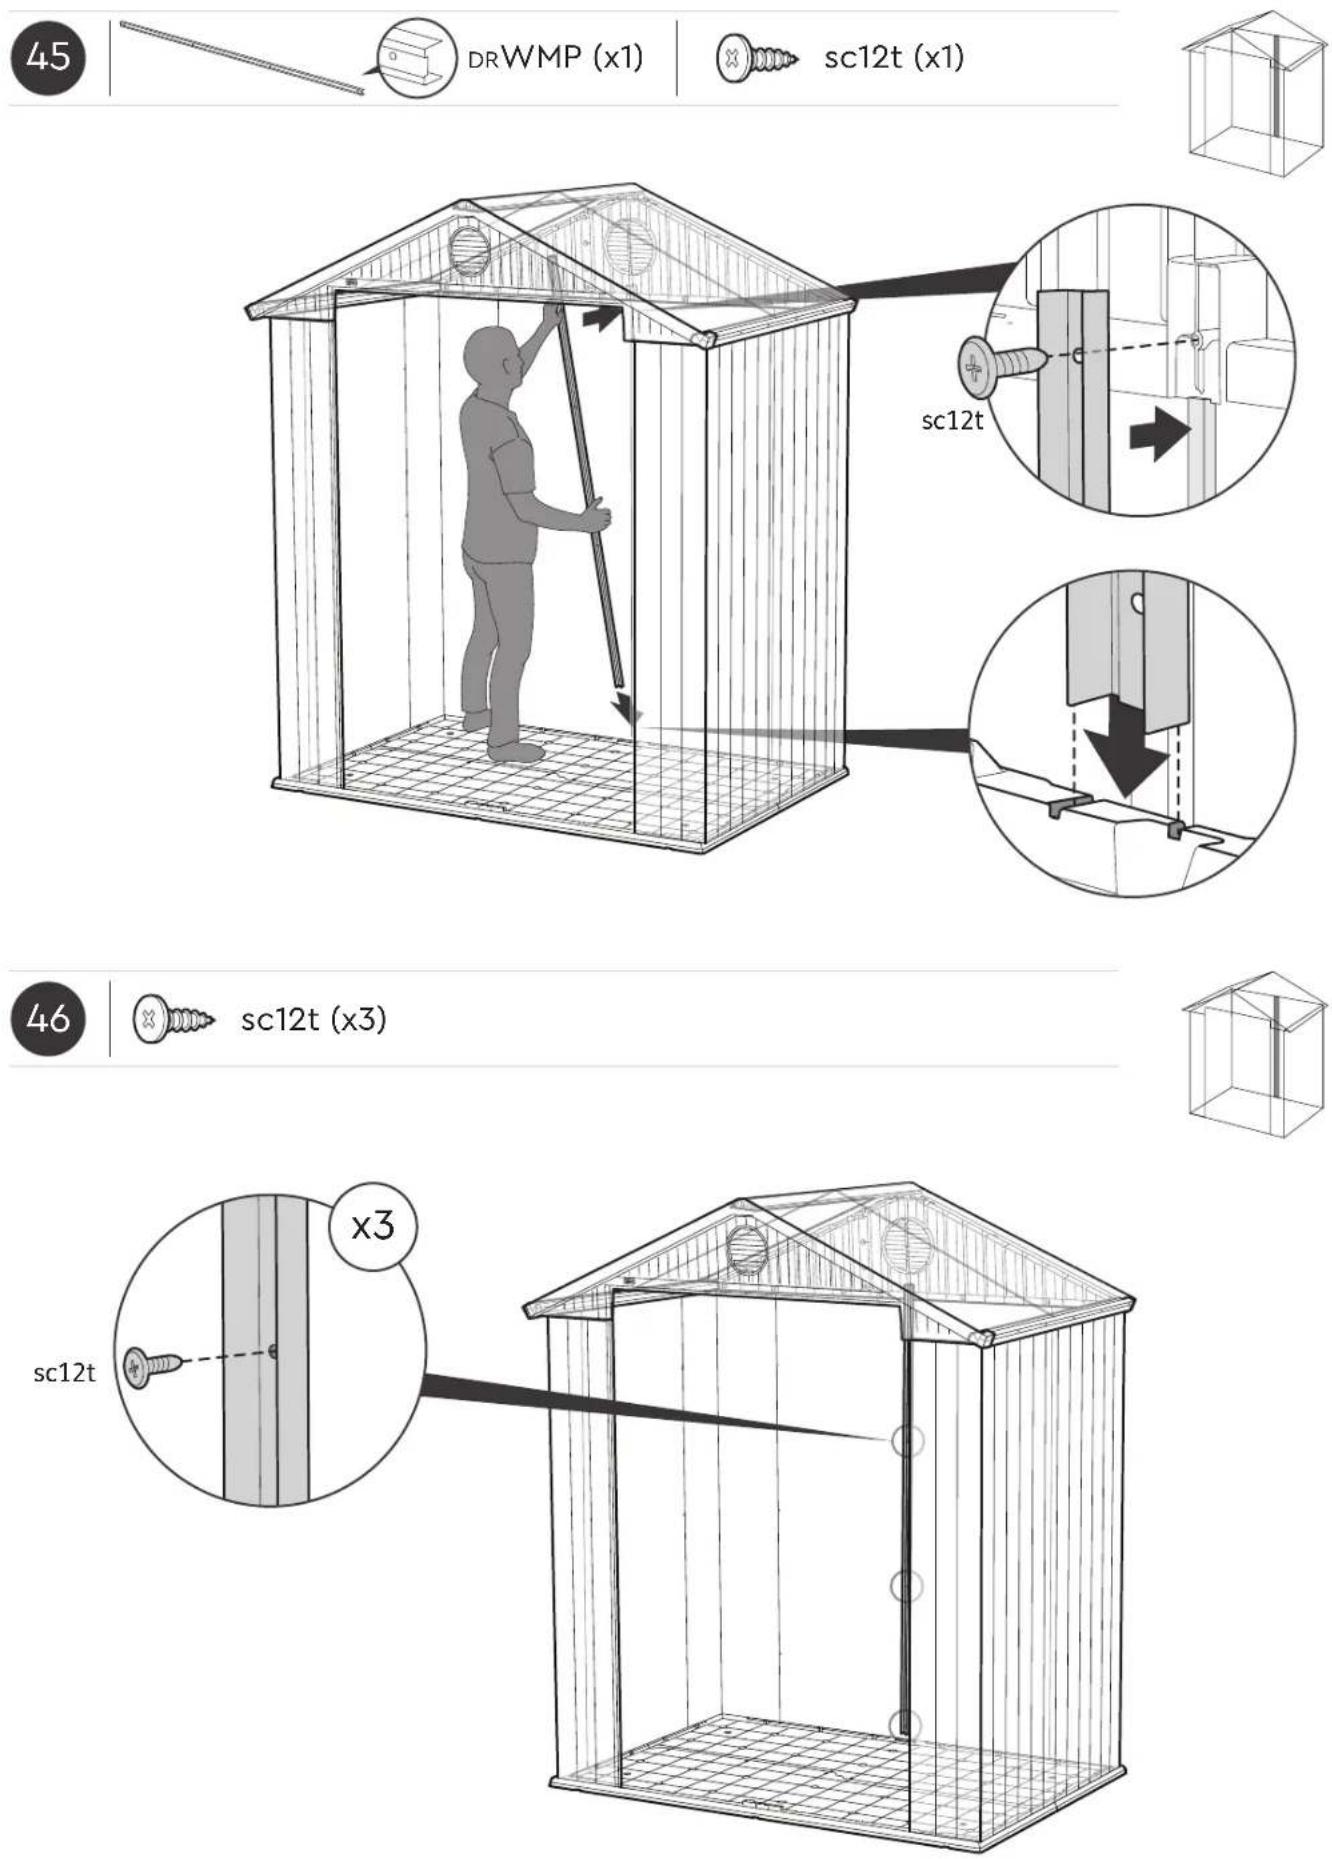

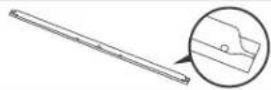
D6BP (x1)

sc12t (x4)
DOOR ASSEMBLY | MONTAGE DE LA PORTE | ARMADO DE LA PUERTA | MONTAGE DER TÜR | DEURMONTAGE | ASSEMBLAGGIO DELLA PORTA | MONTAGEM DA PORTA

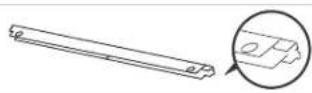
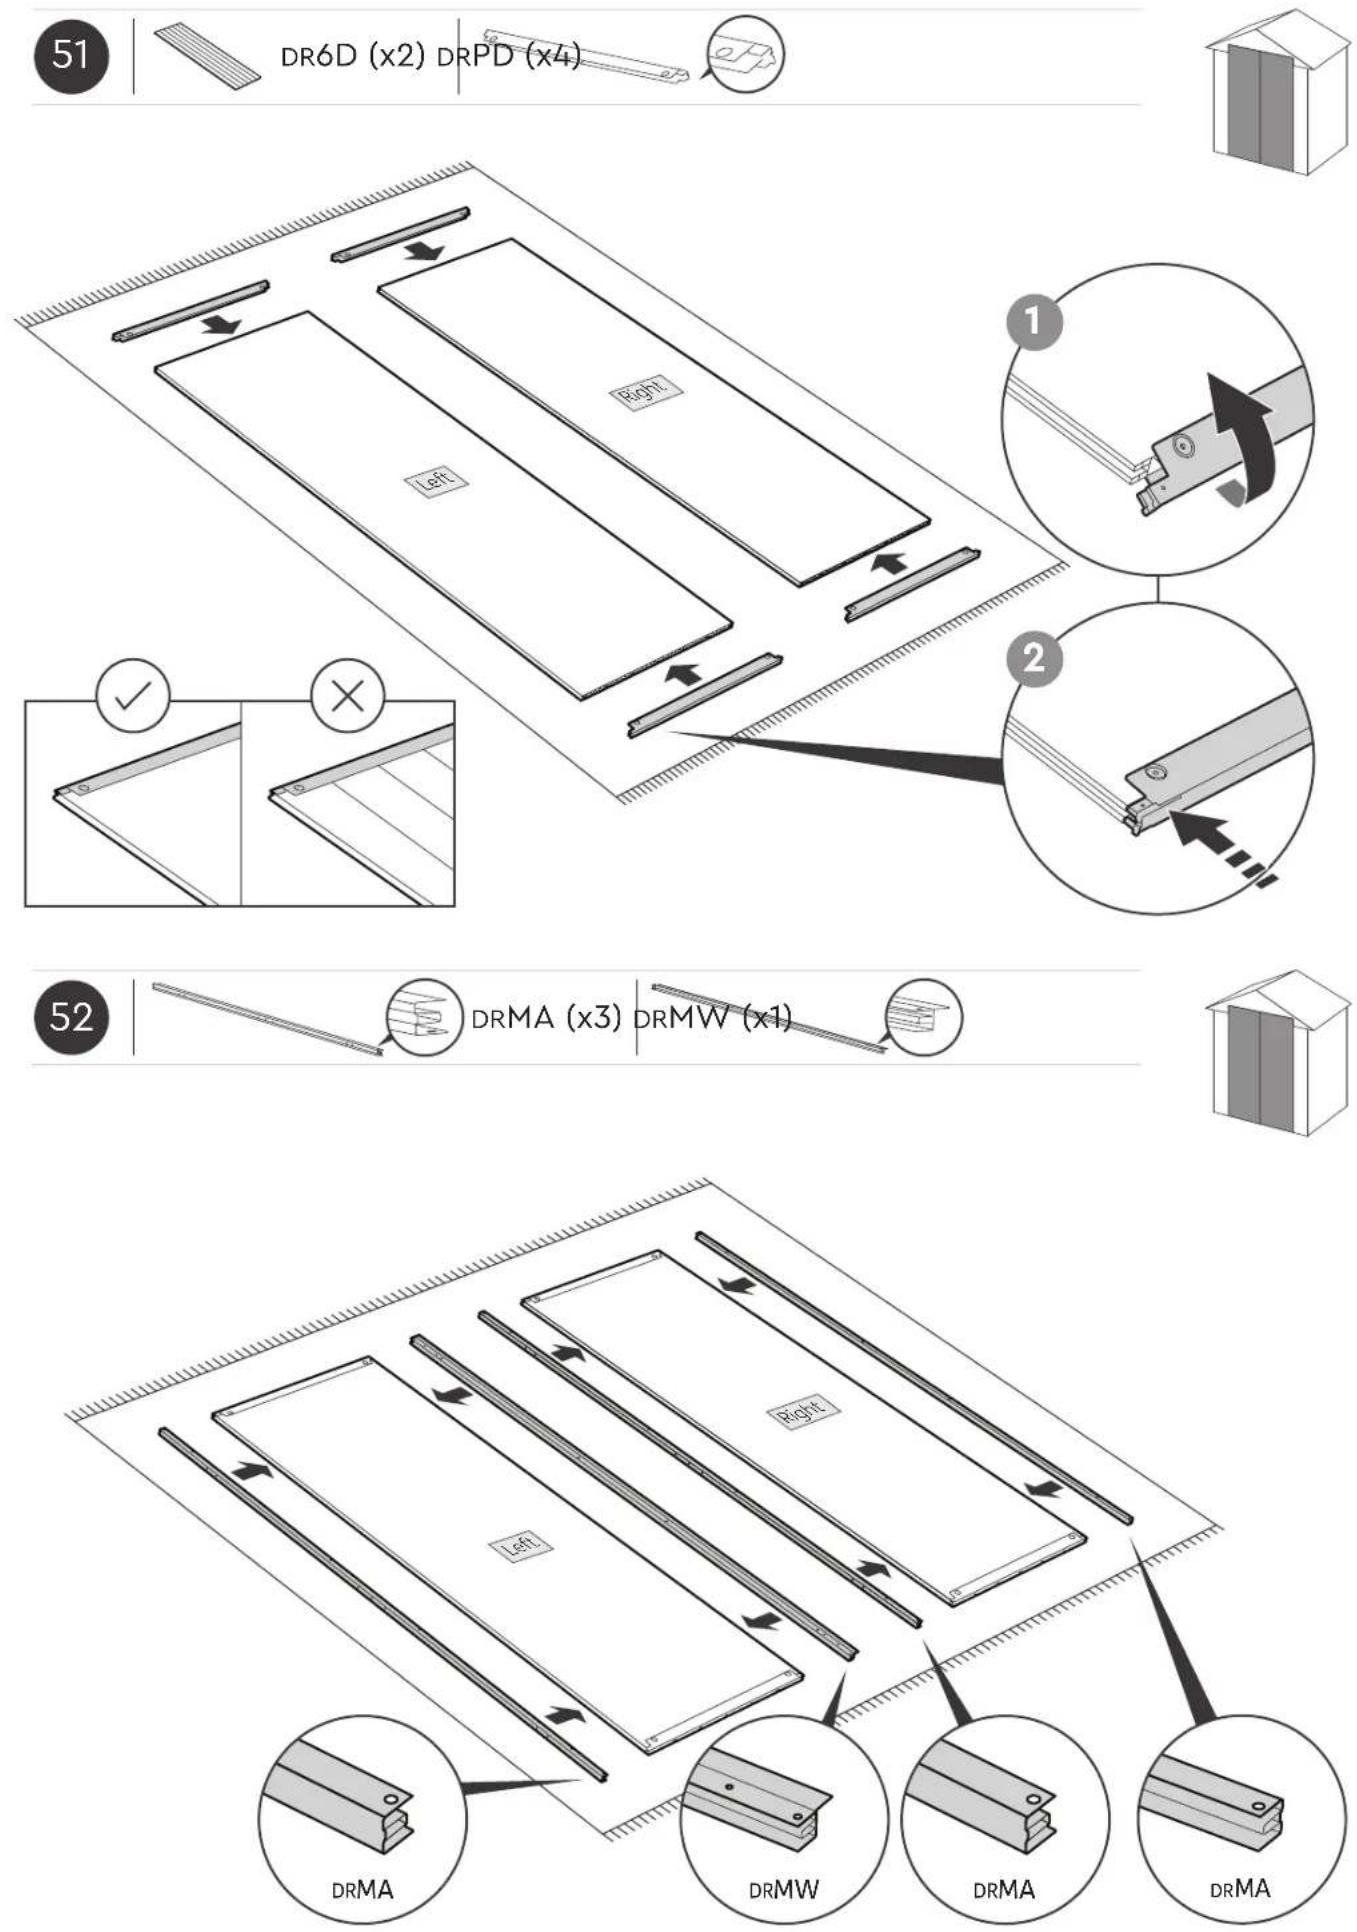
DRPD (x4)
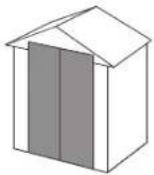
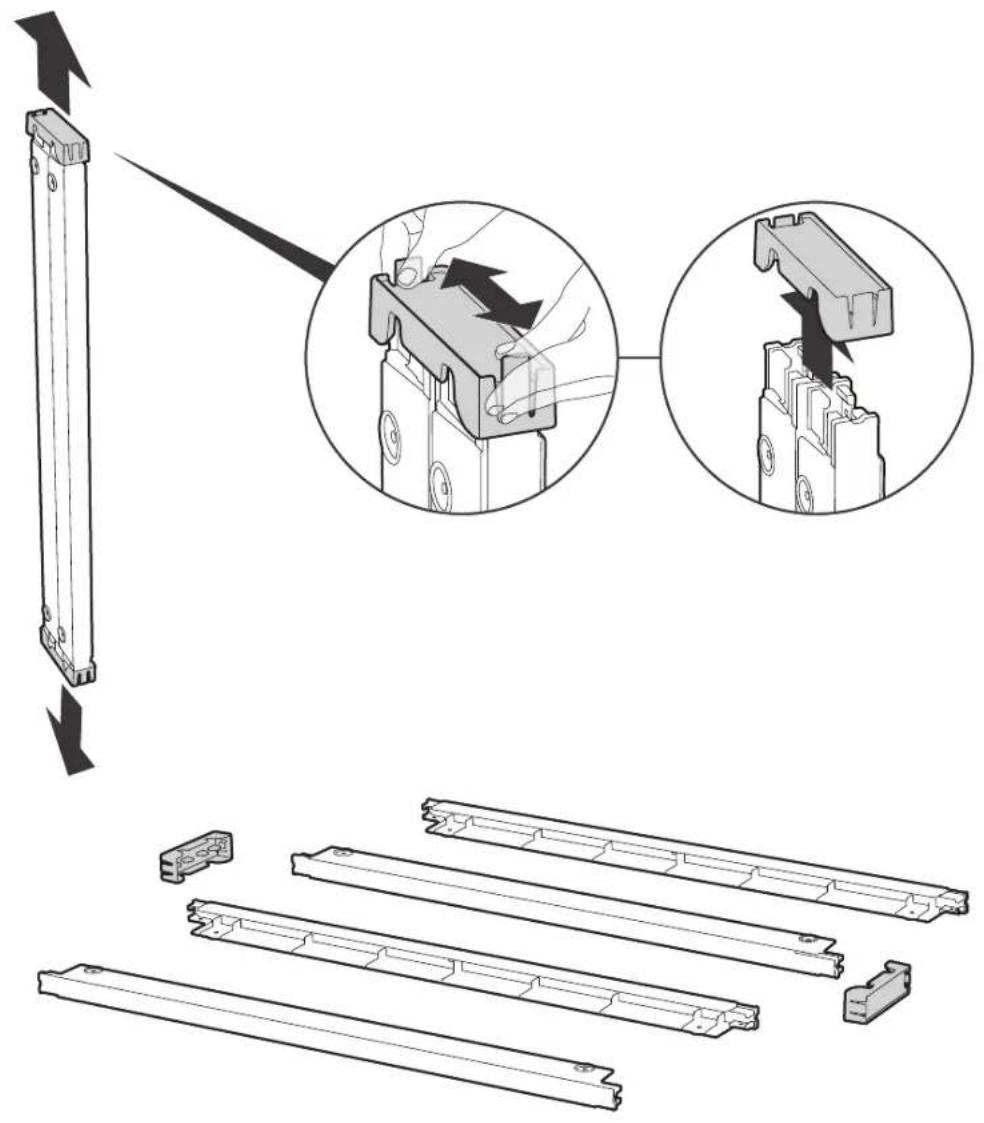
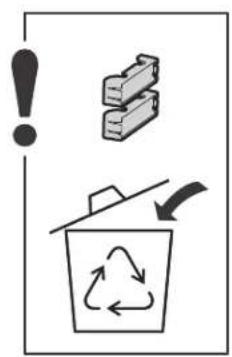

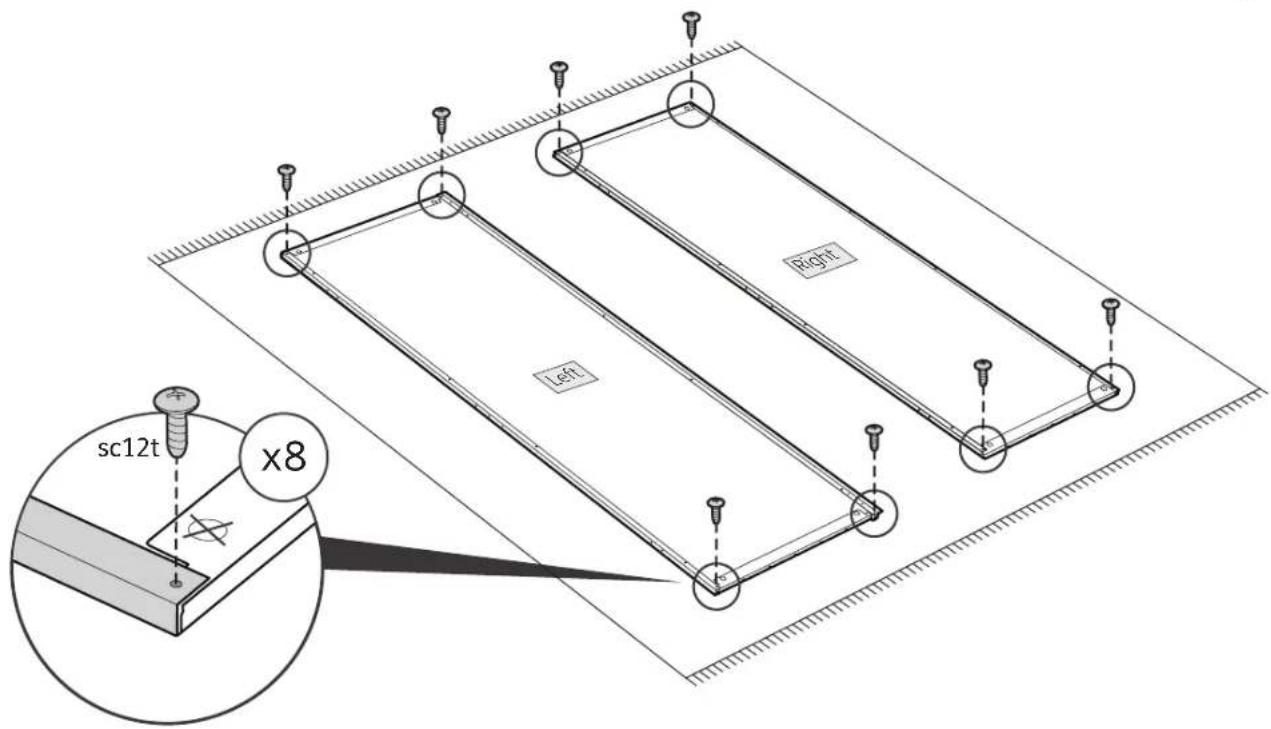
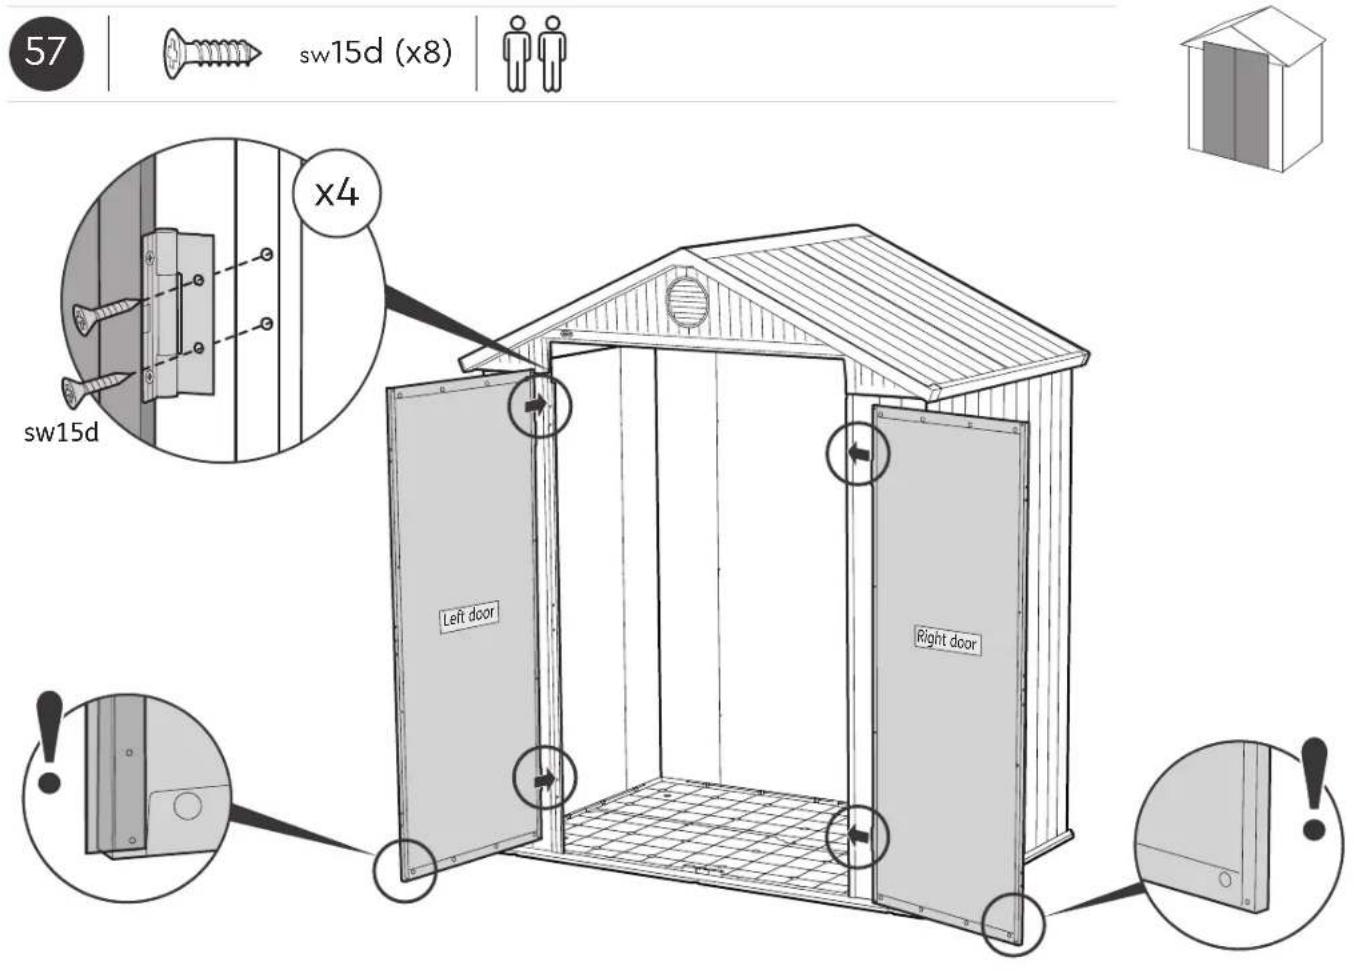
sc12t (x8)

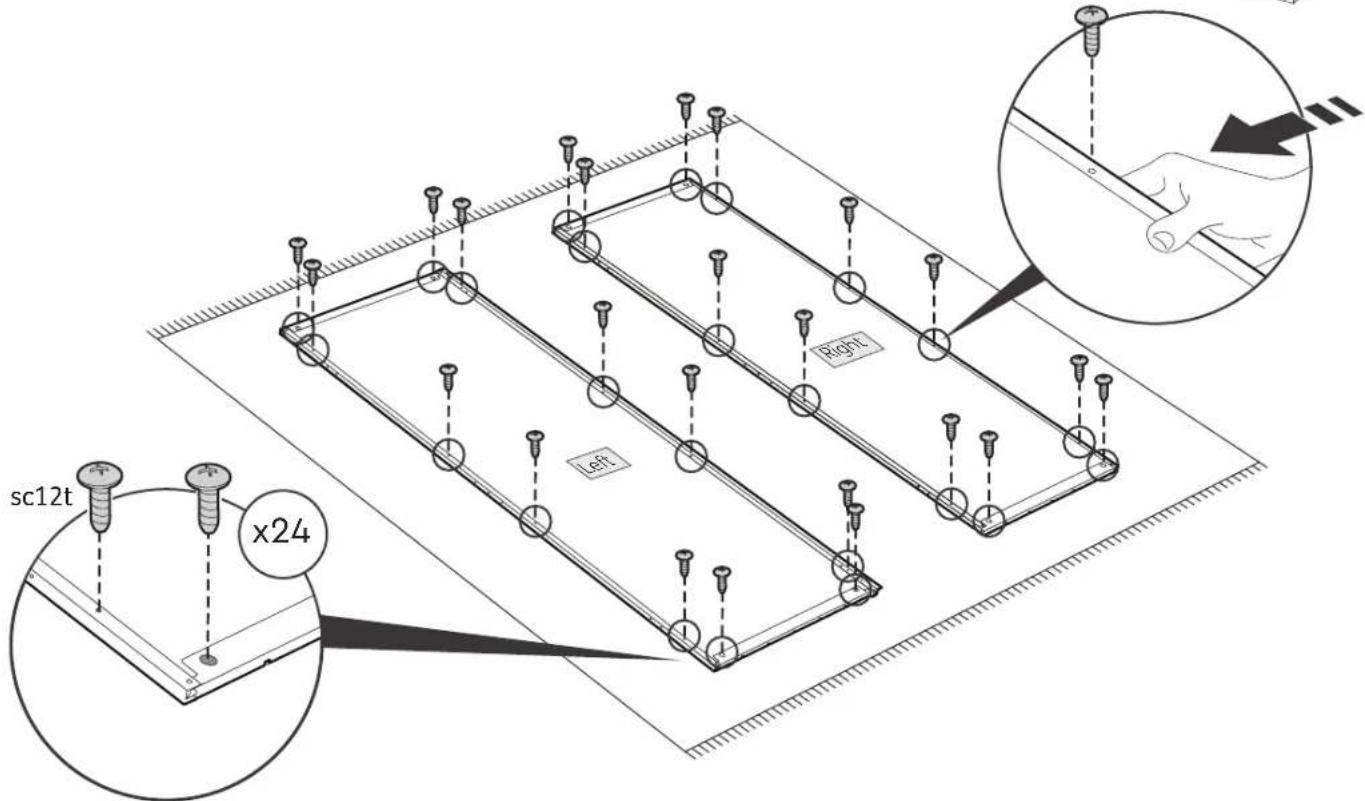
sc12t (x24)
55

56

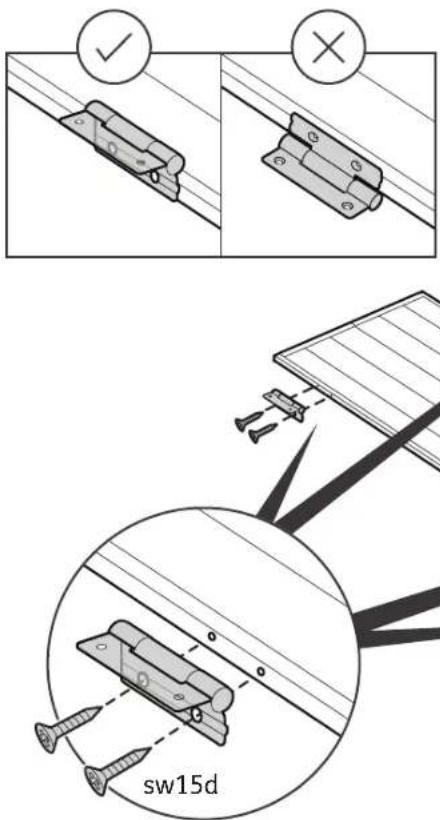
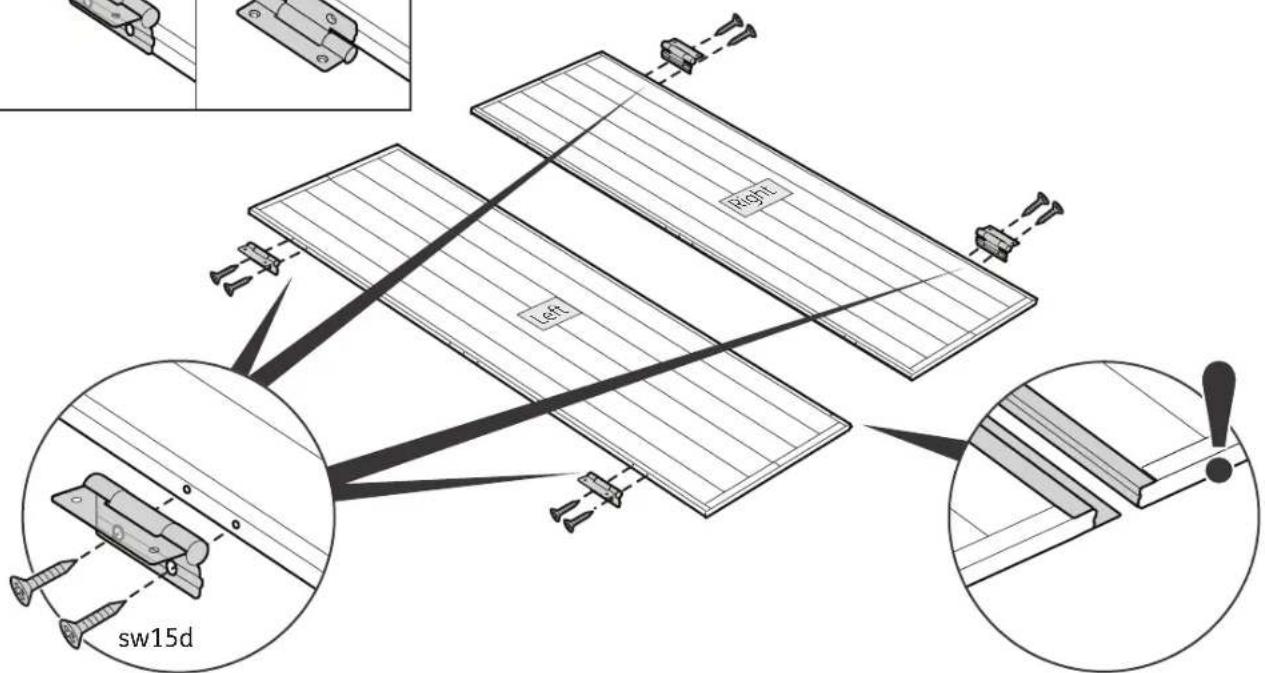
DRHG (x4) sw15d1(x8)


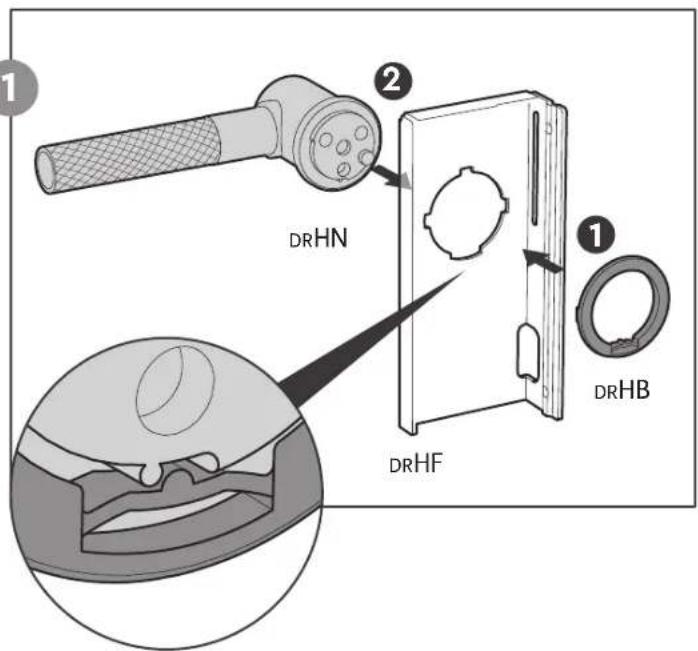
DRHF (x1)
DRHN (x1)

DRHB (x1)

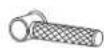
DRHL (x1)
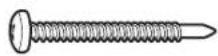
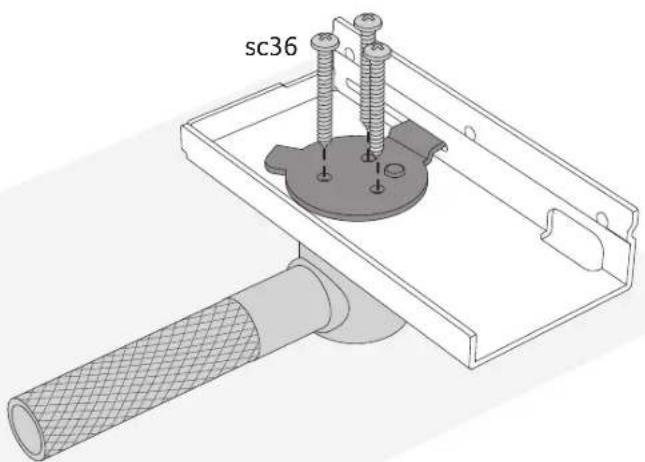
sc36 (x3)
1

3
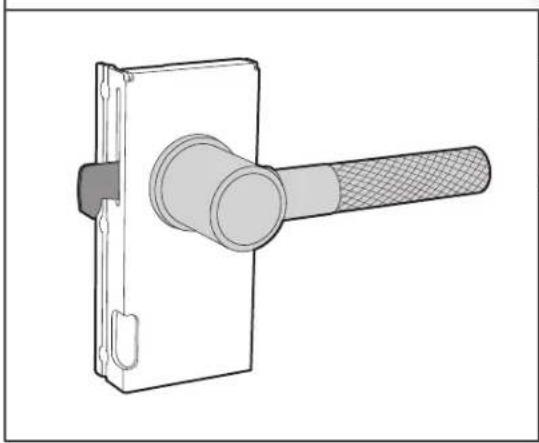
natural_image
Technical line drawing of a hand handle assembly (no text or symbols)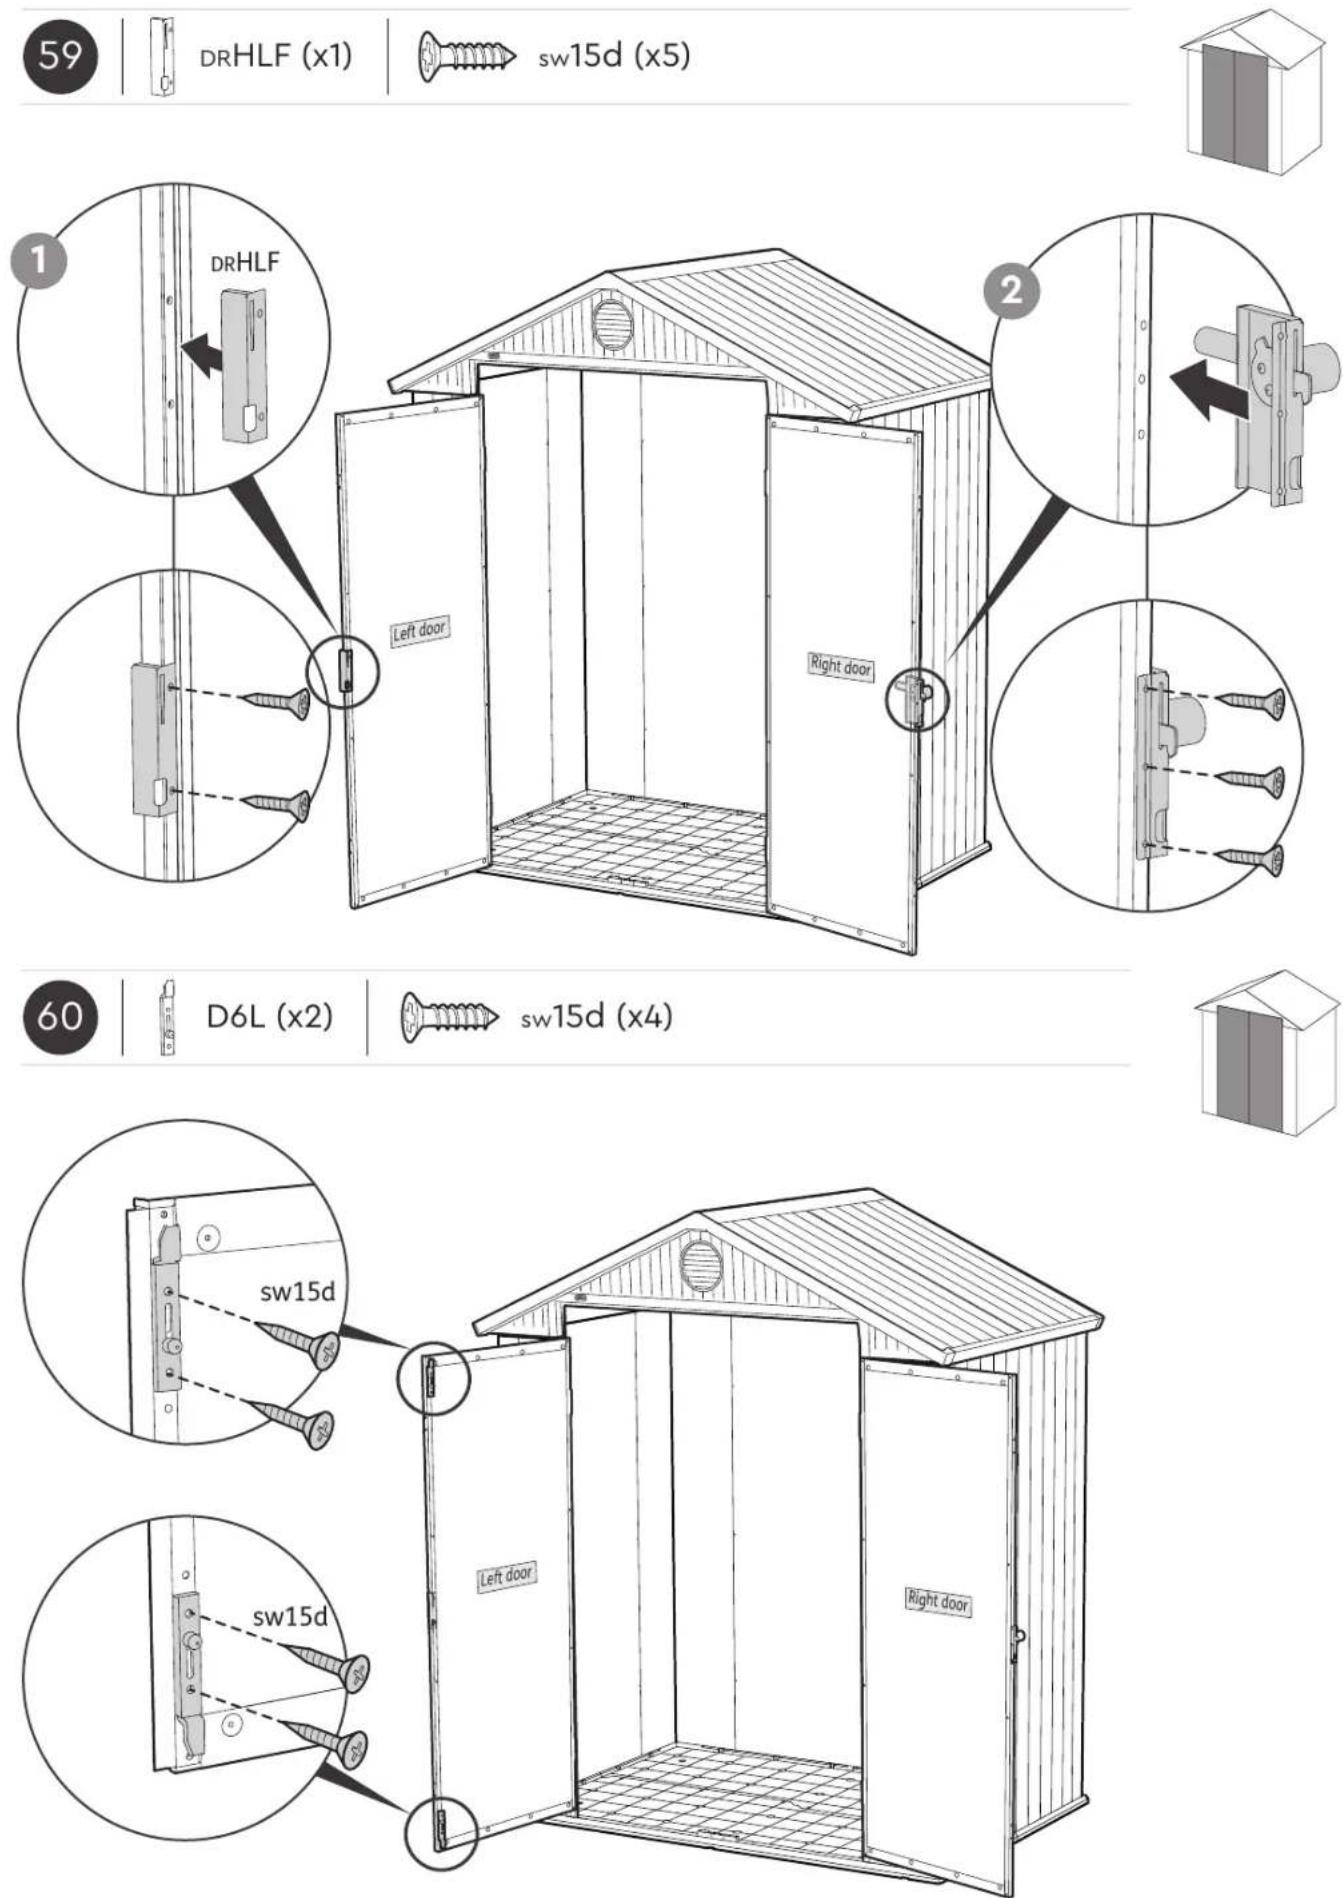

natural_image
Simple diagram of a rectangular structure with a circular symbol labeled 'A' at the top (no text or labels)
natural_image
Simple diagram of two adjacent rectangular panels with a circular label B above, no text or symbols present.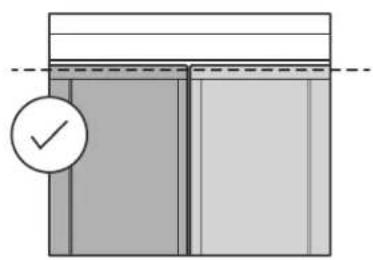
natural_image
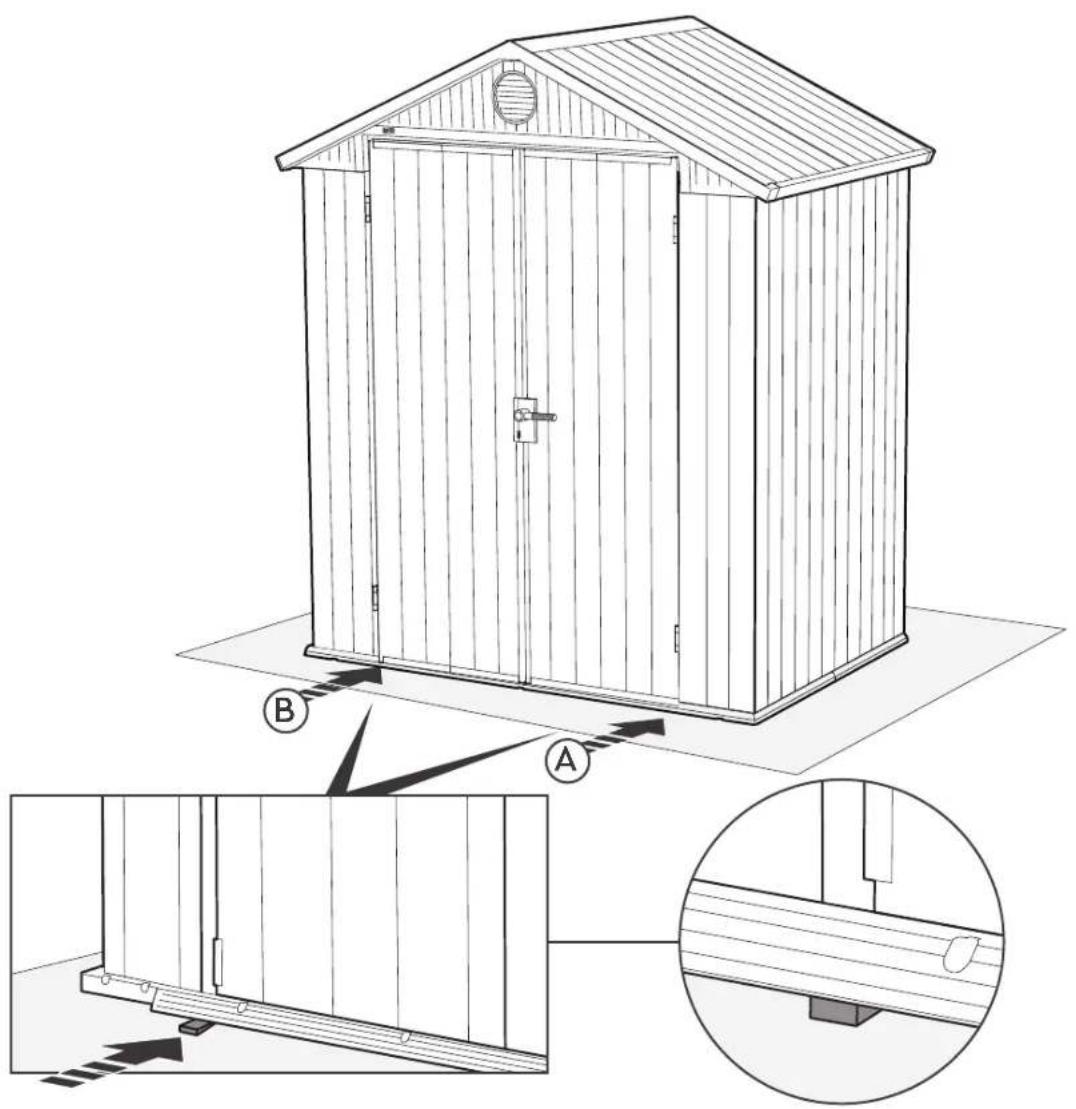
Simple line drawing of a cabinet or cabinet with a checkmark icon (no text or symbols)If you find that the shed is not level, use shims on either side of the shed or door | Si vous trouvez que votre abri n'est pas de niveau, mettez des cales sur chaque côté ou au niveau de la porte | Si usted encuentra que el cobertizo no esta nivelado, utilice cuñas en ambos lados del cobertizo o en la puerta | Falls die Hütte nicht höhengleich sein sollte, verwenden Sie bitte Unterlegscheiben auf beiden Seiten der Hütte oder Tür | Als u merkt dat de schuur niet waterpas staat, gebruik dan vulplaten aan weerszijden van de schuur of deur | Nel caso in cui la casetta non dovesse essere in posizione orizzontale, usare degli spessori nella zona interessata | Se perceber que o armazém não está nivelado, use cunhas niveladoras em ambos os lados do armazém ou na porta
Securing the shed to a foundation
Affix the shed to the foundation by drilling holes in the shed floor at the pre-marked locations and screwing it into the foundation using appropriate screws (screws not included).
natural_image
Line drawing of a person crouching inside a simple house structure with tiled floor and windows (no text or symbols)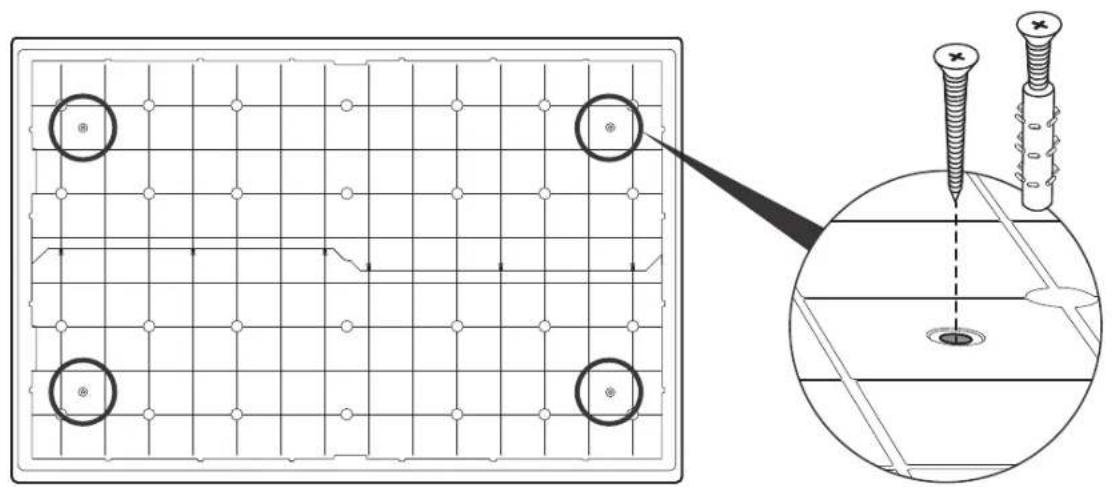
natural_image
Technical diagram showing a grid layout with four circular holes and a magnified inset of screw fasteners (no text or labels)CARE AND SAFETY GUIDELINES
- The shed is intended for storage purposes only. It is not designed for habitation.
- It is strongly recommended to secure the shed to an immovable object or anchor to the ground by drilling holes in the shed floor (at the pre-marked locations) and inserting proper screws into the ground (screws are not included).
- Do not attempt assembly on windy or cold days.
- Periodically check the shed to ensure that it is stable and that the site is level.
- Be careful when handling parts with steel edges.
- When assembling or handling the shed, use only those tools listed in the user manual.
- Avoid using a lawnmower or mechanical scythe near the shed.
- Wear safety goggles and always follow the manufacturer's instructions when using power tools.
- Wash the shed with a garden hose or a mild detergent solution. Do not use a stiff brush or abrasive cleaners, including degreasers and oil- or acetone-based cleaning materials, as these may stain or damage the shed.
- Do not store hot items, such as recently used grills and blowtorches, and volatile chemicals in the shed.
- Avoid placing heavy items against the walls, as this may cause distortion.
- Keep the roof clear of accumulated snow and leaves. Large amounts of snow on the roof can damage the shed, making it unsafe to enter.
- Wind direction is an important factor to consider when determining the location of the shed. Reduce exposure to the wind, in general, and of the door side in particular. Keep doors closed and locked when the shed is not in use to prevent wind damage.
- Do not stand on the roof.
- Consult your local authorities to check if permits are required to erect the shed.
INSTRUCTIONS DE SÉCURITÉ ET D'ENTRETIEN
Your Keter shed ("the Product") was manufactured from high-quality, recyclable materials under rigorous control and supervision.
Should a problem occur with the Product, please address your claim to Keter customer service on our website (www.keter.com) or by phone.
This warranty covers product failure resulting from defects in manufacturing or materials for a period of 10 years from the date of original retail purchase. (The term “defects” is defined as imperfections that impair the use of the Product).
This warranty does not cover defects resulting from normal wear and tear, including, but not limited to, scuffing, scratches or fractures caused during use, discoloration or fading, rusting, unreasonable use, abuse, negligence, alterations, painting, moving, transporting or relocating the Product, "acts of Nature," including, but not limited to, hail, any type of storm, flood and fire, and consequential or incidental damages.
Assembly and handling not in accordance with the recommendations, guidelines and restrictions as described in the Product's user manual, and usage for commercial or public applications, will void this warranty.
Keter is not responsible for any damage incurred by third parties or damage to or loss of objects inside or near the shed.
Upon submitting proof of purchase and evidence of the claimed product failure, and subject to reporting the failure in a timely manner, Keter, at its sole discretion, will replace defective parts of the Product, or refund you a prorated portion of the purchase price on a straight line depreciated basis for the length of the warranty.
GARANTIE LIMITÉE DE 10 ANSC
IF THERE ARE MISSING OR BROKEN PARTS, PLEASE DO NOT RETURN THE PRODUCT TO THE STORE. PLEASE ACCESS OUR WEBSITE WWW.KETER.COM, OR CONTACT CUSTOMER SERVICE IN YOUR COUNTRY/REGION:
S'IL Y A DES PIÈCES MANQUANTES OU CASSÉES, NE RETOURNEZ PAS LE PRODUIT AU MAGASIN. VEUILLEZ ACCÉDER À NOTRE SITE WEB WWW.KETER.COM OU CONTACTER LE SERVICE CLIENT DE VOTRE PAYS/RÉGION:
keter.com/en-us/contact-us.html
Email: NACS@keter.com
UK: (EN)
Tel: +44-121-506-0008
Email: CSUK@keter.com
Keter UK Ltd
16 Great Queen Street, Covent
Garden, London, WC2B 5AH
Mon - Fri | 8am - 4pm
Israel:
Tel: 1-700-70-6015
Switzerland:
Tel: +41-62-767-00-50
Email: info@neogard.ch
France:
Email: info@keter.co.za
Spain: (SP)
Tel: +34-949-277-421
Email: spvketer@carcaba.com

Brand : KETER
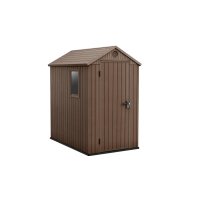
Model : Darwin 6x4
Category : Garden sheds