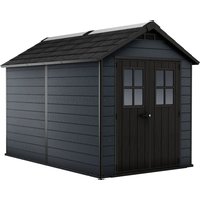
Newton 7511 - Garden sheds KETER - Free user manual and instructions
Find the device manual for free Newton 7511 KETER in PDF.


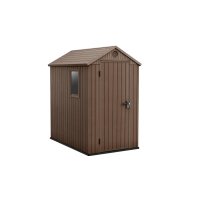
| Product Type | Garden shed |
| Brand | Keter |
| Model | Newton 7511 |
| Material | High-quality recyclable resin |
| Color | Anthracite gray with wood finish |
| External dimensions (L x W x H) | Approximately 1.95 m x 1.21 m x 1.95 m |
| Weight | Approximately 50 kg |
| Ground area | Approximately 2.4 m² |
| Roof type | Sloping roof (single pitch) |
| Door type | Double swing door |
| Lock | Integrated lock with handle |
| Warranty | 10-year limited (manufacturing and material defects) |
| Recommended use | Outdoor storage of garden tools, bicycles, etc. |
| Floor fixing | Recommended: drill holes at marked locations and screw into foundation (screws not included) |
| Weather resistance | UV protection, resistant to rain and moderate wind |
| Maintenance | Wash with clear water or non-abrasive detergent; do not use hard brush |
| Box contents | Panels, hardware, assembly instructions (72 pages) |
| Required tools | Screwdriver, wrench, spirit level, safety glasses |
| Manufacturer | Keter |
Frequently Asked Questions - Newton 7511 KETER
User questions about Newton 7511 KETER
0 question about this device. Answer the ones you know or ask your own.
Ask a new question about this device
Download the instructions for your Garden sheds in PDF format for free! Find your manual Newton 7511 - KETER and take your electronic device back in hand. On this page are published all the documents necessary for the use of your device. Newton 7511 by KETER.
USER MANUAL Newton 7511 KETER
natural_image
Illustration of a simple wooden cabin with a tiled roof and two windows (no text or symbols)IMPORTANT | IMPORTANT | IMPORTANTE
RETAIN FOR FUTURE REFERENCE: READ CAREFULLY
À CONSERVER POUR DE FUTURS BESOINS DE RÉFÉRENCE : À LIRE SOIGNEUSEMENT CONSERVE PARA FUTURA REFERENCIA. LEA CUIDADOSAMENTE
For outdoor use only. Not for commercial use | Utilisation non commerciale à l'extérieur seulement | Para uso externo. No para uso commercial.
SKU: 17208505

US, Canada
Tel: +1877-638-7056, NACS@keter.com
Mon - Fri | 8am - 6pm ET / Lundi-Vendredi 8h -18h
Sat - Sun | 9am - 6pm ET / Samedi-Dimanche 9h-18h
UK
Tel: +44-121-506-0008, CSUK@keter.com
Mon - Fri | 8:30am - 5pm
For other European countries see the last page
Thank you for your purchase of the Keter shed. In order to activate your warranty, please log onto our website and fill in the form under warranty activation.
ACTIVATION DE LA GARANTIE
Recommendation: Construct a wooden or concrete base as a foundation | Recommendation: fabriquez une base en bois ou en béton en guise de fondation | Recomendación: construya una base de madera o de cemento a modo de cimiento | Empfehlung: Bauen Sie als Fundament eine Grundfläche aus Holz oder Beton | Aanbeveling: maak een houten of betonnen ondergrond als fundering | Raccomandazione: costruisci una base di legno o di cemento come fondamenta | Recomendação: Construa uma base de madeira ou de cimento como fundação | 추천사항 : 데크나콘크리트바닥을권장합니다.
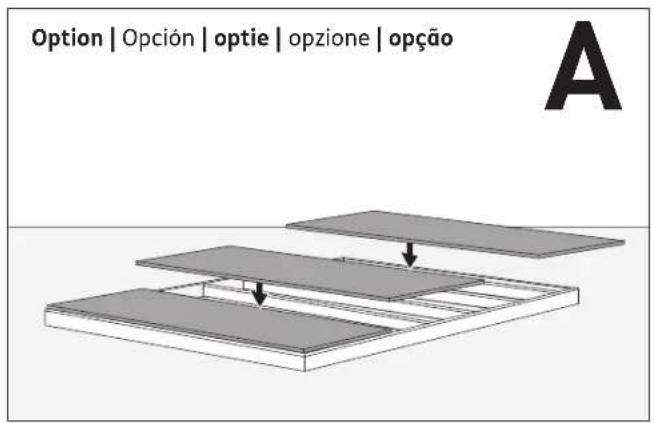
For external access during assembly, make sure to leave enough room around the outside of the shed assembly site.
Read the care and safety guidelines at the end of this manual | Check to ensure that there are no missing or damaged parts BEFORE starting or arranging assembly | Remove all parts from the package(s) and spread them out on a clean work surface | Review all assembly instructions | Assemble all the parts according to the directions in this manual. Do not skip any steps.
natural_image
Illustration of various hand tools including a hammer, wrench, screwdriver, safety goggles, helmet, and ladder (no text or symbols)
ASSEMBLY REQUIRES TWO PEOPLE | LE MONTAGE DOIT ÊTRE EFFECTUÉ PAR DEUX PERSONNES | SE NECESITAN DOS PERSONAS PARA ARMARLO | ZWEI PERSONEN ZUR MONTAGE NOTWENDIG | MONTAGE VEREIST TWEE PERSONEN | MONTAGGIO RICHIEDE DUE PERSONE | A MONTAGEM EXIGE DUAS PESSOAS
SHED PARTS | PIÈCES DE L'ABRI | PARTES DEL COBERTIZO | TEILE DES SCHUPPENS | ONDERDELEN VAN HET SCHUURTJE | COMPONENTI DEL DEPOSITO ATTREZZI | PEÇAS DO ABRIGO
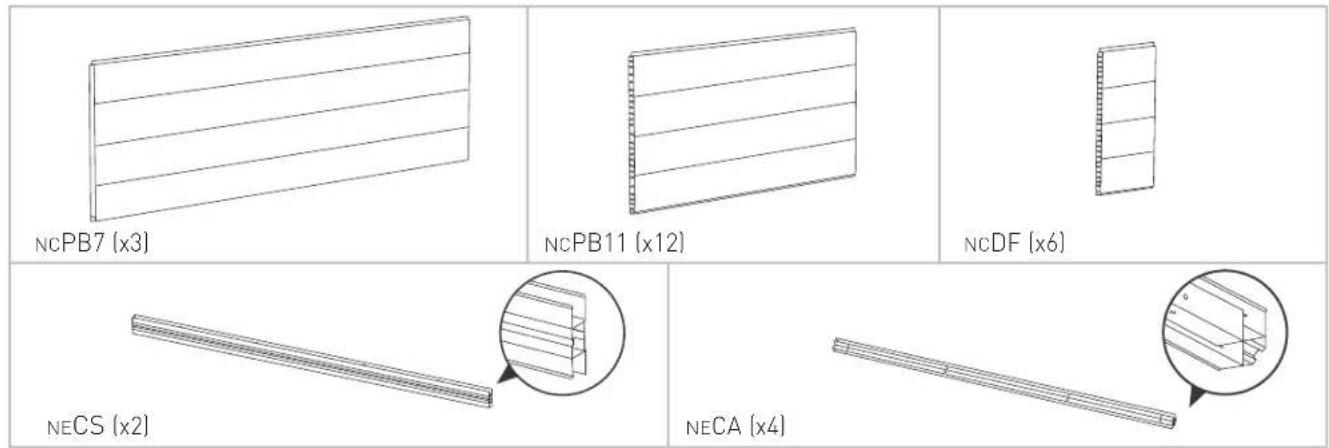
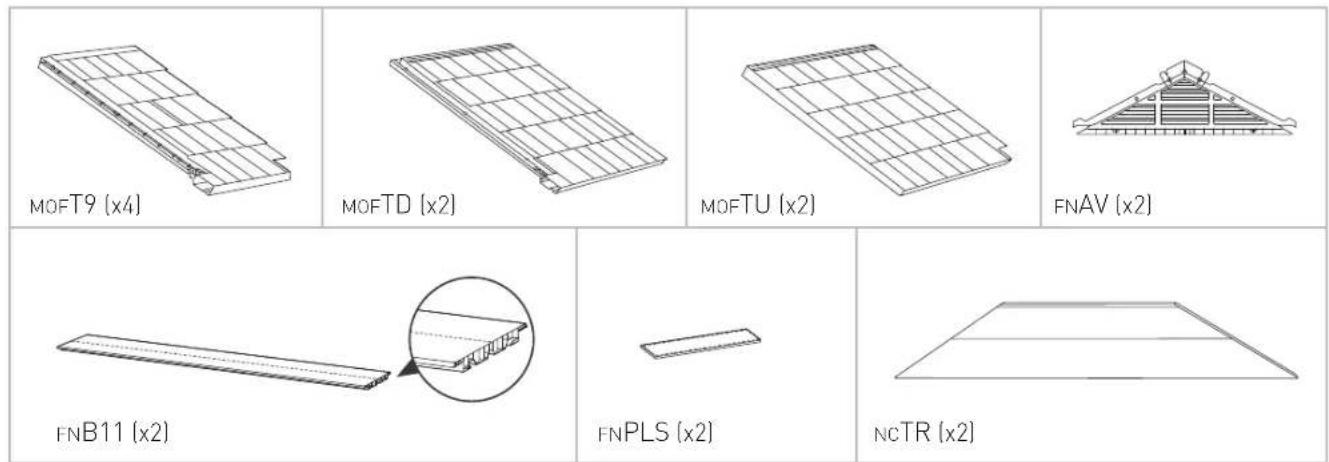
Remove all parts from the package(s) and spread them out on a clean work surface | Code letters are imprinted on each part for easy identification | Retirez toutes les pièces du/des paquet(s) et étalez-les sur une surface de travail propre | Des lettres sont imprimées sur chaque pièce pour une identification facile | Saque todas las piezas del paquete o paquetes y póngalas sobre una superficie de trabajo limpia | El código de letras está marcado en cada pieza para que sea más fácil identificarla | Nehmen Sie alle Teile aus der Verpackung und breiten Sie sie auf einer sauberen Arbeitsfläche aus | Auf jedem T eil sind Kennbuchstaben aufgedruckt, die die Zuordnung der einzelnen Teile erleichtern | Haal alle onderdelen uit het pakket (of uit de pakketten) en leg ze op een schoon werkoppervlak | Op ieder onderdeel zijn codes aangebracht voor een gemakkelijke identicatie | Rimuovi tutti i componenti dal pacchetto (i) e spargili su una superficie di lavoro pulita | Le lettere del codice sono state stampate su ciascun componente per una facile identificazione | Retire todas as peças da embalagem e espalhe-as numa superficie de trabalho limpa | Existem letras de código impressas em cada peça para fácil identificação
FLOOR PARTS | ÉLÉMENTS DU PLANCHER | PARTES DEL SUELO | BODENTEILE | VLOERPANELEN | PARTI DEL PAVIMENTO | PEÇAS DO CHÃO

WALL PARTS | PIÈCES DES MURS | PARTES DE LAS PAREDES | WANDELEMENTE | MUURONDERDELEN | PARTI DELLA PARETE | PAINÉIS LATERAIS
ROOF PARTS | PIÈCES DU TOIT | PARTES DEL TECHO | DACHELEMENTE | DAKONDERDELEN | PARTI DEL TETTO | PEÇAS DO TELHADO
WINDOW PARTS | PIÈCES DE LA FENÊTRE | PARTES DE LA VENTANA | FENSTERELEMENTE | VENSTERONDERDELEN | PARTI DELLA FINESTRA | PEÇAS DA JANELA
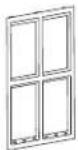 SMWF (x2) SMWF (x2) | 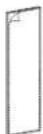 SMWG (x4) SMWG (x4) | 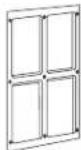 MOWB (x2) MOWB (x2) |
DOOR PARTS | PIÈCES DE LA PORTE | PARTES DE LA PUERTA | TÜRELEMENTE | DEURONDERDELEN | PARTI DELLA PORTA | PEÇAS DAS PORTAS
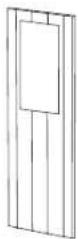 | 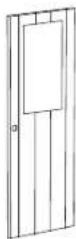 | 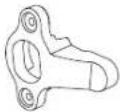 | 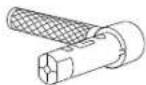 | 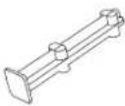 | 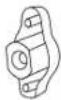 |
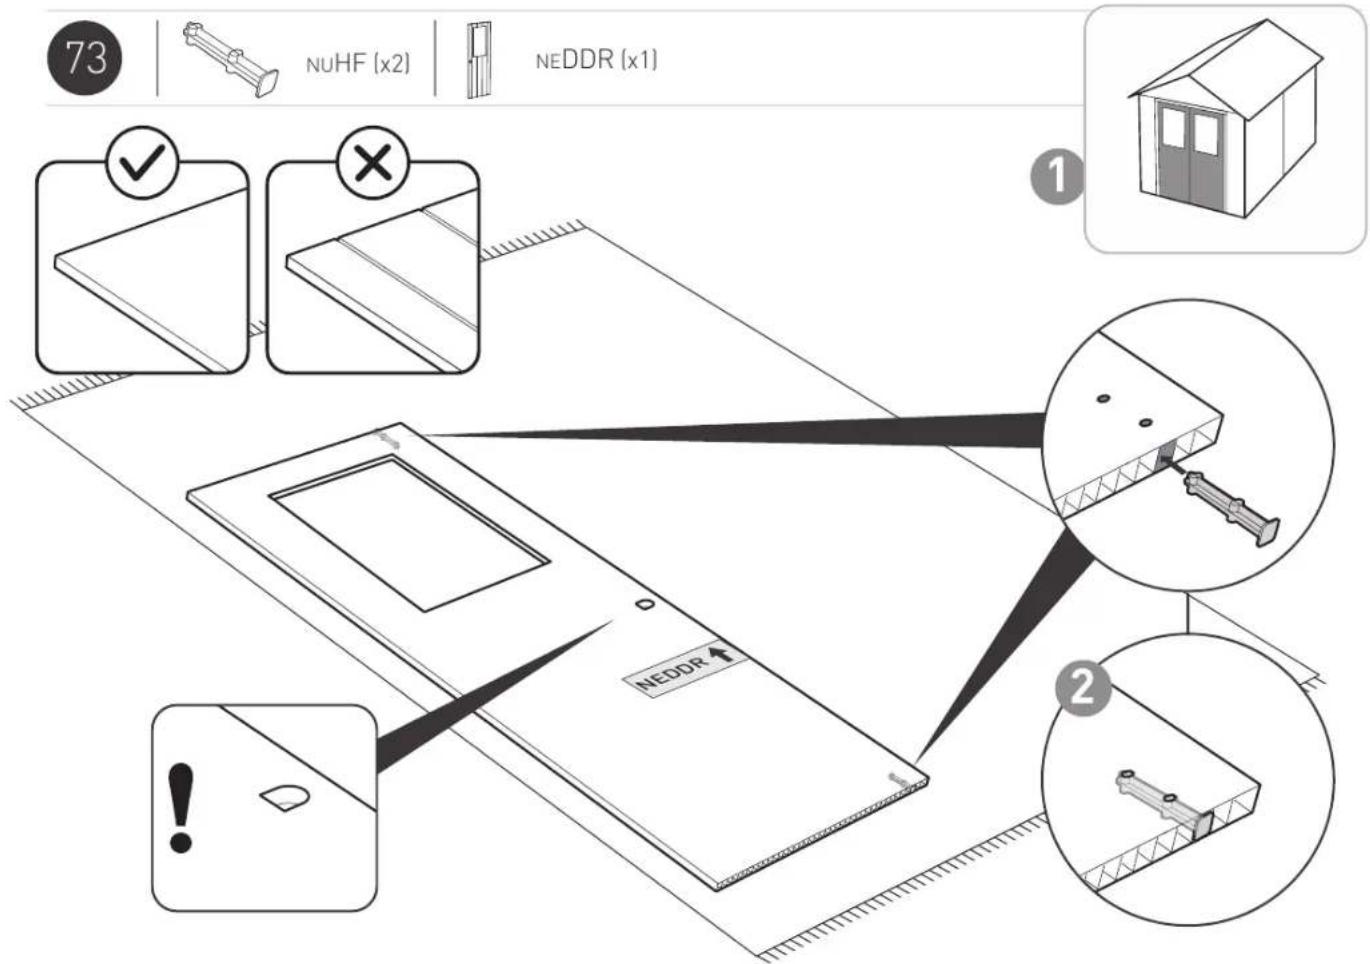
| NUHE (x1) | NUHA (x1) | NUHF (x2) | NUHD (x1) | ||
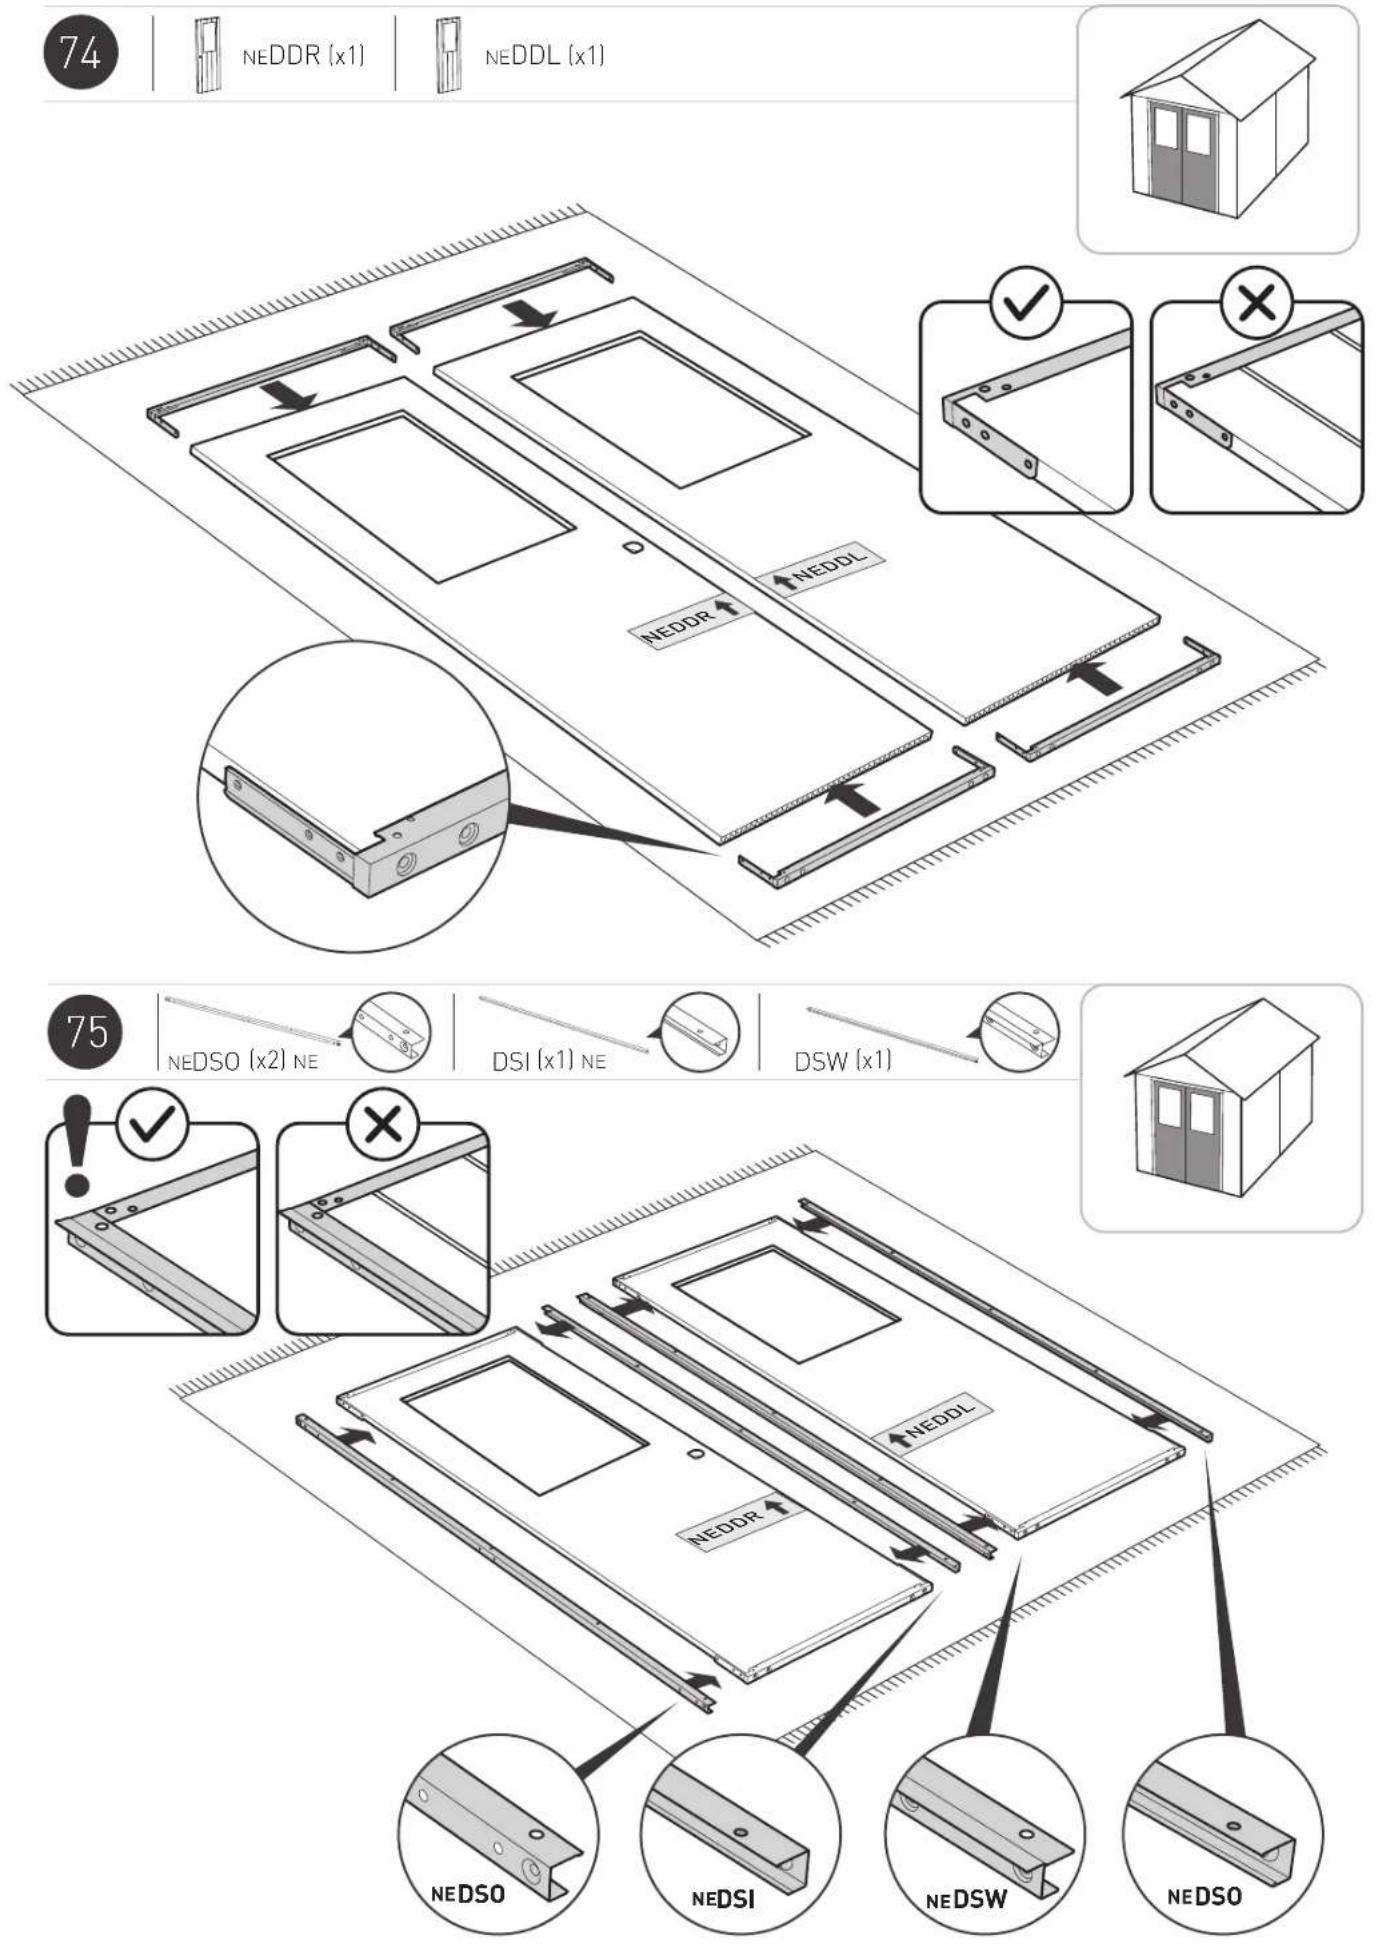
| NEDDL (x1) | NEDDR (x1) |  |  |  |  |
| NUHG (x2) | NUHH (x2) | NUHB (x1) | NUHC (x1) |
METAL PARTS | PIÈCES MÉTALLIQUES | PIEZAS METÁLICAS | METALLTEILE | METALEN DELEN | PARTI IN METALLO | PARTES METÁLICAS
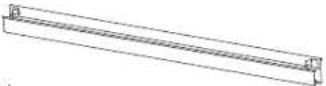 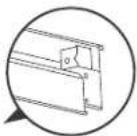 NEUK (x1) NEUK (x1) | 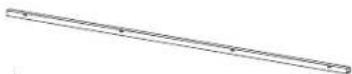 NEFM (x1) NEFM (x1) | 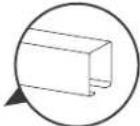 | |
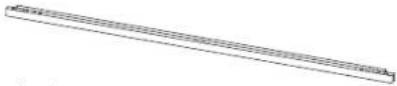 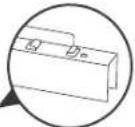 NELR (x2) NELR (x2) | 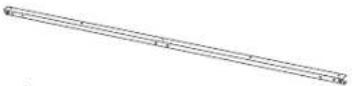 NEDSO (x2) NEDSO (x2) | 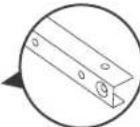 | |
 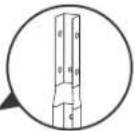 NEMS (x4) NEMS (x4) | 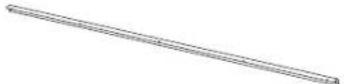 NEDSI (x1) NEDSI (x1) | 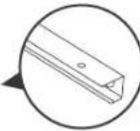 | |
 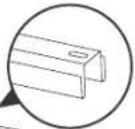 NEMBA (x1) NEMBA (x1) | 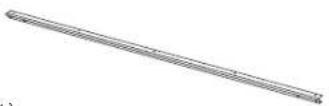 NEDSW (x1) NEDSW (x1) | 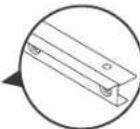 | |
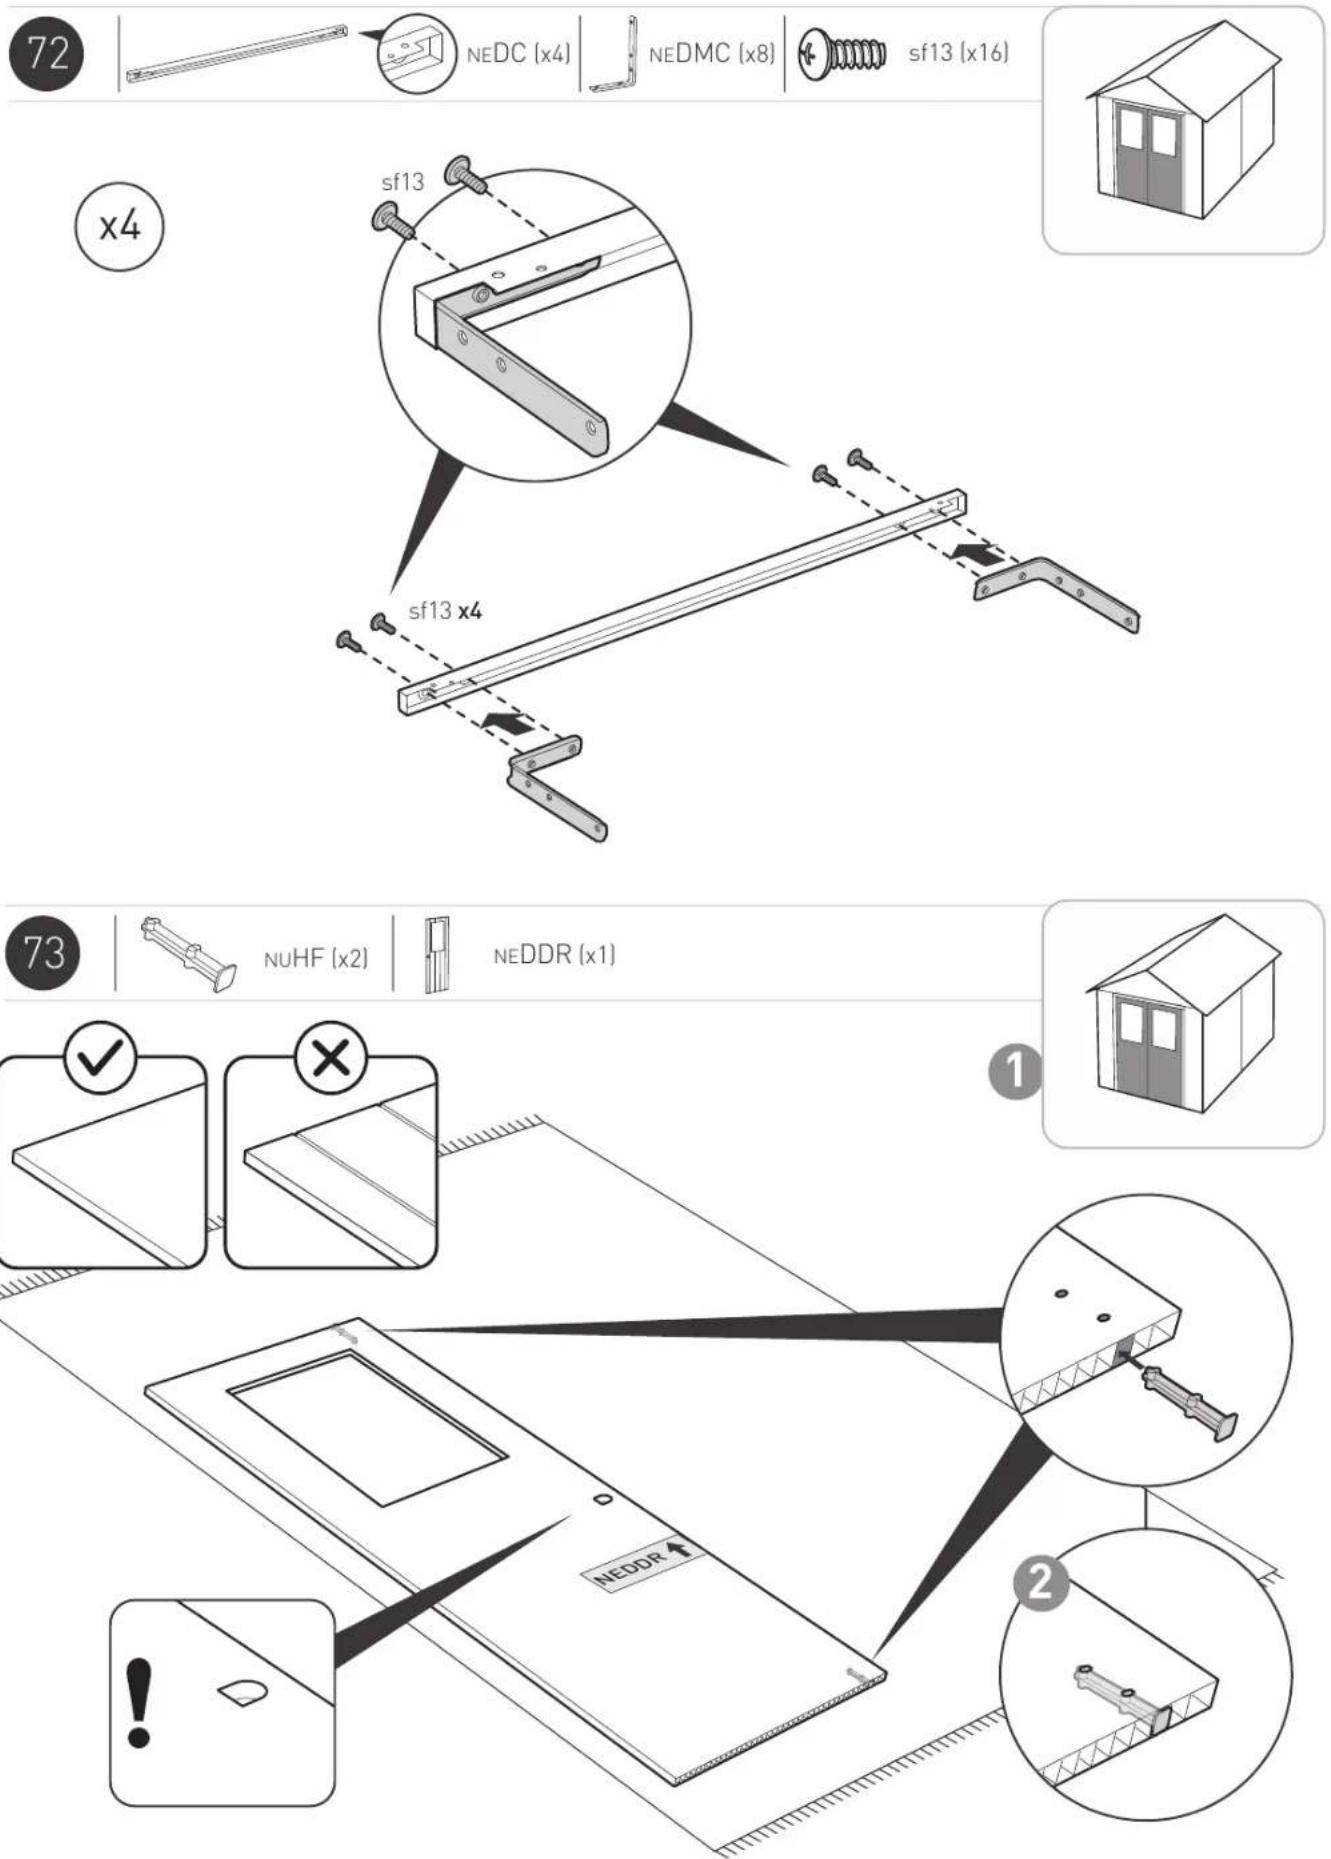
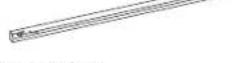 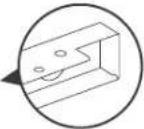 NEDC (x4) NEDC (x4) | 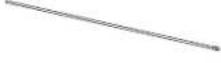  NEMB (x2) NEMB (x2) | 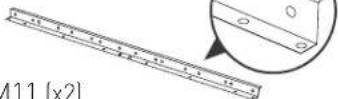 MOH MOH | |
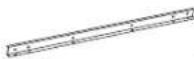 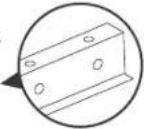 MOFM7 (x4) MOFM7 (x4) | 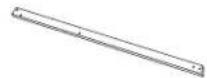 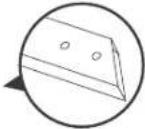 MOSF (x4) MOSF (x4) | 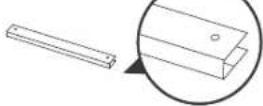 FNMH (x2) FNMH (x2) | |
SMALL PARTS | PETITES PIÈCES | PARTES PEQUEÑAS | KLEINTEILE | KLEINE ONDERDELEN | MINUTERIA | PEÇAS PEQUENAS
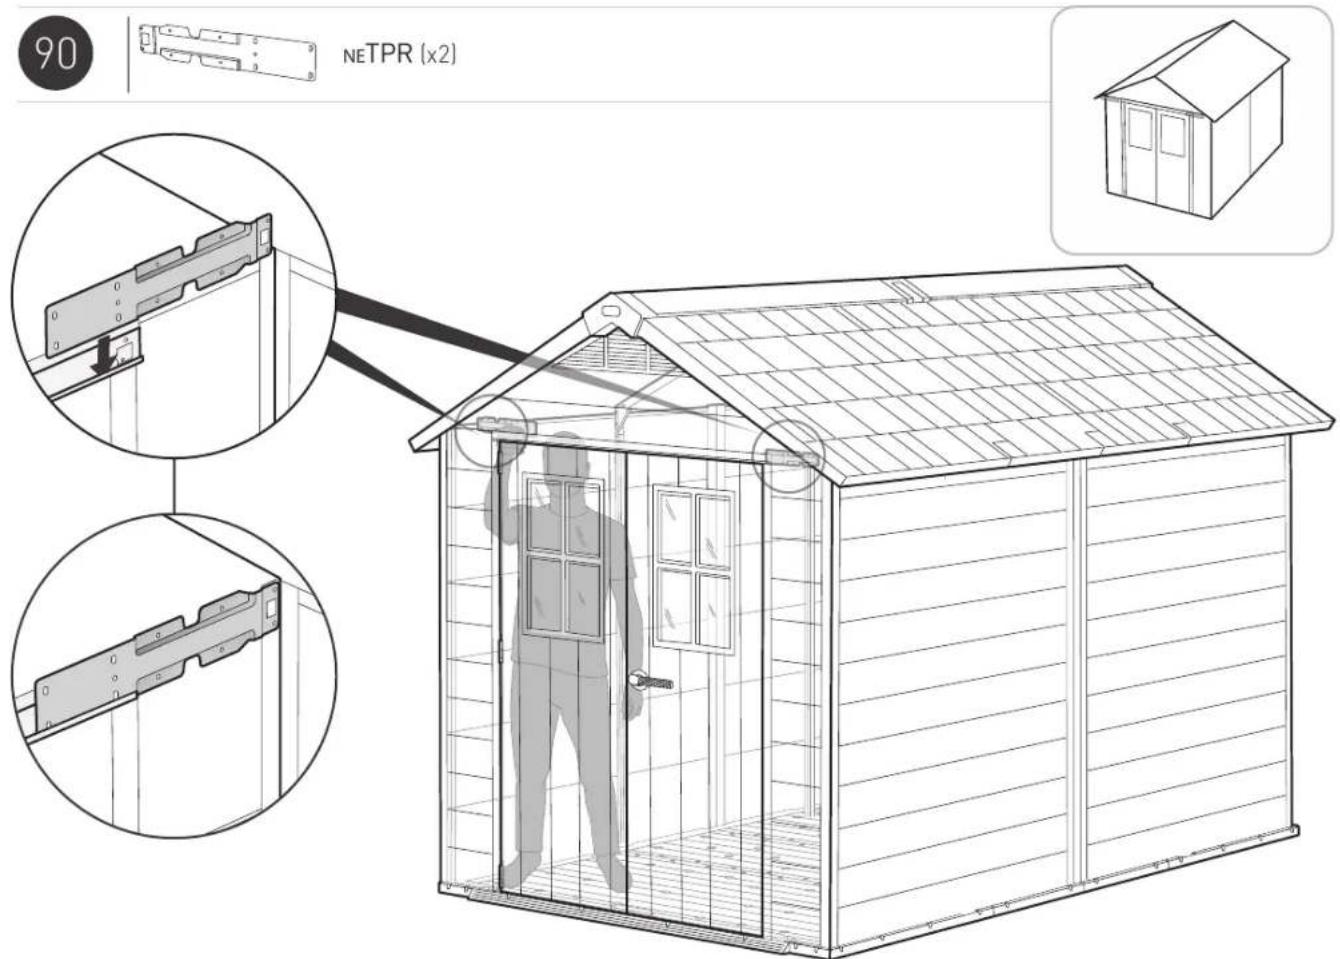
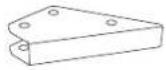 FNME (x4) FNME (x4) | 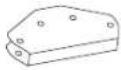 FNMA (x2) FNMA (x2) |  FNTM (x8) FNTM (x8) | 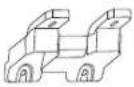 MOFTC (x4) MOFTC (x4) | 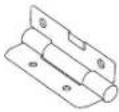 NEDH (x6) NEDH (x6) | 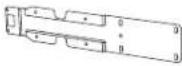 NETPR (x2) NETPR (x2) |
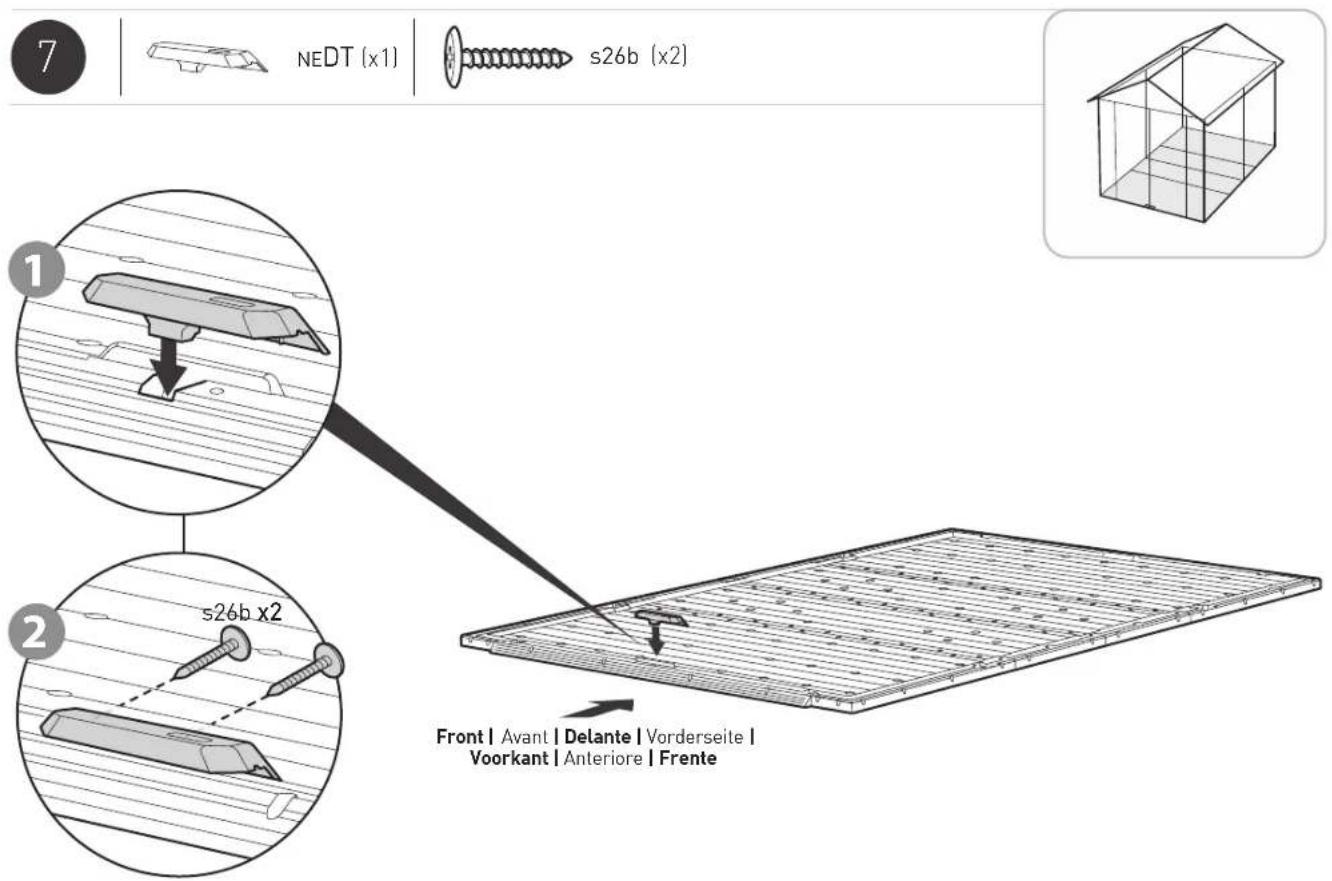
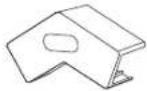 FNAC (x2) FNAC (x2) | 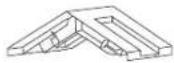 FNBC9 (x1) FNBC9 (x1) |  NEDMC (x8) NEDMC (x8) |  NEDPC (x2) NEDPC (x2) | 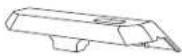 NEDT (x1) NEDT (x1) | |
SCREWS | VIS | TORNILLOS | SCHRAUBEN | SCHROEVEN | VITI | PARAFUSOS
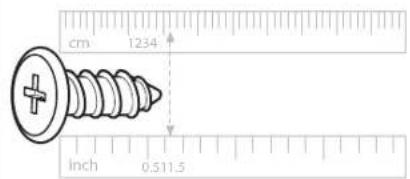
sc15 (x292) 16 mm / 0.63"
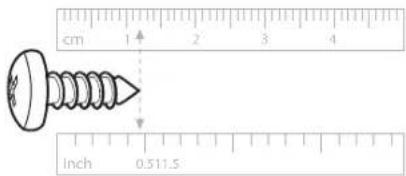
S13b (x136) 12 mm /0.47"
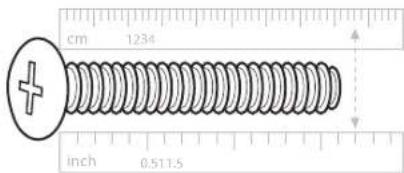
sc8 (x25) 43 mm / 1.69"
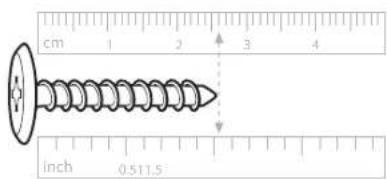
S26b (x8) 26 mm /1"
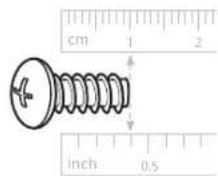
sf13 (x16) 10 mm / 0.39"
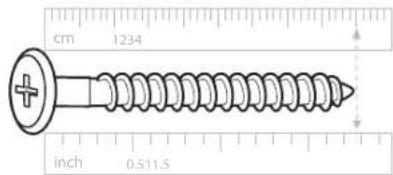
s45b (x56) 45 mm / 1.77"
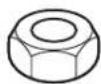
scn8 (x25)
Packaging may contain some additional small parts for use as spare parts | L'emballage peut contenir de petites pièces supplémentaires à utiliser comme pièces de rechange | El envoltorio puede contener algunas piezas pequeñas adicionales que se pueden utilizar como repuestos | In der Verpackung können kleine Zusatzteile enthalten sein, die als Ersatzteile genutzt werden können | De verpakking kan een aantal kleine extra onderdelen bevatten, die als reserveonderdeel gebruikt kunnen worden | La confezione potrebbe contenere piccole parti supplementari da utilizzare come parti di ricambio | A embalagem pode conter algumas pequenas peças adicionais para utilização como peças de reposição
NOTE: Due to variations in production, the actual assembled size may vary slightly from the specified dimensions.
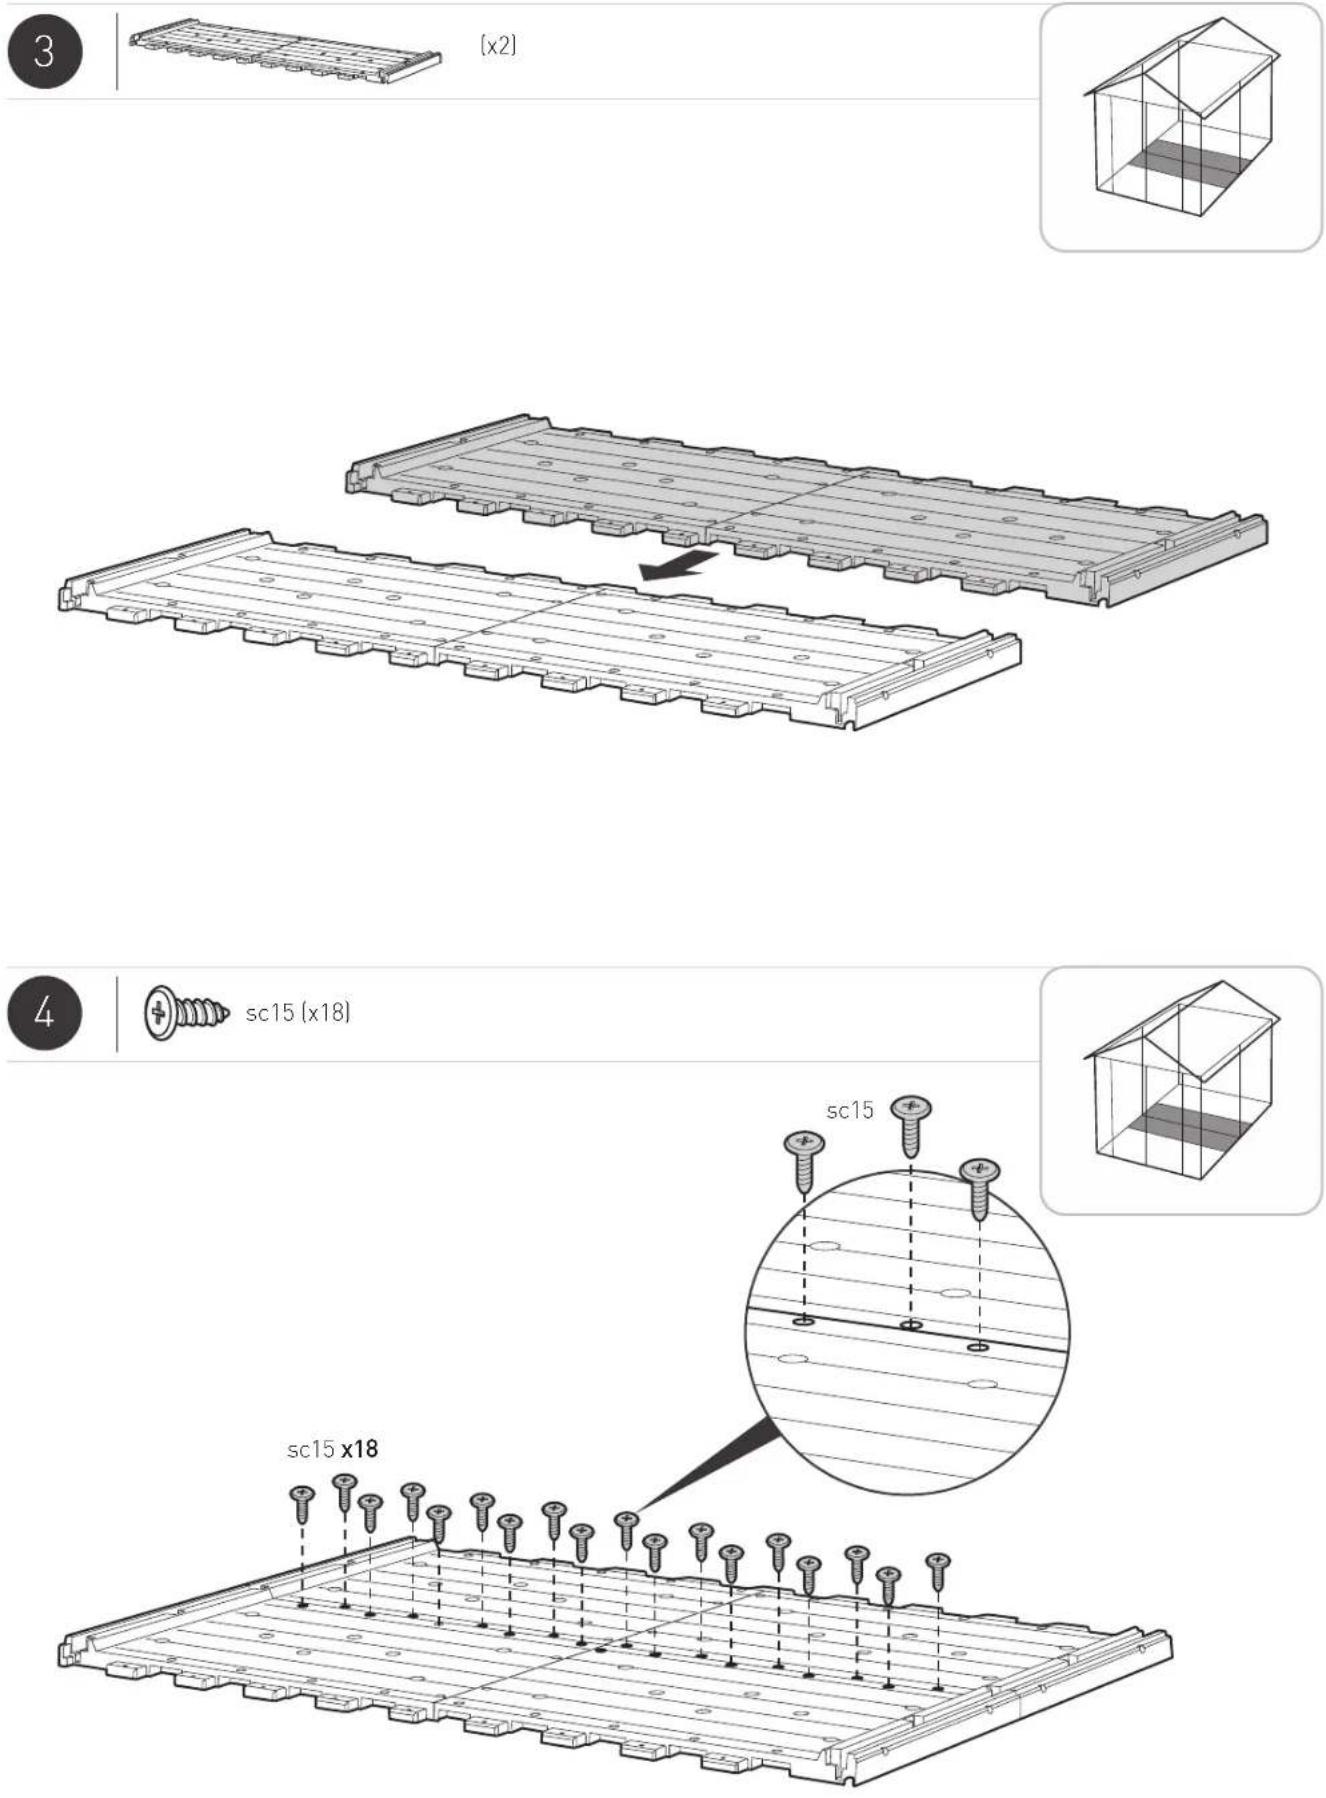
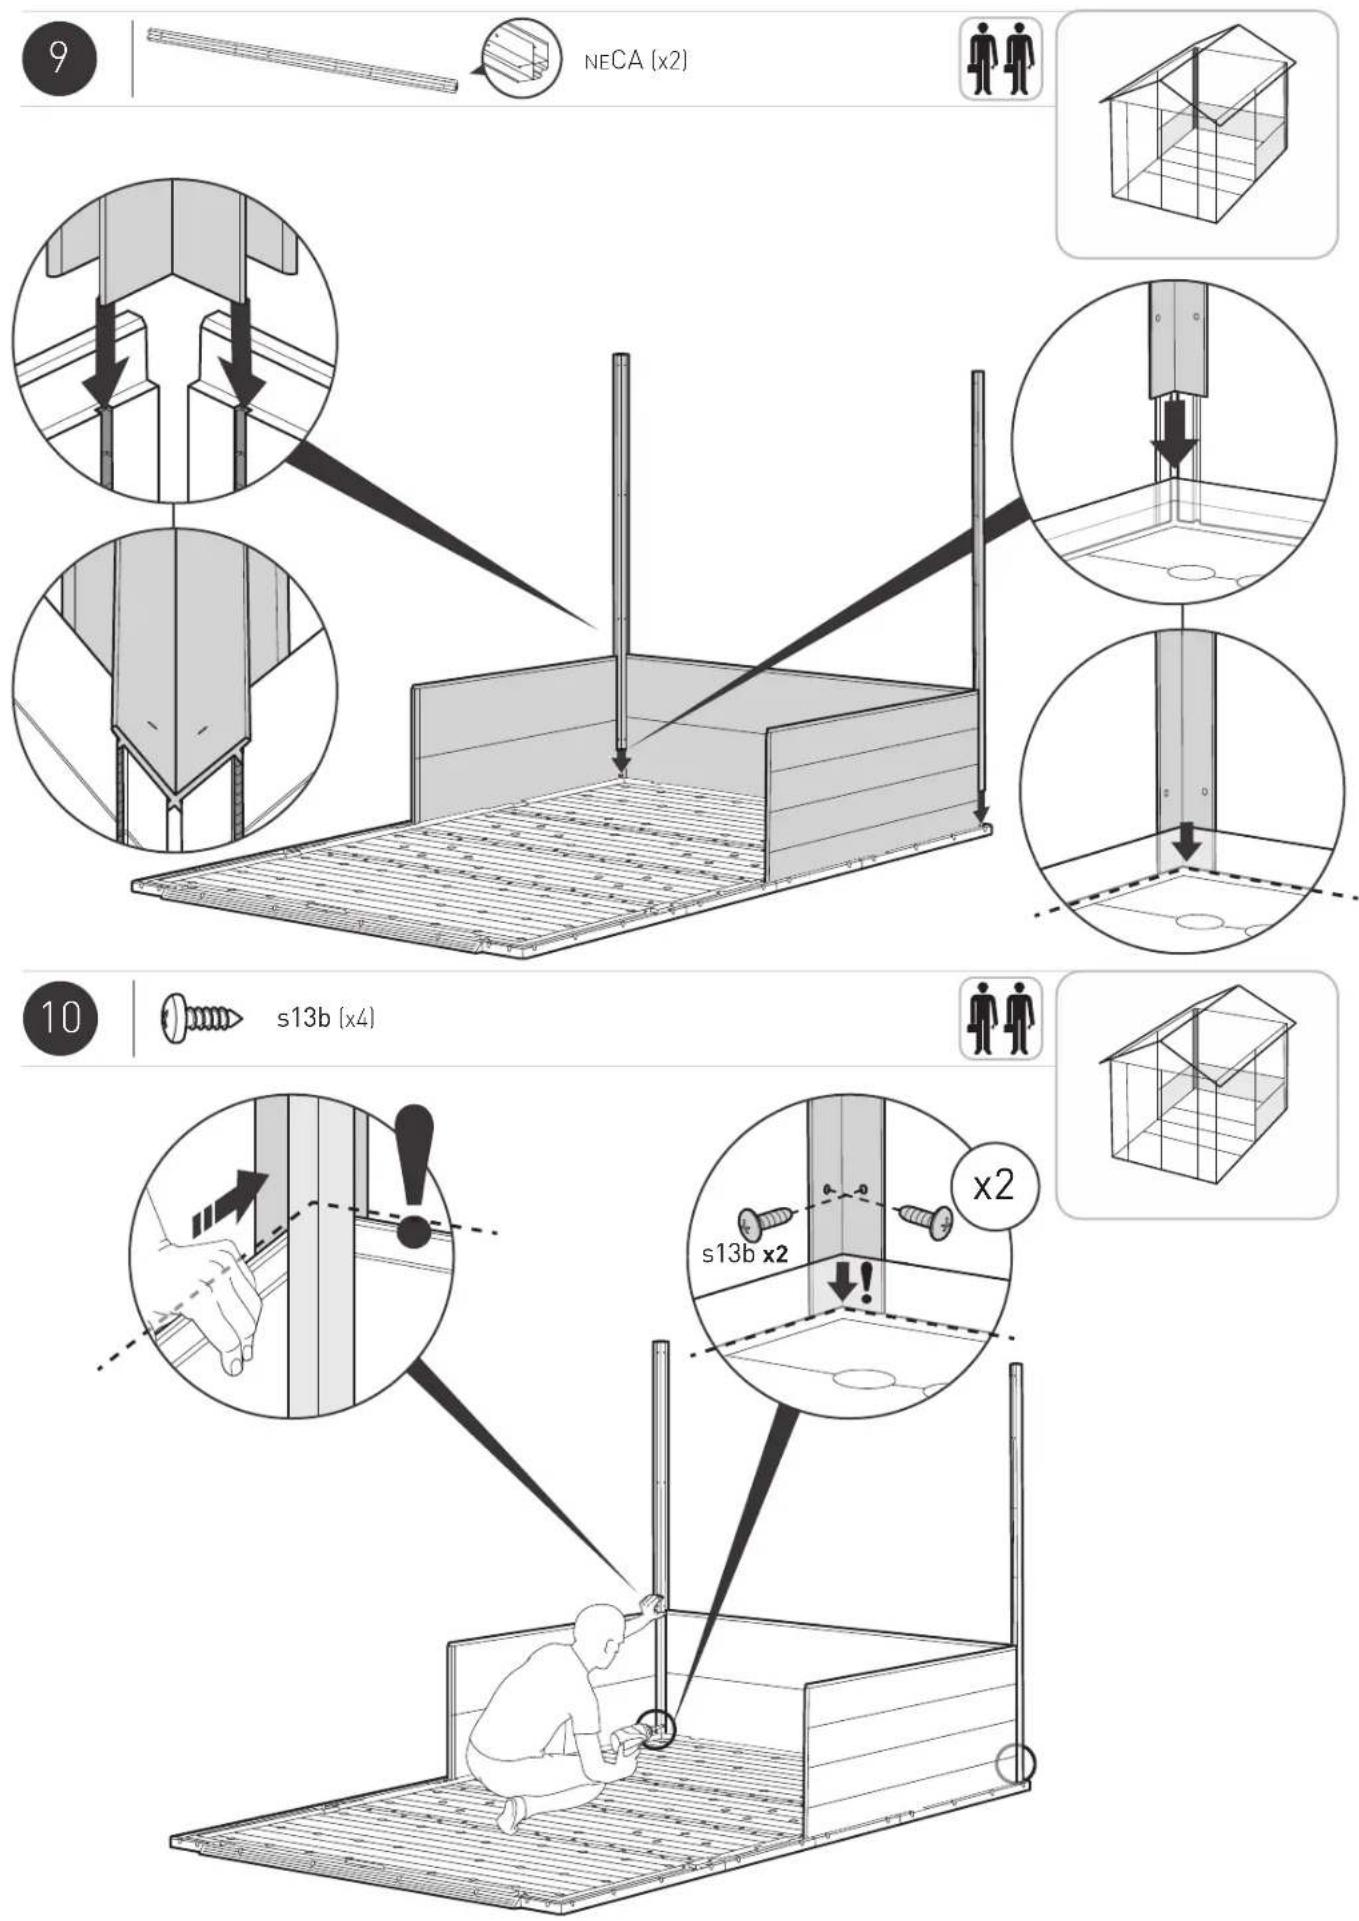
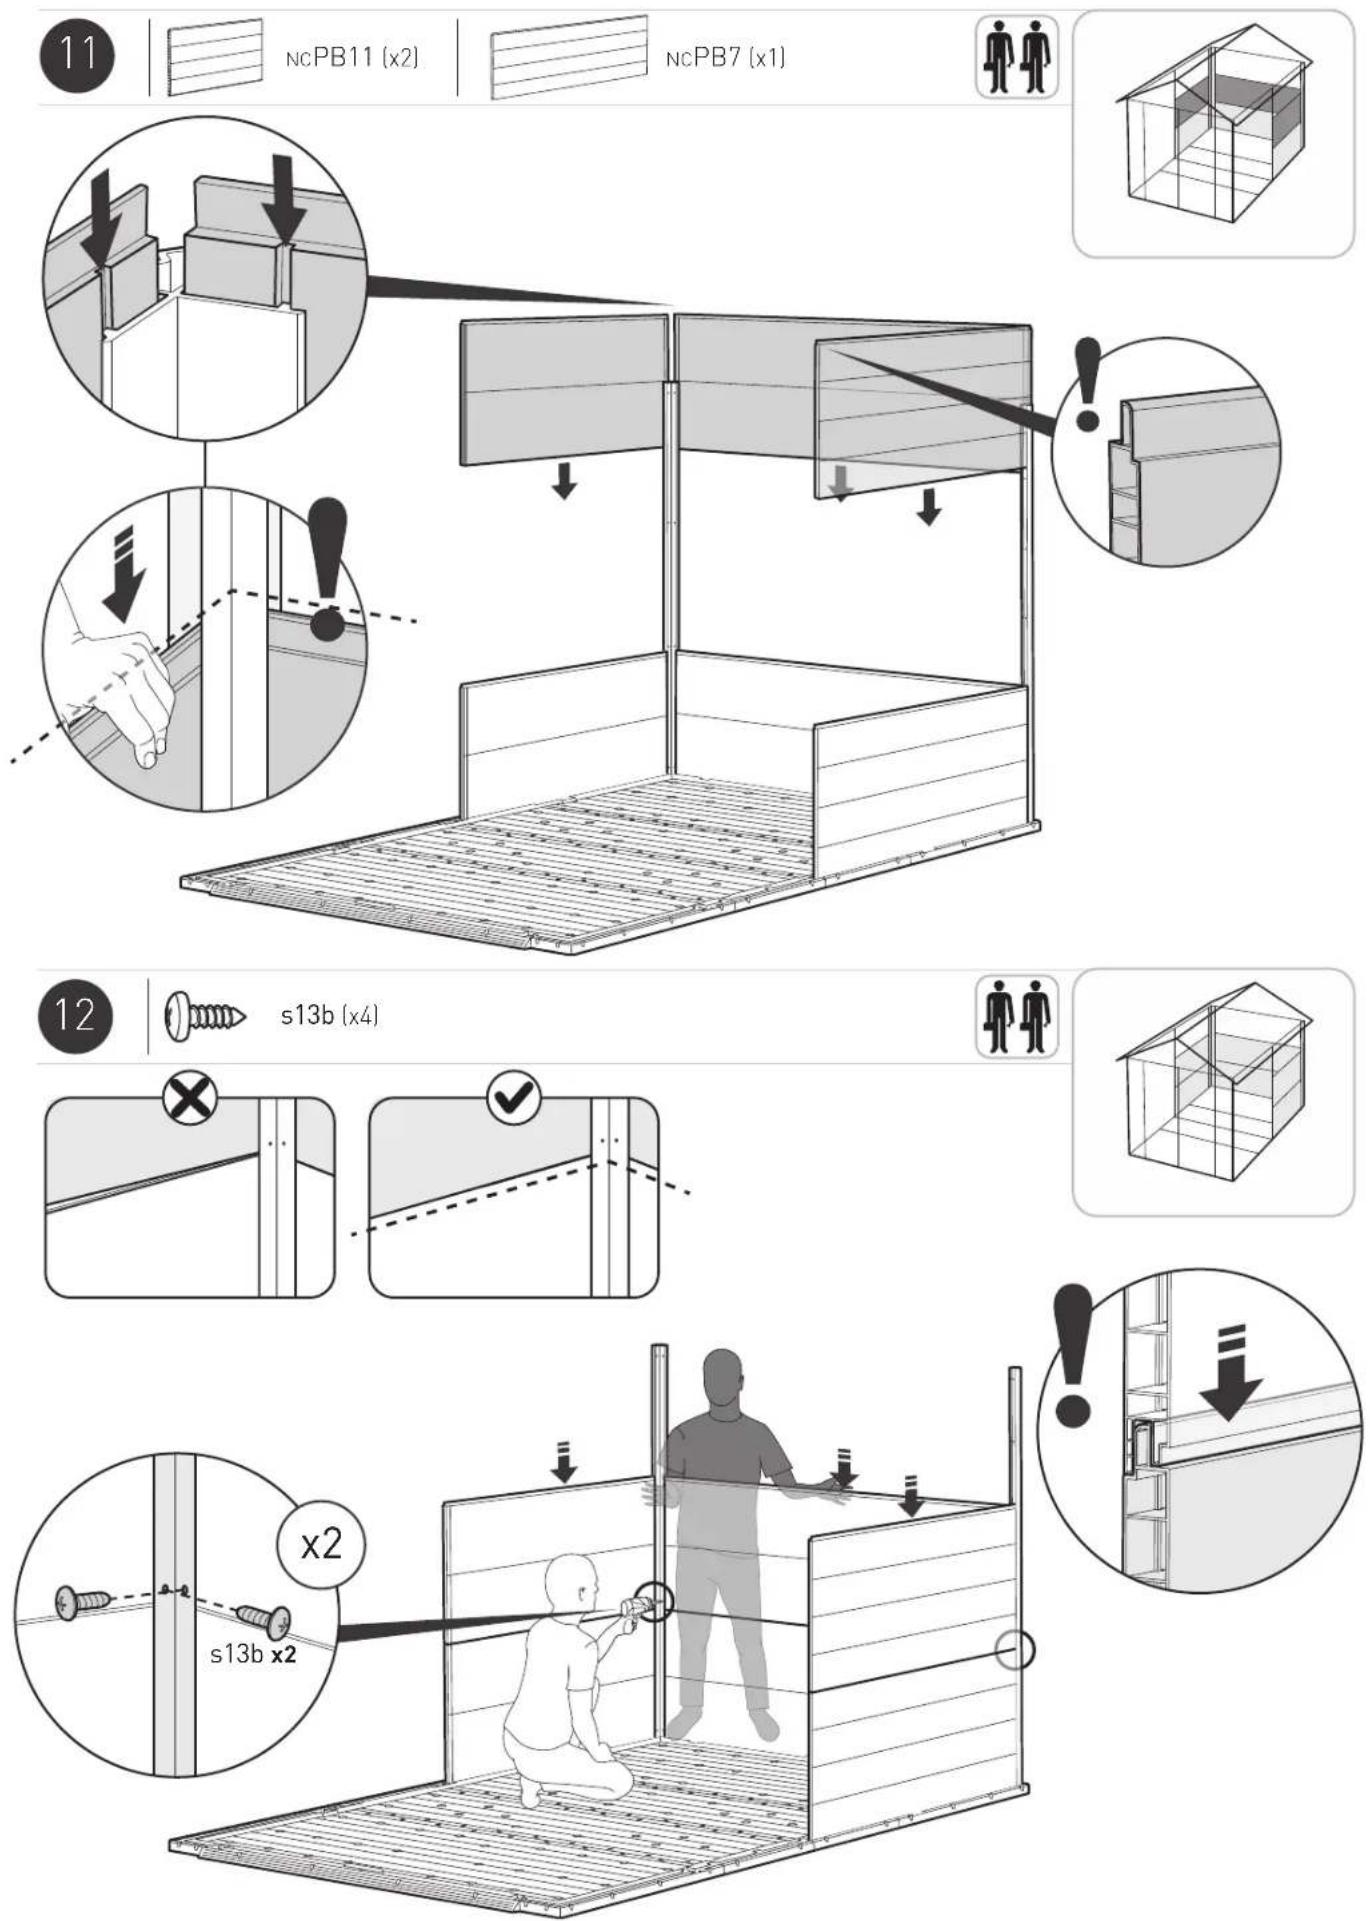
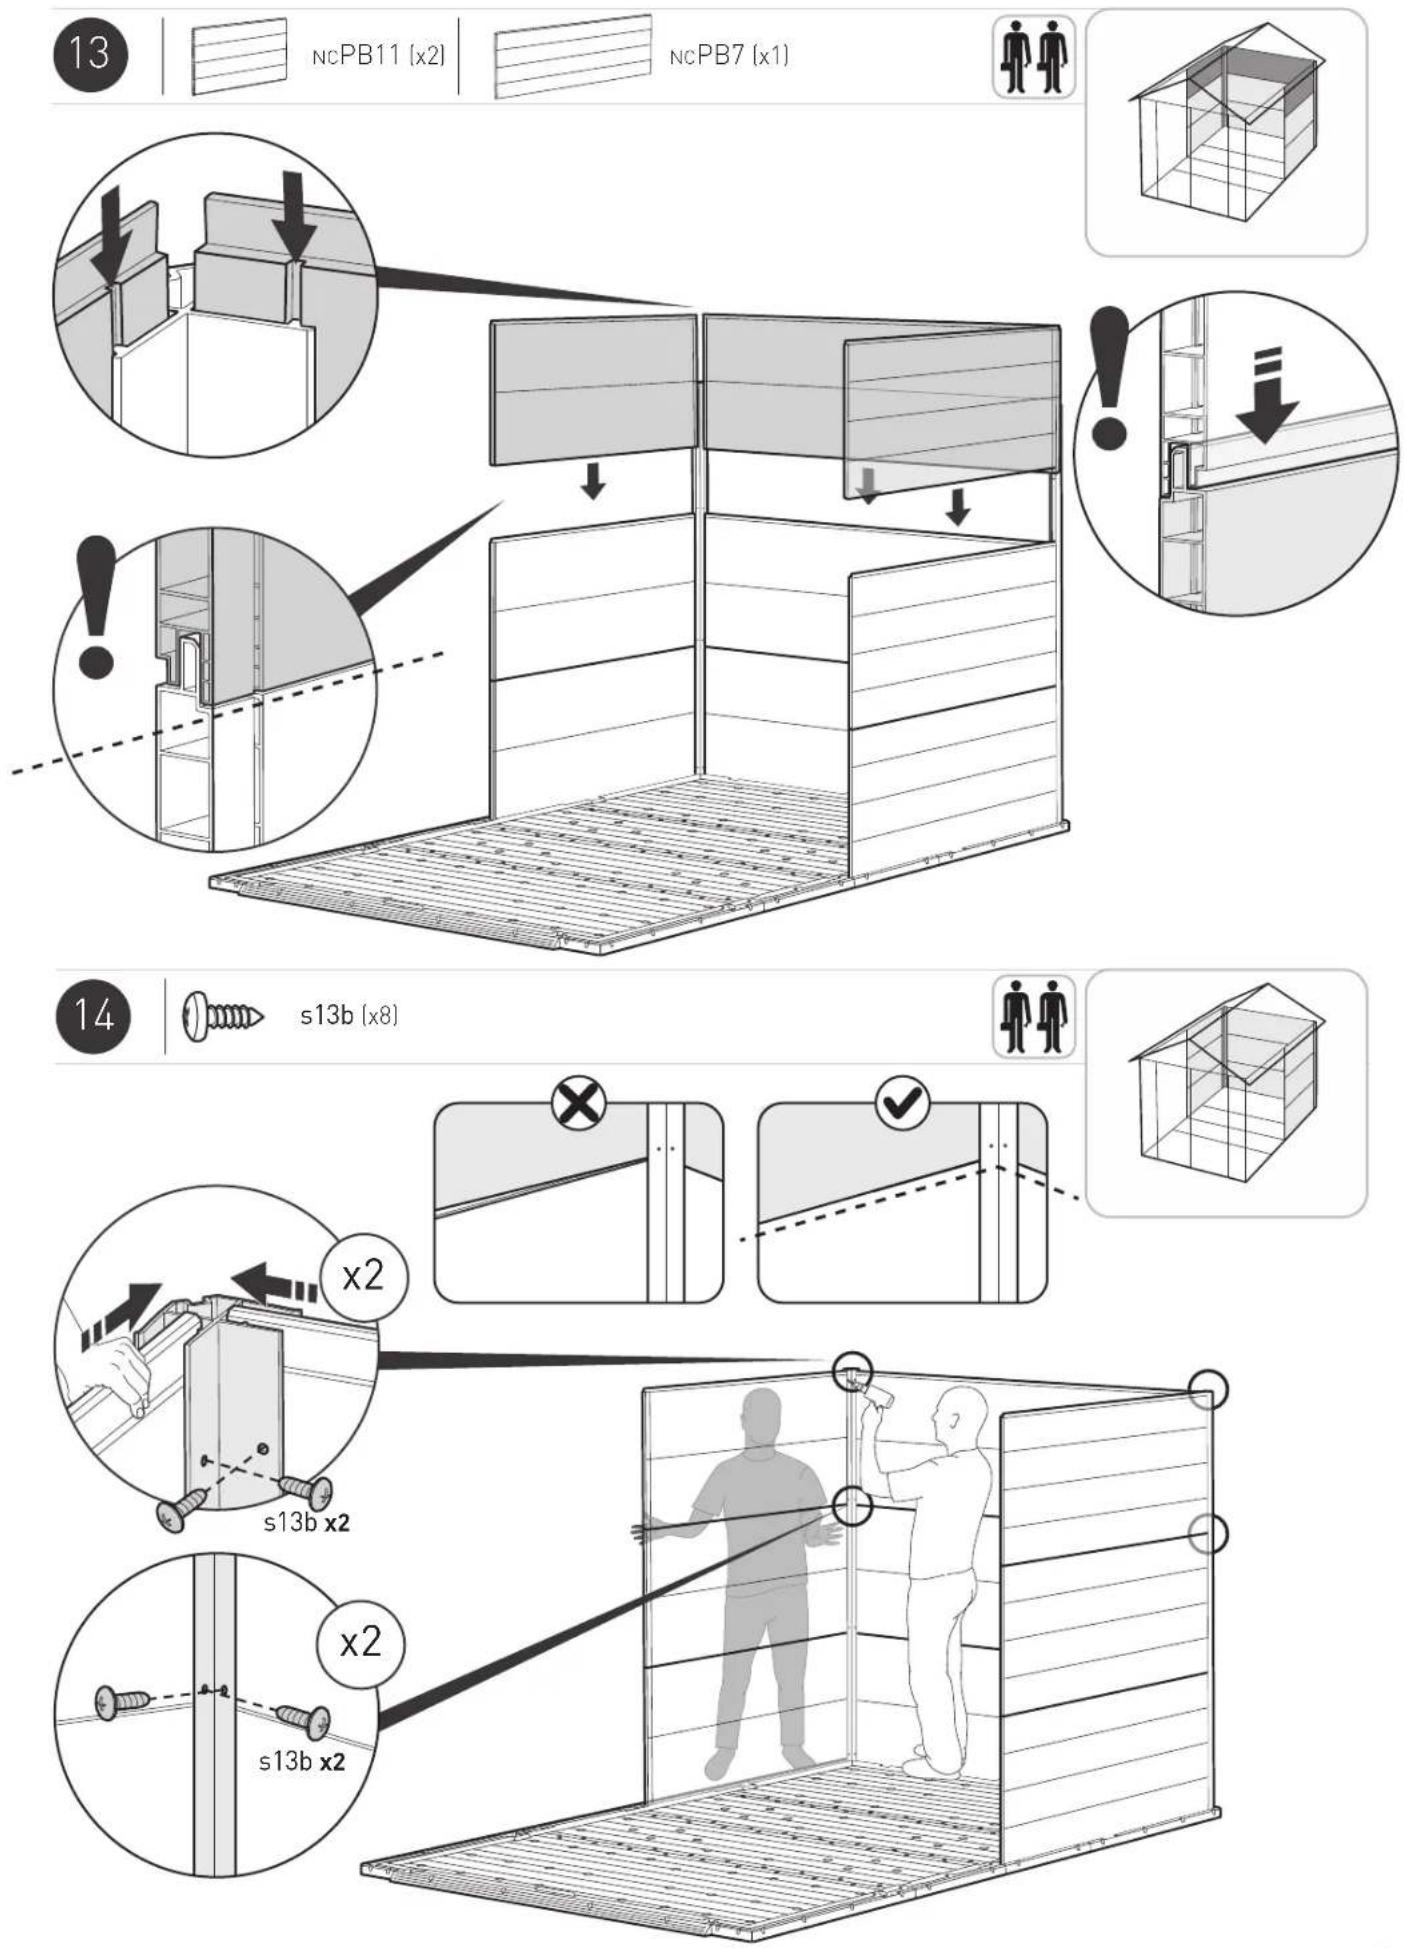
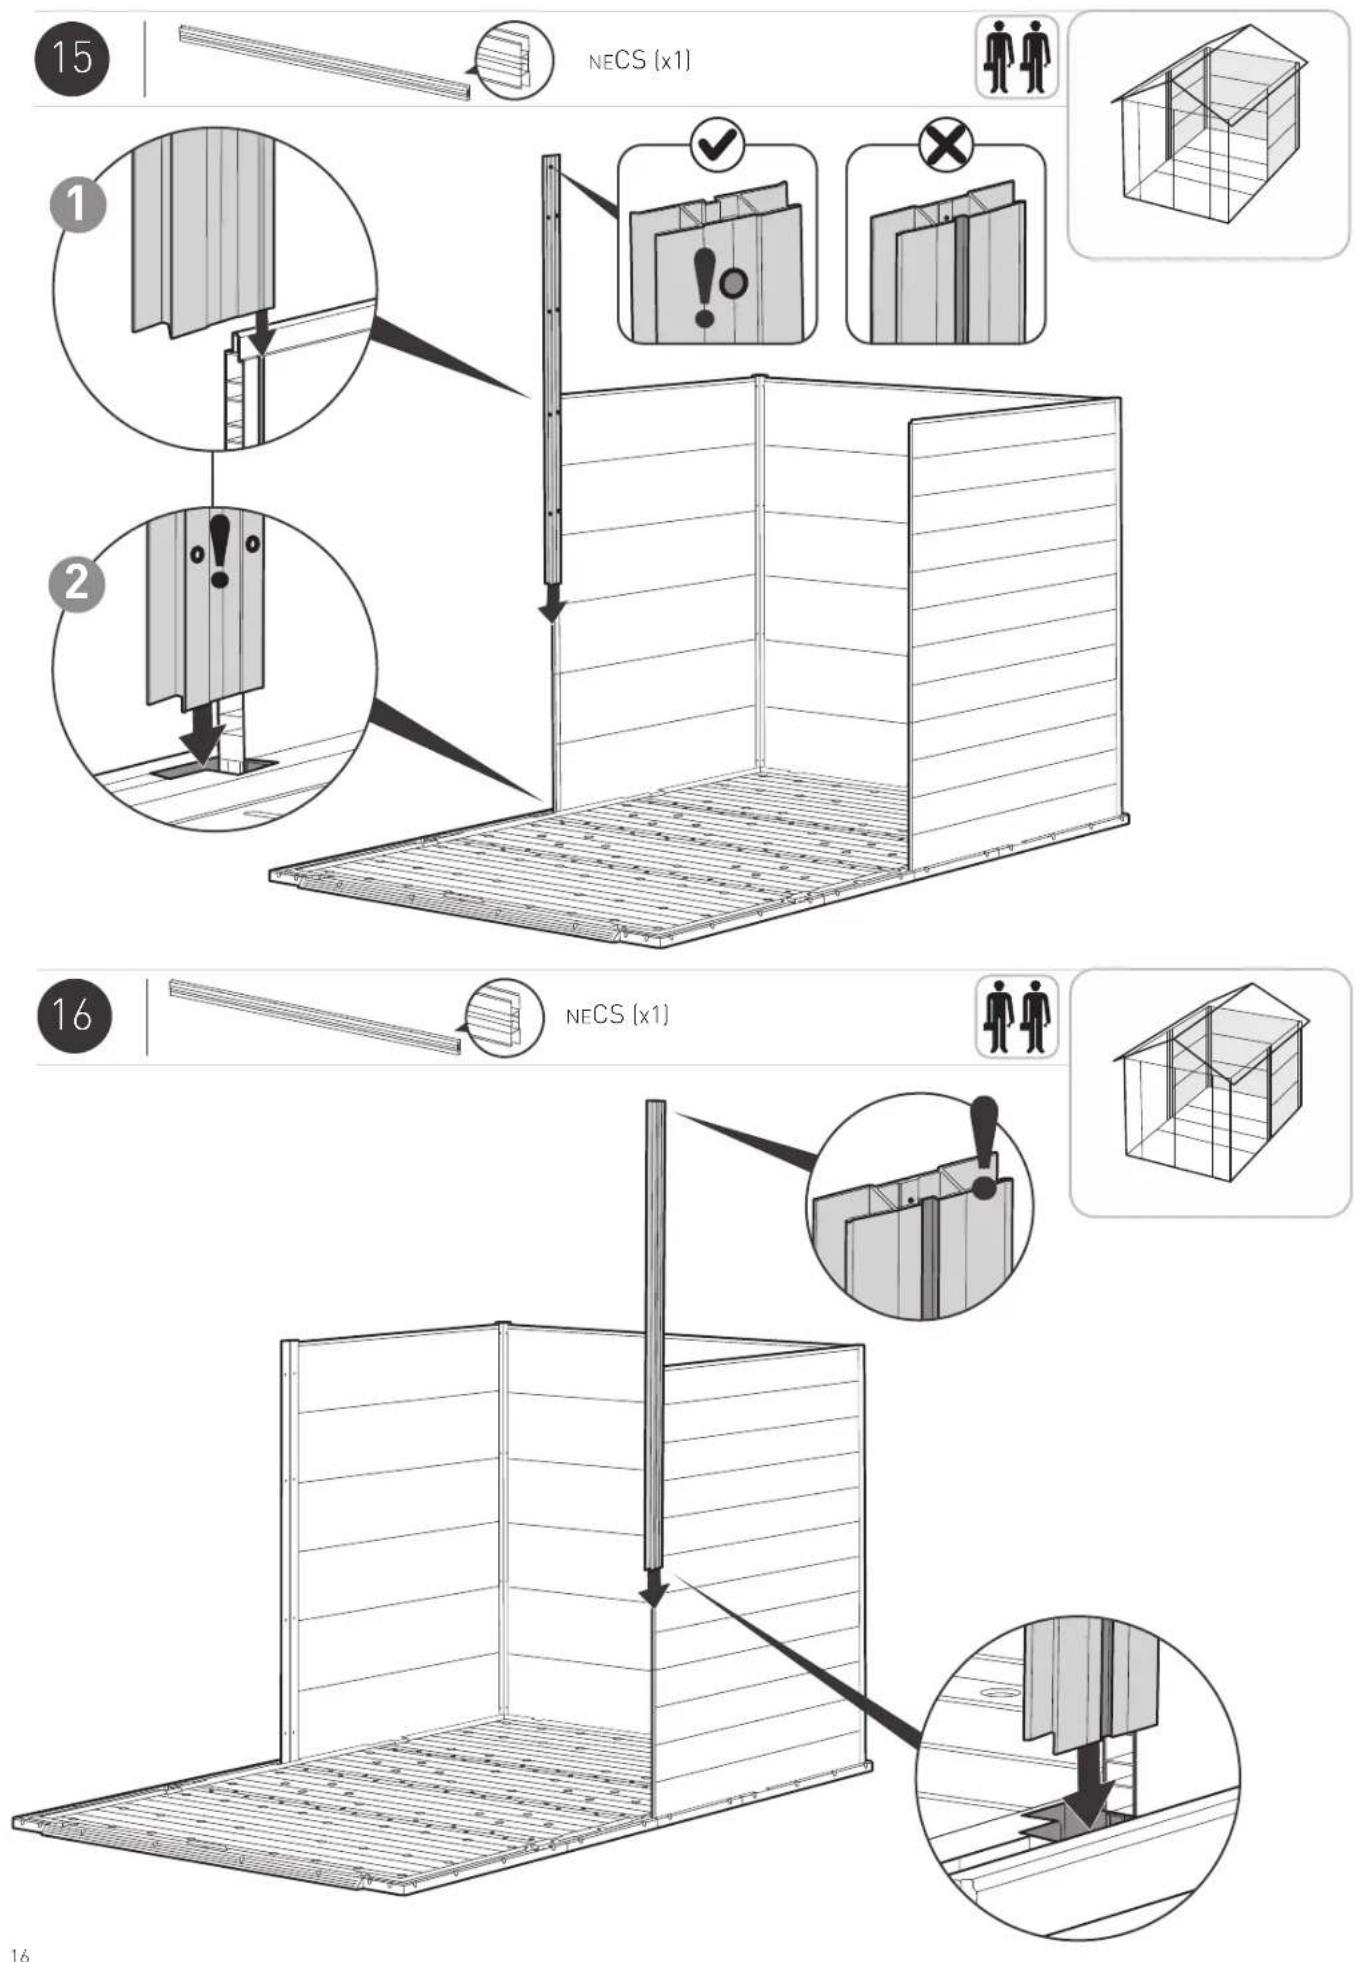
WALL ASSEMBLY | MONTAGE DU MUR | MONTAJE DE LAS PAREDES | MONTAGE DER WÄNDE | MONTAGE VAN DE MUREN | ASSEMBLAGGIO DELLE PARETI | MONTAGEM DA PAREDE


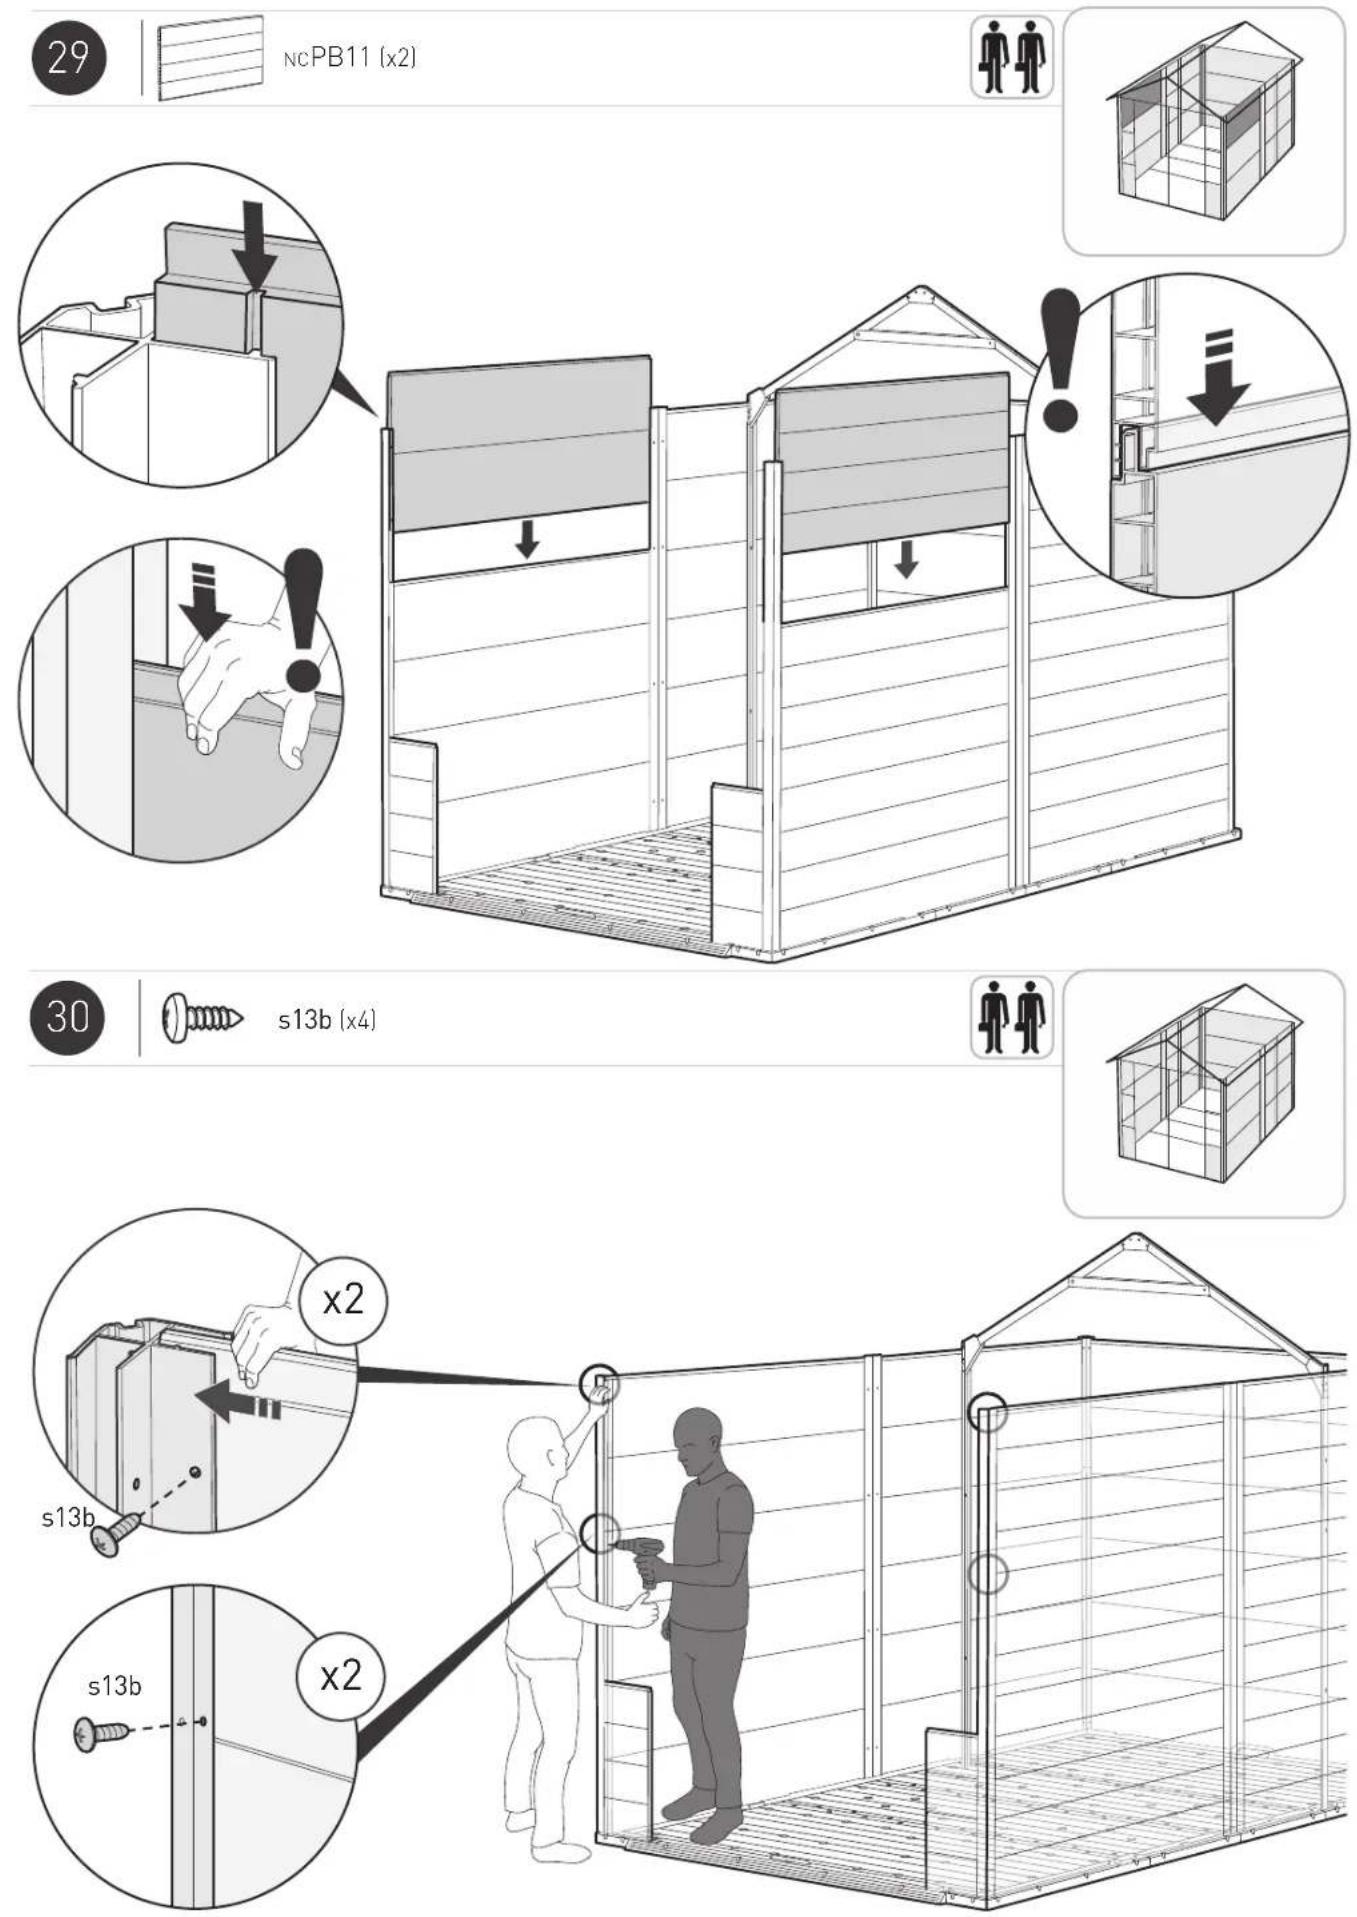
s13b [x8]

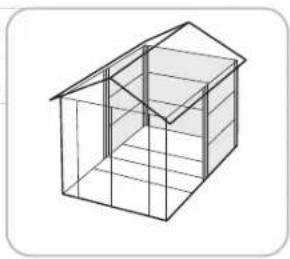
natural_image
Isometric line drawing of a house structure with visible roof, windows, and door (no text or symbols)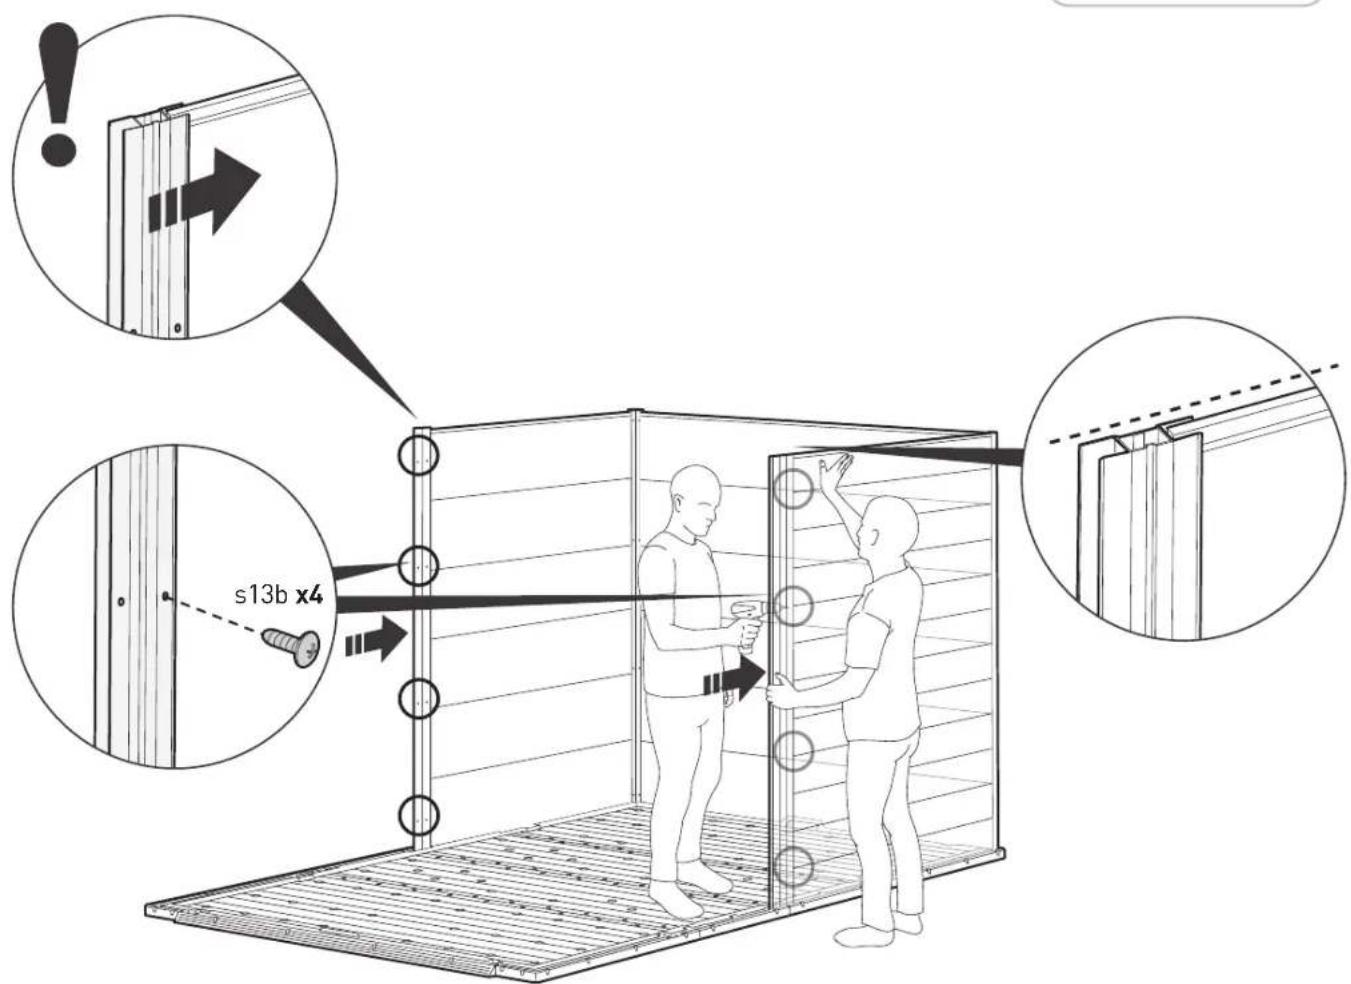
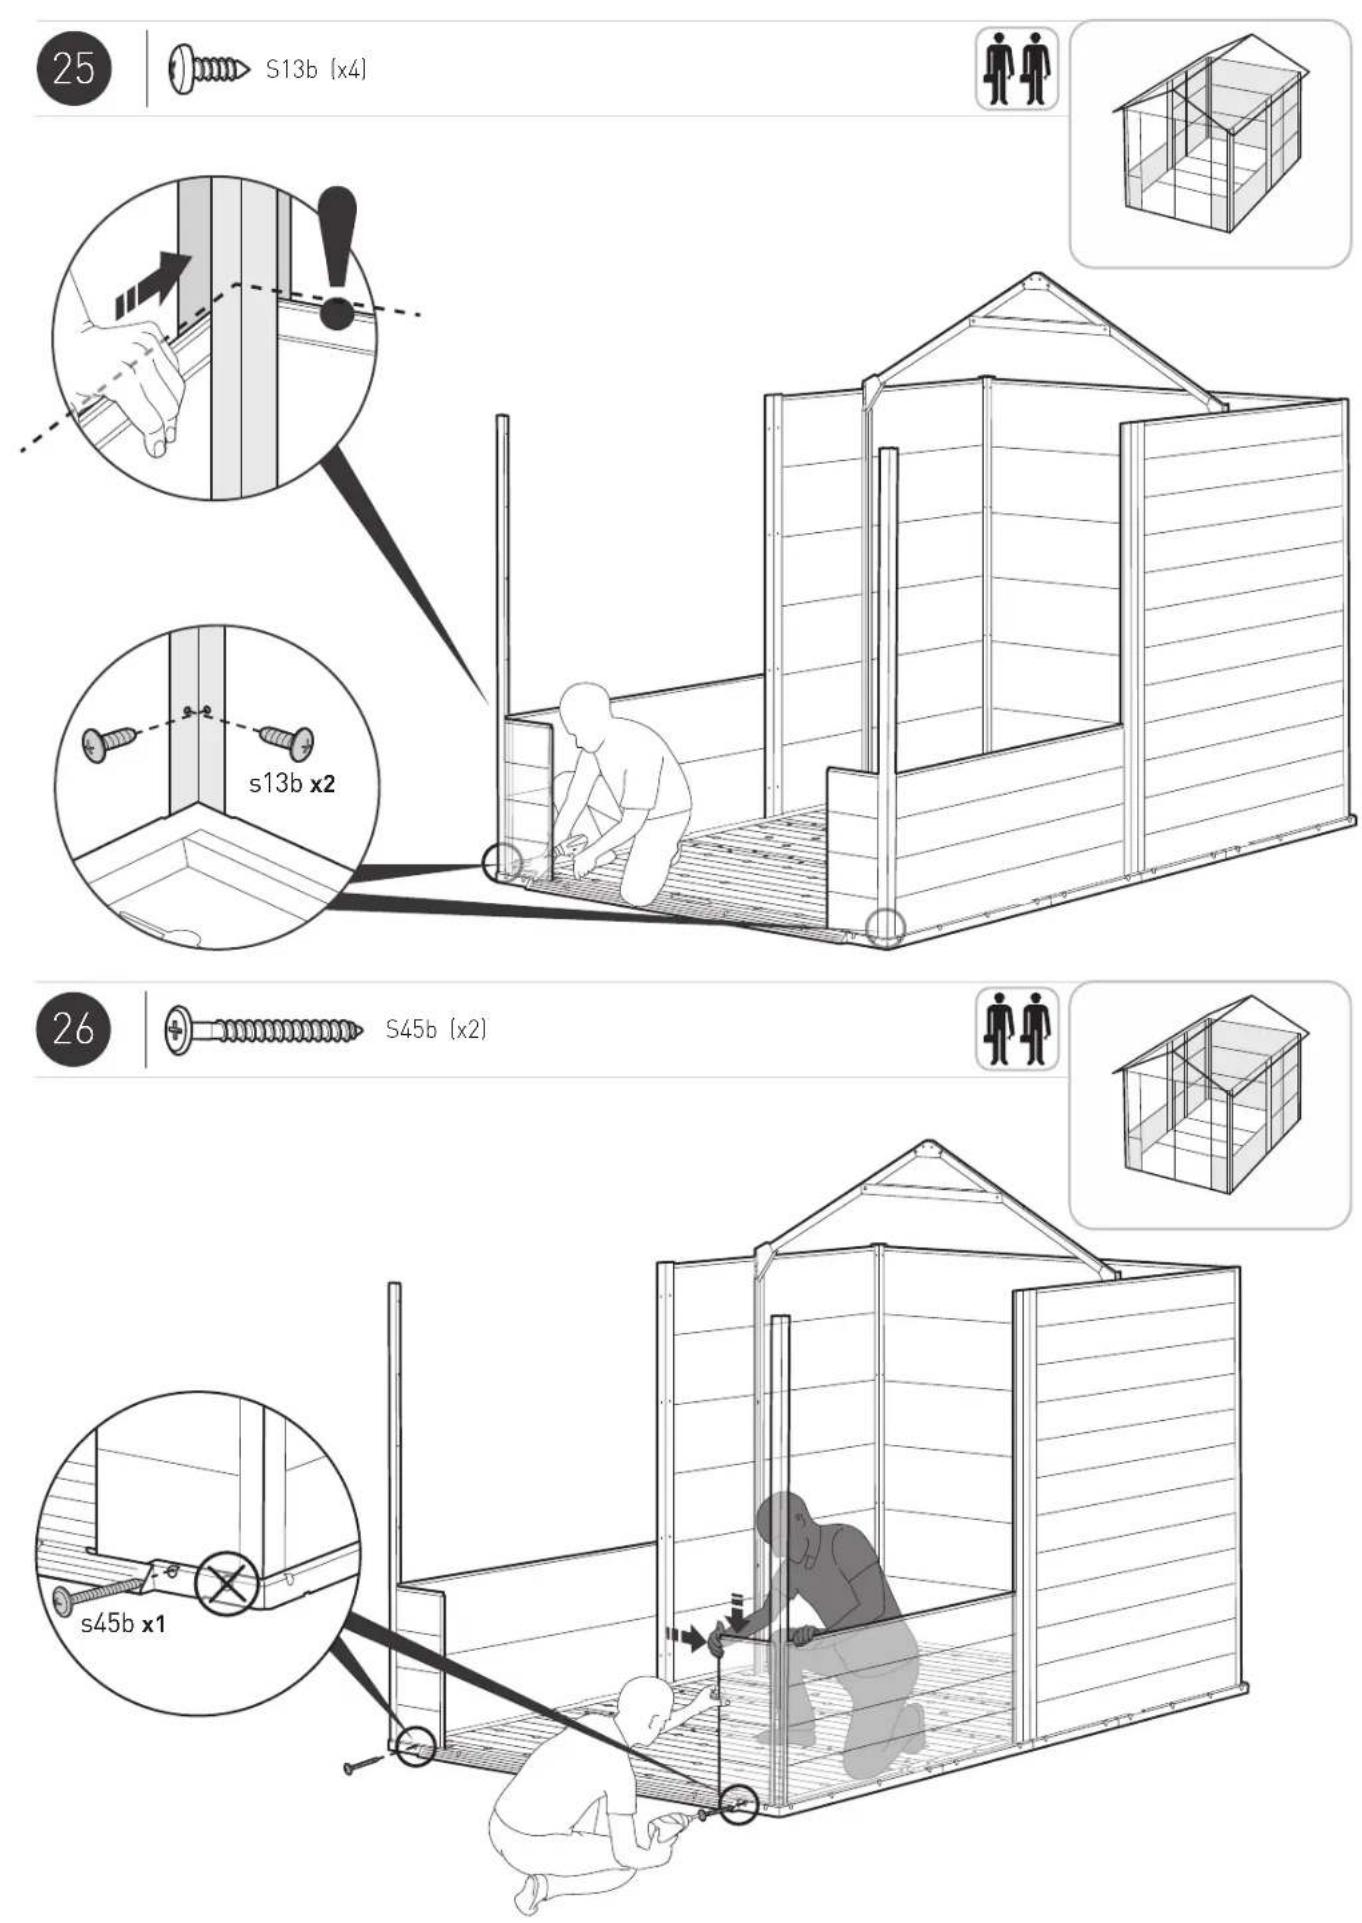
S13b (x4)
S45b (x2)
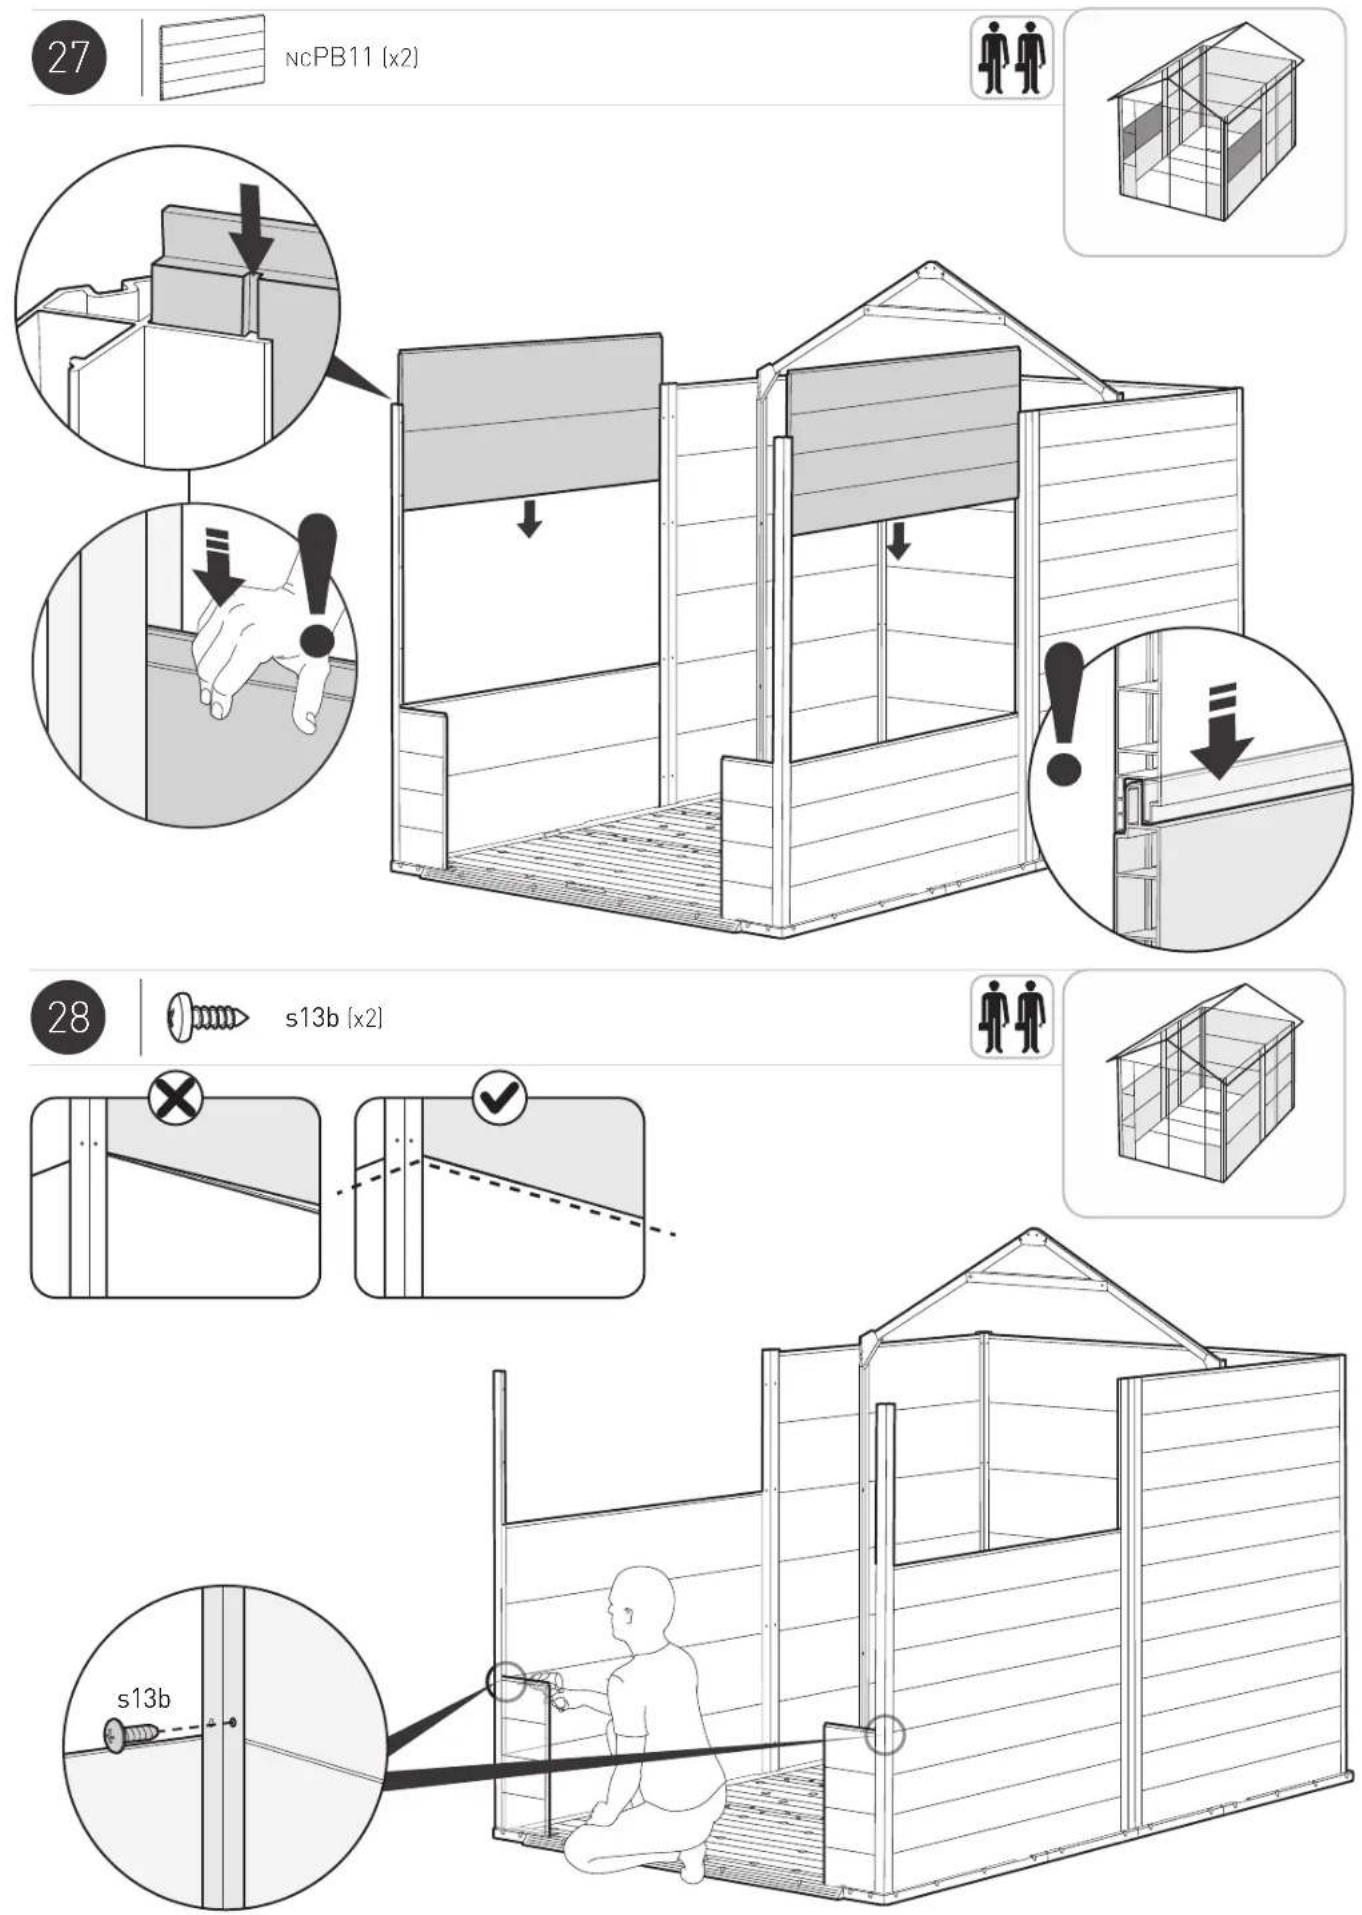
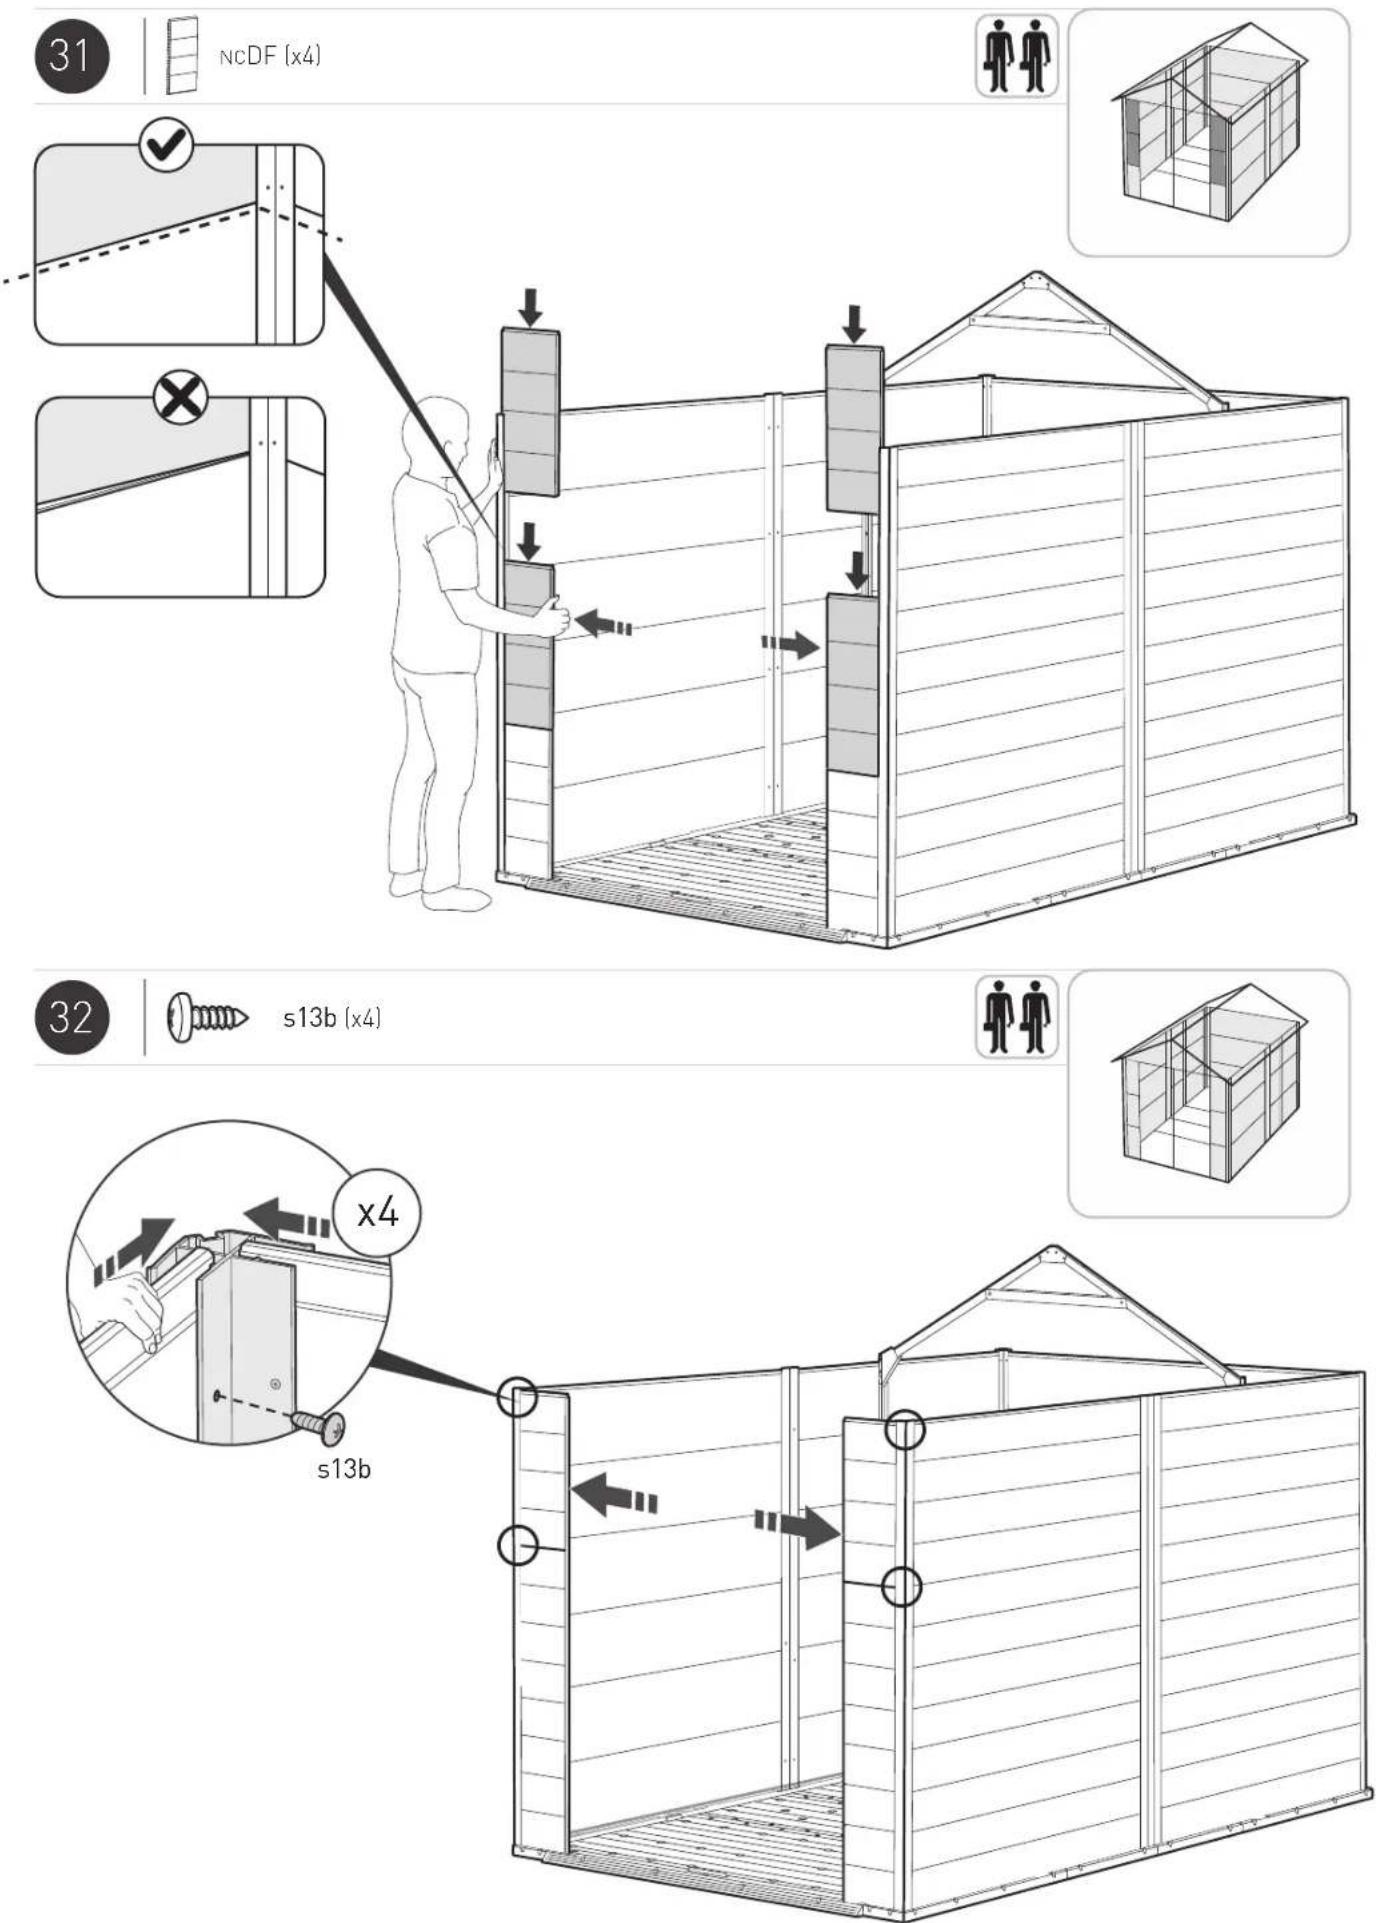
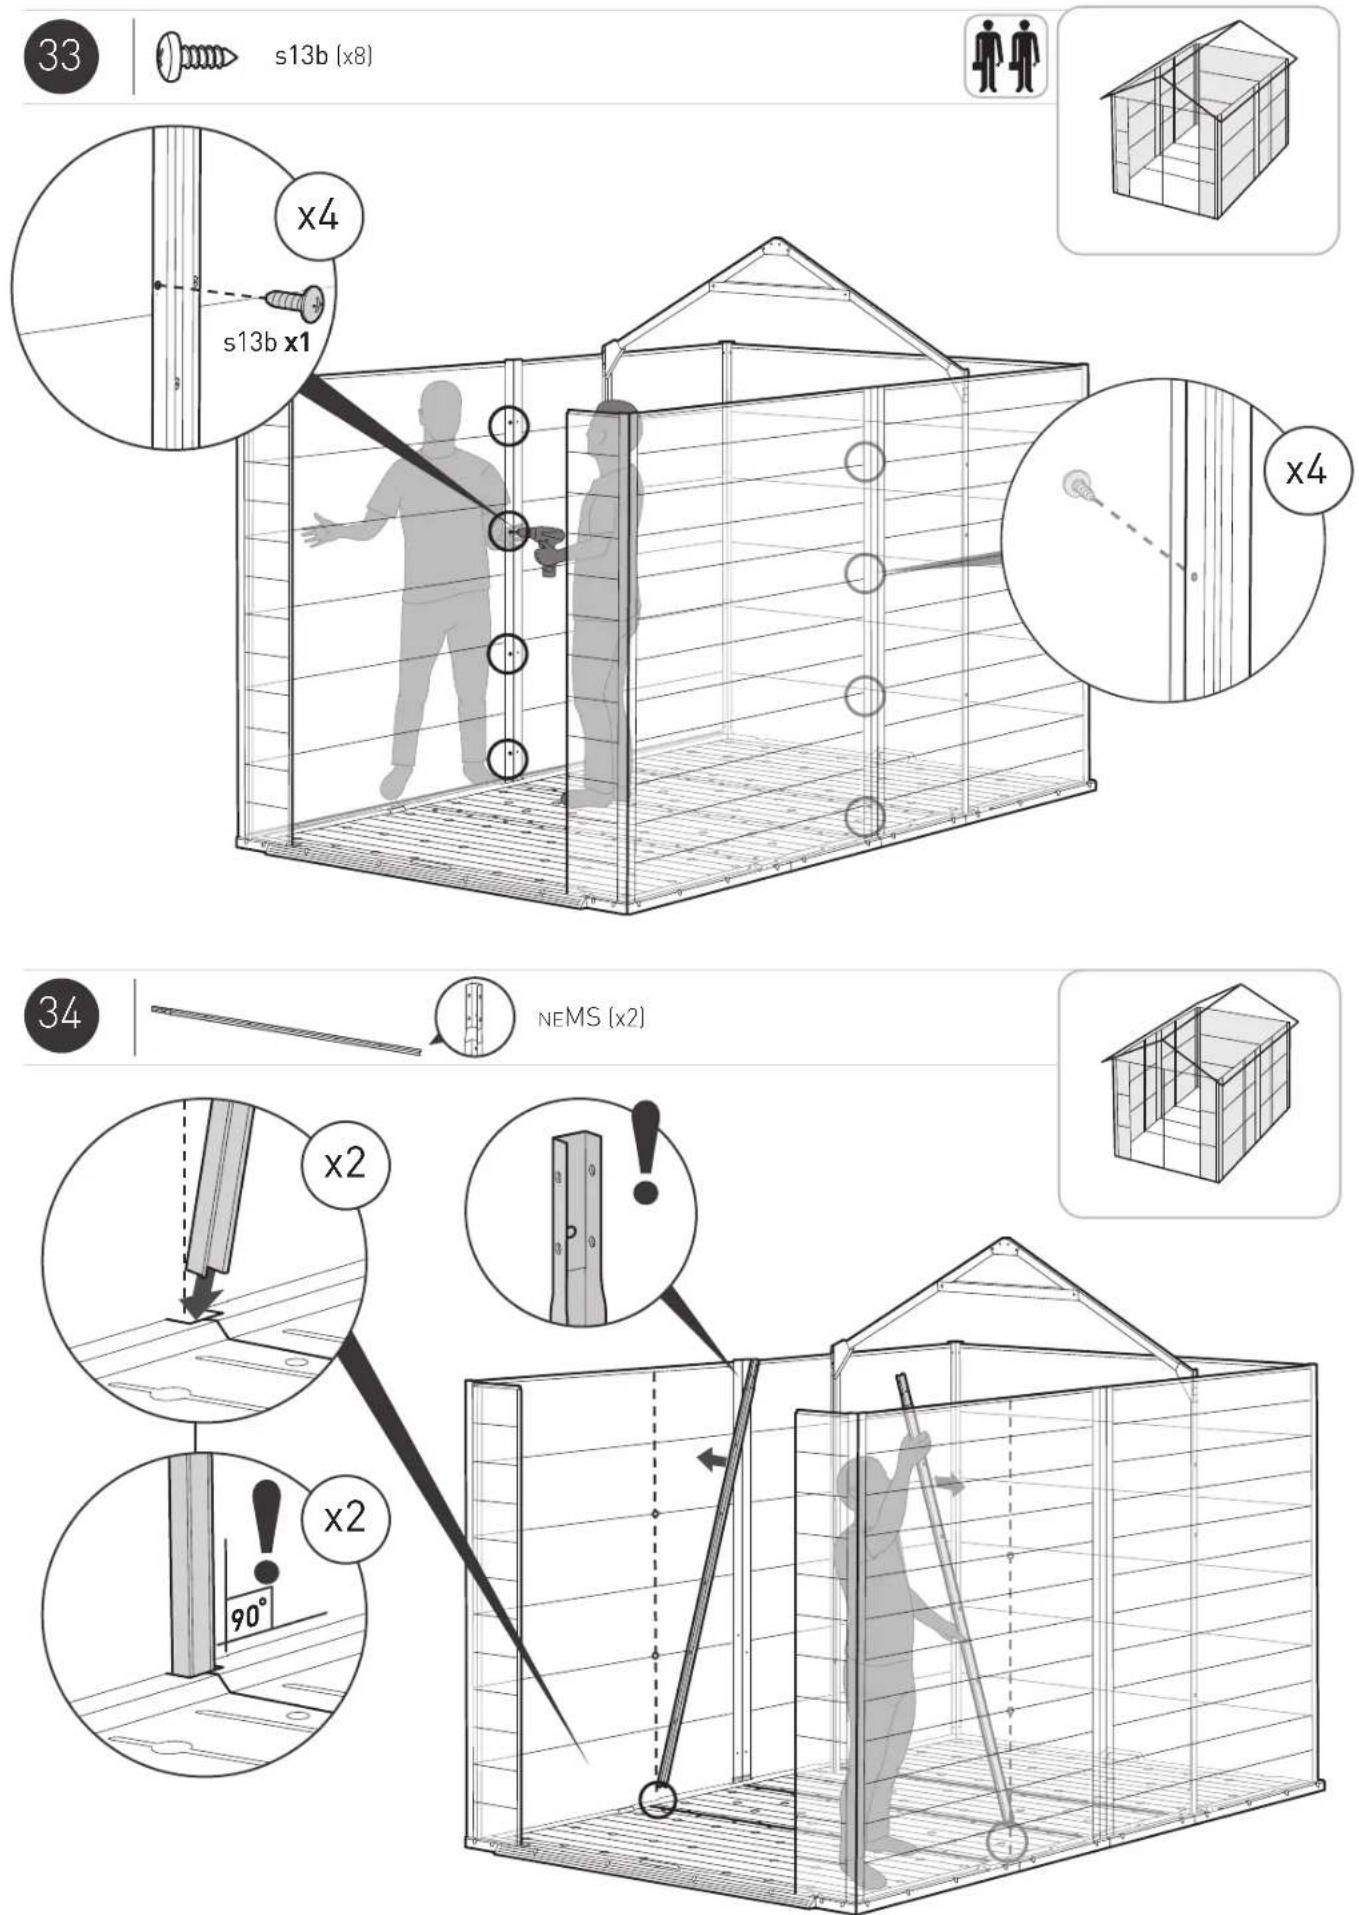
s13b (x8)
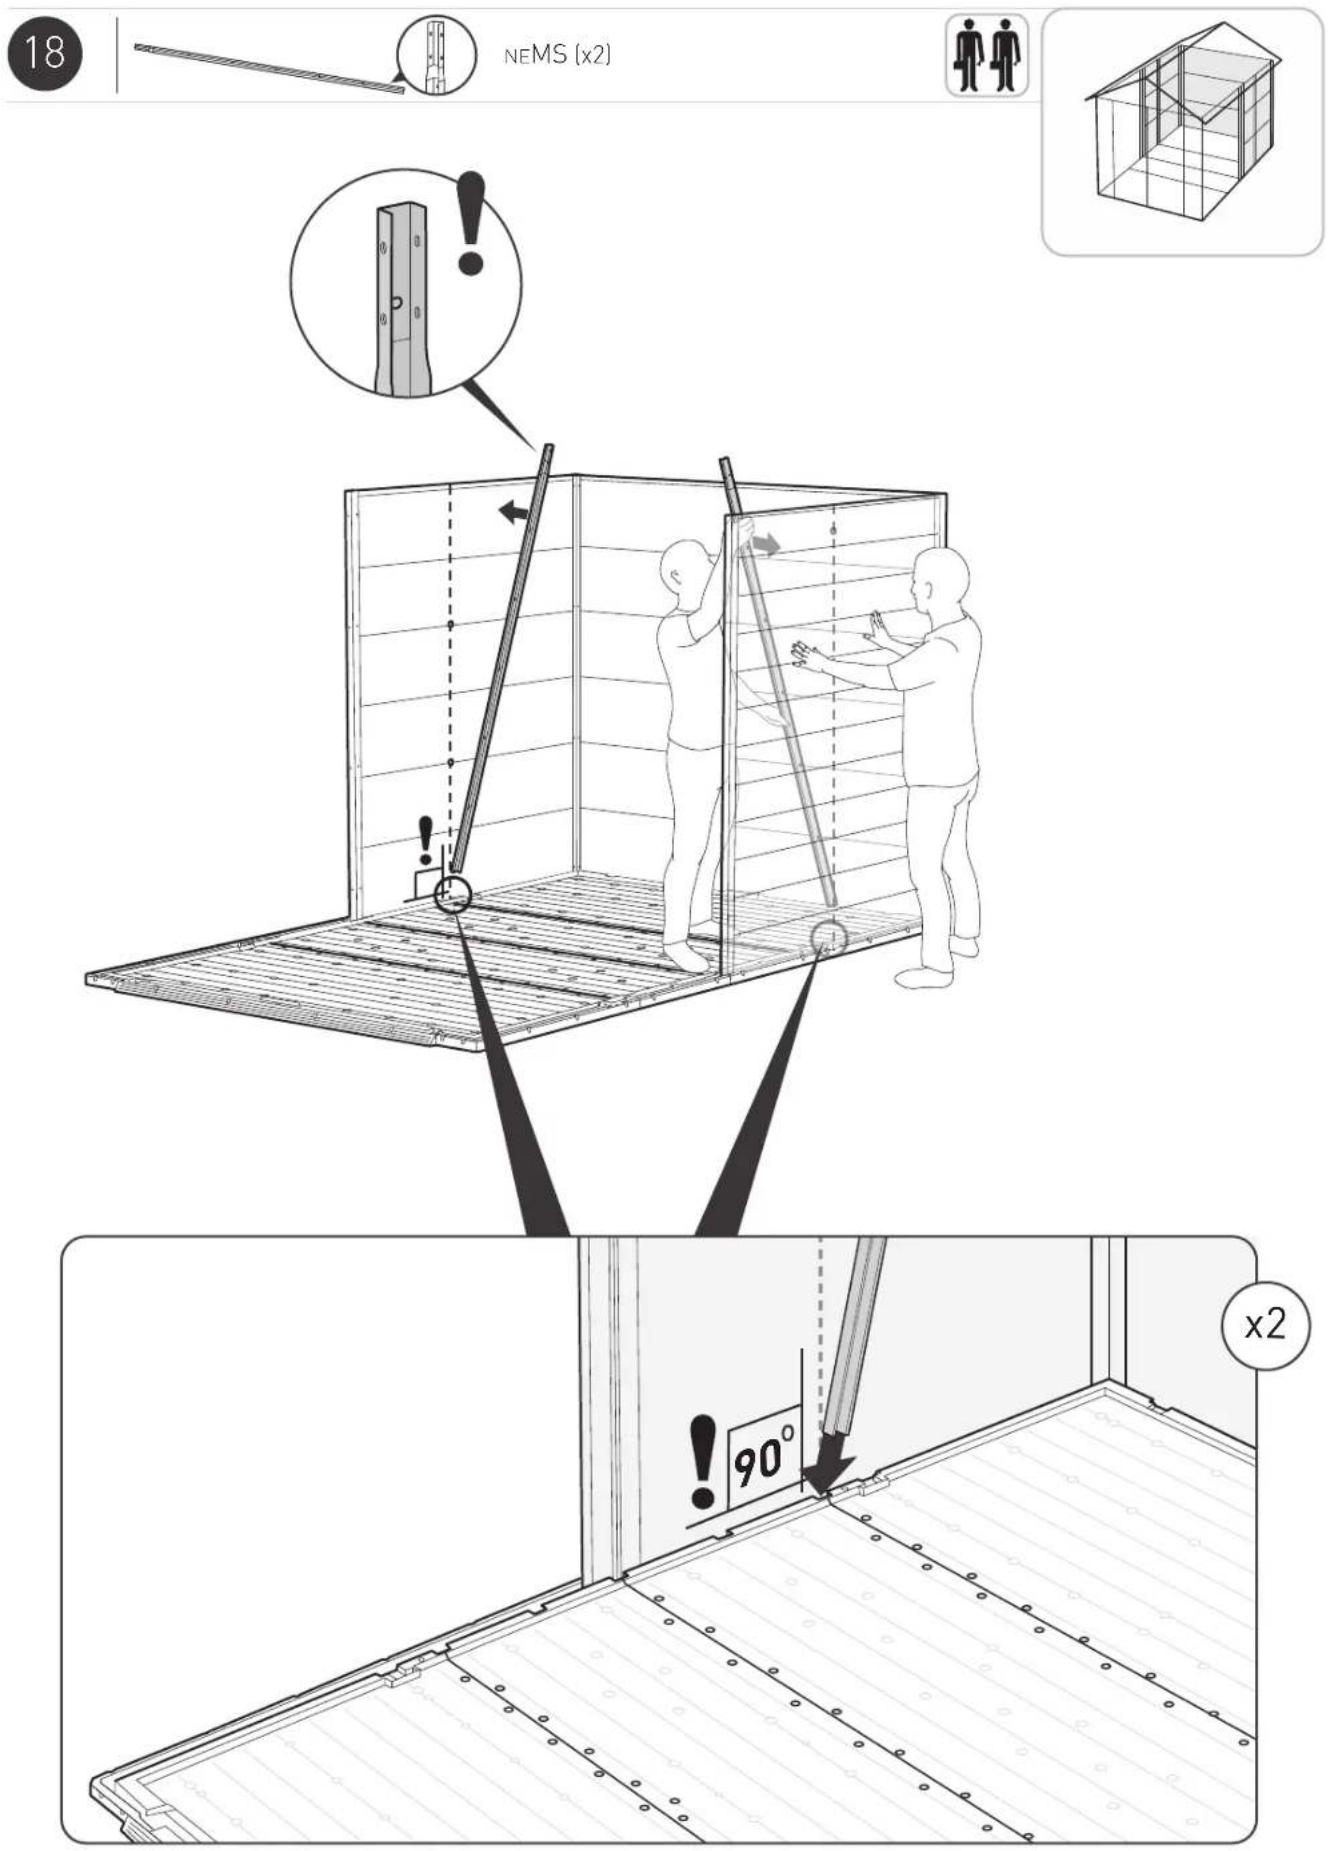
NEMS (x2)
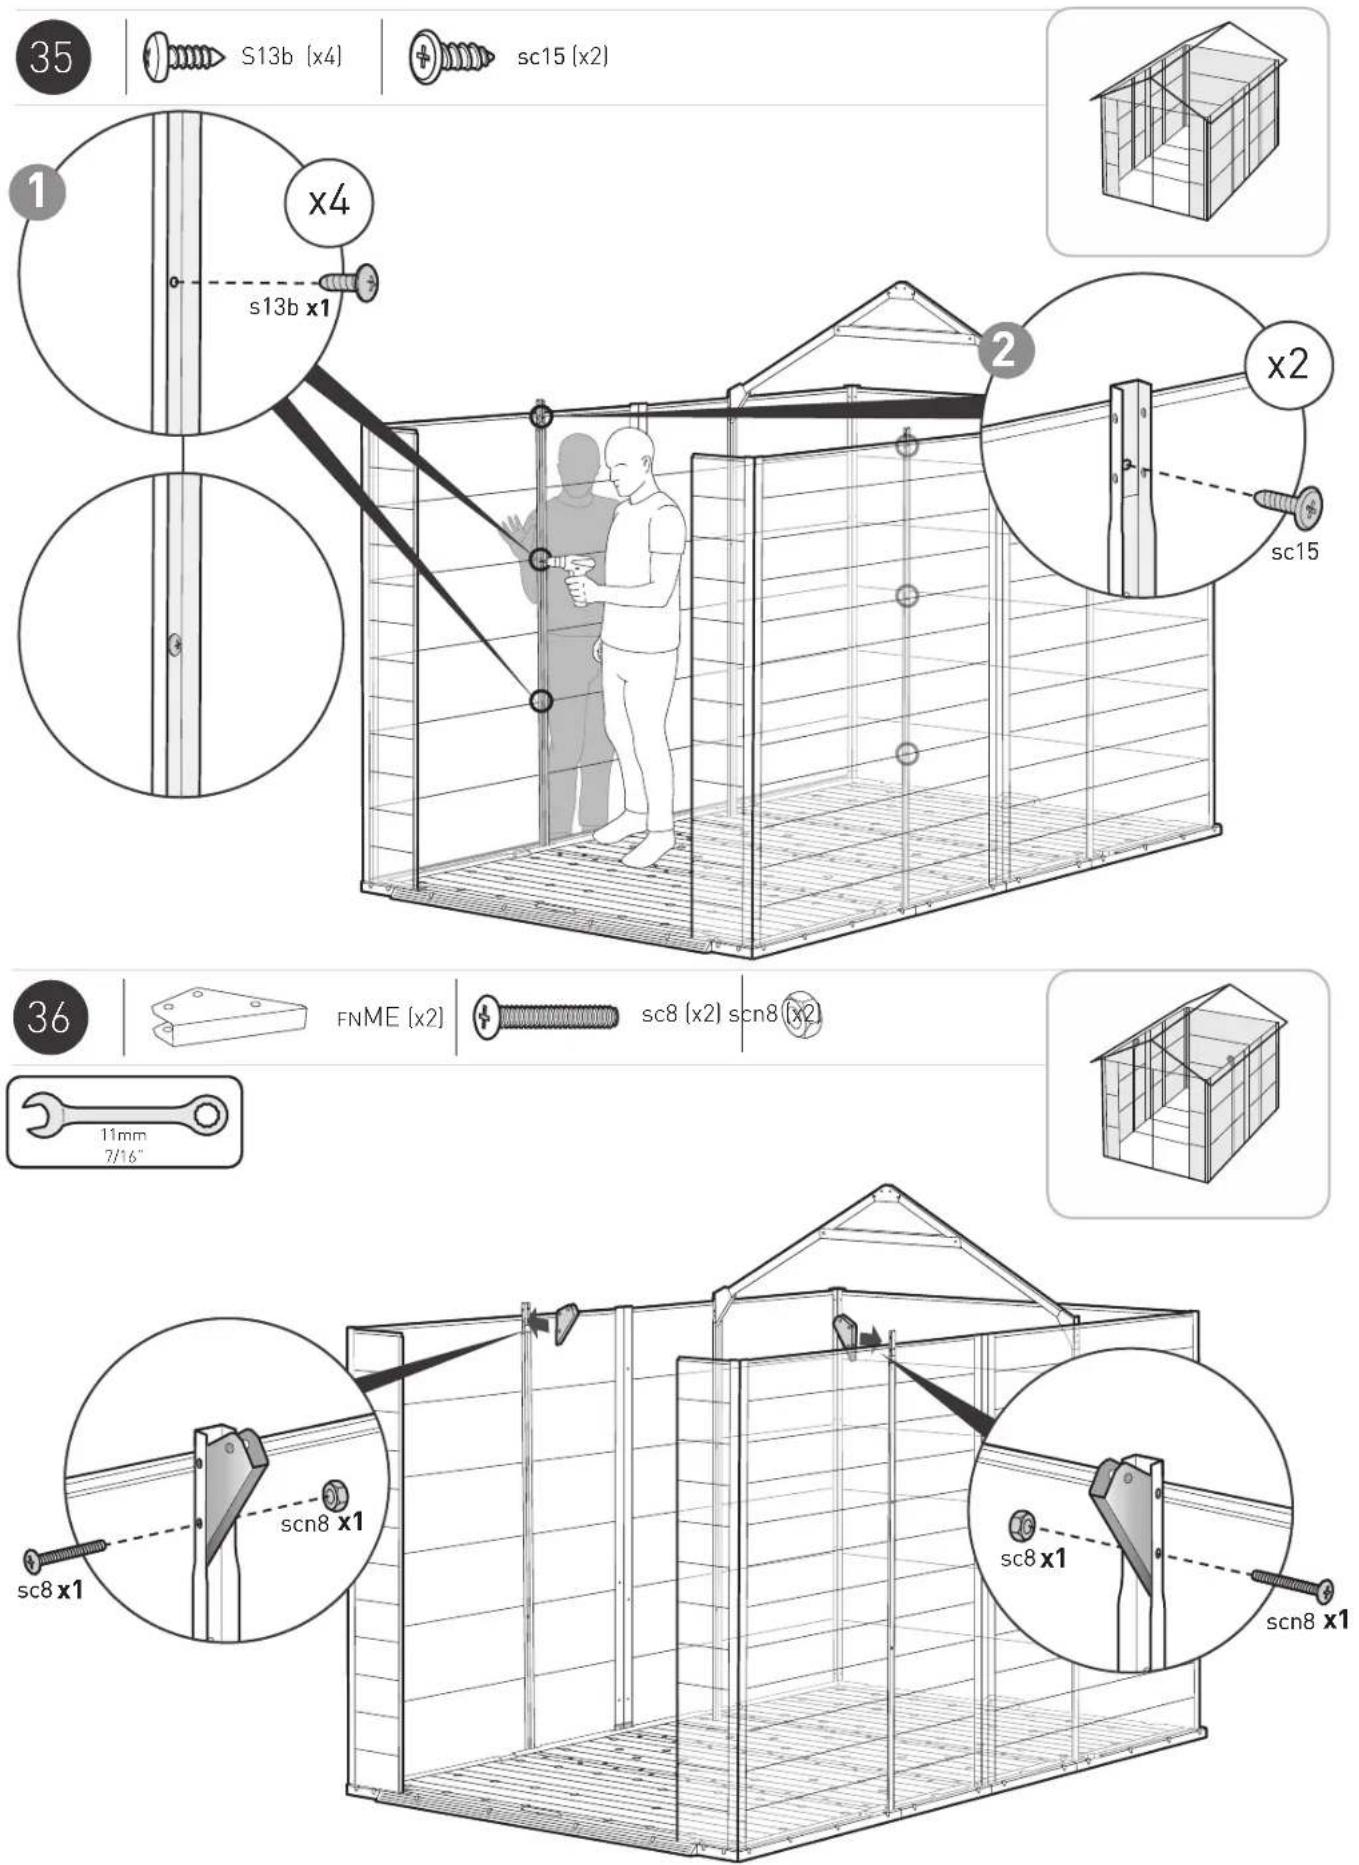
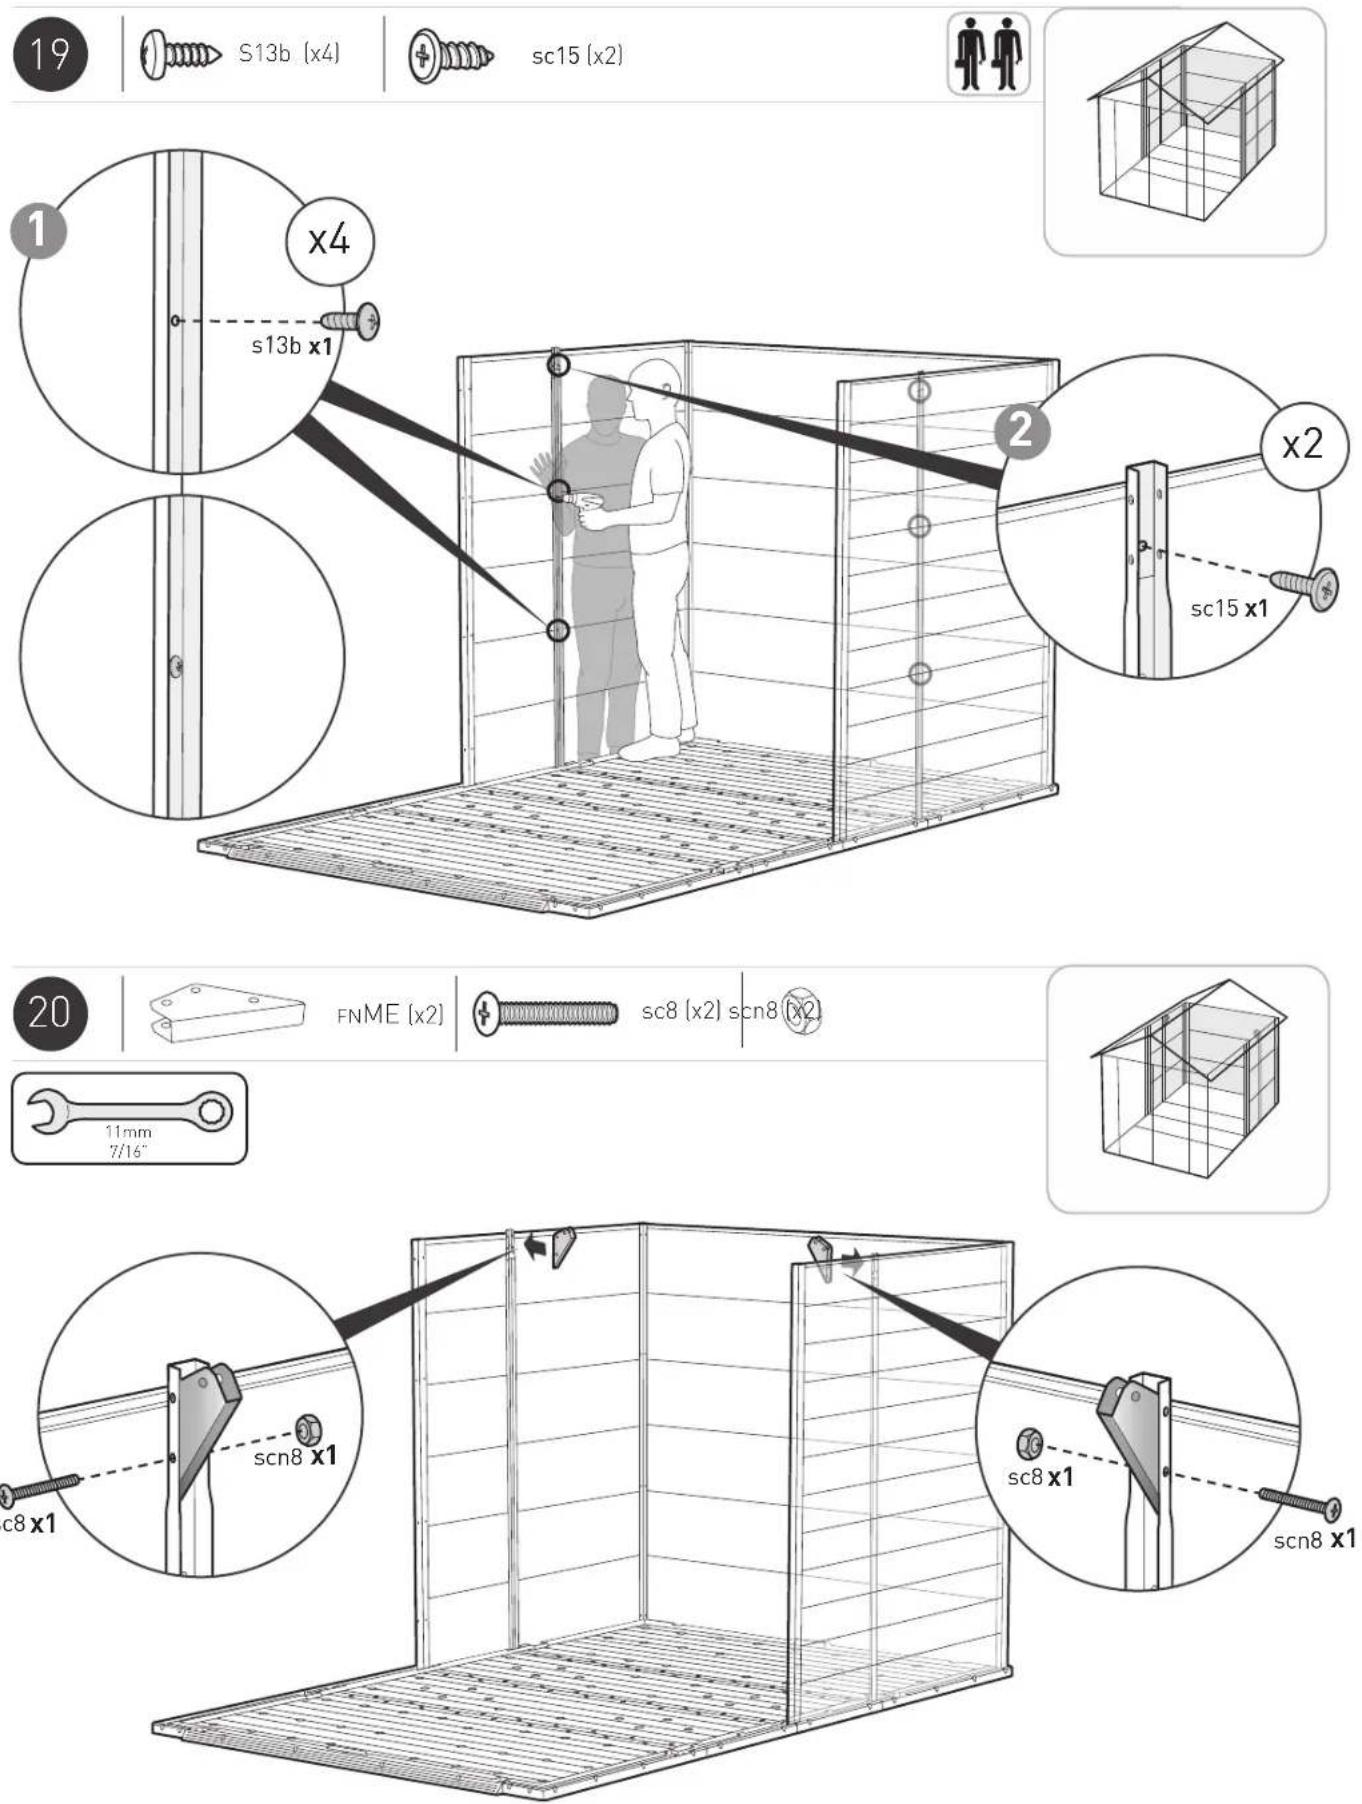
S13b [x4]
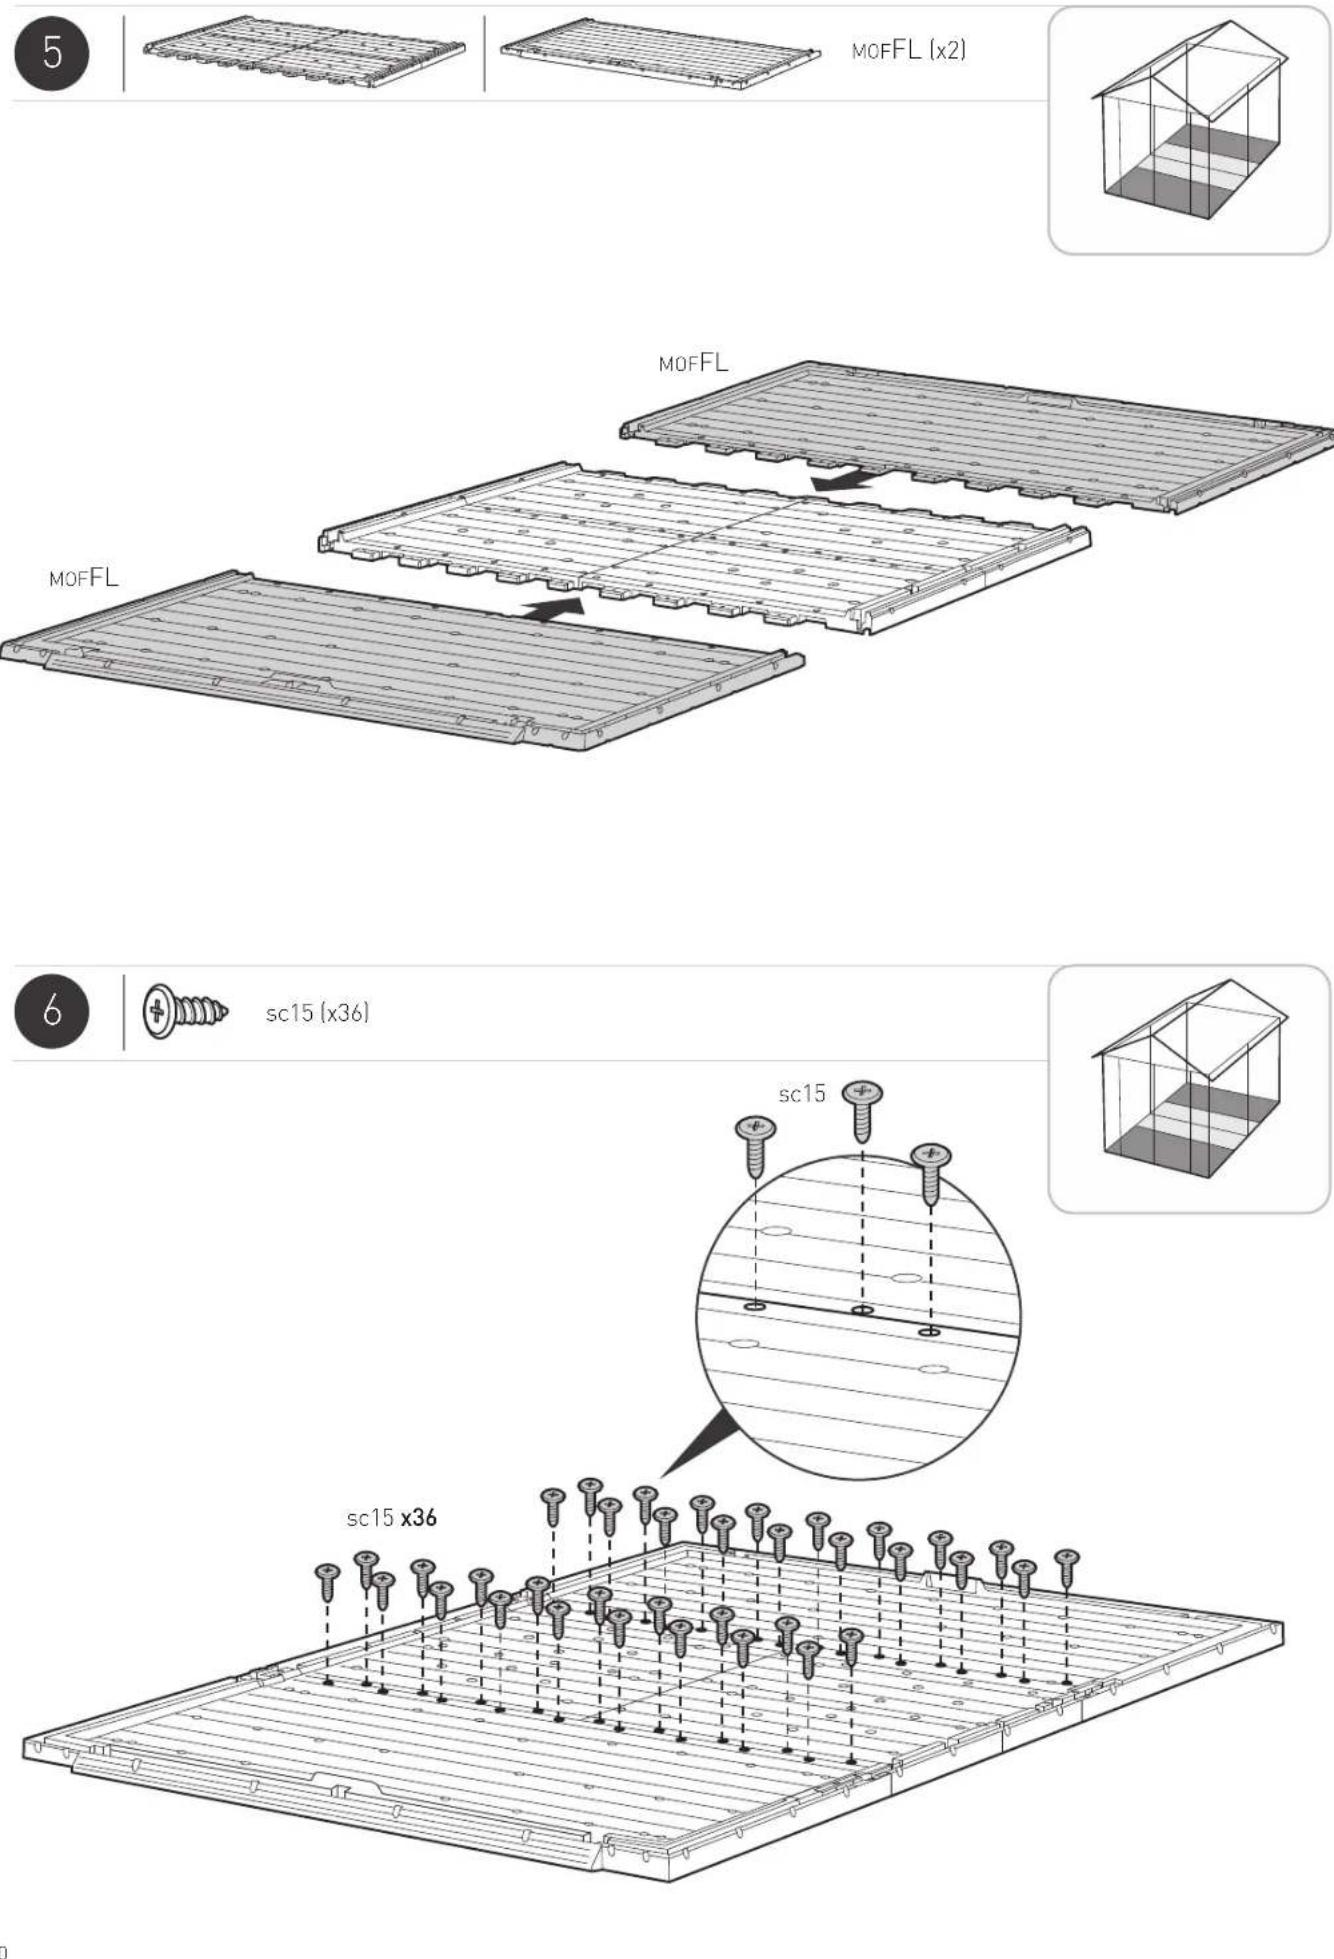
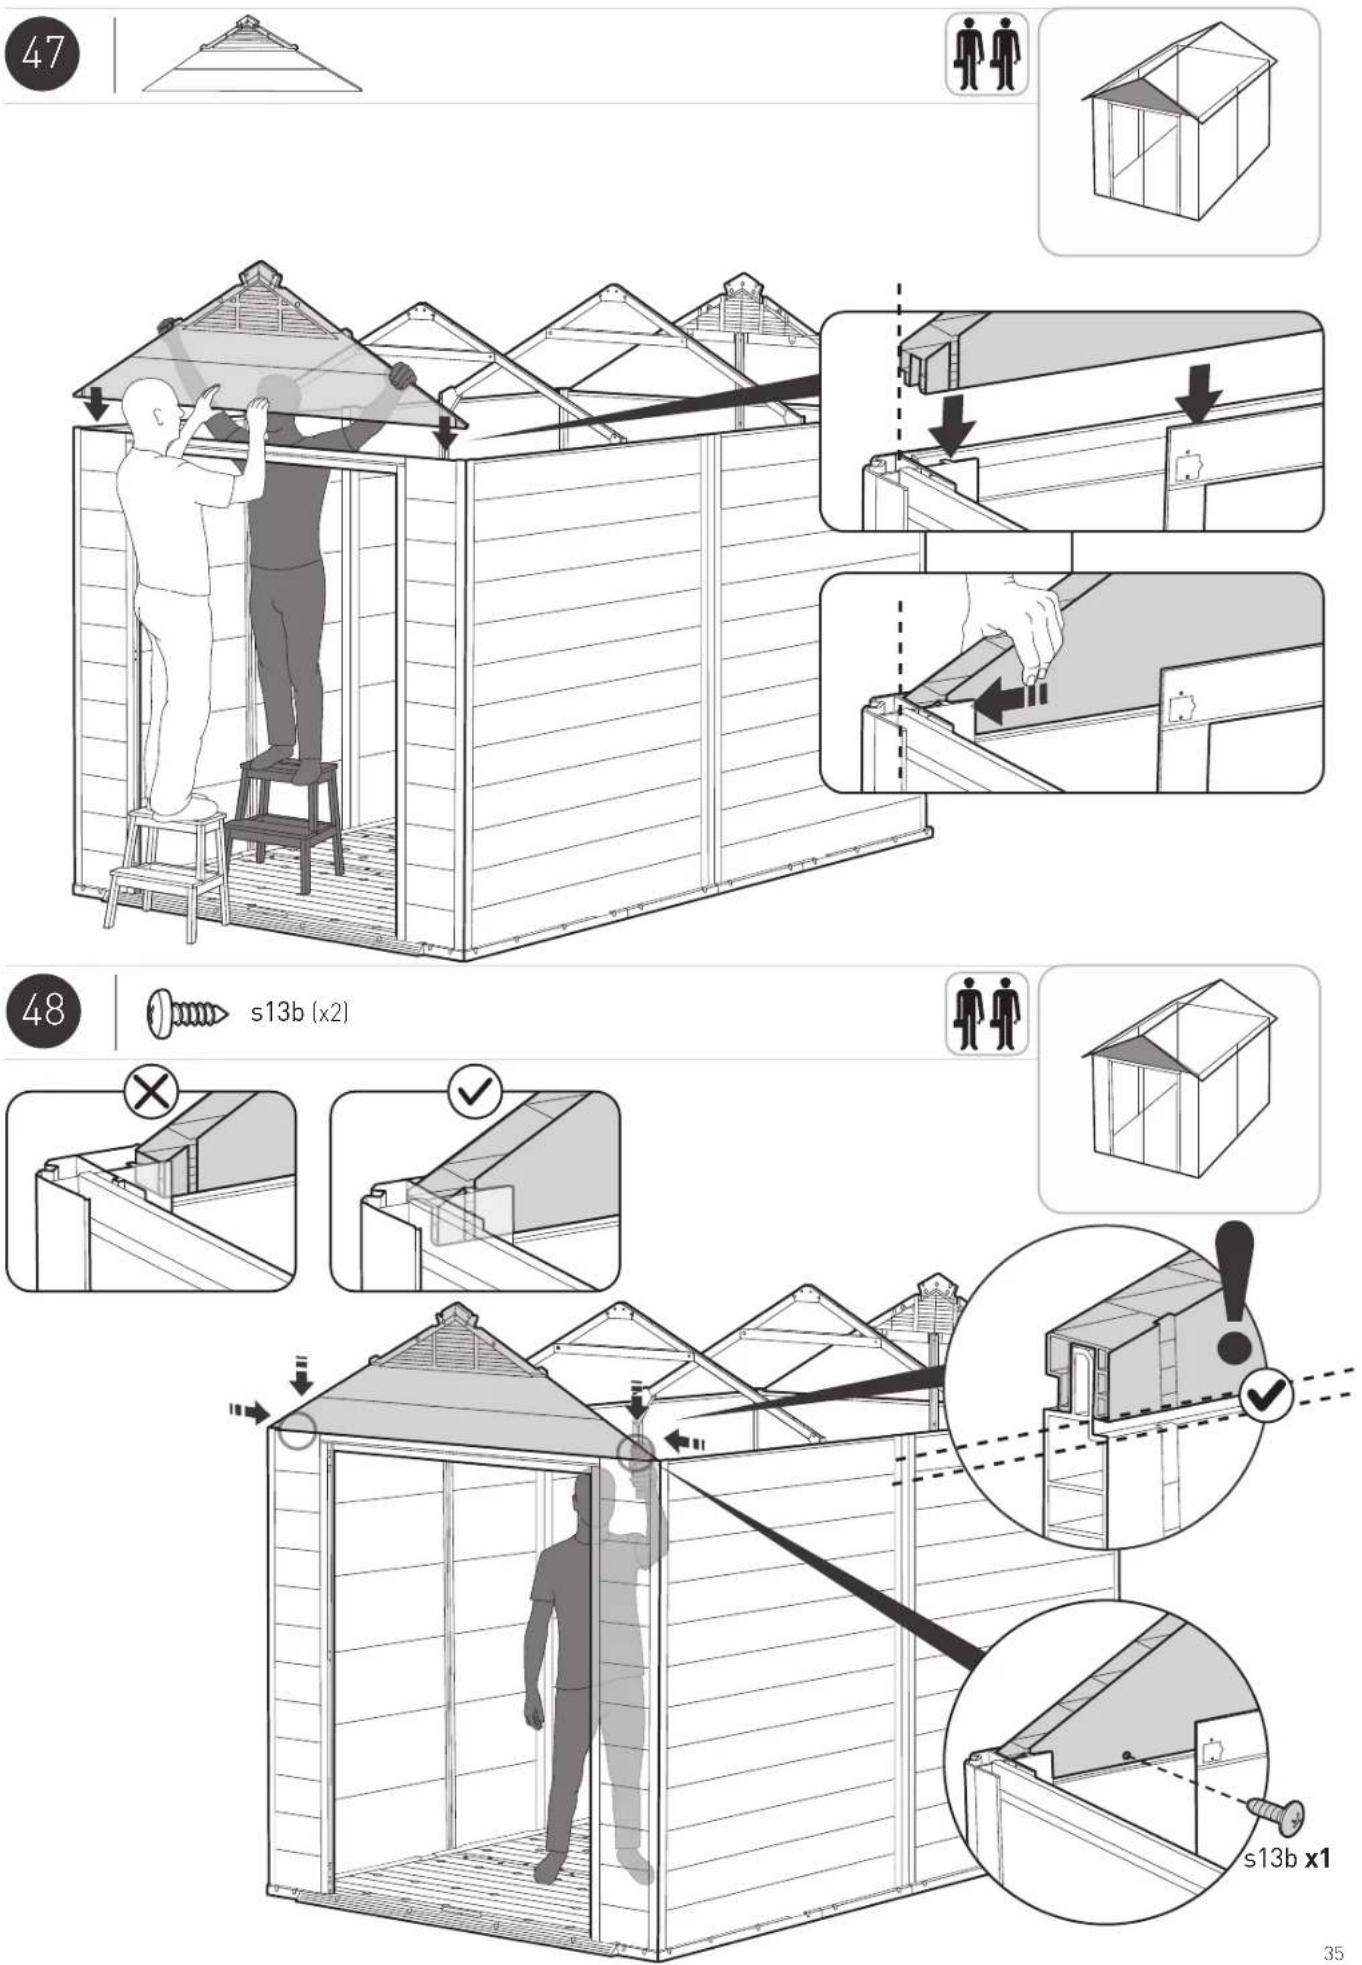
sc15 (x2)
FNME [x2]
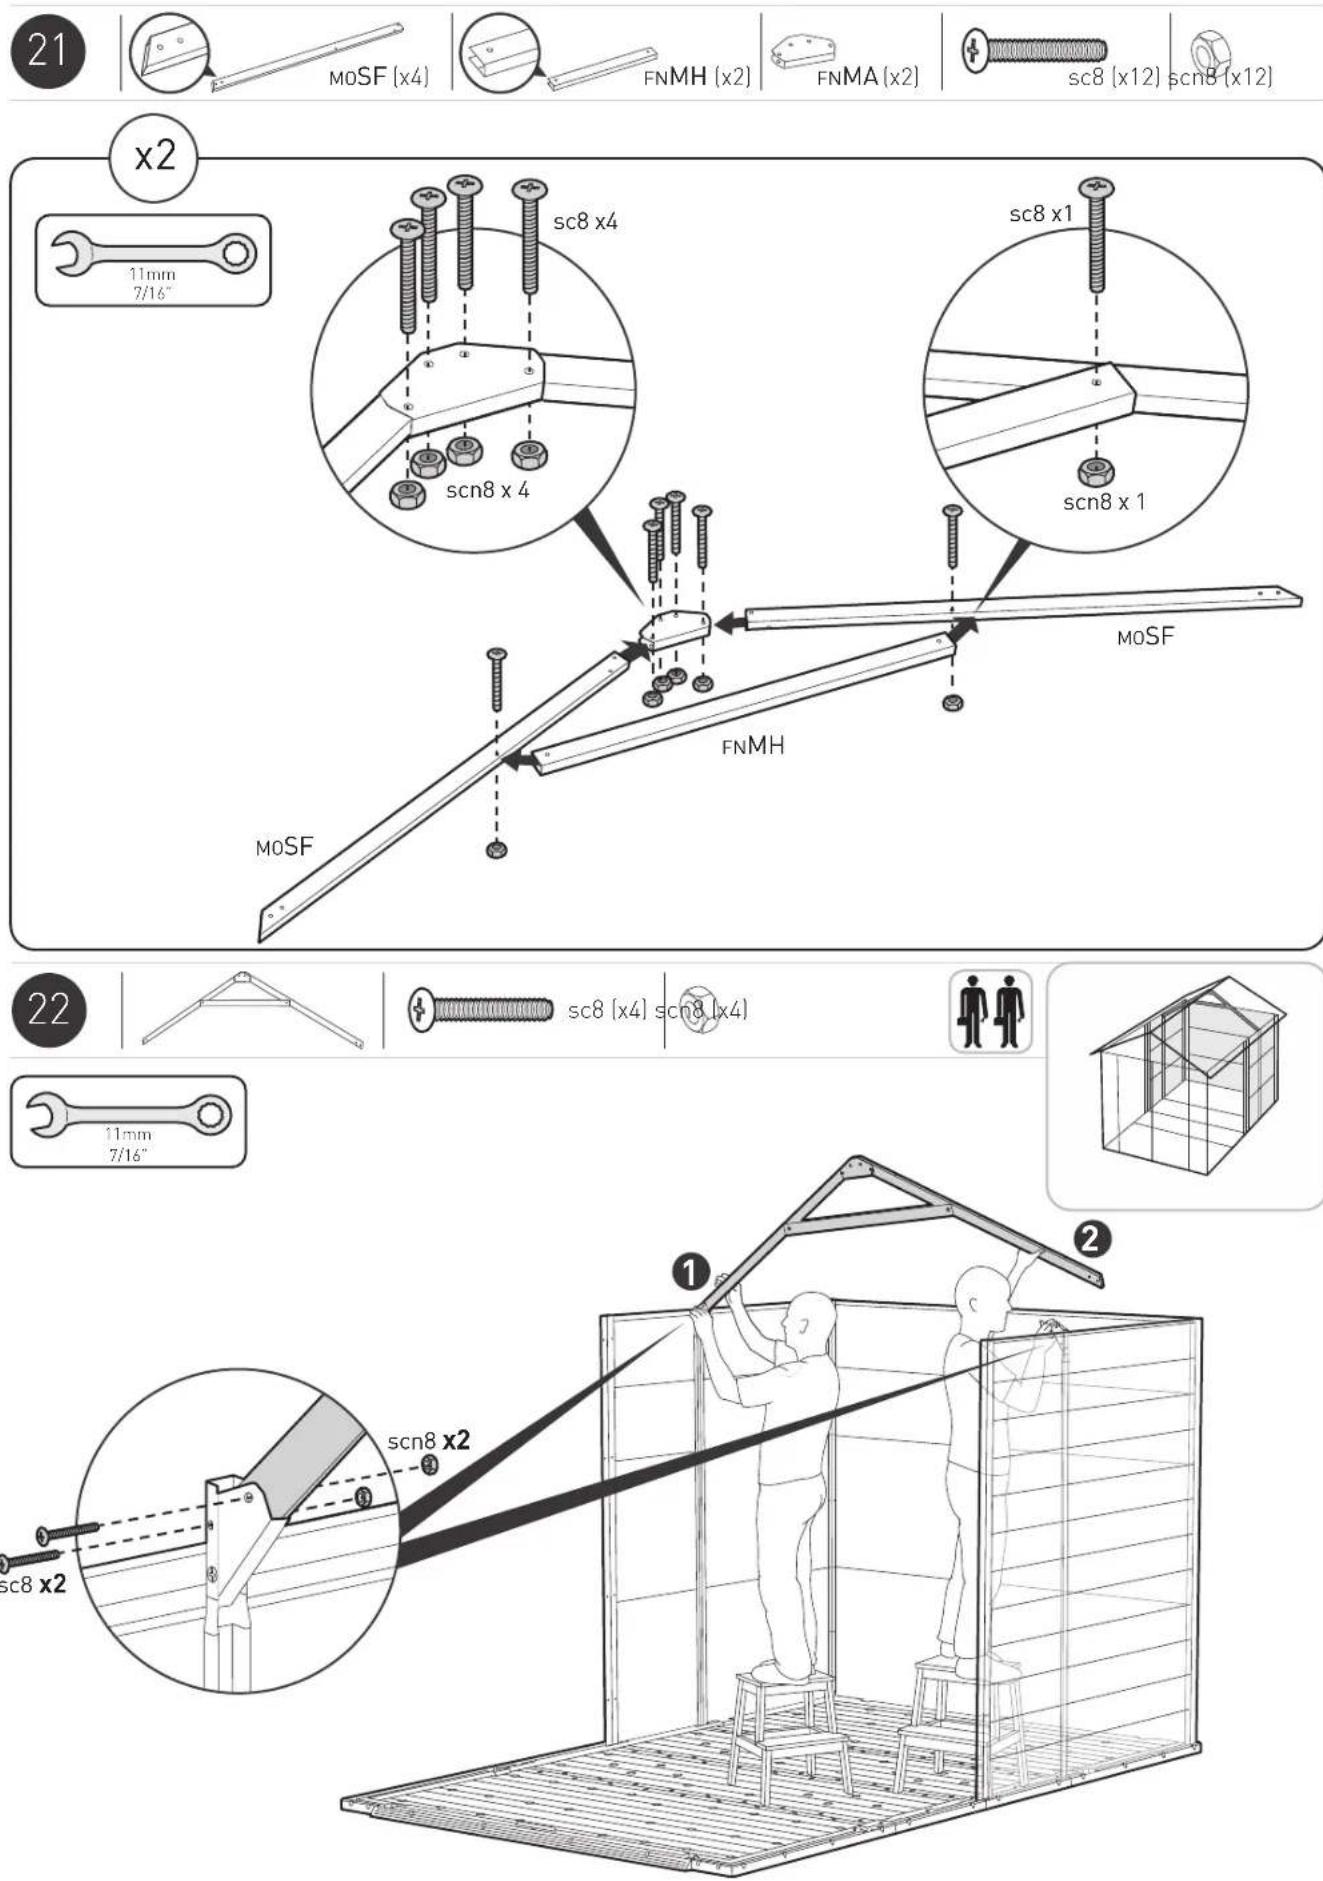
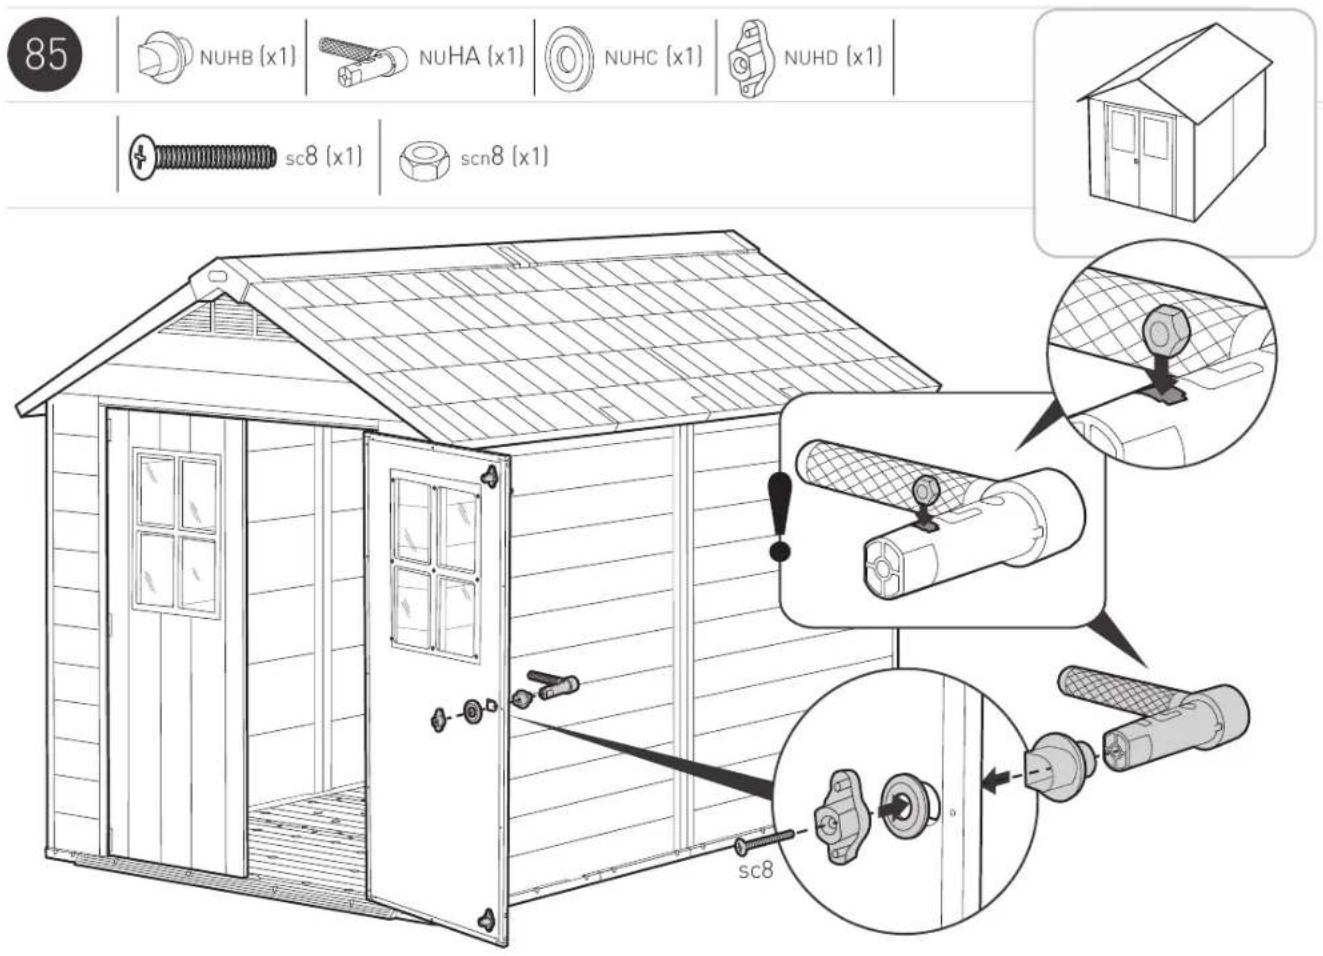
sc8 (x2) scn8
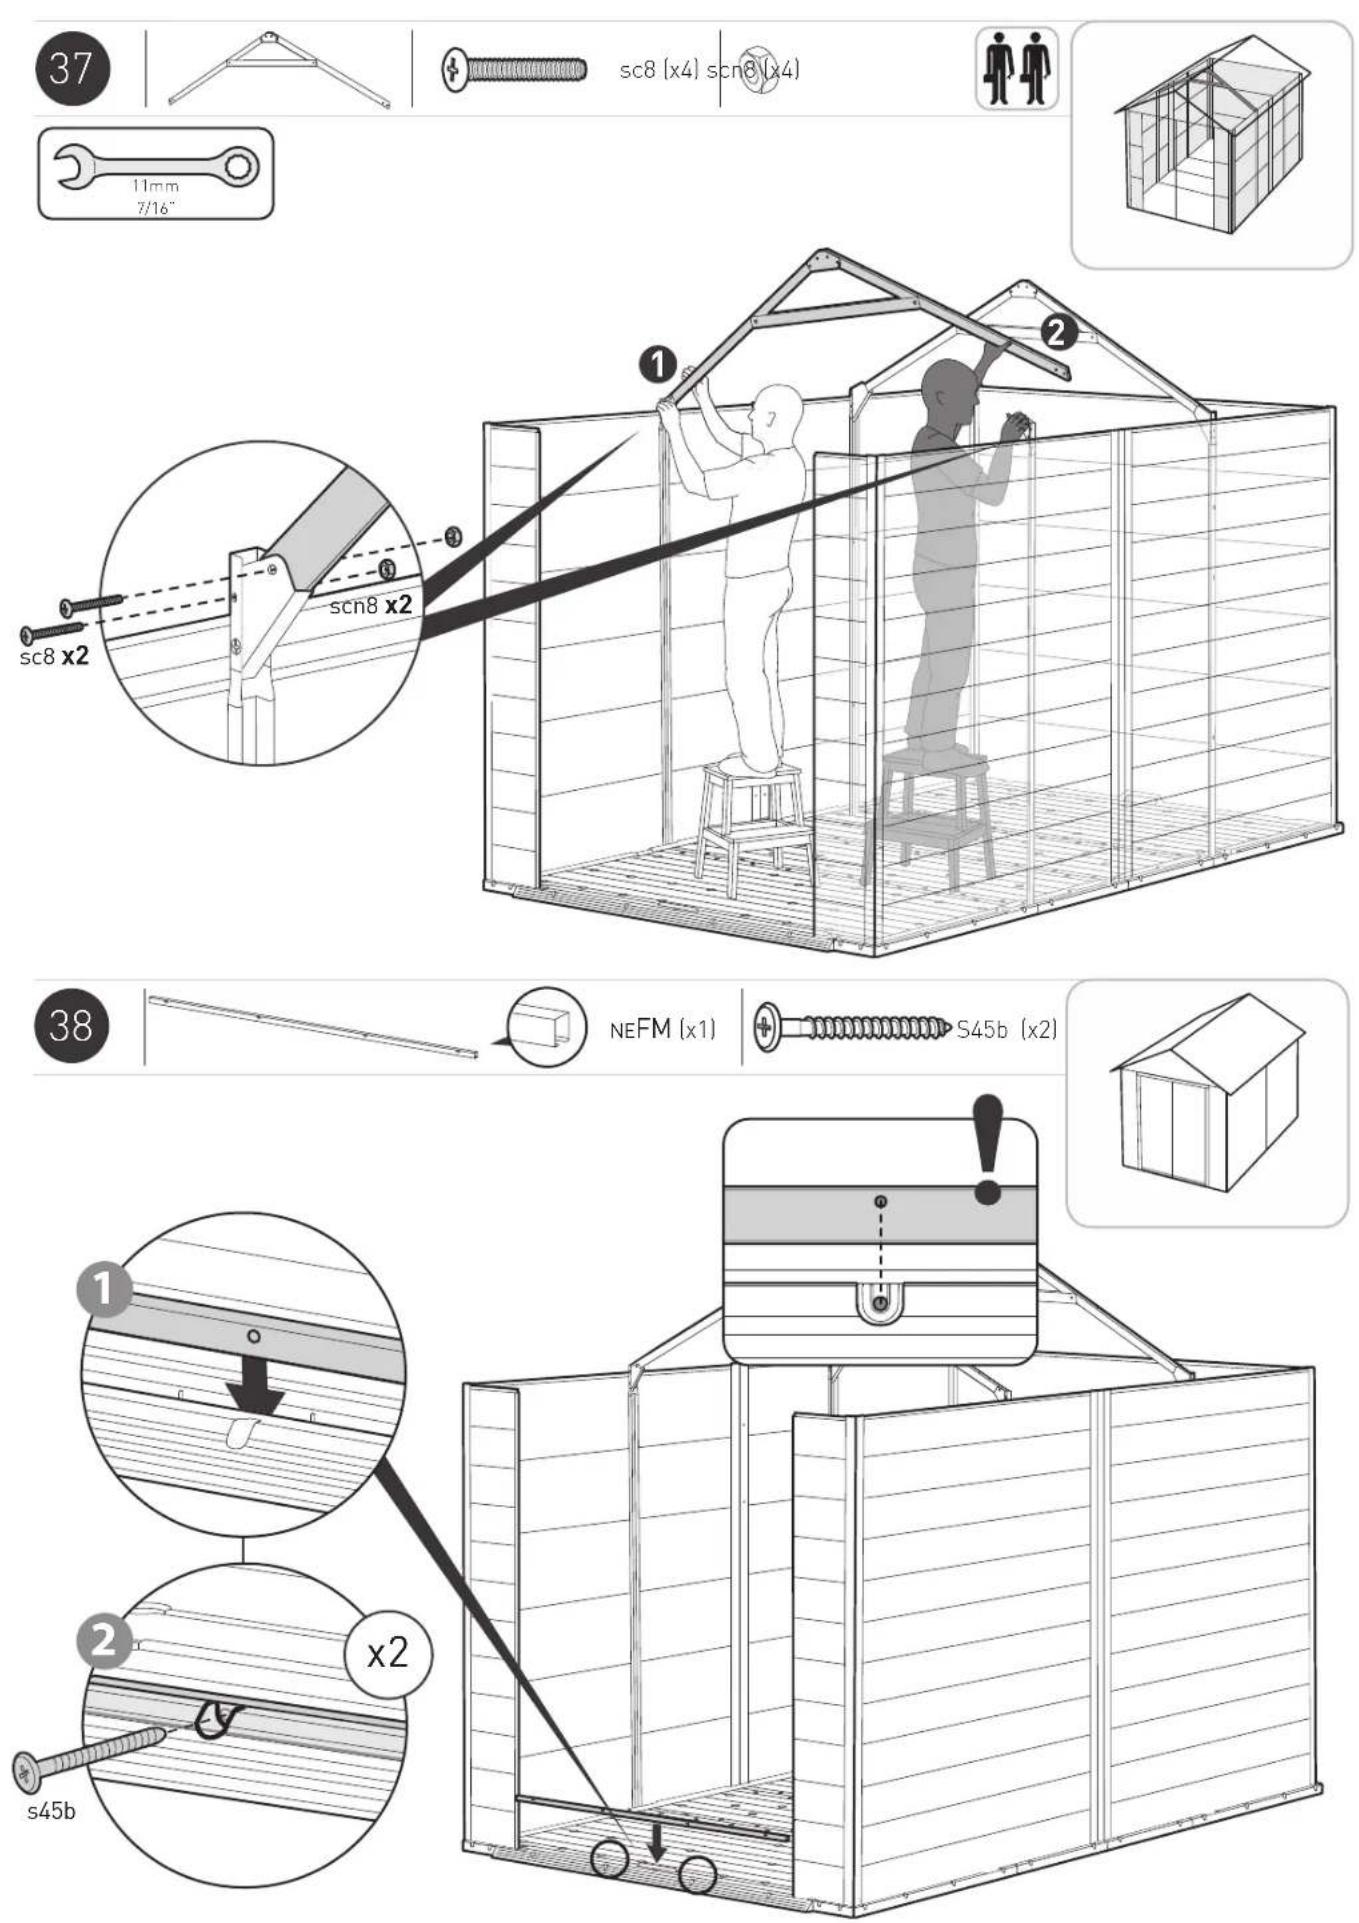
sc8 (x4) scn8 (x4)
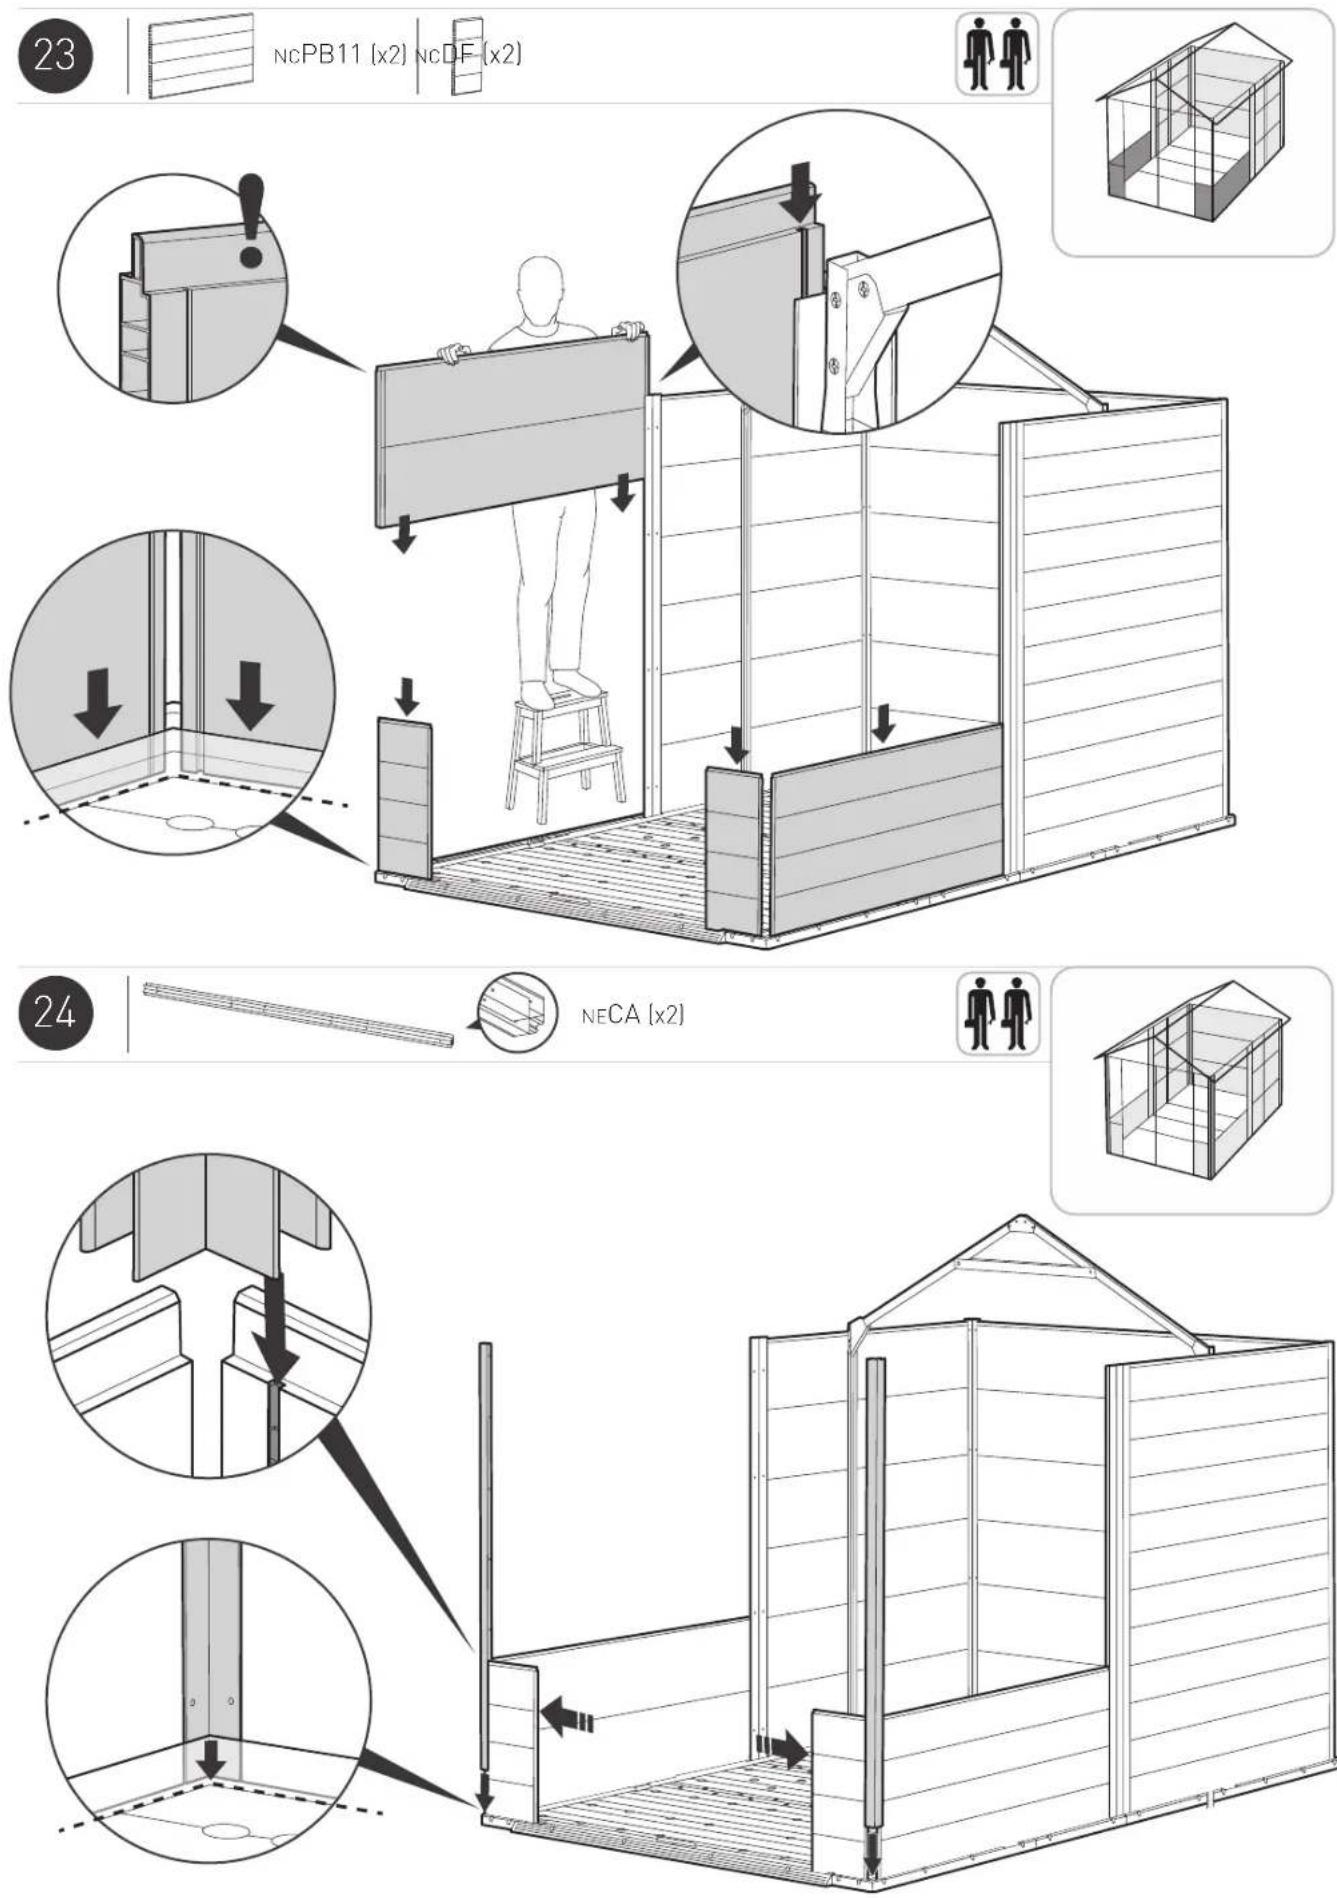
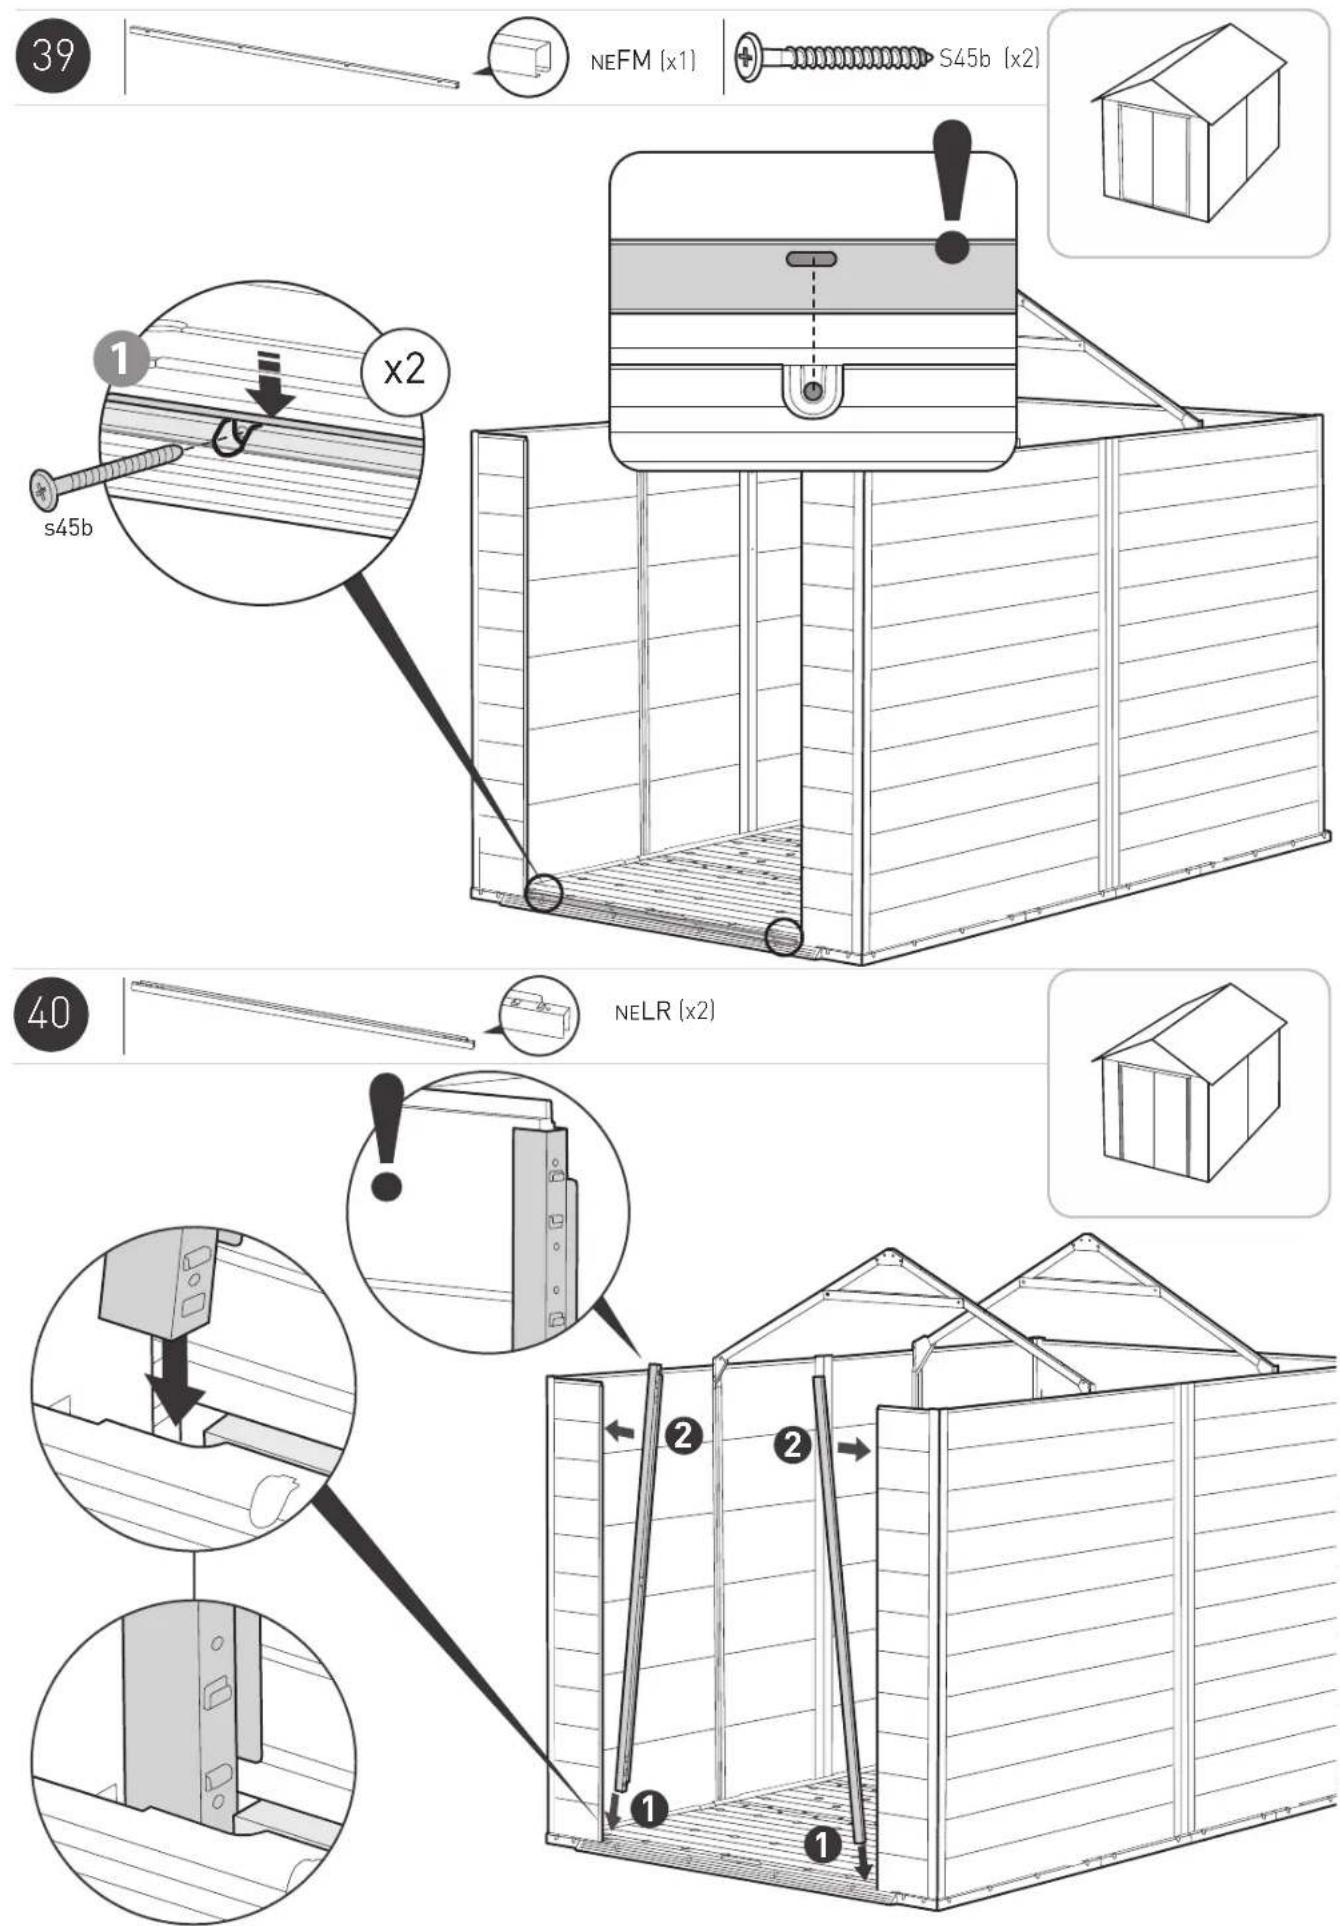
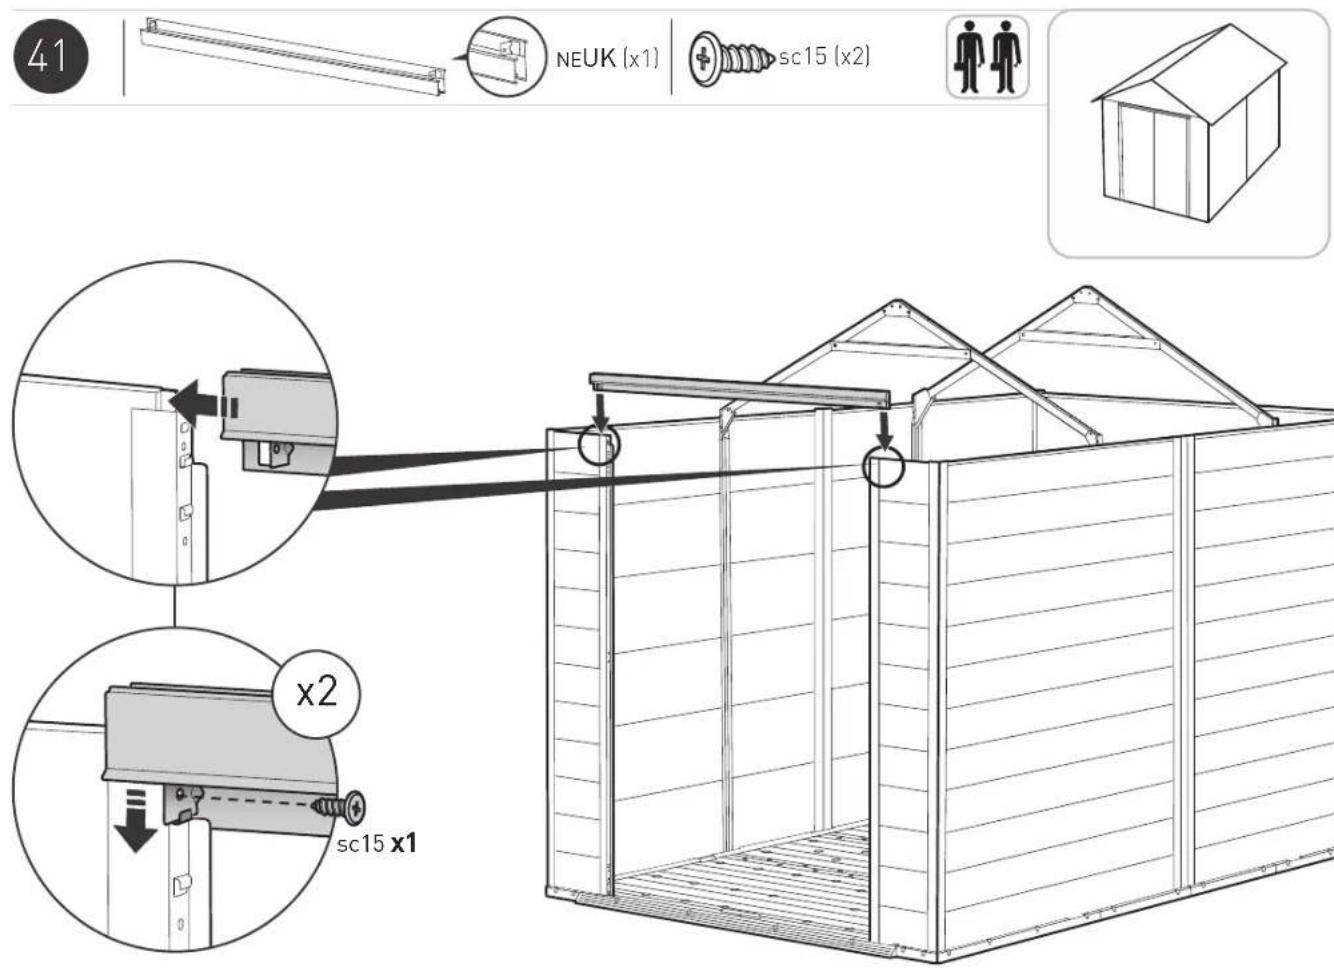
NEFM (x1)
S45b (x2)
42

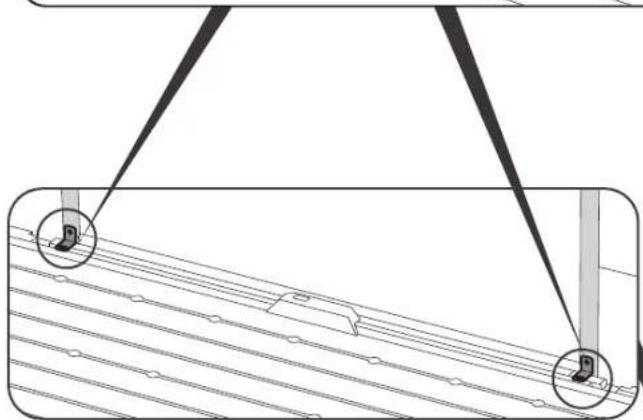
NEDPC (x2)


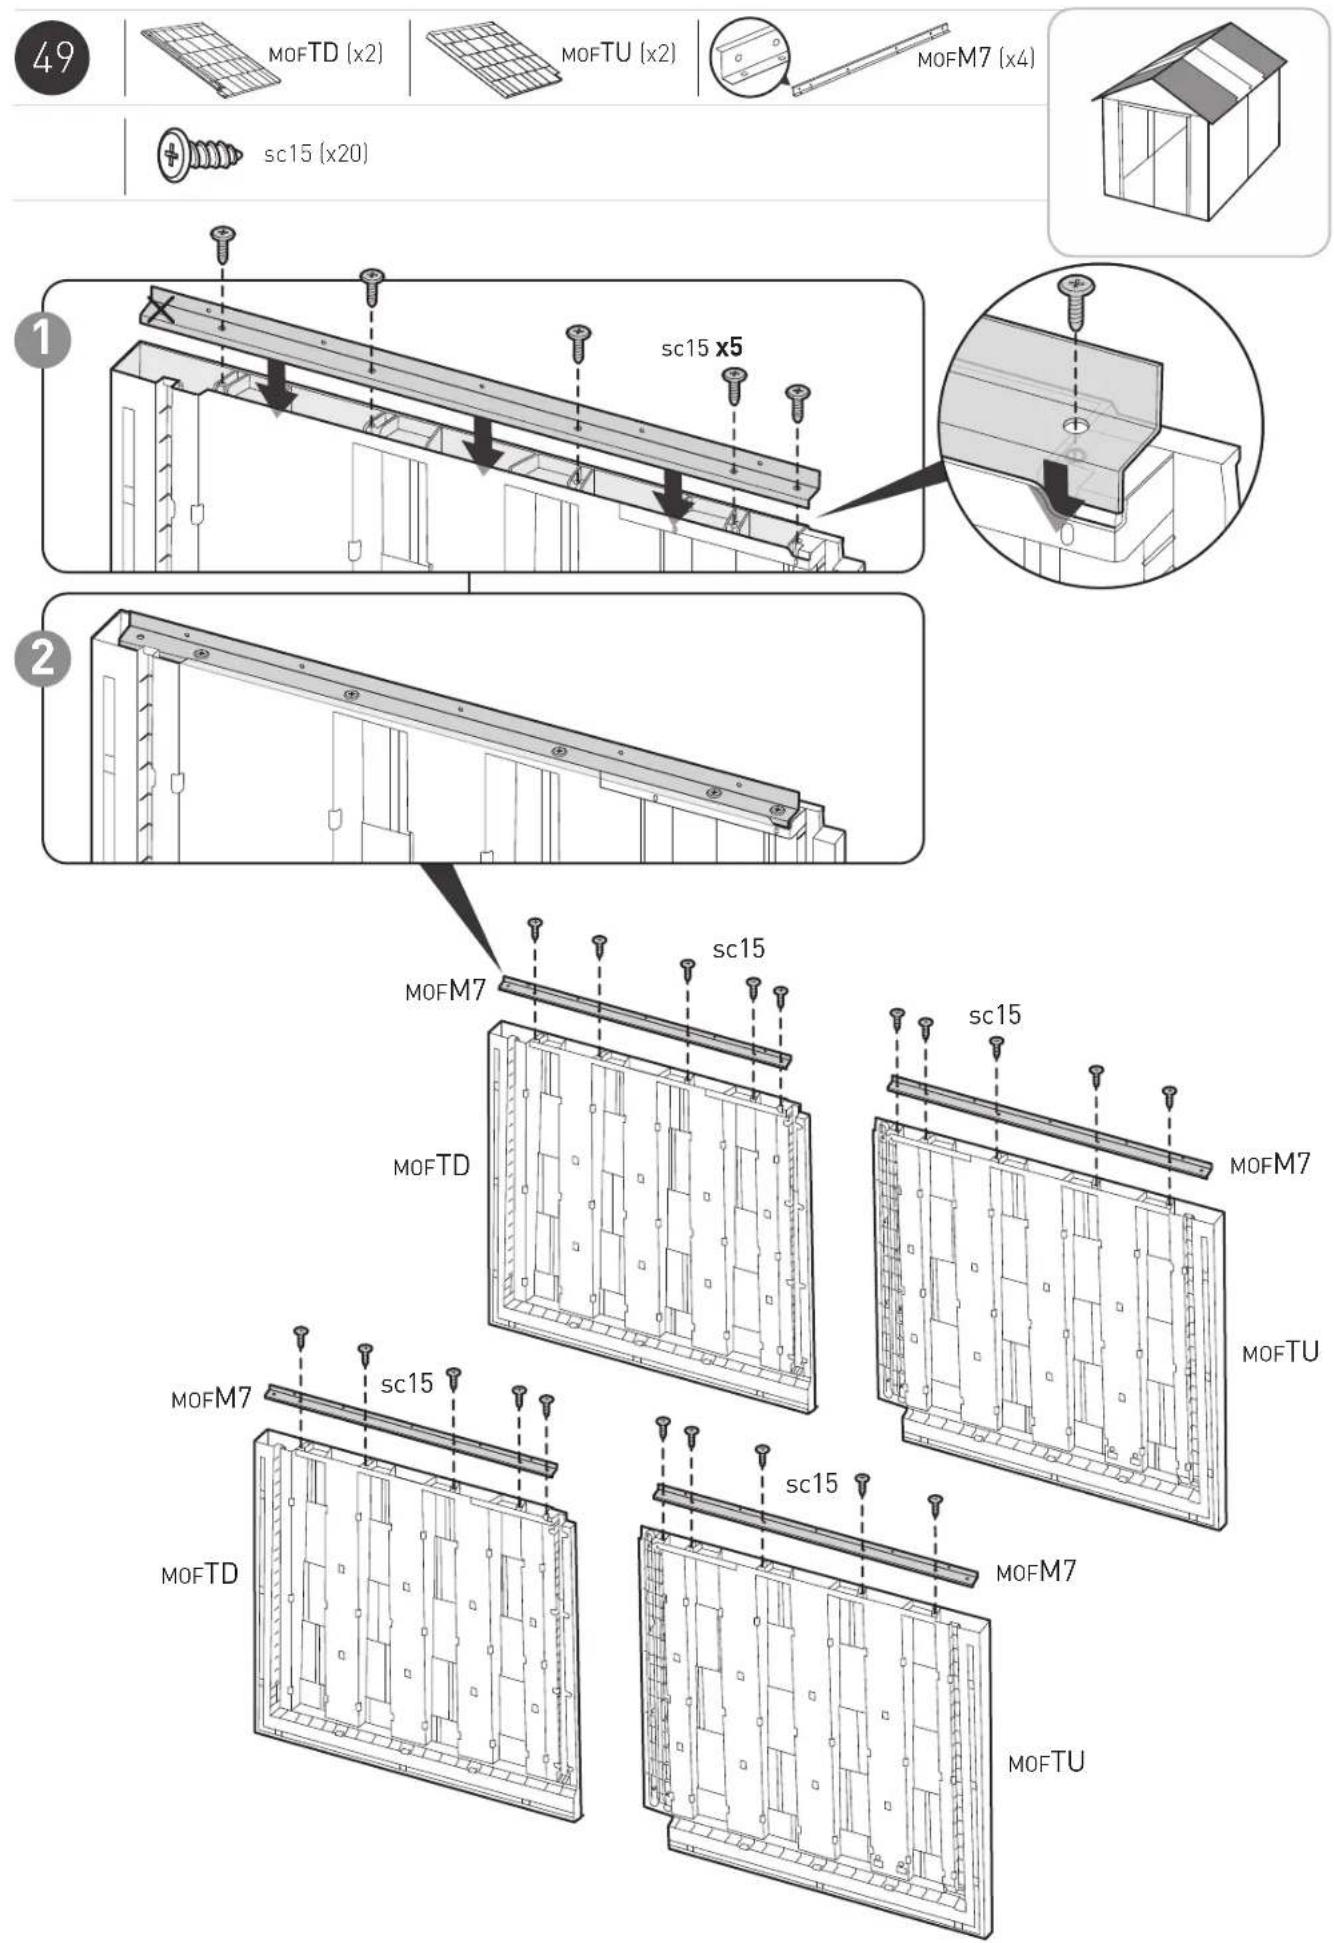
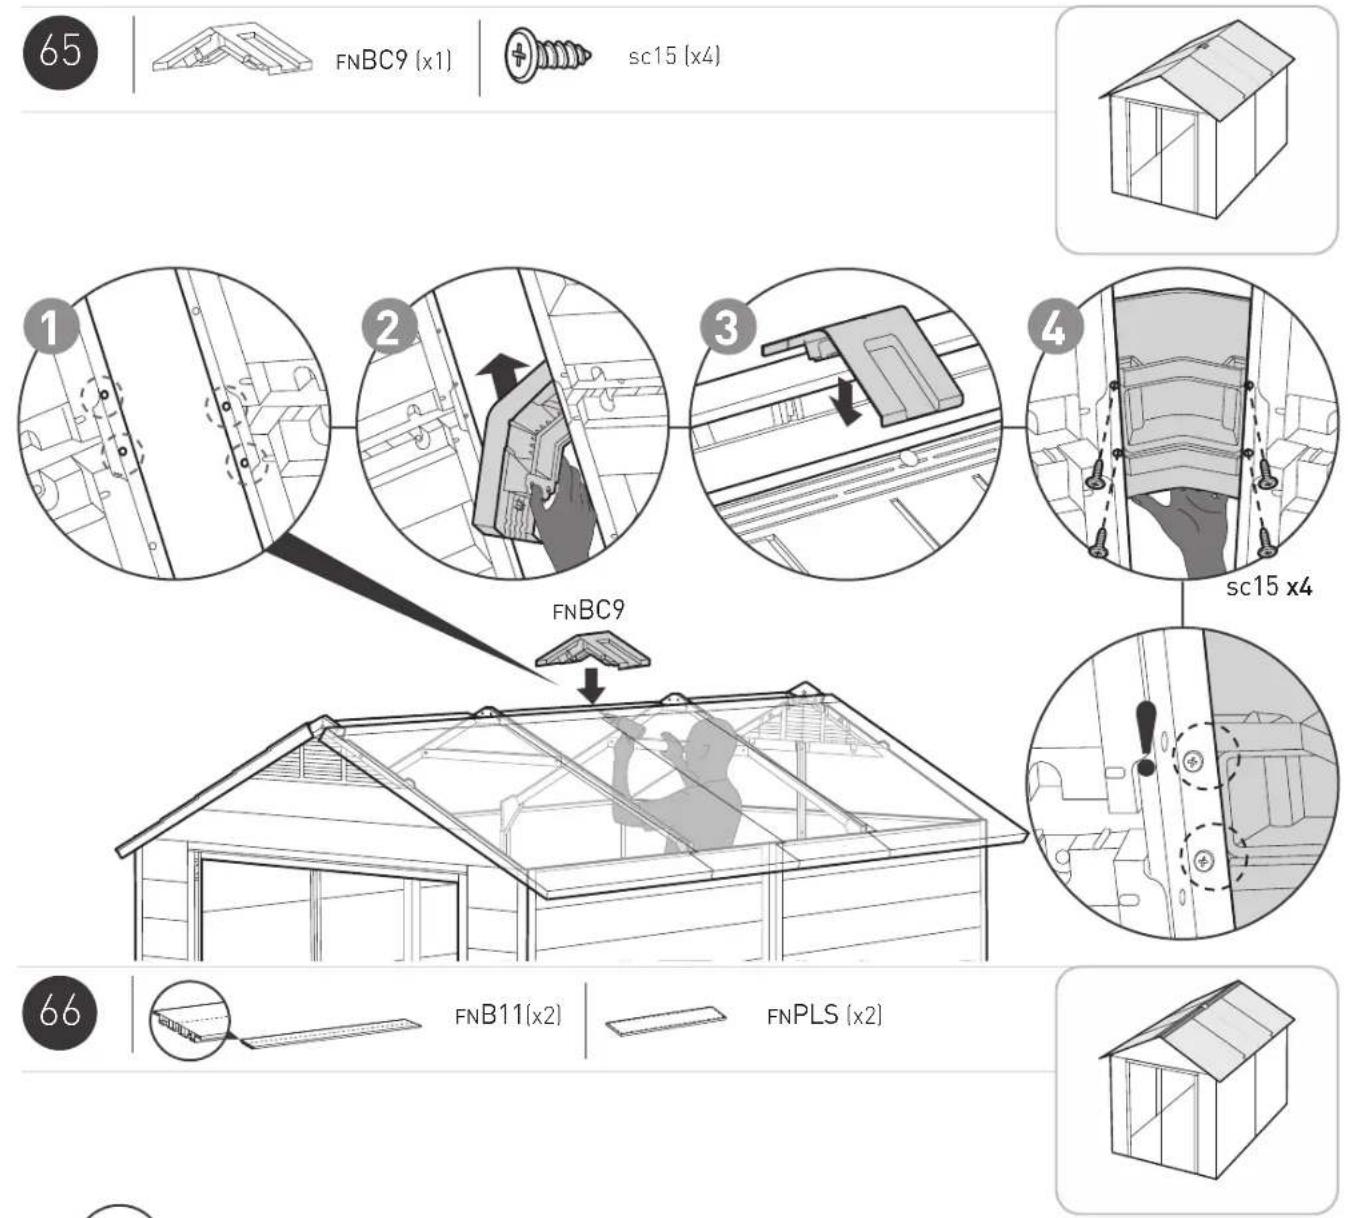
sc15 (x4)
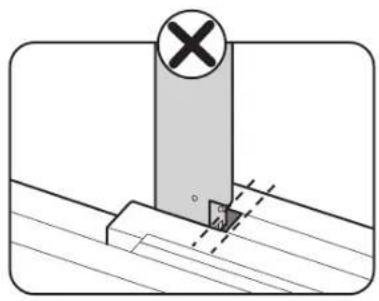
natural_image
Technical diagram showing a vertical support structure with a cross symbol and a small inset detail (no text or labels)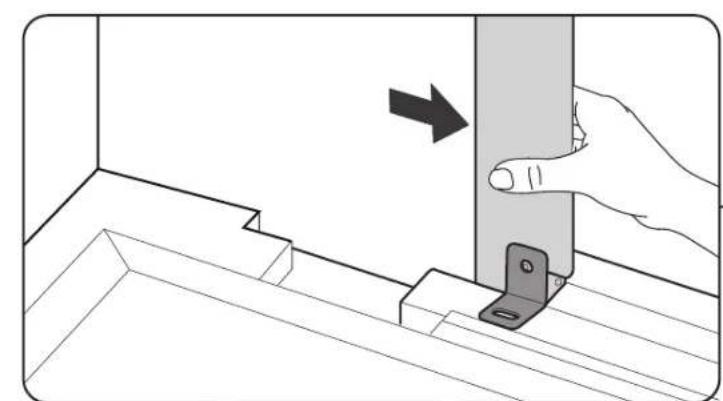
natural_image
Diagram showing a hand holding a metal bracket inserted into a corner, with an arrow indicating direction (no text or symbols present)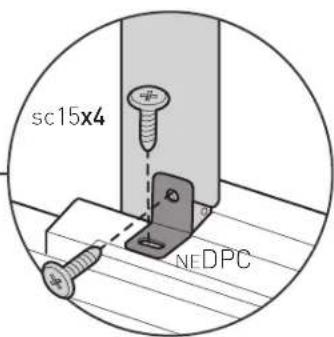
natural_image
Technical diagram of a suspended structure with two circular components and diagonal lines, no text or symbols present.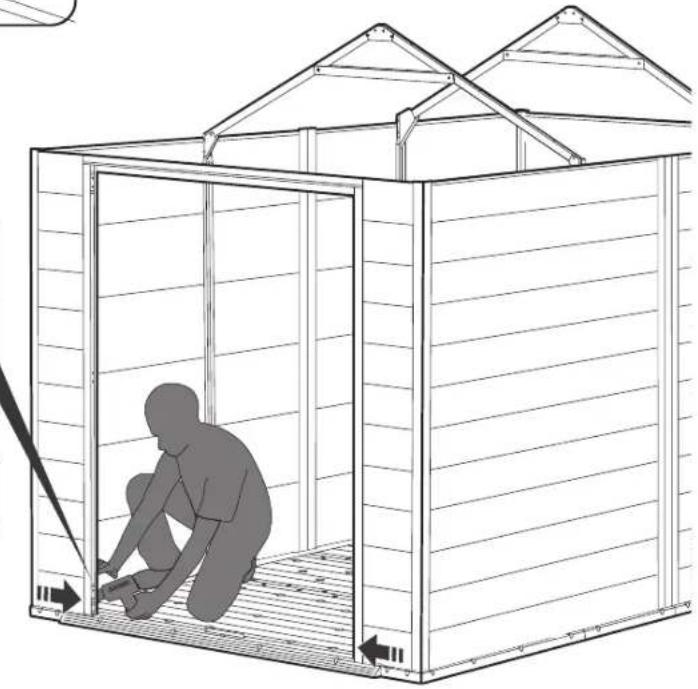
natural_image
Line drawing of a person inside a modular container with roof trusses and metal grating (no text or symbols)No pre-drilled holes | Pas de trous pré-percés | Sin agujeros pretaladrados | Ohne vorgebohrte Löcher | Geen voorgeboorde gaten | Buchi preferati non presenti | Sem buracos perfurados previamente
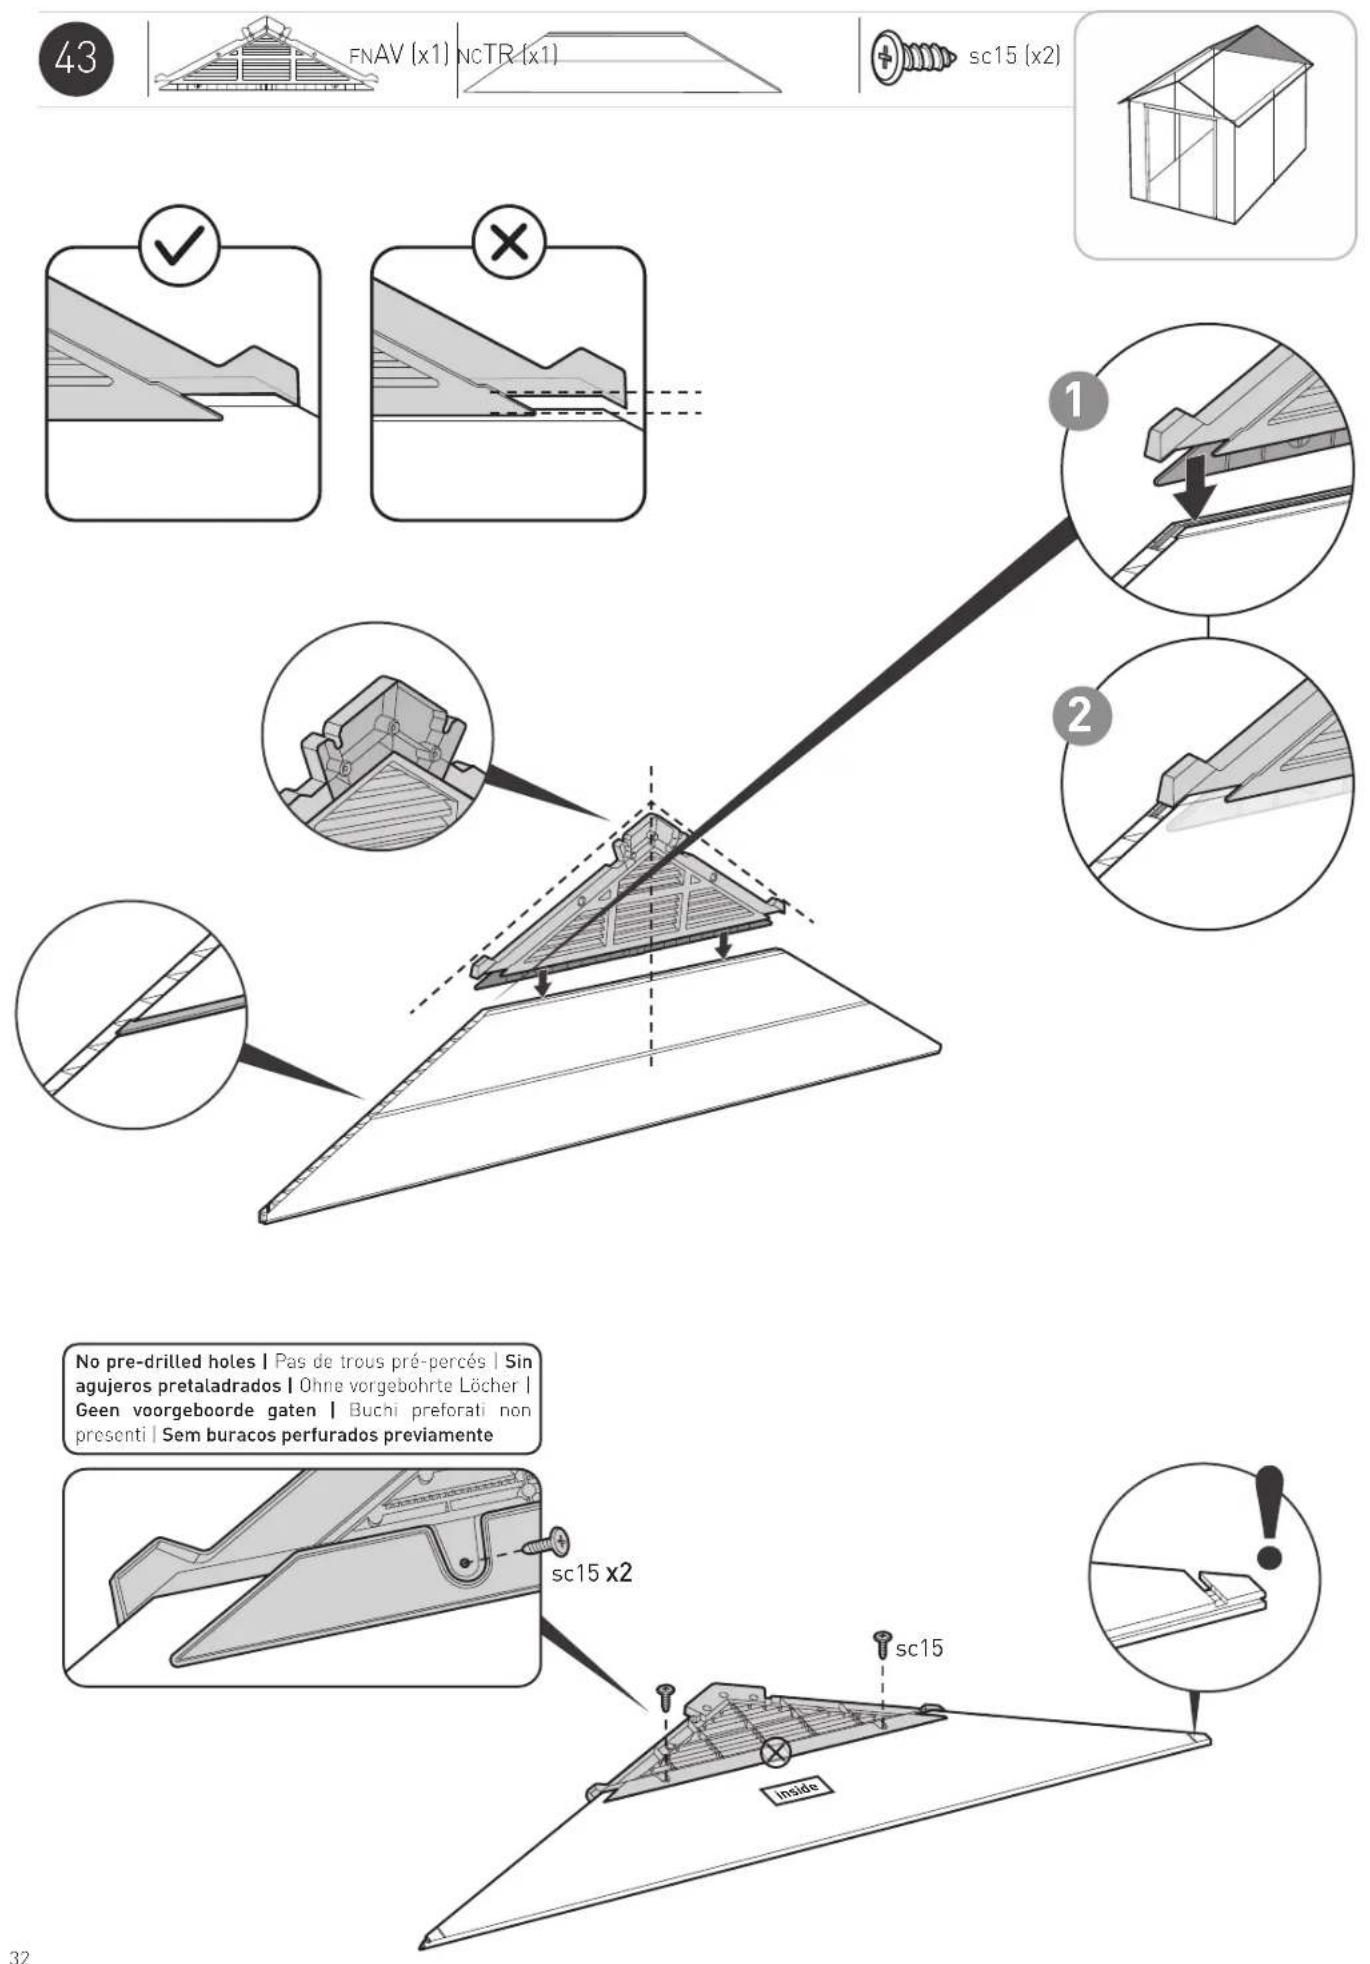
sc15 (x2)
No pre-drilled holes | Pas de trous pré-percés | Sin agujeros pretaladrados | Ohne vorgebohrte Löcher | Geen voorgeboorde gaten | Buchi preferati non presenti | Sem buracos perfurados previamente
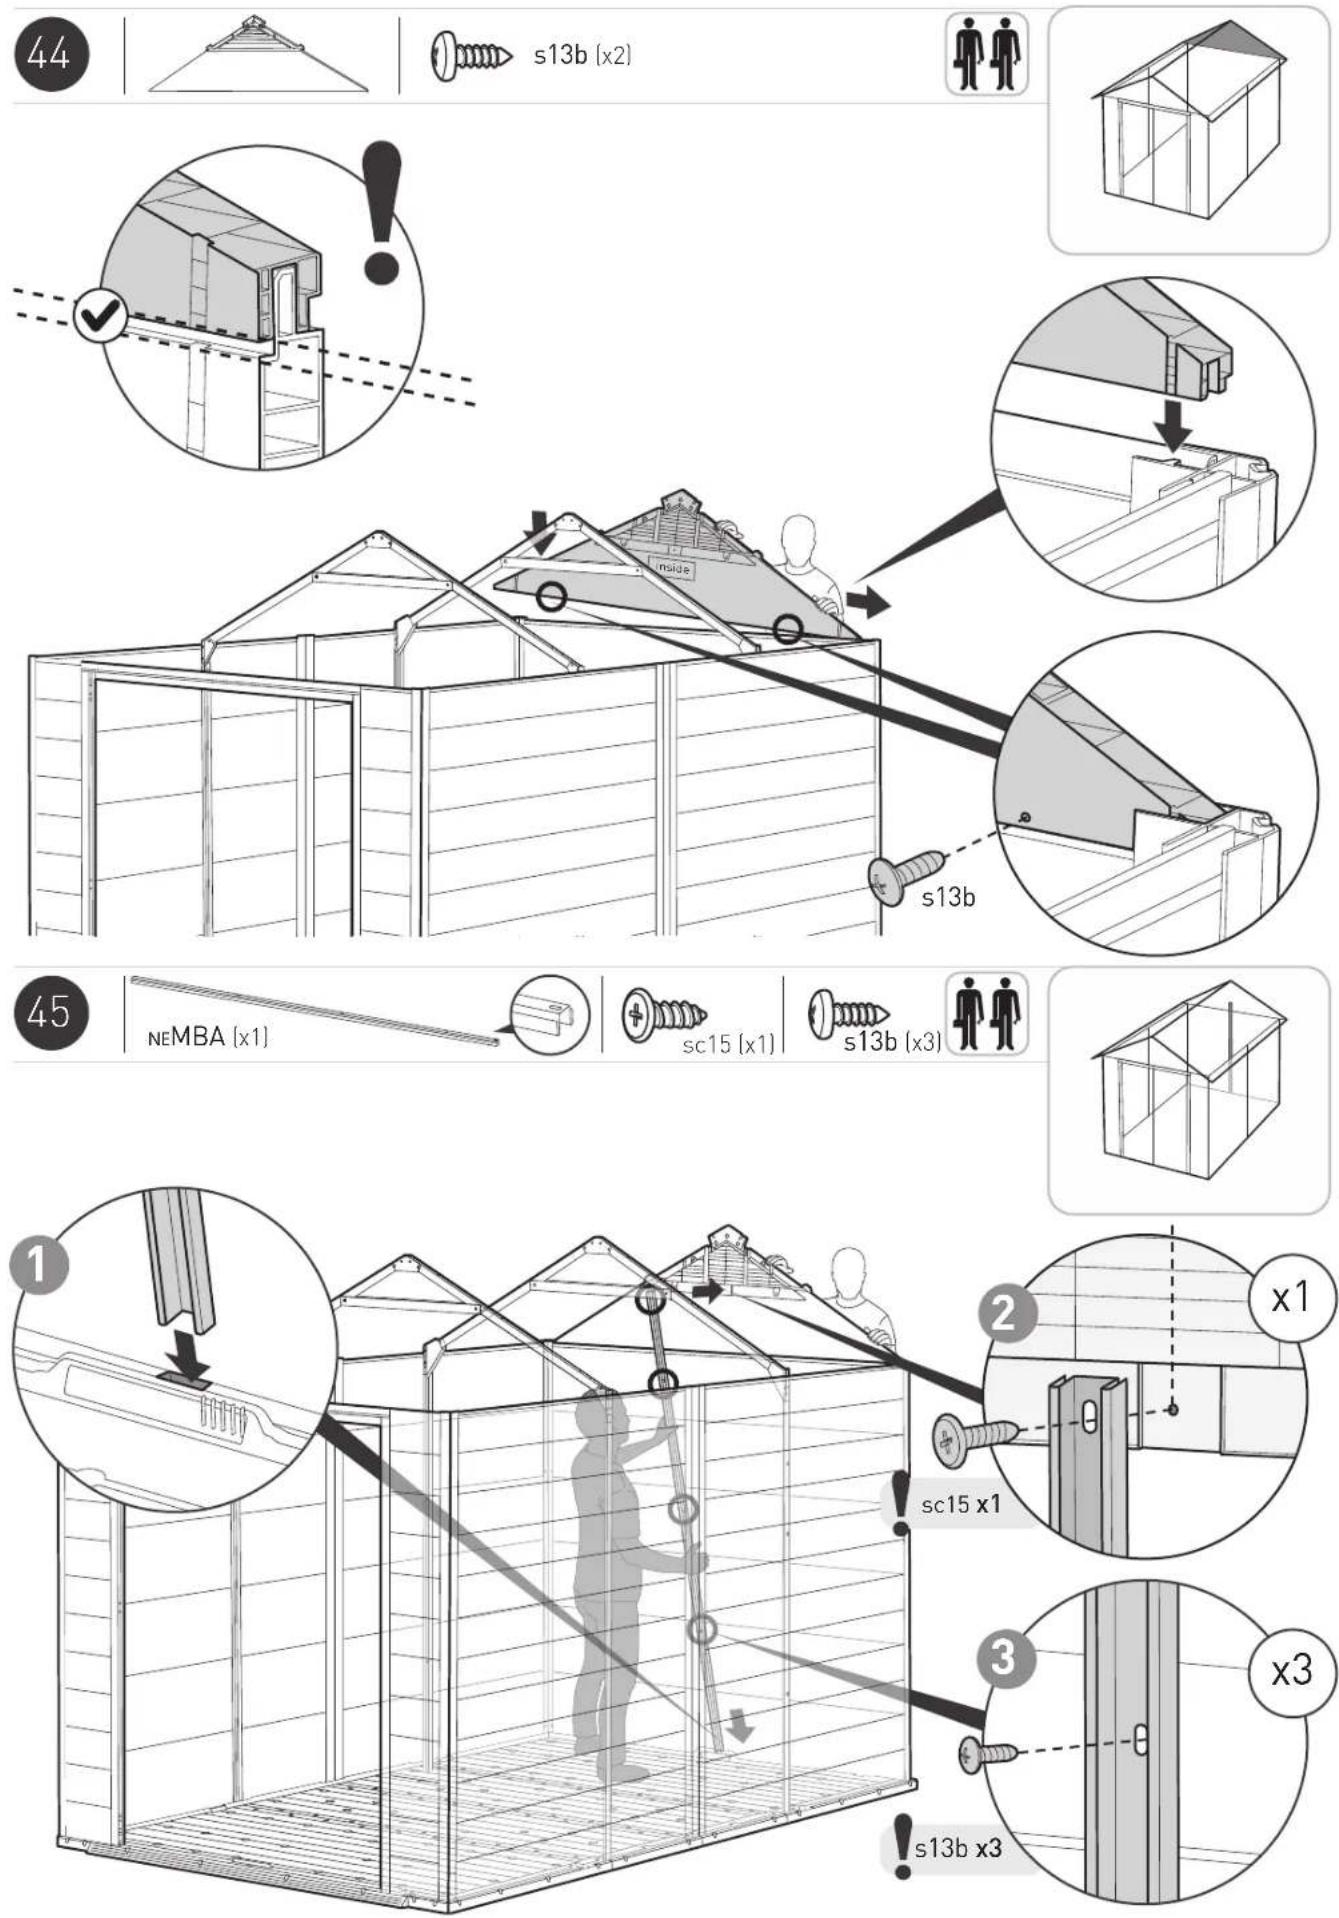
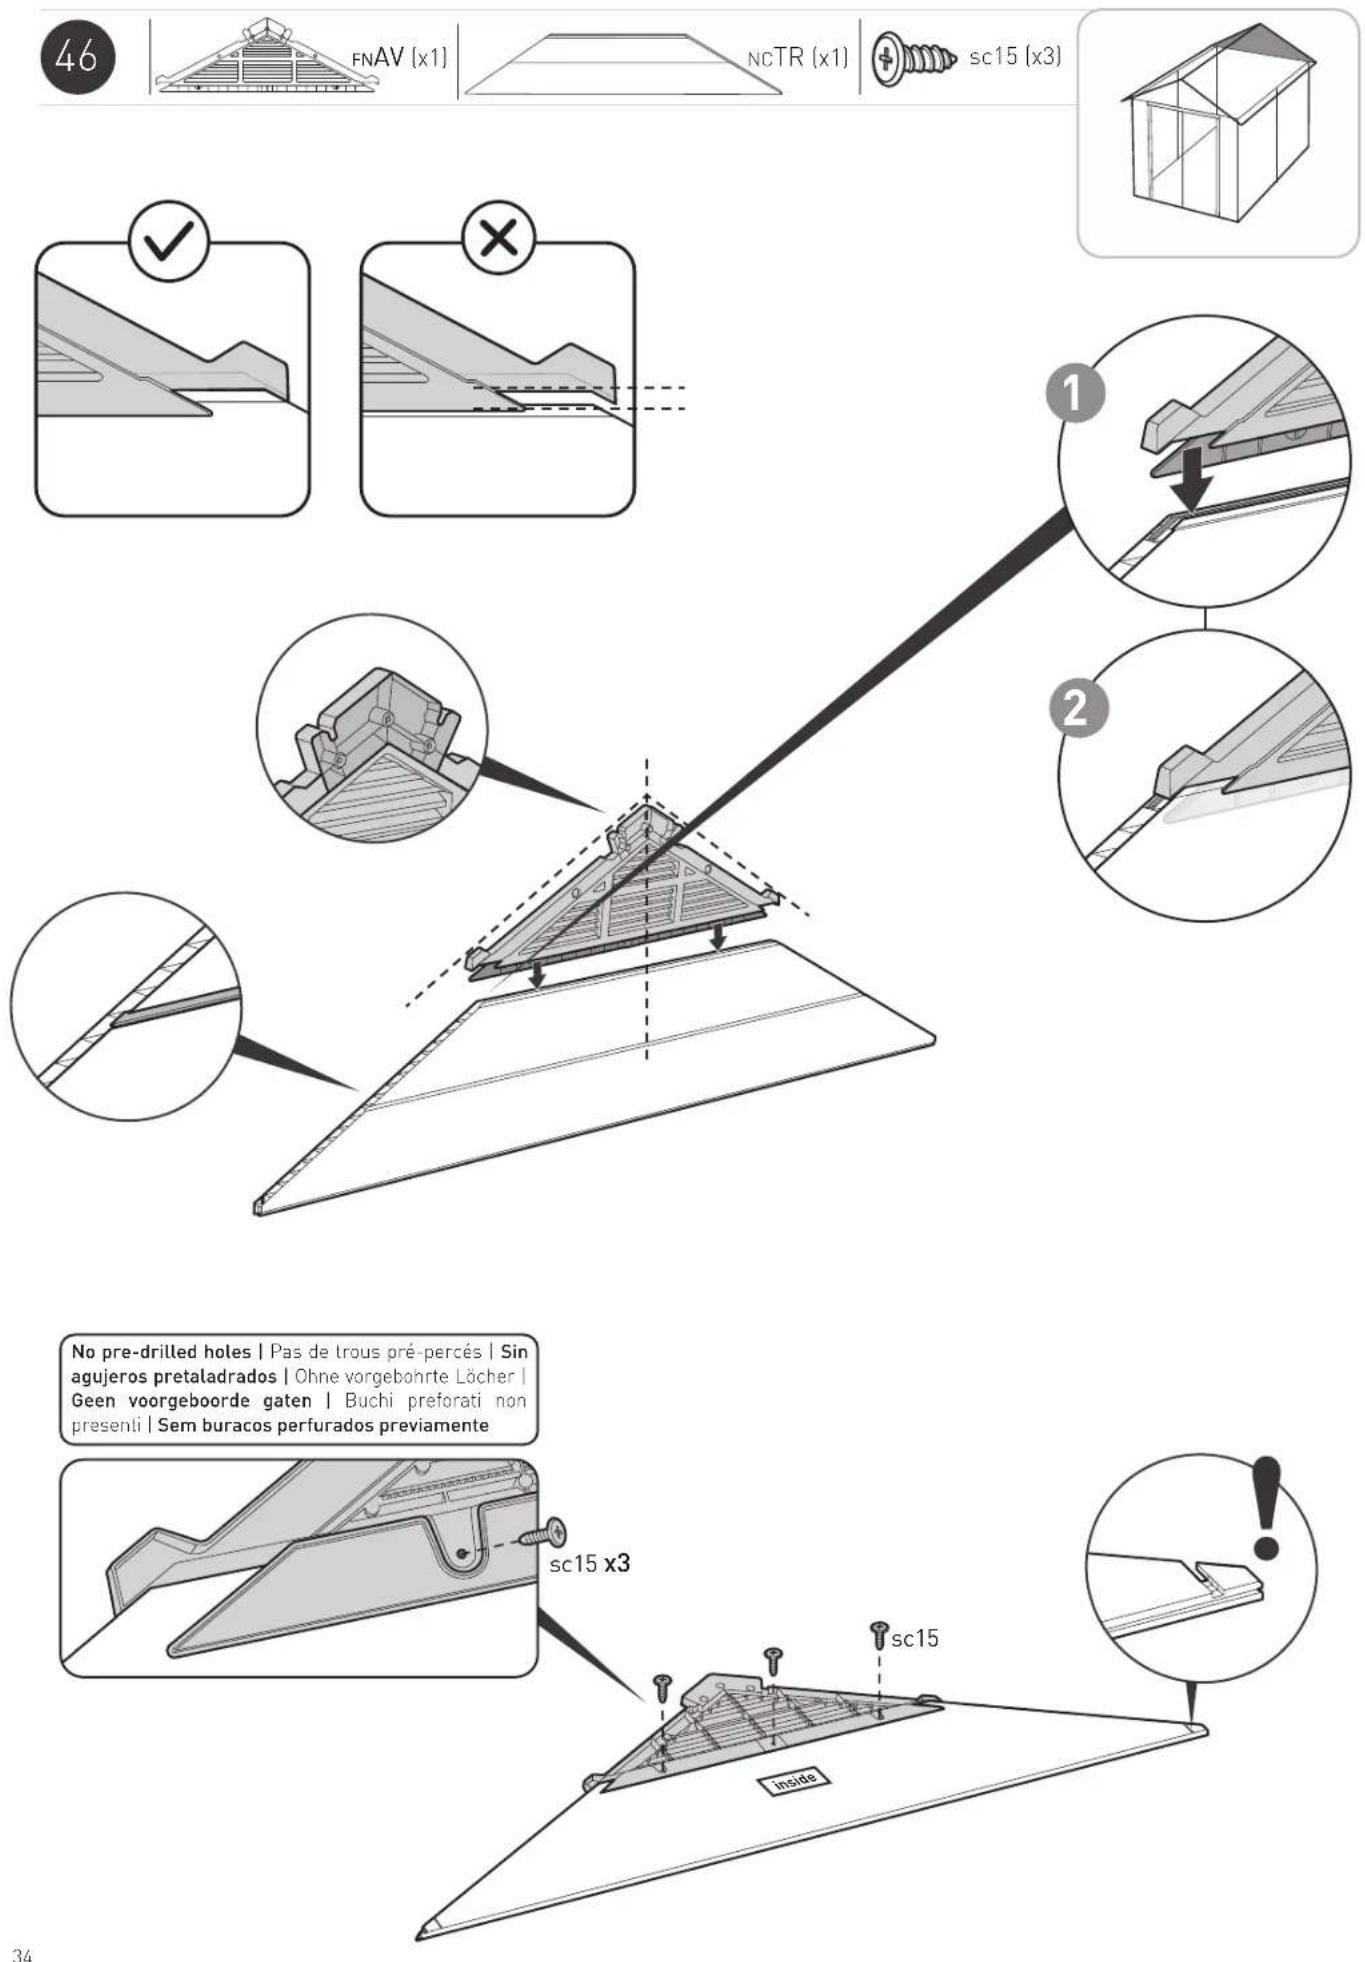
No pre-drilled holes | Pas de trous pré-percés | Sin agujeros pretaladrados | Ohne vorgebohrte Löcher | Geen voorgeboorde gaten | Buchi preferati non presenti | Sem buracos perfurados previamente
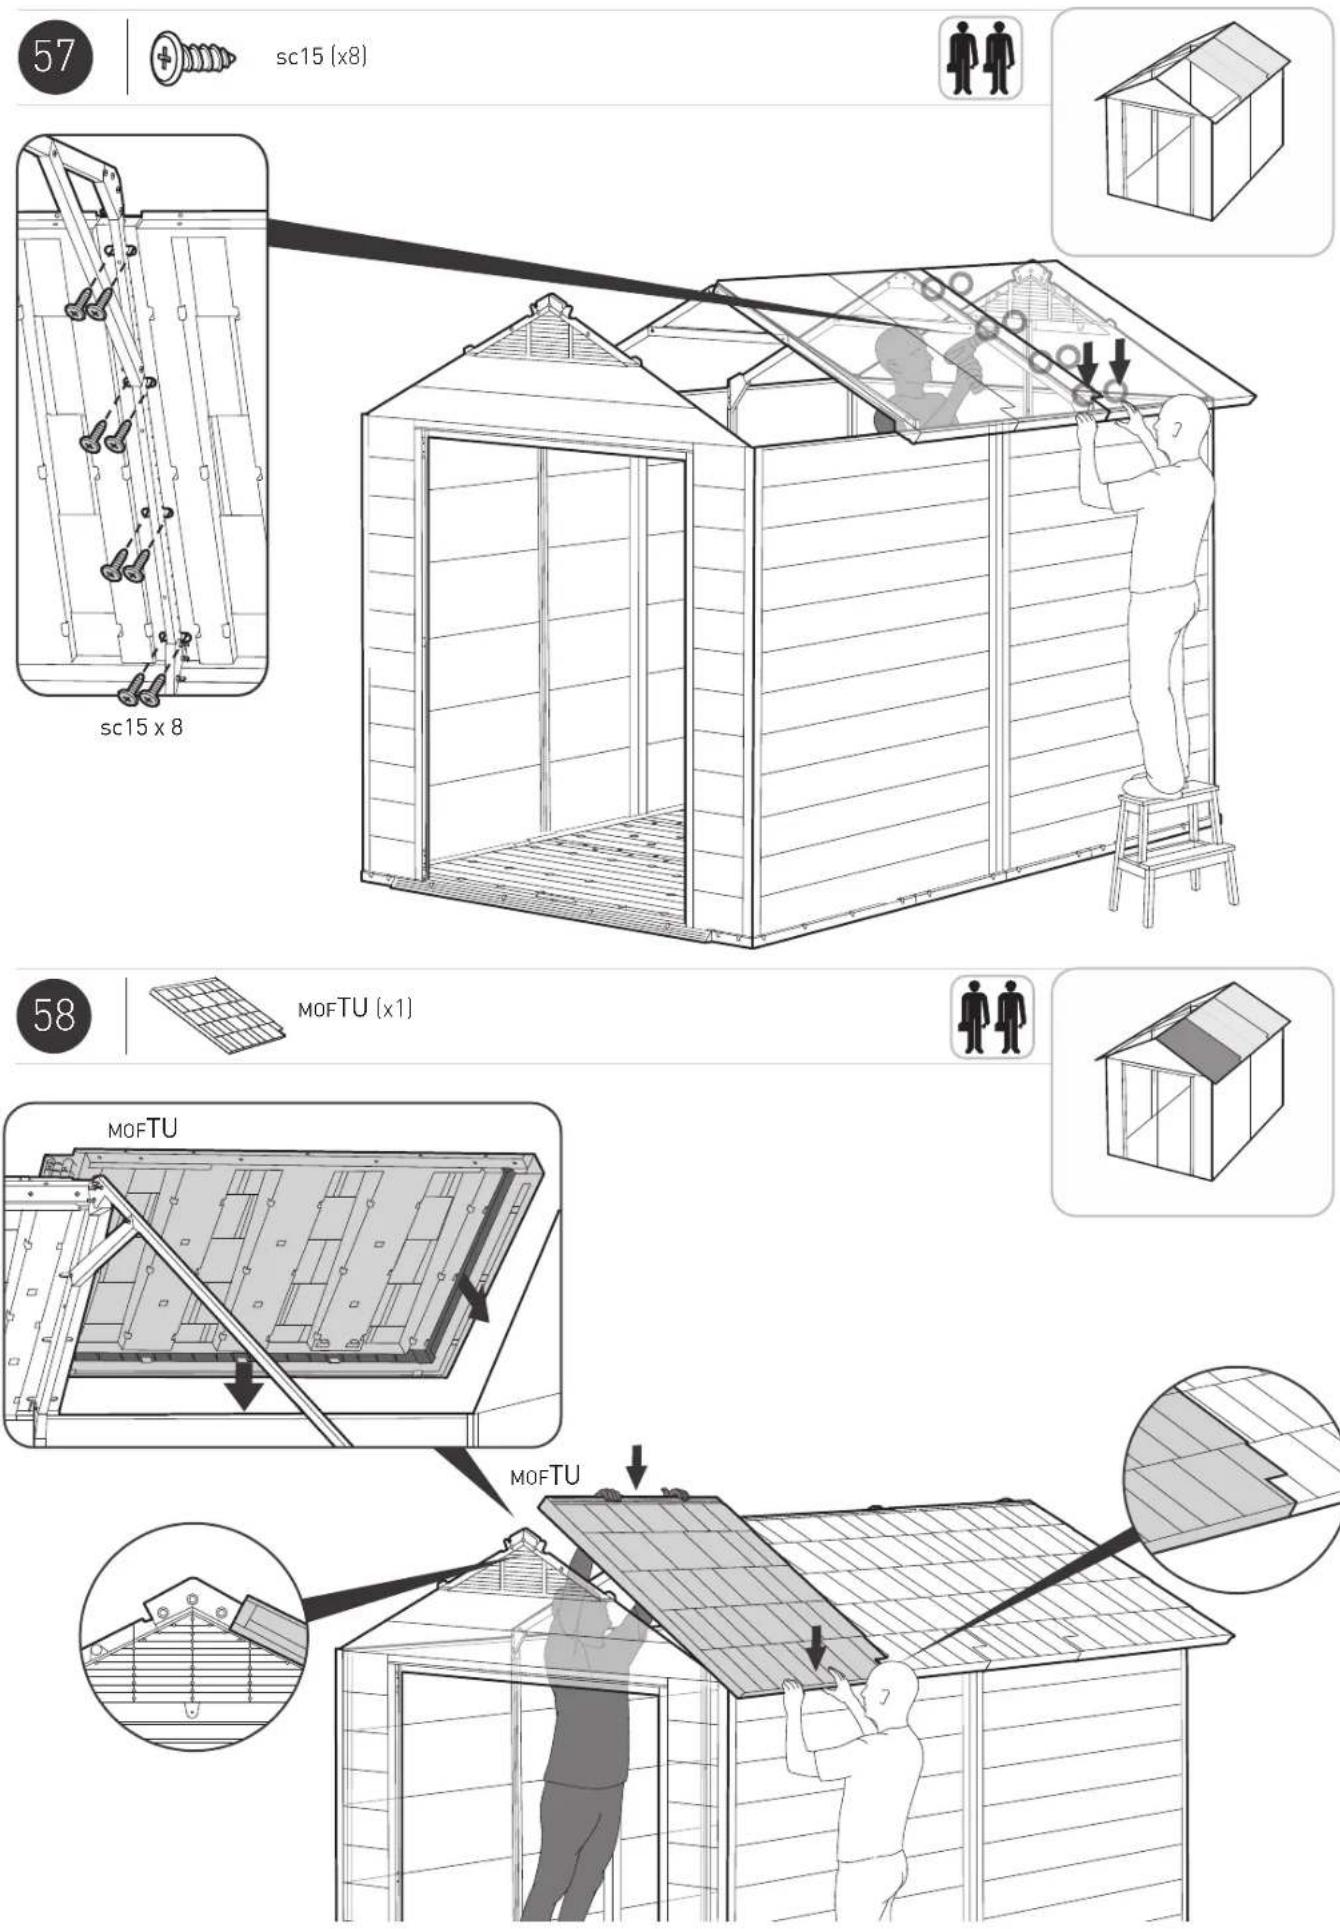
sc15 (x8)
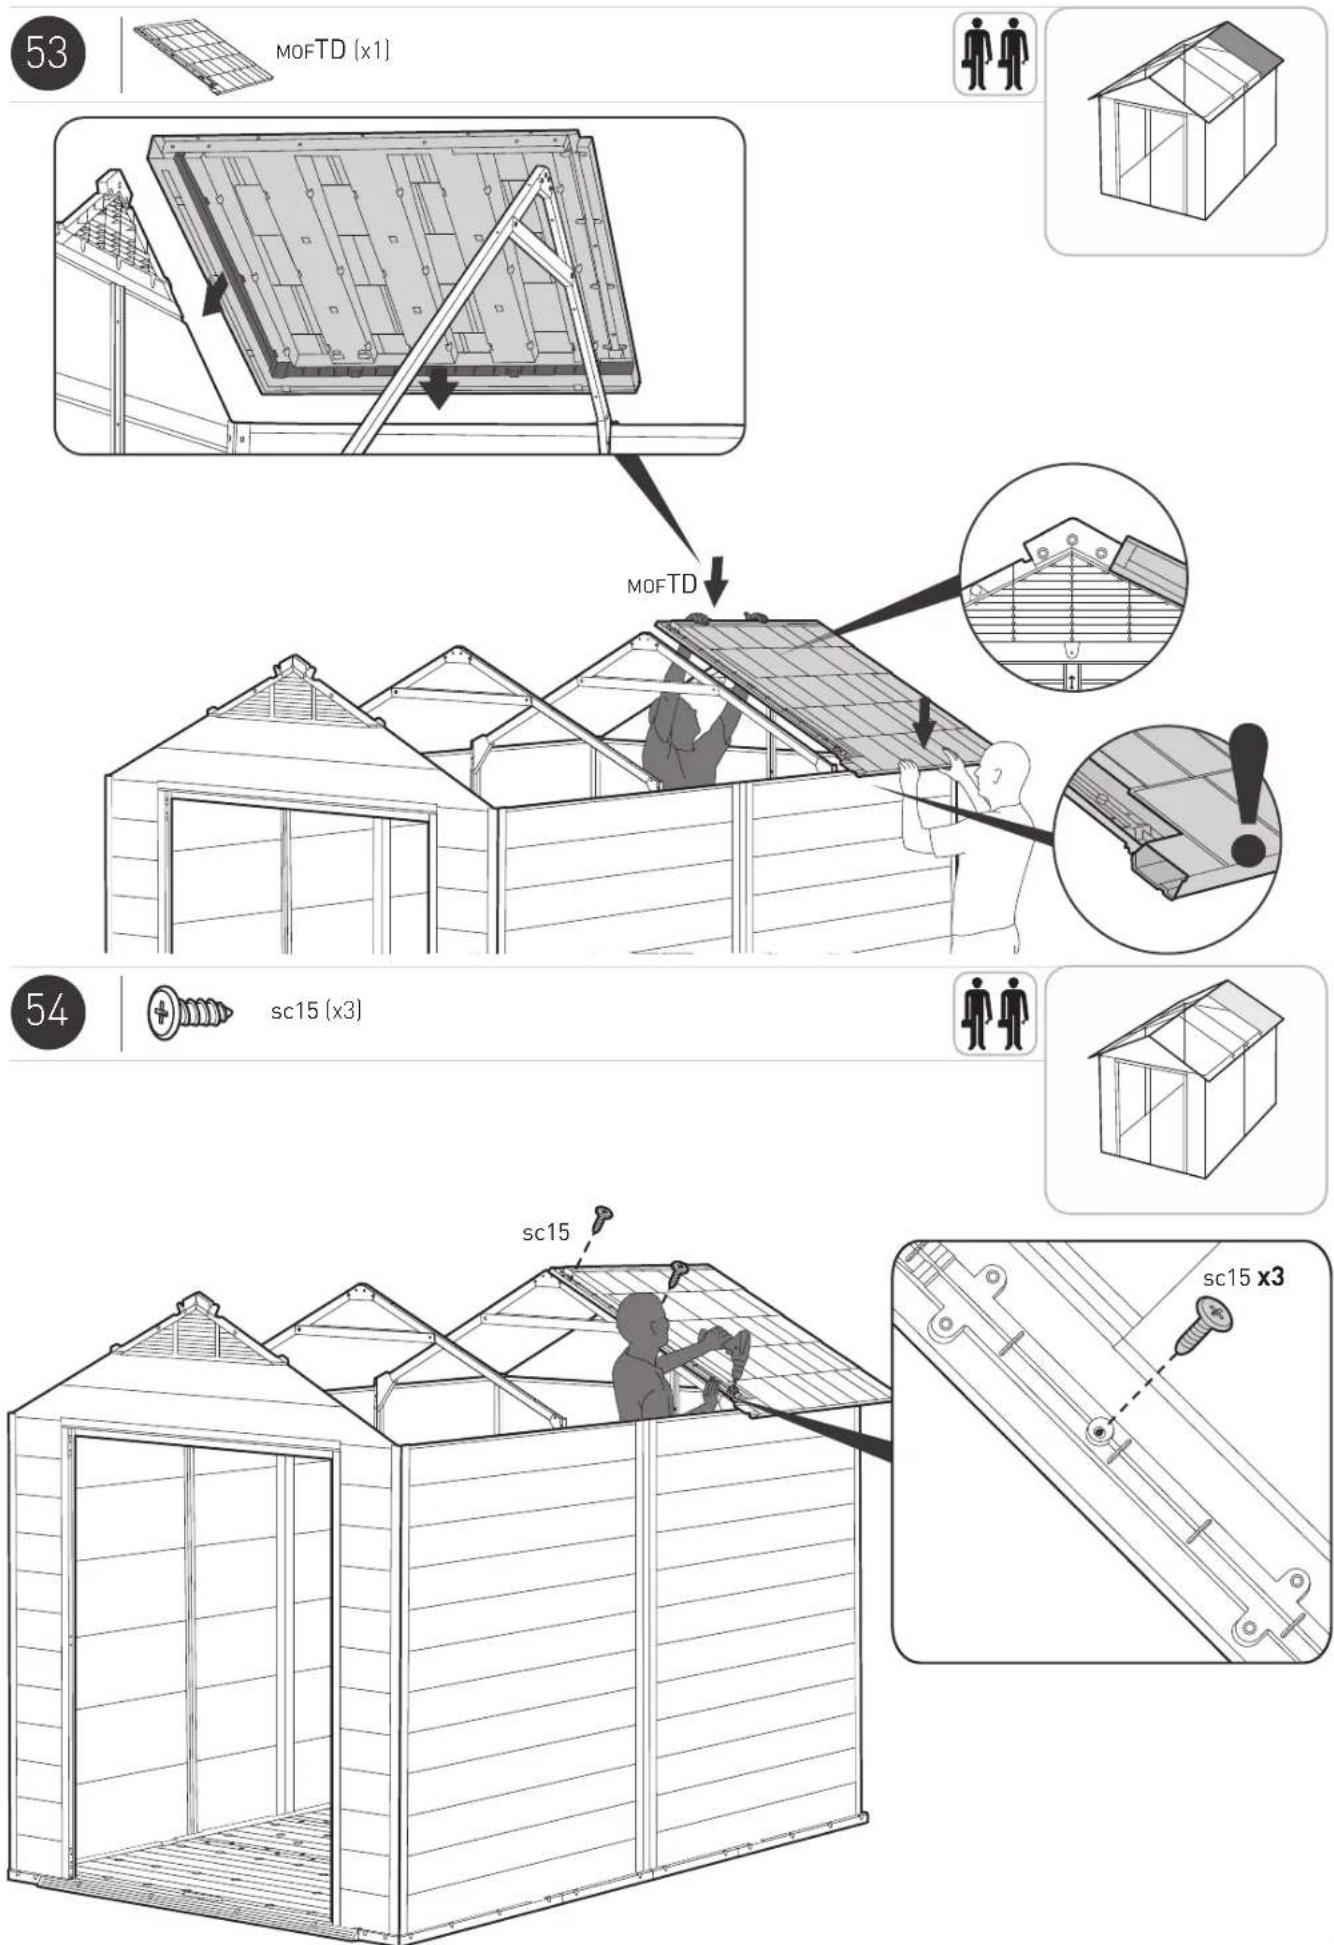
MOFTD [x1]
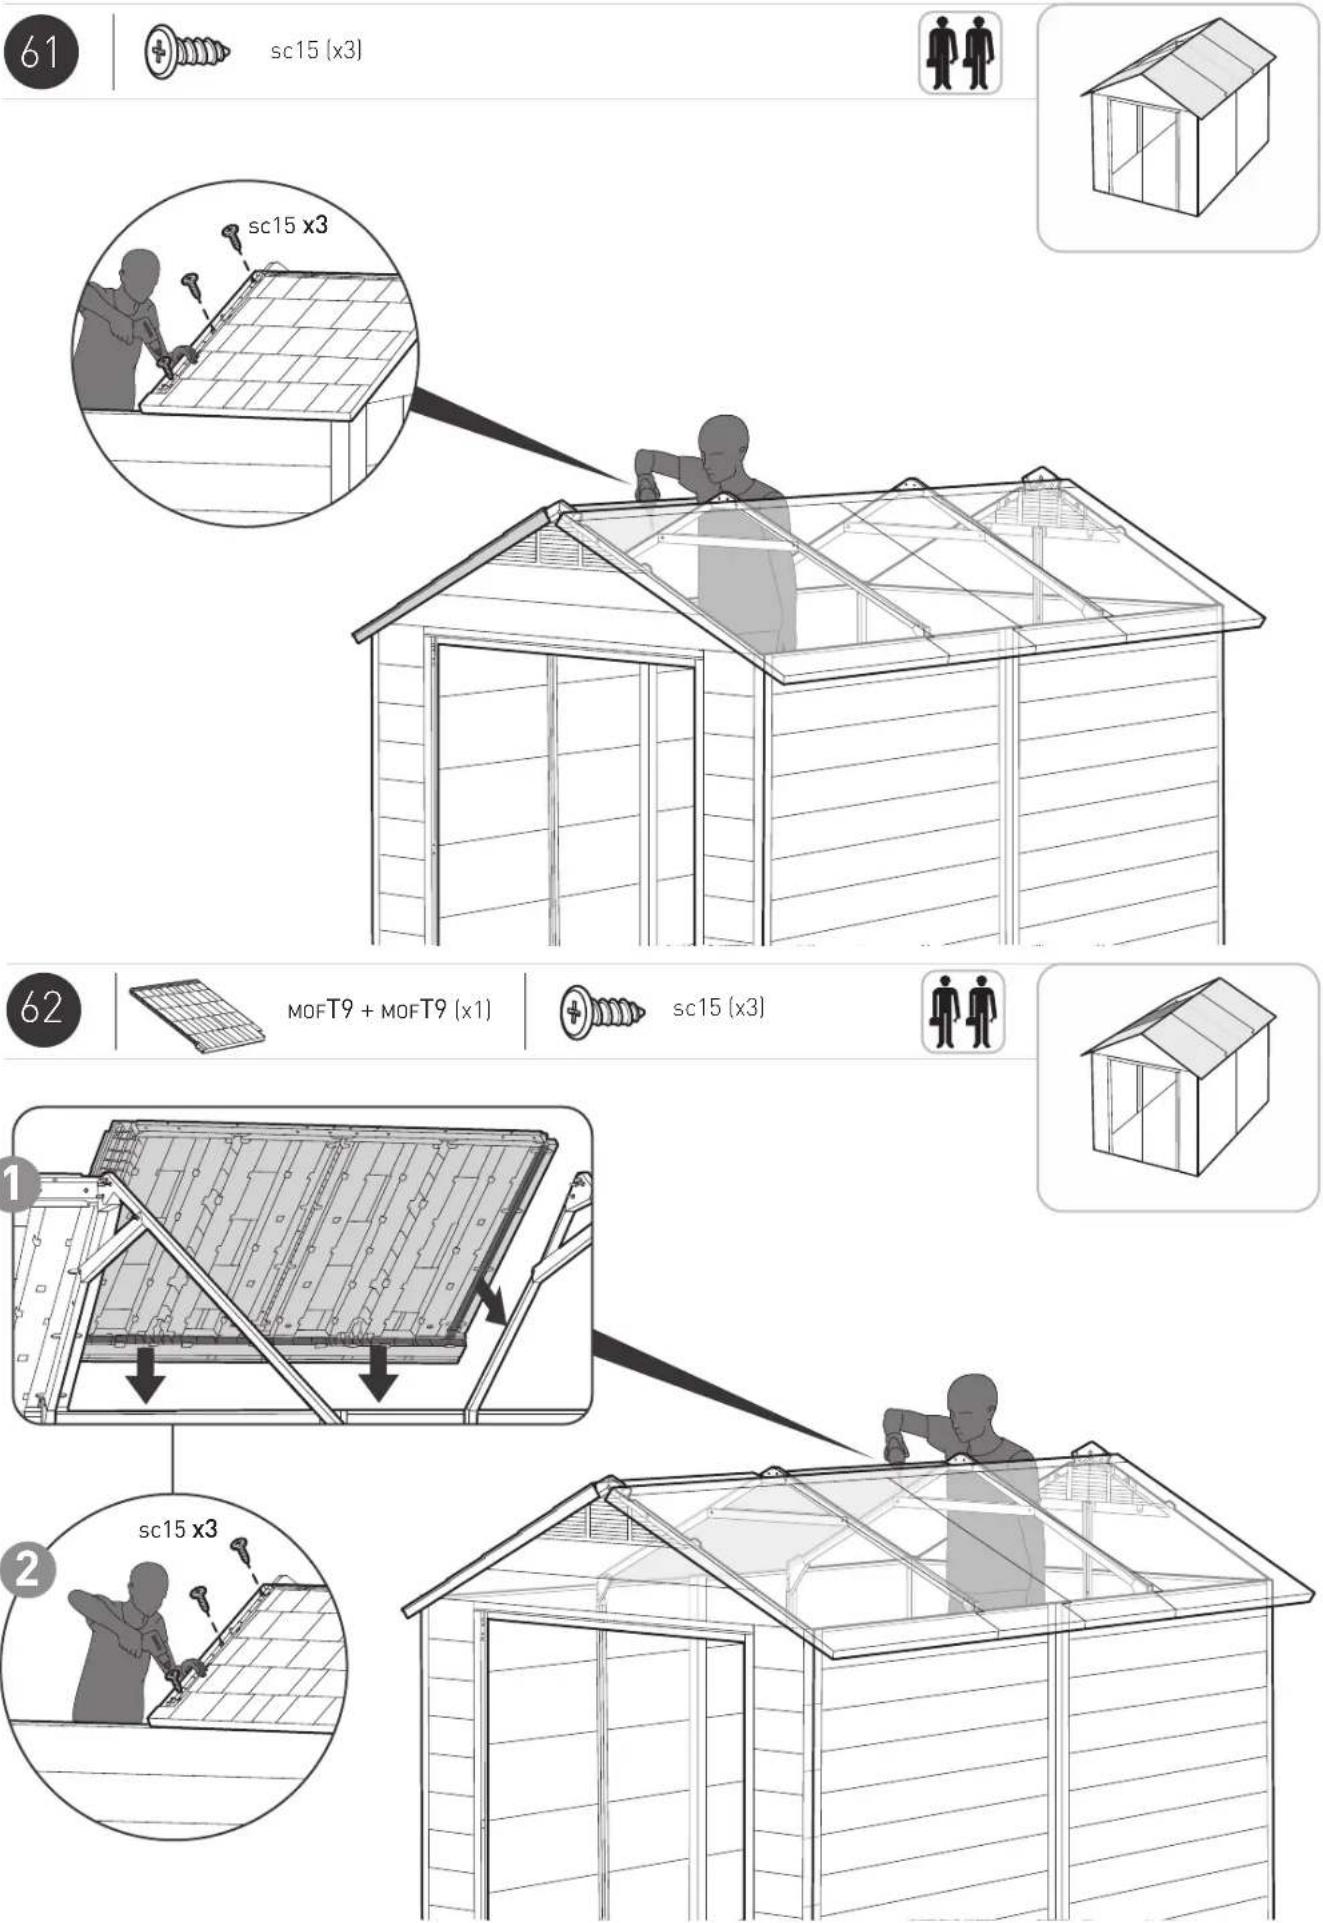
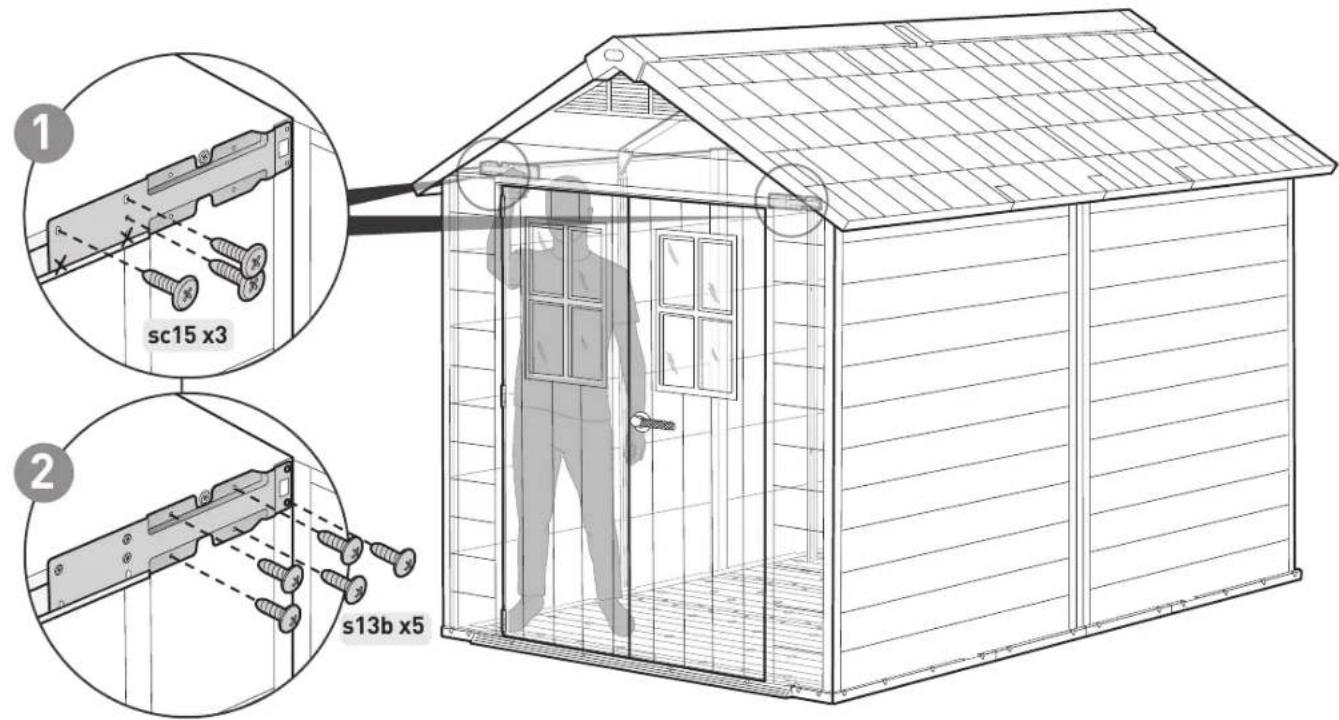
sc15 (x3)
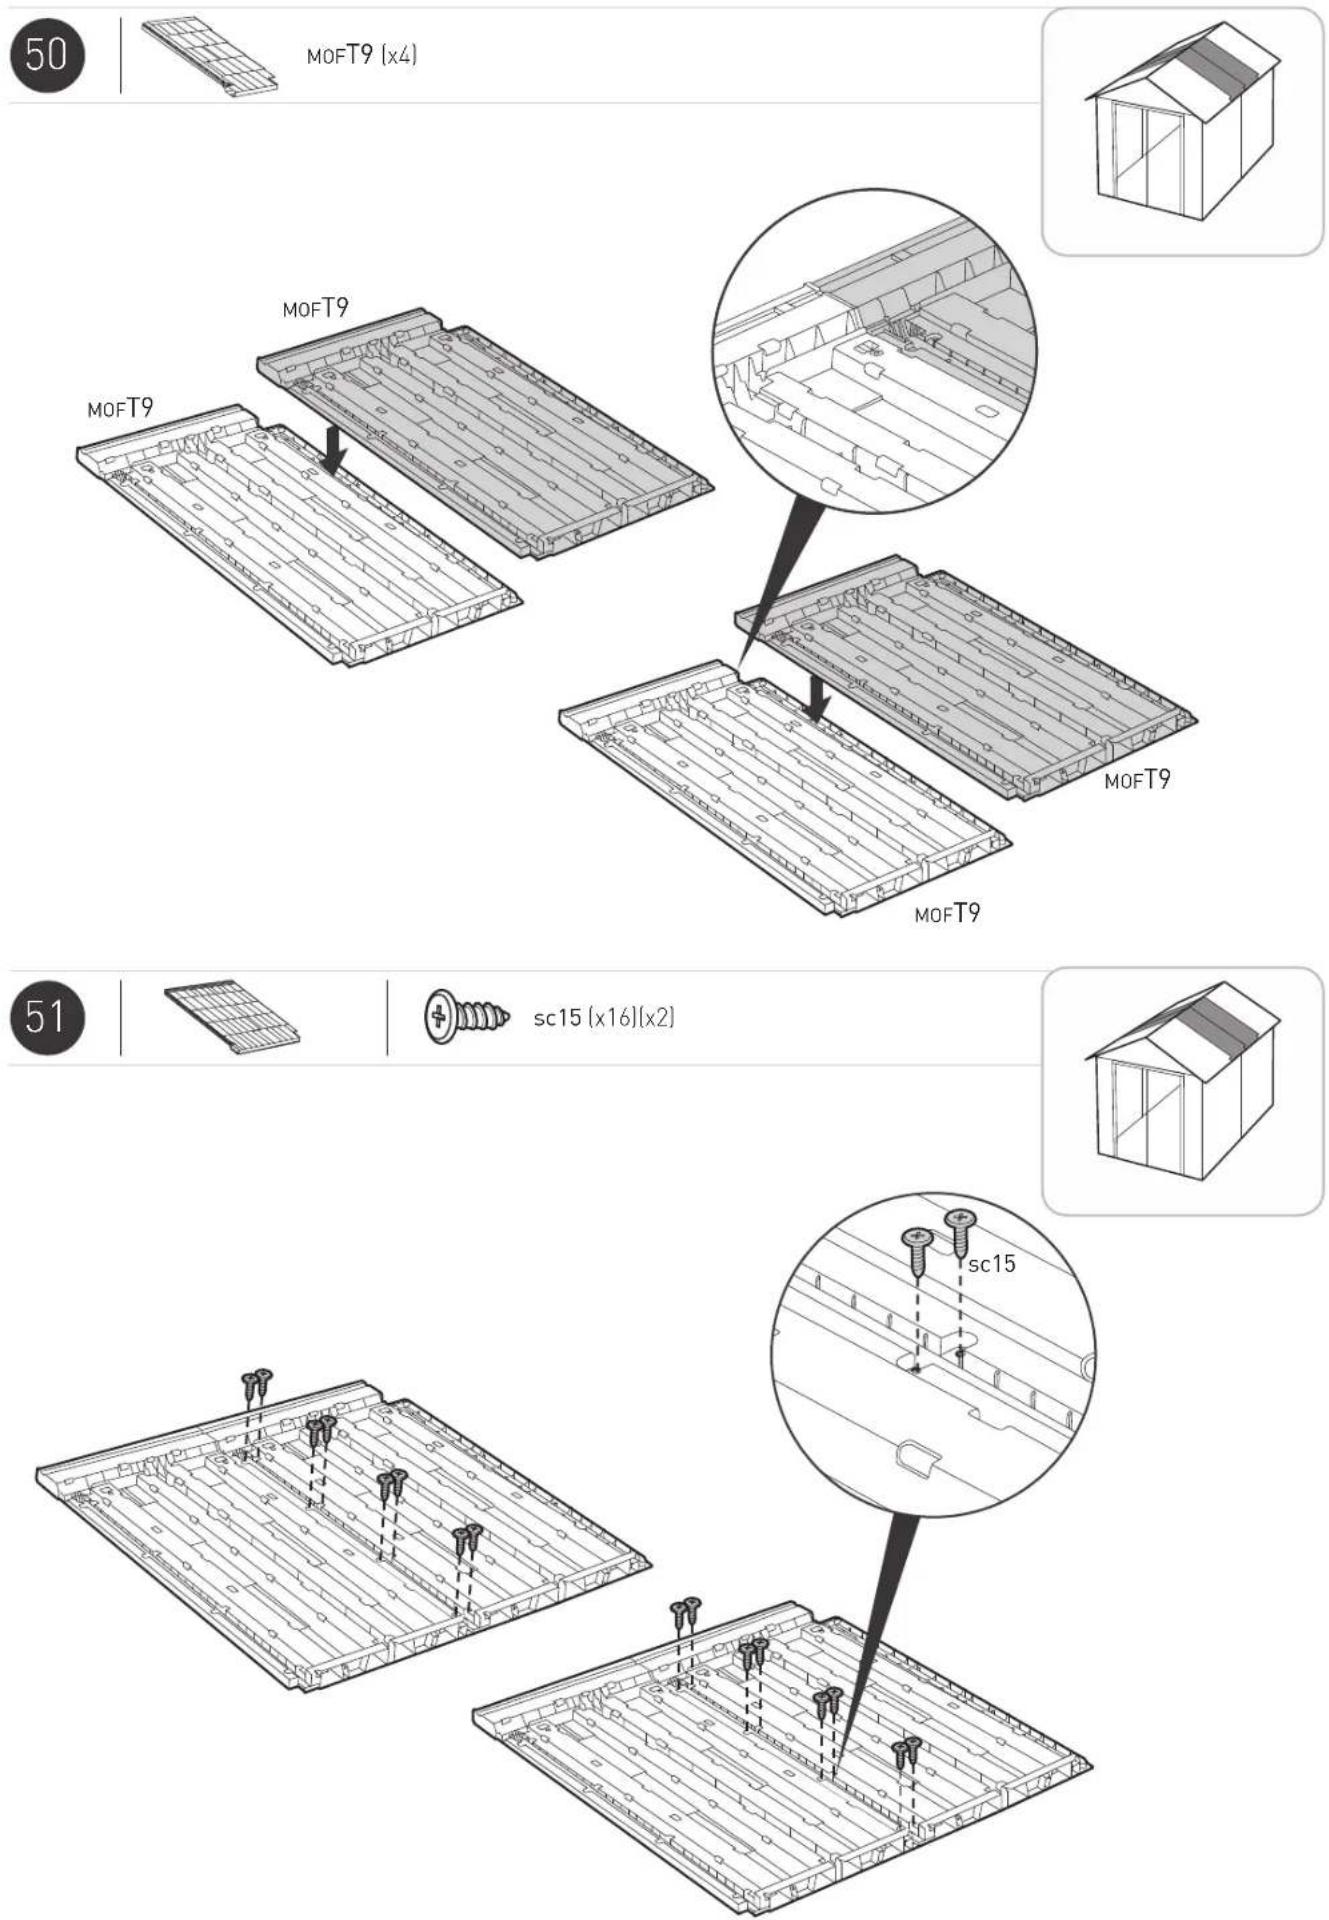
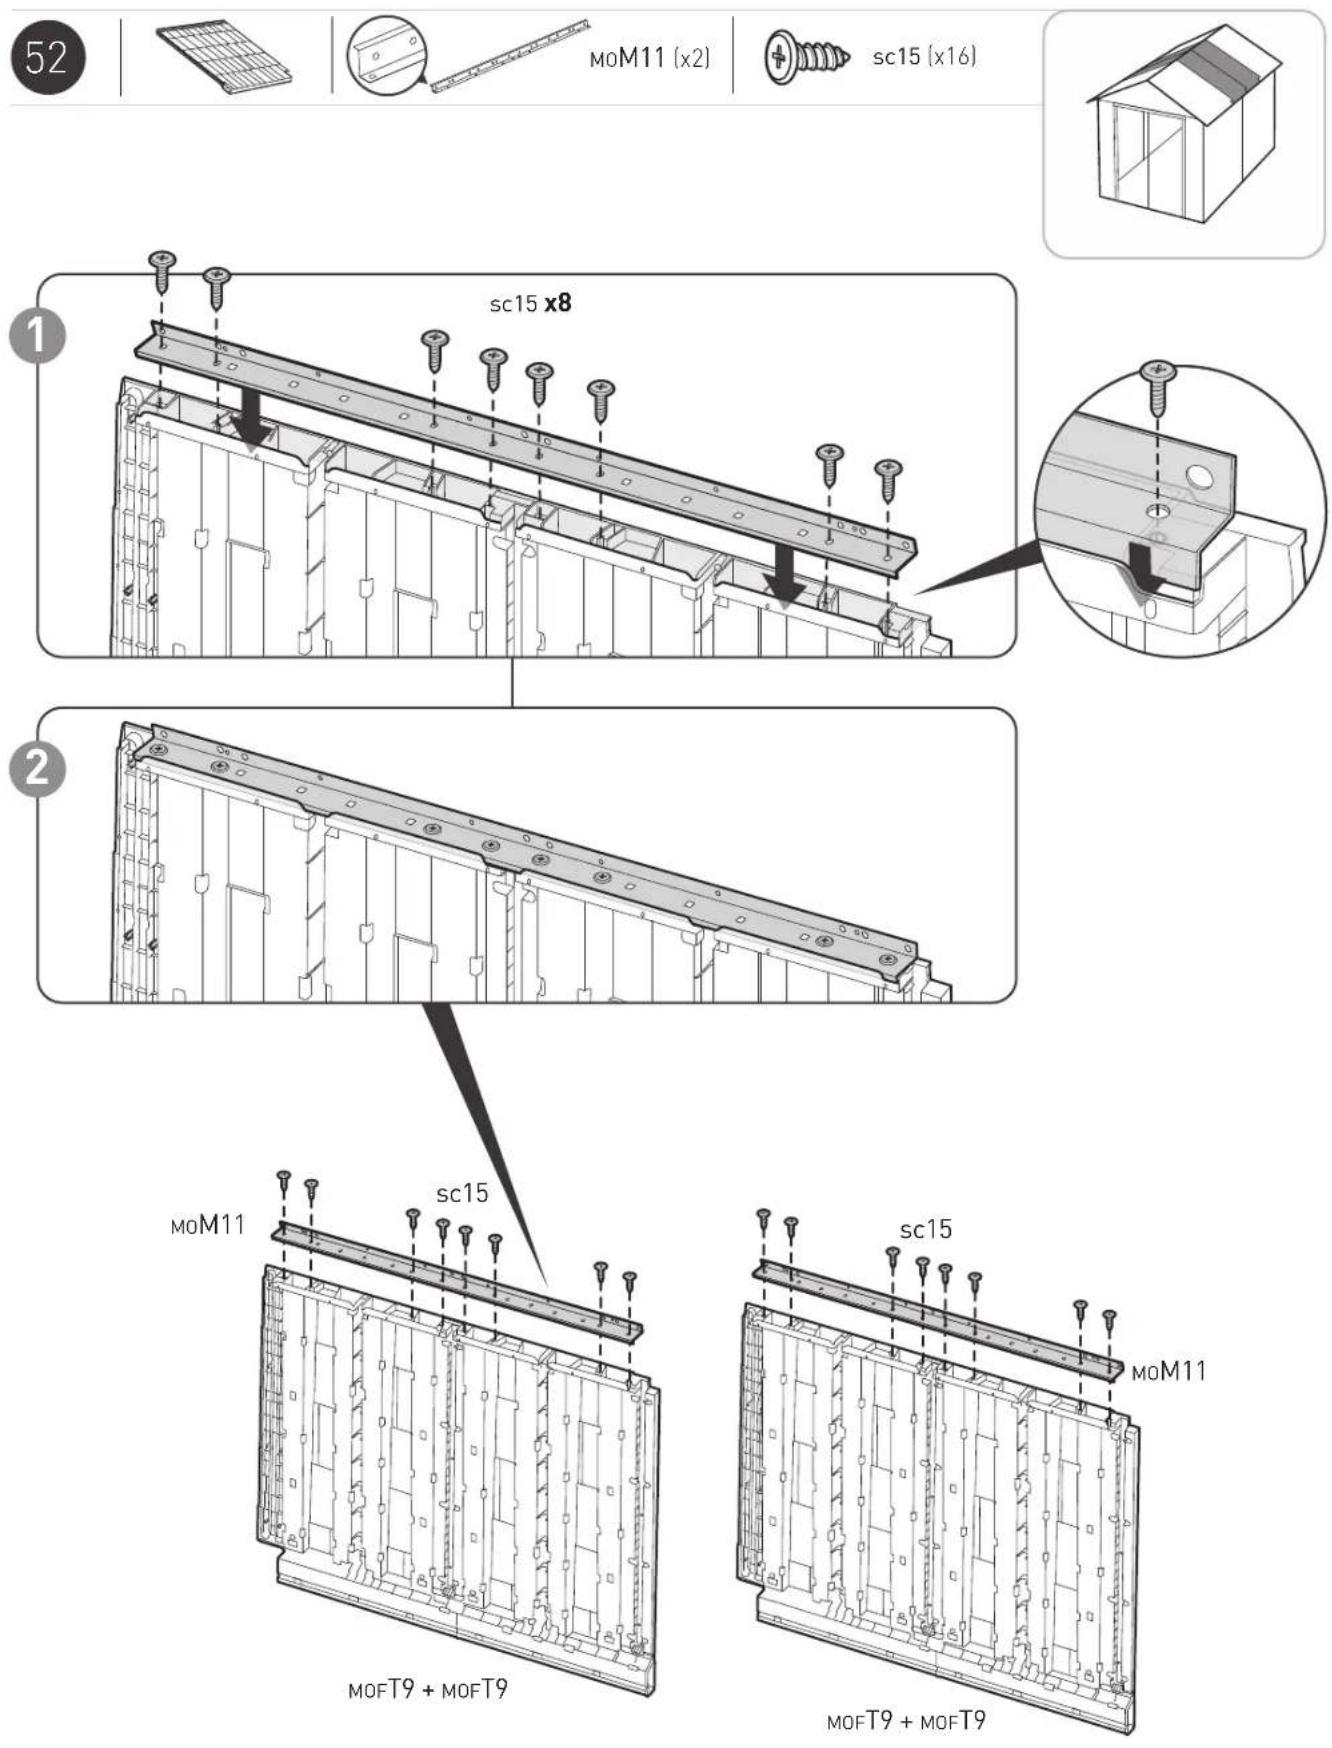
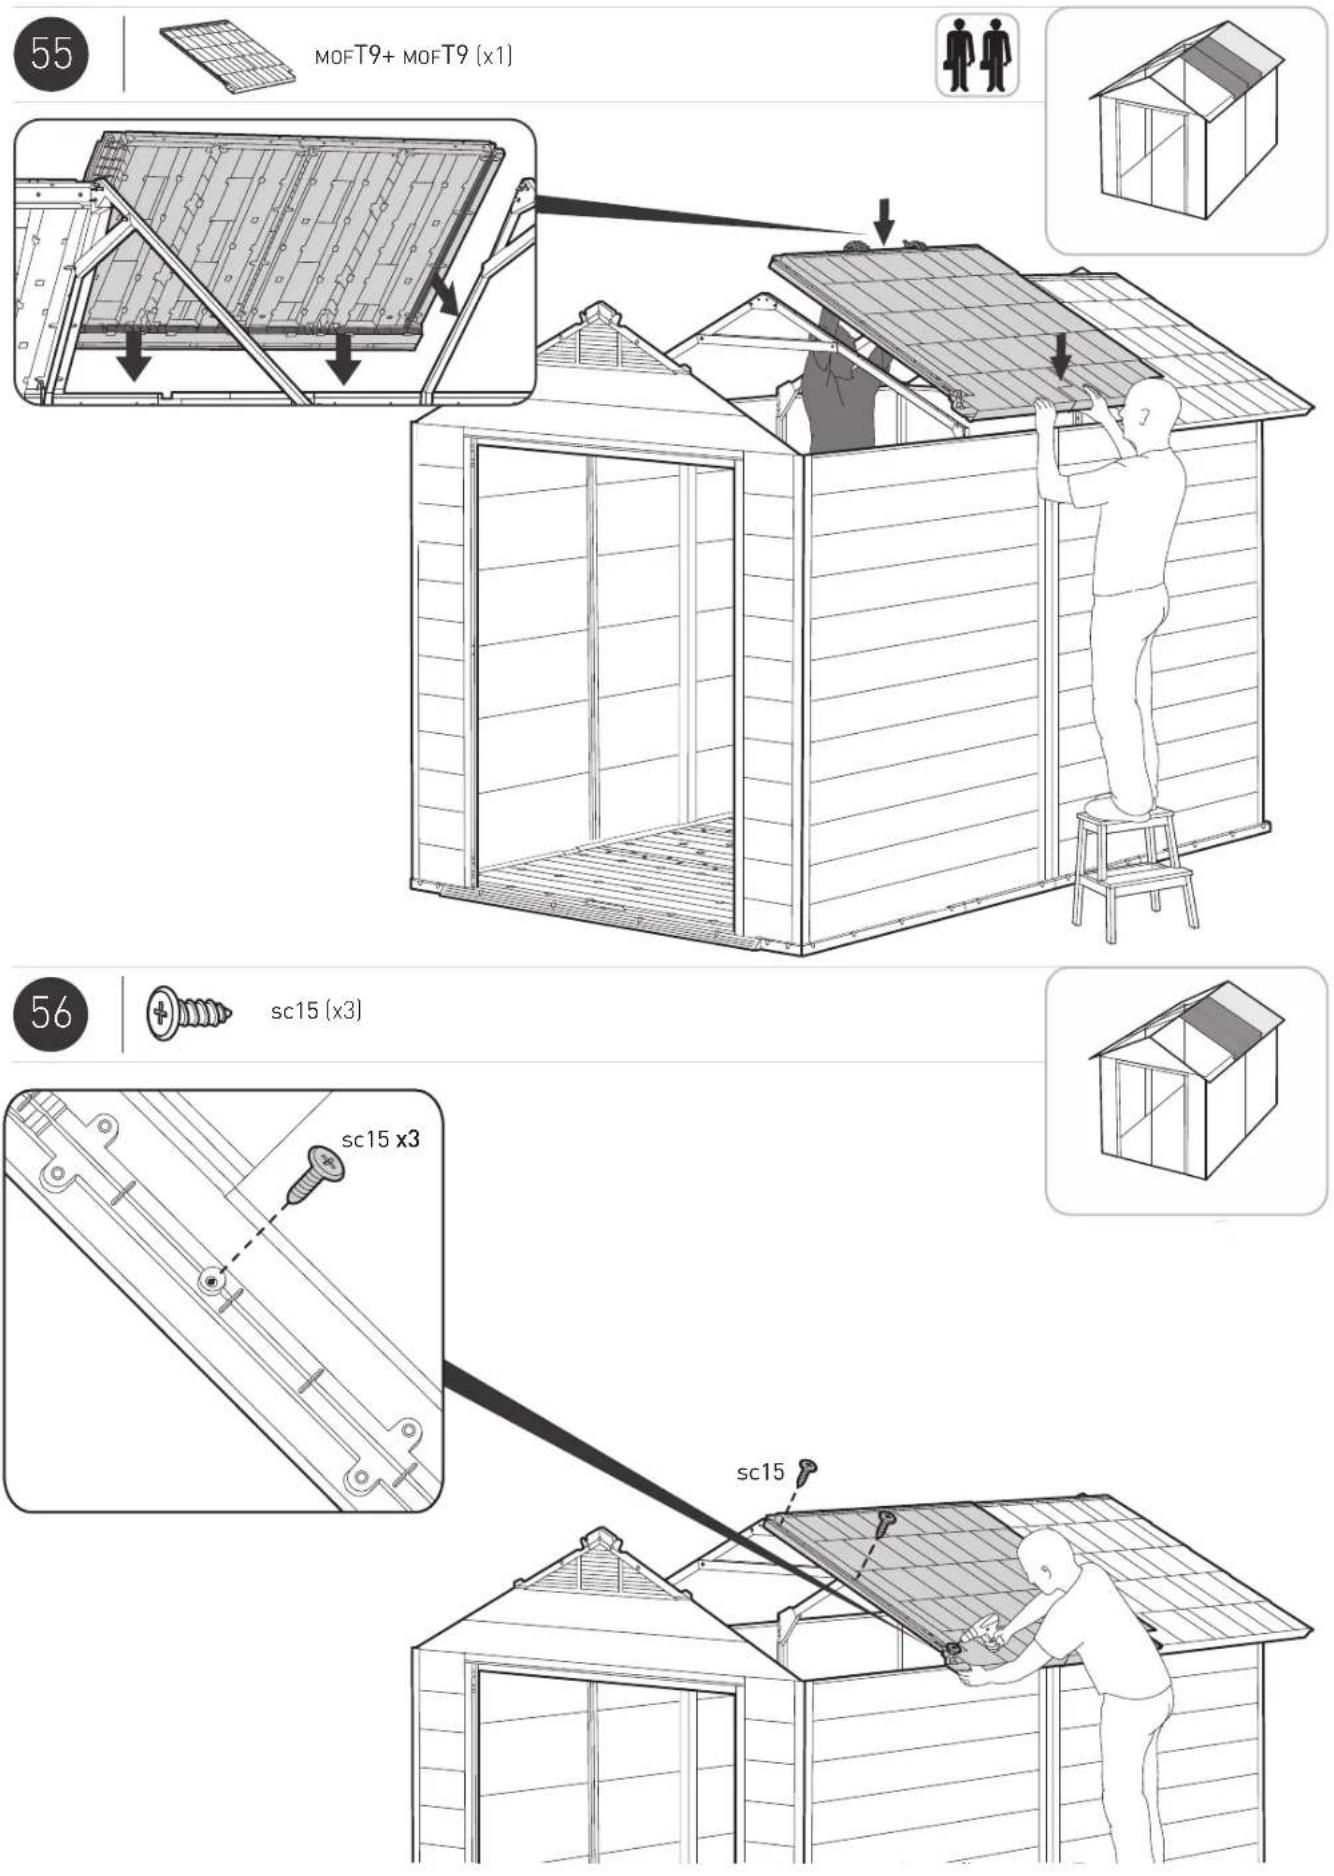
MOFT9 + MOFT9 (x1)
sc15 (x3)
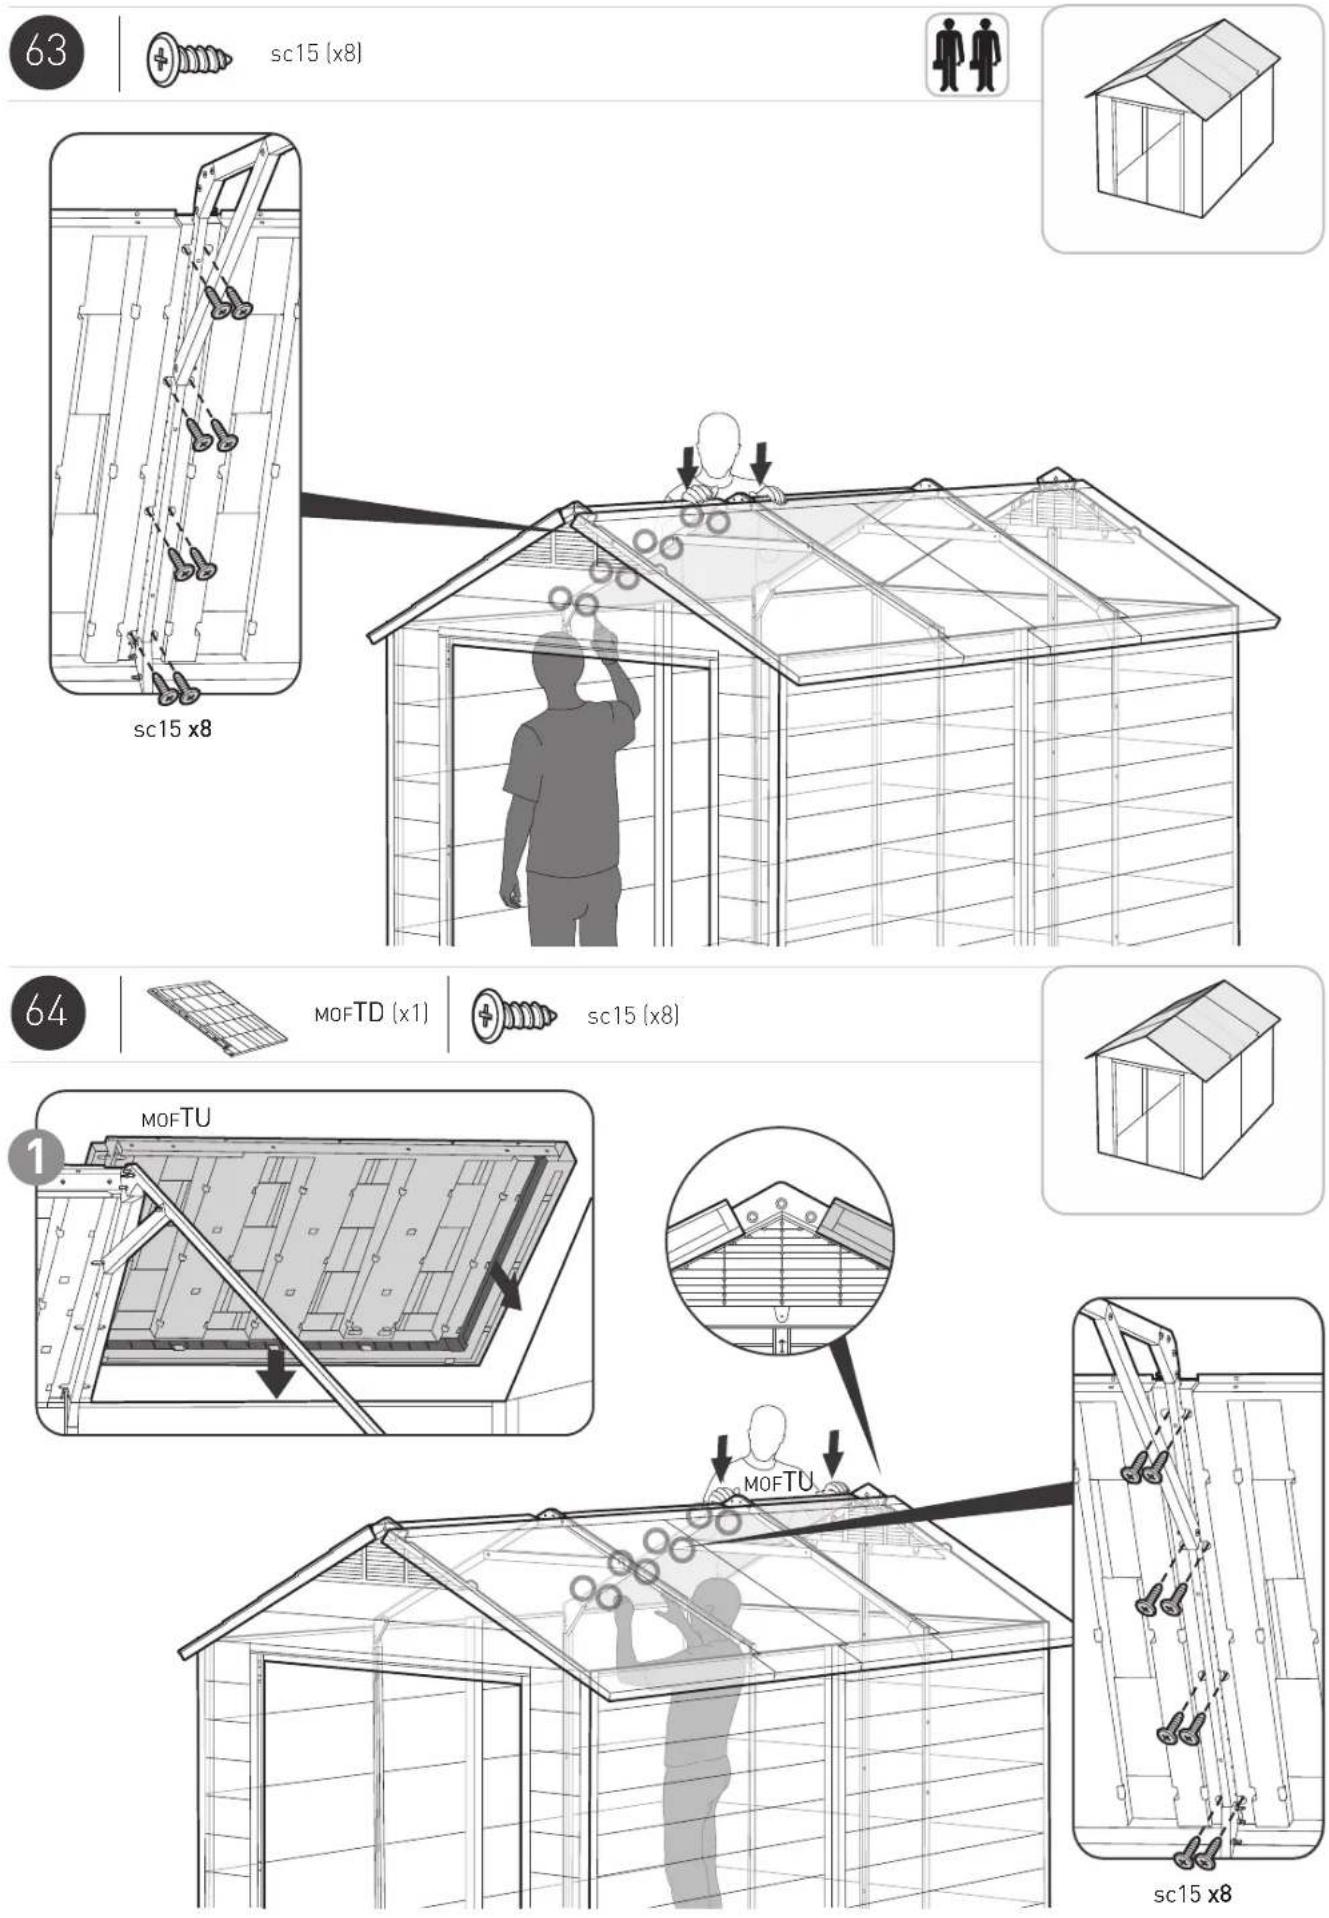
sc15 (x8)
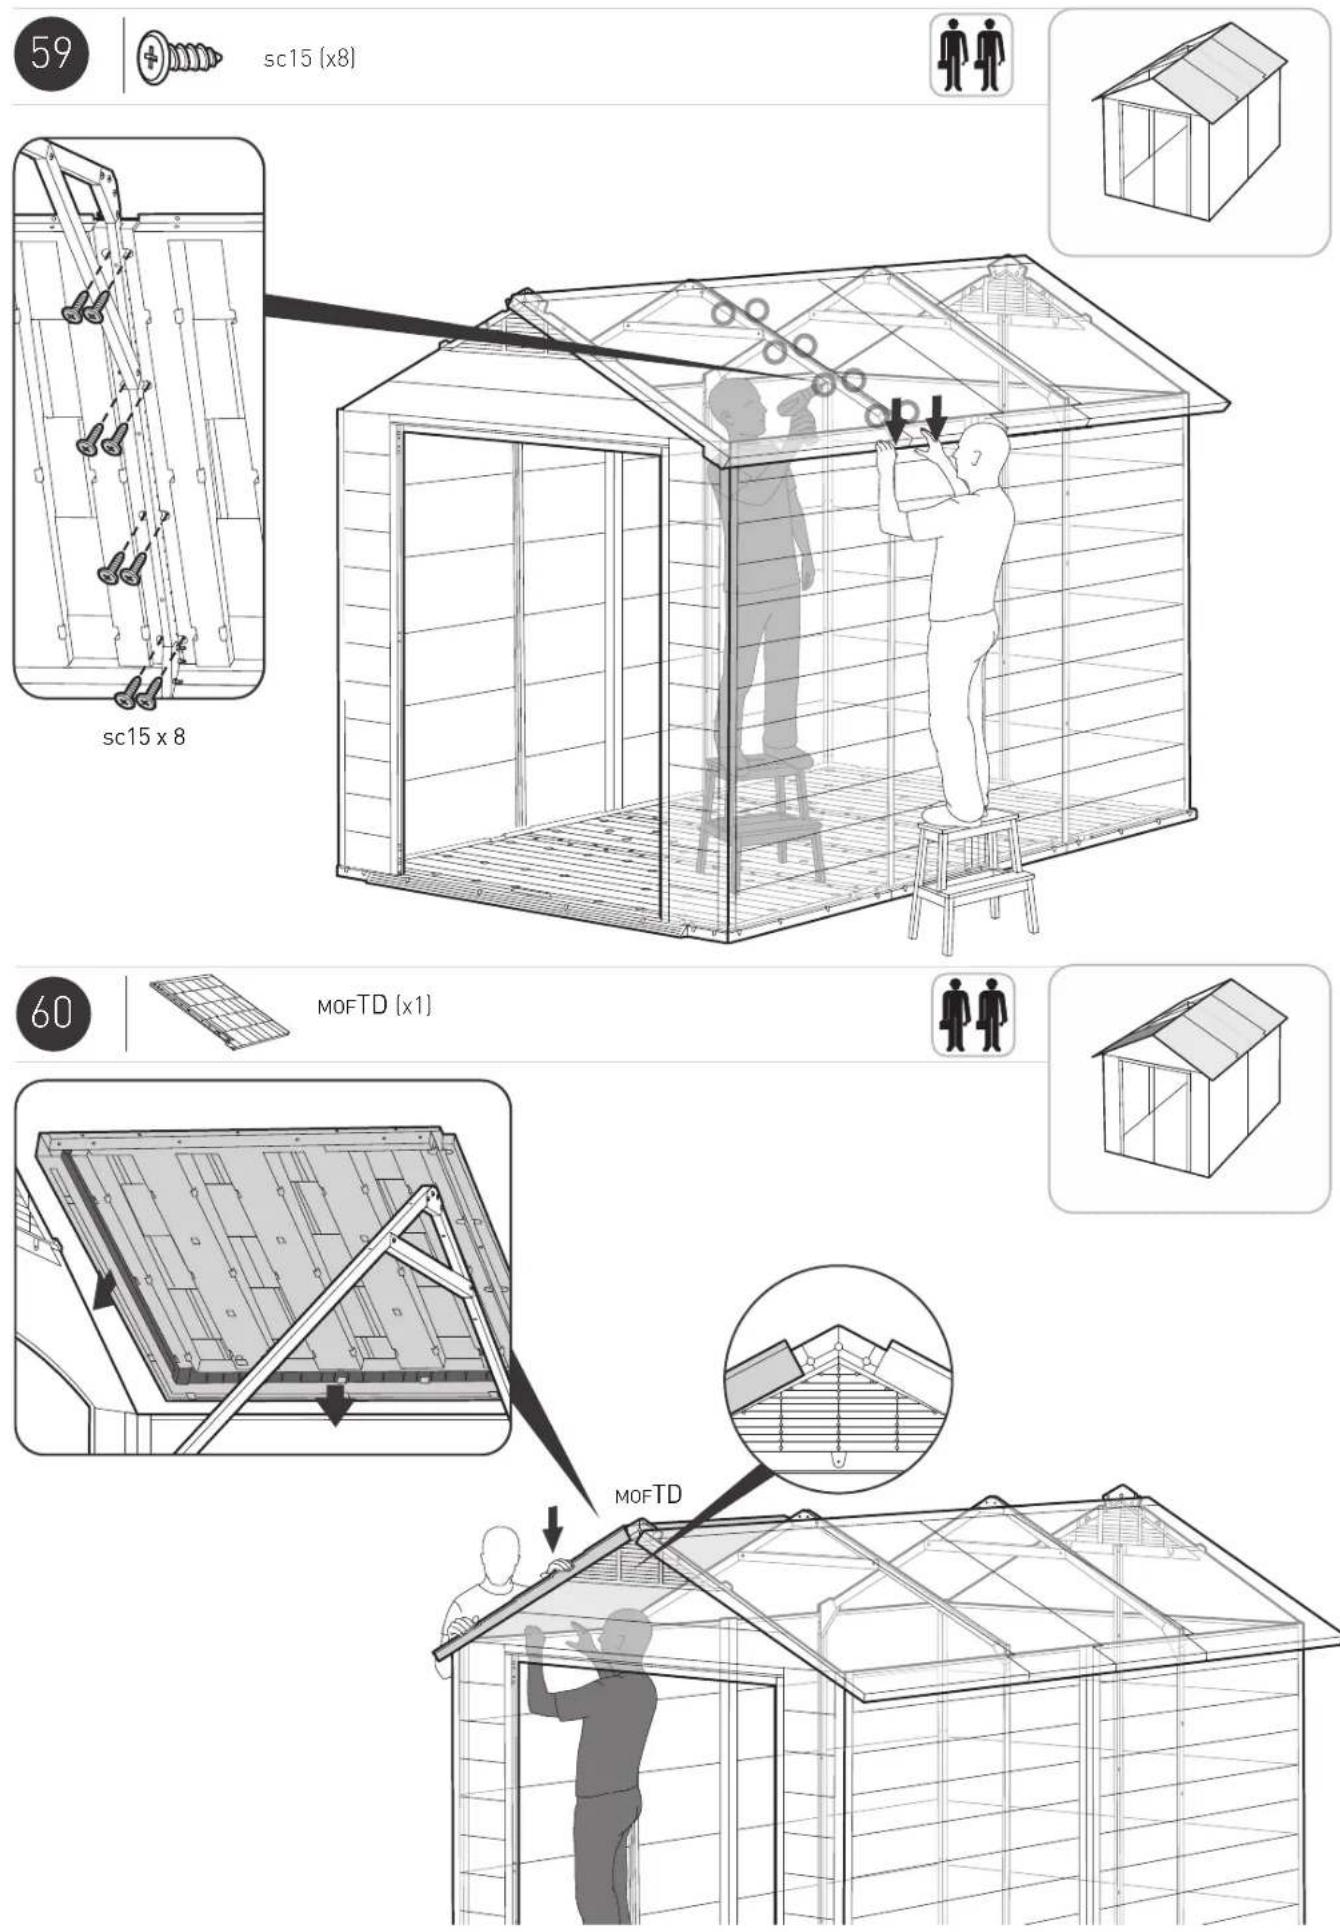
MOFTD (x1)
sc15 (x8)
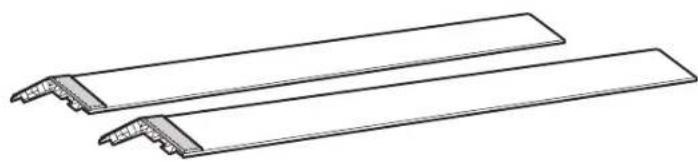
natural_image
Technical line drawing of two parallel wooden beams with hatched sections (no text or symbols)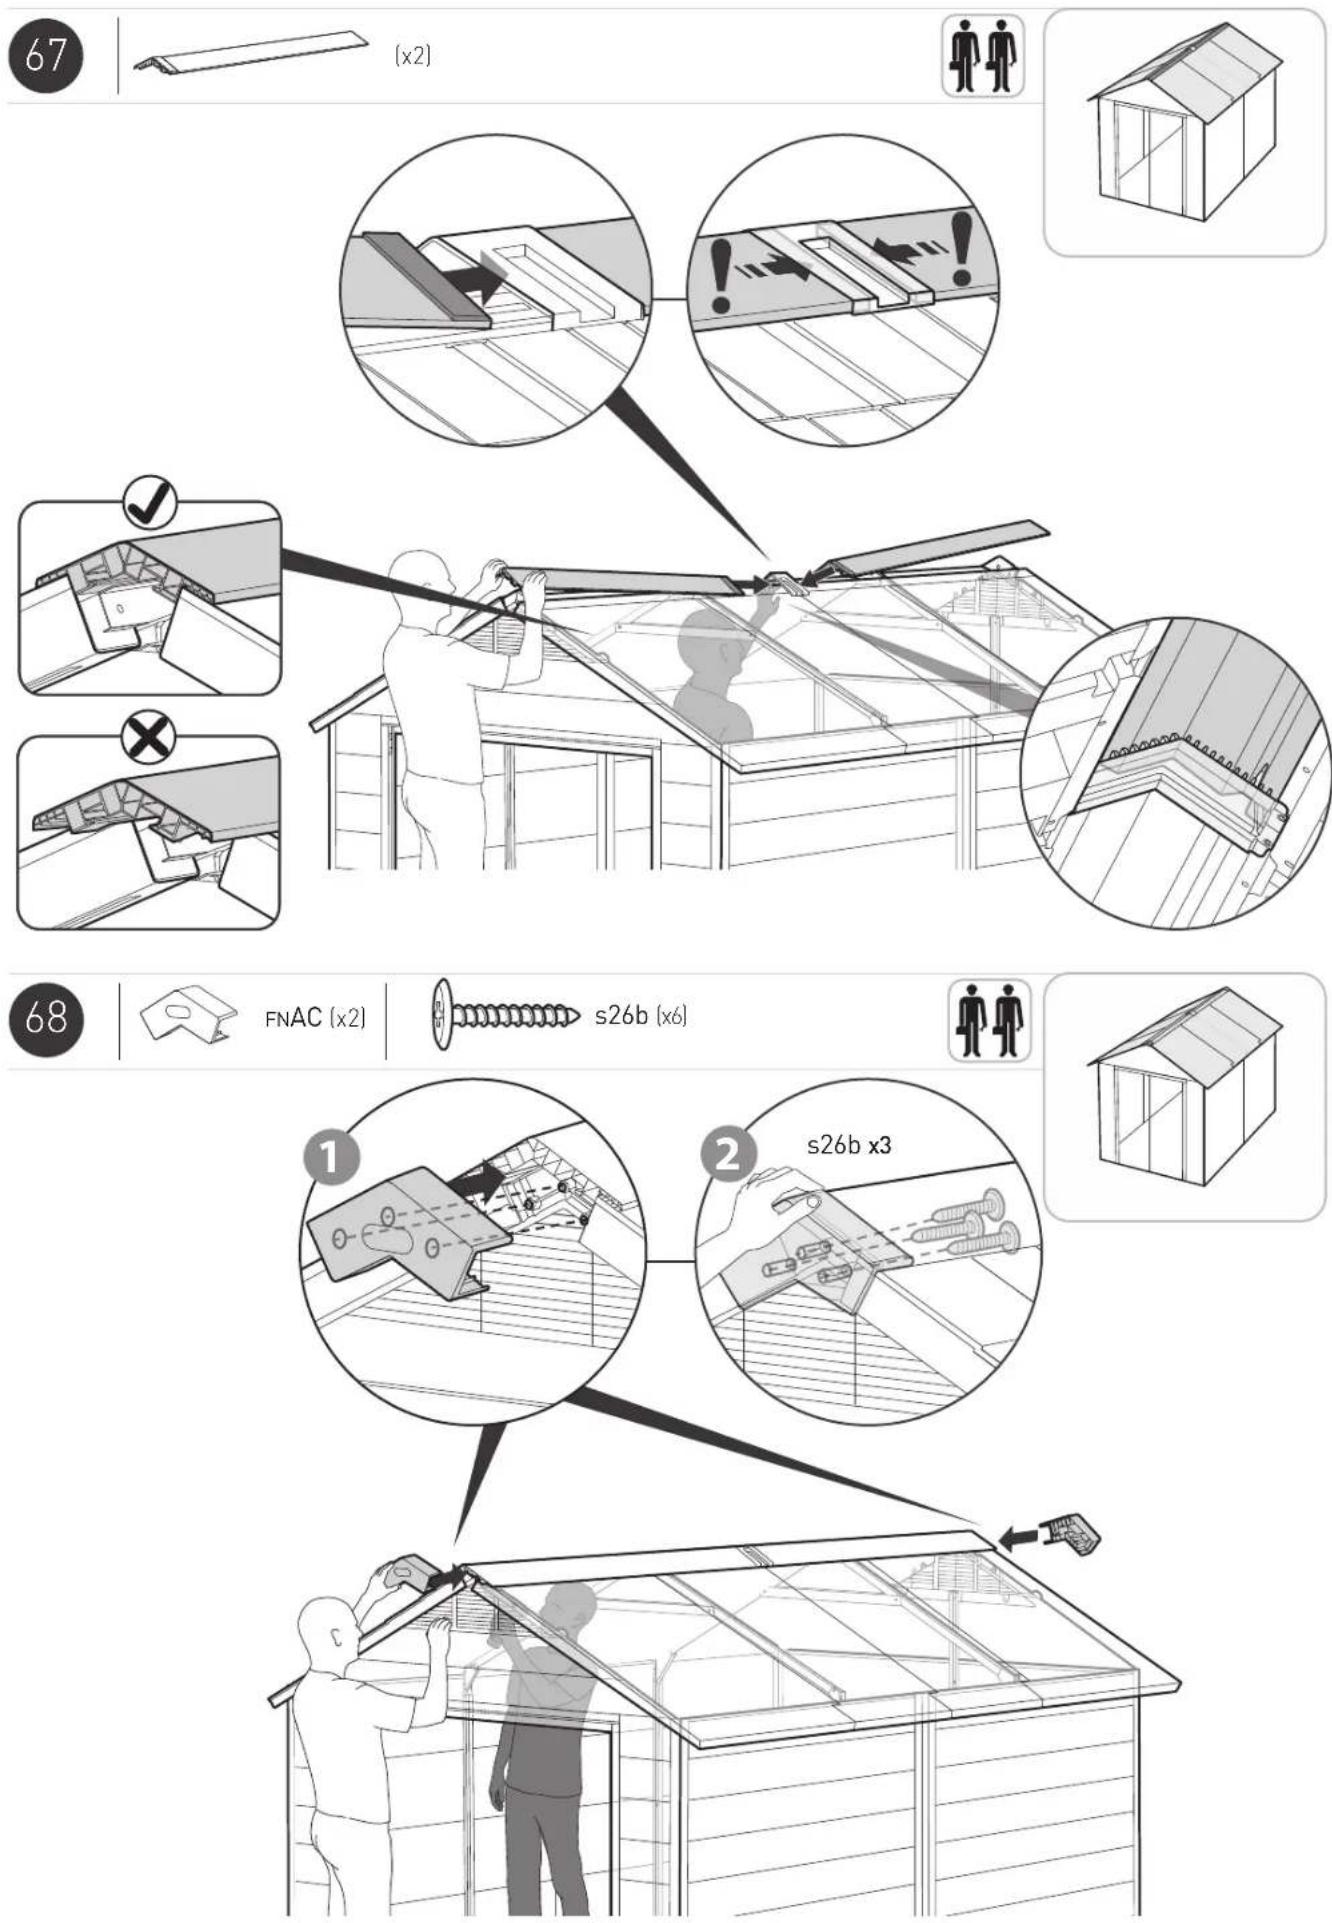


FNTM [x8]

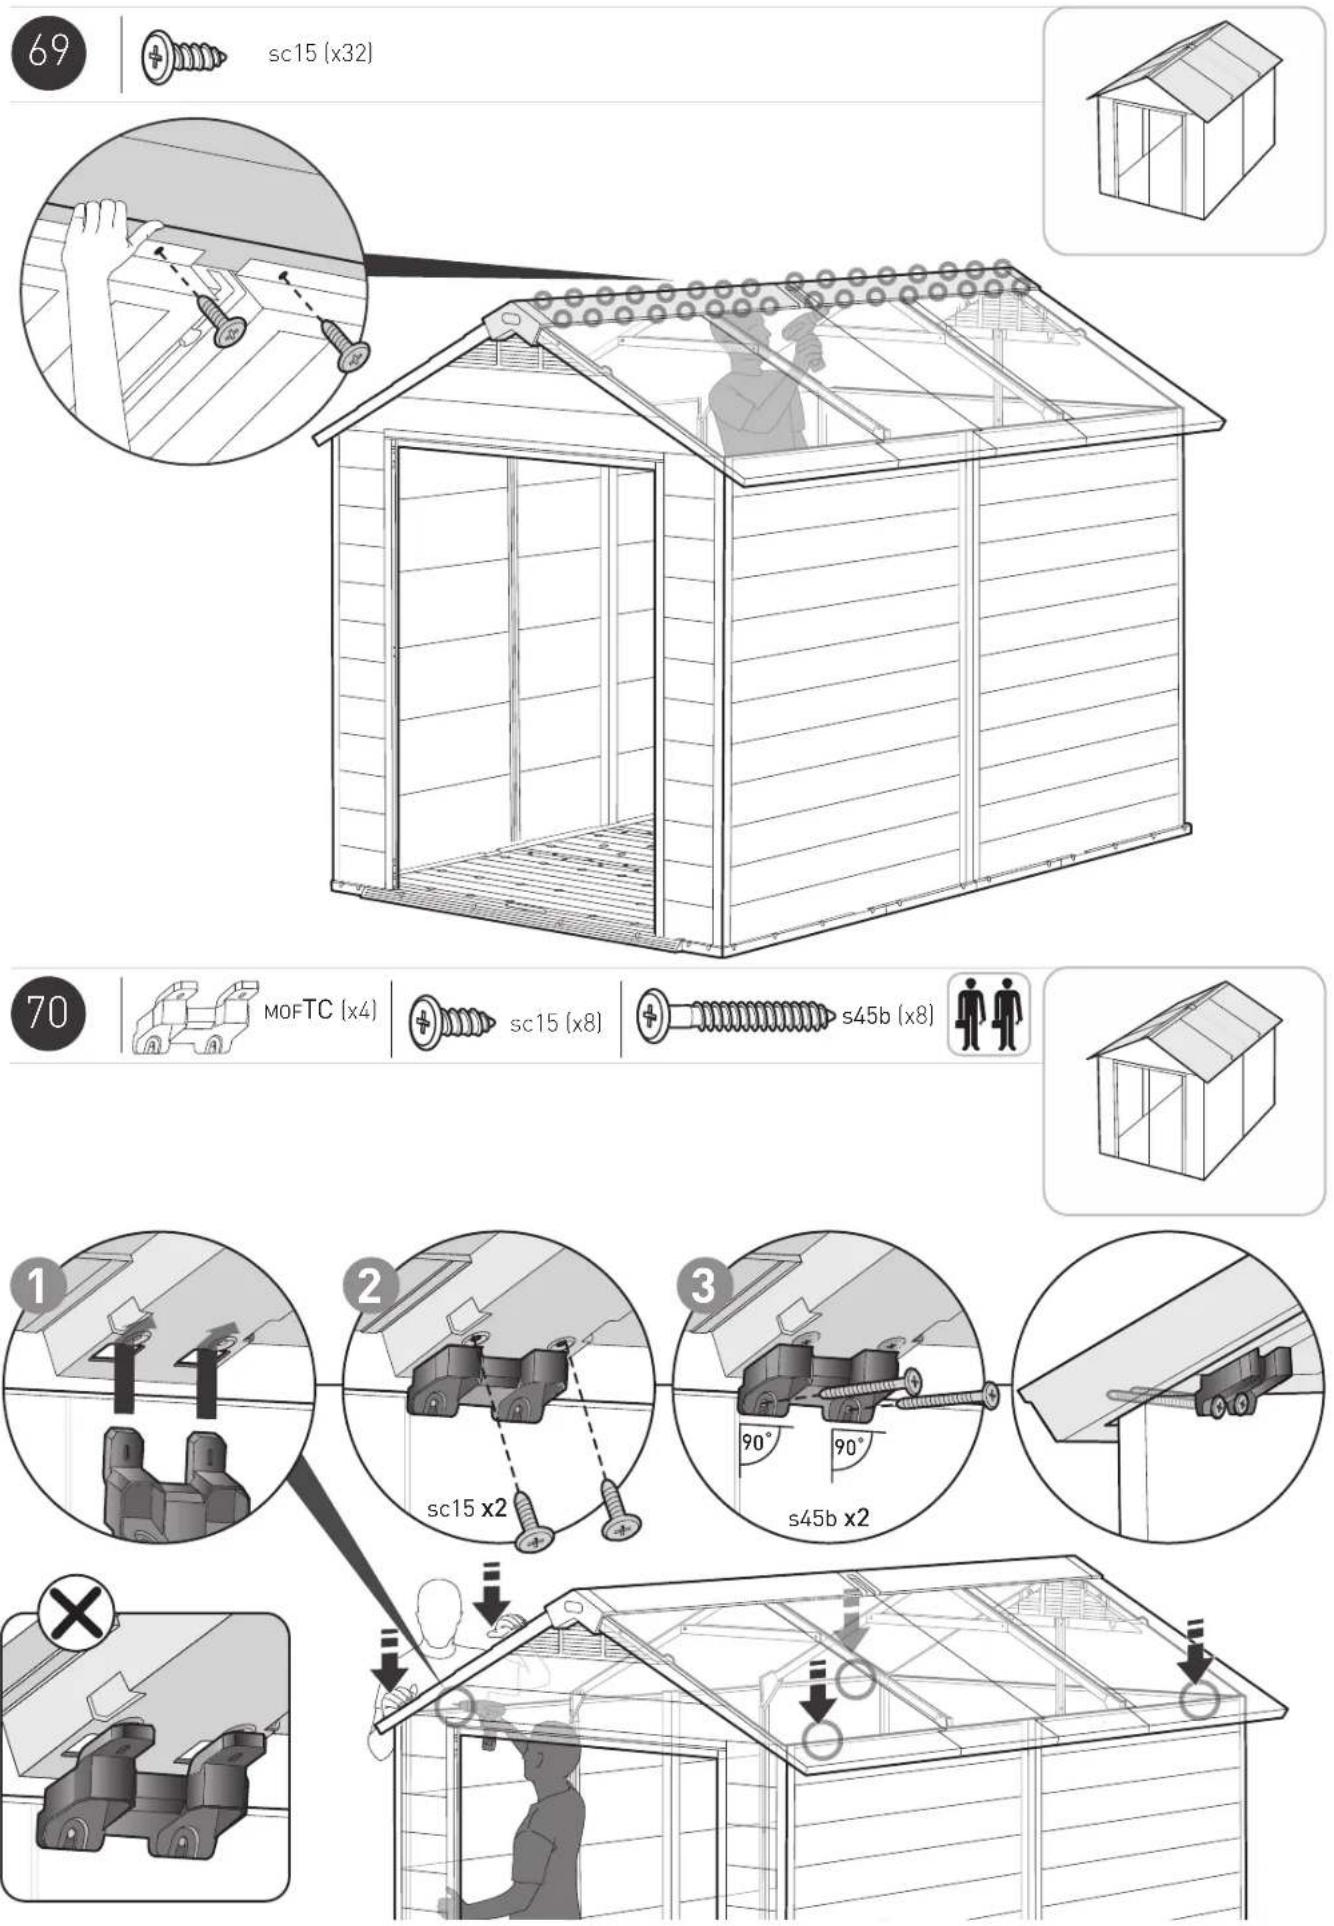
sc15 (x8) s45b(x8)
natural_image
Simple line drawing of a simple house with a tiled roof and open door (no text or symbols)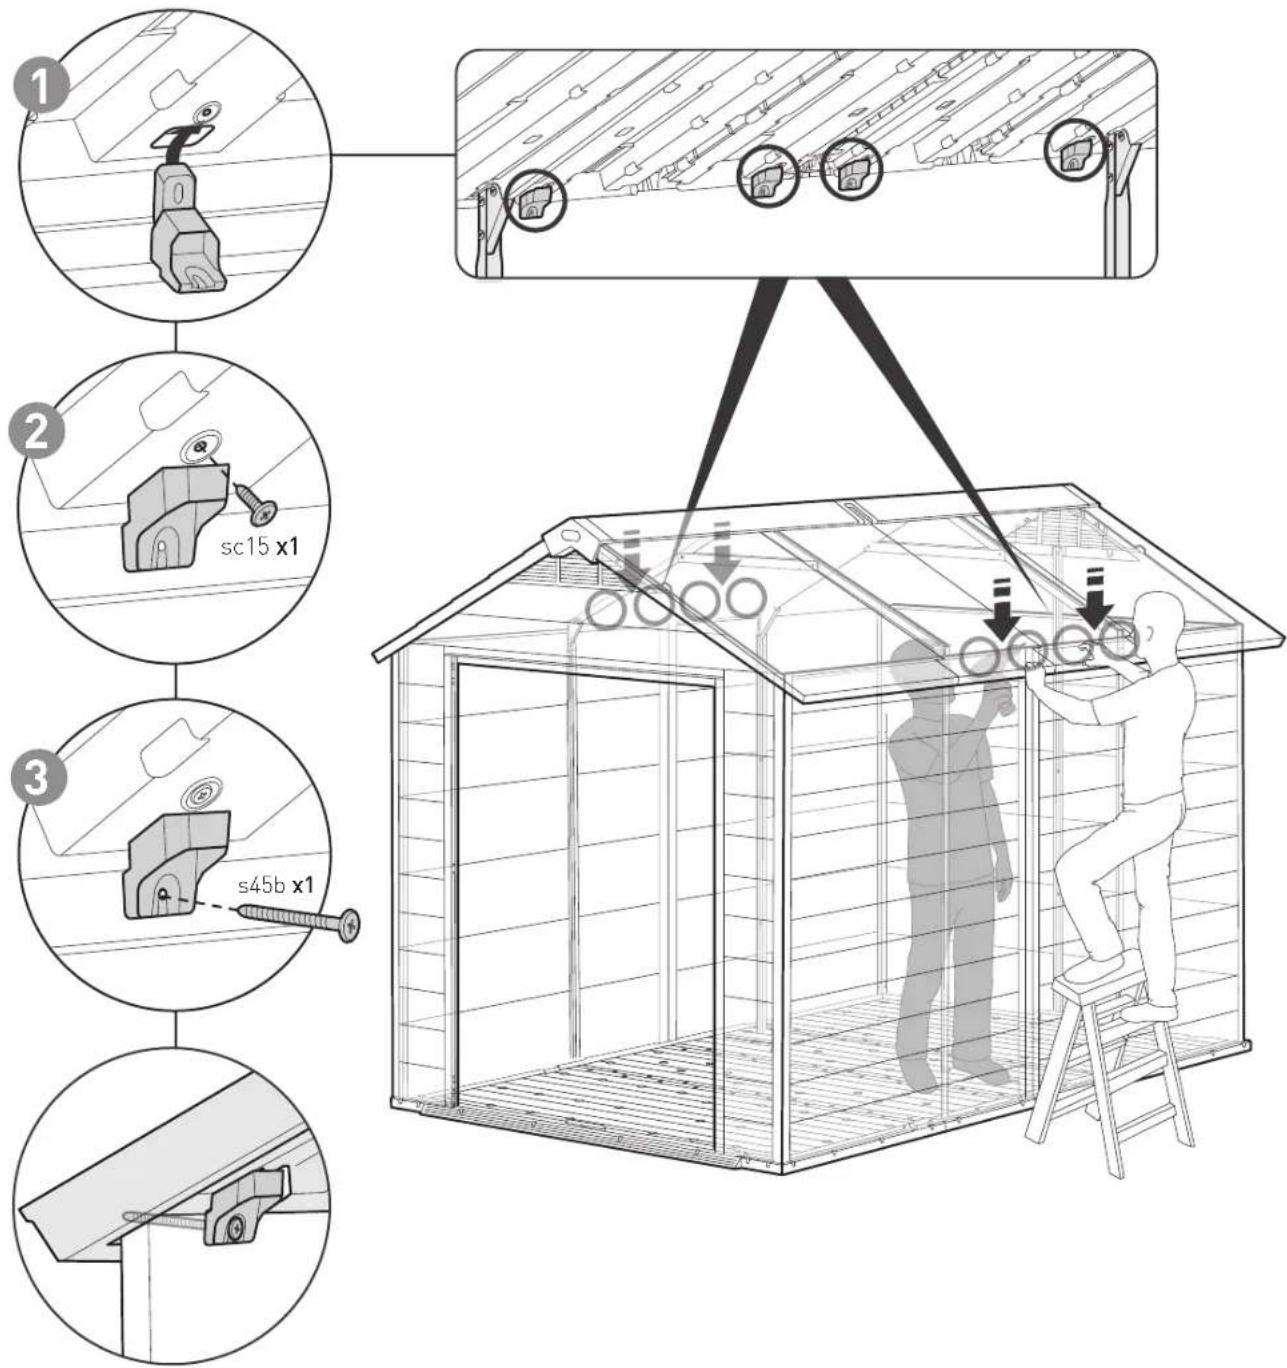
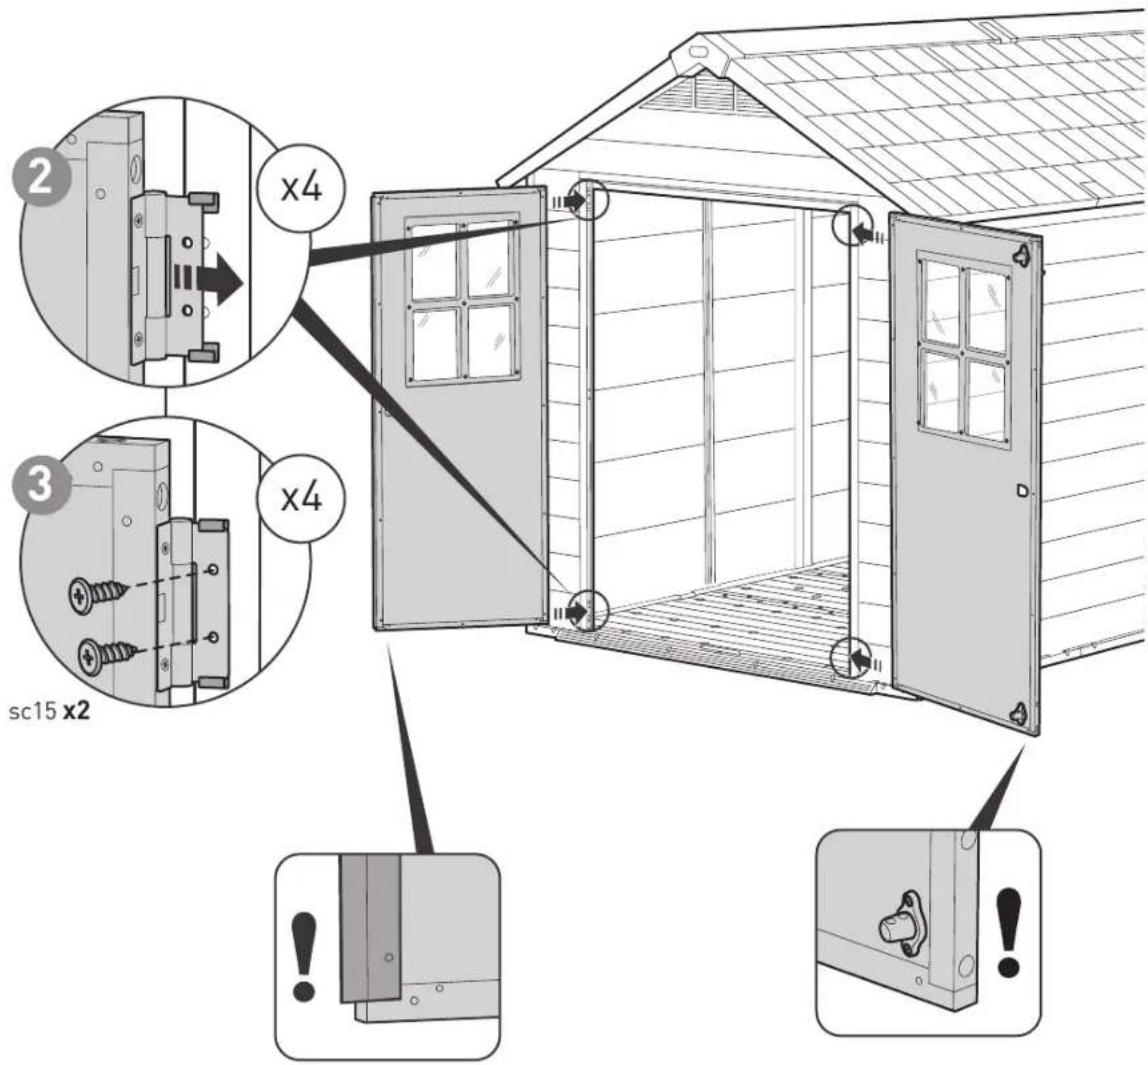
DOOR ASSEMBLY | MONTAGE DE LA PORTE | MONTAJE DE LA PUERTA | MONTAGE DER TÜR | DEURMONTAGE | MONTAGGIO DELLA PORTA | MONTAGEM DA PORTA | 문 조립
76

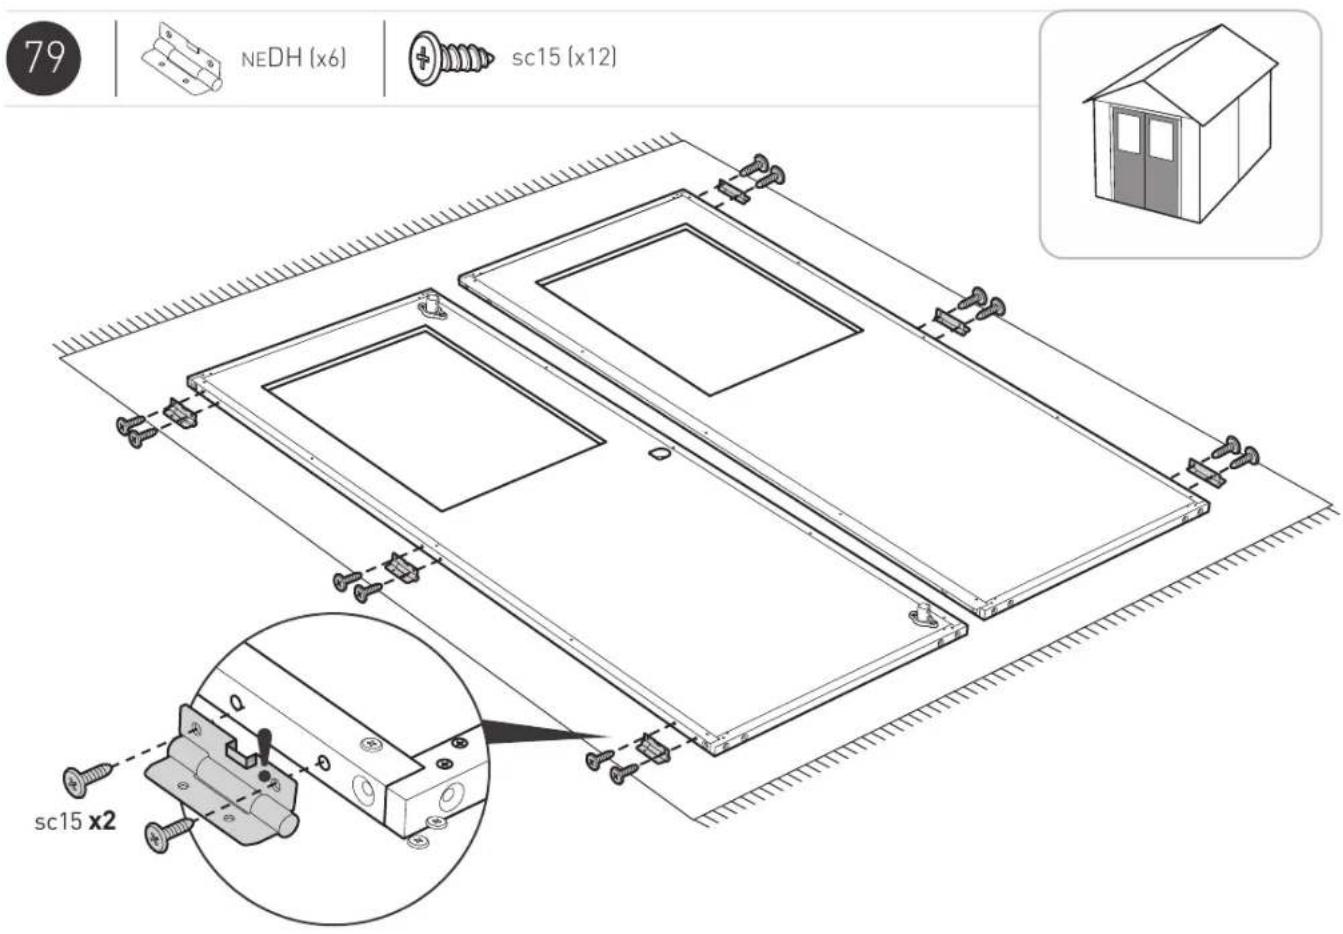
sc15 [x12]
natural_image
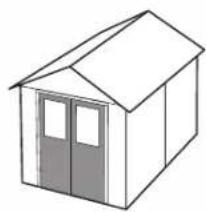
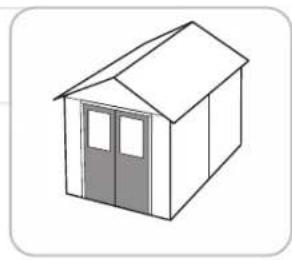
Simple line drawing of a simple house with two doors and a roof (no text or symbols)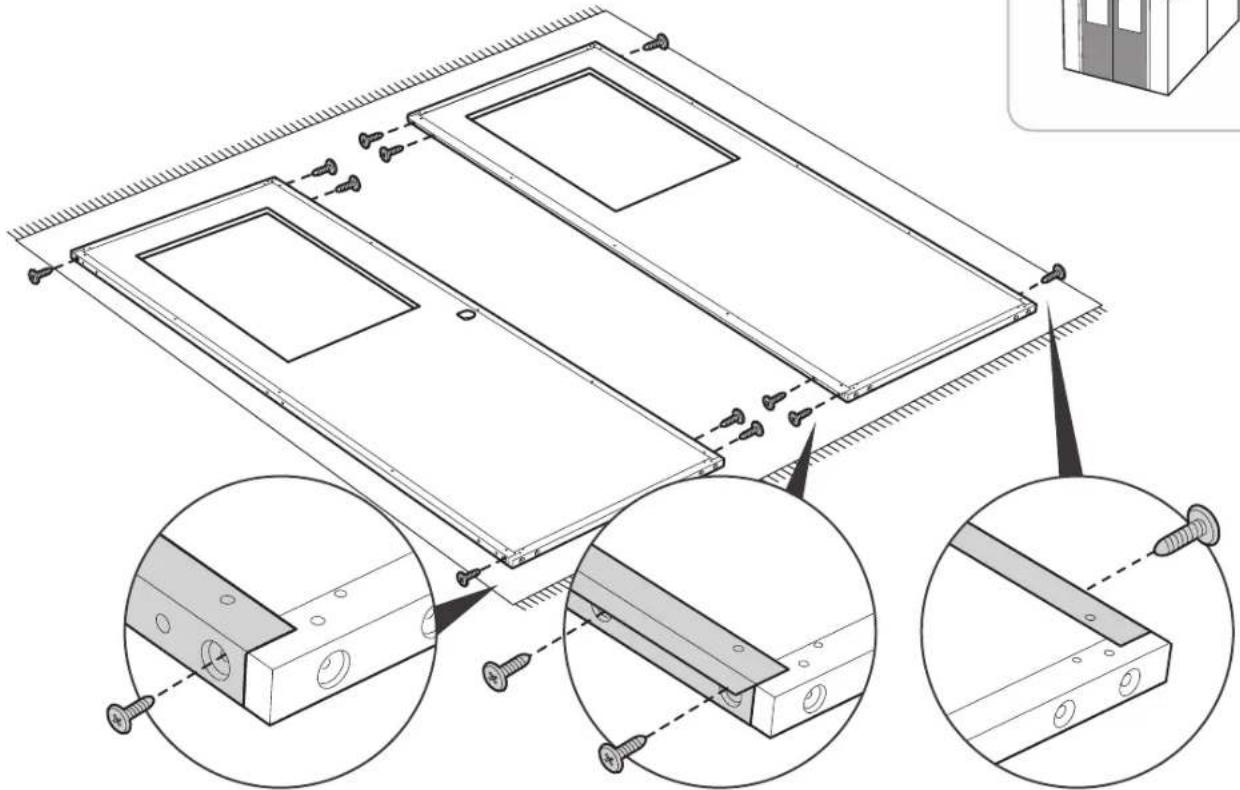
natural_image
Technical line drawing of a door frame assembly with three views of the door, showing mounting hardware and mounting details (no text or symbols present)77
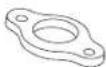
NUHG (x2)

NUHH (x2) sc


WINDOW ASSEMBLY | MONTAGE DE LA FENÊTRE | VENTANA DEL TECHO | FENSTERHMONTAGE | RAAMMONTAGE | MONTAGGIO DE LA FINESTRA | MONTAGEM DO JANELA


SMWF (x2)

SMWG (x4)
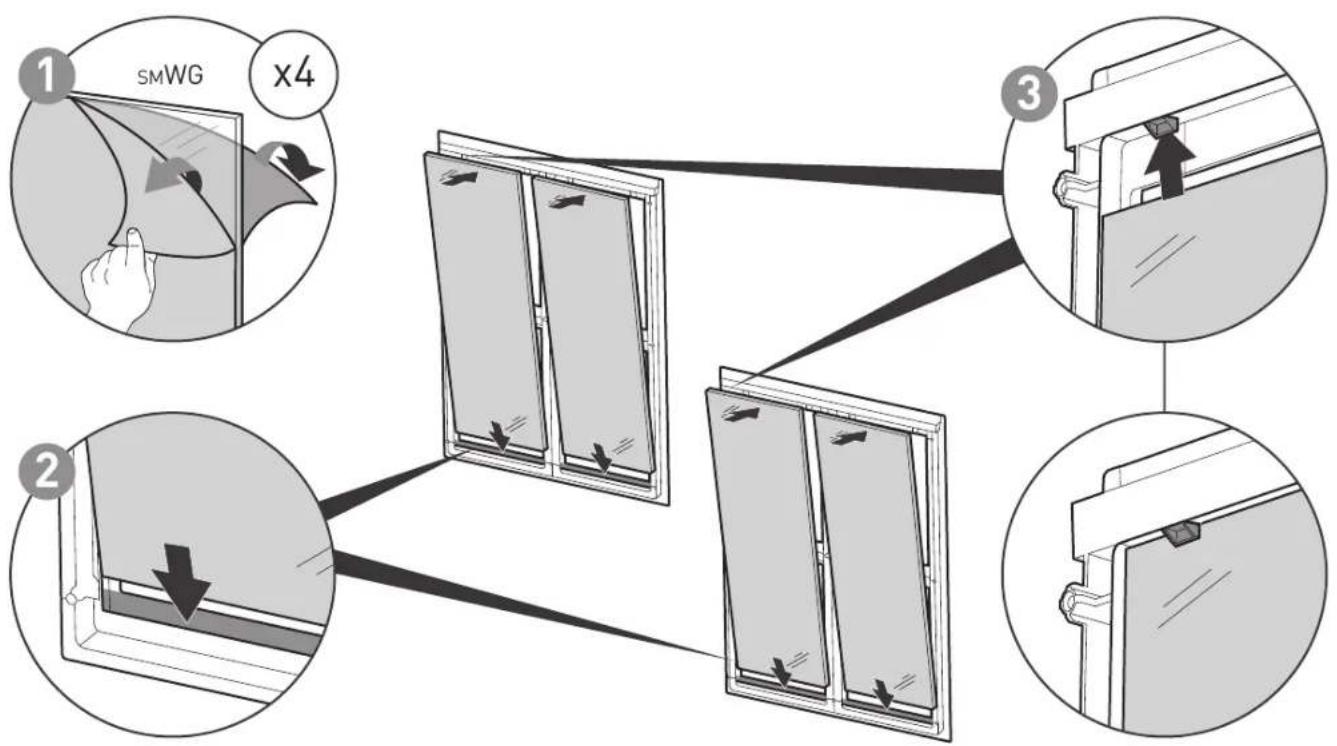
flowchart
graph TD
    A["1 SMWG x4"] --> B["2"]
    B --> C["3"]
    C --> D["4"]


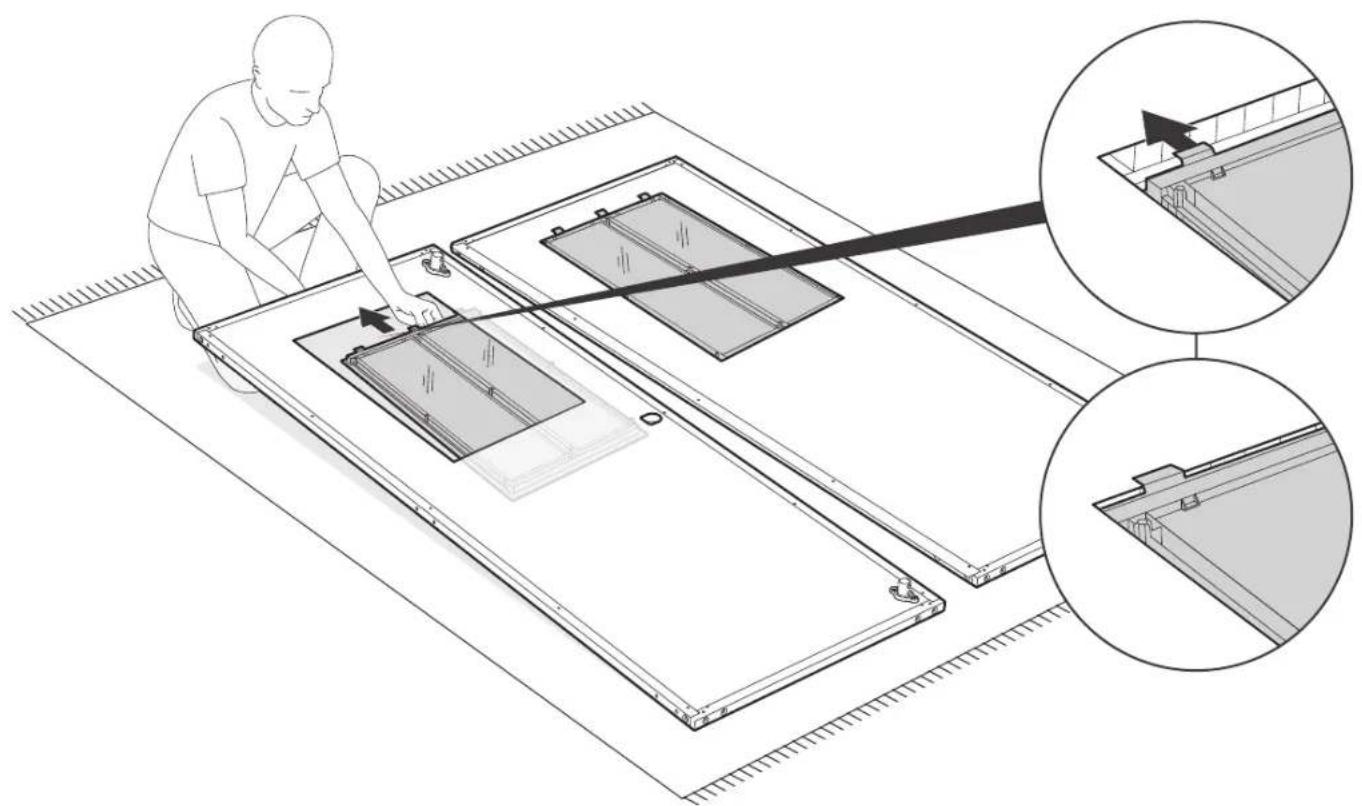
natural_image
Technical line drawing of a mechanical assembly with a person adjusting components, showing three views (top, front, side) without any text or symbols.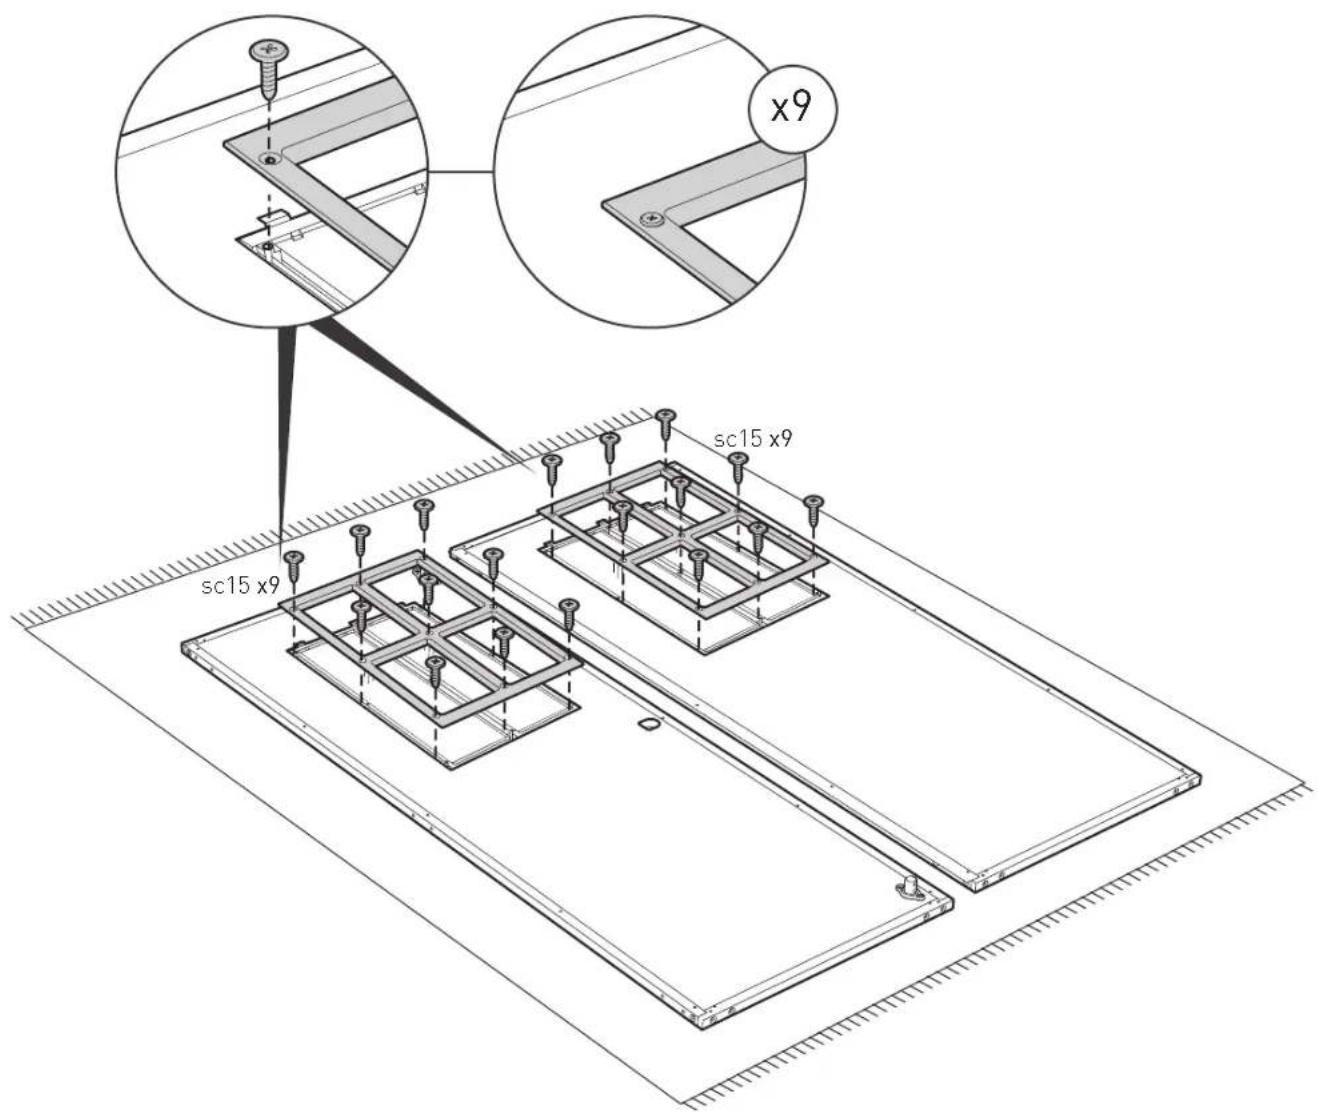
83

sc15 (x8)
natural_image
Simple line drawing of a small house with a roof, door, and window (no text or symbols)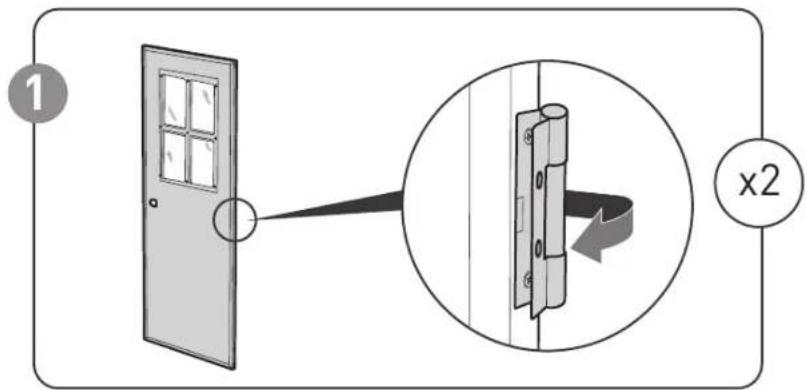


nuHE (x1)
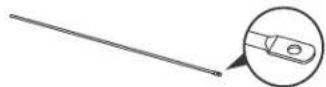
NEMB (x2)

sc15 (x2)
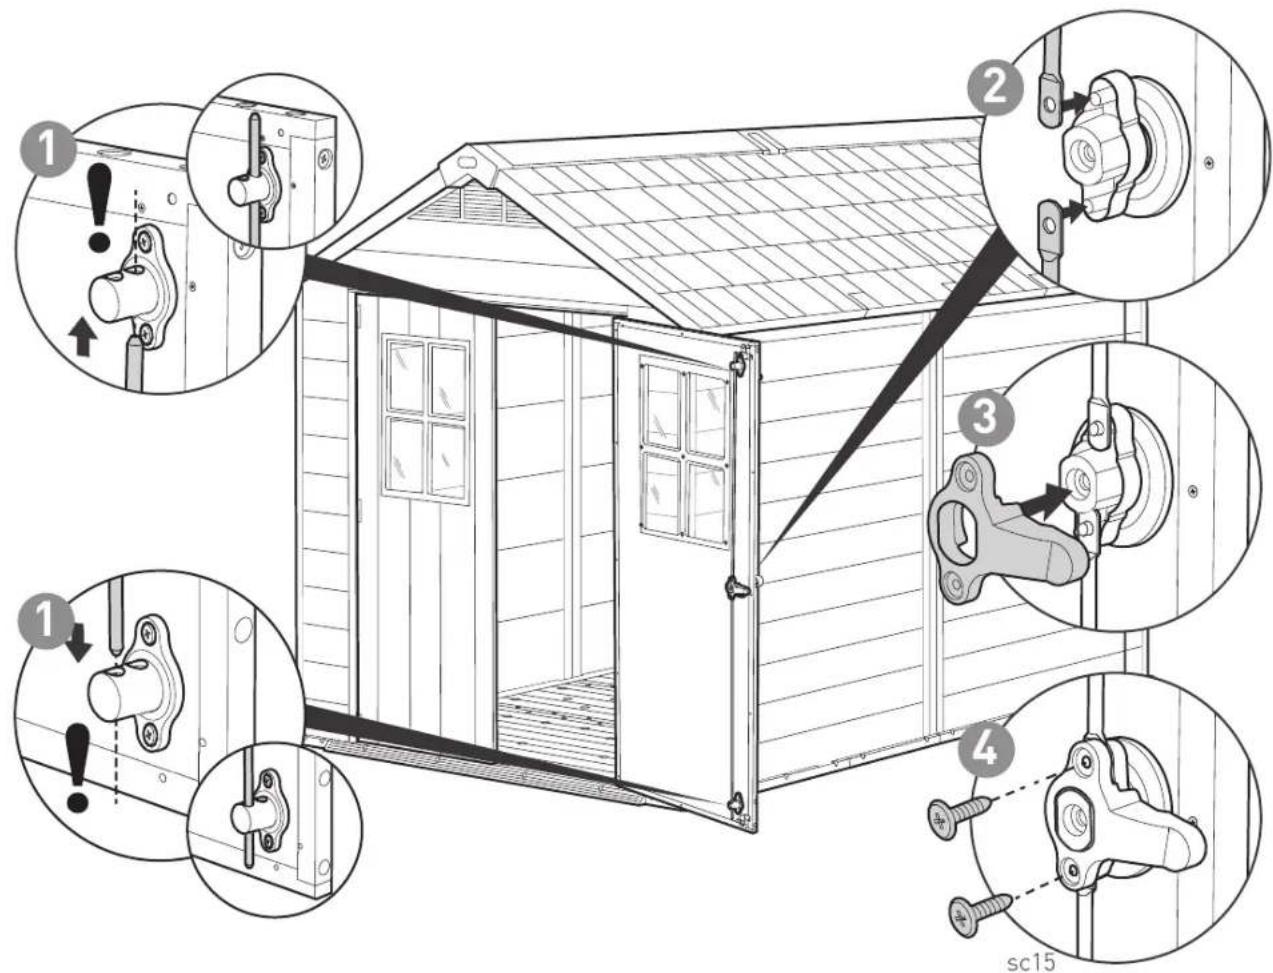
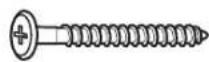
S45b (x34)
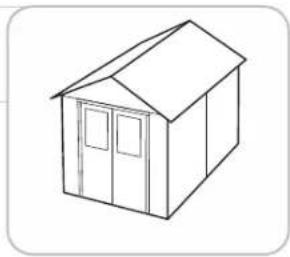
natural_image
Simple line drawing of a simple house with a roof, door, and windows (no text or symbols)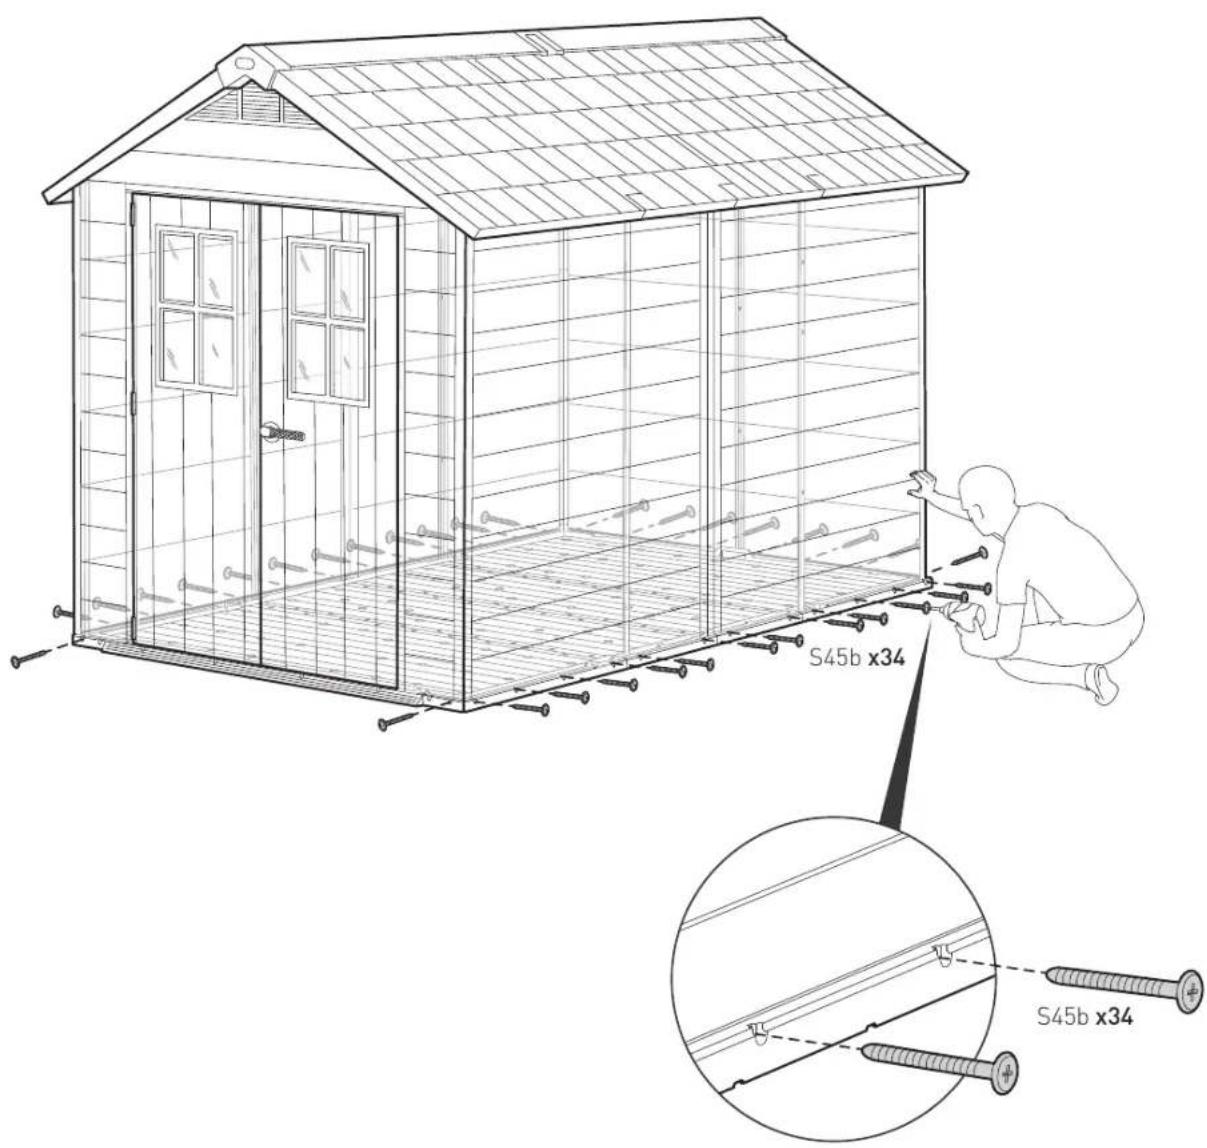
natural_image
Simple line drawing of a small house with a gabled roof and two doors (no text or symbols)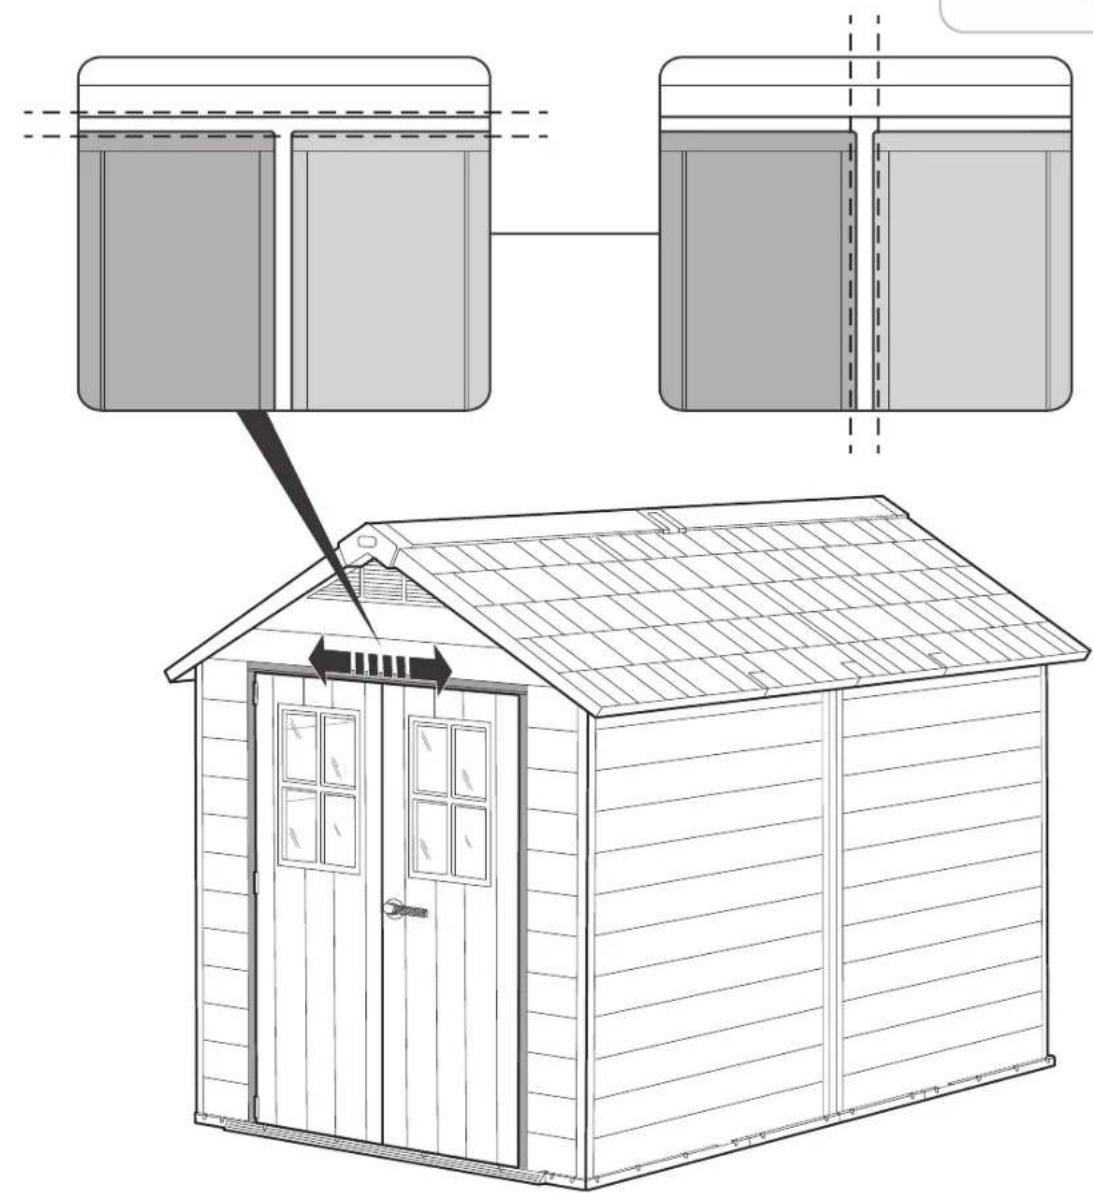
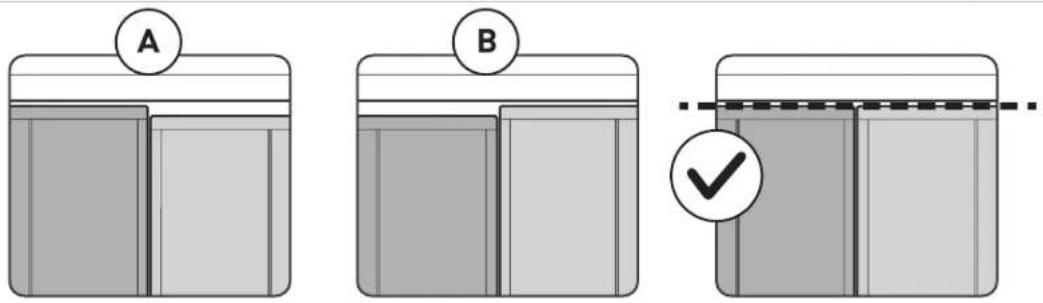
If you find that the shed is not level, use shims on either side of the shed or door | Si vous trouvez que votre abri n'est pas de niveau, mettez des cales sur chaque côté ou au niveau de la porte | Si usted encuentra que el cobertizo no esta nivelado, utilice cuñas en ambos lados del cobertizo o en la puerta
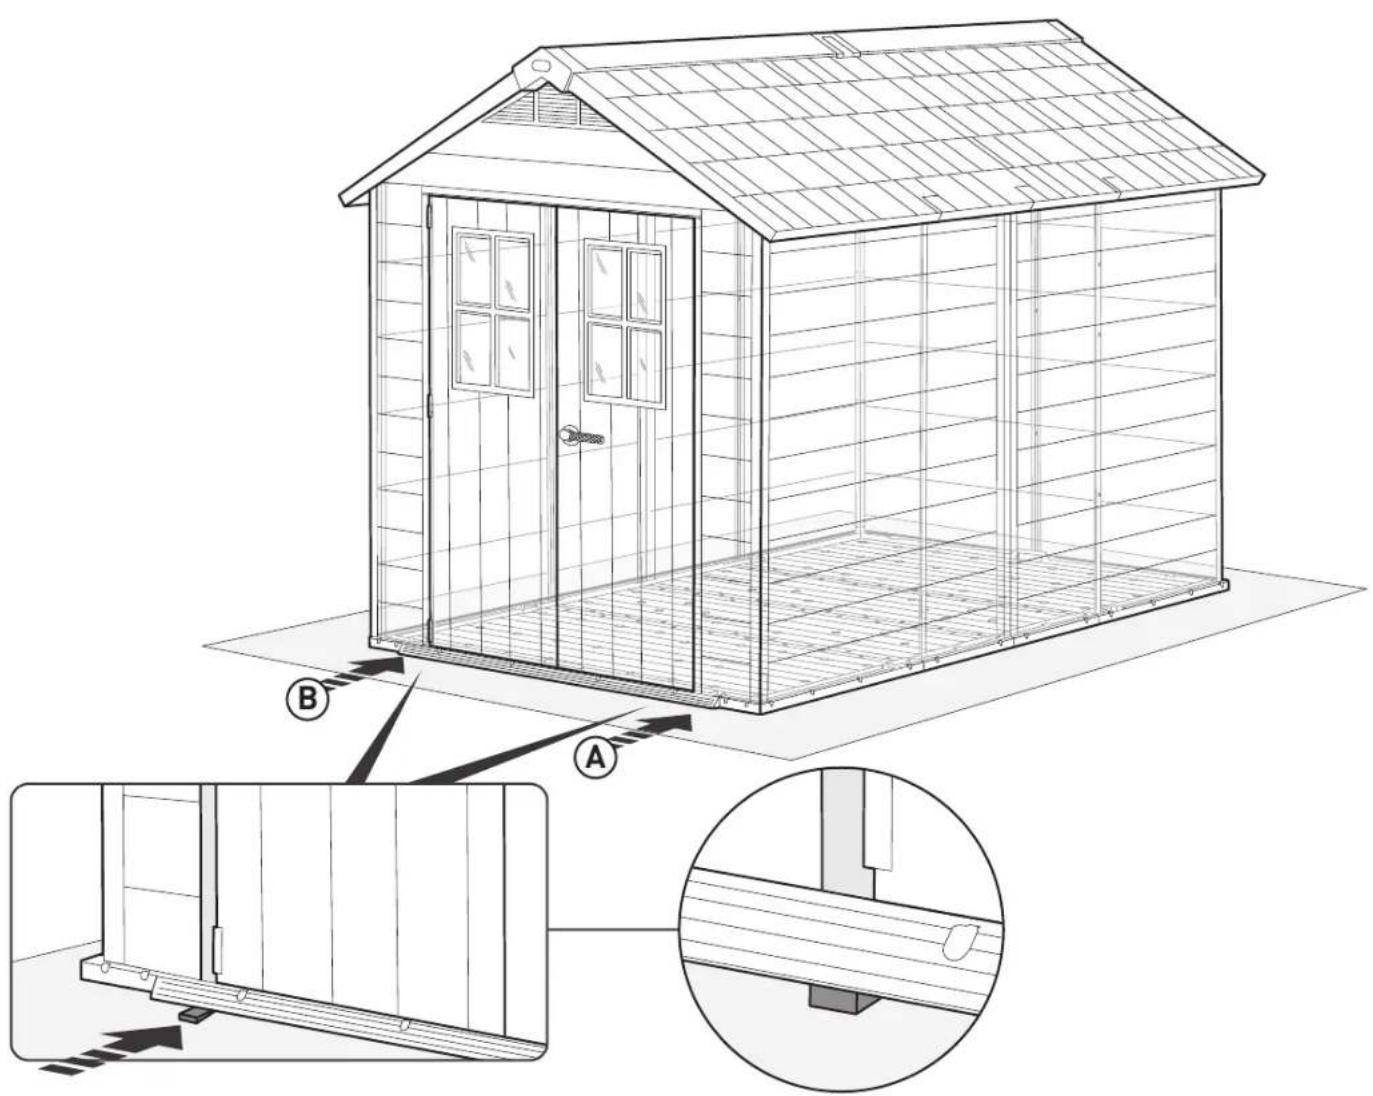
natural_image
Technical line drawing of a small modular house with roof tiles, showing internal structure and structural details (no text or symbols)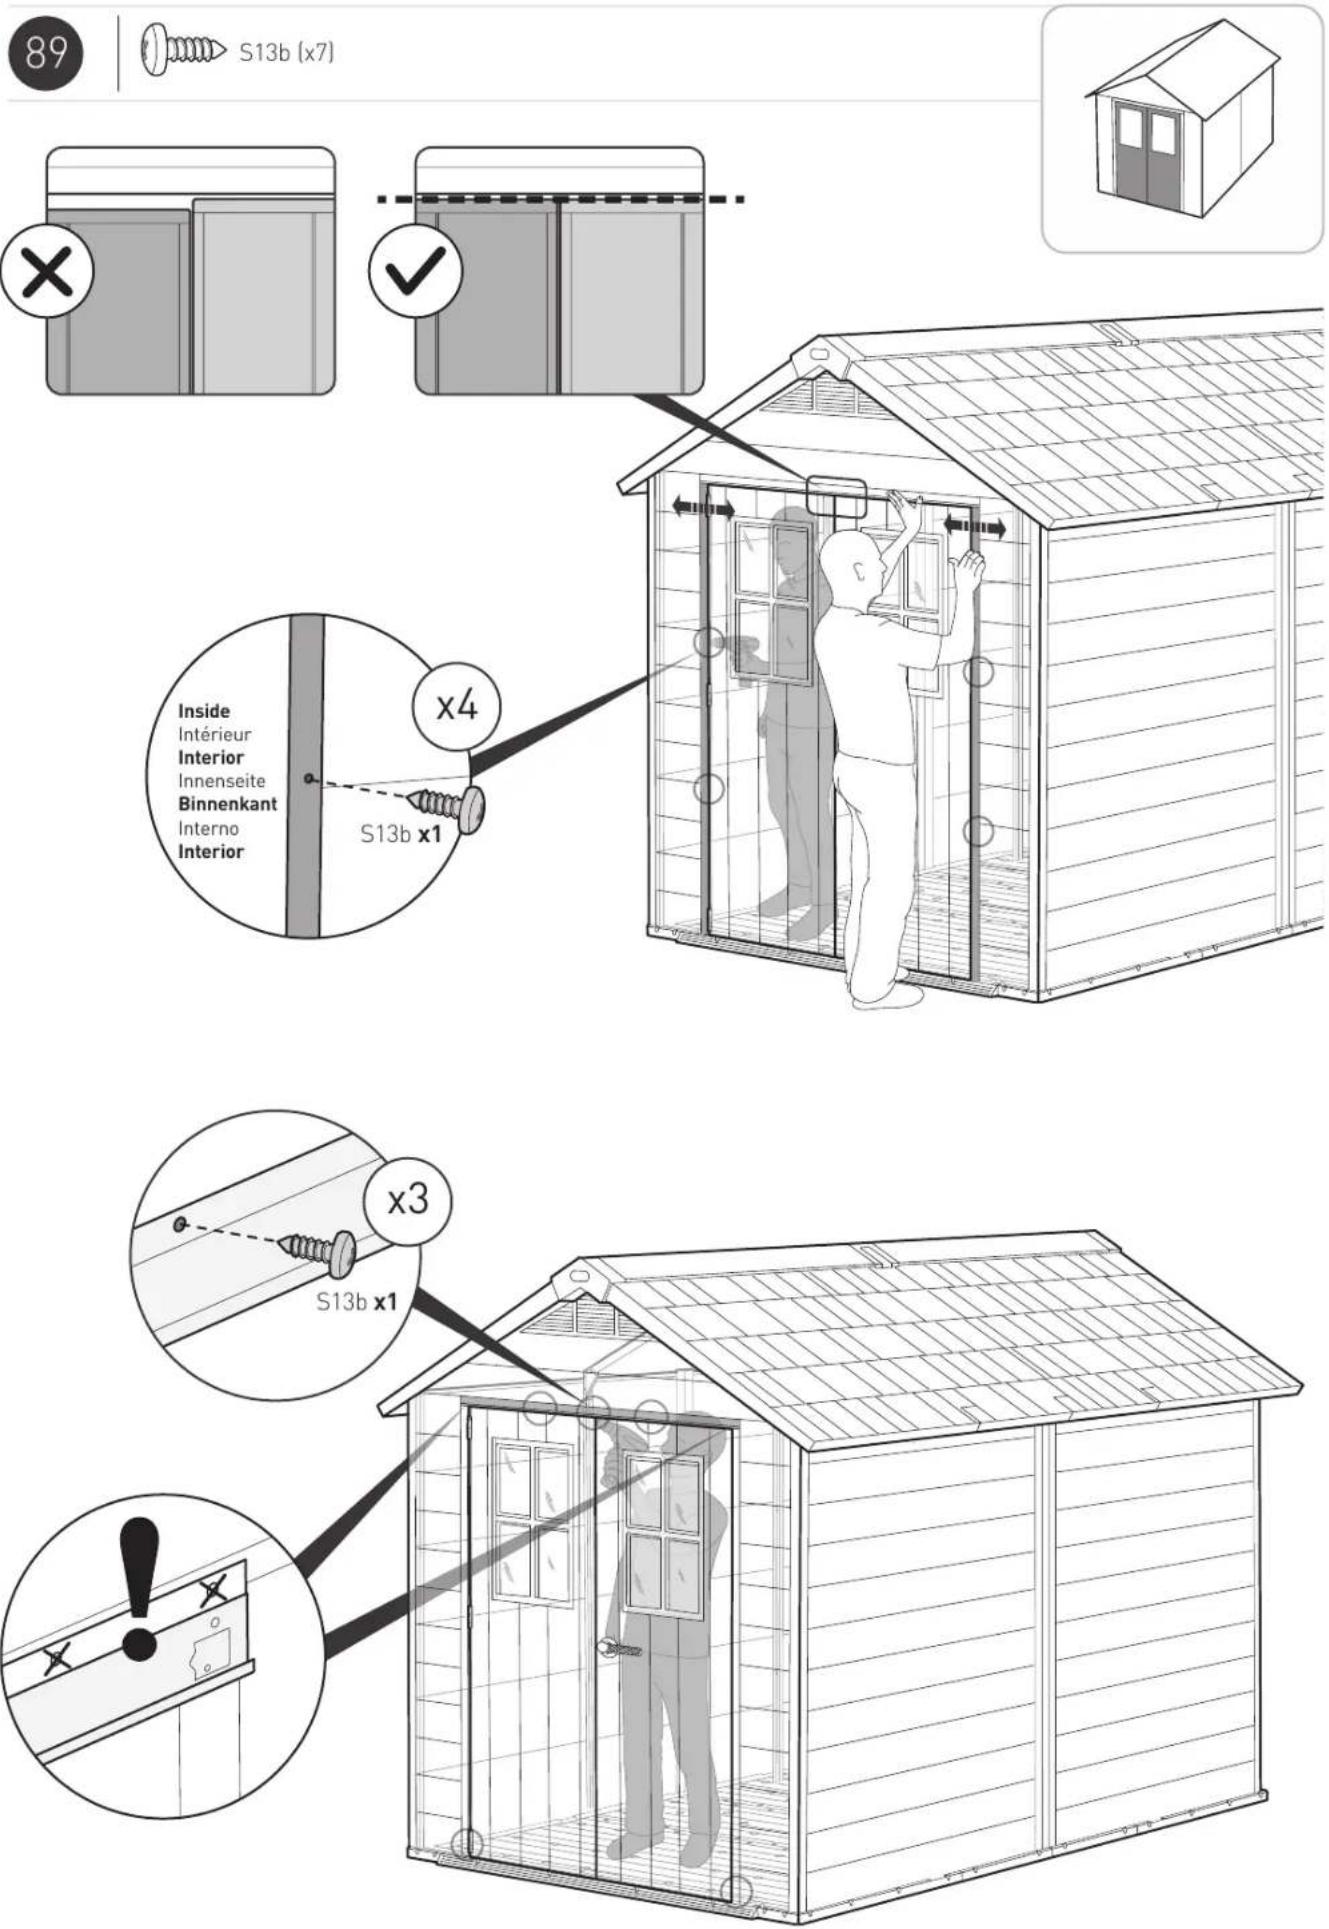
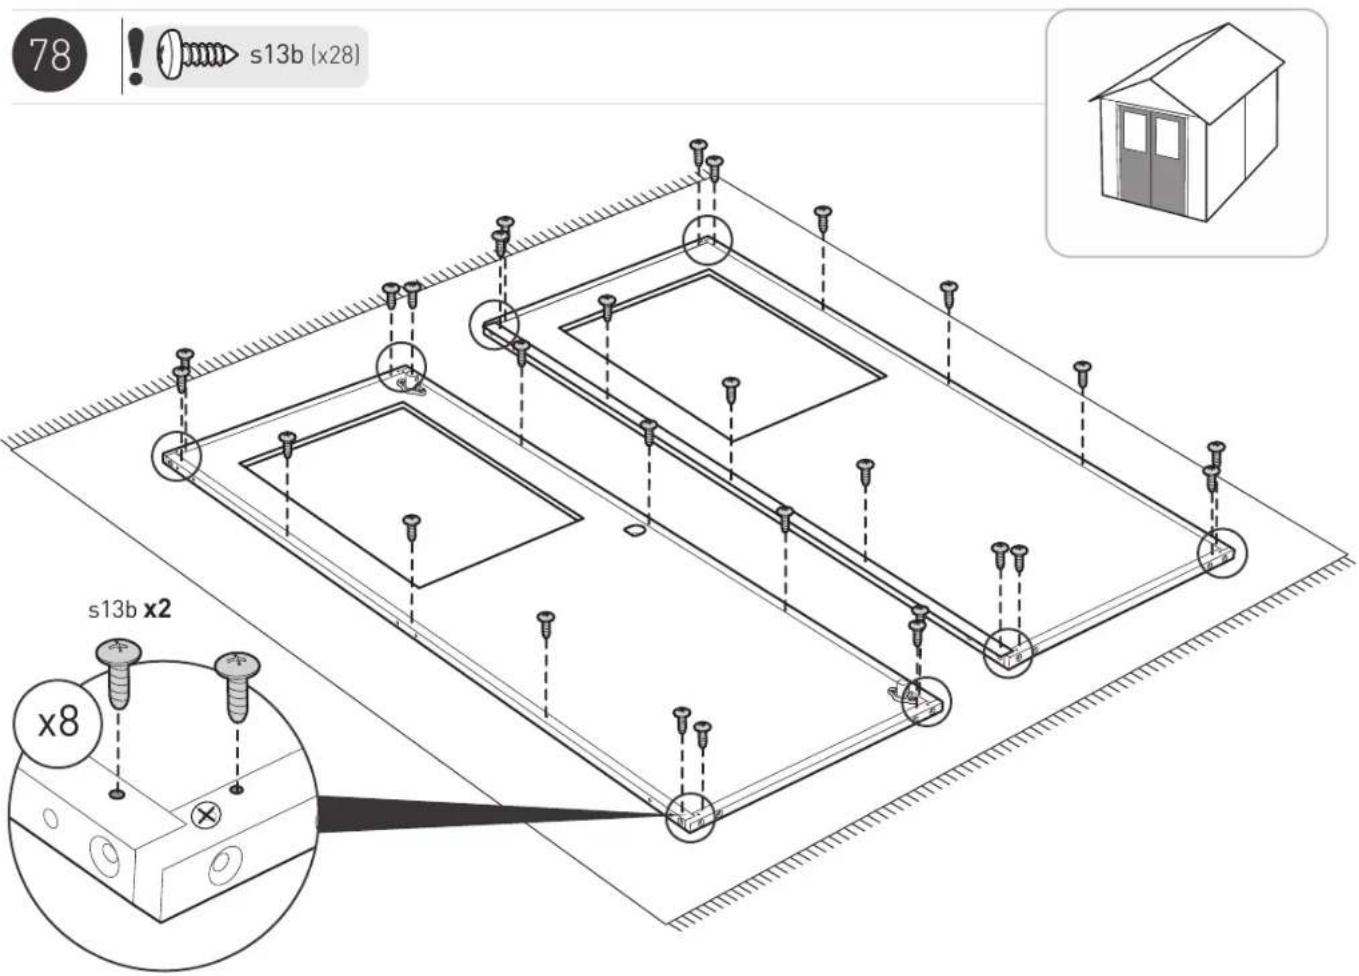
S13b (x7)



s13b (x28)

natural_image
Simple line drawing of a simple house with a roof, windows, and doors (no text or symbols)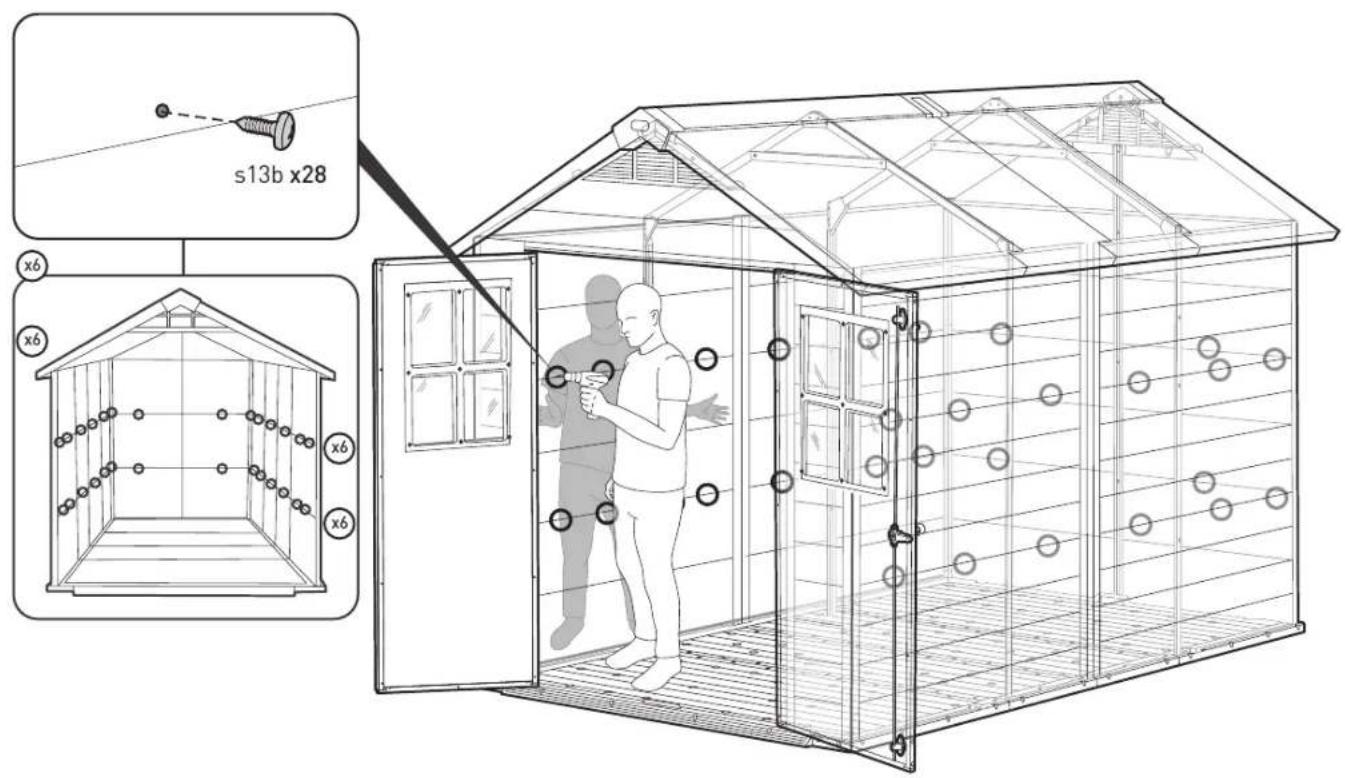
OPTION | OPTION | OPCIÓN | OPTION | OPTIE | OPZIONE | OPÇÃO
SECURING THE SHED TO A FOUNDATION
Affix the shed to the foundation by drilling holes in the shed floor at the pre-marked locations and screwing it into the foundation using appropriate screws (screws not included).
FIXER L'ABRI SUR UNE FONDATION
ABSICHERN DES SCHUPPENS AN EIN FUNDAMENT
natural_image
Technical line drawing of a modular space enclosure with internal components and a close-up inset showing screw fasteners (no text or symbols)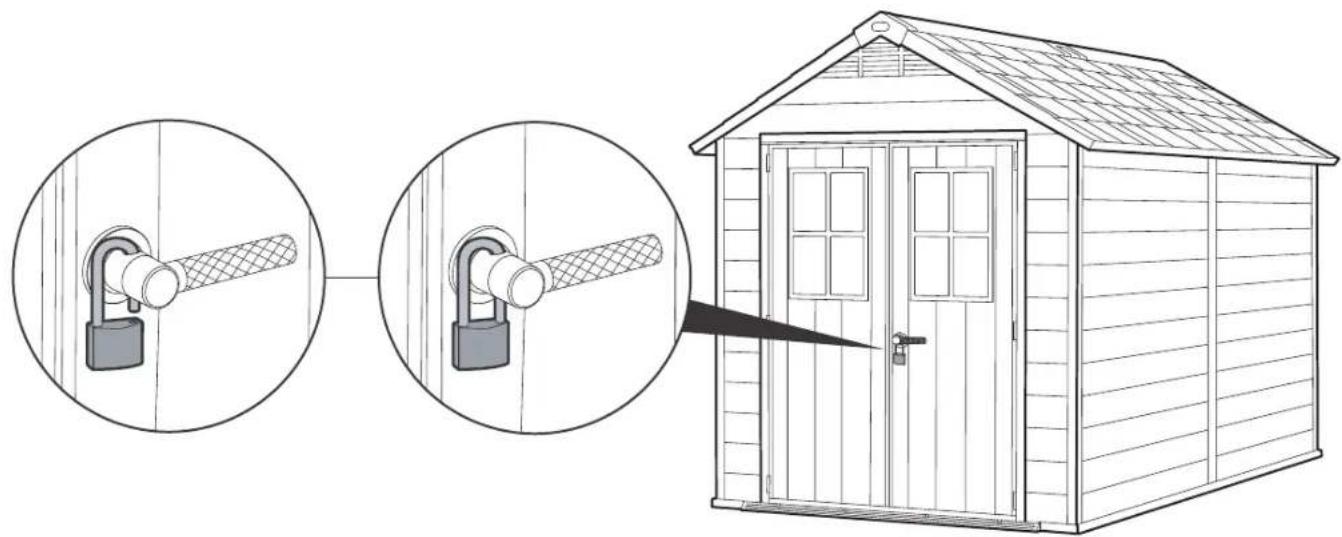
natural_image
Line drawing of a small wooden cabin with two lockers, shown in three views: one close-up, one wide-up, and one open (no text or symbols)CARE AND SAFETY GUIDELINES
- The shed is intended for storage purposes only. It is not designed for habitation.
- It is strongly recommended to secure the shed to an immovable object or anchor to the ground by drilling holes in the shed floor (at the pre-marked locations) and inserting proper screws into the ground (screws are not included).
- Do not attempt assembly on windy or cold days.
- Periodically check the shed to ensure that it is stable and that the site is level.
- Be careful when handling parts with steel edges.
- When assembling or handling the shed, use only those tools listed in the user manual.
- Avoid using a lawnmower or mechanical scythe near the shed.
- Wear safety goggles and always follow the manufacturer's instructions when using power tools.
- Wash the shed with a garden hose or a mild detergent solution. Do not use a stiff brush or abrasive cleaners, including degreasers and oil- or acetone-based cleaning materials, as these may stain or damage the shed.
- Do not store hot items, such as recently used grills and blowtorches, and volatile chemicals in the shed.
- Avoid placing heavy items against the walls, as this may cause distortion.
- Keep the roof clear of accumulated snow and leaves. Large amounts of snow on the roof can damage the shed, making it unsafe to enter.
- Wind direction is an important factor to consider when determining the location of the shed. Reduce exposure to the wind, in general, and of the door side in particular. Keep doors closed and locked when the shed is not in use to prevent wind damage.
- Do not stand on the roof.
- Consult your local authorities to check if permits are required to erect the shed.
INSTRUCTIONS DE SÉCURITÉ ET D'ENTRETIEN
Your Keter shed (“the Product”) was manufactured from high-quality, recyclable materials under rigorous control and supervision.
Should a problem occur with the Product, please address your claim to Keter customer service on our website (www.keter.com) or by phone.
This warranty covers product failure resulting from defects in manufacturing or materials for a period of 10 years from the date of original retail purchase. (The term "defects" is defined as imperfections that impair the use of the Product).
This warranty does not cover defects resulting from normal wear and tear, including, but not limited to, scuffing, scratches or fractures caused during use, discoloration or fading, rusting, unreasonable use, abuse, negligence, alterations, painting, moving, transporting or relocating the Product, "acts of Nature," including, but not limited to, hail, any type of storm, flood and fire, and consequential or incidental damages.
Assembly and handling not in accordance with the recommendations, guidelines and restrictions as described in the Product's user manual, and usage for commercial or public applications, will void this warranty.
Keter is not responsible for any damage incurred by third parties or damage to or loss of objects inside or near the shed.
Upon submitting proof of purchase and evidence of the claimed product failure, and subject to reporting the failure in a timely manner, Keter, at its sole discretion, will replace defective parts of the Product, or refund you a prorated portion of the purchase price on a straight line depreciated basis for the length of the warranty.
GARANTIE LIMITÉE DE 10 ANSC
IF THERE ARE MISSING OR BROKEN PARTS, PLEASE DO NOT RETURN THE PRODUCT TO THE STORE. Please log onto our website, or contact Customer Service at:
S'IL Y A DES PIÈCES MANQUANTES OU CASSÉES, NE RETOURNEZ PAS LE PRODUIT AU MAGASINV. euillez visiter notre site Internet, ou contacter notre Service Clientèle:
Mon - Fri | 8am - 6pm ET
Lundi-Vendredi 8h -18h
Sat - Sun | 9am - 6pm ET
Samedi-Dimanche 9h-18h
UK: (EN)
Tel: +44-121-506-0008
email: CSUK@keter.com
2nd floor WESTPOINT, Mucklow
office park, Halesowen, West
Midlands, B62 8DY, United Kingdom
Mon - Fri | 8:30am - 5pm
Switzerland:
Tel: +41-62-767-00-50
email: info@neogard.ch
France:
Other European Countries
Tel: +31-1612-28300
email: service@keter.com
Mon - Fri | 8:30am - 5pm


NOUS SOUCIONS | NOS IMPORTA
A better world with Keter.
From material innovation to manufacturing processes we encourage sustainable consumption.
- IMPORTANT | IMPORTANT | IMPORTANTE
- US, Canada
- UK
- ACTIVATION DE LA GARANTIE
- OPTION | OPTION | OPCIÓN | OPTION | OPTIE | OPZIONE | OPÇÃO
- SECURING THE SHED TO A FOUNDATION
- FIXER L'ABRI SUR UNE FONDATION
- ABSICHERN DES SCHUPPENS AN EIN FUNDAMENT
- CARE AND SAFETY GUIDELINES
- INSTRUCTIONS DE SÉCURITÉ ET D'ENTRETIEN
- GARANTIE LIMITÉE DE 10 ANSC
- IF THERE ARE MISSING OR BROKEN PARTS, PLEASE DO NOT RETURN THE PRODUCT TO THE STORE. Please log onto our website, or contact Customer Service at:
Brand : KETER
Model : Newton 7511
Category : Garden sheds