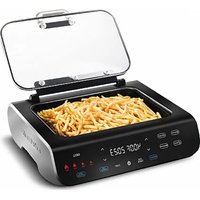
GGA2150 - Electric grill Gourmia - Free user manual and instructions
Find the device manual for free GGA2150 Gourmia in PDF.


| Product type | Electric grill with air fryer |
| Brand | Gourmia |
| Model | GGA2150 |
| Usage | Domestic indoor |
| Power supply | 120 V ~ 60 Hz, 1650 W |
| Temperature range (grill) | 200 °C – 265 °C (400 °F – 510 °F) |
| Temperature range (air fry, bake, roast, dehydrate) | 60 °C – 260 °C |
| Cooking functions | Grill, Air fry, Bake, Roast, Dehydrate |
| Included accessories | Barbecue grill, Air fryer basket, Drip tray with guard, Temperature probe |
| Material | Stainless steel, non-stick coating |
| Cleaning | Accessories dishwasher safe; wipe interior with a damp cloth |
| Safety | Automatic shutdown if lid opened (air fry, bake, roast, dehydrate); built-in smoke extractor; default preheating |
| Warranty | 1 year limited (United States) |
| Power cord | Short with 3-prong grounded plug |
| Electrical specifications | 120 V, 60 Hz, 1650 W |
Frequently Asked Questions - GGA2150 Gourmia
User questions about GGA2150 Gourmia
0 question about this device. Answer the ones you know or ask your own.
Ask a new question about this device
Download the instructions for your Electric grill in PDF format for free! Find your manual GGA2150 - Gourmia and take your electronic device back in hand. On this page are published all the documents necessary for the use of your device. GGA2150 by Gourmia.
USER MANUAL GGA2150 Gourmia
Gourmia ITM. / ART. 1691878
FoodStation™
SMOKELESS GRILL & AIR FRYER
USER MANUAL
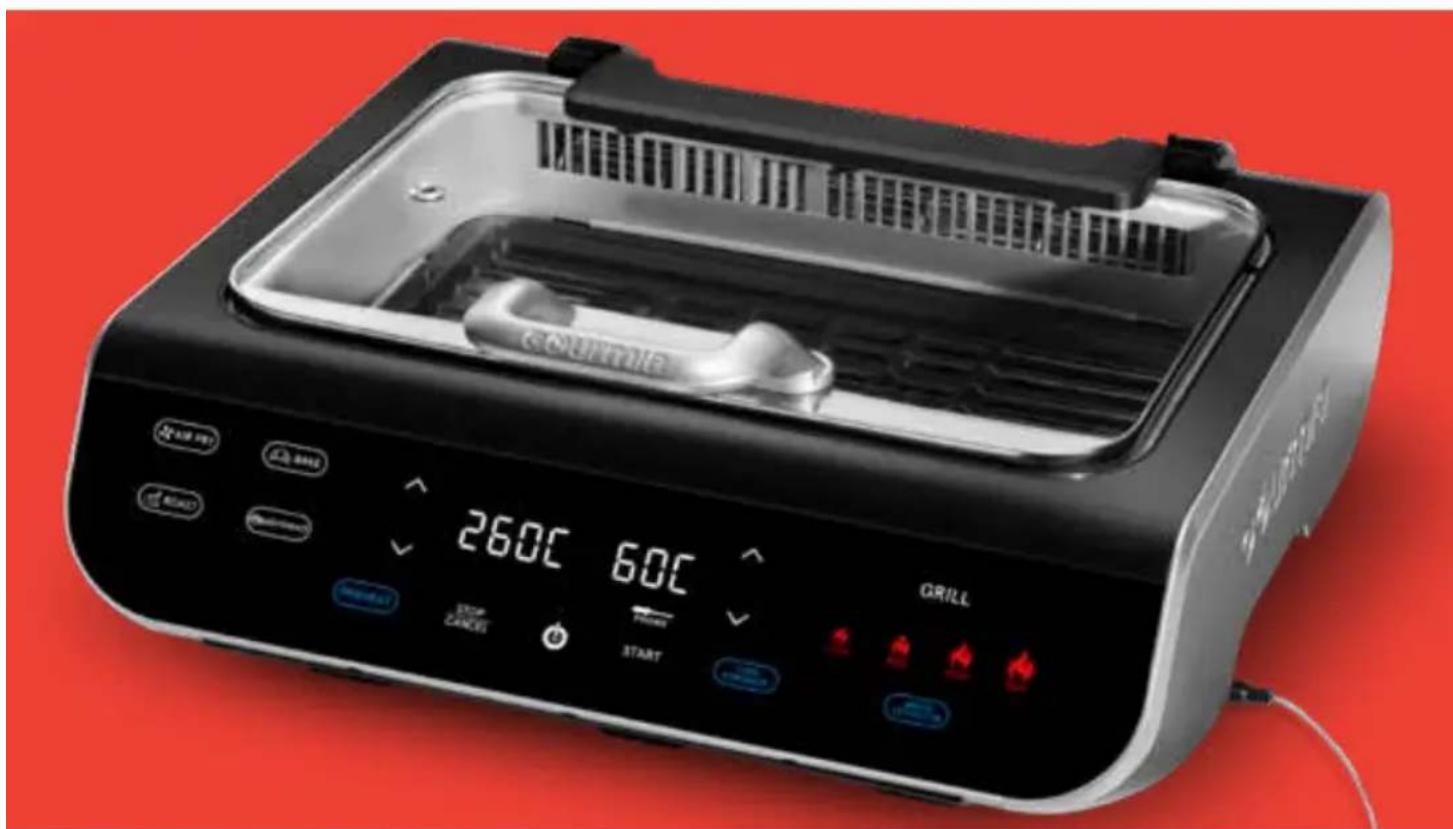
natural_image
Exterior view of a modern kitchen griller with digital display and control buttons (no readable text or symbols)TABLE OF CONTENTS
Congratulations 3
Important Safeguards 5
Know the FoodStation ^TM 8
· Display & Control Panel 9
· Temp & Time Display 9
· Temperature Probe Display 9
· Guided Cooking & Smoke Extractor 10
· °C / °F Toggle & Display Messages 11
- Function Chart 11
Use the FoodStation™ 12
· Before First Use 12
- Set up the FoodStation™ 12
· Cook with Temp & Time 13
· Grill Temp & Time Chart 14
· Cook with the Probe 15
· How to Place the Probe 17
· Doneness Chart 18
- Stop / Cancel Cooking 18
Grilling Tips 18
Air Frying Tips 19
Cleaning & Maintenance 20
Warranty & Service 21
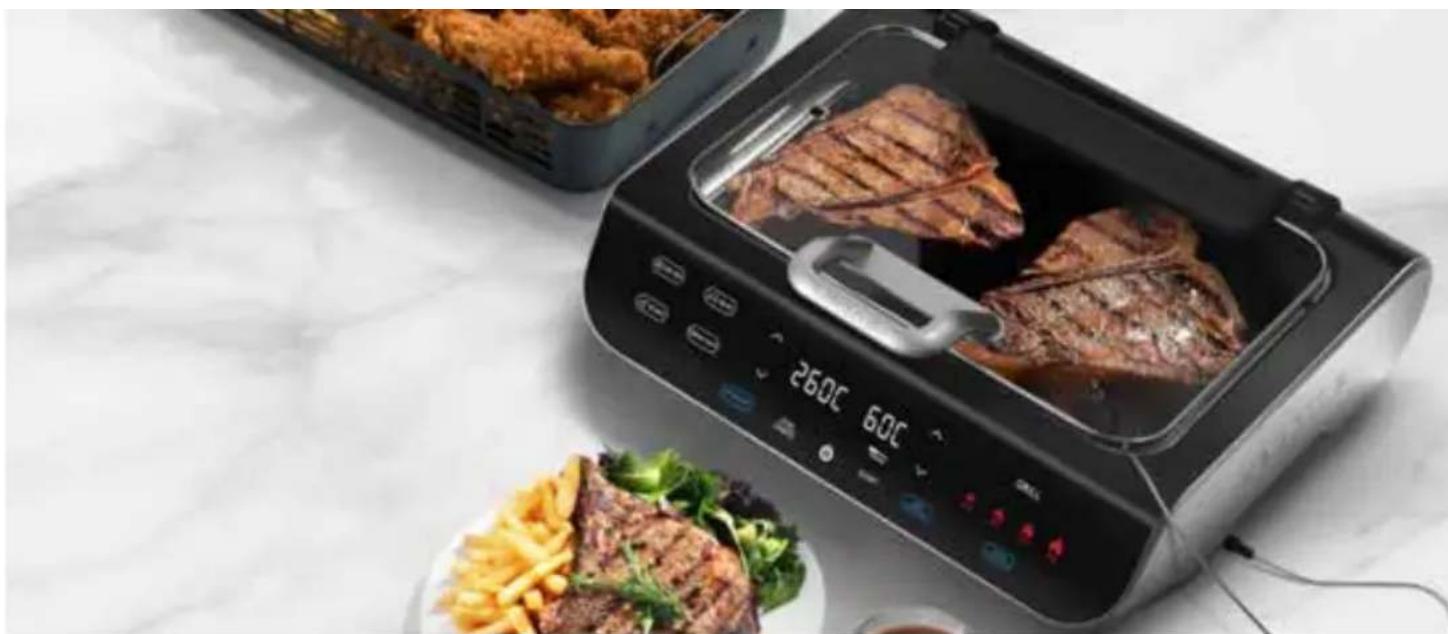
natural_image
Modern air fryer with digital display showing two steamed cuts, accompanied by a plate of fried chicken and salad on a white surface (no text or symbols visible)Congratulations on the purchase of your Smokeless Grill & Air Fryer from Gourmia!
Here at Gourmia, our one and only goal is to make sure nutritious and delicious meals are always a practical possibility no matter how fast-paced your life is. Whether you're in need of a hearty breakfast, a mid-day snack, or a satisfying supper, our dependable, easy-to-use appliances are designed to work for you while you work your way through your busy day.
This manual provides an overview and instructions on all the FoodStation™'s functions and features, along with directions for assembling, operating, cleaning, and maintaining your appliance. Please read all safety instructions before getting started. Keep this manual handy for future use and review.
Our team is available to help with any and every question you might have about your new FoodStation™. We're excited for you and want you to get the most out of your purchase—so whether you need assistance with setup or guidance on which features to enable for which foods, we're happy to walk you through it, step by step.
Happy and easy cooking!
We'd love to hear about the mouthwatering meals you're creating with your new air fryer oven! Share your thoughts, recipes, and photos with us.
@gourmia f Twitter Pinterest
IMPORTANT! READ THIS USER MANUAL CAREFULLY AND RETAIN FOR FUTURE REFERENCE.
natural_image
Close-up of a sesame-coated hamburger with lettuce, cheese, tomato, and onion (no text or symbols visible)IMPORTANT SAFEGUARDS
CORD AND PLUG SAFETY
- A short power-supply cord is provided to reduce risk of becoming entangled in or tripping over a longer cord.
- Extension cords may be used if care is exercised in their use.
- If an extension cord is used:
a. The marked electrical rating of the extension cord should be at least equal to the electrical rating of the appliance; and
b. The extension cord should be arranged so that it will not drape over the countertop or tabletop where it can be pulled on by children or tripped over.
natural_image
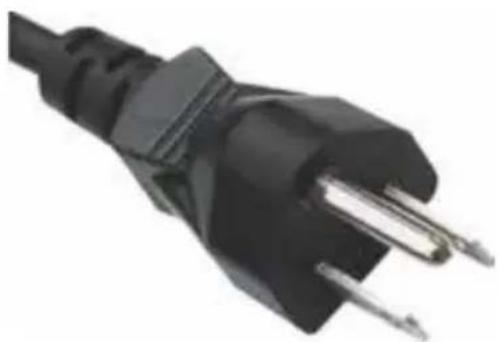
Close-up of a black electrical outlet plug with two metallic pins (no text or symbols visible)ELECTRICAL 3-PRONG PLUG
This appliance is equipped with a 3-prong grounding-type plug. It should be properly connected to a grounding-type outlet. The plug is designed to fit ONLY a 3-grounding outlet unit, and as such, the grounding prong should never be removed. If needed, a 2-prong adapter may be used if local codes allow it.
| Power: | 120VAC, 60Hz, 1650W |
SAVE THESE INSTRUCTIONS
IMPORTANT SAFEGUARDS
Read all instructions before using this electric appliance. The following basic precautions should always be followed:
- This appliance is not intended for use by children or persons with reduced physical, sensory, or mental capabilities or lack of experience and knowledge, unless they have supervision.
- Close supervision is necessary when any appliance is used by or near children. Children should be supervised to ensure that they do not play with the appliance. Cleaning and user maintenance should not be done by children unless they are older than 8 and supervised.
- Do not use the appliance if the plug, main cord, or appliance itself is damaged or has malfunctioned. Return the appliance to the nearest authorized service facility for examination, repair, or adjustment.
- To protect against electric shock, do not immerse the power control, cord, or plug in water or other liquid. Do not plug in the appliance or operate the controls with wet hands.
- Always ensure the appliance is fully assembled before plugging it into a wall outlet and turning it on.
- Place the appliance on a stable, level and heat-resistant surface at a safe distance from hot gas and electric burners. Ensure that the area is clean and dry.
- Do not place the appliance on or
near combustible materials, such as a tablecloth or curtain. The accessible surfaces may become hot during use. Do not place the appliance on or near a hot gas or electric burner or in a heated oven.
- Do not place the appliance against a wall or against other appliances. Leave at least 4 inches of free space around the back and sides, and above the appliance. Do not place anything on top of the appliance.
- Check if the voltage indicated on the appliance corresponds to the local main voltage before you connect the appliance.
- Always attach the power control to the appliance first, then plug the cord into a wall outlet. Make sure the plug is inserted into the outlet properly. To turn off the appliance and disconnect the power control plug, turn the unit off before removing the plug from the outlet.
- Do not let the cord hang over the edge of the table or counter nor let it touch hot surfaces.
- Do not use an outlet below the countertop's surface. The cord should always be behind and away from the appliance.
-
Never connect this appliance to an external remote-control system or timer switch to avoid a hazardous situation.
-
Do not leave the appliance unattended when plugged in.
-
Never use the appliance without the grill grate and drip tray in place, or if the grill grate or drip tray is damaged in any manner.
-
Do not place cooking utensils or anything other than food on the grill grate or in the air fry basket when the unit is hot, on, or plugged in.
-
During air frying, hot steam is released through the air outlet openings. Keep your hands and face at a safe distance from the steam and from the air outlet openings. Also be careful of hot steam and air when you remove the drip tray or air fry basket from the appliance.
-
Immediately unplug the appliance if you see dark smoke coming from the appliance. Wait for the smoke emission to stop before you remove the tray or basket from the appliance.
-
Do not cover the grill with aluminum foil. This will cause the appliance to overheat.
-
Never touch the grill grate while grilling. Do not touch hot surfaces. Use handles and protective equipment to avoid burns.
-
The temperature probe does not replace an external food thermometer.
-
To prevent possible illness, always use a thermometer to ensure food is cooked to recommended temperatures.
-
Do not use the appliance for any other purpose than described in this manual. The use of accessory attachments not recommended by the appliance manufacturer may cause injuries.
-
Extreme caution must be used when moving an appliance containing hot oil or other hot liquids.
-
After using the appliance, avoid contact with the hot metal inside. Unplug from outlet when not in use and before cleaning. Allow the appliance to cool before cleaning.
-
Do not use outdoors.
-
Do not use in moving vehicles or boats.
-
For household use only.
KNOW THE FOODSTATION™
Lid
Assembly: Insert the tabs on the lid into the indents on the unit's upper surface.
Use: When grilling, the lid can be left open or closed. When cooking in the air fry basket, the lid must be closed.

DISPLAY & CONTROL PANEL
TEMP & TIME DISPLAY
Air Fry Basket Temperature
Cooking Functions Grill Functions
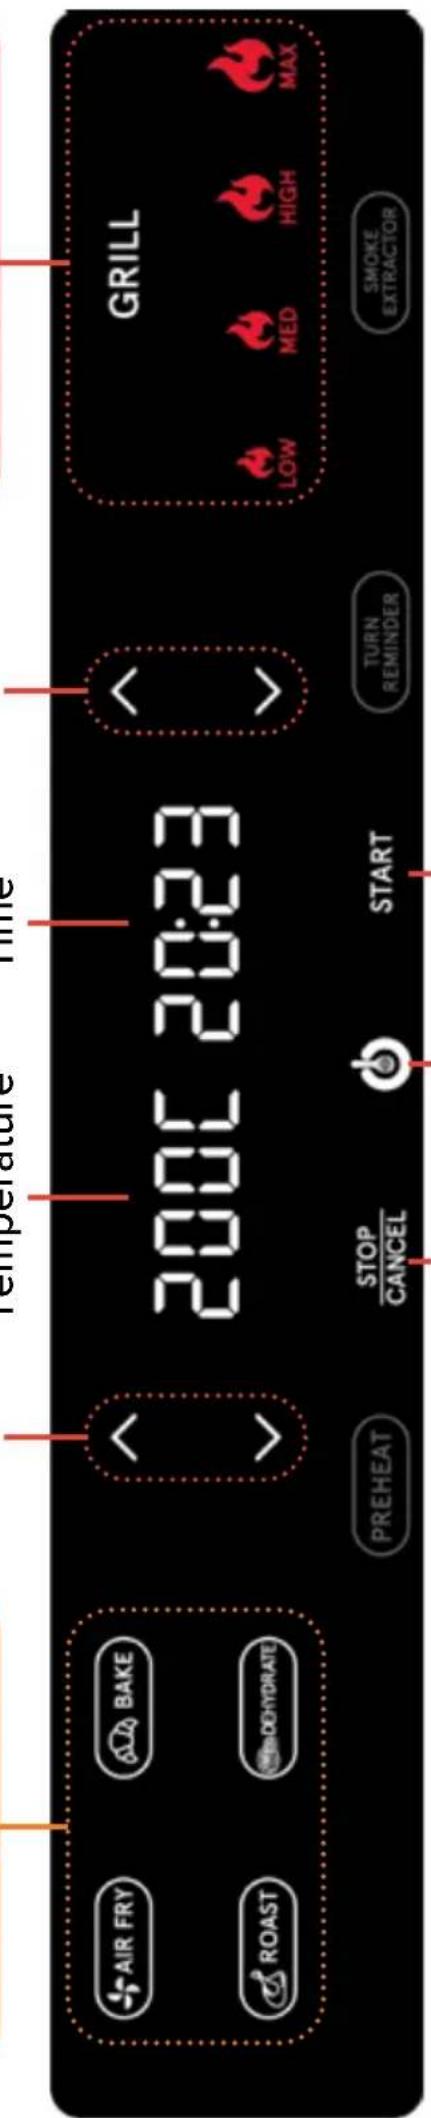
Power Icon STARTSTOP / CANCEL
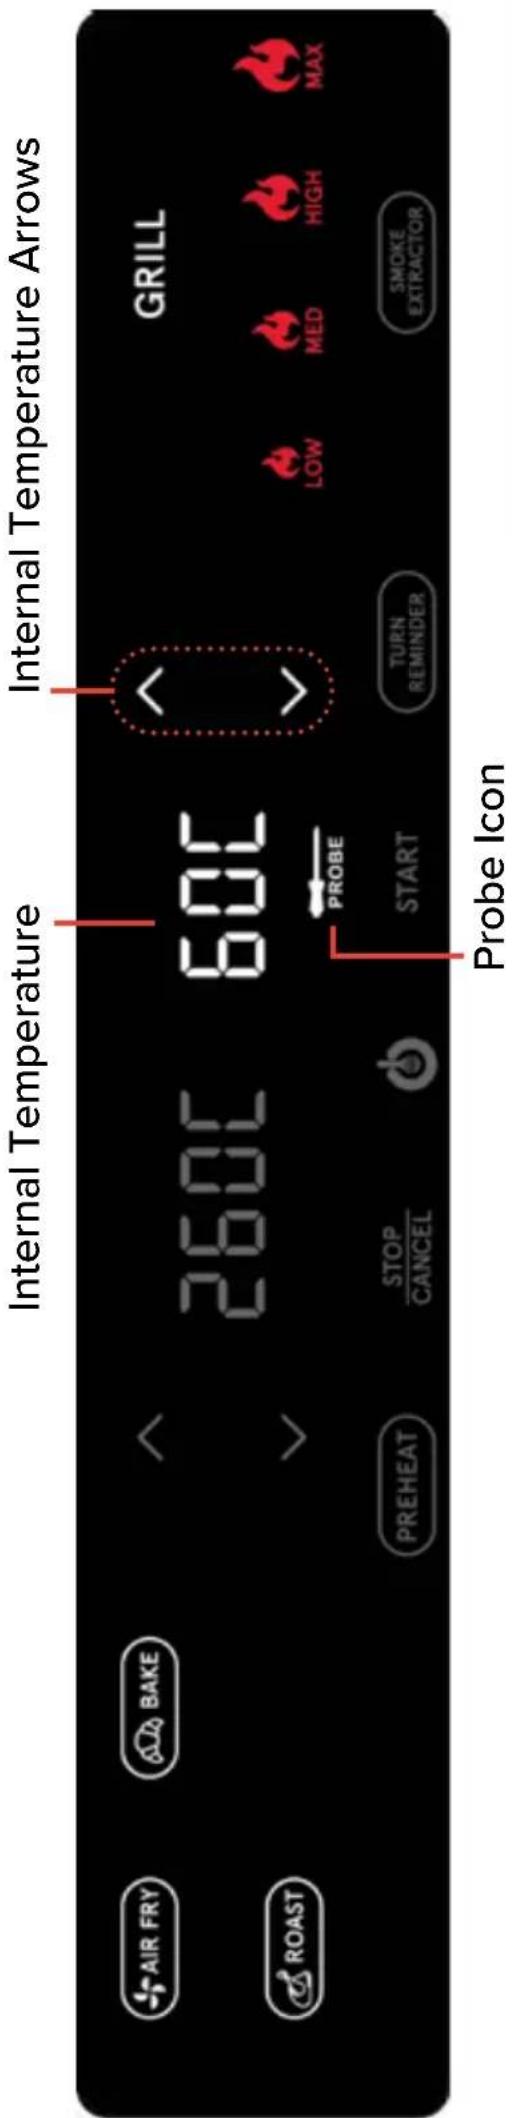
TEMPERATURE PROBE DISPLAY
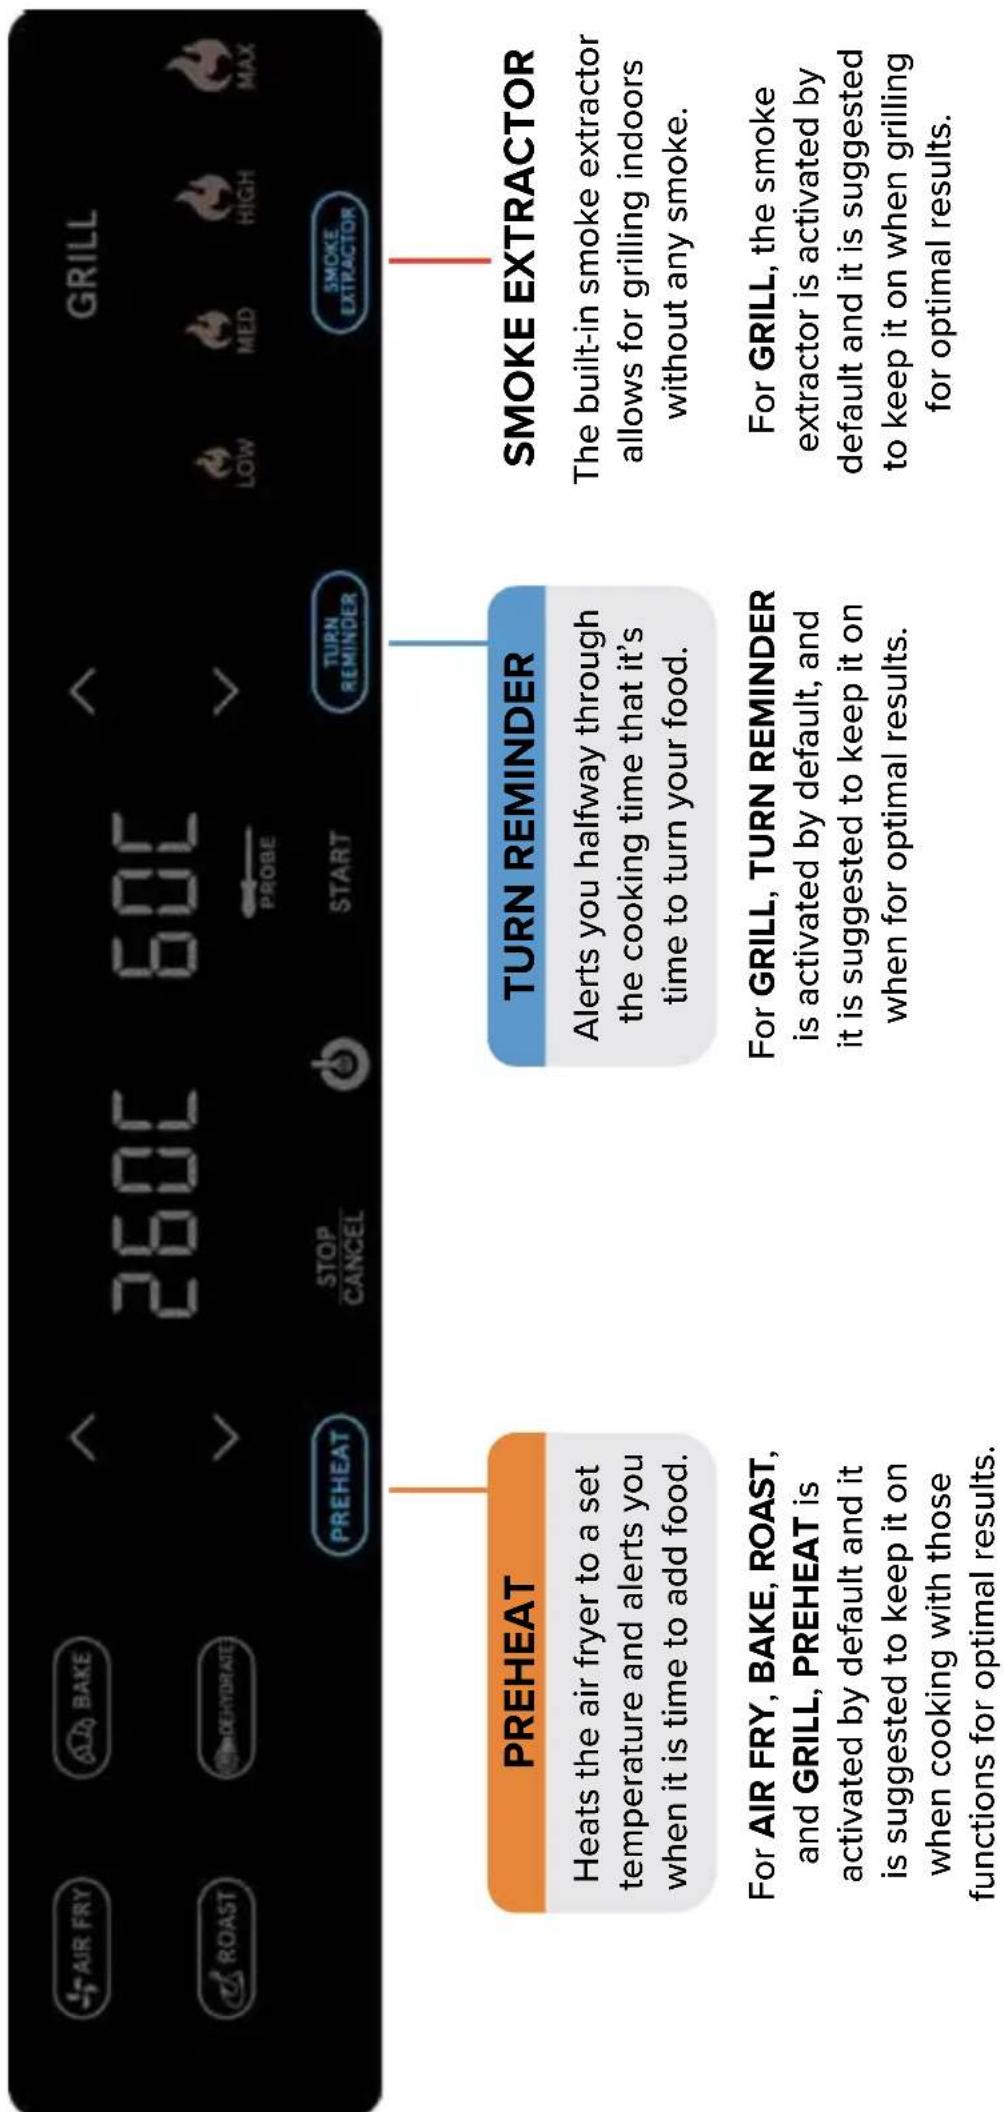
GUIDED COOKING & SMOKE EXTRACTOR
PREHEAT, TURN REMINDER, and SMOKE EXTRACTOR can all be activated or deactivated by tapping the feature on the control panel. When activated, the feature will be lit in blue. When deactivated, the feature will be lit in white.
°C / °F TOGGLE & DISPLAY MESSAGES
°C / °F TOGGLE
To toggle between displaying temperature in Fahrenheit and Celsius, press and hold PREHEAT for 5 seconds.
DISPLAY MESSAGES

Slide the assembled drip tray into the bottom of the unit to begin use.
NOTE: If the drip tray is not properly secured in place, the unit will not turn on.
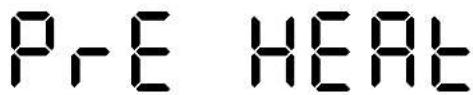
The unit is preheating.

The unit is preheated. Add ingredients.

Reminder to turn or toss food.
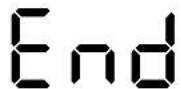
The cook time has elapsed.
FUNCTION CHART
| FUNCTION | INSERT | |
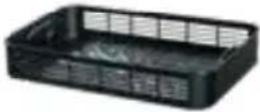
| GRILL |  Always use the grill grate for the GRILL function. Do not use the air fry basket. Always use the grill grate for the GRILL function. Do not use the air fry basket. | Lid may be opened or closed |
 |  | |
 | Lid must be closed. | |
 | Always use the air fry basket for the AIR FRY, BAKE, ROAST, and DEHYDRATE functions. Do not use the grill grate. | |
 |
BEFORE FIRST USE
- Remove and discard all packaging material, labels, and tape from the unit.
- Remove and clean the grill grate, air fry basket, drip tray and drip tray cover with hot water, dishwashing liquid, and a non-abrasive sponge. Dry all parts before use.
- Wipe the inside and outside of the unit with a moist cloth.
NOTE: During the first few uses, there might be a “hot plastic” smell. This is perfectly normal as the material is heated for the first time. The smell will go away after the first few uses.
WARNING:
Do not put anything on top of the unit.
Do not place the unit against a wall or against other appliances. It is important to leave at least 4 inches of free space above and around all sides of the unit to allow for proper ventilation.
Do not fill the air fry basket with oil, frying fat, or any other liquid - air frying works by circulating hot air.
When spraying food for a crispier finish, it is recommend to use regular cooking oil instead of cooking spray, as the latter may damage the nonstick coating.
Recommended
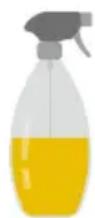
Oil Mister / Spray Bottle
Not Recommended
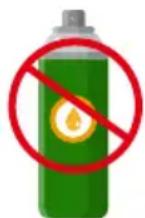
Cooking Spray
SET UP THE FOODSTATION™
- Place the unit on a flat heat-resistant surface. Leave space above and around the unit to ensure safe air circulation.
- Ensure the assembled drip tray is securely in place in the bottom of the unit.
COOK WITH TEMP & TIME
- Place the grill grate or air fry basket inside the unit.
- Plug the unit into an outlet.
- Tap the power icon.

natural_image
Black rounded rectangle with a white power button symbol in the center (no text or numbers)- Tap the desired cooking function: AIR FRY, BAKE, ROAST, DEHYDRATE, or GRILL.
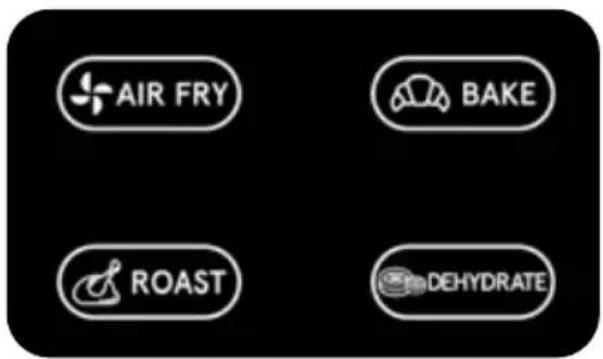
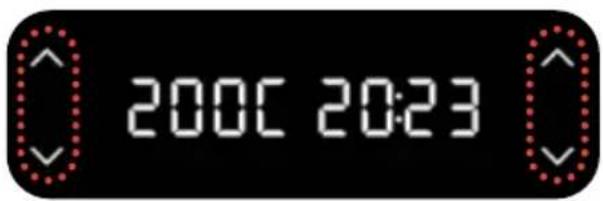
- Set the temperature and time using the temperature and time Arrows.
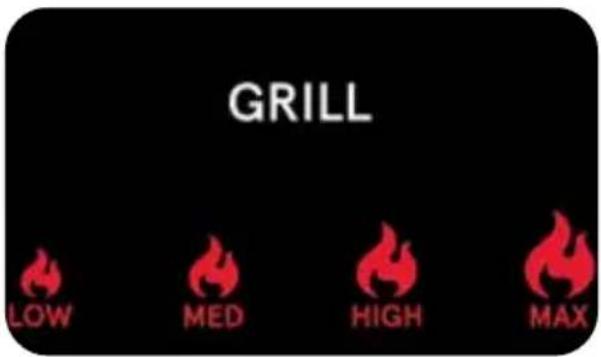
When grilling: Tap GRILL to toggle through the 4 temperature options: LOW, MEDIUM, HIGH, and MAX.
GRILL TEMPERATURES
| LOW | 200°C / 400°F |
| MED | 230°C / 450°F |
| HIGH | 260°C / 500°F |
| MAX | 265°C / 510°F |
NOTE: The lid needs to be closed when using the AIR FRY, BAKE, ROAST, and DEHYDRATE functions. For GRILL, the lid may be open or closed.
When using DEHYRDATE or if PREHEAT is deactivated: Place food onto the grill grate or into the air fry basket, then tap START and skip steps 6 and 7.
COOK WITH TEMP & TIME
6. Tap START.
STOP CANCEL


The display will show Pre HERE (Preheat) and the unit will begin preheating. Once preheated, the unit will beep, and Add Food (Add Food) will appear on the display.
7. Place food onto the grill grate or into the air fry basket.
When grilling or when TURN REMINDER is activated: The unit will beep halfway through the cook time and turn Food (Turn Food) will appear on the display. Carefully flip the food using heat-proof, non-metal tongs.
When your selected cook time has elapsed, the unit will beep, and End (End) will appear on the display.
- Check food for desired doneness; cook longer if necessary.
- Remove food carefully with non-metal tongs.
GRILL TEMP & TIME CHART
| FOOD | TEMPERATURE | TIME |
| Boneless chicken breasts (1⁄2 inch thick) | HIGH | 10 - 15 min |
| Steak (1⁄2-1 inch thick) | HIGH | 10 - 15 min |
| Fish filets (1⁄2 inch thick) | HIGH | 10 - 12 min |
| Hamburgers | HIGH | 7 - 10 min |
| Shrimp | HIGH | 5 - 7 min |
| Sausages | HIGH | 8 - 10 min |
| Bacon | MED | 8 - 10 min |
| Vegetables | MED | 3 - 5 min |
| Grilled Cheese | MED | 10 - 15 min |
| French Toast | MED | 10 - 15 min |
| Chops | HIGH | 10 min |
| Veggie burgers | HIGH | 7 - 10 min |
| Hot Dogs | HIGH | 5 - 7 min |
| Ham steaks | HIGH 8 - 10 min | |
COOK WITH THE PROBE
- Place the grill grate or air fry basket inside the unit.
- Plug the unit into an outlet.
- Tap the power icon.

natural_image
Black rounded rectangle with a white power button symbol in the center (no text or numbers)- Insert the probe into the jack on the right side of the unit. The probe icon will appear on the display.

- Tap the desired cooking function: AIR FRY, BAKE, ROAST, or GRILL..
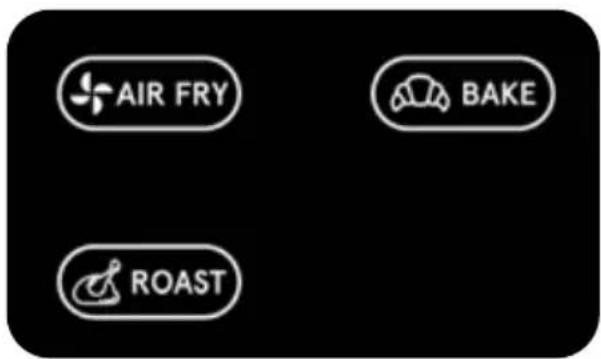
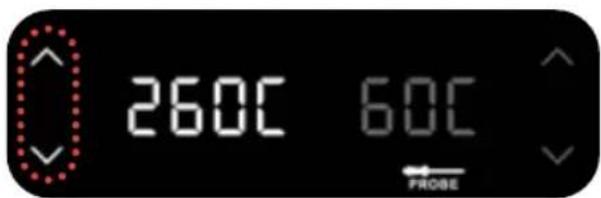
- Set the unit temperature using the temperature arrows (left side).
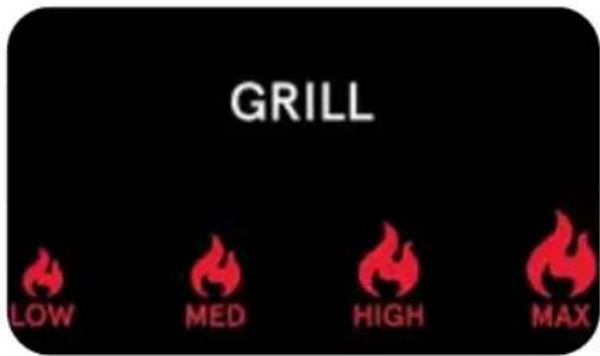
When grilling: Tap GRILL to toggle through the 4 temperature options: LOW, MEDIUM, HIGH, and MAX.
GRILL TEMPERATURES
| LOW | 200°C / 400°F |
| MED | 230°C / 450°F |
| HIGH | 260°C / 500°F |
| MAX | 265°C / 510°F |
NOTE: The lid needs to be closed when using the AIR FRY, BAKE, and ROAST functions. For GRILL, the lid may be open or closed.
COOK WITH THE PROBE
- Select your desired doneness using the internal temperature arrows (right side). See the DONENESS CHART on page 18.
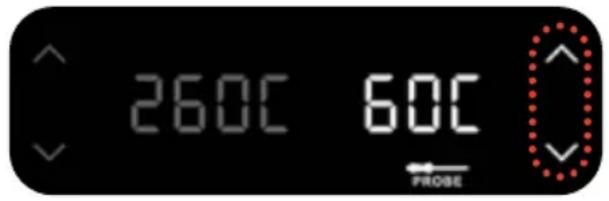
If PREHEAT is deactivated: Follow steps 9-10, then tap START and following the instructions after step 10.
- Tap START.
STOP CANCEL


The display will show Pre HERE (Preheat) and the unit will begin preheating. Once preheated, the unit will beep, and Add Food (Add Food) will appear on the display.
- Insert the probe into the food. See page 17 for more detailed instructions.
- Place food onto the grill grate or into the air fry basket.
When grilling or when TURN REMINDER is activated: The unit will beep halfway through the cooking process and turn Food (Turn Food) will appear on the display. Carefully flip the food using heat-proof, non-metal tongs.
When the food reaches the selected doneness, the unit will beep, and End (End) will appear on the display.
- Remove food carefully with non-metal tongs.
- Let food rest for at least five minutes with the probe still inserted in the food.
NOTE: To reach desired doneness, food must rest for at least five minutes away from the heat. This is known as “carry-over cooking.” See the DONENESS CHART on page 18.
- Remove the probe from the food.
HOW TO PLACE THE PROBE
- Insert the probe horizontally into the center of the thickest part of the food.
NOTE: The thickest part of the food may not be the center. It is important that the probe's end be positioned for the desired result.
- Ensure the top of the probe is inserted straight into the center of the food, not angled toward the bottom or top of it.
- The probe should be close to (but not touching) the bone and should be away from any fat or gristle.
- Do not use the probe for frozen proteins or for cuts of meat 1 inch thick or thinner.
- Do not place lid over probe grip, as it will prop open the lid and create inaccurate temperature readings (The lid can be closed on the temperature probe's cable).
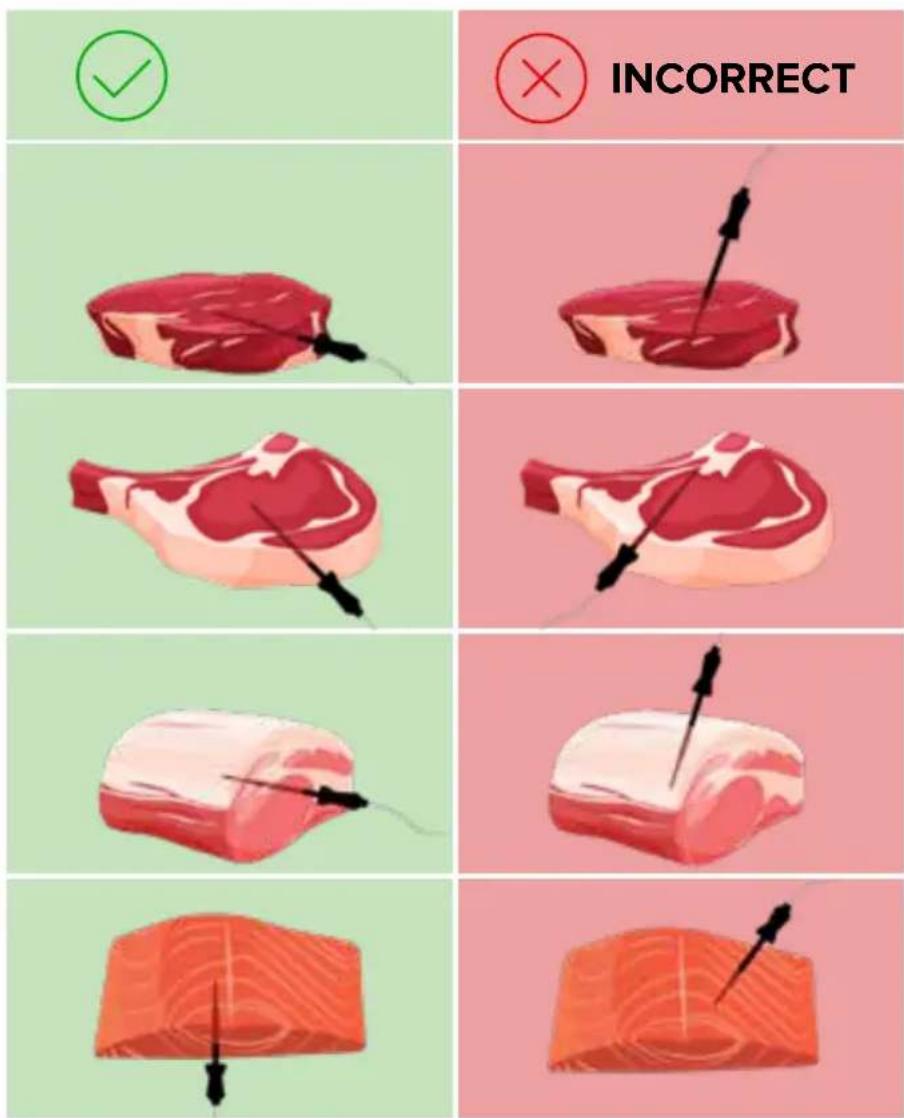
CORRECT
DONENESS CHART
| FOOD: | SET INTERNAL TEMP TO: | ALLOW FOOD TO CARRY-OVER* COOK TO: |
| Fish | 60°C / 140°F | 62°C / 145°F |
| Poultry | 75°C / 165°F | 78°C / 165°F or higher |
| Pork | 60°C / 140°F | 62°C / 145°F |
| Beef | ||
| Rare | 50°C / 120°F | 52°C / 125°F |
| Medium Rare | 55°C / 130°F | 58°C / 135°F |
| Medium | 60°C / 140°F | 62°C / 145°F |
| Medium Well | 60°C / 145°F | 66°C / 150°F |
| Well Done | 70°C / 155°F | 72°C / 160°F |
| Ground Pork / Turkey | 70°C / 155°F | 74°C / 165°F |
* Internal food temperature continues to rise as food rests. This is known as “carry-over cooking,” which occurs when food rests for at least five minutes after being removed from the heat.
STOP / CANCEL COOKING
- Tap the STOP / CANCEL once to pause cooking.
- Tap the START to resume cooking.
- Tap the STOP / CANCEL twice to cancel cooking.



NOTE: When using the AIR FRY, BAKE, ROAST, or DEHYDRATE functions, the unit will pause automatically if the lid is open.
GRILLING TIPS
- Always ensure raw meat and poultry are cooked to safe internal temperatures.
- For foods that have been marinated or are delicate, like flaky white fish, spray or brush the grill grate with regular cooking oil.
- For faster cooking cut foods into smaller pieces.
- For more even cooking, make sure food being cooked at the same time is the same thickness and size.
AIR FRYING TIPS
- For an extensive list of foods and their ideal amounts, temperature and time settings, along with preparation notes, see the Air Fry Cooking Chart and Dehydrate Chart on pages 36 through 39 of the Gourmia Recipe Book.
• Always ensure raw meat and poultry are cooked to safe internal temperatures.
- Check food for desired doneness a few minutes before cook time elapses and cook a little longer if necessary.
• Air fryers perform similar to ovens; follow oven instructions on item packaging or recipe.
• Snacks that can be prepared in an oven can also be prepared in the air fryer.
- Smaller ingredients usually require a slightly shorter cook time than larger ingredients.
- Preheating the air fryer before adding food will generally deliver the best results (see PREHEAT on page 10).
- When cooking multiple batches in a row, only preheat before the first batch.
- Turning food halfway through cook time will deliver evenly browned and crispy results (see TURN REMINDER on page 10).
- Toss fresh potatoes with 1 tablespoon of oil for a crispy exterior. Air fry the ingredients within a few minutes after adding the oil.
• Do not cook foods that will produce a large amount of grease in the air fryer.
- Place a baking pan or an oven-safe dish or pan in the air fry basket to bake a cake or quiche or to air fry fragile or filled ingredients.
CLEANING & MAINTENANCE
WARNING:
NEVER immerse cord, plug, or the unit in water or any other liquid.
Always unplug the unit and allow it to cool completely before cleaning.
Do not use metal kitchen utensils or abrasive cleaning material to clean the grill grate, air fry basket, drip tray or drip tray cover, as this may damage the nonstick coating.
Clean all parts after each use.
The grill grate, air fry basket, drip tray and drip tray cover are dishwasher safe.
- Remove the lid, grill grate, air fry basket, drip tray and drip tray cover to ensure thorough cleaning.
- Clean all removable parts with warm water and soap.
- Wipe down the unit's inner walls using a soft, damp cloth to remove any stains.
- Ensure all parts and the unit are completely dry before use. Do not place the grill glate or air fry basket into the unit if they are not completely dry.
STORAGE
- Unplug the appliance and let it cool down.
- Make sure all parts are clean and dry.
- Store the appliance in a clean and dry place.
ENVIRONMENT
Do not discard the appliance with normal household waste at the end of its life; instead hand it in at an official collection point for recycling. Doing so will help to preserve the environment.
GUARANTEE AND SERVICE
If you need service or information or if you have a problem, please visit www.Gourmia.com or contact your distributor.
WARRANTY & SERVICE
This Limited Warranty is for one full year from the date of purchase and requires proof of purchase from an authorized seller. It is applicable to the original purchaser only and is not transferable to a third party user. Repair or replacement of defective parts is solely at Gourmia's discretion. In the event that repair isn't possible, Gourmia will replace the product/part. If product repair/replacement won't suffice, Gourmia has the option of refunding the cash value of the product or component returned.
Product defects not covered under the Warranty provisions include normal wear and damage incurred from use or accidental negligence, misuse of instruction specifications or repair by unauthorized parties. Gourmia is not liable for any incidental or consequential damages incurred by such circumstances.
Only valid within the United States.
Register your product at www.Gourmia.com/warranty
Model: GGA2150
© 2022 Gourmia
1.0
www.gourmia.com
The Steelstone Group
Brooklyn, NY
All rights reserved. No portion of this manual may be reproduced by any means whatsoever without written permission from The Steelstone Group, except for the inclusion of quotations in a media review.
Although every precaution has been taken in the preparation of this manual, The Steelstone Group assumes no responsibility for errors or omissions. Nor is any liability assumed for damages resulting from the use of the information contained herein. Although every effort has been made to ensure that the information contained in this manual is complete and accurate, The Steelstone Group is not engaged in rendering professional advice or services to the individual consumer; further, The Steelstone Group shall not be held responsible for any loss or damage allegedly arising from any information or suggestions in this manual.
Get cooking with Gourmia

We'd love to hear from you!
888.552.0033
info@gourmia.com
MADE IN CHINA
Distributed by:
Costco Wholesale Corporation
P.O. Box 34535
Seattle, WA 98124-1535
USA
1-800-774-2678
www.costco.com
Costco Wholesale Canada Ltd.*
415 W. Hunt Club Road
Ottawa, Ontario
K2E 1C5, Canada
1-800-463-3783
www.costco.ca
QUESTIONS OR COMMENTS
OR CALL 888.552.0033
MON-THU 9:00AM TO 6:00PM ET
AND FRI 9:00AM TO 3:00PM ET
LANGUAGES SUPPORTED: ENGLISH, SPANISH, FRENCH
Gourmia ITM. / ART. 1691878
FoodStation™
BARBECUE SANS FUMÉE
ET FRITEUSE À AIR CHAUD
GUIDE DE L'UTILISATEUR
natural_image
Black and white photo of a Covenie griller appliance with digital display and control buttons, set against a red background (no readable text or symbols on the device itself)TABLE DES MATIÈRES
Félicitations 27
natural_image
Modern air fryer with digital display showing two steamed cuts, accompanied by a plate of fried chicken and salad on a white surface (no text or symbols visible)natural_image
Close-up of a sesame-coated hamburger with lettuce, cheese, tomato, and onion (no text or symbols visible)MESURES DE SÉCURITÉ IMPORTANTES
SÉCURITÉ DE LA FICHE ET DU CORDON D'ALIMENTATION
natural_image
Black rounded rectangle with a white power button symbol in the center (no text or numbers)natural_image
Black rounded rectangle with a white power button symbol in the center (no text or numbers)CORRECT
TABLEAU DE CUISSON
| ALIMENT : | RÉGLER LA TEMPÉRATURE INTERNE À : | LAISSER LA VIANDE CUIRE PAR CHALEUR ACQUISE* JUSQU'À : |
| Poisson | 60 °C / 140 °F | 62 °C / 145 °F |
| Volaille | 75 °C / 165 °F | 78 °C / 165 °F ou plus |
| Porc | 60 °C / 140 °F | 62 °C / 145 °F |
| Bœuf | ||
| Signant | 50 °C / 120 °F | 52 °C / 125 °F |
| Mi-saignant | 55 °C / 130 °F | 58 °C / 135 °F |
| À point | 60 °C / 140 °F | 62 °C / 145 °F |
| Cuit | 60 °C / 145 °F | 66 °C / 150 °F |
| Bien cuit | 70 °C / 155 °F | 72 °C / 160 °F |
| Porc haché/Dinde | 70 °C / 155 °F | 74 °C / 165 °F |
The Steelstone Group
Brooklyn, NY
Costco Wholesale Corporation
P.O. Box 34535
Seattle, WA 98124-1535
USA
1-800-774-2678
www.costco.com
Costco Wholesale Canada Ltd.*
415 W. Hunt Club Road
Ottawa, Ontario
K2E 1C5, Canada
1-800-463-3783
www.costco.ca
OU COMPOSEZ LE 888.552.0033
DU LUNDI AU JEUDI DE 9 h À 18 h
ET LE VENDREDI DE 9 h À 15 h
LANGUES PRISES EN CHARGE :
ANGLAIS, FRANÇAIS, ESPAGNOL
- Gourmia ITM. / ART. 1691878
- FoodStation™
- SMOKELESS GRILL & AIR FRYER
- USER MANUAL
- TABLE OF CONTENTS
- Congratulations 3
- Important Safeguards 5
- Know the FoodStation TM 8
- Use the FoodStation™ 12
- Grilling Tips 18
- Air Frying Tips 19
- Cleaning & Maintenance 20
- Warranty & Service 21
- Congratulations on the purchase of your Smokeless Grill & Air Fryer from Gourmia!
- IMPORTANT SAFEGUARDS
- CORD AND PLUG SAFETY
- ELECTRICAL 3-PRONG PLUG
- SAVE THESE INSTRUCTIONS
- KNOW THE FOODSTATION™
- DISPLAY & CONTROL PANEL
- TEMP & TIME DISPLAY
- GUIDED COOKING & SMOKE EXTRACTOR
- °C / °F TOGGLE & DISPLAY MESSAGES
- DISPLAY MESSAGES
- BEFORE FIRST USE
- WARNING:
- SET UP THE FOODSTATION™
- COOK WITH TEMP & TIME
- Tap START.
- STOP CANCEL
- Place food onto the grill grate or into the air fry basket.
- COOK WITH THE PROBE
- HOW TO PLACE THE PROBE
- STOP / CANCEL COOKING
- GRILLING TIPS
- AIR FRYING TIPS
- CLEANING & MAINTENANCE
- STORAGE
- ENVIRONMENT
- GUARANTEE AND SERVICE
- WARRANTY & SERVICE
- Get cooking with Gourmia
- We'd love to hear from you!
- MADE IN CHINA
- GUIDE DE L'UTILISATEUR
- TABLE DES MATIÈRES
- Félicitations 27
- MESURES DE SÉCURITÉ IMPORTANTES
- SÉCURITÉ DE LA FICHE ET DU CORDON D'ALIMENTATION
Brand : Gourmia
Model : GGA2150
Category : Electric grill