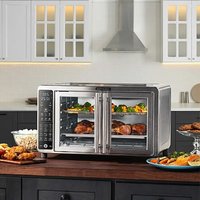
GTF7660 CA - Electric oven Gourmia - Free user manual and instructions
Find the device manual for free GTF7660 CA Gourmia in PDF.


| Product Type | Electric Air Fryer Oven |
| Brand | Gourmia |
| Model | GTF7660 CA |
| Power Supply | 120 V ~ 60 Hz, 1700 W |
| Temperature Range | 30°C to 230°C (90°F to 450°F) |
| Timer | Up to 99 minutes (1 to 99 min depending on mode) |
| Presets | 19 presets: Air Fry, Fries, Wings, Bacon, Vegetables, Snacks, Seafood, Toast, Bake, Roast, Bagel, Convection Bake, Broil, Pizza, Reheat, Keep Warm, Dehydrate, Slow Cook, Popcorn |
| Display | Backlit Digital Display |
| Included Accessories | Air Fry Basket, Baking Tray, Crumb Tray, Oven Rack |
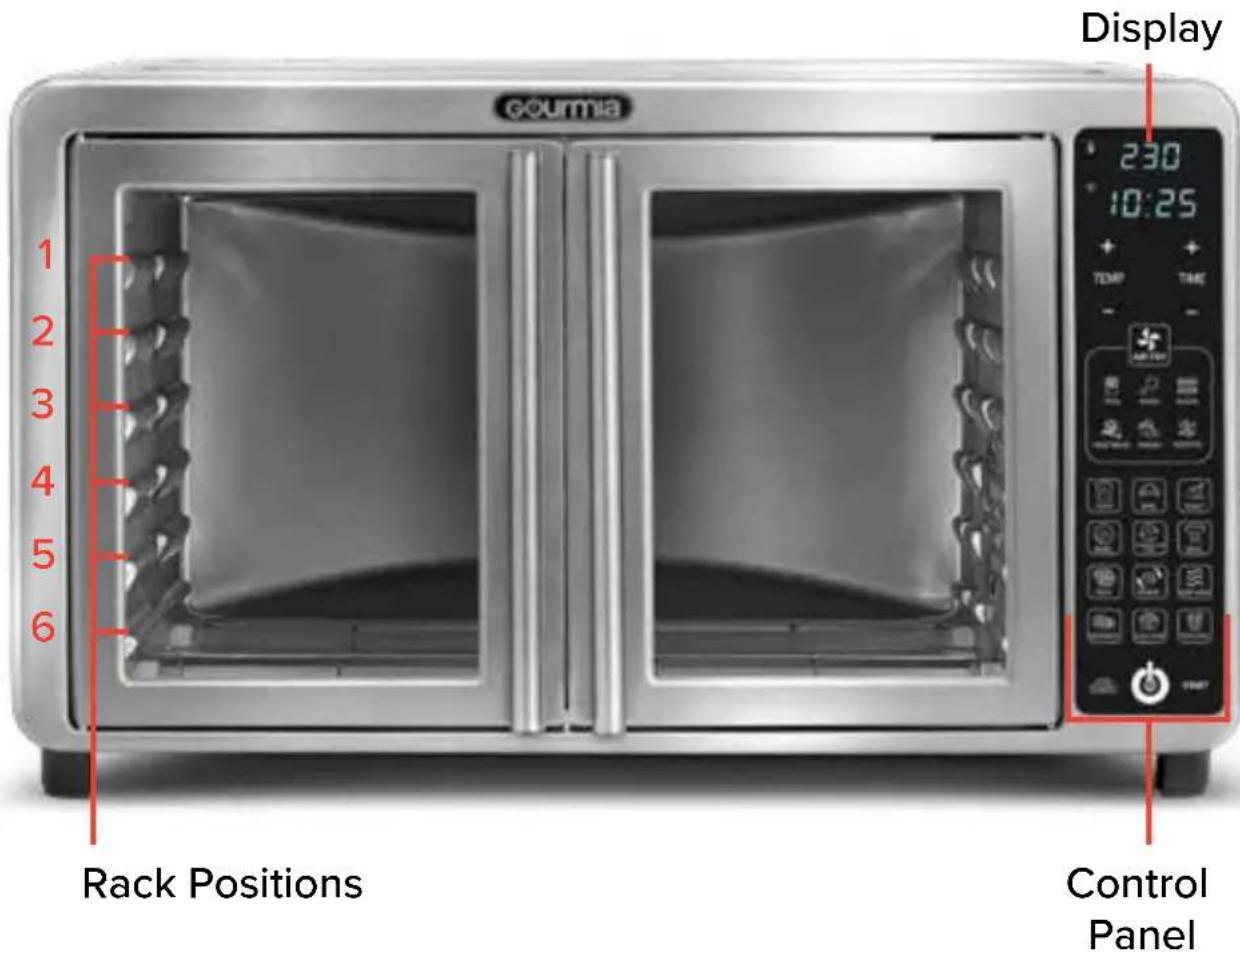
| Rack Positions | 6 positions |
| Preheating | Automatic for most programs |
| Special Functions | Dehydrate, Slow Cook, Popcorn, Keep Warm |
| Cleaning | Dishwasher safe accessories (top rack) |
| Safety | Auto shut-off, polarised plug, hot surface warning |
| Warranty | 1 year limited |
| Usage | Household use only |
| Dimensions (approx.) | 35 x 35 x 35 cm (estimate) |
| Weight (approx.) | 9 kg (estimate) |
Frequently Asked Questions - GTF7660 CA Gourmia
User questions about GTF7660 CA Gourmia
0 question about this device. Answer the ones you know or ask your own.
Ask a new question about this device
Download the instructions for your Electric oven in PDF format for free! Find your manual GTF7660 CA - Gourmia and take your electronic device back in hand. On this page are published all the documents necessary for the use of your device. GTF7660 CA by Gourmia.
USER MANUAL GTF7660 CA Gourmia
natural_image
Exterior view of a Goumia oven with digital temperature and temperature display (no text or symbols on the main body)USER MANUAL
GTF7660 CA
ENGLISHFRANÇAIS
TABLE OF CONTENTS
Congratulations 3
Important Safeguards 5
Know Your Air Fryer Oven 8
· Accessories 8
· Display & Control Panel 9
Using Your Air Fryer Oven 10
· Before First Use 10
· Set Up Your Air Fryer Oven 10
· Using Your Air Fryer Oven 11
· Stop / Cancel Cooking 11
Preset Chart 12
Using The Popcorn Preset 17
Cooking Tips 18
Cleaning & Maintenance 19
Warranty & Service 20

natural_image
Plate of golden-brown fried chicken pieces garnished with parsley, served on a dark surface with a bowl of food in the background (no text or symbols visible)Congratulations on the purchase of your Digital Air Fryer Oven from Gourmia!
Here at Gourmia, our one and only goal is to make sure nutritious and delicious meals are always a practical possibility no matter how fast-paced your life is. Whether you're in need of a hearty breakfast, a mid-day snack, or a satisfying supper, our dependable, easy-to-use appliances are designed to work for you while you work your way through your busy day.
This manual provides an overview and instructions on all the air fryer oven's functions and features, along with directions for assembling, operating, cleaning, and maintaining your appliance. Please read all safety instructions before getting started. Keep this manual handy for future use and review.
Our team is available to help with any and every question you might have about your new air fryer oven. We're excited for you and want you to get the most out of your purchase—so whether you need assistance with setup or guidance on which features to enable for which foods, we're happy to walk you through it, step by step.
Happy and easy cooking!
We'd love to hear about the mouthwatering meals you're creating with your new air fryer oven! Share your thoughts, recipes, and photos with us.
@gourmia

IMPORTANT
READ CAREFULLY
RETAIN FOR FUTURE REFERENCE
FOR CUSTOMER SERVICE
QUESTIONS OR COMMENTS
OR CALL 888.552.0033
MON-THU 9:00AM TO 6:00PM ET
AND FRI 9:00AM TO 3:00PM ET
LANGUAGES SUPPORTED: ENGLISH, FRENCH, SPANISH
Model: GTF7660 CA
© 2022 Gourmia
1.1
www.gourmia.com
The Steelstone Group
Brooklyn, NY
All rights reserved. No portion of this manual may be reproduced by any means whatsoever without written permission from The Steelstone Group, except for the inclusion of quotations in a media review.
Although every precaution has been taken in the preparation of this manual, The Steelstone Group assumes no responsibility for errors or omissions. Nor is any liability assumed for damages resulting from the use of the information contained herein. Although every effort has been made to ensure that the information contained in this manual is complete and accurate, The Steelstone Group is not engaged in rendering professional advice or services to the individual consumer; further, The Steelstone Group shall not be held responsible for any loss or damage allegedly arising from any information or suggestions in this manual.
IMPORTANT SAFEGUARDS
CORD AND PLUG SAFETY
- A short power-supply cord is provided to reduce risk of becoming entangled in or tripping over a longer cord.
- Extension cords may be used if care is exercised in their use.
- If an extension cord is used:
a. The marked electrical rating of the extension cord should be at least equal to the electrical rating of the appliance; and
b. The extension cord should be arranged so that it will not drape over the countertop or tabletop where it can be pulled on by children or tripped over.
natural_image
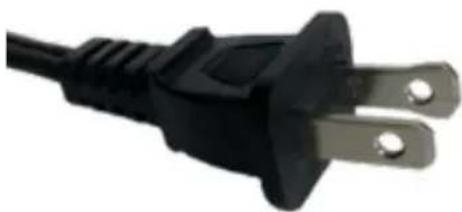
Close-up of a black and silver electrical outlet plug (no text or symbols visible)ELECTRICAL POLARIZED PLUG
This unit has a polarized plug (one blade is wider than the other). To reduce the risk of electric shock, the plug is intended to be used by inserting it into the electrical outlet only one way. If the plug does not fit securely into the outlet, reverse the plug and re-insert. If it still does not fit, contact a qualified electrician for assistance. Do not modify the plug in any way.
| Power: | AC120V~ 60Hz 1700W |
SAVE THESE INSTRUCTIONS
IMPORTANT SAFEGUARDS
Read all instructions before using this electric appliance. The following basic precautions should always be followed:
- This appliance is not intended for use by children or persons with reduced physical, sensory, or mental capabilities, or lack of experience and knowledge, unless they have supervision.
- Close supervision is necessary when any appliance is used by or near children. Children should be supervised to ensure that they do not play with the appliance. Cleaning and user maintenance should not be done by children unless they are older than 8 and supervised.
- Check if the voltage indicated on the appliance corresponds to the local main voltage before you connect the appliance.
- Always ensure the appliance is fully assembled before plugging it into a wall outlet and turning it on.
- Do not use the appliance if the plug, main cord, or appliance itself is damaged or has malfunctioned. Return the appliance to the nearest authorized service facility for examination, repair, or adjustment.
- Never connect this appliance to an external remote-control system or timer to avoid a hazardous situation.
- Do not use an outlet below the countertop's surface. The cord should always be behind and away
from the appliance.
- Do not let the cord hang over the edge of the counter or table, nor let it touch hot surfaces.
- Do not plug in the appliance or operate the controls with wet hands.
- Always ensure the plug is inserted into the outlet properly.
- Do not leave the appliance unattended when plugged in.
- Place the appliance on a stable, level, and heat-resistant surface at a safe distance from gas or electric burners and heated ovens. Ensure that the area is clean and dry.
- Do not place the appliance against a wall or against other appliances. Leave at least 10 cm / 4 inches of free space on the back and sides, and 10 cm / 4 inches of free space above the appliance.
- Do not place anything on top of the appliance when in use.
-
A fire may occur if the air fryer oven is covered or touching flammable material, including curtains, draperies, tablecloths, walls, and the like, when in operation. Do not place the air fryer oven on or near combustible materials.
-
Do not cover the crumb tray or any part of the oven with metal foil. This will cause overheating of the oven.
- Do not use the appliance for any other purpose than described in this manual. The use of accessory attachments not recommended by the appliance manufacturer may cause injuries.
- Do not place any of the following materials in the oven: paper (other than parchment paper), cardboard, plastic, and the like. Extreme caution should be exercised when using containers constructed of anything other than metal or glass.
- Oversized foods or metal utensils must not be inserted into the toaster oven, as they may create a fire or risk of electric shock.
- During cooking, hot steam is released through the air vents. Keep your hands and face at a safe distance from the steam and from the air vents. Be careful of hot steam when you open the doors of the appliance.
- Do not touch hot surfaces. Use handles and protective equipment to avoid burns. Use extreme caution when removing accessories or disposing of hot grease.
-
Extreme caution must be used when moving an appliance containing hot oil or other hot liquids.
-
Extreme caution should be exercised when using containers constructed of materials other than metal or glass.
- Immediately unplug the appliance if you see dark smoke coming from the appliance.
- After using the appliance, avoid contact with the hot metal inside.
- Always attach plug to appliance first, then plug cord into the wall outlet. To disconnect, turn any control to "off", then remove plug from wall outlet.
- Unplug from outlet when not in use and before cleaning. Allow the appliance to cool before cleaning.
- To protect against electric shock, do not immerse the cord, plug, or appliance in water or other liquid.
- Do not clean with metal scouring pads. Pieces can break off the pad and touch electrical parts, creating a risk of electric shock.
- Do not store any materials other than manufacturer's recommended accessories in this oven when not in use.
- Do not use outdoors.
- Do not use in moving vehicles or boats.
- For household use only.
KNOW YOUR AIR FRYER OVEN
ACCESSORIES
natural_image
Blank rectangular plastic tray with rounded corners (no text or symbols)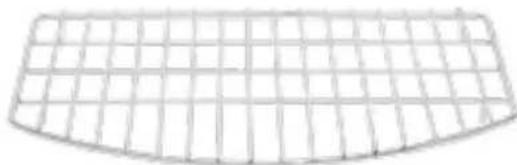
natural_image
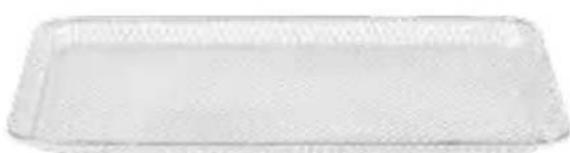
Pure grid pattern with curved edges, no text or symbols presentAir Fry Basket Oven Rack
natural_image
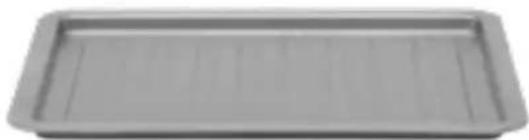
Gray rectangular tray with horizontal lines, no visible text or symbols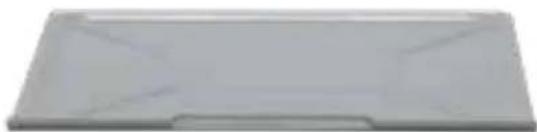
natural_image
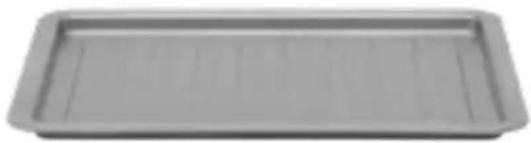
Blank gray rectangular object with no visible text, symbols, or markingsBaking Pan Crumb Tray
NOTE: Always ensure the crumb tray is in the bottom of the air fryer oven during cooking.
KNOW YOUR AIR FRYER OVEN
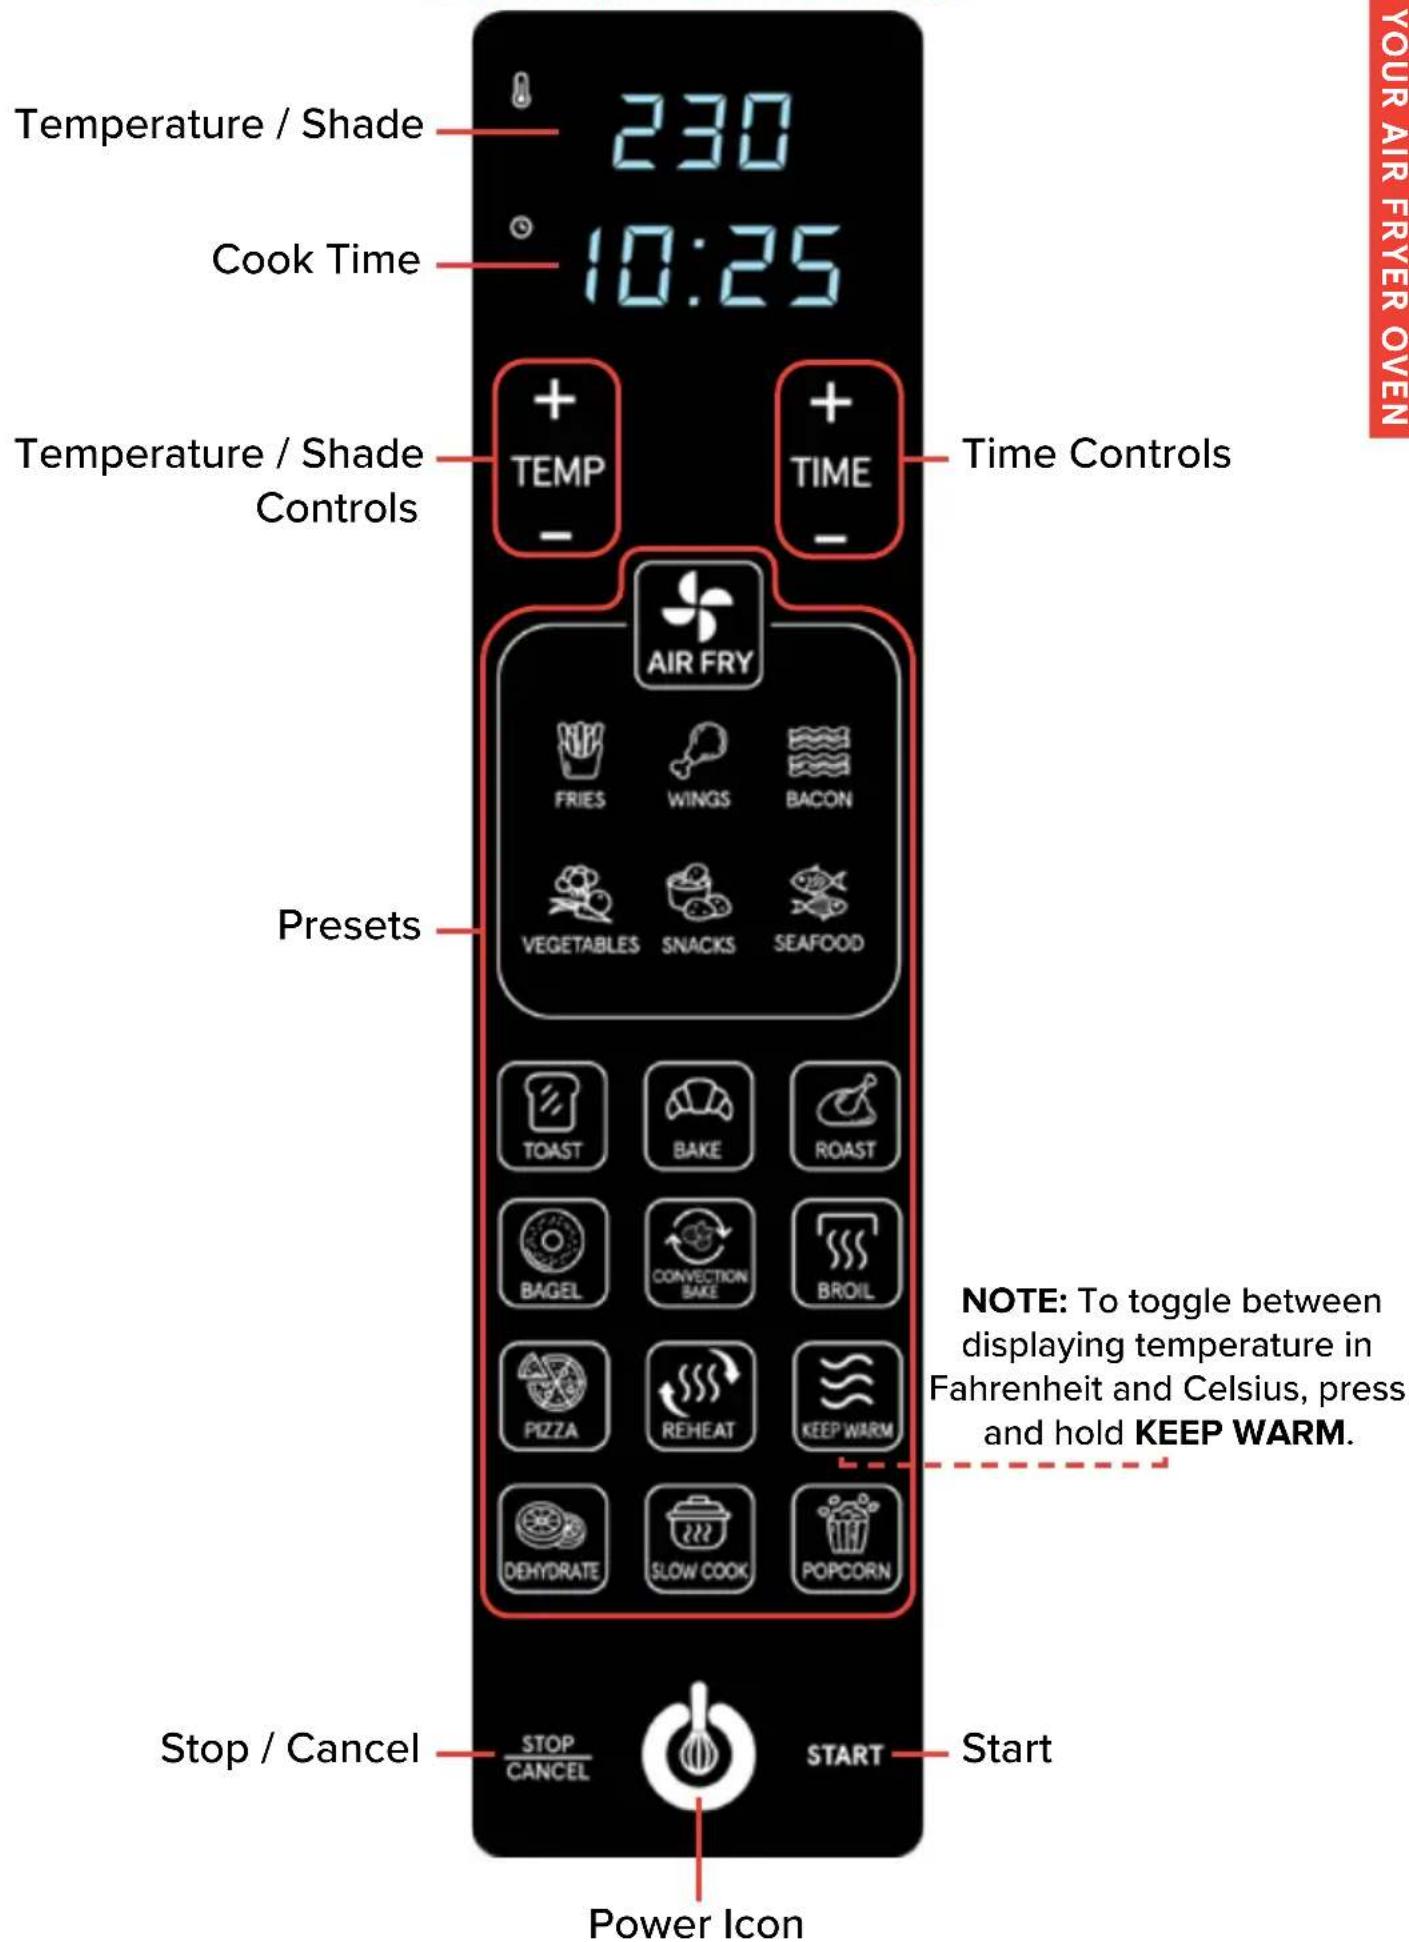
DISPLAY AND CONTROL PANEL
BEFORE FIRST USE
- Remove and discard all packaging material, labels, and tape from the unit.
- Thoroughly clean air fry basket, oven rack, baking pan, and crumb tray with hot water, dishwashing liquid, and a non-abrasive sponge. Dry all parts before use.
- Wipe the inside and outside of the unit with a moist cloth.
WARNING:
Do not place the appliance against a wall or against other appliances. Leave at least 10 cm / 4 inches of free space on the back and sides, and 10 cm / 4 inches of free space above the appliance.
Do not place anything on top of the appliance when in use.
Always use CAUTION when opening the doors; hot steam may escape!
The oven, accessories and food will be hot! Do not touch hot surfaces. Use oven mitts when inserting or removing food from the oven.
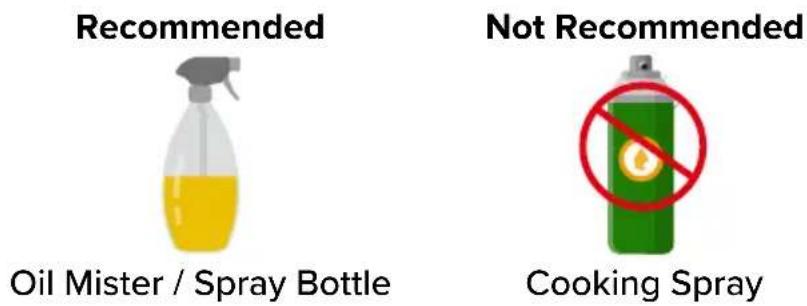
NOTE: When spraying food for a crispier finish, we recommend using regular cooking oil instead of cooking spray, as the latter may damage the accessories.
SET UP YOUR AIR FRYER OVEN
- Place the air fryer oven on a stable, level, and heat-resistant surface.
- Place the crumb tray in the bottom of the air fryer oven.
- Plug the air fryer oven into an outlet.
- Tap the power icon. The display will show ☐n (On).
USING YOUR AIR FRYER OVEN
- Tap the desired preset.
- Use the temperature controls to adjust the temperature.
For TOAST or BAGEL presets: Use the shade controls to adjust the toast shade.
- Use the time controls to adjust the cook time.
For TOAST or BAGEL presets: Time adjustment is not available.
NOTE: See the PRESET CHART on pages 12-16 for each presets' settings and which accessory to use.
For presets without preheat: Place food into the air fryer oven and tap START to begin.
- Tap START.
The display will show PrE (Preheat) and the air fryer oven will begin preheating.
Once preheated, the air fryer oven will beep and the display will show Add Food (Add Food).
- Open the doors, carefully place food into the air fryer oven, and close the doors.
The cook time will begin automatically. When the cook time has elapsed, the air fryer oven will beep and the display will show End (End).
- Open the doors. Carefully remove the food and place it on a heat-resistant surface.
STOP / CANCEL COOKING
Tap STOP / CANCEL to pause cooking.
Tap START to resume cooking.
Tap STOP / CANCEL twice to cancel cooking.
PRESET CHART
 |  |  |  | |
| PRESET |  AIR FRY AIR FRY |  FRIES WINGS BACON FRIES WINGS BACON |  |  |
| PREHEAT | Yes | Yes Yes Yes | ||
| TEMP | ||||
| DEFAULT | 220 °C / 425 °F | 220 °C / 425 °F | 230 °C / 450 °F | 200 °C / 400 °F |
| RANGE | 80 °C - 230 °C /170 °F - 450 °F | 80 °C - 230 °C /170 °F - 450 °F | 80 °C - 230 °C /170 °F - 450 °F | 80 °C - 230 °C /170 °F - 450 °F |
| TIME | ||||
| DEFAULT | 20 min 18 min | 25 min | 10 min | |
| RANGE | 1 - 60 min 1 - 60 min | 1 - 60 min | 1 - 60 min | |
| ACCESSORY | * | |||
| RACK POSITION | Position 3 or 4 | Position 3 or 4 | Position 4 | Position 3 or 4 |
| FAN |  |  |  |  |
PRESET CHART
 VEGETABLES VEGETABLES |  SNACKS SEAFOOD TOAST SNACKS SEAFOOD TOAST |  |  |
| Yes | Yes Yes No | ||
| 200 °C / 400 °F80 °C - 230 °C /170 °F - 450 °F | 220 °C / 425 °F80 °C - 230 °C /170 °F - 450 °F | 200 °C / 400 °F80 °C - 230 °C /170 °F - 450 °F | Shade 31 - 7 shades |
| 25 min 12 min1 - 60 min 1 - 60 min | 10 min1 - 60 min | N/AN/A | |
Position 3 or 4 | Position 3 or 4 | Position 3 or 4 | Position 3 or 4Fan Off |
PRESET CHART
 |  |  |  | |
| PRESET |  BAKE BAKE |  ROAST BAGEL ROAST BAGEL |  |  CONVECTIONBAKE CONVECTIONBAKE |
| PREHEAT | Yes | Yes Yes Yes | ||
| TEMP | ||||
| DEFAULT | 160 °C / 325 °F | 200 °C / 400 °F | Shade 3 | 160 °C / 325 °F |
| RANGE | 80 °C - 230 °C /170 °F - 450 °F | 80 °C - 230 °C /170 °F - 450 °F | 1 - 7 shades | 80 °C - 230 °C /170 °F - 450 °F |
| TIME | ||||
| DEFAULT | 30 min 25 min | N/A | 10 min | |
| RANGE | 1 - 99 min 1 - 99 min | N/A | 1 - 60 min | |
| ACCESSORY | ||||
| RACK POSITION | Position 3 or 4 | Position 3 or 4 | Position 1 or 2 | Position 3 or 4 |
| FAN | Fan Off | Fan Off | ||
PRESET CHART
| BROIL | PIZZA REHEAT KEEP WARM | ||
| Yes | Yes No No | ||
| 230 °C / 450 °F | 200 °C / 400 °F | 160 °C / 325 °F | 90 °C / 200 °F |
| N/A | 80 °C - 230 °C / 170 °F - 450 °F | 80 °C - 230 °C / 170 °F - 450 °F | 30 °C - 90 °C / 90 °F - 200 °F |
| 10 min 12 min | 15 min | 30 min | |
| 1 - 60 min 1 - 60 min | 1 - 60 min | 1 - 99 min | |
| + | |||
| Air Fry Basket | |||
| Position 1 or 2 | Position 4 or 5 | Position 3 or 4 | Position 3 or 4 |
| Baking Pan Below Oven Rack | |||
| Fan Off | Fan Off | Fan Off | |
PRESET CHART
 |  |  | |
| PRESET |  |  |  |
| DEHYDRATE | SLOW COOK | POPCORN | |
| PREHEAT | No | No Yes | |
| TEMP | |||
| DEFAULT | 60 °C / 135 °F | Low 90 °C / 190 °F | 200 °C / 400 °F |
| RANGE | 30 °C - 80 °C / 90 °F - 170 °F | Low 90 °C / 190 °FHigh 120 °C / 250 °F | 150 °C - 230 °C / 300 °F - 450 °F |
| TIME | |||
| DEFAULT | 8 hrs 4 hrs | 5 min | |
| RANGE | 30 min - 72 hrs | 15 min - 12 hrs | 1 - 15 min |
| ACCESSORY | + | ||
| RACK POSITION | Position 3 or 4 | Position 6 | Upside Down Air Fry Basket Position 6Baking Pan Position 6See USE THE POPCORN PRESET on page 17 |
| FAN | |||
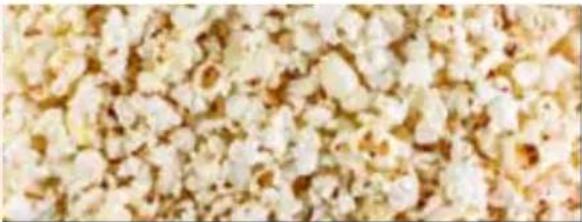
USING THE POPCORN PRESET
1. Tap POPCORN.
Optional: Use the temperature and time controls to adjust the temperature and time.
2. Tap START.
The display will show PrE (Preheat) and the air fryer oven will begin preheating.
-
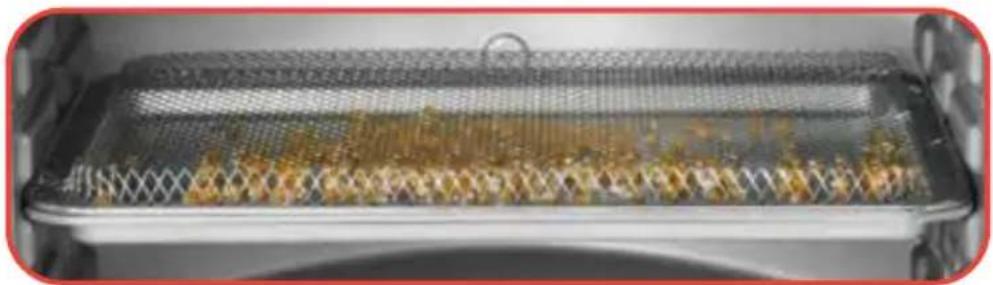
Pour 115 g of popcorn kernels into the baking pan.
-
Turn the air fry basket upside down and place it on top of the baking pan.
Once preheated, the air fryer oven will beep and the display will show Add Food (Add Food).
natural_image
Interior view of a stainless steel grater with mesh filter and dried food on the tray (no text or symbols visible)- Open the doors, carefully insert the baking pan along with the upside down air fry basket into the bottom rack position, and close the doors.
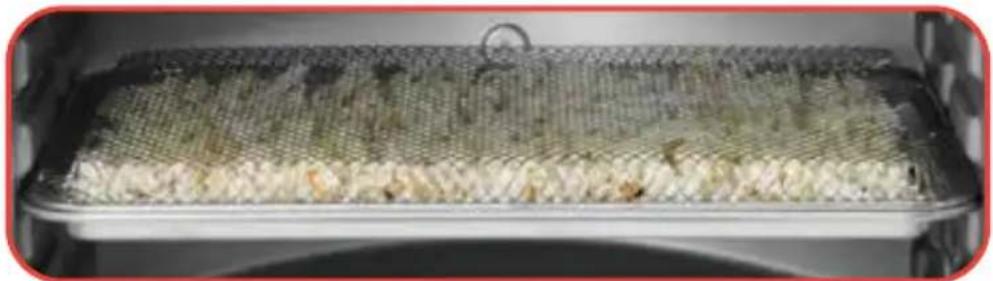
The cook time will begin automatically. When the cook time has elapsed, the air fryer oven will beep and the display will show End (End).
natural_image
Interior view of a food processor with a mesh tray filled with cooked ingredients (no visible text or symbols)- Let sit one to two minutes until popping has stopped before opening the doors. Carefully remove the popcorn and place it on a heat-resistant surface.
COOKING TIPS
- For an extensive list of foods, their ideal amounts, temperature and time settings, along with preparation notes, see the Air Fry Cooking Chart and Dehydrate Chart on pages 60 through 63 of the Gourmia Air Fryer Oven Recipe Book.
- Spread food out in single layer in; do not overcrowd.
- When following instructions on item packaging or a standard recipe, reduce the cooking temperature by 4 °C / 25 °F, check food for desired doneness a few minutes before cook time elapses, and cook a little longer if necessary.
• Always ensure raw proteins reach food-safe temperature.
TROUBLESHOOTING
| Problem Solution | |
| Food is not cooked | Use smaller batches for more even cooking |
| Raise temperature and continue cooking | |
| Food is not browned evenly | Turn over food halfway through cooking process |
| Cook similar sized foods together | |
| White smoke is coming out of the air fryer oven | Clean the air fryer oven and accessories after each use to remove greasy residue |
CLEANING & MAINTENANCE
WARNING:
NEVER immerse cord, plug, or the unit in water or any other liquid.
Before cleaning, tap the power icon to turn off the appliance, unplug it, and allow it to cool completely.
Do not use metal kitchen utensils or abrasive cleaning material to clean the unit or the accessories.
- Clean and dry the appliance and accessories after each use.
- Clean the accessories with hot water, mild liquid soap, and a non-abrasive sponge.
- Wipe the inside and outside of the unit with a damp cloth or non-abrasive sponge.
- The air fry basket, oven rack, and baking pan are top rack dishwasher safe.
STORAGE
- Unplug the appliance and let it cool down.
• Make sure all parts are clean and dry. - Store the appliance in a clean and dry place.
ENVIRONMENT
Do not discard the appliance with normal household waste at the end of its life; instead, hand it in at an official collection point for recycling. Doing so will help to preserve the environment.
GUARANTEE AND SERVICE
If you need service or information or if you have a problem, please visit www.Gourmia.com or contact your distributor.
WARRANTY & SERVICE
This Limited Warranty is for one full year from the date of purchase and requires proof of purchase from an authorized seller. It is applicable to the original purchaser only and is not transferable to a third party user. Repair or replacement of defective parts is solely at Gourmia's discretion. In the event that repair isn't possible, Gourmia will replace the product/part. If product repair/replacement won't suffice, Gourmia has the option of refunding the cash value of the product or component returned.
Product defects not covered under the Warranty provisions include normal wear and damage incurred from use or accidental negligence, misuse of instruction specifications, or repair by unauthorized parties. Gourmia is not liable for any incidental or consequential damages incurred by such circumstances.
Only valid within the United States.
Register your product at www.Gourmia.com/warranty
Get cooking with Gourmia

We'd love to hear from you!
888.552.0033
info@gourmia.com
Distributed by:
Costco Wholesale Corporation
P.O. Box 34535
Seattle, WA 98124-1535
USA
1-800-774-2678
www.costco.com
Gourmia®
FOUR NUMÉRIQUE À FRITURE À AIR CHAUD XL AVEC PORTE DOUBLE
natural_image
Exterior view of a Goumia oven with digital display and control panel (no text or symbols on main body)GUIDE DE L'UTILISATEUR
GTF7660 CA
ENGLISHFRANÇAIS
TABLE DES MATIÈRES
Félicitations 23
natural_image
Plate of golden-brown fried chicken pieces garnished with parsley, served on a dark surface with a bowl of food in the background (no text or symbols visible)OU COMPOSEZ LE 888.552.0033
DU LUNDI AU JEUDI DE 9 h À 18 h
ET LE VENDREDI DE 9 h À 15 h
LANGUES PRISES EN CHARGE : ANGLAIS, FRANÇAIS,
ESPAGNOL
Modèle : GTF7660 CA
© 2022 Gourmia
1.1
www.gourmia.com
The Steelstone Group
Brooklyn, NY
natural_image
Close-up of a black and silver electrical outlet plug (no text or symbols visible)FICHE ÉLECTRIQUE POLARISÉE
natural_image
Transparent rectangular plastic tray with textured surface (no text or symbols)natural_image
Simple line drawing of a curved grid structure (no text or symbols)Grille du four
natural_image
Gray rectangular tray with horizontal lines, no visible text or symbols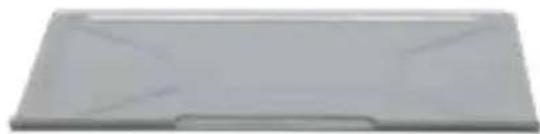
natural_image
Blank gray rectangular object with a small notch at the bottom (no visible text or symbols)natural_image
Interior view of a stainless steel grater with mesh filter and dried food on the tray (no text or symbols visible)natural_image
Interior view of a food processor with mesh grating and visible contents (no text or symbols)Costco Wholesale Canada Ltd.*
415 W. Hunt Club Road
Ottawa, Ontario
K2E 1C5, Canada
1-800-463-3783
www.costco.ca
- TABLE OF CONTENTS
- Congratulations on the purchase of your Digital Air Fryer Oven from Gourmia!
- IMPORTANT
- READ CAREFULLY
- RETAIN FOR FUTURE REFERENCE
- IMPORTANT SAFEGUARDS
- CORD AND PLUG SAFETY
- ELECTRICAL POLARIZED PLUG
- SAVE THESE INSTRUCTIONS
- KNOW YOUR AIR FRYER OVEN
- BEFORE FIRST USE
- WARNING:
- SET UP YOUR AIR FRYER OVEN
- USING YOUR AIR FRYER OVEN
- STOP / CANCEL COOKING
- USING THE POPCORN PRESET
- Tap POPCORN.
- Tap START.
- COOKING TIPS
- CLEANING & MAINTENANCE
- STORAGE
- ENVIRONMENT
- GUARANTEE AND SERVICE
- WARRANTY & SERVICE
- Gourmia®
- TABLE DES MATIÈRES
- Félicitations 23
- FICHE ÉLECTRIQUE POLARISÉE
Brand : Gourmia
Model : GTF7660 CA
Category : Electric oven