Rossendale - Bathtub Victoria + Albert - Free user manual and instructions
Find the device manual for free Rossendale Victoria + Albert in PDF.


User questions about Rossendale Victoria + Albert
0 question about this device. Answer the ones you know or ask your own.
Ask a new question about this device
Download the instructions for your Bathtub in PDF format for free! Find your manual Rossendale - Victoria + Albert and take your electronic device back in hand. On this page are published all the documents necessary for the use of your device. Rossendale by Victoria + Albert.
USER MANUAL Rossendale Victoria + Albert
Gordano Rossendale Kaldera 1 - 6
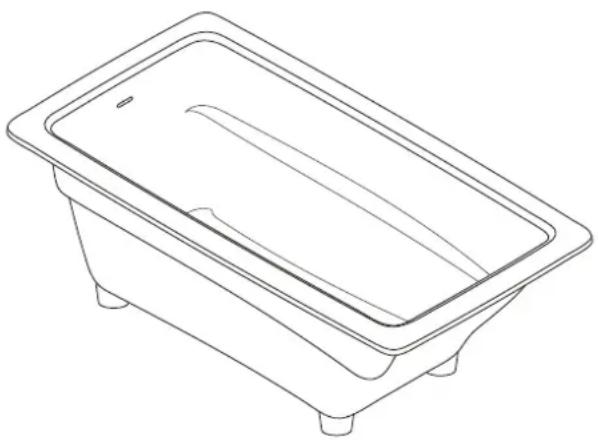
natural_image
Line drawing of a rectangular basin or basin with four legs (no text or symbols)Fitting instructions Notice d'installation Instrucciones de montaje Montageanleitung Istruzioni di montaggio Montagehandleiding Instrukcja montażu Указания по креплению
ADA: In order for this to satisfy ADA requirements the installation must meet the standards set out in ANSI A117.1.
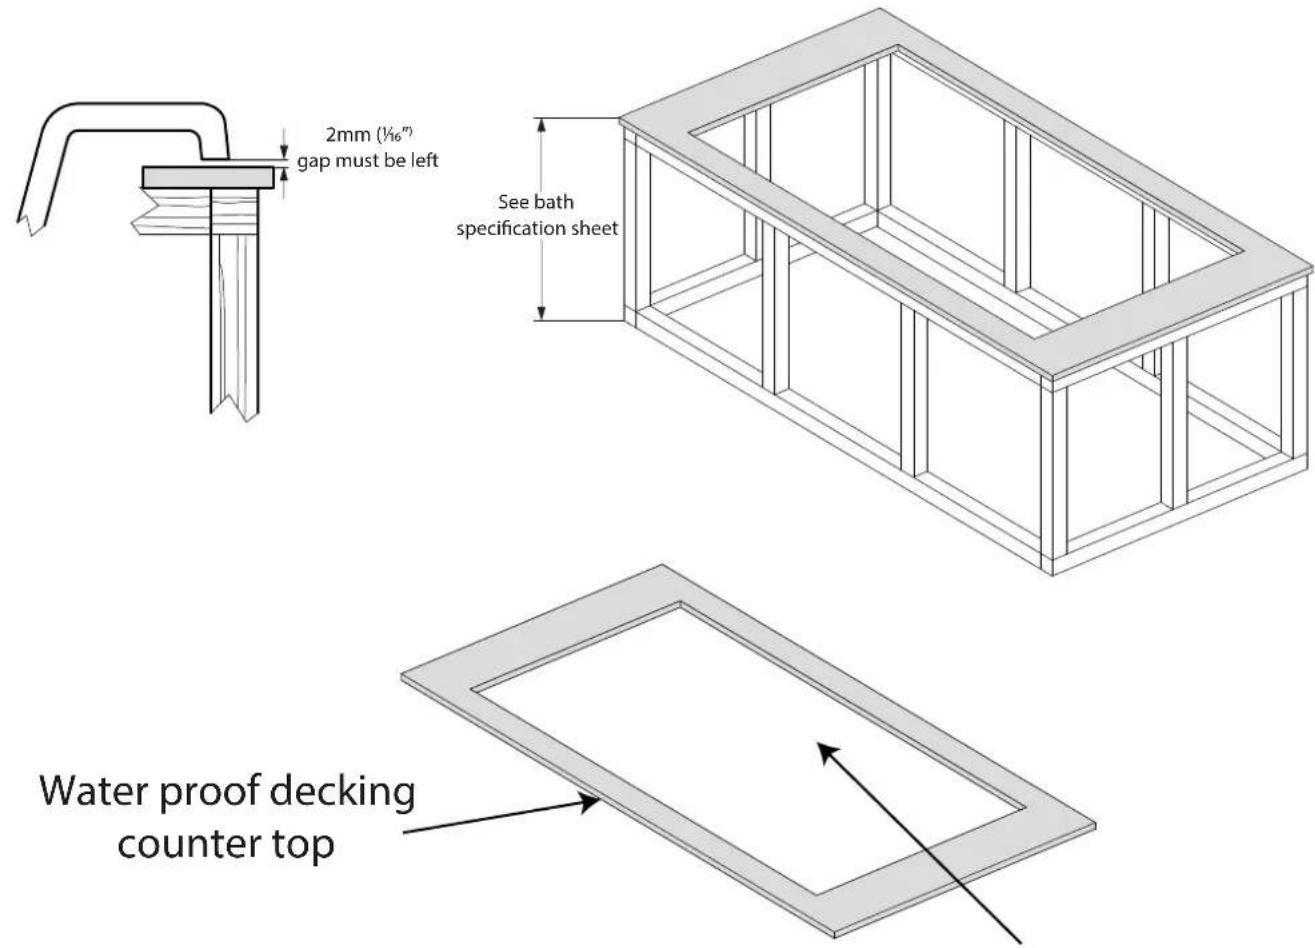
text_image
2mm (1/16") gap must be left See bath specification sheet Water proof decking counter topCut Out (see bath diagram)

text_image
Stud FramingNote: DO NOT support the bathtub by the frame, the bath tub is self supporting on its feet
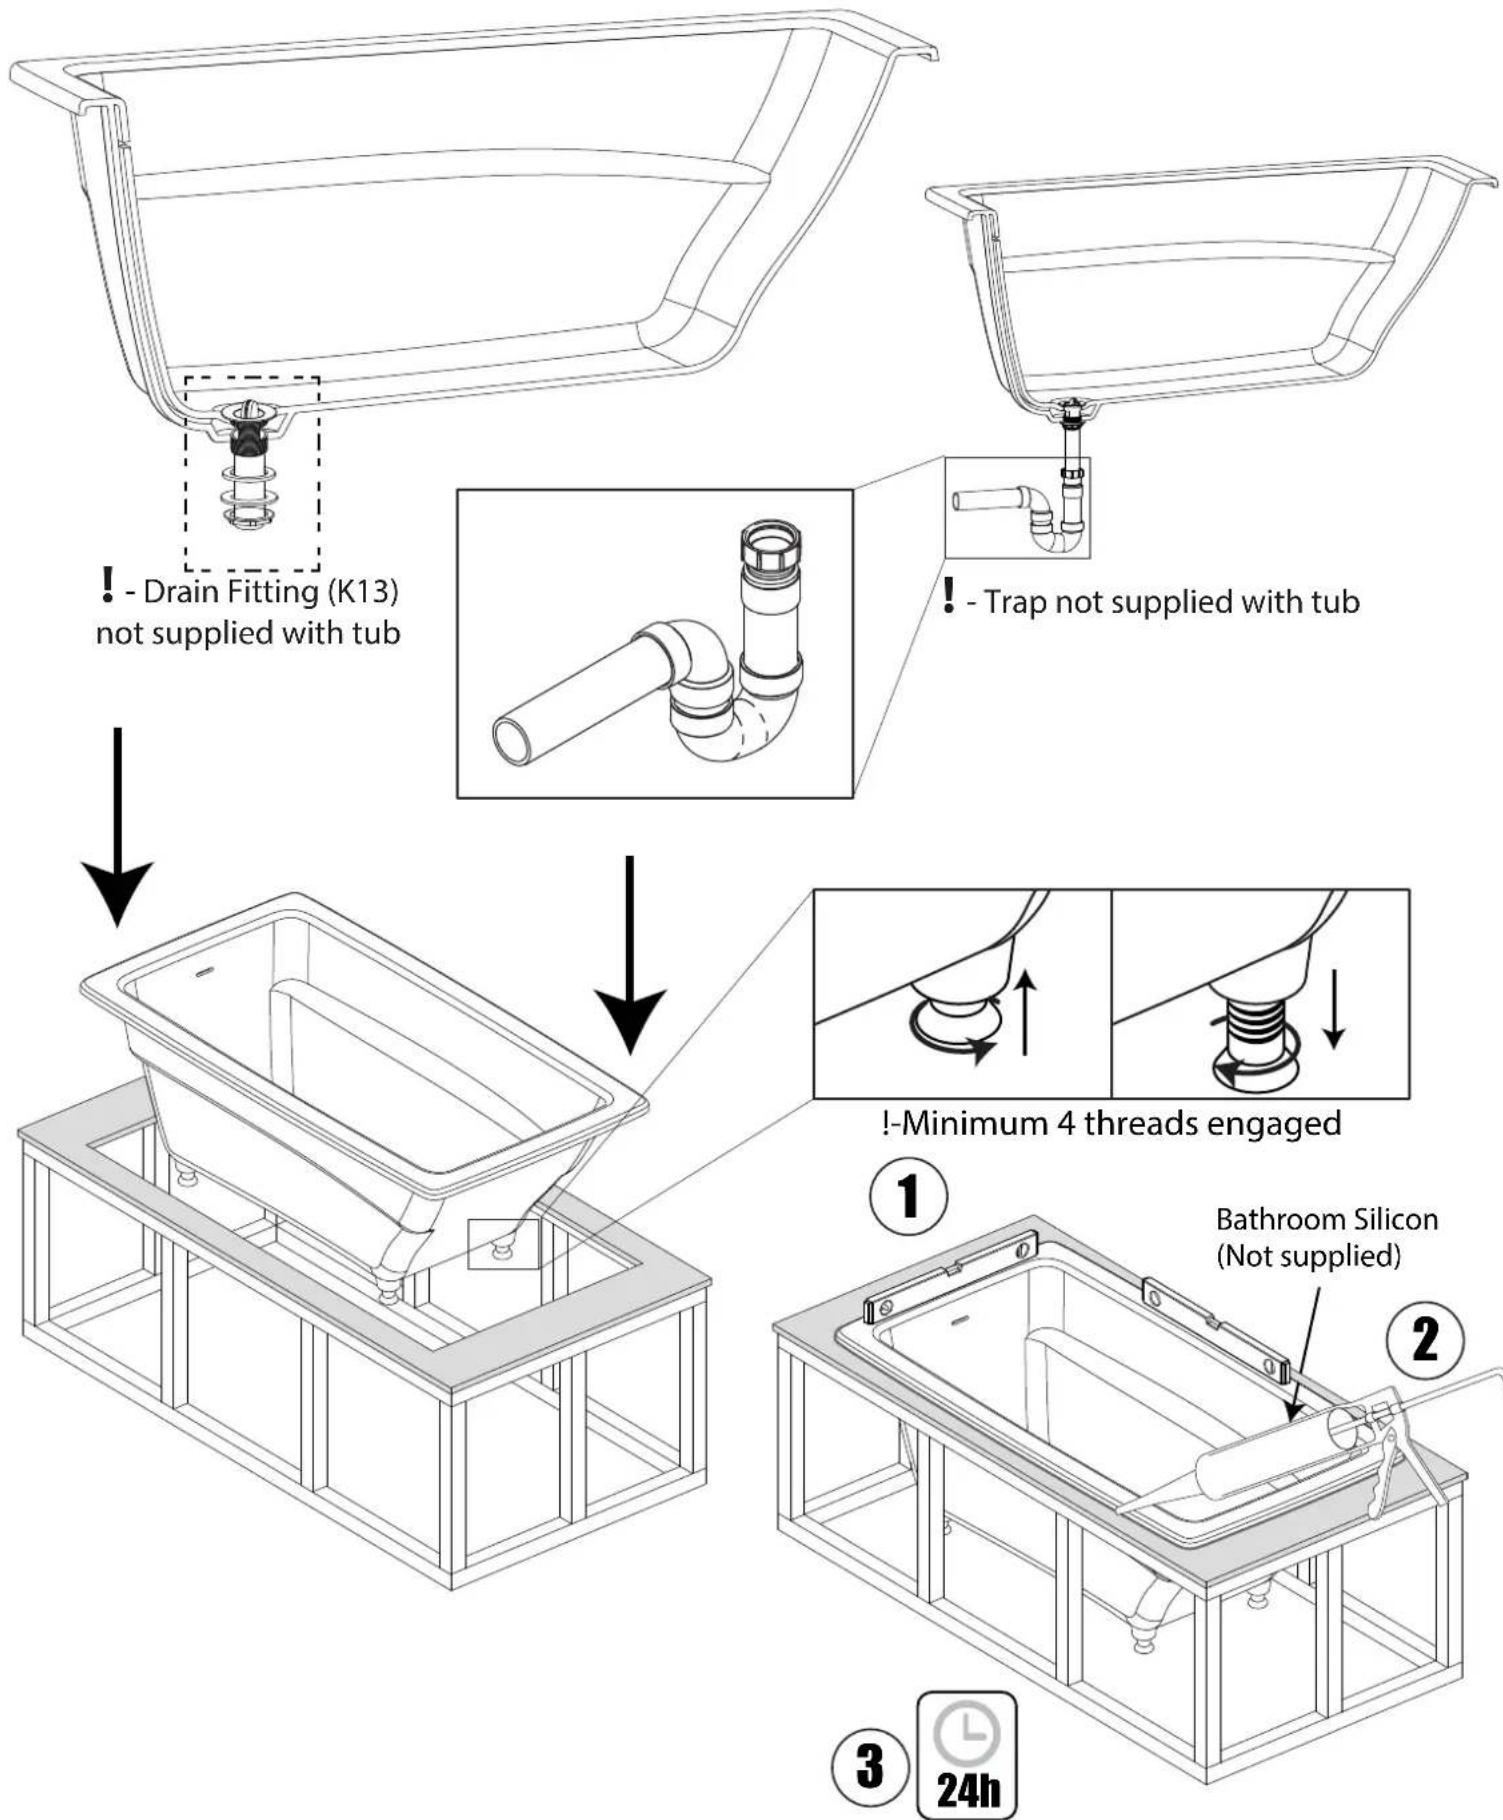
flowchart
graph TD
    A["Drain Fitting (K13) not supplied with tub"] --> B["Trap not supplied with tub"]
    B --> C["Minimum 4 threads engaged"]
    C --> D["Bathroom Silicon (Not supplied)"]
*Not suitable for bathtubs with a tile flange
ADA: In order for this to satisfy ADA requirements the installation must meet the standards set out in ANSI A117.1.
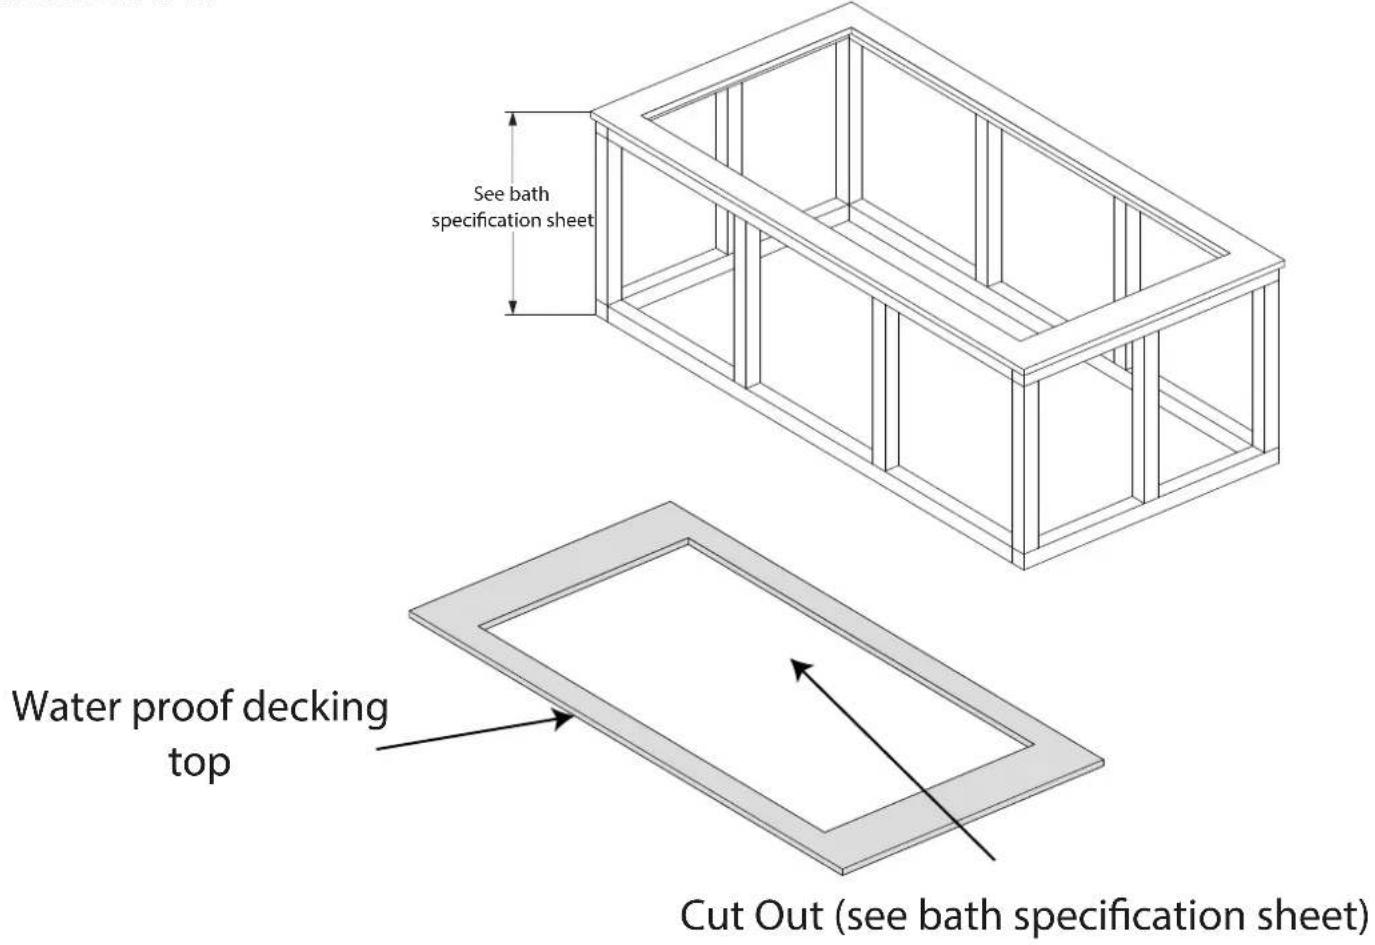
text_image
See bath specification sheet Water proof decking top Cut Out (see bath specification sheet)
text_image
Stud FramingNote: DO NOT support the bathtub by the frame, the bath tub is self supporting on its feet
*Not suitable for bathtubs with a tile flange

text_image
Drain Fitting (K13) not supplied with tub Trap not supplied with tub !-Minimum 4 threads engaged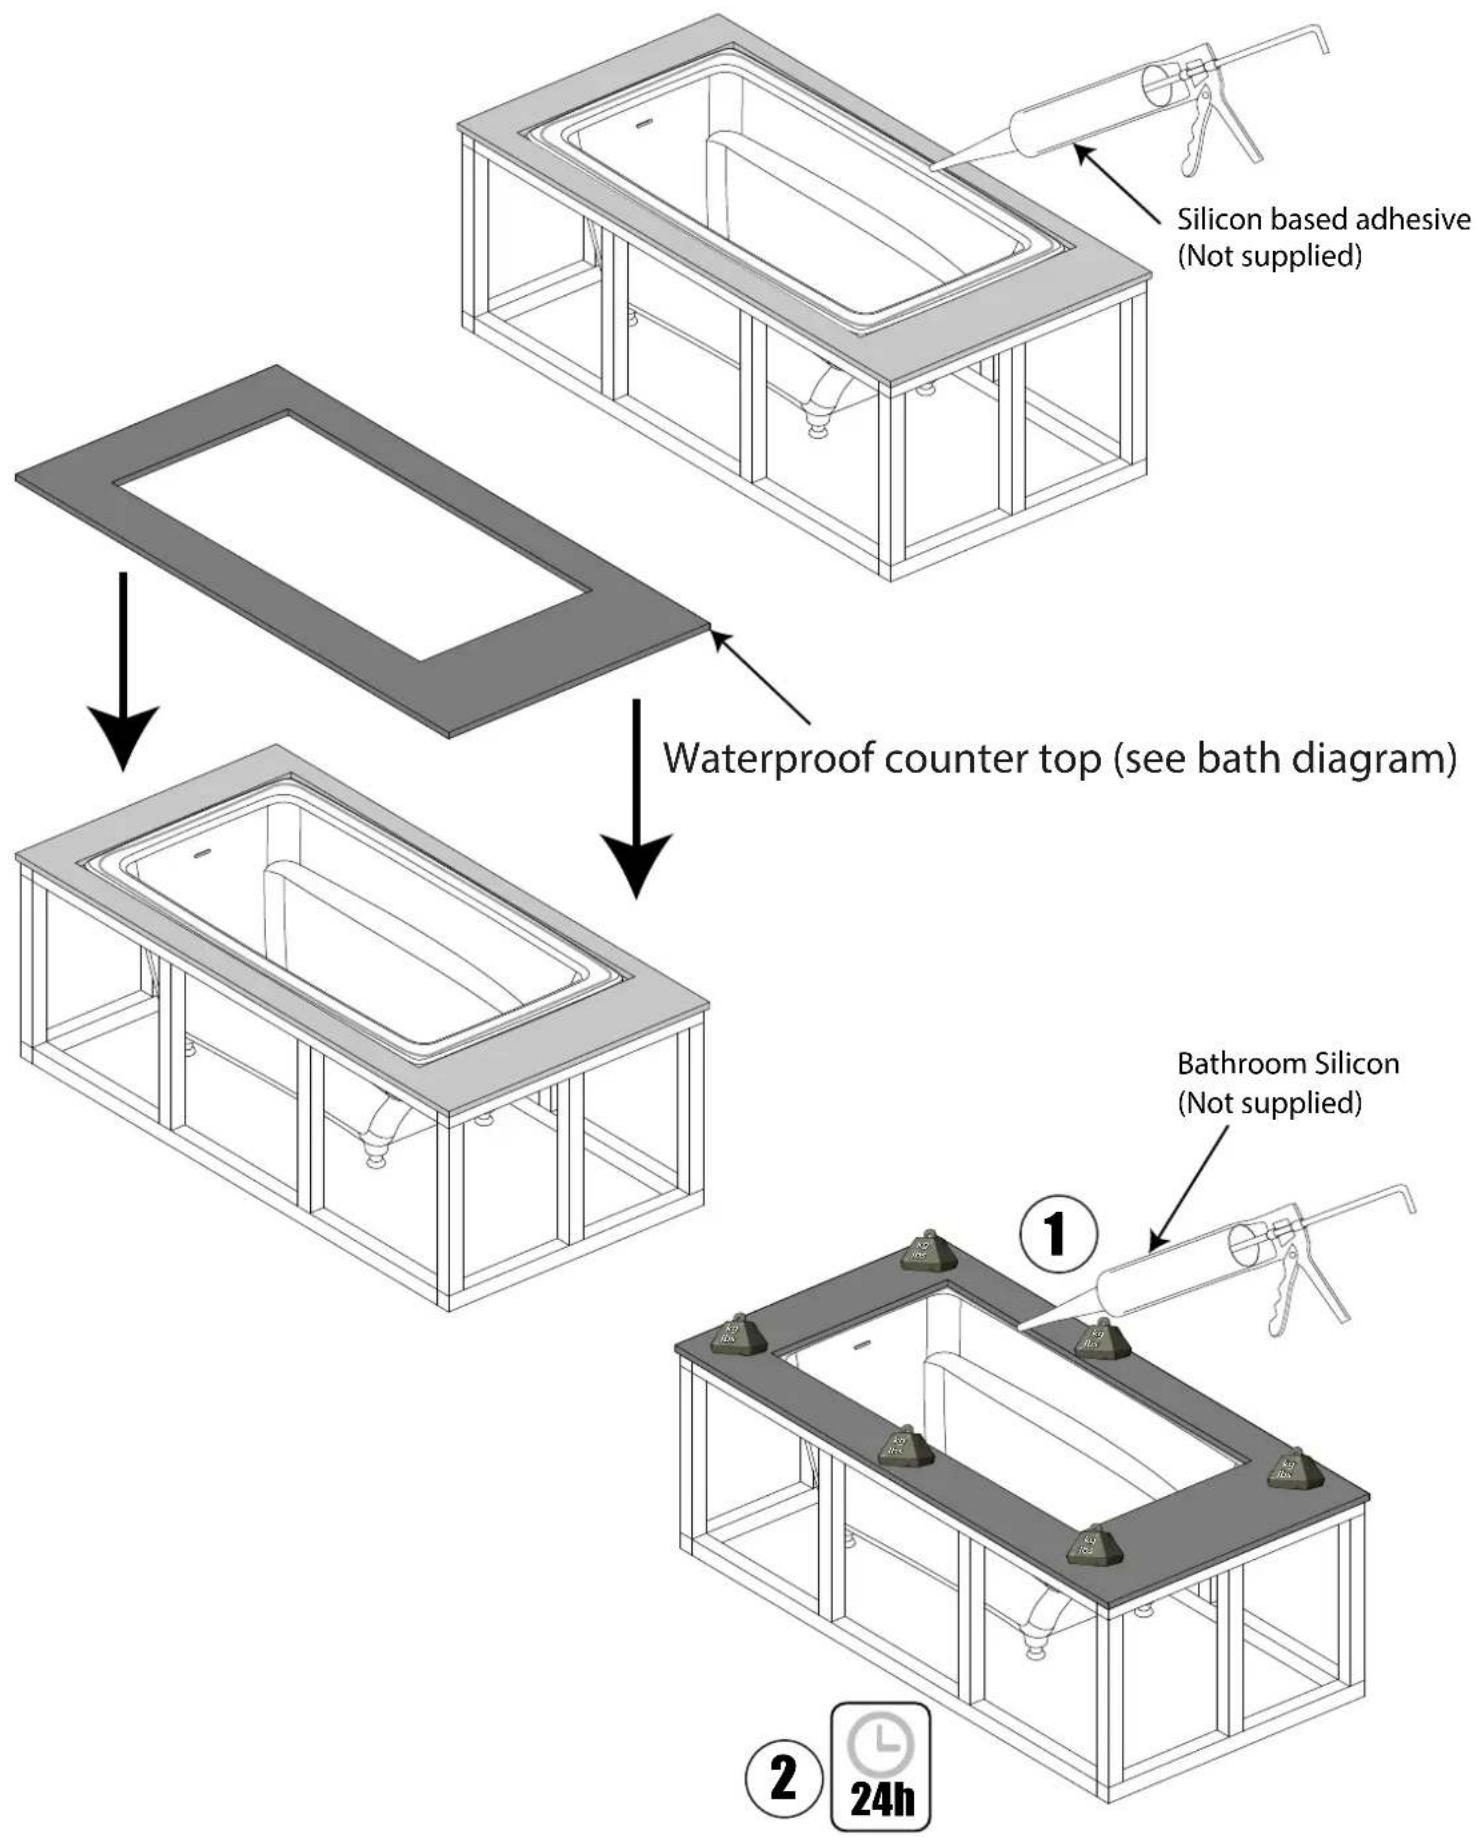
flowchart
graph TD
    A["Silicon based adhesive (Not supplied)"] --> B["Waterproof counter top (see bath diagram)"]
    B --> C["Bathroom Silicon (Not supplied)"]
To be removed for use by the homeowner /occupant
Receiving and Installing Goods
The fitting of the bath feet or installation of the entire product will be seen as acceptance of quality. We strongly recommend that you use a suitable qualified installer. Instructions must be adhered to. We cannot accept responsibility for incorrect installation.
Please note that shrinkage lines, air holes, casting marks and blemishes on the underside of the product (where they cannot be seen when turned upright) do not adversely affect performance or aesthetics and are not regarded as defects.
Should you wish to paint or customise the outside of your bath/vessel basin, please follow the below instructions.
Day to day use
Please note that whilst our material has excellent stain resistance, we recommend that bath water containing additives such as oils and bath salts is always drained and rinsed off with clean water immediately after use.
Cleaning
We recommend soap with plenty of warm water. All cleaners should be fully rinsed off afterwards with clean water. For any stubborn staining, we recommend the use of our polishing kit, which is available from customer services.
Repair & Maintenance
Light scratches that cannot be felt with a finger nail may be removed by polishing with a fine cut automotive compound. If they still remain, try rubbing with a fine (2000 grit) waterproof abrasive paper on a sanding block with water. Re-polish the surface afterwards using a fine cut automotive rubbing compound - available from reputable auto supply or professional auto paint supply stores.
Deep scratches that can be felt with a finger nail will require a more specific repair and we recommend you contact customer services to be talked through the steps.
Painting
Having a smooth exterior surface, baths, vessel basins and feet can be decorated using oil or water based paints. Firstly, rub down the surface with a fine abrasive paper to get a 'key' for the paint to stick to. Wipe down thoroughly to remove any dust before applying paint. If applicable, using a pencil, mark the outline of the feet on the bath. Important: Do not paint more than 5mm / 1/4" over this line as it could result in poor adhesion and possible failure.
Following the paint manufacturer's instructions, apply the paint. We recommend two top coats and doubling the waiting period between coats. Use a small roller or brush, applying paint in a random fashion so as not create paint lines. If you wish to paint the feet, follow the above procedure using a small brush or spray paint instead of a roller. Important: Do not paint the inside of the foot as it could result in poor adhesion of the feet and possible failure.