
Iridea D2DFA07IRZU - Deep fryer Tognana - Free user manual and instructions
Find the device manual for free Iridea D2DFA07IRZU Tognana in PDF.
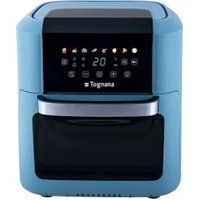


| Product Type | Oil-free fryer (Airfryer oven) |
| Brand | Tognana |
| Model | Iridea D2DFA07IRZU |
| Power | 2000 W |
| Capacity | 11 L |
| Supply Voltage | 220-240 V~ 50-60 Hz |
| Dimensions (L x D x H) | 33.9 x 40.4 x 38.3 cm |
| Net Weight | 6700 g |
| Temperature Range | 80-200 °C (30-80 °C for dehydration) |
| Timer | 1-60 min (1-24 h for dehydration) |
| Preset Programs | Fries, Chicken, Steaks, Fish, Shrimp, Cakes, Pizza, Dehydrator |
| Included Accessories | 2 wire mesh trays, 1 rotating spit with forks, 1 roasting basket, 1 drip tray, 1 handle |
| Special Functions | Rotation (for spit/basket), interior light, automatic preheating, shake indicator |
| Standby Consumption | 0.26 W |
| Cleaning | Dishwasher-safe accessories (max 55 °C), exterior with damp cloth, heating element with brush |
| Safety | Automatic stop when door is opened, hot surface, short-circuit protection |
| Material | Stainless steel, tempered glass |
| Warranty | 2 years (Tognana conventional warranty) |
| Repairability | Refer to an authorized service center, no user-serviceable parts |
Frequently Asked Questions - Iridea D2DFA07IRZU Tognana
User questions about Iridea D2DFA07IRZU Tognana
0 question about this device. Answer the ones you know or ask your own.
Ask a new question about this device
Download the instructions for your Deep fryer in PDF format for free! Find your manual Iridea D2DFA07IRZU - Tognana and take your electronic device back in hand. On this page are published all the documents necessary for the use of your device. Iridea D2DFA07IRZU by Tognana.
USER MANUAL Iridea D2DFA07IRZU Tognana
Cod. D2DFA07IRZU
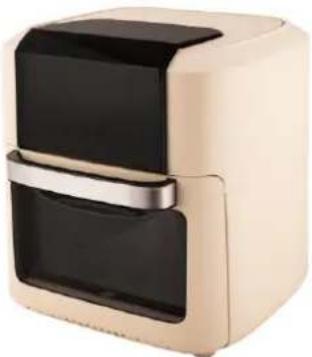
Cod. D2DFA07IRCH
2.
3.
4.

5.
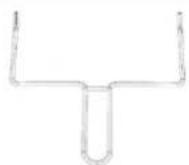
1. Wire rack

Ingredients
- Potatoes
500 g
• Oil
2 teaspoons
- Salt
to taste
- Pepper
to taste
Ingredients
- Chicken wings
350 gr
- Garlic
2 cloves
• Oil
2 teaspoons
- Salt
1 teaspoon
- Pepper
1 teaspoon
Ingredients
Ingredients
Ingredients
Fresh shrimp 300 g • Oil 1 teaspoon • Semolina flour as needed • Salt as needed
Thank you for choosing our air fryer oven for cooking and heating food for home consumption. Tognana Porcellane S.p.A. declines any liability for any damage that may arise, directly or indirectly, for persons, things and pets as a result of failure to comply with all the requirements indicated in the appropriate “Manual of use” regarding the installation, use and maintenance of the appliance.
SYMBOLS IN THE MANUAL/PRODUCT AND THEIR MEANING
 | This symbol indicates that you need to read this manual carefully before use. Pay particular attention to safety guidance. Keep this manual as an integral part of the product. |
 | DANGER: the word indicates a potential imminent danger with a high level of risk that, if not avoided, has a high probability of causing serious injury or death. |
 | WARNING: the word indicates a potential hazard with an average level of risk that, if not avoided, has a high probability of causing serious injury or death. |
 | ATTENTION: the word indicates a potential hazard with a low level of risk that, if not avoided, could lead to minor or moderate injuries. |
 | this symbol indicates that the protection of the appliance is not based solely on the main insulation, but requires an additional safety measure. |
 | ATTENTION - HOT SURFACE!: The symbol indicates that the surface temperature of the area of application can reach become dangerously high and for this reason direct contact with the skin and heat sensitive fabrics/materials should be avoided. |
 | IMPORTANT NOTICE: the words indicate useful information for the correct use of the product. |
 | This symbol on the product or packaging indicates that the appliance at the end of its useful life must be collected separately from other waste for proper treatment and recycling. |
 | This symbol indicates that the appliance complies with the safety requirements laid down in EU regulations/directives. |
 | This symbol indicates that the materials and objects in contact with food (MOCA) are suitable for food contact. |

IMPORTANT NOTES ON CORRECT USE
- This appliance is intended exclusively for cooking and heating food for domestic consumption.
- This appliance is intended for domestic use and similar applications, such as:
*kitchen areas of shop staff, offices and other working environments;
*agrotourism
*customers of hotels, guesthouses and other residential environments;
*rooms like bed and breakfast.
- This product is not a toy.
- Do not leave parts of the packaging (plastic bags, polystyrene foam, etc.) within reach of children or dependant persons, as these objects are potential sources of danger (e.g.: risk of suffocation).
- Use the product for the sole purpose for which it was designed. The manufacturer is not liable for damage or injury caused by improper use.
- Unauthorised repairs or modifications will invalidate the warranty.
- Do not use outdoors.
- Never leave the turned on appliance unattended.
- Do not place on or near a gas or electric stove, or in a hot oven.
- Before use, place the appliance on a solid, flat, horizontal and non-flammable surface.
- To turn off the appliance manually, press the shutdown button.
- Never put the appliance in the dishwasher.
- Do not soak the appliance in water or rinse it under the tap, as it contains electronic components and heating elements.
- Use only original or manufacturer-recommended spare parts and accessories.

DANGER
PRODUCT
- Before connecting the appliance to the power supply, check that the voltage indicated on the appliance corresponds to the voltage available in your home.
Connect the appliance to a power outlet equipped with efficient grounding. The manufacturer cannot be held responsible for any accidents caused by the lack of grounding of the system.
- The appliance may be used by children of at least 8 years of age and by persons with reduced physical, sensory or mental abilities, or without experience or knowledge, provided that they are supervised or have received instructions on the safe use of the appliance and the understanding of the hazards inherent thereto. Children should not play with the appliance. Cleaning and maintenance intended to be carried out by the user shall not be carried out by children without supervision.
- Supervise the children so that they do not play with the appliance.
- Do not insert metal objects into the slots of the appliance.
- Do not cover the air inlet and outlet when the appliance is in operation or when it is connected to the power outlet.
- Do not place the product against the wall or other objects: the back of the product, the middle side and the upper side of the product must have a free space of at least 10 cm. Do not place objects on top of the product.
- Do not add oil to the air fryer oven as this may cause a fire hazard.
- To avoid short circuits, do not put bulky food that can touch the resistors in the oven. In addition, do not put food wrapped in aluminium or metal tools in the oven.
- Disconnect the appliance from the socket when moving and not in use.
- Let the appliance cool about 30 minutes before cleaning.
- Remove any burnt food residues.
- Incorrect use of the product can cause damage or injury.
- In order to avoid electric shocks, do not immerse the body of the product in water or other liquids.
- This product does not contain repairable parts. Don't try to fix it yourself. Have maintenance performed by a qualified service centre using only identical spare parts. This will ensure that the safety of the product is maintained.
- Do not use the appliance at high temperatures, in very humid or wet environments or in the vicinity of flammable material (curtains, tablecloths, etc.).
- Do not use if the appliance has fallen or has been damaged in any way. Do not attempt repairs yourself. Contact your dealer for
repair/replacement, if under warranty, or customer support.
- If the product emits black smoke, disconnect the power supply immediately. Wait for the product to stop emitting smoke before opening the door and removing the contents from the fryer.
DANGER OF SCALDING!
- Do not touch the hot parts of the appliance to avoid burns (See A, B, C, D and Fig. 1). The rotating basket, rotisserie and trays become very hot during use. Wear oven mitts or pliers when handling hot accessories or surfaces.
- TO AVOID PERSONAL INJURY, never place your hands inside the unit unless it is fully cooled.
- Be careful when cleaning the cooking chamber: The heating element and the inside walls are hot.

- This appliance can release heat, steam or condensation during and after operation. Hands and face should be kept safe from steam and air intakes. Also pay attention to hot steam and heat when removing accessories to prevent the risk of burns, scalds or other injuries, as well as property damage.
- When the appliance is in operation and for a few minutes after the end of operation, the temperature of the outside surface and air outlet can be very high. Do not touch or move the appliance to avoid danger of burns.
- For the air fryer-oven you can use baking paper or aluminum/tin film of suitable size. Do not use too large sheets to prevent them from touching the heating elements during operation.
CABLE AND PLUG
- The power cord must be connected to an AC electrical outlet (standard household current). Do not use other electrical outlets.
- In case of incompatibility between the socket and the plug of the
- The power cord must be connected to an AC electrical outlet (standard household current). Do not use other electrical outlets.
- In case of incompatibility between the socket and the plug of the
appliance, have the socket replaced by another suitable type by qualified personnel. The use of adapters, multiple sockets, and/or extensions is not recommended. Should their use be necessary, use only simple or multiple adapters and extensions complying with the current safety standards, taking care not to exceed the power limit marked on the adapter and/or extension.
- Do not use the power cord if damaged.
- Use only the power cord supplied in the package.
- In order to avoid electric shock, do not immerse the power cord in water or other liquids.
- The power cord should be used in a dry and clean place. Use in wet or dirty environments may lead to risks of fire, electric shock or electrocution.
- Do not touch the cable or power plug with wet hands.
- Do not let the cable dangle or fall down from a countertop.
- Be careful not to pull or trip over the power cord. Keep the cable away from sources of heat, hot objects or open flames.
- Disconnect the cable from the power outlet before cleaning and when the appliance is not in use. To disconnect, turn off the appliance, then remove the plug from the wall outlet. Don't pull the cable but grab the plug.
- Always connect the plug to the appliance first, then connect the cable to the wall outlet. Make sure the cable is fully extended.
- The cable should not be twisted or wrapped around the appliance.
- Do not use the appliance if the power cord is damaged. Do not attempt repairs yourself. Contact your dealer for repair/replacement, if under warranty, or customer support.
- Do not use extension cables or timer devices.
TECHNICAL DATA
• Power: 2000 W - Capacity: 11L - Input voltage: 220-240 Vac ~ 50–60 Hz • Dimensions: 33.9 x 40.4 x 38.3 cm - Net weight: 6700 g
ENERGY CONSUMPTION
Product information for energy consumption and maximum time to reach the applicable low power mode.
| Standby mode | 0.26 W |
| Maximum time required for the appliance to automatically reach the applicable low power mode or condition. | 0 minutes |
CONFORMITY OF THE PRODUCT
The manufacturer Tognana Porcellane S.p.A. declares that the product Air fryer oven 11L Mod. Iridea complies with Directive 2014/30/EU of the European Parliament and of the Council of 26 February 2014 on the harmonisation of the laws of the Member States relating to electromagnetic compatibility.
The manufacturer Tognana Porcellane S.p.A. declares that the product Air fryer oven 11L Mod. Iridea complies with Directive 2014/35/EU of the European Parliament and of the Council of 26 February 2014 on the harmonisation of the laws of the Member States relating to the making available on the market of electrical equipment intended for use within certain voltage limits.
The manufacturer Tognana Porcellane S.p.A. declares that the product Air fryer oven 11L Mod. Iridea complies with Directive 2009/125/EC of the European Parliament and of the Council of 21 October 2009 establishing a framework for the setting of ecodesign requirements for energy-related products.
The manufacturer Tognana Porcellane S.p.A. declares that the product Air fryer oven 11L Mod. Iridea complies with Directive 2011/65/EU of the European Parliament and of the Council of 8 June 2011 and subsequent Commission Delegated Directive 2015/863 on the restriction of the use of certain hazardous substances in electrical and electronic equipment.
COMPONENTS
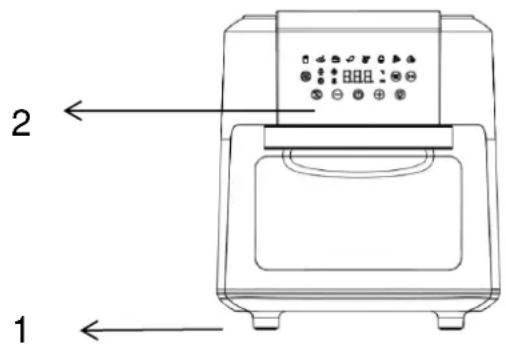
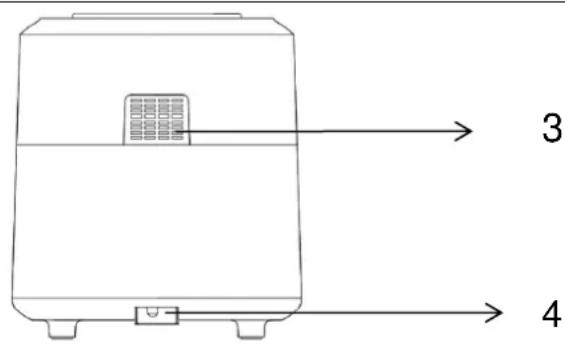
1 Door with window 2 Digital control panel 3 Air outlet 4 Power cord
BEFORE FIRST USE
- Remove the different components from the packaging, check that they are complete and intact, carefully remove any protections and labels. The package contains:
• No. 1 Air fryer oven - No. 1 Handle - No. 2 Mesh tray - No. 1 Broiler • No. 1 Rotisserie basket - No. 1 Drip tray • No. 1 User Manual
- Make sure that all parts are assembled correctly and in place before use.
- It is recommended that you wash all removable parts that will come into contact with food following the instructions in the section "CLEANING AND MAINTENANCE".
- Operate the empty appliance at 200 °C without food for 10 minutes. The appliance may emit smoke and odors due to residues from the manufacturing process. This is normal and does not indicate any defect or danger.
Accessories
1.
2.
3.
4.

5.
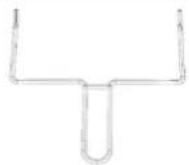
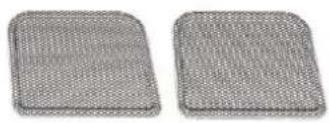
1. Mesh tray
It can be used not only for dehydration but also for cooking crispy snacks or heating up food such as pizza. Place the tray on the top shelf for a crispier result or for faster cooking.
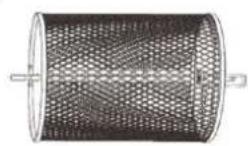
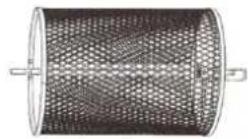
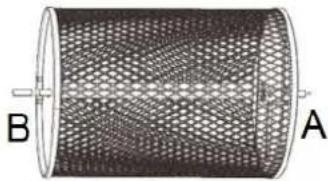
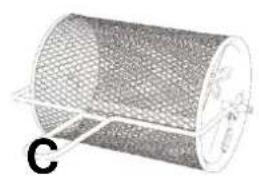
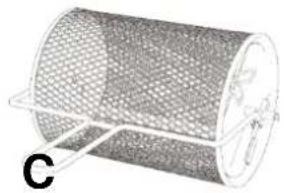
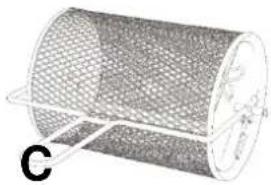
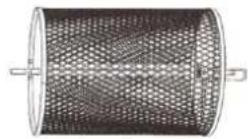
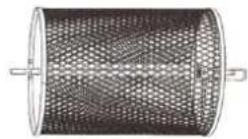
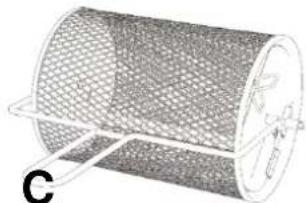
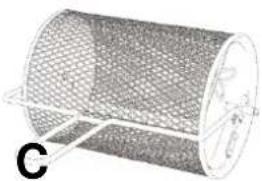
2. Rotating basket
Great for French fries, roasting nuts, and other snacks.
To properly position the basket (2), first insert the right end (A) and then the left end (B) into the cooking chamber.
Slightly shift the basket to the left, securing the left end into the hole on the left side of the cooking chamber. Hook the first notch of the right end of the basket onto the groove on the right side of the cooking chamber. Make sure that the basket is correctly positioned before turning it on.
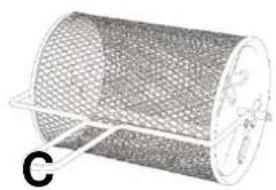
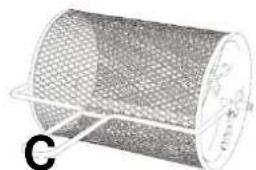
Use the rotisserie tongs to place or remove the basket (C).
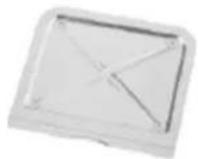
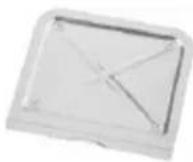
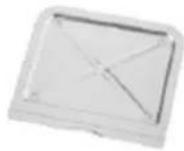
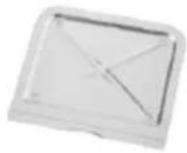
3. Drip tray
Always position the drip tray at the lowest level of the cooking chamber for easy cleaning.
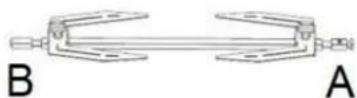
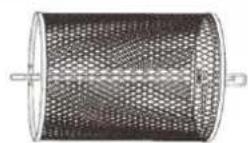
4. Rotisserie spit, forks, and fixing screws
Use for roasts and whole chicken. Insert the spit lengthwise into the center of the chicken or roast. Slide the forks onto the spit from both ends into the meat, then lock them in place with the fixing screws. There are grooves on the spit for the fixing screws. You can fasten the screws closer to the center if necessary but never towards the ends.
To properly position the rotisserie (4), first insert the right tip (A) and then the left tip (B) into the cooking chamber.
Slightly shift the spit to the left, securing the left tip into the hole on the left side of the cooking chamber. Hook the first notch of the right tip of the spit onto the groove on the right side of the cooking chamber. Make sure the spit is correctly positioned before turning it on.
Use the rotisserie tongs to place or remove the rotisserie.
NOTE: Ensure that the roast or chicken is not too large to rotate freely inside the oven.
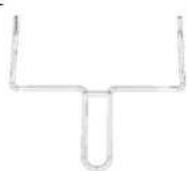
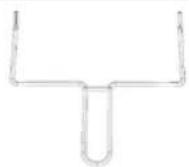
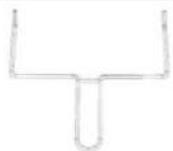
5. Rotisserie tongs
Use to remove roasts and chicken prepared using the rotisserie, or the rotating basket. Position it under the rotisserie spit or the basket and lift, first the right side, then gently extract the food.
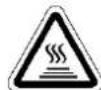
DANGER OF SCALDING!
The forks and other metal parts of this appliance are sharp and will become extremely hot during use.
Extreme caution is required to avoid personal injury. Wear protective gloves or oven mitts.
CONTROL PANEL FUNCTIONS
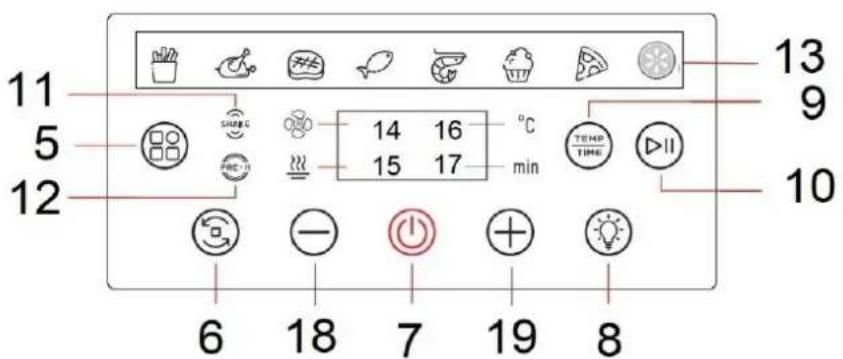
- Pre-set menu selection button
- Rotation button
- On/Off button
- Internal light On/Off button
- Temperature/time selection button
- Start/pause button
- Shake function indicator "SHAKE"
- Preheating function indicator "PRE-H"
- Pre-set menus
- Fan indicator
- Heating element indicator
- Set temperature indicator (°C)
- Set time indicator (min)
- Temperature/time adjustment button (-) 19. Temperature/time adjustment button (+)
USING THE CONTROL PANEL
5 Pre-set menu selection button

Select the desired menu by pressing this button; the indicator for the selected program will flash, and the display will show the default time and temperature. These values can be changed by pressing the temperature and time adjustment buttons (18-19). Confirm the program by pressing the start button ▷
6 Rotation button

Press this button if using the rotisserie or rotating basket. Select after choosing the desired menu; the icon will then flash.
7 On/off button

Once the appliance is plugged into the power outlet, the indicator light for the power on/off button will illuminate. Press the button, and the entire control panel will light up.
8 Internal light

Pressing this button allows you to monitor the cooking progress while the appliance is in operation.
Opening the door during the cooking process will pause the appliance. The internal light activates when the door is opened.

9 Temperature/time selection button
This button allows you to adjust the cooking temperature or time.
Press the button once, the display will indicate the preset temperature.
Press the -/+ buttons (18,19) to adjust the desired temperature in 5°C intervals.
Press the button again, the display will show the preset time.
Press the -/+ buttons (18,19) to adjust the desired cooking time per minute, from 1 to 60 minutes in all modes.
You can change the default time and temperature of the menu by pressing and holding the temperature/time
adjustment button for about 5 seconds until you hear three beeps. The new settings will replace the original ones and will be saved accordingly.
10 Start/Pause button ▷
Confirm the setting by pressing this button, and the appliance will start operating. Press this button again to pause the function during the cooking cycle.
INSTRUCTIONS FOR USE
- Place the appliance on a flat, stable, heat-resistant, and dry surface.
- Insert the power plug into a grounded wall outlet; an audible signal will be emitted, indicating that the air fryer-oven is in standby mode, and the display will show the power on/off button indicator (7).
- Open the door and place the food on one of the accessories as needed.
- Position the accessory correctly inside the oven and close the door.
- Press the on/off button (7), and the preset temperature and time will be displayed on the screen.
- At this point, you can manually adjust the time and temperature using the time and temperature adjustment buttons -/+ (18,19) or select one of the menu functions by pressing the pre-set menu selection button (5).
- Press the start button (10) to start cooking.
- Each cooking program starts with a preheating phase of about 3 minutes. During the preheating phase,
the indicator light (12), the fan indicator (14) and the heating element indicator (15) will light up. At the end of the preheating cycle, the appliance will emit 3 beeps to indicate the start of the cooking cycle.
- During cooking, you can press the internal light button (8) for the interior lighting. Press the button again to turn off the light. The light will automatically turn off after about 10 seconds.
- Shaking indicator (11): The shake indicator is signaled by an audible sound during the cooking cycle of certain programs (refer to the "pre-set menu" table). This function allows you to shake the food inside, ensuring more even cooking.
Note: If you do not open the door and shake the food, the shake indicator (SHAKE) on the control panel
will continue to flash. Once the door is opened, the shake indicator (SHAKE) will stop flashing.
- At the end of the cooking cycle, an audible signal will be emitted, and "END" will be displayed on the screen.
- After removing the accessories from the appliance, place them on a suitable surface and let them cool for at least 30 seconds before removing the food.
PRESET MENU TABLE
| Menu | Set time (min) | Set temperature (°C) | Pre-heating | Shake | |
 1. 1. | French Fries | 20 | 200 | YES | If rotation is selected, the SHAKE function does not activate. |
 2. 2. | Chicken | 30 | 200 | YES | If rotation is selected, the SHAKE function does not activate. |
 3. 3. | Steaks | 12 | 180 | YES | YES |
 4. 4. | Fish | 15 | 200 | YES | YES |
 5. 5. | Shrimps | 12 | 160 | YES | YES |
 6. 6. | Cakes | 30 | 175 | YES | NO |
 7. 7. | Pizza | 15 | 180 | NO | NO |
 8. 8. | Dehydrator | 8 hours | 60 | NO | NO |
The table "Preset menu" is suggestive; the cooking time and temperature depend on the type of food and its consistency. Therefore, the pre-set values are to be understood only as a reference.
NOTES:
- The temperature adjustment range is between 80 and 200°C, except for the Dehydrator menu where the selectable temperature ranges from 30 to 80°C.
- The time adjustment range is between 1 and 60 minutes, except for the Dehydrator menu where the time adjustment range is from 1 to 24 hours.
- The appliance automatically shuts off when the door is opened. Once the door is closed, the appliance restarts and continues the cooking process.
- During use, steam may escape from the appliance. This is normal and does not indicate any defect or danger.
- At the end of cooking, the motor may continue to run for about 1 minute, then the appliance will start to cool down and enter standby mode.
- It may be necessary to check and turn some foods during the cooking cycle. Turning the food optimizes the final result and avoids uneven cooking. Remove the tray, turn the food, then place the tray back inside the oven to continue the cooking process.
- The cooking time in the air fryer is different from that of a traditional oven.
- Smaller foods and smaller quantities of food require only slightly shorter preparation times than larger ones.
- For optimal results, it is recommended to use pre-cooked French fries (the ideal quantity is 500g). If you want to prepare homemade French fries, follow the steps outlined in the recipe book.
- Do not prepare very fatty food in the appliance. • To bake a cake/quiche or fry delicate or filled foods, place a baking tray or dish in the container.
- If the food is not ready yet, let it cook for a few more minutes.
- The appliance can also be used to reheat food. Set the appliance to 150°C for no more than 10 minutes and check regularly to avoid burning the food.
COOKING TIPS
| Food | Quantity (gr) min-max | Cooking time (min) | Temperature (°C) | Shake | Notes |
| Potatoes and fries | |||||
| Thin frozen fries | 300-700 | 9-16 | 200 | - | |
| Thick frozen fries | 300-700 | 11-20 | 200 | - | |
| Homemade French fries (8x8 mm) | 300-800 | 10-16 | 200 | - | Add 1/2 tablespoon of oil |
| Homemade potato wedges | 300-800 | 18-22 | 180 | - | Add 1/2 tablespoon of oil |
| Homemade potato cubes | 300-750 | 15-18 | 180 | - | Add 1/2 tablespoon of oil |
| Potato gratin | 500 | 15-18 | 200 | - | |
| Meat and poultry | |||||
| Steak | 100-500 | 8-12 | 180 | yes | |
| Pork ribs | 100-500 | 10-14 | 180 | yes | |
| Hamburger | 100-500 | 7-14 | 180 | yes | |
| Sausage | 100-500 | 13-15 | 200 | yes | |
| Chicken nuggets | 100-500 | 18-22 | 180 | yes | |
| Chicken breast | 100-500 | 10-15 | 180 | yes | |
| Bacon | 100-500 | 10-12 | 180 | yes | |
| Snacks | |||||
| Spring rolls | 100-400 | 8-10 | 200 | yes | |
| Frozen chicken nuggets | 100-500 | 6-10 | 200 | yes | |
| Frozen fish sticks | 100-400 | 6-10 | 200 | - | |
| Frozen cheese snacks | 100-400 | 8-10 | 180 | - | |
| Stuffed vegetables | 100-400 | 1-10 | 160 | - | |
| Cakes | |||||
| Cakes | 300 | 20-25 | 160 | - | Use a baking tray |
| Quiche | 400 | 20-22 | 180 | - | Use a baking tray |
| Muffins | 300 | 15-18 | 200 | - | Use a baking tray |
| Sweet snacks | 400 | 1-20 | 160 | - | Use a baking tray |
Notes:
- Cooking time and temperature depend on the type of food and its consistency. Therefore, the values indicated are only to be considered as reference.
- Add a maximum of 1/2 tablespoon of oil. Exceeding quantities may compromise the integrity of the appliance.
CLEANING AND MAINTENANCE
Before proceeding with the cleaning, always disconnect the plate from the power outlet and let it cool completely.
Remove the cooking accessories to allow the appliance to cool down more quickly.
The appliance should be cleaned after each cooking cycle. Let the appliance cool about 30 minutes before cleaning.
1. CLEANING
Cleaning the outside of the air fryer oven
Clean the outside of the oven with a soft cloth or a slightly moistened sponge and dry with a cloth.

DANGER! DO NOT PUT IN THE DISHWASHER OR SOAK IN
LIQUIDS.
Clean the basket, the mesh trays and the rotisserie
The basket, trays, and rotisserie are dishwasher safe at a temperature not exceeding 55°C.
In the case of particularly stubborn food residue, soak the cooking accessory in warm soapy water to facilitate removal.
Clean the inside of the air fryer oven.
Clean the inside of the oven with warm water, a mild detergent, and a non-abrasive sponge.
IMPORTANT NOTE: Do not use chemical detergents, steel wool, or abrasive cleaners for cleaning.
Cleaning the heating element
Clean with a brush to remove any food residues.
2. STORING
Allow the appliance to cool completely before storing it or wrapping the supply cable around it.
Check that there are no food residues inside the appliance.
Make sure all parts are clean and dry before storing them.
Never store the appliance when it is still wet.
It is recommended to store the appliance in a dry place, clean and away from moisture and dust.
TROUBLESHOOTING
| Problem | Possible cause | Solution |
| The appliance is not working | The plug has not been inserted correctly | Connect the plug into the power outlet |
| The cooking time and temperature were not selected | Set the time and the desired cooking temperature | |
| The food is not well cooked | The amount of food is excessive | Reduce the amount of food |
| The temperature set is too low | Set a higher temperature | |
| The cooking time set is too short | Set a longer cooking time | |
| The food is not cooked evenly | The food should be turned halfway through the cooking process | Turn the food over and check if it is done |
| The snacks are not crispy | Ensure that snacks suitable for air frying have been used | Use oven-ready snacks or brush some oil on the snacks |
| From the appliance white smoke comes out and the outside of the appliance is warmer than usual | Greasy foods are being cooked. | Normal phenomenon that does not affect the appliance or the result of cooking |
| The cooking accessories contain grease from previous cooking | Wash the accessories after each use | |
| Fresh fries are unevenly cooked or are not crispy | The potato sticks were not rinsed and dried properly before cooking | Rinse the potato sticks well to remove starch and dry thoroughly |
| The potato sticks are too large | Cut the sticks into smaller pieces | |
| Insufficient oil | Add a bit more oil | |
| The door opens by itself | The door has detached from the hinges | Place the door and hinge in a horizontal position, then screw from below to fix the door |
| The problem is not solved | Contact an authorized service center |
1. French fries with fresh potatoes
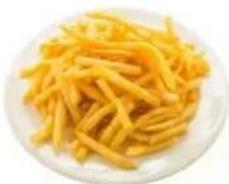
Ingredients:
- Potatoes
500 g
• Oil
2 teaspoons
- Salt
to taste
- Pepper
to taste
a. Peel the potatoes and cut them into sticks.
b. Soak the potato sticks in salted water for at least 20 minutes and boil for 2 minutes, then dry the sticks with kitchen paper.
c. Pour 1/2 tablespoon olive oil into a bowl, pour in the sticks and stir until they are coated with oil.
d. Remove the sticks from the bowl with your fingers or a kitchen utensil so that excess oil remains in the bowl.
e. Place the potato sticks inside the rotating basket, insert the basket into the appliance, and set the "French Fries" program or set the time and temperature depending on the size and quantity of the fries or until golden brown.
f. At the end of cooking, place the potatoes in a bowl, add salt and pepper to taste, and serve.
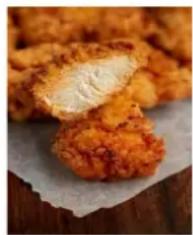
2. Fried chicken wings
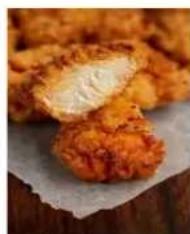
Ingredients:
- Chicken wings
350 g
- Garlic
2 cloves
• Oil
2 teaspoons
- Salt
1 teaspoon
- Pepper
1 teaspoon
a. Mix the wings with oil, garlic, salt, and pepper, and let marinate for 20 minutes. b. Arrange the chicken wings evenly in the mesh tray, insert the tray into the appliance, and set the "French Fries" program or set the time and temperature depending on the size and quantity of the wings or until golden brown. c. At the end of cooking, place the wings in a bowl and serve.
TIP: for best results, turn the wings halfway through the cooking process.
3. Beef steak
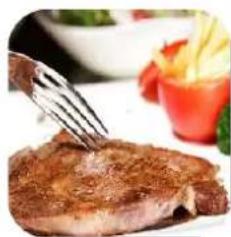
Ingredients:
- Beef steak
350 g
- Garlic powder
1 teaspoon
- Oil
2 teaspoons
- Salt
1/2 teaspoon
- Pepper
1 teaspoon
- Soy sauce
to taste
a. Mix the steak with oil, garlic, soy sauce, salt, and pepper, and let marinate for 20 minutes.
b. Place the steak on the mesh tray, insert the tray into the appliance, and set the "Steak" program or set the time and temperature depending on the size and quantity of the steaks or until golden brown.
c. Halfway through cooking, turn the steak, reduce the temperature to 150°C, and cook for another 6 minutes or until golden brown.
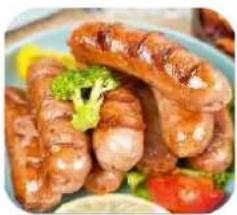
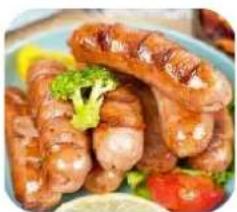
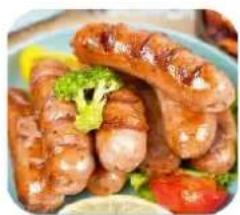
4. Grilled sausage
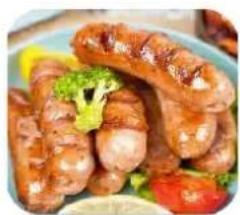
Ingredients:
- Fresh sausage
250 g
• Oil
1 teaspoon
a. Mix the sausages with the oil.
b. Arrange the sausages evenly on the mesh tray, insert the tray into the appliance, and set the "Steak" program or set the time and temperature depending on the size and quantity of the sausages or until golden brown.
c. At the end of cooking, place the sausages in a bowl and serve.
TIP: for best results, turn the sausages halfway through the cooking process.
5. Fried shrimps
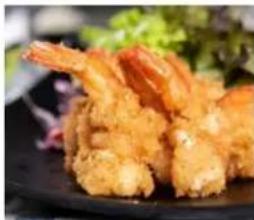
Ingredients:
- Fresh shrimps
300 g
- Oil
1 teaspoon
- Semolina flour
as needed
- Salt
as needed
a. Clean the shrimps, wash them, and dry them very well with paper towels.
b. Take a bowl and put the shrimps into the bowl.
c. Season with a little oil and coat with semolina flour.
d. Sprinkle some oil over the shrimps.
e. Arrange the shrimp evenly on the mesh tray, insert the tray into the appliance, and set the "Shrimp" program or set the time and temperature depending on the size and quantity of the shrimp or until golden brown.
f. At the end of cooking, place the shrimps in a bowl, add salt, and serve.
TIP: for best results, turn the shrimps halfway through the cooking process.
INFORMATION ON THE DISPOSAL OF THE PRODUCT
PRODUCT
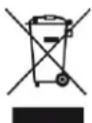
Pursuant to art. 26 of Legislative Decree No. 49 of 14 March 2014 “Implementation of Directive 2012/19/EU on waste electrical and electronic equipment (WEEE)”, the presence of the wheeled bin symbol indicates that this product is not to be considered urban waste: Non-separate disposal can be a potential harm to the environment and health. This product may be returned to the distributor upon purchase of a new appliance.
Improper disposal of the product constitutes fraudulent conduct and is subject to sanctions by the Public Safety Authority. For more information, please contact the local environmental authority.
PACKAGING
For information on how to properly dispose of the packaging that protects this product and its parts and/or accessories, follow the instructions in the packaging.
"TOGNANA" SMALL APPLIANCES WARRANTY
The Company Tognana Porcellane S.p.A. thanks its Customers for their choice and guarantees that its appliances are the result of the latest technologies and research.
This warranty applies only to small appliances marked with the "Tognana" brand and is valid as a conventional warranty pursuant to Article 135-quinquies of the Italian Consumer Code (Legislative Decree 206 of 6 September 2005). This warranty does not in any way affect the rights expressly provided for in favour of the consumer by the regulations on the sale of consumer movable goods, whether Italian or of the consumer's country of residence: the consumer can therefore always assert his rights against the retailer from which he purchased the appliance, under the conditions and within the terms provided for by these regulations.
Under this warranty, the appliance is covered by the conventional warranty for a period of two years from the date of purchase by the first user.
It is up to the consumer - through a delivery document issued by the retailer (or by Tognana Porcellane S.p.A. itself, in the case of a purchase made by the consumer directly in the online shop of the latter) or by another evidentiary document (for example, tax receipt, cash receipt or similar, purchase order, etc.), which shows the name of the retailer and the date on which the sale was made - to demonstrate that this warranty is still valid at the time of filing the complaint of defect of the appliance.
In the event of a defect in the appliance, pursuant to this warranty, the consumer may highlight this defect by contacting the appliance dealer or by contacting Tognana Porcellane S.p.A. directly at the e-mail address support@tognana.com, or at the telephone number +39 0422 6721.
Tognana Porcellane S.p.A. guarantees the free repair or replacement of the appliance and/or its components that have defects due to ascertained causes of manufacture and/or malfunctions, directly or through affiliated service centres (check any contacts on the Tognana Porcellane S.p.A. website: www.tognana.com). Tognana Porcellane S.p.A. reserves the right to completely replace the appliance, if repairability is impossible or too expensive, with another identical or similar appliance (or one that has functional and aesthetic characteristics similar to those of the purchased appliance), without the consumer being able, in this second hypothesis, to contest the choice made by Tognana Porcellane S.p.A.
When submitting a complaint, the consumer must specify the defect found and, if necessary for verifying the defect, provide photographic documentation. They must also provide their personal data—name and surname, residential address, email, and telephone number—for all subsequent communications. To ensure successful replacement or repair, the consumer must follow the instructions given by Tognana Porcellane S.p.A. employees or the authorized service center.
All costs for repair and delivery of the replacement appliance or defect-free components will be fully borne by Tognana Porcellane S.p.A., which will also cover the costs of returning the defective appliance or component, if expressly requested by the consumer.
Please note that after replacement or repair, the effective date of this warranty remains the date of the original purchase. Therefore, warranty service does not extend the warranty period.
For this warranty to be effective, the appliance must be used exclusively for domestic purposes. Any other use will void this warranty. Additionally, the appliance will not be considered defective if it needs to be adapted or modified to comply with national or local safety and/or technical standards in force in the consumer's country, if outside the European Union.
In any case, this warranty does not cover:
- Parts subject to wear and tear, or those requiring periodic replacement and/or maintenance;
- Negligence or carelessness in the use of the appliance (e.g., failure to follow the operating instructions);
- Professional use of the appliance;
- Defects due to incorrect installation, configuration, or updating of software/BIOS/firmware not performed by authorized Tognana Porcellane S.p.A. personnel;
- Repairs or interventions carried out by personnel not authorized by Tognana Porcellane S.p.A.;
- Tampering with components of the appliance or, where applicable, with the software;
- Other circumstances that cannot be attributed to manufacturing defects in the appliance.
Tognana Porcellane S.p.A. disclaims all liability for any damage that may directly or indirectly occur to people, property, or pets as a result of failure to comply with all requirements specified in the instruction booklet, especially regarding installation, use, and maintenance of the device.
Further claims, in particular if they relate to claims, are excluded, unless the liability arises from express provision of law. At the end of the period of validity of this warranty, or for goods that are not covered by it, Tognana Porcellane S.p.A. remains available to the customer for any questions or information. Further information is available on the website: www.tognana.com.
Dear customer,
PRODUCT CONFORMITY
Ingredients:
- Potatoes
500 g
- Oil
2 teaspoons
- Salt
to taste
- Pepper
to taste
Ingredients:
Ingredients:
Ingredients:
Ingredients:
PRODUCT CONFORMITY
2.
3.
4.

5.
1. Mesh tray

3. Drip tray
Ingredients:
Ingredients:
Ingredients:
Ingredients:
- Fresh sausage
- Oil
250 g
1 teaspoon
Ingredients:
- Fresh shrimp
- Oil
- Semolina flour
- Salt
PRODUCT CONFORMITY
3. Drip tray
Ingredients:
Ingredients:
Ingredients:
Ingredients:
Ingredients:
3. Drip tray
Ingredients:
- 500 g potatoes
- 2 tbsp oil • salt to taste
- pepper to taste
a. Peel the potatoes and cut them into sticks. b. Soak the potatoes in salted water for at least 20 minutes, then boil them for 2 minutes and dry them with kitchen paper. c. Pour half a tablespoon of olive oil into a bowl, add the potatoes and mix until they are well coated with oil. d. Remove the potatoes from the bowl with your fingers or kitchen utensils so that the excess oil remains in the bowl. e. Place the potatoes in the basket, insert the basket into the appliance, select the "Fries" program or adjust the baking time and temperature according to the size and thickness of the fries, or bake until they are golden brown. f. At the end of cooking, put the fries in a bowl, add salt and pepper and serve.
2. Fried chicken wings
Ingredients:
- 350 g chicken wings
- 2 cloves of garlic
- 2 tbsp oil • 1 tbsp salt
- 1 tbsp pepper
d. Mix the wings with oil, garlic, salt and pepper, and leave to marinate for 20 minutes. e. Place the wings on the grill, insert the grill into the appliance, select the "Fries" program or adjust the baking time and temperature according to the size and quantity of the wings, or bake until they are golden brown.
Ingredients:
• 350 g beef steak - 1 tbsp garlic powder • 2 tbsp oil • 1/2 tbsp salt • 1 tbsp pepper - soy sauce to taste
a. Mix the steak with oil, garlic, soy sauce, salt and pepper, and leave to marinate for 20 minutes. b. Place the steak on the grill, insert the grill into the appliance, select the "Steak" program or adjust the baking time and temperature according to the size and quantity of the wings, or bake until they are golden brown. c. Halfway through cooking, turn the steak over, reduce the temperature to 150 °C and bake for another 6 minutes until it turns golden brown.
4. Grilled sausage
Ingredients:
Ingredients:
• fresh shrimp 300 g - oil 1 tablespoon • wheat flour to taste • salt to taste
a. Clean the shrimp, wash them and dry them well with kitchen towels. b. Take a bowl and put the shrimp in the bowl. c. Season with a little oil and sprinkle with wheat flour. d. Spray a little oil on the shrimp.
e. Place the shrimp on the rack, insert the rack into the appliance, select the "Crustaceans" program or adjust the cooking time and temperature according to the size and quantity of the shrimp, or cook until golden brown.
2.
3.
4.

5.
1. Rack
Ingredients:
• Potatoes 500 g • Oil 2 teaspoons - Salt to taste - Pepper to taste
a. Peel the potatoes and cut them into sticks. b. Soak the potatoes in salted boiling water for at least 20 minutes, then cook for 2 minutes and then dry with kitchen paper. c. Pour half a tablespoon of olive oil into a bowl, add the potatoes and mix until they are well coated with oil. d. Remove the potatoes with your fingers or a kitchen utensil, so that the excess oil remains in the bowl. e. Place the potatoes in the basket, insert the basket into the appliance, select the "Fries" program or adjust the cooking time and temperature according to the size and thickness of the fries, or cook until golden brown.
f. At the end of cooking, put the fries in a bowl, salt and pepper them, and serve.
Ingredients:
• 350 g chicken wings • 2 cloves garlic • 2 teaspoons oil • 1 tablespoon salt • Pepper
a. Mix the chicken wings with oil, garlic, salt, and pepper, and let them marinate for 20 minutes. b. Place the wings on the grill rack, insert the rack into the appliance, select the "Fries" program or adjust the cooking time and temperature according to the size and quantity of the wings, or cook until golden brown.
c. After cooking, transfer the wings to a bowl and serve.
TIP: For best results, turn the wings halfway through cooking.
3. Beef steak
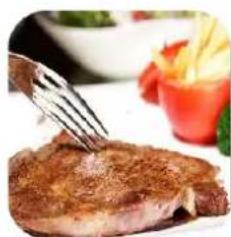
Ingredients:
• 350 g beef steak • 1 teaspoon garlic powder • 2 teaspoons oil • 1/2 teaspoon salt • Pepper • Soy sauce to taste
a. Mix the steak with oil, garlic, salt, and pepper, and let it marinate for 20 minutes. b. Place the steak on the grill rack, insert the rack into the appliance, select the "Steaks" program or adjust the cooking time and temperature according to the size and quantity of the steak, or cook until golden brown.
c. Halfway through cooking, turn the steak, lower the temperature to 150 °C, and cook for another 6 minutes until golden brown.
4. Grilled sausage
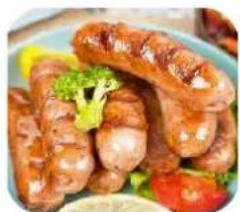
Ingredients:
- Fresh sausage • Oil
250 g 1 teaspoon
a. Mix the sausages with oil.
Ingredients:
Authorized service center:
| PSC PREŠEREN D.O.OLitijska cesta 12A1000 Ljubljana – SLO01-540-10-00,031-807-407info@servispreseren.comod PON do PET med 7:00 in 17:00 | PSC PREŠEREN D.O.O. PE MBPtujska cesta 92000 Maribor - SLO02-331-64-00, 031-620-900,info-mb@servispreseren.comod PON do PET med 7:00 in 16:00 |
Dear customers,
Thank you for choosing our air fryer oven for cooking and heating food for home use. Tognana Porcellane S.p.A. will not be responsible for any damage that may occur, directly or indirectly, to persons, property, and pets as a result of failure to comply with all conditions set forth in the relevant "Instruction Manual" regarding the installation, use, and maintenance of the appliance.
SYMBOLS INDICATED IN THE INSTRUCTIONS/ON THE DEVICE AND THEIR
MEANING
 | Ovaj simbol označava da je potrebno pozorno pročitati ova uputstva prije upotrebe. Obratite posebnu pozornost na sigurnosne informacije. Čuvajte ova uputstva na sigurnom mjestu jer su ona sastavni dio samog proizvoda. |
 | OPASNOST: riječ označava potencijalnu neizbježnu opasnost s visokim nivoom rizika koja, ako se ne izbjegne, ima veliku mogućnost da izazove ozbiljne ozljede ili smrt. |
 | UPOZORENJE: riječ označava potencijalnu neizbježnu opasnost sa srednjim nivoom rizika koja, ako se ne izbjegne, ima veliku mogućnost da izazove ozbiljne ozljede ili smrt |
 | OPREZ: riječ označava potencijalnu opasnost s niskim nivoom rizika koja, ako se ne izbjegne, mogla bi da dovede do manjih ili srednjih ozljeda. |
 | ovaj simbol označava da se zaštita opreme ne zasniva samo na osnovnoj izolaciji, već zahtijeva dodatne sigurnosne mjere. |
 | POZORNOST – VRUĆA POVRŠINA!: Simbol ukazuje na to da temperatura površine može postati opasno visoka i stoga treba izbjegavati direktan kontakt sa kožom i tkaninama/materijalima osjetljivim na toplotu. |
 | VAŽNA NAPOMENA: ove riječi označavaju korisne informacije za upotrebu proizvoda. |
 | Ovaj simbol na proizvodu ili ambalaži označava da se uređaj na kraju svojega vijeka trajanja mora zbrinuti odvojeno od drugog otpada zbog pravilne obrade i recikliranja. |
 | Ovaj simbol pokazuje da je uređaj usklađen sa sigurnosnim zahtjevima kojeg predviđaju uredbe/direktive Evropske zajednice. |
 | Ovaj simbol označava da su materijali i predmeti u kontaktu s hranom (MOCA) prikladni za kontakt s hranom. |

IMPORTANT NOTES ON CORRECT USE
2.
3.
4.

5.
1. Rack
It can be used not only for dehydration but also for preparing crispy snacks or reheating food such as pizza.
3. Drip tray
Ingredients
- chicken wings 350 g
- 2 cloves of garlic • 2 tablespoons of oil • 1 tablespoon of salt • 1 tablespoon of pepper
a. Mix the wings with oil, garlic, salt, and pepper, and let them marinate for 20 minutes. b. Place the wings on the grill rack, insert the rack into the appliance, select the "Fries" program or adjust the cooking time and temperature according to the size and quantity of the wings, or cook until golden brown. c. At the end of cooking, place the wings in a bowl and serve.
TIP: for best results, turn the wings halfway through cooking.
3. Beef steak

Ingredients
- beef steak 350 g
- garlic powder 1 tablespoon
- oil 2 tablespoons • salt 1/2 tablespoon • pepper 1/2 tablespoon
- soy sauce to taste
a. Mix the beef steak with oil, garlic, soy sauce, salt, and pepper, and let it marinate for 20 minutes. b. Place the steak on the grill rack, insert the rack into the appliance, select the "Steaks" program or adjust the cooking time and temperature according to the size and quantity of the steak, or cook until golden brown. c. Halfway through cooking, turn the steak, reduce the temperature to 150 °C, and cook for another 6 minutes until golden brown.
4. Grilled sausage
Ingredients
• fresh shrimp 300 g - oil 1 tablespoon • wheat flour to taste • salt to taste
a. Clean the shrimp, wash them, and dry them well with kitchen towels. b. Take a bowl and place the shrimp in the bowl. c. Season with a little oil and sprinkle with wheat flour. d. Spray a little oil on the shrimp. e. Place the shrimp on the grill rack, insert the rack into the appliance, select the "Crustaceans" program or adjust the cooking time and temperature according to the size and quantity of the shrimp, or cook until golden brown. f. At the end of cooking, place the shrimp in a bowl and serve.
3. Fat collecting container
Ingredients
- potatoes
500 g
- oil
2 tablespoons
- salt
to taste
- pepper
to taste
Ingredients
- chicken wings
350 g
- garlic
2 cloves
- oil
2 tablespoons
• salt
1 teaspoon
- pepper
1 teaspoon
a. Mix the wings with oil, garlic, salt, and pepper, and let them marinate for 20 minutes.
b. Place the wings on the grill rack, insert the rack into the appliance, select the "Fries" program or set the time and baking temperature according to the size and quantity of the wings, or bake until golden brown.
c. At the end of cooking, put the wings in a bowl and serve.
Ingredients
- beef steak
350 g
- garlic powder
1 tablespoon
- oil
2 tablespoons
• soy sauce
1/2 tablespoon
- pepper
1 tablespoon
- soy sauce
to taste
a. Mix the steak with oil, garlic, salt, and pepper and let it marinate for 20 minutes.
b. Place the steak on the grill, insert the grill into the appliance, select the "Steaks" program or adjust the cooking time and temperature according to the size and quantity of the steak, or cook until browned.
c. Halfway through cooking, turn the steak, reduce the temperature to 150 °C and cook for another 6 minutes until golden brown.
4. Grilled sausage
Ingredients
- fresh sausage
250 g
- oil
1 tablespoon
Ingredients
- fresh shrimp
300 g
- oil
1 tablespoon
- wheat flour
to taste
• salt
to taste
a. Clean the shrimp, wash them, and dry them well with paper towels.
- WIRE RACK
- INGREDIENTS
- IMPORTANT NOTES ON CORRECT USE
- DANGER
- PRODUCT
- DANGER OF SCALDING
- CABLE AND PLUG
- TECHNICAL DATA
- ENERGY CONSUMPTION
- CONFORMITY OF THE PRODUCT
- COMPONENTS
- BEFORE FIRST USE
- ACCESSORIES
- MESH TRAY
- ROTATING BASKET
- DRIP TRAY
- ROTISSERIE SPIT, FORKS, AND FIXING SCREWS
- ROTISSERIE TONGS
- CONTROL PANEL FUNCTIONS
- USING THE CONTROL PANEL
- PRE-SET MENU SELECTION BUTTON
- ROTATION BUTTON
- ON/OFF BUTTON
- INTERNAL LIGHT
- TEMPERATURE/TIME SELECTION BUTTON
- START/PAUSE BUTTON ▷
- INSTRUCTIONS FOR USE
- NOTES
- CLEANING AND MAINTENANCE
- CLEANING
- CLEANING THE OUTSIDE OF THE AIR FRYER OVEN
- DANGER! DO NOT PUT IN THE DISHWASHER OR SOAK IN
- LIQUIDS
- CLEAN THE BASKET, THE MESH TRAYS AND THE ROTISSERIE
- CLEAN THE INSIDE OF THE AIR FRYER OVEN
- IMPORTANT NOTE: DO NOT USE CHEMICAL DETERGENTS, STEEL WOOL, OR ABRASIVE CLEANERS FOR CLEANING
- CLEANING THE HEATING ELEMENT
- STORING
- FRENCH FRIES WITH FRESH POTATOES
- FRIED CHICKEN WINGS
- BEEF STEAK
- GRILLED SAUSAGE
- FRIED SHRIMPS
- INFORMATION ON THE DISPOSAL OF THE PRODUCT
- PACKAGING
- TOGNANA" SMALL APPLIANCES WARRANTY
- DEAR CUSTOMER
- PRODUCT CONFORMITY
- RACK
- DEAR CUSTOMERS
- SYMBOLS INDICATED IN THE INSTRUCTIONS/ON THE DEVICE AND THEIR
- FAT COLLECTING CONTAINER
Brand : Tognana
Model : Iridea D2DFA07IRZU
Category : Deep fryer