
BELLISSIMO C7CESAS3RD3 - Coffee machine Café - Free user manual and instructions
Find the device manual for free BELLISSIMO C7CESAS3RD3 Café in PDF.

| Product type | Semi-automatic espresso machine |
| Brand | Café |
| Model | BELLISSIMO C7CESAS3RD3 |
| Power supply | 120 V ~ 60 Hz |
| Built-in grinder | Yes, adjustable from 0 (very fine) to 15 (very coarse) |
| Main functions | Single and double espresso, steam for milk, hot water |
| Water tank capacity | Approx. 1.5 L (not exactly specified) |
| Bean hopper capacity | Approx. 250 g (estimated) |
| Pump pressure | Not specified (typical vibrating pump 15 bar) |
| Portafilter | With single and double filters, tamper included |
| Steam wand | Swivel, removable tip for cleaning |
| Connectivity | Wi-Fi, SmartHQ app for settings and monitoring |
| Programmable functions | Single/double espresso volume, hot water temperature (via app) |
| Maintenance and cleaning | Guided descaling cycle, cleaning alert, brush and pin provided |
| Safety | Automatic shut-off after purge, overpressure protection, hot surfaces warned |
| Spare parts and repairability | Parts not available at retail, repair by Café Appliances authorized service |
| Warranty | 1 year limited (parts and labor) |
Frequently Asked Questions - BELLISSIMO C7CESAS3RD3 Café
User questions about BELLISSIMO C7CESAS3RD3 Café
0 question about this device. Answer the ones you know or ask your own.
Ask a new question about this device
Download the instructions for your Coffee machine in PDF format for free! Find your manual BELLISSIMO C7CESAS3RD3 - Café and take your electronic device back in hand. On this page are published all the documents necessary for the use of your device. BELLISSIMO C7CESAS3RD3 by Café.
USER MANUAL BELLISSIMO C7CESAS3RD3 Café
It's time appliances had a personality. Yours.

natural_image
White modern espresso machine with glass lid and control panel (no visible text or symbols)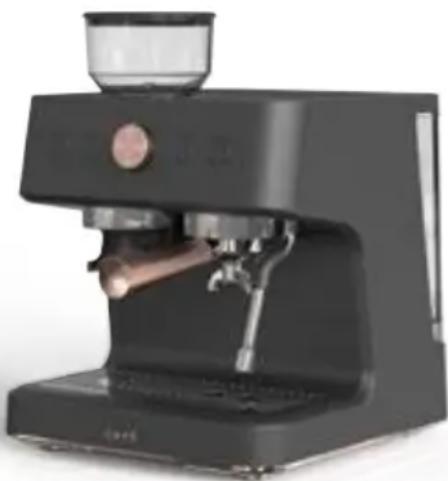
natural_image
Modern black and white espresso machine with lever handle and glass cup (no visible text or symbols)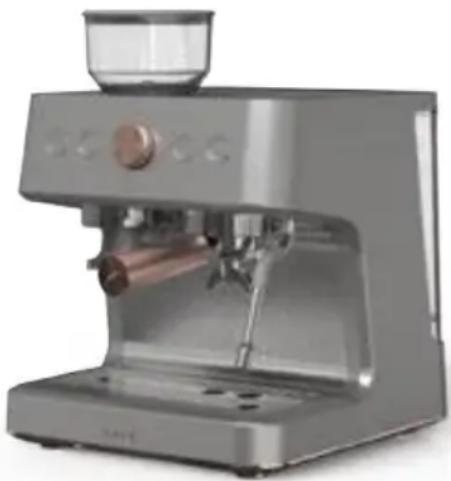
natural_image
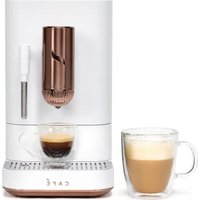
Modern stainless steel coffee maker with glass cup and copper handle (no visible text or labels)BELLISSIMO- Café Semi Automatic Espresso Machine + Frother
OWNER'S MANUAL
ENGLISH/FRANÇAIS/ESPAÑOL
THANK YOU FOR MAKING CAFÉ A PART OF YOUR HOME.
We take pride in the craftsmanship, innovation and design that goes into every Café product, and we think you will too. Among other things, registration of your appliance ensures that we can deliver important product information and warranty details when you need them.
Register your Café appliance now online. Helpful websites are available in the Consumer Support section of this Owner's Manual. You may also mail in the pre-printed registration card included in the packing material.

DISTINCT BY DESIGN™
Table of Contents
Models: C7CESAS3RD3, C7CESAS4RW3, C7CESAS2RS3
SAFETY INFORMATION 4
GETTING STARTED 6
COMPONENTS....7
ACCESSORIES 8
CONTROL PANEL....8
FUNCTIONS 9
ALERTS 10
USING YOUR ESPRESSO MACHINE....11
CARE AND CLEANING....15
TIPS 17
TROUBLESHOOTING....18
WiFi CONNECT SMART HQ APP....20
FCC STATEMENT....21
LIMITED WARRANTY.... 22
CONSUMER SUPPORT 23
Product Registration
Write the model and serial numbers here:
Model # ____
Serial #
Find these numbers on a label on the back of the machine.
IMPORTANT SAFETY INFORMATION READ ALL INSTRUCTIONS BEFORE USING THE APPLIANCE
WARNING
Read the instructions carefully before using the appliance for
the first time. Save these instructions for reference. The appliance is designed for domestic use and may only be operated in accordance with these instructions for use. Always handle with care and warn other users of potential danger.
IMPORTANT SAFEGUARDS
Always follow these safety precautions when using this appliance.
- Read all instructions before using
- Use only a 120 V, 60 Hz standard electrical supply that is properly grounded in accordance with the National Electric Code and local codes and ordinances.
- Make sure the appliance is set up on a flat and steady surface.
- Turn the appliance OFF, then unplug from the outlet when not in use, before assembling or disassembling parts and before cleaning. To unplug, grasp the plug and pull from the outlet. Never pull from the power cord.
- Do not use outdoors. Household use only.
- Use this product only for its intended purpose as described in this user manual.
- Use of any accessories not recommended by the manufacturer can cause injuries.
- This appliance is not intended for use by persons (including children) with reduced physical, sensory, or mental capabilities, or lack of experience and knowledge, unless they are closely supervised and instructed concerning use of the appliance by a person responsible for their safety. Close supervision is necessary when any appliance is used by or near children. Children should be supervised to ensure that they do not play with the appliance.
- Allow to cool before putting on or taking o parts, and before cleaning the appliance. DO NOT touch the steam wand after use. Doing so can cause serious burns.
• Make sure the drip tray is always present during use. - Always use cold water to make coffee in your espresso machine. Warm water or other liquids could cause damage to the coffee maker.
• DO NOT put any liquid other than water in the water tank. - To reduce the risk of fire or electric shock, do not attempt to disassemble, repair, modify, or replace any part of your product.
- If the power cord is damaged, it must be replaced by the manufacturer. DO NOT replace the power cord on your own.
- Do not operate any appliance with a damaged cord or plug or after the appliance malfunctions, or is dropped or damaged in any manner. Contact Café Appliances at the website listed in the Contact Us section for information on examination, repair, or adjustment.
SAVE THESE INSTRUCTIONS
IMPORTANT SAFETY INFORMATION READ ALL INSTRUCTIONS BEFORE USING THE APPLIANCE
Read the instructions carefully before using the appliance for the first time. Save these instructions for reference. The appliance is designed for domestic use and may only be operated in accordance with these instructions for use. Always handle with care and warn other users of potential danger.
IMPORTANT SAFEGUARDS
Always follow these safety precautions when using this appliance.
- Use the coffee grinder to grind coffee beans only. DO NOT put coffee grounds in the espresso machine, only put whole coffee beans in the coffee bean container.
- Do not allow children to touch the appliance or the power cord during the operation
- DO NOT use the espresso machine if the drip tray is out of position.
- DO NOT immerse the appliance in water or any other liquids. This will damage the appliance and be a risk of an electric shock.
- Do not let cord hang over edge of table or counter.
- Do not let cord contact hot surface, including the stove.
• DO NOT use an extension power cord. - The use of accessories not included in the box is not recommended. It might be dangerous and should be avoided.
- Do not operate the hot water function continuously for more than one tank of water.
- Check hopper for presence of foreign objects before usage.
- Avoid contacting moving parts. Do not attempt to defeat any safety interlock mechanisms.
- Do not touch hot surfaces. Use handles or knobs.
- Do not place on or near a hot gas or electric burner, or in a heated oven.
- To disconnect, turn any control to "off," then remove plug from wall outlet.
To avoid the risk of injury, do not open the brew chamber during the brew process.
RISK OF FIRE OR ELECTRIC SHOCK
■ TO REDUCE THE RISK OF FIRE OR ELECTRIC SHOCK, DO NOT REMOVE COVER (OR BACK).
- Do not attempt to repair or replace any part of your espresso machine unless it is specifically recommended in this manual. All other servicing should be performed by authorized service personnel.
SAVE THESE INSTRUCTIONS
Getting Started
Drip Tray
■ Remove the packaging from the drip tray before using the machine.
General Information
Espresso is sensitive to bean selection and grind size. We recommend to start with a grind size of 7 to 9. Overly fine grounds may result in clogging and short shots. See page 14 for instructions on dialing in your perfect shot.
Place drip tray in place prior to powering the machine on. Machine purges when powered on.
natural_image
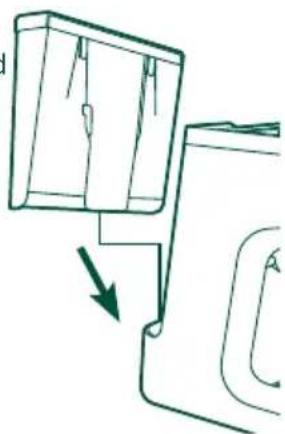
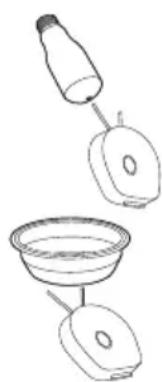
Simple line drawing of a mechanical component with an arrow indicating direction (no text or symbols)Water Tank
■ Remove the water tank and orange seal from the bottom of the tank and fill it with water. Gently press down on the Water Tank so it is secure in the machine before using any functions.
■ Make sure the water level is between the MIN and MAX lines in the Water Tank before use.
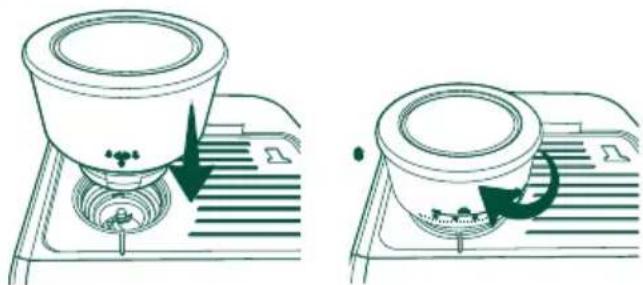
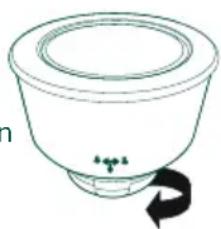
Coffee Bean Hopper
■ Remove the bean hopper from the packaging
■ Place the bean hopper into the machine by aligning the arrow with the machine.
■ Turn the bean hopper clockwise to lock in place.
■ Turn the bean hopper to a grind size between 7 and 9.
natural_image
Two-step diagram showing a coffee maker pressing down on a tray, with arrows indicating the process (no text or symbols present)NOTE: The hopper grind size setting ranges from 0-15, 0 is the finest and 15 is the coarsest.
NOTE: It is recommended to use whole coffee beans instead of pre-ground coffee. Pre-ground coffee loses its aroma and taste quickly.
NOTE: It may take several tries to get a grind size that best fits your taste. Follow in dial instructions on page 14.
Ready to Use!
- Plug in your espresso machine. The Power button will flash. Press the Power button.
- Choose your desired function and enjoy! See the "Using the Espresso Machine" section for instructions of each function.
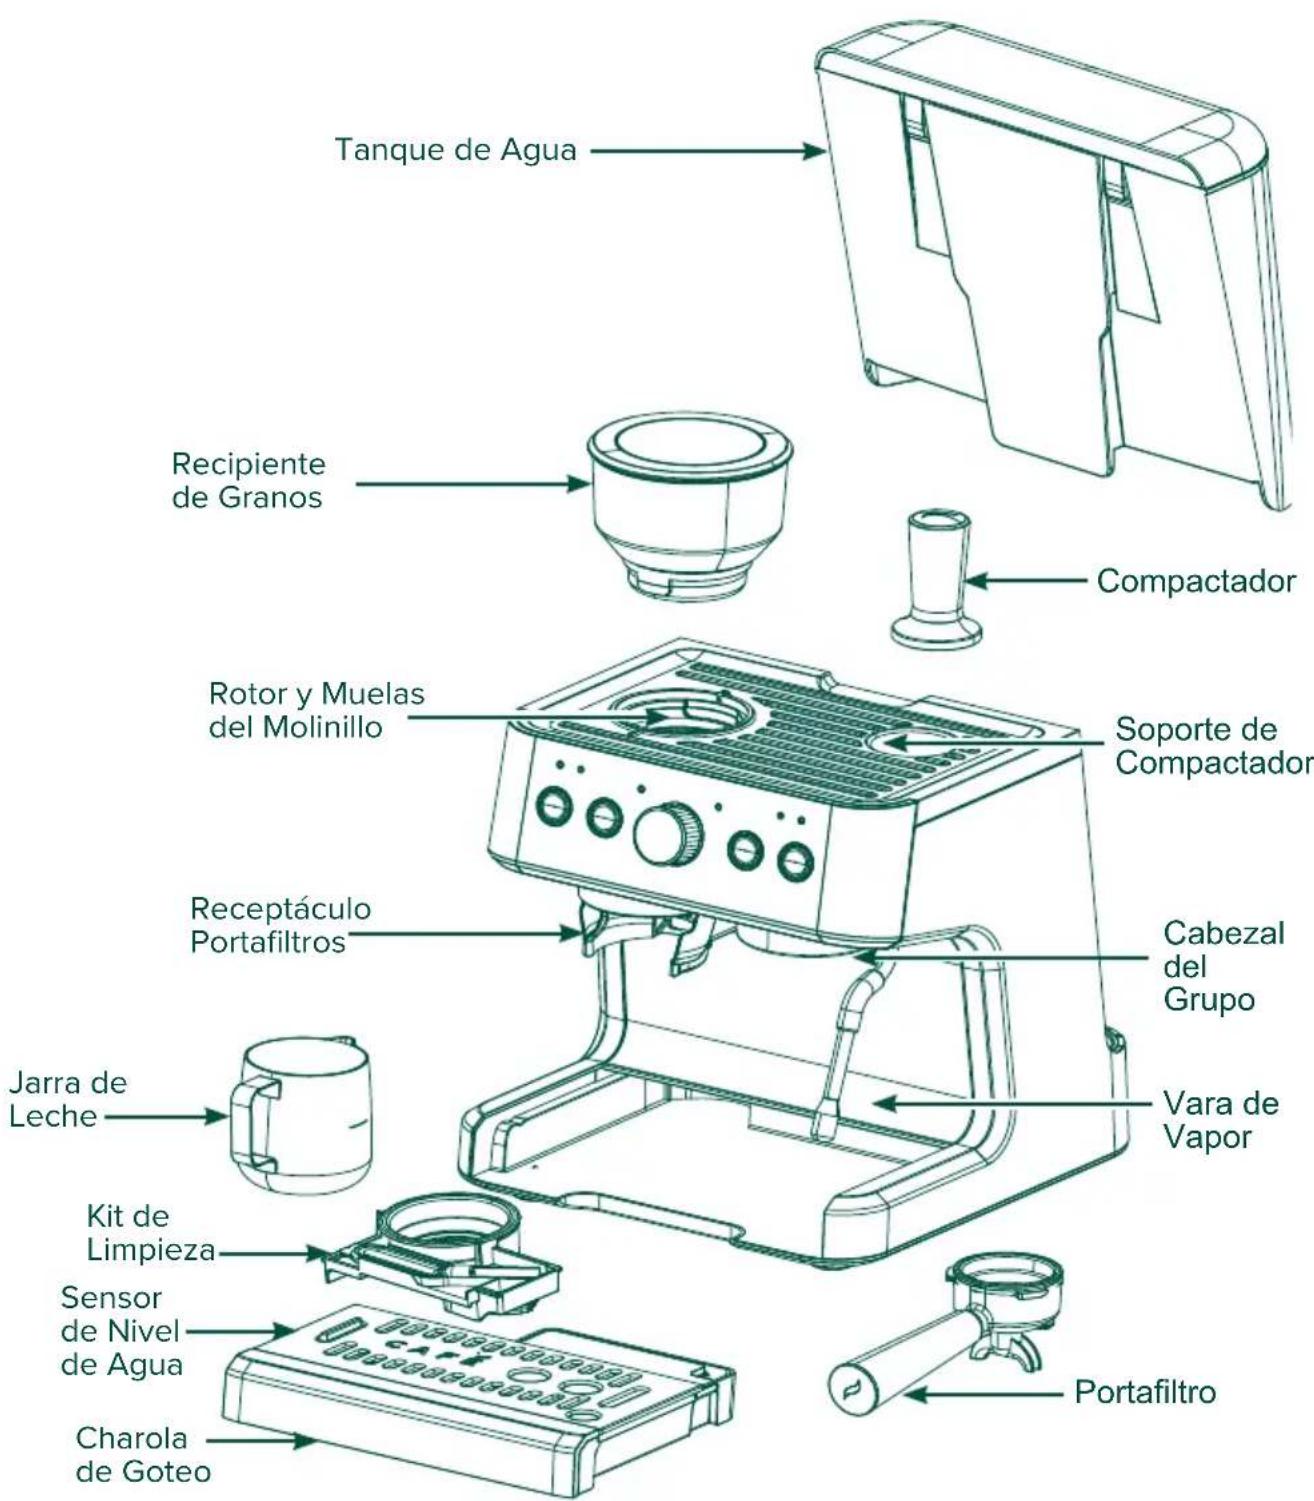
Components
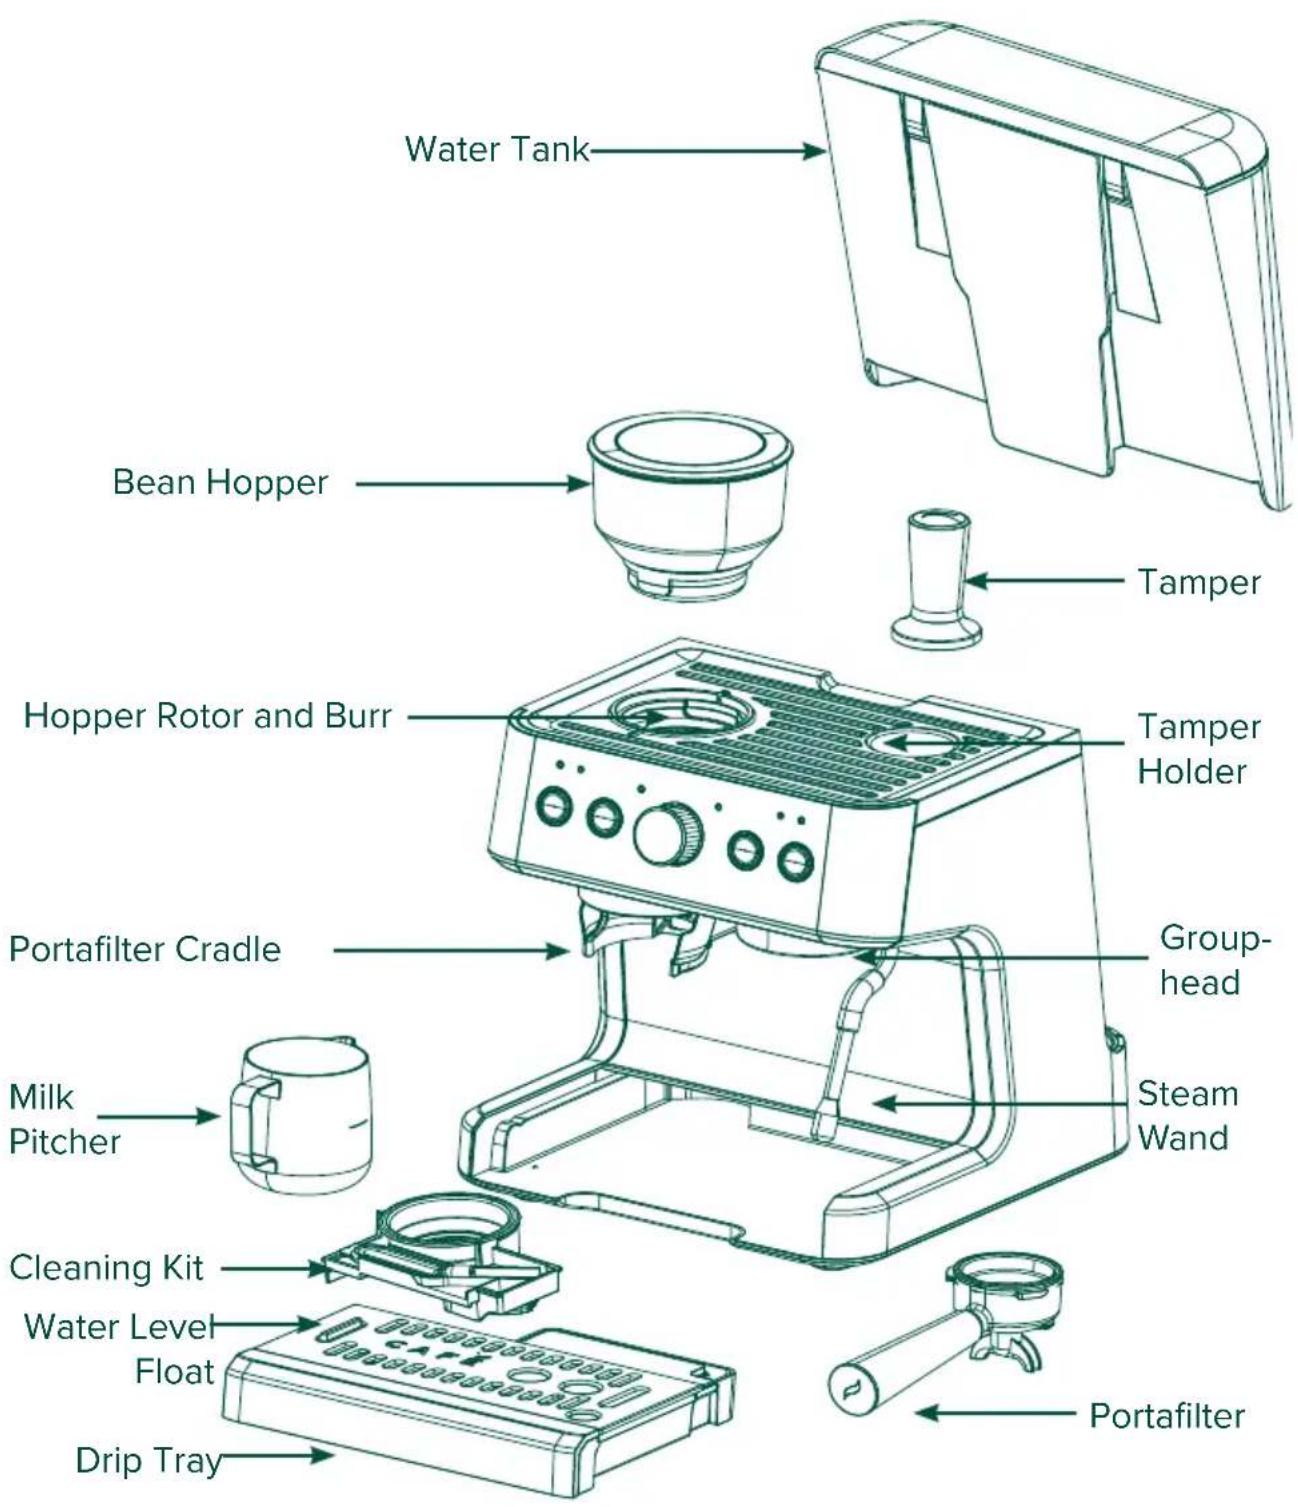
NOTE: When the water level float reaches the top of the drip tray, remove the tray and dispose of the liquid. Replace back in the machine before next use.
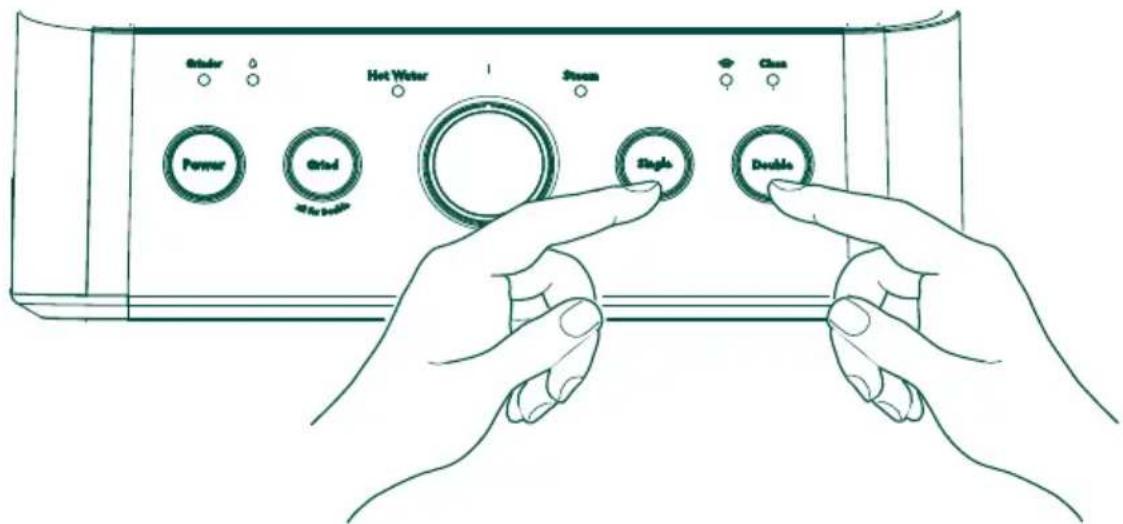
Controls
Control Panel
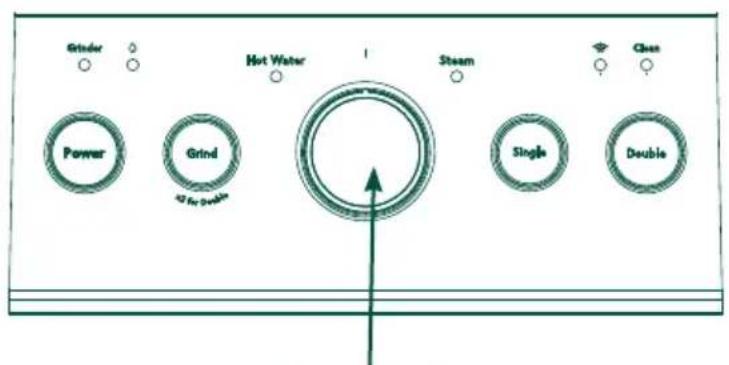
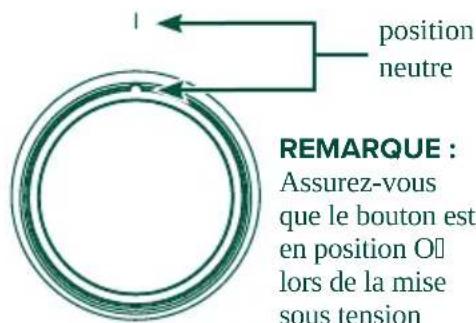
Control Knob
NOTE: Ensure knob is in neutral position when powering on the machine. Brew Function will not be available unless knob is in neutral position upon startup.
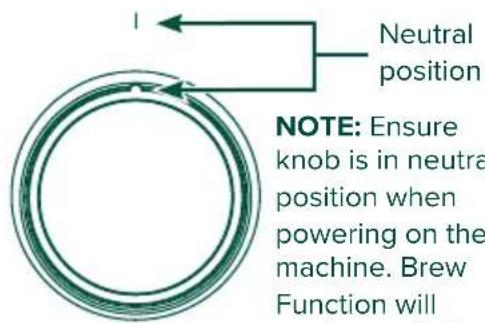
Accessories
To access the cleaning kit, remove the drip tray. The kit is located in the bottom left corner of the machine.
natural_image
Line drawing of a laboratory pipette with a black end cap (no text or symbols)

Cleaning Brush Cleaning Pin Cleaning Brush

natural_image
Green decorative border frame with vertical stripes and a blank white space (no text or symbols)
Cleaning Solution (3) Water Hardness Strip
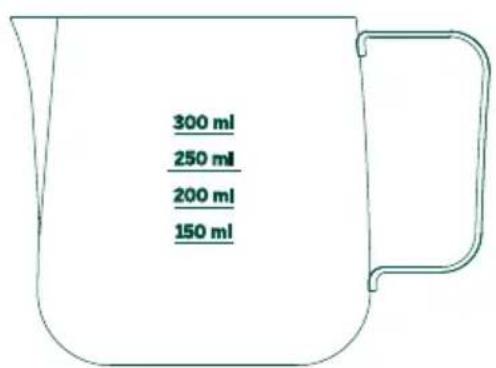
Milk Pitcher
natural_image
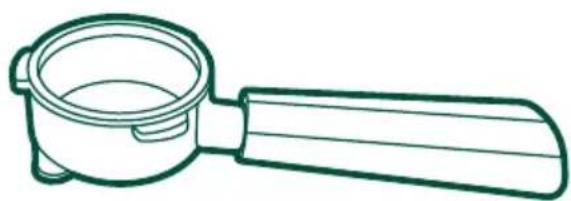
Line drawing of a simple cooking pot with handle and lid (no text or symbols)Portafilter
 |  |  |  |
 |  |  |  |
| Single Layer Single Shot Filter | Single Layer Double Shot Filter | Double Layer Single Shot Filter | Double Layer Double Shot Filter |
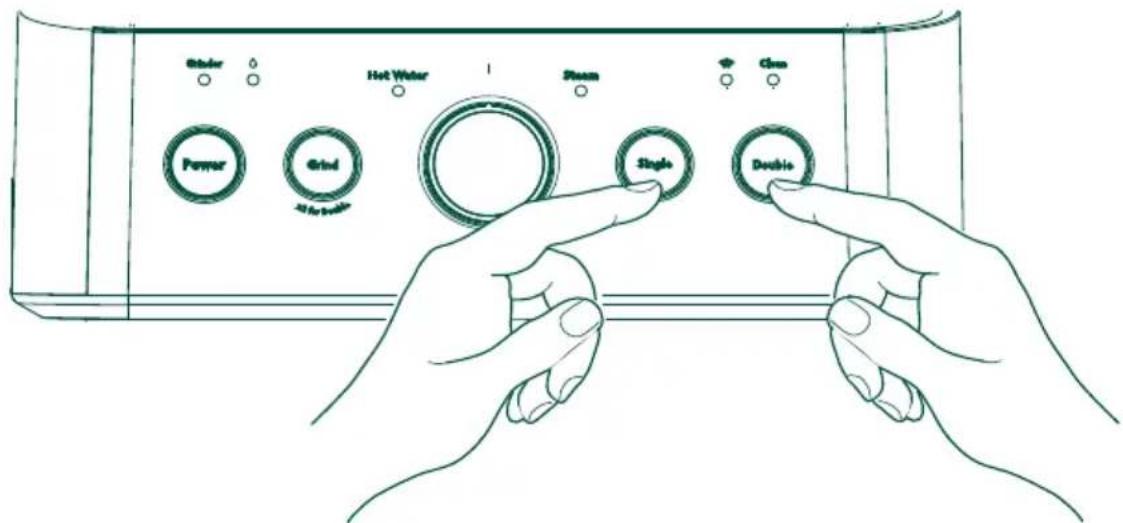
Functions
Buttons
Power
Press the Power button to turn on the espresso machine.
Grind
Press the Grind button once for a single espresso and twice quickly for a double espresso.
Single (Espresso)
Espresso is a full-flavored coffee drink served as a concentrated shot. Cappuccinos, Flat Whites, and Lattes are all made with an espresso shot.
Default setting: 13-15-grams of coffee yields 30 mL of espresso (1oz)
Double
This will create a cup that has double the water and extraction time.
Default setting: 18-20 grams of coffee yields 60 mL of espresso (2oz).
NOTE: Coffee ground amounts and espresso volumes may vary depending on bean type and machine settings.
NOTE: Using an overly coarse grind will result in an overflowing portafilter and weaker coffee. Larger grind sizes can be used for other coffee types.
NOTE: Using an overly fine grind size may result in not enough grounds to fill the filter, as well as overpressure. Finer grind settings are included for user to adjust grind size as grinder dulls with use.
To set Default Dispense Amount:
Press and hold Single, Double, or Grind until the desired amount of liquid or grounds is dispensed. Stop pressing the button to save the new amount.
NOTE: Espresso volumes are inherently small, and the range of volume adjustment is finite. If the dispense is not stopped during changing the default volume, the machine will default to the maximum setting.
NOTE: Changes to volumes may affect the flavor of the espresso.
NOTE: To return the machine to factory default settings press and hold Single, Double, and Grind buttons for 3 seconds.
NOTE: Only the Single shot grind amount can be adjusted manually. To adjust Double grind amount, refer to the SmartHQ app.
Control Knob
Steam
Steam is used to heat up liquids through the steam wand.
CAUTION
To avoid possible burns
to body parts and/or other injury from hot steam, do not touch liquids or steam wand during or after steaming. Do not remove pitcher until steaming is complete. Hold milk pitcher by the handle.
Hot Water
The Hot Water function dispenses hot water from the steam wand. No coffee is used during this function.
Alerts
Grinder
The Grinder indicator will appear for one of three reasons.
Bean Hopper Removed: The Grinder indicator will illuminate SOLID RED if the hopper is removed or not locked into place. Place hopper into the machine and rotate to locked position to resolve.
Locked Rotor: The Grinder indicator will FLASH RED when the grinder is locked up or blocked. Clear grinder with provided brushes to resolve. Locked rotor error can be removed after the issue is resolved and grinding repeated, machine times out or is powered down. Refer to page 16.
Continuous Runtime: The Grinder indicator will FLASH WHITE, meaning the grinder has been running for at least 3 minutes and needs to cool down for 6 minutes. Once the grinder has cooled, the indicator will disappear and the machine is ready to use again.
Add Water
Add water indicator appears when water tank is low on water or water tank is missing.
WiFi
Your espresso machine is WiFi compatible. See page 20 for how to connect and use the SmartHQ app.
Clean
Clean alert will appear when it is time to run a descale cycle for best operation and life span of the machine. See page 15 for descaling process.
Using Your Espresso Machine
Single and Double
NOTE: Make sure you have a coffee cup or container placed under the dispenser before using the Single or Double function.
NOTE: Follow dial in instructions for correct grind size and volume of grounds
- Push either the single shot or double shot filter into the portafilter until it clicks into place.
- Make sure there are coffee beans in the bean hopper.
-
Place the portafilter within the grinder cradle.
-
Press the Grind button. Refer to table.
-
When grinding is complete, remove the portafilter and gently tap to even out the coffee grounds.
-
Tamp down firmly using the tamper provided. Consistent pressure will create the best coffee puck. Clear away any excess grounds from the rim of the portafilter. Refer to Tips on page 17 for more information on tamping.

natural_image
Line drawing of a mechanical device with a cylindrical component inserted into a housing (no text or symbols)| Single Double | |
| Press Grind 1 time | Quickly press Grind 2x |
 |  |
| See page 13 for the best filter to use for your taste. | |
NOTE: Tamping clears out air pockets to avoid water channeling through the grounds.
NOTE: User can run an empty shot first to heat the group-head and/or clean out from previous shot.
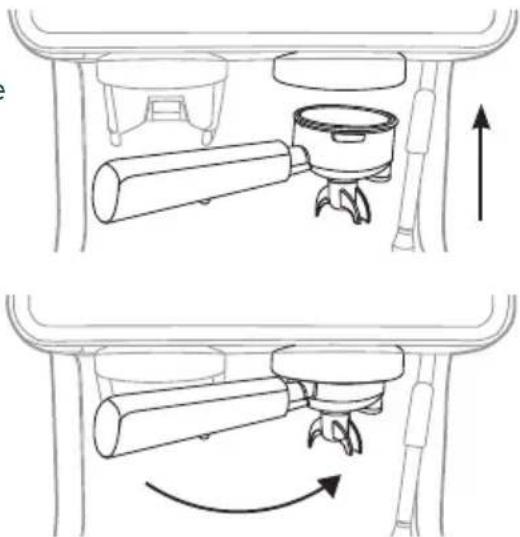
- Place the portafilter with pressed coffee puck into the group-head at a 45^ angle and rotate it to the right until it locks into place as shown.
NOTE: Portafilter installation has some resistance. If it is too hard to install, then there may be too much coffee grounds. Refer to Tips section on page 17.
-
Press the Single or Double button to begin brewing.
-
When your function is complete, dispose of coffee grounds, rinse the portafilter, then dry. Follow cleaning instructions for the portafilter in the Care and Cleaning section.
NOTE: After every single/double cycle your machine will release internal pressure as it is cooling down by slowly releasing excess water into the back of the drip tray. DO NOT remove the drip tray until the process is complete.
NOTE: There may be excess hot water in the portafilter. Be cautious when disposing of grounds.
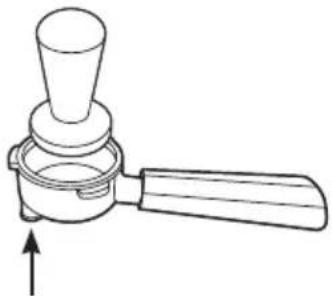
natural_image
Line drawing of a mechanical device with a handle and lever (no text or symbols)NOTE: Use the rubber pad on the bottom of the portafilter to level on the edge of a flat surface while tamping.
natural_image
Diagram showing two mechanical components with arrows indicating motion, no text or symbols presentUsing Your Espresso Machine
NOTE: Make sure the control knob is always in the neutral position when NOT using the Steam and Hot Water functions.
NOTE: The steam wand swivels for easier use. DO NOT pull on steam wand.
CAUTION
To avoid possible burns to body parts and/or other injury from
hot steam, do not touch liquids or steam wand during or after steaming. Do not remove pitcher until steaming is complete. Hold milk pitcher by the handle.
Steam
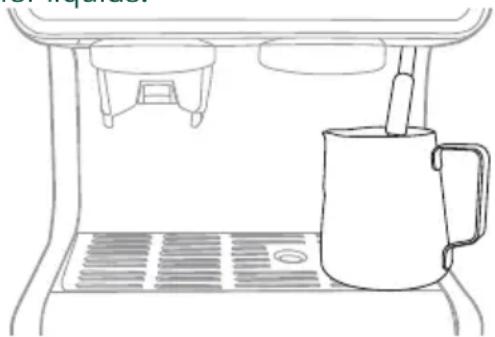
The Steam function can be used to steam milk and other liquids.
See the Tips section for techniques and recipes.
- Turn the control knob on the front of the espresso machine to Steam. Ensure the steam wand is pointing towards the drip tray as it will clear out some water during preheat. Once steam starts to come out, switch the knob to neutral position and quickly insert the wand into the milk. Proceed with steaming process by turning the control knob back to Steam.
natural_image
Line drawing of a coffee machine with a mug and side table (no text or symbols)NOTE: If there is a delay longer than a few seconds between heating and steaming, the heating will shut off and need to be repeated.
- Turn the control knob back to neutral when complete.
NOTE: Use a hot, wet cloth to wipe off steam wand after every use. It is also recommended to purge the steam wand immediately after every use by quickly turning Steam back on for a short time.
NOTE: After every steam cycle your machine will automatically release internal pressure as it is cooling down by slowly pumping access water and steam into the drip tray. Steam coming out of the drip tray is normal during this process. DO NOT remove the drip tray until the process is complete.
Hot Water
NOTE: If using the Hot Water function after steam, allow the machine to dispense excess steam before using this function per note above.
NOTE: Hot water volume and temperature can be adjusted via the SmartHQ app.
-
Place your desired cup or milk pitcher provided under the steam wand.
-
Turn the control knob on the front of the espresso machine to Hot Water.
-
Fill your cup to your desired amount. If the dispense is not stopped manually by user, the machine will continue to dispense until a programmed volume is set.
-
Turn the control knob back to neutral when complete.
Using Your Espresso Machine
How to Wake the Machine
Make sure the control knob is in the neutral position. Press the Power button to wake the machine.
Turn On/Off Sounds
Press and hold the Single and Grind buttons together for 3 seconds to turn off all sounds.
Factory Reset
Press and hold the Grind, Single and Double buttons together for 3 seconds to turn reset all programmable settings back to the factory settings.
Overpressure
This means the coffee grounds are too small, there are too many grounds, or the grounds are packed too tight in the portafilter. Overpressure is indicated by all functional button lights FLASHING WHITE. To fix, dispose of grounds, and try again by increasing the ground size, decreasing the dosage, or tamping the grounds with less pressure.
Overpressure may occur more often at first, especially with finer grind sizes.
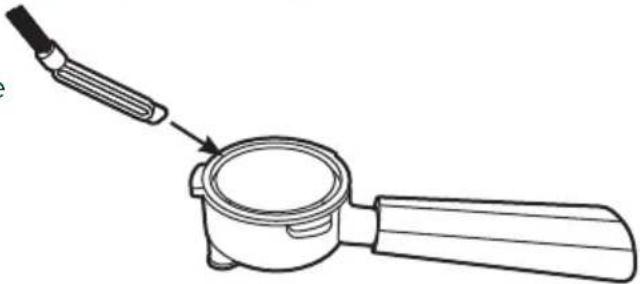
Portafilter and Filters
To remove filters from the portafilter, use the flat end of the cleaning brush to lift the filter out of the portafilter.
If there is too much resistance while inserting the portafilter into the group-head, there are too many coffee grounds in the filter. Remove some grounds and try again.
Ground puck may be difficult to remove from the filter. Use an utensil to remove grounds. Excessive impact to portafilter to remove grounds may result in damage.
Single and Double Layer Filters
- Double Layer filters provide more consistent results between varying grind sizes and bean types and generally result in more crema.
- Single Layer filters are more sensitive to grind size adjustments and bean types but allow for more adjustability.
natural_image
Line drawing of a mechanical tool emitting a pointed tip into a cylindrical component (no text or symbols)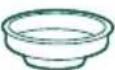 |  |  |  |
 |  |  |  |
| Single Layer Single shot Filter | Single Layer Double shot Filter | Double Layer Single shot Filter | Double Layer Double shot Filter |
Using Your Espresso Machine
Dial In Instructions
Dial in your machine by altering the different parameters to create the best tasting shot for a particular coffee choice. Once the machine is “dialed-in”, you can create repeatable results with ease.
- Select a desired grind size. (Setting 7-9 is the recommended starting point)
- Grind and weigh coffee for an espresso shot (18-20g worth of grounds for double, 13-15g for single). Directions on how to change the grind function are on page 9.
- Gently tap the sides of the portafilter to even out the coffee distribution.
- Tamp firmly to create a level surface, wipe the excess coffee grounds from the edges of the portafilter and brew your espresso.
- Weigh the liquid espresso to find the brew ratio. Brew ratios are personal preference, but can be used to guide your taste as well.
- Brew ratio is defined as the ratio of coffee grounds in the portafilter to liquid espresso.
- Example: If 18g of coffee grounds yields 36g of liquid espresso, this is a 1:2 brew ratio.
| Ristretto 1:1 to 1:2 |
| Espresso 1:2 to 1:3 |
| Lungo 1:3 to 1:4 |
- The water volume can be increased or decreased to alter the brew ratio. Directions on how to do so are on page 9 of the manual.
-
Aim for a brew time between 20-40 seconds for your shot.
-
Time is recorded from when the function starts to when espresso stops dispensing into cup.
- If time is below range, use a finer setting or larger water volume.
-
If time is above range, use a coarser setting or lesser water volume.
-
If brew time is within range, taste the espresso.
| Sour shot Use a | finer setting or larger water volume. |
| Bitter shot Use a | coarser setting or lesser water volume. |
| These are guidelines, adjust per preference. | |
Other Tips
- It is important to only change one parameter at a time, and keep other variables constant through this process.
- If you prefer a milk-based espresso drink, taste the espresso with your milk choice as it will affect the flavor profile.
Care and Cleaning
WARNING
Allow heating element to completely cool to avoid risk of fire or
injury and disconnect power prior to cleaning or service.
CAUTION
To avoid possible burns to body parts and/or other injury from
hot steam, do not touch liquids or steam wand during or after frothing. Do not remove pitcher until steaming is complete. Hold milk pitcher by the handle.
Cleaning your Espresso Machine
■ Unplug the espresso machine from the wall.
■ Pour out all water left in the water tank and drip tray. Wash and air or towel dry.
■ Wipe down appliance using a non-scratch cloth and non-abrasive cleaner.
■ DONOT place any part of the espresso machine in the dishwasher. Hand wash only.
NOTE: When not in use for long periods of time, such as vacation, run System Empty Cycle, dry water tank, and open water tank lid.
Clean / Descale
Descale process consists of 2 stages and will take approximately 30 minutes. Clean alert will turn off after both stages are completed.
DO NOT use any cleaning agents not provided with the product or recommended in this manual.
NOTE: If descale is not properly completed, unit may timeout and return to IDLE state. This will affect the quality of the coffee until all cleaning solution is removed as well as the quality of descaling process. Run descale again.
NOTE: During descaling the unit will dispense continuously as well as pulse dispense for a better cleaning.
STAGE 1:
- Fill third of the water tank with water.
- Add one pack of cleaning solution in the water tank (one tablet or packet). Mix well until cleaning agent is fully dissolved.
- Place a sufficiently large container under the brew head and steam wand.
- Press and hold the Grind and Double buttons for 3 seconds to initiate. Clean alert flashes.
- Rotate the control knob to Steam. Water starts dispensing.
- After Add Water LED turns on, rotate the control knob to the neutral position.
STAGE 2:
- Remove, rinse, fully refill, and reinstall the water tank.
- Repeat steps 3, 5, and 6 from STAGE 1.
- Refill the water tank. Machine is ready for normal operation.
NOTE: As an alternative, a 1:1 ratio of water and white vinegar can be used as a cleaning solution for the descaling process.
Care and Cleaning
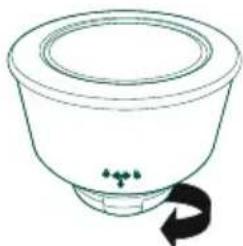
Cleaning the Grinder
- Make sure the unit is off.
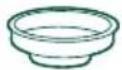
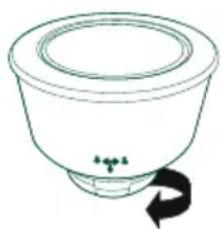
- Remove the bean hopper by rotating counterclockwise to unlock from the machine (figure 1).
-
Empty all beans from the bean hopper.
-
Scoop out any loose coffee beans from the burr grinder.
-
Replace the empty bean hopper back on the machine, twist clockwise to lock.
-
Be sure to place a cup or container under the grinder when completing this next process to collect loose grounds of coffee.
-
Place grind setting to the "Fine" (0) and then Turn the machine ON by pressing the Power button.
-
Press the "Grind" button until there are no beans left in the machine.
-
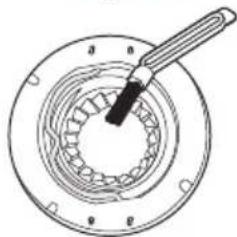
After grinding is done, remove the bean hopper just like step 2.
-
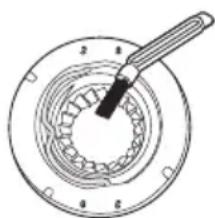
Remove the upper burr by pulling the wire arm up and twisting counterclockwise.
Use a stiff bristled brush to clean the upper and lower burrs.
- Use the same brush to clean the grind outlet.
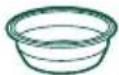
- Place the upper burr and bean hopper back on by locking it in place, clockwise (figure 3).
- Grinder is ready for use.
Note: The burrs and bean hopper are not dishwasher safe.
Cleaning the Steam Wand
To clean the steam wand, remove the tip by unscrewing. Use the cleaning pin provided to clear the tip of any debris.
Cleaning the Portafilter and Filters
To clean the portafilter and filters, dispose of coffee grounds then rinse with water. Allow the portafilter and filters to dry completely before using again.
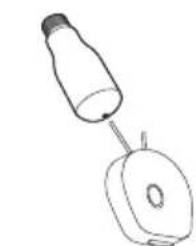
System Emptying
The System Emptying process empties the system of all water. Use this function when storing the machine for long periods.

natural_image
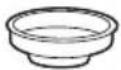
Simple line drawing of a bowl-shaped container with a curved arrow indicating rotation (no text or symbols)Figure 1
natural_image
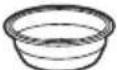
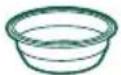
Simple line drawing of a bowl with a curved arrow indicating rotation (no text or symbols)Figure 2
natural_image
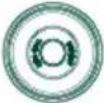
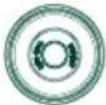
Technical line drawing of a mechanical component with concentric rings and a handle (no text or symbols)Figure 3
natural_image
Simple line drawing of a bottle connected to a connector (no text or symbols)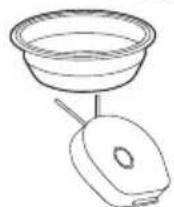
■ Empty the water tank.
■ Press and hold the Power and Double button together for 3 seconds to put the machine into system emptying mode.
■ The machine will beep once and Power and Double will flash to confirm the action.
■ The system will empty water into the drip tray and return to idle when complete.
Checking Your Water Hardness
Included with the machine is a Water Hardness Test Kit. Please follow the instructions on the package using the same water that will be used to make espresso. Once results are gathered, please refer to the SmartHQ app to set the water hardness level.
Tips
Espresso is often mistakenly thought of as a drink made with darker roast beans. Some coffee roasters even mark their product as "Espresso Coffee". This is misleading because espresso is mainly distinguished from other coffee drinks by the correct grind size and brew process, not the type, origin, or roast of the coffee beans. Any coffee bean can be used in making your espresso!
■ Use the hot water button to heat up your espresso cup before brewing. Espresso has a very small volume and will cool quicker if brewed in a cold cup.
■ Some functions can be adjusted within the SmartHQ App to meet your specific preferences or coffee type. Reference the SmartHQ section on page 20.
The top of the espresso machine can act as a cup warmer if left on for an extended period of time. If using the machine for longer than an hour, place your cups on the top of the machine to heat them up before use.
- Milks or Milk substitutes with higher fat contents are better at creating a creamier, thicker foam, while Low/Non-fat Milk or Milk substitutes are better at creating a lighter foam with larger bubbles.
It is recommended that the edge of the tamper is aligned with the edge of the portafilter when tamping. Adjust the amount of grounds to achieve optimal coffee puck thickness.

natural_image
Line drawing of a mechanical device with a handle and lever (no text or symbols)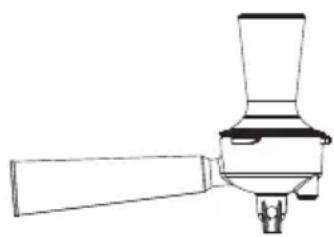
natural_image
Line drawing of a mechanical device with a handle and lever (no text or symbols)Your espresso machine can be used to make an unlimited number of espresso based drinks. Frothed milk drinks like Cappuccinos and Lattes are classics admired by many.
Make sure to brew espresso BEFORE using steam. Steam function requires higher temperatures than espresso and brewing espresso immediately after steaming will affect the taste of espresso.
Cappuccino
This drink is made with espresso, milk, and large amount of microfoam. Do not fill the milk pitcher above half way to avoid microfoam overflow during steaming. Frothed milk may be as much as doubled in volume.
Latte
This drink uses espresso and steamed milk with a smaller head of foam.
■ How to steam milk:
NOTE: Steam wand may purge hot water while preheating. Introduce steam wand into milk after preheating.
- After steam is preheated and ready, place the tip of the steam wand right under the surface of the milk at the edge of the milk pitcher at approximately a 45^ angle to create a vortex. Start steaming. The longer milk is steamed under the surface the more microfoam is created. Once desired amount of microfoam is reached, dip the steam wand lower into the milk and continue to steam until desired temperature is reached. Place a hand under the pitcher to feel the change in temperature. Once the bottom is warm enough to feel uncomfortable, optimal temperature is achieved.
- Large bubbles can be broken into smaller bubbles by light tapping of the milk pitcher.
NOTE: To heat up milk, you want to position the steam wand lower into the pitcher to prevent air from entering the milk and creating bubbles. This will result in a steamed milk with a smaller head of foam.
Troubleshooting
| Problem Cause Solution | ||
| Appliance does not work/does not turn on | No power is connected to the appliance ■ | Check cable and plug are connected to power and press the "on" button■ Check GFI plug |
| Coffee is not hot enough | Cup is not preheated Run hot water in the cup prior to brewing to warm up.Or place your cup on top of the machine prior to use. | |
| Water/Steam does not come out of steam wand | Excessive scale has built up Descale the appliance as directed on page 15. | |
| Empty system function may have been used | Run the hot water function until water starts dispensing | |
| Pump airlock (air in the water pump) Run the hot water function until water starts dispensing | ||
| Something is blocking the steam wand Run the hot water function until water starts dispensing | ||
| Coffee does not come out of portafilter | Coffee is tamped too tightly in the portafilter or gounds are too fine. | Empty portafilter and try again with a larger grind size or less force while tamping. |
| The dose of coffee is too high Use a coarser grind size or less dosage. | ||
| Espresso shot has no crema | Coffee grounds are too coarse Adjust coffee bean grind size to a finer setting during grinding operation or use a double layer filter provided. | |
| Coffee beans are not fresh Change or use appropriate coffee beans | ||
| Appliance takes too long to heat up | Excessive scale has built Descale the appliance | |
| Water tank is empty but "Add Water" alert does not show up | Water sensor is detecting water on the outside of the water tank | ■ Wipe the water tank and back area of the machine completely dry.■ Avoid pouring water directly into the water tank. It is recommended to pull out water tank, fill, then replace in the machine. |
Troubleshooting
| Problem Cause Solution | ||
| Grinder is making a very loud sharp noise | There are foreign objects in the grinder. Clear the grinder per the directions in the Care and Cleaning section. | |
| Coffee dispensed is watery | Grinder setting is too coarse. | ■ Adjust coffee bean grind size to a finer setting during grinding operation.■ Go to the SmartHQ app and adjust coffee settings. |
| No steam or hot water is coming out of the steam wand | The machine is not preheated yet. Wait for machine to preheat. Once water is up to temperature, the process will begin. | |
| Steam or hot water have stopped dispensing mid-process | Water tank is empty. | Refill the water tank to continue process. |
| The function was cancelled early. NOTE: Hot Water will stop automatically once preset volume is dispensed. This volume can be changed in SmartHQ. | Refill the water tank to continue process. | |
| There is water underneath the drip tray | Residual water, steam, or condensation may be present underneath the drip tray. This is normal and should not be a problem. | Wipe the area under the drip tray with a cloth or towel. |
| The portafilter does not turn and lock into place in group-head | Portafilter is not level and/or not at the correct angle to be inserted. | Ensure the portafilter is level and inserted at a 45 degree angle before twisting. |
| Dosage is too large and is coming in contact with group-head. | Remove a small amount of coffee from portafilter or use a lower dosage. | |
| Poor crema formation and weak espresso | High altitude affects boiling point and extraction. | Adjustments may be made using the SmartHQ app for high altitude settings. |
| Leaking water from the portafilter during brewing | Grouphead gasket is not sealing properly Call customer service: 1-833-426-3393 | |
WiFi Connect – SmartHQ
WiFi Connect
Press and hold the Single and Double buttons simultaneously for 3 seconds to turn on the WiFi function. The espresso maker will beep to confirm the action and the WiFi LED will start flashing. When the unit is successfully connected to WiFi the WiFi LED will go solid.
Follow the directions in the SmartHQ app to continue WiFi setup.
NOTE: To disconnect from WiFi, follow the same steps. The WiFi icon will disappear.
NOTE: Connecting the unit may take multiple attempts.
NOTE: In case of loss of power or connection, the unit may take a up to five minutes to reconnect to WiFi.
SmartHQ
Your Espresso Maker is WiFi Connect Enabled. A WiFi communication card is built into the product allowing it to communicate with your Smart Phone for remote monitoring, control, and notifications.
Please visit geappliances.com/ge/connected-appliances/ to learn more about connected appliance features and to learn what connected appliance App's will work with your Smart Phone.
FCC/IC Compliance Statement
Remote Enable Equipment
This device complies with part 15 of the FCC Rules. Operation is subject to the following two conditions: (1) This device may not cause harmful interference, and (2) this device must accept any interference received, including interference that may cause undesired operation.
FCC ID: ZKJ-WCATA008
IC: 10229A-WCATA008
Limited Warranty
If your appliance fails to operate properly while in use under normal household conditions within the warranty period, visit cafeappliances.com/support for product care/maintenance self-help.
In Canada, visit service.geappliances.ca/servicio/en_CA/.
To initiate a warranty claim, please visit cafeappliances.com/support/returns/, or call
1-800-430-1757. Please have your model number and serial number available. Return and packing instruction information will be provided at that time.
In Canada, contact us at cafeappliances.ca
For the Period of: Café Appliances Covers
| One YearFrom the date of the original purchase | If the Coffee Maker fails due to a defect in materials or workmanship, during the limited one-year warranty, GE Appliances will either replace or refurbish your product with a new or remanufactured product, or refund the purchase price of the product at GE Appliances sole discretion. |
What Café Appliances Will Not Cover:
■ Improper installation, delivery or maintenance.
■ Failure of the product if it is abused, misused, or used for other than the intended purpose or used commercially.
■ Damage caused after delivery.
■ Damage to the product caused by accident, fire, floods or acts of God.
■ Incidental or consequential damage caused by possible defects with this appliance.
■ Software bugs that can be corrected with an update via the Café App.
■ Labor and other charges to install and/or remove the product.
EXCLUSION OF IMPLIED WARRANTIES
Your sole and exclusive remedies are product exchange or refund as provided in this Limited Warranty. Any implied warranties, including the implied warranties of merchantability or fitness for a particular purpose, are limited to one year or the shortest period allowed by law.
For sale in the 50 United States, District of Columbia, and Canada only:
This limited warranty is extended to the original purchaser for products purchased for home use within the USA. In Alaska and Hawaii, the limited warranty does not include the costs of shipping units. California residents may gave additional return options. Please ask call center for additional information.
Some states do not allow the exclusion or limitation of incidental or consequential damages. This warranty gives you specific legal rights, and you may also have other rights which vary from state to state. To know what your legal rights are, consult your local or state consumer affairs office or your state's Attorney General.
Warrantor: GE Appliances, a Haier company
Louisville, KY 40225
For Customers in Canada: This limited warranty is extended to the original purchaser and any succeeding owner for products purchased in Canada for home use within Canada. In-home warrant service will be provided in areas where it is available and deemed reasonable by Mabe to provide. For extended warranty information, visit geappliances.ca/purchase-extended-warranty
Warrantor Canada: MC Commercial, Burlington, Ontario, L7L 6C7
Consumer Support
CAFÉ WEBSITE
Have a question or need assistance with your appliance? Try the Café Appliances Website 24 hours a day, any day of the year! You can also shop for more great Café Appliances products and take advantage of all our on-line support services designed for your convenience.
cafeappliances.com
In Canada: cafeappliances.ca
REGISTER YOUR APPLIANCE
Register your new appliance on-line at your convenience! Timely product registration will allow for enhanced communication and prompt service under the terms of your warranty, should the need arise. You may also mail in the pre-printed registration card included in the packing material.
cafeappliances.com/register
In Canada, service.geappliances.ca/servicio/en_CA/
PARTS AND ACCESSORIES
Individuals qualified to service their own appliances can have parts or accessories sent directly to their homes
(VISA, MasterCard and Discover cards are accepted). Order on-line today 24 hours every day. cafeappliances.com/parts
In Canada: geappliances.ca/parts-filters-accessories
Instructions contained in this manual cover procedures to be performed by any user. Other servicing generally should be referred to qualified service personnel. Caution must be exercised, since improper servicing may cause unsafe operation.
CONTACT US
If you are not satisfied with the service you receive from Café Appliances, contact us on our Website with all the details including your phone number, or write to: General Manager,
General Manager, Customer Relations | GE Appliances, Appliance Park | Louisville, KY 40225 cafeappliances.com/contact
In Canada: Director, Consumer Relations, MC Commercial Inc. | Suite 300, 5420 North Service Road | Burlington, ON L7L 6C7
cafeappliances.ca/support/contact-us
CAFE
DISTINCT BY DESIGN™
CAFÉ
DISTINCT BY DESIGN™
natural_image
White modern espresso machine with glass lid and control panel (no visible text or symbols)
natural_image
Modern black and white espresso machine with lever and cup (no visible text or symbols)
natural_image
Modern espresso machine with glass cup and lever mechanism (no visible text or labels)CONNEXION WI-FI....20
CONFORMITÉ DE LA FCC/IC....21
GARANTIE LIMITÉE 22
SOUTIEN AU CONSOMMATEUR.... 23
natural_image
Simple line drawing of a door handle with an arrow indicating direction (no text or symbols)Réservoir d'eau
natural_image
Two-step diagram showing a coffee maker on a platform, with arrows indicating the process (no text or symbols present)Bouton de commande
natural_image
Simple line drawing of a mechanical tool or tool with a curved handle and a cylindrical shaft (no text or symbols)Brosse de nettoyage
natural_image
Blank whiteboard with green decorative border (no text or symbols)natural_image
Line drawing of a simple cooking pot with handle and lid (no text or symbols)Porte-filtre
 |  |  |  |
 |  |  |  |
| Filtre dose simple, couche simple | Filtre dose double, couche simple | Filtre dose simple, couche double | Filtre dose simple, couche double |
Fonctions Boutons
Pouvoir
natural_image
Technical line drawing of a mechanical device with no visible text or symbolsnatural_image
Line drawing of a mechanical lever or pump component with a handle and central shaft (no text or symbols)natural_image
Line drawing of a kitchen appliance with a spatula, lid, and pot (no text or symbols)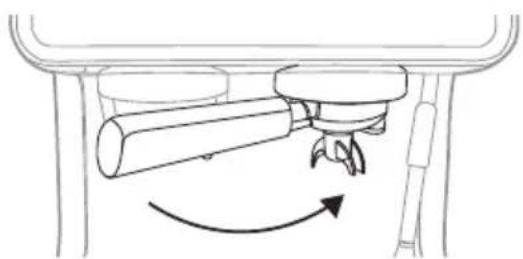
natural_image
Diagram of a mechanical assembly with a lever and pivot, showing rotational motion (no text or symbols)natural_image
Line drawing of a coffee machine with a mug and side table (no text or symbols)Hot Water (eau chaude)
natural_image
Line drawing of a mechanical tool with a lever and handle, no text or symbols present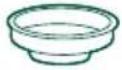 | 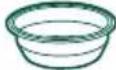 | 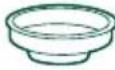 |  |
 |  |  |  |
 |  |  |  |
Application SmartHQ
natural_image
Simple line drawing of a cup with a circular arrow indicating rotation (no text or symbols)Figure 1
natural_image
Simple line drawing of a bowl with a curved arrow indicating rotation (no text or symbols)Figure 2

natural_image
Technical line drawing of a mechanical component with concentric rings and a handle (no text or symbols)Figure 3
natural_image
Line drawing of a mechanical device with a handle and lever (no text or symbols)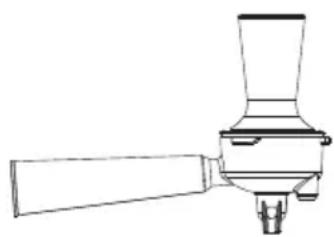
natural_image
Line drawing of a mechanical device with a handle and central component (no text or symbols)Au Canada, visitez service.geappliances.ca/servicio/fr_CA/.
Garantr: GE Appliances, a Haier company
Louisville, KY 40225
Garant Canada: MC Commercial, Burlington, Ontario, L7L 6C7
In Canada: cafeappliances.ca
ENREGISTREZ VOTRE ÉLECTROMÉNAGER
cafeappliances.com/register
PIÈCES ET ACCESSOIRES
cafeappliances.com/parts
Au Canada: geappliances.ca/parts-filters-accessories
General Manager, Customer Relations | GE Appliances, Appliance Park | Louisville, KY 40225
CafeAppliances.com/contact
Au Canada: Director, Consumer Relations, MC Commercial Inc. | Suite 300, 5420 North Service Road | Burlington, ON L7L 6C7
cafeappliances.ca/support/contact-us
CAFE
DISTINCT BY DESIGN™
CAFE
DISTINCT BY DESIGN™
natural_image
White modern espresso machine with glass lid and wooden handle (no visible text or symbols)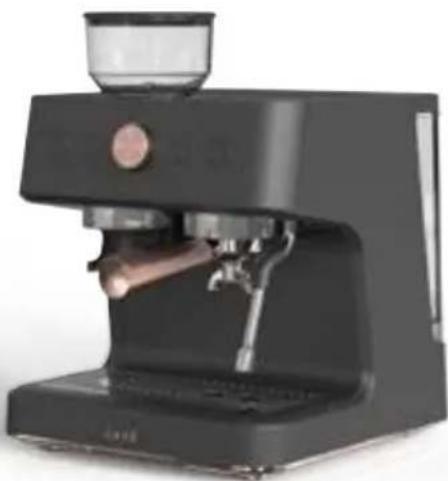
natural_image
Modern black and white espresso machine with lever and cup (no visible text or symbols)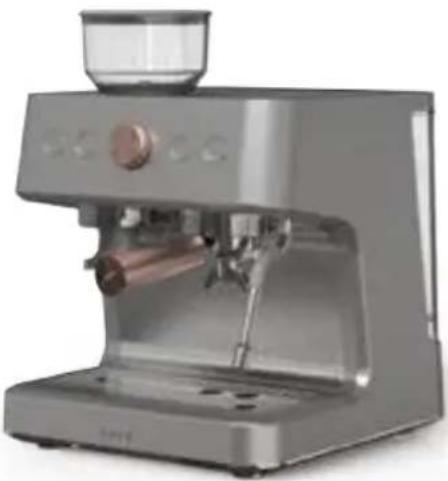
natural_image
Modern stainless steel coffee maker with glass lid and copper handle (no visible text or symbols)BELLISSIMO- Máquina Expreso Café Semi
natural_image
Two-step diagram showing a coffee maker pressing down on a tray, with arrows indicating the process (no text or symbols present)natural_image
Simple line drawing of a mechanical component with an arrow indicating direction (no text or symbols)Componentes
natural_image
Line drawing of a portable mortar with handle and label 'Portafiltro' below (no other text or symbols)natural_image
Line drawing of a mechanical device with a lever and base plate (no text or symbols)natural_image
Line drawing of a mechanical device with a handle and lever, no text or symbols presentnatural_image
Diagram of a kitchen sink with a spatula and lid, showing an upward arrow (no text or symbols)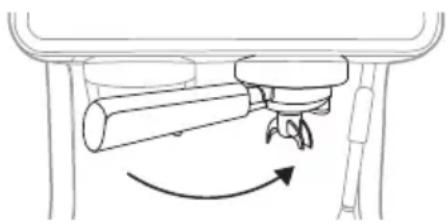
natural_image
Diagram of a mechanical assembly with a lever and pivot, showing rotational motion (no text or symbols)natural_image
Line drawing of a mechanical tool interacting with a circular component (no text or symbols)natural_image
Simple line drawing of a bowl with a circular top and a curved arrow indicating rotation (no text or symbols)Figura 1
natural_image
Simple line drawing of a bowl-shaped container with a curved arrow indicating rotation (no text or symbols)Figura 2
natural_image
Technical line drawing of a mechanical component with concentric rings and a central protruding rod (no text or symbols)Figura 3
natural_image
Line drawing of a kitchen appliance setup with a bottle, fan, and bowl (no text or symbols)natural_image
Diagram showing two mechanical components with arrows indicating motion or assembly (no text or symbols)WiFi Connect – SmartHQ
Conexión WiFi
Follow the directions in the SmartHQ app to continue WiFi setup.
Louisville, KY 40225
Soporte al Cliente
SITIO WEB DE CAFÉE
Register your new appliance on-line at your convenience! Timely product registration will allow for enhanced communication and prompt service under the terms of your warranty, should the need arise. You may also mail in the pre-printed registration card included in the packing material. cafeappliances.com/register
PIEZAS Y ACCESORIOS
Instructions contained in this manual cover procedures to be performed by any user. Other servicing generally should be referred to qualified service personnel. Caution must be exercised, since improper servicing may cause unsafe operation.
CONTÁCTENOS
General Manager, Customer Relations | GE Appliances, Appliance Park | Louisville, KY 40225 cafeappliances.com/contact
CAFE
DISTINCT BY DESIGN™
- THANK YOU FOR MAKING CAFÉ A PART OF YOUR HOME.
- Table of Contents
- Product Registration
- IMPORTANT SAFETY INFORMATION READ ALL INSTRUCTIONS BEFORE USING THE APPLIANCE
- WARNING
- IMPORTANT SAFEGUARDS
- SAVE THESE INSTRUCTIONS
- RISK OF FIRE OR ELECTRIC SHOCK
- Getting Started
- Drip Tray
- General Information
- Water Tank
- Coffee Bean Hopper
- Ready to Use!
- Components
- Controls
- Accessories
- Functions
- Buttons
- Power
- Grind
- Single (Espresso)
- Double
- To set Default Dispense Amount:
- Control Knob
- Steam
- CAUTION
- Hot Water
- Alerts
- Grinder
- Add Water
- WiFi
- Clean
- Using Your Espresso Machine
- Single and Double
- How to Wake the Machine
- Turn On/Off Sounds
- Factory Reset
- Overpressure
- Portafilter and Filters
- Single and Double Layer Filters
- Dial In Instructions
- Other Tips
- Care and Cleaning
- Cleaning your Espresso Machine
- Clean / Descale
- STAGE 1:
- STAGE 2:
- Cleaning the Grinder
- Cleaning the Steam Wand
- Cleaning the Portafilter and Filters
- System Emptying
- Checking Your Water Hardness
- Tips
- Cappuccino
- Latte
- ■ How to steam milk:
- WiFi Connect – SmartHQ
- WiFi Connect
- SmartHQ
- FCC/IC Compliance Statement
- Remote Enable Equipment
- Limited Warranty
- What Café Appliances Will Not Cover:
- EXCLUSION OF IMPLIED WARRANTIES
- For sale in the 50 United States, District of Columbia, and Canada only:
- Consumer Support
- CAFÉ WEBSITE
- REGISTER YOUR APPLIANCE
- PARTS AND ACCESSORIES
- CONTACT US
- CAFE
- CAFÉ
- Réservoir d'eau
- Fonctions Boutons
- Pouvoir
- Hot Water (eau chaude)
- Application SmartHQ
- ENREGISTREZ VOTRE ÉLECTROMÉNAGER
- PIÈCES ET ACCESSOIRES
- Componentes
- Conexión WiFi
- Soporte al Cliente
- SITIO WEB DE CAFÉE
- PIEZAS Y ACCESORIOS
- CONTÁCTENOS
Brand : Café
Model : BELLISSIMO C7CESAS3RD3
Category : Coffee machine