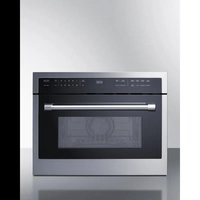
CMV115 - Oven Summit - Free user manual and instructions
Find the device manual for free CMV115 Summit in PDF.


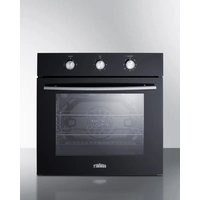
| Product Type | Combination microwave oven (microwave, grill, convection) |
| Brand | Summit |
| Model | CMV115 |
| Supply Voltage | 120 VAC, 60 Hz |
| Maximum Power | 3,400 W |
| Microwave Power | 1,000 W |
| Capacity | 44 L |
| Turntable Diameter | 363 mm |
| Dimensions (W x D x H) | 595 x 568 x 454 mm |
| Net Weight | Approximately 37.1 kg |
| Cooking Types | Microwave, Grill (Broil High/Low), Convection, Cooking Sensor, Reheat, Defrost |
| Main Functions | Popcorn, Beverage, Pizza, Auto Menu (8 programs), Frozen Foods, Quick Preheat, Child Lock, Clock, Quick Cook |
| Microwave Power Levels | 10 levels (10% to 100%) |
| Child Safety | Yes (panel lock) |
| Installation | Built-in (only for heat-resistant kitchen up to 90°C) |
| Cavity Material | Stainless steel |
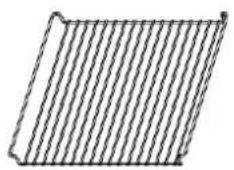
| Included Accessories | Metal turntable, ceramic plate, metal rack |
| Cleaning and Maintenance | Clean regularly with soapy water; do not use steam cleaner or abrasives |
| Warranty | 1-year limited (parts and labor in contiguous 48 states) |
| Customer Service | 800-932-4267 (9 am-5 pm ET) or summitappliance.com/support |
Frequently Asked Questions - CMV115 Summit
User questions about CMV115 Summit
0 question about this device. Answer the ones you know or ask your own.
Ask a new question about this device
Download the instructions for your Oven in PDF format for free! Find your manual CMV115 - Summit and take your electronic device back in hand. On this page are published all the documents necessary for the use of your device. CMV115 by Summit.
USER MANUAL CMV115 Summit
BUILT-IN COMBINATION OVEN WITH HOT AIR AND MICROWAVE OPERATION MANUAL
MODEL: CMV115
READ THESE INSTRUCTIONS CAREFULLY
Write Serial Number here:
Felix Storch, Inc.
An ISO 9001:2015 registered company
Summit Appliance Division
770 Garrison Avenue
Bronx, NY 10474
www.summitappliance.com
PRECAUTIONS TO AVOID POSSIBLE EXPOSURE TO EXCESSIVE MICROWAVE ENERGY
(a) Do not attempt to operate this oven with the door open since this can result in harmful exposure to microwave energy. It is important not to break or tamper with the safety interlocks.
(b) Do not place any object between the oven's front face and the door or allow soil or cleaner residue to accumulate on sealing surfaces.
(c) WARNING: If the door or door seals are damaged, the oven must not be operated until a competent person has repaired it.
Technical Data
| Rated Voltage | 120 V~ 60 Hz |
| Maximum Power | 3400W |
| Rated Output Power (Microwave) | 1000W |
| Oven Capacity | 44L |
| Turntable Diameter | 363mm |
| External Dimensions (without handle) | 23.4" (W) x 22.3" (D) x 17.8" (H) |
| Net Weight | Approx. 81.7 lbs. (37.1 kg) |
IMPORTANT SAFETY INSTRUCTIONS
IMPORTANT SAFETY INSTRUCTIONS WARNING
To reduce the risk of fire, electric shock, injury to persons, or exposure to excessive microwave oven energy when using your appliance, follow basic precautions, including the following:
READ CAREFULLY AND KEEP FOR FUTURE REFERENCE
NOTE: If the apparatus is not kept clean, its surface could degrade and affect the lifespan of the apparatus and could lead to a dangerous situation.
- Read and follow instructions in the section titled: "PRECAUTIONS TO AVOID POSSIBLE EXPOSURE TO EXCESSIVE MICROWAVE ENERGY"
- Keep the appliance and its cord out of reach of children younger than 8 years old.
- If the supply cord is damaged, it must be replaced by the manufacturer, its service agent, or a similarly qualified person in order to avoid a hazard. (For appliances with type Y attachment)
-
WARNING: It is hazardous for anyone other than a competent person to carry out any service or repair operation that involves the removal of a cover which gives protection against exposure to microwave energy.
-
WARNING: Liquids and other foods must not be heated in sealed containers since they can explode.
-
This appliance can only be used by children aged 8 years and above and persons with reduced physical, sensory, or mental capabilities or lack of experience and knowledge if they have been given supervision or instruction concerning the use of the appliance in a safe way and understand the hazards involved. Children shall not play with the appliance. Cleaning and user maintenance shall not be made by children without supervision unless they are aged 8 years and above and are unsupervised.
-
When heating food in plastic or paper containers, keep an eye on the oven due to the possibility of ignition.
- Only use utensils that are suitable for use in microwave ovens.
- If smoke is emitted, switch off or unplug the appliance and keep the door closed in order to stifle any flames.
- Microwave heating of beverages can result in delayed eruptive boiling; therefore, care must be taken when handling the container.
-
The contents in feeding bottles and baby food jars shall be stirred or shaken and the temperature checked before consumption, in order to avoid burns.
-
Eggs in their shell and hardboiled eggs should not be heated in microwave ovens since they may explode, even after microwave heating has ended.
-
The oven should be cleaned regularly and any food deposits removed.
-
Failure to maintain the oven in a clean condition could lead to deterioration of the surface that could adversely affect the life of the appliance and possibly result in a hazardous situation.
-
Only use the temperature probe recommended for this oven.(For ovens provided with a facility to use a temperature-sensing probe.)
-
The microwave oven must be operated with the decorative door open. (For ovens with a decorative door.)
-
This appliance is intended to be used in household and similar applications such as:
-staff kitchen areas in shops, offices and other working environments.
-by clients in hotels, motels, and other residential type environments.
-farmhouses.
-bed and breakfast type environments.
-
Care should be taken not to displace the turntable when removing containers from the appliance. (For fixed appliances and built-in appliances being used equal or higher than 900mm above the floor and having detachable turntables. But this is not applicable for appliances with horizontal bottom hinged doors.)
-
The appliance shall not be cleaned with a steam cleaner.
-
WARNING: Make sure the appliance is switched off before replacing the lamp to avoid the possibility of electric shock.
-
WARNING: Accessible parts may become hot during use. Young children should be kept away.
-
Steam cleaner is not to be used.
-
The microwave oven is intended for heating food and beverages. Drying of food or clothing and heating of warming pads, slippers, sponges, damp cloth and similar may lead to risk of injury, ignition, or fire.
-
WARNING: The appliance and its accessible parts become hot during use.
NOTE:
Care should be taken to avoid touching heating elements. Children less than 8 years of age shall be kept away unless continuously supervised.
-
During use the appliance becomes hot. Care should be taken to avoid touching heating elements inside the oven.
-
Metallic containers for food and beverages are not allowed during microwave cooking.
-
Do not use harsh abrasive cleaners or sharp metal scrapers to clean the oven door glass since they can scratch the surface, which may result in shattering of the glass.
-
The appliance is intended to be used built-in.
-
The appliance must not be installed behind a decorative door in order to avoid overheating (This is not applicable for appliances with decorative doors.)
-
WARNING: When the appliance is operated while it is in Combination mode, children should only use the oven under adult supervision due to the temperatures generated
Causes of damage
Caution!
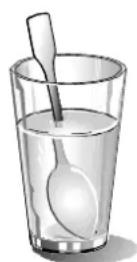
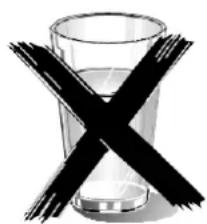
- Creation of sparks: Metal - e.g., a spoon in a glass - cannot be placed inside the unit while it is functioning as a microwave. Sparks could irreparably damage the glass on the inside of the door.
■ Water in the hot cooking compartment: Never pour water into the hot cooking compartment. This will cause steam. The temperature change can cause damage. - Moist food: Do not store moist food in the closed cooking compartment for long periods. Do not use the appliance to store food. This can lead to corrosion.
- Cooling with the appliance door open: Only leave the cooking compartment to cool with the door closed. Do not trap anything in the appliance door. Even if the door is only slightly ajar, the fronts of adjacent units may be damaged over time.
- Dirty Seals: If the seal is very dirty, the appliance door will no longer close properly during operation. The fronts of adjacent units could be damaged. Always keep the seal clean.
- Operating the microwave without food: Operating the appliance without food in the cooking compartment may lead to overloading. Never switch on the appliance unless there is food
in the cooking compartment. An exception to this rule is a short crockery test (see the section "Microwave, suitable crockery").
- Using the appliance door for standing on or placing objects on: Do not stand or place anything on the open appliance door. Do not place ovenware or accessories on the appliance door.
- Transporting the appliance: Do not carry or hold the appliance by the door handle. The door handle cannot support the weight of the appliance and could break.
- Microwave popcorn: Never set the microwave power too high. Use a power setting no higher than 600 watts. Always place the popcorn bag on a glass plate. The disc may jump if overloaded.
- Liquid that has boiled over must not be allowed to run through the turntable drive into the interior of the appliance. Monitor the cooking process. Choose a shorter cooking time initially and increase the cooking time as required.
- The oven should be cleaned regularly, and any food deposits removed since they may explode, even after microwave heating has ended.
- Failure to maintain the oven in a clean condition could lead to deterioration of the surface that could adversely affect the life of the appliance and possibly result in a hazardous situation.
Installation
- This appliance is only intended to be fully fitted in a kitchen.
■ This appliance is not designed to be used as a tabletop appliance or inside a cupboard. - The fitted cabinet must not have a back wall behind the appliance.
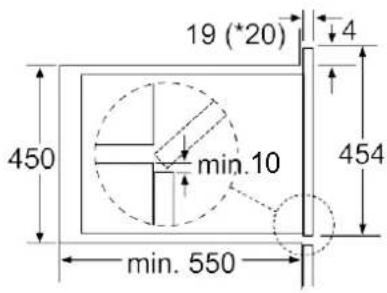
- A gap of at least 45 mm must be maintained between the wall and the base or back panel of the unit above.
- The fitted cabinet must have a ventilation opening of 250 cm ^2 on the front. To achieve this, cut back the base panel or fit a ventilation grille.
Installation dimensions
Ventilation openings
behind, min. 250 cm²
■ Ventilation slots and intakes must not be covered.
- The safe operation of this appliance can only be guaranteed if it has been installed in accordance with these installation instructions.
- The fitter is liable for any damage resulting from incorrect installation.
- The units into which the appliance is fitted must be heat-resistant up to 194 °F (90°C).
NOTE: For a complete and detailed set of installation instructions, refer to the "Installation Manual" that was also packaged with this manual.
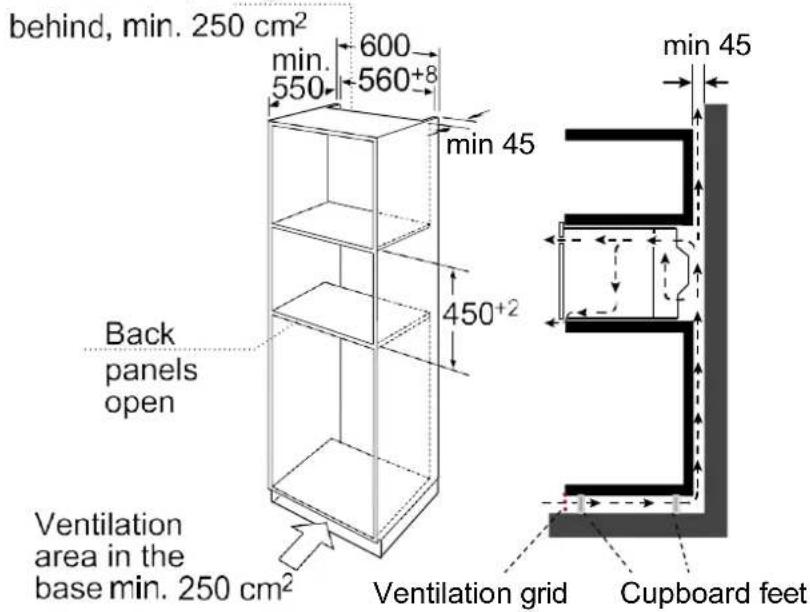
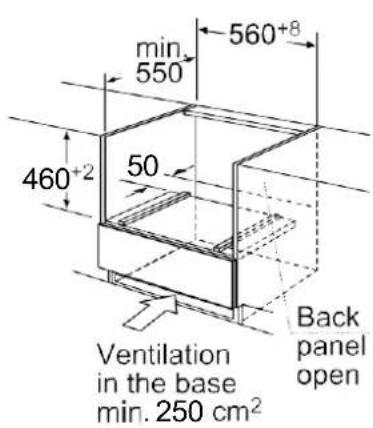
Note: There should be gap above the oven.
Built-In Installation
- Do not hold or carry the appliance by the door handle. The door handle cannot hold the weight of the appliance and may break off.
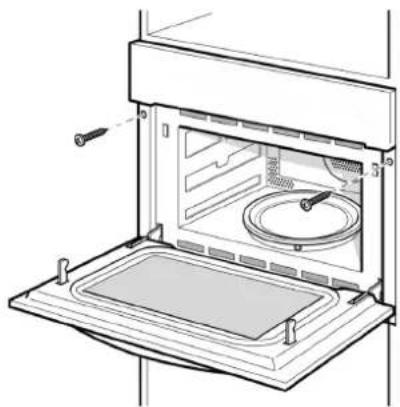
- Carefully push the microwave into the box, making sure that it is in the center.
- Open the door and fasten the microwave with the screws that were supplied.

natural_image
Line drawing of an open microwave oven with a dish inside, showing internal components and a handle (no text or symbols)* 20 mm for metal fascias
■ Fully insert the appliance and center it.
Do not kink the connecting cable.
Screw the appliance into place.
The gap between the countertop and the appliance must not be closed by additional battens.
IMPORTANT INFORMATION
The appliance is designed to be permanently installed with a three-pin power cord and may only be connected by a licensed expert in accordance with the connection diagram.
Only a qualified electrician who takes the relevant regulations into account may replace the power cord.
Do not use multiple plugs, power strips or extensions. Overloading causes a risk of fire.
If the connection is no longer accessible following installation, an all-pin isolating switch with a contact gap of at least 3 mm must be provided.
CONNECT THE WIRES OF THE MAINS POWER CORD IN ACCORDANCE WITH THE FOLLOWING COLOR CODING:
Green and Grounding wire ±(E)
yellow
Blue Neutral wire (N)
Brown Live (L)
Your new appliance
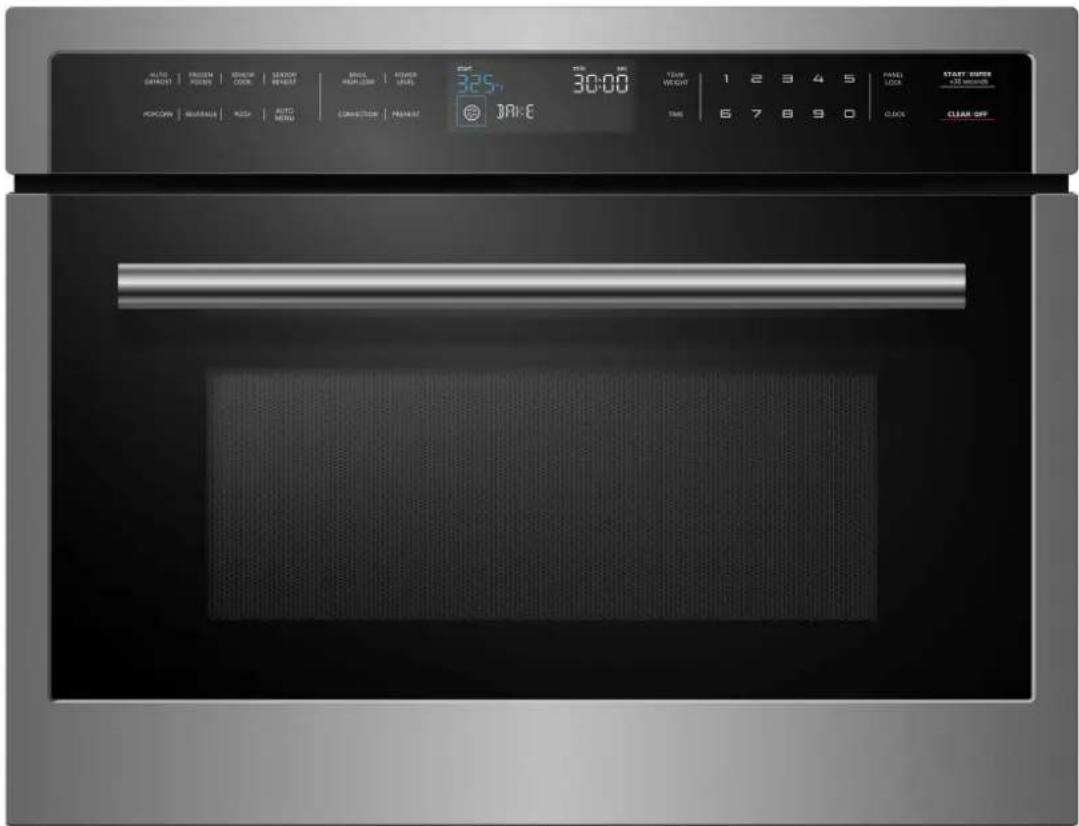
Use this section to familiarize yourself with your new appliance. The control panel and the individual operating controls are
Control Panel
explained. You will find information on the cooking compartment and the accessories.

Touch keys and display
The touch keys are used to set the various additional functions. On the display, you can read the values that you have set.
| Symbol | Function |
| AUTO DEFROST | Select Auto Defrost programs |
| FROZEN FOODS | Start cooking programs for frozen foods |
| SENSOR COOK | Select Sensor Cook program |
| SENSOR REHEAT | Select Sensor Reheat Program |
| POPCORN | Cook popcorn |
| BEVERAGE | Heat beverages |
| PIZZA | Select pizza programs |
| AUTO MENU | Select auto menu programs |
| BROIL HIGH-LOW | Set Broil modes (Hi/Lo) |
| POWER LEVEL | Set power level for microwave operation |
| CONVECTION | Select Bake Cook programSelect Roast Cook program |
| PREHEAT | Select preheat programs |
| TEMP. WEIGHT | Set Temp. or weight of cooking |
| TIME | Set cooking time |
| PANEL LOCK | Activate/deactivate child lock |
| CLOCK | Set time of day |
| 0 - 9 | Use the number keys to enter customized values |
| START/ENTER +30 seconds | Confirm entered values/Start cooking modeAdd 30 seconds |
| CLEAR/OFF | Clear entered value / Turn the appliance off |
Parameter adjustment
Use the adjusting keys to set the parameters.
| Parameter | Function |
| Auto Menu | Select 8 automatic programs. |
| Weight | Set the weight of item. |
| Time | Set the length of cooking time. |
Cooling fan
Your appliance has a cooling fan. The cooling fan switches on during operation. The hot air escapes above the door.
The cooling fan continues to run for a certain time after operation.
CAUTION!
Do not cover the ventilation slots. Otherwise, the appliance will overheat.
Notes
- The appliance remains cool during microwave operation. The cooling fan will still switch on. The fan may run even when the microwave operation has ended.
- Condensation may appear on the door window, interior walls, and floor. This is normal and does not adversely affect microwave operation. Wipe away the condensation after cooking and the unit is cool to the touch.
Accessories
natural_image
Diagram showing a circular tray and its interior view of a microwave oven (no text or symbols)Turntable
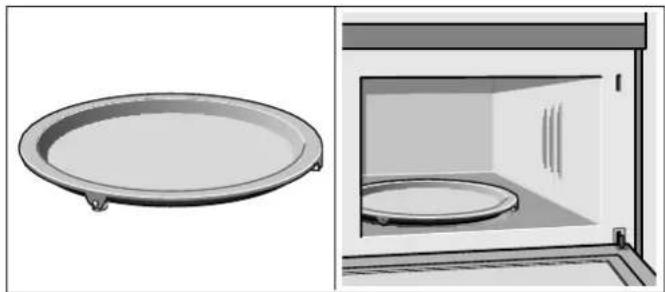
As a surface for the wire rack.
Food which particularly requires a lot of heat from underneath can be prepared directly on the turntable.
The turntable can turn clockwise or anti-clockwise.
Place the turntable on the drive in the center of the cooking compartment. Ensure that it is properly fitted.
■ Never use the microwave without the turntable.
■ The turntable can withstand max. 5 kg.
- The turntable must turn when using all types of heating.
natural_image
Simple line drawing of a rectangular prism with diagonal hatching (no text or symbols)NOTE:
Accessory details and specifications are subject to change without notice.
Setting up
Here you will find everything you need to do before using your oven to prepare food for the first time. First read the section on Safety information.
Clock Settings
Once the appliance is connected, "12:00" will be displayed as the time of day. To set the correct time, proceed as follows:
- Touch Clock.
-
Enter the correct time using the number keys. Example: To set the clock to 12:41 type in 1 2 4 1.
-
Touch Start/Enter to confirm. +30 seconds
Heating up the oven
To get rid of that new oven smell, heat up the appliance when it is empty and closed. One hour on Convection at 350^ F (180 °C) is ideal. Ensure that no packaging remnants have been left in the oven cavity.
- Press Convection once to enter bake mode.
- Enter the numbers 3-5-0 with the number keys.
- Press TIME to adjust cooking time.
- Enter the numbers 6-0 with the number keys.
- Press Start/Enter to start cooking. +30 seconds
The oven light will turn on and the appliance will start heating up.
Cleaning the accessories
Before you use the accessories for the first time, clean them thoroughly with hot soapy water and a soft dishcloth.
Oven Settings
There are various ways in which you can set your oven. Here we will explain how you can select the desired type of heating and temperature or grill setting. You can also select the oven cooking time for your dish. Please refer to the section onClock and Timer Settings
Convection Mode Setting
Example: Roast at 350°F (177°C) for 20 minutes
- Press Convection twice to enter Roast mode.
- Enter the numbers 3-5-0 with the number keys.
- Press TIME to adjust the cooking time.
-
Enter the numbers 2-0-0-0 with the number keys.
-
Press Start/Enter to start cooking.
+30 seconds
Opening the oven door during operation
Operation is suspended. After closing the door, press the
Start/Enter key. Operation continues. +30 seconds
Cancelling operation
Press Clear/Off to cancel the active oven mode. The appliance turns off and the clock is displayed.
The cooling fans may continue to run for a while and then switch off automatically.
Rapid Preheating
With rapid preheating, your oven reaches the set temperature particularly quickly.
Only put your food in the cooking compartment when the preheating phase is complete.
-
Press the PREHEAT key.
-
Enter the temperature setting with the number keys. The input temperature should be within 100 to 450°F.
-
Press the Start/Enter key. +30 seconds
The oven will begin to warm up.
Once the preheating process is complete, the unit will emit a sound. Put your dish in the oven and set the cooking mode you need.
NOTE: Only once the alarm rings and the preheating icon starts blinking can you open the oven and place your food inside.
Cancelling rapid preheating
While setting up rapid heating, Pressing Clear/Off will cancel the function. This will also happen while the unit is rapid preheating.
Also, opening the door will cancel rapid preheating.
The Microwave
The microwave can be used solo, i.e., on its own, or in combination with a different type of heating. In this section, you will find information about ovenware and how to set the microwave.
NOTE:
In the Expert Cooking Guide, you will find examples for defrosting, heating, and cooking with the microwave oven.
Notes regarding ovenware
SUITABLE OVENWARE
Suitable dishes are heat-resistant ovenware made of glass, glass ceramic, porcelain, ceramic, or heat-resistant plastic. These materials allow microwaves to pass through.
You can also use serving dishes. This saves you from having to transfer food from one dish to another. You should only use ovenware with a decorative gold or silver trim if the manufacturer guarantees that they are suitable for use in microwaves.
UNSUITABLE OVENWARE
Metal ovenware is unsuitable. Metal does not allow microwaves to pass through. Food in covered metal containers will remain cold.
CAUTION!
Creation of sparks: Metal - e.g., a spoon in a glass - cannot be placed inside the unit while it is functioning as a microwave. Sparks could irreparably damage the glass on the inside of the door.
OVENWARE TEST
Do not switch on the microwave unless there is food inside. The following ovenware test is the only exception to this rule.
Perform the following test if you are unsure whether your ovenware is suitable for use in the microwave:
-
Heat the empty ovenware at maximum power for 12 to 1 minute.
-
Check the temperature occasionally during that time.
The ovenware should still be cold or warm to the touch.
If it becomes hot or creates sparks, the ovenware is unsuitable.
Microwave power settings
You can select from 10 different microwave power levels. If you do not set a power level, the microwave will automatically operate at the highest power level 10.
The table below provides suggested power levels for various types of food that can be prepared in the microwave.
| Power level | Microwave output | Use for |
| 10 | 100% | Boiling water |
| High | Cooking ground meat | |
| Making candy | ||
| Cooking fresh fruit & vegetables | ||
| Cooking fish & poultry | ||
| Preheating browning dish | ||
| Reheating beverages | ||
| Cooking bacon slices | ||
| 9 | 90% | Reheating meat slices quickly |
| Sauté onions, celery & green peppers | ||
| 8 | 80% | All reheating |
| Cooking scrambled eggs | ||
| 7 | 70% | Cooking breads & cereal products |
| Cooking cheese dishes | ||
| Cooking muffins, brownies & cupcakes | ||
| Cooking whole poultry | ||
| 6 | 60% | Cooking pasta |
| 5 | 50% | Cooking meat |
| Cooking custard | ||
| Cooking spareribs, rib roast & sirloin roast | ||
| Power | Microwave | Use for level output |
| 4 | 40% | Cooking fewer tender cuts of meat |
| 3 | 30% | Reheating frozen packaged foodsThawing meat, poultry & seafoodCooking small quantities of foodFinish cooking casseroles, stew & some saucesMelting chocolate |
| 2 | 20% | Softening butter & cream cheese |
| 1 | 10% | Softening ice creamRaise yeast dough |
Setting the microwave
- Enter the desired cook time with the number keys. The timer display will fill in from right to left. Example: To set a microwave time of 20 minutes and 30 seconds, enter the numbers 2 0 3 0.
- You can start microwave operation with the default power level of 10 by pressing Start/Enter, -or - +30 seconds you can set a different power level. By pressing Power Level.
- Enter the desired power level using the number keys.
- Touch Start/Enter to start the microwave operation. The microwave timer will start to count down.
Express cooking
- While the unit is on standby, press number keys 1 to 9 to start 100% microwave cooking in 1 to 9 minutes.
- If the door is closed, the oven will start to cook automatically after 2 seconds.
Change power level
You can change the power level at any time during microwave operation.
- Press Power Level.
- Enter the desired power level with the number keys.
- Press Start/Enter.
+30 seconds
Microwave operation will continue at the new power level.
Opening the oven door during operation
If the door is opened, the operation will be suspended. After closing the door, press the Start/Enter key and the operation will continue. +30 seconds
Cancelling operation
Press Clear/Off to cancel the active oven mode. The appliance will turn off and the clock will be displayed.
The cooling fans may continue to run for a while and then switch off automatically.
Speedy microwave cooking
Use the Start/Enter key to quick start your microwave at the highest power level. You can press the key repeatedly to increase the microwave time in increments of 30 seconds.
Pressing this key during microwave operation will add 30 seconds to the remaining microwave time.
The cooking time has elapsed.
Once microwave operations has finished, the unit will make a sound.
Multi-stage cooking
- Enter the desired cook time with the number keys. The timer display will fill in from right to left.
- Press Power Level.
- Enter the desired power level using the number keys.
- Press Power Level.
- Enter the desired power level using the number keys.
- Press Start/Enter
+30 seconds - Enter the desired cook time with the number keys.
- Press Start/Enter to start the microwave operation. +30 seconds
The buzzer will sound 3 times when the first stage of cooking is finished and enters the second stage.
Automatic Programs
The automatic programs enable you to prepare food very easily. You select the program and enter the weight of your food. The automatic program chooses the optimum setting. You can choose from 9 programs.
Always place the food in the cold cooking compartment.
Setting a program
When you have selected a program, set the oven. The temperature selector must be in the off position.
- Press Auto menu.
- Press Auto menu repeatedly to scroll through all Auto menus.
-
Press TEMP. WEIGHT to adjust the weight of food.
-
Press Start/Enter to start cooking. +30 seconds
Opening appliance door during operation
Opening the appliance door during operation will interrupt the current mode. Close the appliance door and then press Start/Enter to resume operation.
+30 seconds
Cancel operation
Press Clear/Off to cancel the active oven mode. The appliance will turn off and the clock is displayed.
The cooling fans may continue to run for a while and then switch off automatically.
Defrosting programs
You can use the 2 defrosting programs to defrost ground meat and meat pieces.
- Touch Auto Defrost once or twice to choose "GROUND MEAT" or "MEAT PIECES".
- Enter the weight of the food you want to defrost using the number keys.
- Touch Start/Enter to start defrosting. +30 seconds
NOTES:
■ Preparing food
Use food that has been frozen at -0.4^ F ( -18^ C) and stored in portion-sized quantities that are as thin as possible.
Take the food to be defrosted out of all packaging and weigh it. You need to know the weight to set the program.
- Liquid will be produced when defrosting meat or poultry. Drain off this liquid when turning meat and poultry and under no circumstances use it for other purposes or allow it to come into contact with other foods.
Auto Menu
| Program | Weight range | Food placement |
| 1 - Chicken Breasts | 0.5 - 3.0 lbs. | Wire rack, facing down |
| 2 - Chicken Thigh | 0.5 - 3.0 lbs. | Wire rack, facing down |
| 3 - Whole Poultry | 1.5 - 4.5 lbs. | Turntable |
| 4 - Beef Roast | 0.5 - 3.25 lbs. | Turntable |
| 5 - Pork Tenderloin | 1.0 - 3.0 lbs. | Wire rack, facing down |
| 6 - Pork Chops | 0.5 - 3.0 lbs. | Wire rack, facing down |
| 7 - Meatloaf | 1.0 - 3.25 lbs. | Turntable |
| 8 - Fish Fillets | 0.5 - 2.0 lbs. | Wire rack, facing down |
- Ovenware
Place the food in a microwaveable shallow dish, e.g., a china or glass plate, but do not cover it.
- When defrosting chicken and chicken portions (d 01), an audible signal will sound on two occasions to indicate that the food should be turned.
- Resting time
The defrosted food should be left to stand for an additional 10 to 30 minutes until it reaches an even temperature. Large pieces of meat require a longer standing time than smaller pieces. Flat pieces of meat and items made from minced meat should be separated from each other before leaving to stand.
After this time, you can continue to prepare the food, even though thick pieces of meat may still be frozen in the middle. The giblets can be removed from poultry at this point.
| Program no. | Defrost | Weight range in kg |
| 1 | Ground meat | 0.50 - 2.00 |
| 2 | Meat pieces | 0.50 - 3.00 |
Popcorn
CAUTION
Do not leave the oven unattended while popping corn. Popcorn may ignite and cause fire.
The popcorn feature lets you pop 3 different bag sizes of commercially packaged microwave popcorn. Use the following table to determine the setting to use:
| Bag size | Press Popcorn key |
| 1.2 oz. once | |
| 2.5 oz. twice | |
| 3.5 oz. 3 times |
Setting Popcorn mode
The appliance must be turned off.
-
Press Popcorn. The cook time is displayed.
-
Press Popcorn repeatedly or press number keys 1 to 3 to choose the desired weight.
-
Press Start/Enter. +30 seconds
The microwave timer will start to count down.
When the microwave timer has elapsed, a beep will sound. The appliance will turn off and the clock will be displayed.
Beverage
The beverage feature heats 0.5 to 2 cups of a beverage. Use the table below to determine the setting to use.
| Amount | Touch Beverage key |
| 0.5 cups (about 4 oz.) | once |
| 1 cup (about 8 oz.) | twice |
| 1.5 cups (about 12 oz.) | 3 times |
| 2 cups (about 16 oz.) | 4 times |
Setting Beverage mode
- Press Beverage.
The cook time is displayed.
-
Press Beverage repeatedly or press number key 1 to 4 to choose the desired amount.
-
Press Start/Enter. +30 seconds
The microwave timer will start to count down.
When the microwave timer has elapsed, a beep will sound. The appliance will turn off and the clock will be displayed.
Frozen Foods
Use the Frozen Foods feature to prepare frozen convenience foods, like chicken nuggets, french fries, fish sticks, using bottom heat and Convection.
Place the food you want to cook directly on the metal tray turntable.
You can set a temperature range from 200 to 450°F (93 to 230°C).
Frozen Foods Setting
The appliance must be inactive.
- Press Frozen Foods.
- You can change the temperature by using the number keys. You can enter a temperature between 200 and 450°F (93-232°C).
- Press TIME to adjust the cooking time.
- Press Start/Enter to start cooking. +30 seconds
Opening appliance door during operation
Opening the appliance door during operation will interrupt the current mode. When you close the appliance door, the operation will be resumed.
Cancel operation
Press Clear/Off to cancel the active oven mode. The appliance turns off and the clock is displayed.
The cooling fans may continue to run for a while and then switch off automatically.
Pizza
You can use the Pizza mode to bake three different types of pizza:
| Mode no. | Pizza type | Bake on |
| 1 | Frozen pizza | Metal tray |
| 2 | Fresh pizza | Metal tray |
| 3 | Microwave pizza | Ceramic tray |
Pizza tips
- Check pizza before the minimum time is up, pizza may cook faster compared to a traditional oven.
- For fresh pizza use a pizza paddle for sliding the pizza on and from the metal turntable.
- If using a pizza paddle, sprinkle the paddle liberally with cornmeal for ease in transferring the dough to the metal turntable.
- Maximum size is 12 inches for fresh and frozen pizzas.
- Avoid using a pizza stone as it can damage the oven.
- The metal turntable can be used for cutting pizza into slices. Remove the turntable from the oven after the pizza is baked.
Setting Pizza mode for fresh or frozen pizza
The appliance must be turned off.
You can set a temperature range from 375 to 450°F (191 to 232°C) for fresh and frozen pizza modes.
You can bake fresh or frozen pizza directly on the metal tray turntable.
- Press Pizza.
- Press Pizza repeatedly to scroll through all pizza modes.
- Press Start/Enter +30 seconds
- . You can change the temperature by using the number keys. Press Start/Enter to confirm. +30 seconds
The unit will stary preheating. The set temperature is reached once the preheat bar has filled up completely and the unit beeps.
Opening appliance door during operation
Opening the appliance door during operation will interrupt the current mode. When you close the appliance door, operation will be resumed.
Setting Pizza mode for microwave pizza
Place the microwave pizza on the ceramic tray and put it in the oven following package directions.
- Press Pizza.
- Press the number key 3 or press Pizza repeatedly until MICROWAVE PIZZA is displayed.
- Press Start/Enter. +30 seconds
- Press Start/Enter again. sensing and the microwave symbol light up on the display. The appliance will start sensing.
Sensor cooking
You can select two sensor cooking modes. Sensor cooking allows you to cook many of your favorite foods without selecting cooking times and power levels. The microwave oven automatically determines the required cooking time for each food item.
For best results for cooking by sensor, follow these recommendations:
- Food cooked with the sensor system should start from normal storage temperature.
- Turntable tray, ceramic tray, and outside of the container should be dry.
- Foods should always be covered loosely with microwavable plastic wrap, wax paper, or lid.
- Do not open the door or press the Clear/Off key during sensing time. When sensing time is over, the oven beeps once and the remaining cooking time will appear in the display. At this time, you can open the door to stir, turn or rearrange the food.
When the sensing is complete, a beep will sound, and the calculated cook time will start to count down.
After the cook time has run out a beep will sound. The appliance turns off and the clock is displayed.
NOTE: Do not open the door during the sensing process, or the program will be canceled.
Once the calculated cooking time is displayed, you can open the door to stir, turn, or rearrange the food. Press Start/Enter to resume operation.
Opening appliance door during operation
Opening the appliance door during operation will interrupt the current mode. Close the appliance door and press Start/Enter to resume operation.
+30 seconds
Sensor Reheat
The Sensor Reheat feature lets you reheat dinner plates or casseroles (8-16 oz.) for your cooking convenience.
Setting Sensor Reheat
- Press Sensor Reheat.
- Press Start/Enter.
- Sensing will be displayed. The microwave will turn on during sensing.
- When the sensing is complete, a beep will sound, and the calculated cook time will start to count down.
NOTE: Do not open the door during the sensing process, or the program will be canceled.
Once the calculated cooking time is displayed, you can open the door to stir, turn, or rearrange the food. Press Start/Enter to resume operation.
When sensor reheat is finished, a beep will sound, and the appliance turns off.
NOTES:
- Cover with vented plastic wrap or wax paper.
- Reheat food on a microwaveable dinner plate.
| Food Directions Quantity | ||
| Dinner plate | Use only pre-cooked, refrigerated foods. Cover plate with vented plastic wrap or waxed paper, tucked under plate. If food is not hot enough after heating with the Reheat feature, continue heating using manual time and power level setting.Contents:- 3-4 oz. meat, poultry or fish (up to 6 oz. with bone)- 1/2 cup starch (potatoes, pasta, rice, etc.)- 1/2 cup of vegetables (about 3-4 oz.) | 1 serving (1 plate) |
| Casserole, Pasta | Cover plate with lid or vented plastic wrap. If food is not hot enough after heating with the Reheat feature, continue heating using manual time and power level setting.Stir foods once before serving.Contents:- Casserole: refrigerated foods (such as beef stew or lasagna)- Pasta: Canned spaghetti and ravioli, refrigerated foods | 1 to 4 servings |
Sensor Cook
Sensor Cook allows you to cook many of your favorite foods without selecting cooking times and power levels. The microwave oven automatically determines the required cooking time for each food item.
Setting Sensor Cook
The appliance must be off.
Example: Setting the Sensor Cook for Ground Meat.
- Press Sensor Cook.
- Press Sensor Cook repeatedly to scroll through all Sensor Cook modes.
- Press Start/Enter. +30 seconds
The program will start sensing with the microwave operating.
Sensor Cook Programs
| Sensor Cook Program | Quantity | Cooking tips |
| 1 - Baked Potato | 1 - 4 potatoes (8 - 32 oz.) | Pierce skin with a fork. Do not cover. After cooking, allow to stand wrapped in foil for 5 minutes. |
| 2 - Ground Meat | 8 - 24 oz. (0.5 - 1.5 lbs.) | After cooking, allow to stand, covered, for 3 - 4 minutes. |
| 3 - Fresh Vegetables | 4 - 16 oz. (0.25 - 1 lbs.) | No water is needed if vegetables have just been washed. Add 2 tablespoons water per 8 ounces of fresh vegetables. |
| 4 - Fish/ Seafood | 8 - 20 oz. (0.5 - 1.25 lbs.) | Roll thin edges underneath. Arrange in a ring around microwaveable dish. |
| 5 - Frozen Entrees | 10 - 20 oz. | Follow package instructions for venting, cutting plastic film, etc. |
When sensing is complete, a beep will sound, and the calculated cook time will start to count down.
Note: Do not open the door during the sensing process, or the program will be cancelled.
Once the calculated cook time is displayed, you can open the door to stir, turn or rearrange the food. Press Start/Enter to resume operation.
When sensor cook is finished a beep will sound and the appliance turns off.
Opening appliance door during operation
Opening the appliance door during operation will interrupt the current mode. Close the appliance door and then press Start/Enter to resume operation. +30 seconds
Cancel operation
Press Clear/Off to cancel the active oven mode. The appliance turns off and the clock is displayed.
The cooling fans may continue to run for a while and then switch off automatically.
Broil
The Broil feature uses intense heat radiated from the upper element.
You can set two intensity levels:
- Broil high

- Broil low

Setting Broil mode
The appliance must be turned off.
- Press Broil HIGH-LOW.
- Press Broil again, to change to Broil low mode.
- Enter the desired cooking time with the number keys.
- Press Start/Enter to start the operation.
+30 seconds
NOTE: Always use a broil pan when cooking in Broil mode (see optional accessories).
Opening appliance door during operation
Opening the appliance door during operation will interrupt the current mode. When you close the appliance door, the operation will be resumed.
Cancel operation
Press Clear/Off to cancel the active oven mode. The appliance turns off and the clock is displayed.
The cooling fans may continue to run for a while and then switch off automatically.
Clock and Timer Settings
Your oven has various time-setting options. You can use the Clock key to call up the menu and switch between the individual functions.
Setting the cooking time
The cooking time for your meal can be set on the control panel. When the cooking time has elapsed, the oven switches itself off automatically. The cooking time cannot be accidentally exceeded.
The oven will start, and the cooking time counts down in the display.
The cooking time has elapsed.
The unit will beep, and the oven will stop heating.
Setting the clock
- Press Clock.
- Enter the correct time using the number keys. Example: To set the clock to 12:41 type in 1 2 4 1.
- Press Start/Enter to confirm.
+30 seconds
Changing the clock
- Press Clock while the unit is on stand-by mode. The actual time will disappear and then the time will blink in the display.
- Enter the correct time using the number keys.
- Press Start/Enter to confirm.
+30 seconds
Childproof Lock
The oven has a childproof lock to prevent children from accidentally switching it on.
The oven will not react to any settings input. The timer and clock can be set when the childproof lock has been switched on.
Switching on the childproof lock
NOTE: No cooking time should be set.
Press and hold the Panel lock key for approx. 3 seconds.
The lock symbol appears on the display. The childproof lock is activated.
Switching off the childproof lock
Press and hold the Panel lock key for approx. 3 seconds.
The lock symbol on the display will turn off and childproof lock will be deactivated.
Childproof lock with other cooking operations
When other cooking programs have been set, the childproof lock will not be operational.
Care and cleaning
With great care and cleaning your microwave oven will retain its looks and remain in good working order. This section will explain here how you should care for and clean your appliance.
Risk of electric shock.!
Penetrating moisture may cause an electric shock. Do not use any high-pressure cleaners or steam cleaners.
Risk of burns!
Never clean the appliance immediately after switching off. Let the appliance cool down.
Risk of serious damage to health!
Microwave energy may escape if the cooking compartment door or the door seal is damaged. Never use the appliance if the cooking compartment door or the door seal is damaged. Contact customer service immediately.
NOTES:
- Slight differences in color on the front of the appliance are caused by the use of different materials, such as glass, plastic, and metal.
- Shadows on the door panel which look like streaks, are caused by reflections made by the oven light.
- Unpleasant odors, e.g., after fish has been prepared, can be removed very easily. Add a few drops of lemon juice to a cup of water. Place a spoon into the container as well, to prevent delayed boiling. Heat the water for 1 to 2 minutes at maximum microwave power.
Cleaning agents
To ensure that the different surfaces are not damaged by using the wrong cleaning agent, read the information in the table. Do not use:
■ sharp or abrasive cleaning agents,
■ metal or glass scrapers to clean the glass in the appliance door.
■ metal or glass scrapers to clean the door seal,
■ hard scouring pads and sponges,
■ cleaning agents with high concentrations of alcohol.
Wash new sponge cloths thoroughly before use.
Allow all surfaces to dry thoroughly before using the appliance again.
| Area | Cleaning agents |
| Appliance front | Hot soapy water:Clean with a dish cloth and dry with a soft cloth. Do not use glass cleaners or metal or glass scrapers for cleaning. |
| Stainless steel part of appliance front | Hot soapy water:Clean with a dish cloth and dry with a soft cloth. Remove flecks of limescale, grease, starch and albumin (e.g., egg white) immediately. Corrosion can form under such residues. Special stainless steel cleaning agents can be obtained from the after-sales service or from specialist shops. Do not use glass cleaners or metal or glass scrapers for cleaning. |
| Cooking compartment | Hot soapy water or a vinegar solution:Clean with a dish cloth and dry with a soft cloth.If the oven is very dirty: Do not use oven spray or other aggressive oven cleaners or abrasive materials. Scouring pads, rough sponges and pan cleaners are also unsuitable. These items scratch the surface. Allow the interior surfaces to dry thoroughly. |
| Recess in the cooking compartment | Damp cloth:Ensure that no water seeps through the turntable drive into the appliance interior. |
| Wire racks | Hot soapy water:Clean using stainless steel cleaning agent or in the dishwasher. |
| Door panels | Glass cleaner:Clean with a dishcloth. Do not use a glass scraper. |
| Seal | Hot soapy water:Clean with a dishcloth, do not scour. Do not use a metal or glass scraper for cleaning. |
Troubleshooting
Please refer to the troubleshooting. table before calling the after-sales service.
If a meal does not turn out exactly as you wanted, refer to the Expert Cooking Guide section, where you will find plenty of cooking tips and tricks.
Risk of electric shock!
Faulty repairs are dangerous. Repairs may only be carried out by one of our trained after-sales engineers.
| Problem | Possible cause | Solution/information |
| The appliance does not work. | Faulty circuit breaker. | Look in the fuse box and check that the circuit breaker for the appliance is in working order. |
| Plug is not plugged in. | Plug in the plug. | |
| Power cut | Check whether the kitchen light works. | |
| The appliance does not work. appears in the display panel. | Childproof lock is active. Deactivate the childproof lock (see section: Childproof lock). | |
| 0:00 is in the display panel. | Power cut | Reset the clock. |
| The microwave does not switch on. | Door not fully closed. | Check whether food residue or debris is trapped in the door. |
| It takes longer than before for the food to heat up in the microwave | The selected microwave power level is too low. | Select a higher power level. |
| A larger amount than usual has been placed in the appliance. | Double the amount = almost double the cooking time. | |
| The food was colder than usual. | Stir or turn the food during cooking. | |
| Turntable grates or grinds. | Dirt or debris in the area around the turntable drive. | Clean the rollers under the turntable and the recess in the oven floor thoroughly. |
| A particular operating mode or power level cannot be set. | The temperature, power level or combined setting is not possible for this operating mode. | Choose permitted settings. |
| E1 appears in the display panel. | The thermal safety switch-off function has been activated. | Call the after-sales service. |
| E2 appears in the display panel. | The thermal safety switch-off function has been activated. | Call the after-sales service. |
| E4 appears in the display panel. | Moisture in the control panel. | Allow the control panel to dry. |
| E17 appears in the display panel. | Rapid heating has failed. | Call the after-sales service. |
If you have checked the table above and find that you still need help with your appliance, call our Customer Service facility at 800-932-4267 between 9:00AM and 5:00PM ET or visit summitappliance.com/support. We will do our best to answer your questions.
Acrylamide in foodstuffs
Which foods are affected?
Acrylamide is mainly produced in grain and potato products that are heated to high temperatures, such as potato crisps, chips, toast, bread rolls, bread, fine baked goods (biscuits, gingerbread, cookies).
| Tips for keeping acrylamide to a minimum when preparing food | |
| General | Keep cooking times to a minimum. Cook meals until they are golden brown, but not too dark. Large, thick pieces of food contain less acrylamide. |
| Baking biscuits Oven chips | Max. 392°F (200 °C) in Top/bottom heating or max. 356°F (180 °C) in 3D hot air or hot air mode. Max. 374°F (190°C) in Top/bottom heating or max. 338°F (170 °C) in 3D hot air or hot air mode. Egg whites and egg yolk reduce the formation of acrylamide. Distribute thinly and evenly over the baking tray. Cook at least 400 g at once on a baking tray so that the chips do not dry out. |
Tips on Saving Energy
Here you can find tips on how to save energy when baking and roasting and how to dispose of your appliance properly.
Energy Saving
- Only preheat the oven if this is specified in the recipe or in the operating instruction tables.
■ Use dark, black lacquered, or enameled baking tins. They absorb the heat particularly well. - Open the oven door as infrequently as possible while you are cooking, baking, or roasting.
- It is best to bake several cakes one after the other. The oven is still warm. This reduces the baking time for the second cake. You can also place two loaf tins next to each other.
- For longer cooking times, you can switch the oven off for 10 minutes before the end of the cooking time and use the residual heat to finish cooking.
Expert Cooking Guide
These charts can be used as a guide. For the best results, follow the directions on your package or recipe.
Broil
Place pan of food on the wire rack with the recess facing up.
| Food | Oven temperature | Cooking time (minutes) | Internal temperature | Cooking Tip / Procedure |
| Hamburgers, 34" to 1", medium | High | Side 1: 9 - 11Side 2:10 - 12 | 160°F(71°C) | Use a pan that allows fat to drain away from the food.High fat meat causes more spattering. |
| Lamb chops, 1", medium | High | Side 1: 9 - 11Side 2:10 - 12 | 160°F(71°C) | Use a pan that allows fat to drain away from the food.Slit fat to prevent curling. |
| Sausage, fresh | High | Side 1: 9 - 11Side 2: 8 - 10 | 160°F(71°C) | Use a pan that allows fat to drain away from the food. |
| Steaks, 34" to 1", medium rare | High | Side 1: 9 - 11Side 2:10 - 12 | 145°F(63°C) | Use a pan that allows fat to drain away from the food.Slit fat to prevent curling. |
| Steaks, 34" to 1", medium | High | Side 1: 9 - 11Side 2:10 - 12 | 160°F(71°C) | Use a pan that allows fat to drain away from the food.Slit fat to prevent curling. |
| Toasting bread | Low | 3 - 5 | - | Check at minimum time. |
| Top browning casseroles | Low | 3 - 5 | - | Use only metal or glass ceramic dishes such as Corning Ware® |
Convection Broil
Place pans of food on the wire rack with the recess facing up.
| Food | Oven temperature | Cooking time (minutes) | Internal temperature | Cooking tip / Procedure |
| Chicken breasts, bone-in | Low | Side 1: 9 - 11Side 2: 10 - 12 | 170°F(76°C) | Start breast side down. |
| Fish filets, 34 " to 1" | Low | 11 - 15 | 145°F(63°C) | No turning of fish.Turn thin ends under.Brush with olive oil or butter to prevent sticking. |
Convection
Preheat the oven before adding food. Once the oven is preheated, place the food in the oven quickly to minimize
the loss of heat. Place pans of food on the wire rack with the recess facing down.
| Food | Oven temperature | Cooking time (minutes) | Cooking Tip / Procedure |
| Biscuits | 350°F (177°C) | 13 - 20 | A dark or dull baking sheet will result in a browner, crisper crust. |
| Cake, 13" x 9" | 350°F (177°C) | 23 - 28 | For a tender, light golden brown crust, use light, shiny metal bakeware. |
| Cookies | 350 - 375°F (177 - 190°C) | 8 - 14 | A dark or dull baking sheet will result in a browner, crisper crust. |
| Cornbread | 425 - 450°F (218 - 232°C) | 25 - 30 | Use a square baking pan. |
| Cupcakes | 350°F (175°C) | 18 - 21 | Ideal for ready-made mixes. Prepare according to package directions. |
| Dinner rolls | 400°F (205°C) | 12 - 18 | Use with fresh or frozen dinner rolls. |
| Fresh fruit pie | 375°F (191°C) | 50 - 60 | A dark or dull baking pie pan will result in a browner, crisper crust. |
| Muffins | 400°F (205°C) | 10 - 18 | Ideal for ready-made mixes. Prepare according to package directions. |
| Roasted vegetables | 425 - 450°F (218 - 232°C) | 15 - 20 | Use dark or dull metal pan. Stir once. |
| Shortcakes | 450°F (232°C) | 10 - 18 | Best for individual shortcakes. Use dark coated pan. |
Cooking eggs in your microwave
- Never cook eggs in the shell and never warm hard-cooked eggs in the shell; they can explode.
- Always pierce yolk on whole eggs to keep them from bursting.
- Cook eggs just until set; they will become tough if overcooked.
- Cooking scrambled eggs is safe.
Cooking vegetables in your microwave
- Vegetables should be washed just before cooking. Rarely is extra water needed. If dense vegetables such as potatoes or carrots are being cooked, add about 14 cup of water.
- Small vegetables (sliced carrots, peas, lima beans, etc.) will cook faster than larger vegetables.
-
Whole vegetables, such as potatoes, acorn squash, or corn on the cob, should be arranged in a circle on the turntable before cooking. They will cook more evenly if turned over halfway through cooking.
-
Always place vegetables like asparagus and broccoli with the stem ends pointing towards the edge of the dish and the tips toward the center.
- When cooking cut vegetables, always cover the dish with a lid or vented microwavable plastic wrap.
- Whole, unpeeled vegetables such as potatoes, sweet potatoes, squash, eggplant, etc., should have their skin pricked in several locations before cooking to prevent them from bursting.
- For more even cooking, stir or rearrange whole vegetables halfway through the cook time.
- Most of the time, the denser the food, the longer the required standing time. For example, a baked potato should stand for 5 minutes before serving, while a dish of peas may be served immediately.
Heating Liquid
Risk of scalding!
There is a possibility of delayed boiling when a liquid is heated. This means that the liquid reaches boiling temperature without the usual steam bubbles rising to the surface. Even if the container only moves a little, the hot liquid can suddenly boil over and spatter. When heating liquids, always place a nonmetallic spoon in the container. This will prevent delayed boiling.
natural_image
Glass with a black X symbol crossed out, indicating no text or symbols presentCooking seafood in your microwave
Be sure to place fish on a microwave-safe roasting rack in a microwave-safe dish. Be sure to always cook fish until it flakes easily with a fork. Use a tight cover to steam fish, a lighter cover of wax paper or paper towel provides less steaming. And be sure not to overcook fish; check it for doneness at a minimum cooking time before cooking longer.
| Seafood | Power level | Cook time | Directions |
| Fish steaks up to 1 12 lbs. | medium high (7) | 7–11 min. /lb. | Arrange fish on roasting rack with meaty portions towards the outside of the rack. Cover with wax paper. Turn over and rearrange halfway through cook time. Cook until fish flakes easily with fork. Let stand 3–5 mins. |
| Fish fillets up to 1 12 lbs. | medium high (7) | 7–11 min. /lb. | Arrange fillets in a baking dish, turning any thin pieces under. Cover with wax paper. If over 12 inch thick, turn over and rearrange halfway through cook time. Cook until fish flakes easily with fork. Let stand 2–3 mins. |
| Shrimp up to 1 12 lbs. | medium high (7) | 7–11 min. /lb. | Arrange shrimp in a baking dish without overlapping or layering. Cover with wax paper. Cook until firm and opaque, stirring 2 or 3 times. Let stand 5 mins. |
Cleaning and Maintenance
WARNING
Be sure the entire appliance has cooled, and grease has solidified before attempting to clean any part of the appliance.
Cleaning Guide
- For best performance and for safety reasons, keep the oven clean inside and outside. Take special care to keep the inner door panel and oven front frame free of food and grease build-up.
- Never use abrasive scouring powder or pads on the microwave. Wipe the microwave oven inside and out
with a soft cloth and warm (not hot) mild detergent solution. Then rinse and wipe completely dry.
- Wipe spatters immediately with a wet paper towel, especially after cooking greasy foods like chicken or bacon.
- Clean your microwave oven weekly or more often, if needed.
- Never operate the microwave oven without food in the oven cavity, unless pre-heating with Convection, Pizza, Frozen Foods, and Keep Warm mode; this can damage the magnetron tube or ceramic tray. You may wish to leave a cup of water standing inside the oven when it is not in use to prevent damage if the oven is accidentally turned on.
Part Recommendations
| Oven cavity | Keep the inside (cavity) of the oven clean. Food particles and spilled liquids can stick to the oven walls, causing the oven to work less efficiently.Wipe up spills immediately. Use a damp, clean cloth, and mild soap.DO NOTuse harsh detergents or abrasive cleaners.To help loosen baked-on food particles or liquids, heat 2 cups of water (squeeze one lemon into it if you wish to keep the oven smelling fresh) in a 4 cup measuring glass at High power for 5 minutes or until boiling. Let stand in oven cavity for 1 or 2 minutes.For baked-on grease spatters, wash with hot, soapy water, rinse and dry. |
| Wire rack | Wash with soapy water. Rinse thoroughly and dry, or gently rub with cleansing powder or soap-filled pads as directed. The wire rack can also be washed in the dishwasher. |
| Metal turntable tray | Remove the metal turntable tray from the oven when cleaning the oven cavity and tray.Wash the metal turntable tray in warm sudsy water or in the dishwasher. |
Ceramic tray Clean with warm, soapy water or in the dishwasher.
Door seal Wipe with damp cloth.
Part Recommendations
| Door glass | Wash with soap and water or glass cleaner. Apply Fantastik® or Formula 409® to a clean sponge or paper towel and wipe clean. Avoid using powder cleaning agents, steel wool pads, and oven cleaners.If steam accumulates inside or outside the oven door, wipe with a soft cloth. Steam can accumulate when operating the oven in high humidity and in no way indicates microwave |
| Painted surfaces | leakage.Clean with hot soapy water or apply Fantastik® or Formula 409® to a clean sponge or paper towel and wipe clean. Avoid using powder cleaning agents, steel wool pads, and oven cleaners. |
| Stainless steel surfaces/exterior surfaces | Always wipe or rub in the direction of the grain. Clean with a soapy sponge, then rinse and dry, or wipe with Fantastik® or Formula 409® spray on a paper towel. Protect and polish with Stainless Steel Magic® and a soft cloth. Remove water spots with a cloth dampened with white vinegar. |
| Plastic & Controls | When cool, clean with soapy water, rinse, and dry. |
| Printed areas (words & numbers) | Do not use abrasive cleaners or petroleum-based solvents. |
LIMITED WARRANTY
ONE YEAR LIMITED WARRANTY
Within the 48 contiguous United States, for one year from the date of purchase, when this appliance is operated and maintained according to instructions attached to or furnished with the product, warrantor will pay for factory-specified parts and repair labor to correct defects in materials or workmanship. Service must be provided by a designated service company. Outside the 48 states, all parts are warranted for one year from manufacturing defects. Plastic parts, shelves and cabinets are warranted to be manufactured to commercially acceptable standards and are not covered from damage during handling or breakage.
ITEMS WARRANTOR WILL NOT PAY FOR:
- Service calls to correct the installation of your appliance, to instruct you how to use your appliance, to replace or repair fuses or to correct wiring or plumbing.
- Service calls to repair or replace appliance light bulbs or broken shelves. Consumable parts (such as filters) are excluded from warranty coverage.
- Damage resulting from accident, alteration, misuse, abuse, fire, flood, acts of God, improper installation, installation not in accordance with electrical or plumbing codes, or use of products not approved by warrantor.
- Replacement parts or repair labor costs for units operated outside the United States.
- Repairs to parts or systems resulting from unauthorized modifications made to the appliance.
- The removal and reinstallation of your appliance if it is installed in an inaccessible location or is not installed in accordance with published installation instructions.
DISCLAIMER OF IMPLIED WARRANTIES; LIMITATION OF REMEDIES
CUSTOMER'S SOLE AND EXCLUSIVE REMEDY UNDER THIS LIMITED WARRANTY SHALL BE PRODUCT REPAIR AS PROVIDED HEREIN. IMPLIED WARRANTIES, INCLUDING WARRANTIES OF MERCHANTABILITY OR FITNESS FOR A PARTICULAR PURPOSE, ARE LIMITED TO ONE YEAR. WARRANTOR SHALL NOT BE LIABLE FOR INCIDENTAL OR CONSEQUENTIAL DAMAGES. SOME STATES DO NOT ALLOW THE EXCLUSION OR LIMITATION OF INCIDENTAL OR CONSEQUENTIAL DAMAGES, OR LIMITATIONS ON THE DURATION OF IMPLIED WARRANTIES OF MERCHANTABILITY OR FITNESS, SO THESE EXCLUSIONS OR LIMITATIONS MAY NOT APPLY TO YOU. THIS WARRANTY GIVES YOU SPECIFIC LEGAL RIGHTS AND YOU MAY ALSO HAVE OTHER RIGHTS, WHICH VARY FROM STATE TO STATE.

WARNING: This product can expose you to chemicals including Nickel (Metallic) which is known to the State of California to cause cancer.
For more information go to www.P65Warnings.ca.gov
Note: Nickel is a component in all stainless steel and some other metallic compositions.
Summit Appliance
Division of Felix Storch, Inc.
An ISO 9001:2015 registered company
770 Garrison Avenue
Bronx, NY 10474
www.summitappliance.com

For parts and accessory ordering, troubleshooting and helpful hints, visit: www.summitappliance.com/support
FOUR COMBINÉ ENCASTRÉ AVEC AIR CHAUD ET MICRO-ONDES GUIDE D'UTILISATION
MODELE : CMV115
natural_image
Diagram showing a circular vent with a lid on the left and an open oven interior (no text or symbols)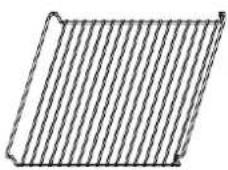
natural_image
Simple 3D diagram of a rectangular prism with diagonal hatching (no text or symbols)Plateau tournant
natural_image
Two glassware illustrations: one with a spoon inside, the other with a black X symbol (no text or symbols present)Division of Felix Storch, Inc.
An ISO 9001:2015 registered company
770 Garrison Avenue
Bronx, NY 10474
www.summitappliance.com

www.summitappliance.com/support

- BUILT-IN COMBINATION OVEN WITH HOT AIR AND MICROWAVE OPERATION MANUAL
- READ THESE INSTRUCTIONS CAREFULLY
- PRECAUTIONS TO AVOID POSSIBLE EXPOSURE TO EXCESSIVE MICROWAVE ENERGY
- IMPORTANT SAFETY INSTRUCTIONS
- IMPORTANT SAFETY INSTRUCTIONS WARNING
- READ CAREFULLY AND KEEP FOR FUTURE REFERENCE
- NOTE:
- Causes of damage
- Caution!
- Installation
- Installation dimensions
- Built-In Installation
- IMPORTANT INFORMATION
- CONNECT THE WIRES OF THE MAINS POWER CORD IN ACCORDANCE WITH THE FOLLOWING COLOR CODING:
- Your new appliance
- Control Panel
- Touch keys and display
- Parameter adjustment
- Cooling fan
- Notes
- Accessories
- Turntable
- Setting up
- Clock Settings
- Heating up the oven
- Cleaning the accessories
- Oven Settings
- Convection Mode Setting
- Opening the oven door during operation
- Cancelling operation
- Rapid Preheating
- Cancelling rapid preheating
- The Microwave
- Notes regarding ovenware
- SUITABLE OVENWARE
- UNSUITABLE OVENWARE
- OVENWARE TEST
- Microwave power settings
- Setting the microwave
- Express cooking
- Change power level
- Speedy microwave cooking
- The cooking time has elapsed.
- Multi-stage cooking
- Automatic Programs
- Setting a program
- Opening appliance door during operation
- Cancel operation
- Defrosting programs
- NOTES:
- - Ovenware
- - Resting time
- Popcorn
- CAUTION
- Setting Popcorn mode
- Beverage
- Setting Beverage mode
- Frozen Foods
- Frozen Foods Setting
- Pizza
- Pizza tips
- Setting Pizza mode for fresh or frozen pizza
- Setting Pizza mode for microwave pizza
- Sensor cooking
- NOTE: Do not open the door during the sensing process, or the program will be canceled.
- Sensor Reheat
- Setting Sensor Reheat
- Sensor Cook
- Setting Sensor Cook
- Note: Do not open the door during the sensing process, or the program will be cancelled.
- Broil
- Setting Broil mode
- Clock and Timer Settings
- Setting the cooking time
- Setting the clock
- Changing the clock
- Childproof Lock
- Switching on the childproof lock
- Switching off the childproof lock
- Childproof lock with other cooking operations
- Care and cleaning
- Cleaning agents
- Troubleshooting
- Acrylamide in foodstuffs
- Tips on Saving Energy
- Energy Saving
- Expert Cooking Guide
- Convection Broil
- Convection
- Cooking eggs in your microwave
- Cooking vegetables in your microwave
- Heating Liquid
- Risk of scalding!
- Cooking seafood in your microwave
- Cleaning and Maintenance
- WARNING
- Cleaning Guide
- LIMITED WARRANTY
- ONE YEAR LIMITED WARRANTY
- ITEMS WARRANTOR WILL NOT PAY FOR:
- DISCLAIMER OF IMPLIED WARRANTIES; LIMITATION OF REMEDIES
- FOUR COMBINÉ ENCASTRÉ AVEC AIR CHAUD ET MICRO-ONDES GUIDE D'UTILISATION
- Plateau tournant
Brand : Summit
Model : CMV115
Category : Oven