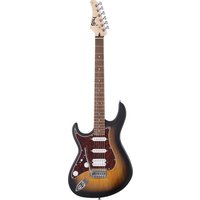
G110 - Guitar Cort - Free user manual and instructions
Find the device manual for free G110 Cort in PDF.


User questions about G110 Cort
0 question about this device. Answer the ones you know or ask your own.
Ask a new question about this device
Download the instructions for your Guitar in PDF format for free! Find your manual G110 - Cort and take your electronic device back in hand. On this page are published all the documents necessary for the use of your device. G110 by Cort.
USER MANUAL G110 Cort
natural_image
Close-up of a black electric guitar with visible fretboard and grille (no text or symbols)Instruction Manual
Page Index
ENGLISH 3 \~ 6
ESPAÑOL 7 \~ 10
DEUTSCH 11 \~ 14
FRANÇ AIS 15 \~ 18
ITALIANO 19 \~ 22
РУССКИЙ 23 \~ 26
中文 27 \~ 30
한국어 31 \~ 34
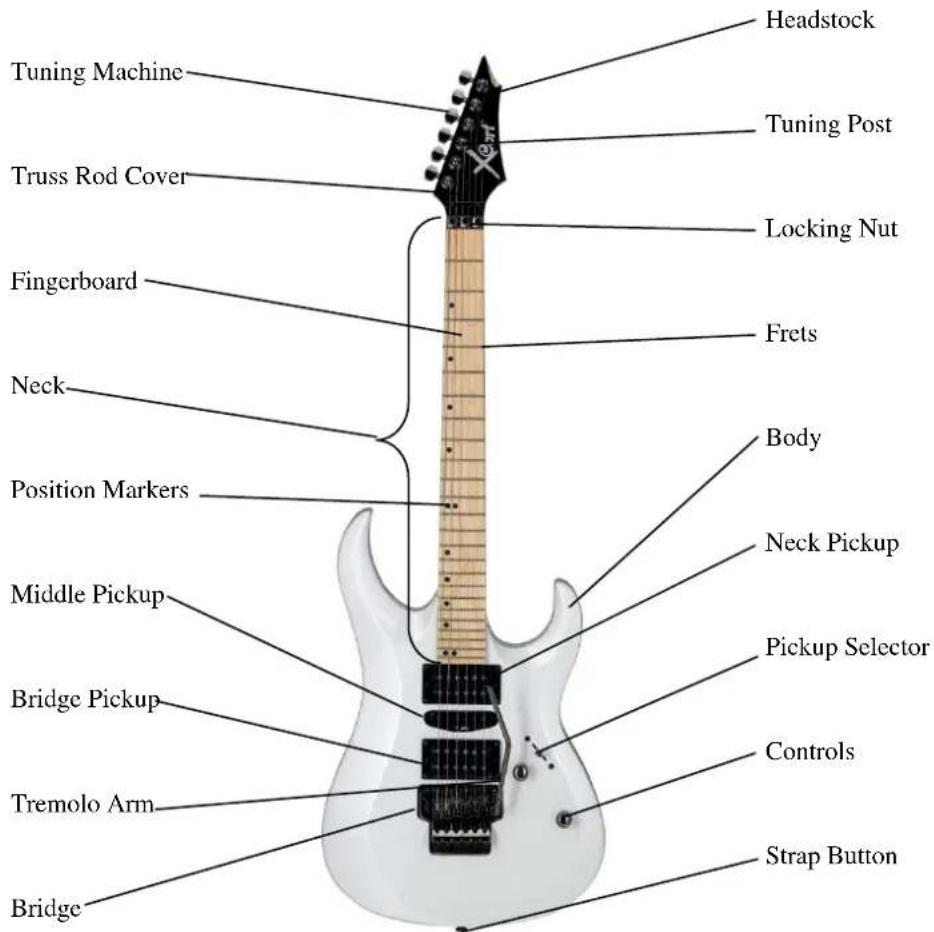
Parts of Your Electric Guitar
text_image
Headstock Tuning Machine Tuning Post Truss Rod Cover Locking Nut Fingerboard Frets Neck Position Markers Body Neck Pickup Pickup Selector Middle Pickup Bridge Pickup Controls Tremolo Arm Strap Button BridgeThe above illustrations show typical models in the Cort guitar line. The model you purchased may be slightly different from that shown in the illustration. For more information about the specific Cort model you have, please consult your dealer or visit the Cort website at www.cortguitars.com
Protect your guitar and become a part of the Cort family by registering your guitar today. For over 50 years, Cort has built the finest guitars and basses, representing quality and value that is unparalleled in our industry. Our mission is to exceed our customers' expectations by utilizing cutting edge designs, hand selected materials and state of the art technology. Each Cort employee approaches his or her job with a sense of pride allowing us to work as one extended family working towards one common goal: to endeavor to bring customers the finest quality instruments possible. Please visit www.cortguitars.com today and click the 'Registration' button and welcome to the family.
www.cortguitars.com
Truss Rod
Adjusting the Truss Rod
In order to keep your guitar playing and performing at its best, periodic adjustments to the guitar's truss rod will be required. Adjusting the truss rod is the first step when setting up an instrument to play properly. You should always do the truss rod adjustment before setting string height and/or intonation. To adjust the truss rod, first locate the truss rod access at the end of the headstock or at the end of neck where it meets the body. If it is located at the headstock, you may need to first remove the truss rod cover before making any adjustments. If it is located at the body, you will need to remove the pickguard to make any adjustments. Be sure to use the proper tool to make the adjustments. Depending on the model of the guitar you have, you will need an allen wrench, socket/nut driver or screw driver.
Checking neck bow
First, tune your guitar to pitch. With your fretting hand, hold down the low 'E' string at the first fret. If you have a capo, it will be easier to clamp the capo at the first fret instead of using your fretting hand. Now with your picking hand thumb, fret the same string at the area where the neck joints the body (around 16 ^th fret). While holding both positions on the string, reach with your first finger of your picking hand to the 7 ^th fret and tap the string down to the frets. The amount of distance that the string is travelling, from the bottom of the string to the top of the fret, is the amount of relief that is in the neck. It is desirable to have some amount of relief and factory specs for your Cort Guitar range between .3mm - .5mm (.010" - .020").

natural_image
Close-up of a wooden pipe with black and brown bands, showing a circular feature and two arrows pointing to the top edge (no text or symbols)Making adjustments
If the relief is more than what you prefer your neck has an up bow

natural_image
Black and white abstract image with faint white dots on a dark background (no text or symbols)To correct this, tighten the truss rod by turning clockwise. Be careful not to turn too much. A quarter to a half turn should be enough to fix the problem. If it is hard to turn or you hear squeaking when you turn, stop immediately and consult a professional. If you continue, you risk damaging the guitar.
If the relief is less than what you prefer, your neck has a back bow.

natural_image
Dark abstract image with scattered white dots, no visible text or symbolsTo correct this, loosen the
truss rod by turning it counterclockwise. Again, be careful not to turn too much. A quarter to a half turn should be enough to fix the problem. If it is hard to turn or you hear squeaking when you turn, stop immediately and consult a professional. If you continue, you risk damaging the guitar.
String Height
Setting String Height
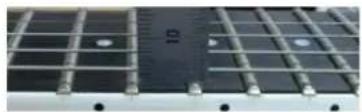
Only after you have adjusted your truss rod, will you be able to properly adjust your string height or action. To measure the height of your strings, either install a capo at the first fret or use your fretting hand to fret the first fret of each string as you work on it. With the string fretted at the first fret with your finger or capo, measure the distance between the bottom of the string and the top of the 17 ^th fret. Because each sting is different in size, you will need to measure and adjust each string individually. The recommended setting for all Cort electric guitars is:
Strings 1 - 4 : 5/64"(2mm) +/- 1/64"(.4mm)
Strings 5 - 6 : 3/32"(2.4mm) +/- 1/64"(.4mm)
natural_image
Close-up of a solar panel with visible grid lines and mounting holes (no text or symbols)These dimensions are the recommended settings from the Cort factory. The optimum string height or action varies from player to player due to differences in technique, playing styles, string gauges, etc.
Setting Intonation
In order to properly set the intonation of your guitar, we want the string to play the same note at the 12^th fret as it does when played open, only an octave higher. Tune your open strings to pitch. Starting with the first string (high 'E'), fret the string at the 12^th fret. If the note is sharp, move the individual saddle back, away from the fingerboard. If the note is flat, move the saddle forward, closer to the fingerboard. Repeat this process for each individual string until each string is properly intonated. Note that this step can only be done after your string height has been adjusted as the height of the string will greatly affect the intonation when playing your guitar.
Changing Strings
We recommend that you change one string at a time. Removing all strings at once can have a dramatic effect on the tension of the neck. Plus, if your guitar is equipped with a floating tremolo bridge system, removing all of the strings at the same time will make it difficult to tune the guitar back to pitch. When you remove the old string from the guitar, make note of how the string is installed through the bridge. Some guitars have strings that feed through the body, others through a tail piece and some directly through the bridge itself. Once the old string is removed, take the time to clean the exposed parts of your guitar before installing the new string. Thread the new string through the bridge pulling the string toward the headstock so that the ball of the string sits firmly in place. Thread the string through the tuning post leaving enough string to wrap tightly around the post. For wound strings, you want to have two or three wraps around the post. For plain strings, three or four windings will do. The best way to measure this is to pull the string through the post and measure one or two posts beyond it. There are many variations on how to wind the string around the post but most importantly, make sure that the windings are turned to the inside of the headstock, wound tight and neatly stacked up the post. Please note that changing string gauges will drastically change your relief, bow, string height and intonation requiring you to repeat the initial steps to insure your guitar plays properly.
Special Instructions for Floyd Rose Style Bridges
When changing strings on a FR style bridge, special care must be taken to insure best results. It is very important that you only change one string at a time.
- On the headstock, first unlock the three clamps at the nut.
- Set each of the fine tuners on the bridge to their middle position.
- Loosen the first string by detuning it at the tuning machine.
- Unclamp the string at the saddle by unscrewing the bolt locking the block in place. Do not remove the bolt out entirely. All you need to do is loosen it enough to remove the string.
- Cut the ball end off the new string and firmly insert the cut end into the saddle.
- Lock the block and bolt back into place.
- Thread the other end of the string underneath the nut clamp, under the string hold down bar and then through the tuning post.
- Tune the string.
- Repeat steps 3 through 8 for each individual string.
- Retune the guitar.
- Lock down the three nut clamps at the headstock.
- Retune by making adjustments with the fine tuners on the bridge.
Maintenance
To ensure that your Cort guitar last a long time and performs at its best, take the time to wipe sweat and oil off the strings, frets, bridge saddles and nut. Dirty strings cause a loss of tone, performance, sustain, intonation and tuning stability.
Your Cort guitar is made of different woods that are sensitive to temperature and humidity sensitive. Take great care not to expose your instrument to extreme temperatures or humidity as it could be damaging to the instrument.
natural_image
Close-up of a wooden pipe with black and brown bands, showing two downward arrows indicating measurement or damage points (no text or symbols present)Realizar ajustes
natural_image
Black and white abstract image with faint white dots on a dark background (no text or symbols)natural_image
Black and white abstract image with faint white dots on dark background (no text or symbols)natural_image
Close-up of a solar panel with grid lines and mounting holes (no text or symbols visible)natural_image
Close-up of a wooden pipe with black and brown bands, showing two arrows pointing to the ends (no text or symbols)Einstellung
natural_image
Black and white abstract image with faint white dots on a dark background, no text or symbols visible.natural_image
Black and white abstract image with faint white dots on a dark horizontal band (no text or symbols)natural_image
Close-up of a solar panel with grid lines and mounting holes (no visible text or symbols)text_image
0.5mm (0.010" - 0.020")natural_image
Black and white abstract image with faint white dots on a dark horizontal band (no text or symbols)natural_image
Black and white abstract image with faint white dots on a dark background (no text or symbols)natural_image
Close-up of a solar panel with grid lines and mounting holes (no text or symbols visible)natural_image
Close-up of a wooden guitar blade with black and brown bands, showing no text or symbolsnatural_image
Black and white abstract image with faint white dots on a dark background, no text or symbols visiblenatural_image
Dark abstract image with scattered white dots, no visible text or symbolsnatural_image
Close-up of a solar panel with visible grid lines and mounting holes (no text or symbols)natural_image
Close-up of a wooden violin with black ridges and two arrows pointing to the ends (no text or symbols)Настройка
natural_image
Black and white abstract image with faint white dots on a dark horizontal band (no text or symbols)natural_image
Black and white abstract image with faint white dots on dark background (no text or symbols)natural_image
Close-up of a solar panel with grid lines and mounting holes (no visible text or symbols)natural_image
Close-up of a wooden pipe with black and brown bands, showing bolt holes and two arrows pointing to the ends (no text or symbols)不良状况的校正
natural_image
Black and white abstract image with faint curved lines and scattered bright spots (no text or symbols)natural_image
Dark abstract image with faint white dots, no visible text or symbolsnatural_image
Close-up of a solar panel with visible grid lines and mounting holes (no text or symbols)text_image
Headstock Tuning Machine Tuning Post Truss Rod Cover Locking Nut Fingerboard Frets Neck Position Markers Body Neck Pickup Middle Pickup Pickup Selector Bridge Pickup Controls Tremolo Arm Strap Button Bridgenatural_image
Close-up of a wooden pipe with black and brown bands, showing two downward arrows indicating pressure or force (no text or symbols)트러스로드 조정
natural_image
Black and white abstract image with faint curved lines and scattered white dots (no text or symbols)넥과 줄 사이가