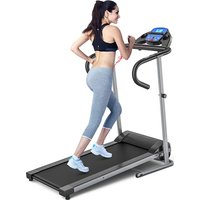
SP35368 - Treadmills COSTWAY - Free user manual and instructions
Find the device manual for free SP35368 COSTWAY in PDF.


| Product type | Electric treadmill |
| Brand and model | Costway SP35368 |
| Usage | Home use |
| Maximum user weight | 120 kg |
| Speed range | 0.8 to 6 mph (approx. 1.3 to 9.7 km/h) |
| Display | Backlit LCD |
| Display functions | Time, speed, distance, calories, heart rate (hand grips) |
| Training programs | 12 automatic programs (P1-P12) + manual mode |
| Preset modes | Target time (5:00-99:00 min), target distance (0.50-99.5 km) |
| Safety | Emergency stop switch with magnetic key |
| Auto standby | After 10 minutes of inactivity |
| Auto stop | Program countdown or when key is removed |
| Assembly required | Yes – tool included |
| Lubrication | Recommended with silicone spray on the deck |
| Cleaning | Belt: mild soap and water; deck: furniture polish |
| Power supply | Standard wall outlet |
| Dimensions | Not specified (foldable model not confirmed) |
| Repairability | Spare parts available via after-sales service |
Frequently Asked Questions - SP35368 COSTWAY
User questions about SP35368 COSTWAY
0 question about this device. Answer the ones you know or ask your own.
Ask a new question about this device
Download the instructions for your Treadmills in PDF format for free! Find your manual SP35368 - COSTWAY and take your electronic device back in hand. On this page are published all the documents necessary for the use of your device. SP35368 by COSTWAY.
USER MANUAL SP35368 COSTWAY
natural_image
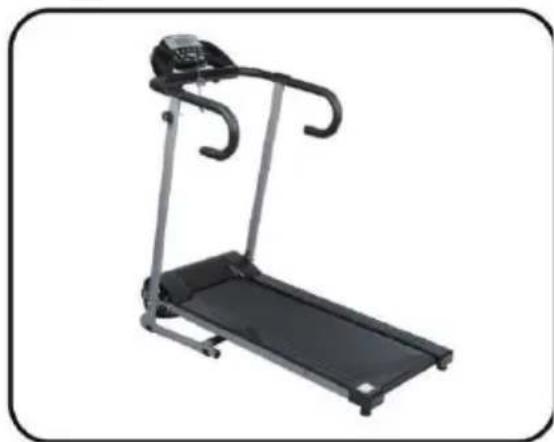
Black treadmill with adjustable arms and control panel, isolated on white background (no text or symbols visible)USER'S MANUAL/MANUEL DE L'UTILISATEUR
SP35368
MOTORIZED TREADMILL /Tapis de Course Pliable
Parts Assembly
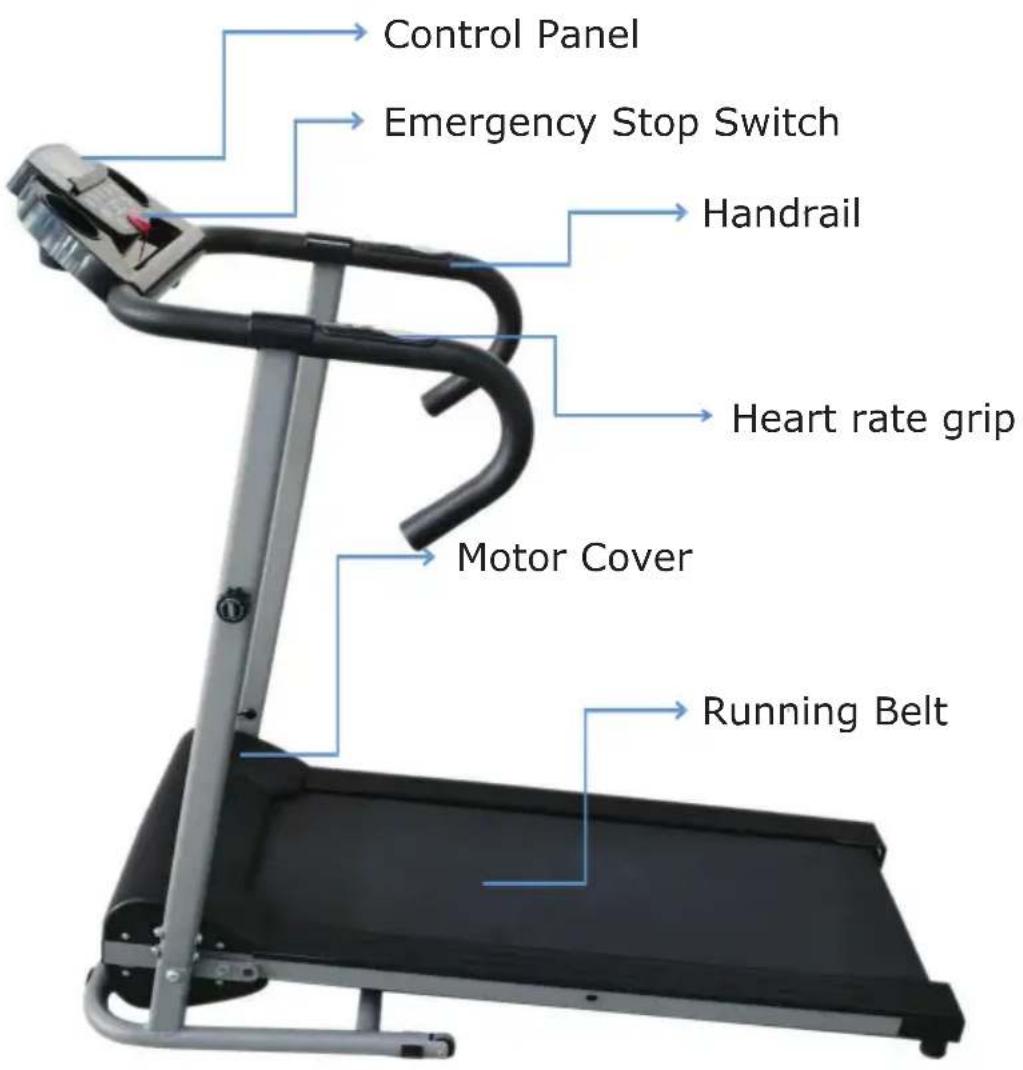
CHART OF PRODUCT
IMPORTANT SAFETY INFORMATION
Please keep this manual in a safe place for easy reference.
- It is important to read this entire instruction before assembling and using the equipment. Safe and effective use can only be achieved if the equipment is assembled, maintained and used properly. It is your responsibility to ensure that all users of the equipment are informed of all warnings and precautions.
- Before starting any exercise program, you should consult your doctor to determine if you have any medical conditions that could put your health and safety at risk, or prevent you from using the equipment properly. Your doctor's advice is essential if you are taking medicine that affects your hear rate, blood pressure or cholesterol level.
- Be ware of your body's signals, incorrect or excessive exercise can damage your health. Stop exercising if you experience any of the following symptoms: pain, tightness in your chest, irregular heartbeat, extreme shortness of breath, light headache, dizziness, or feeling of nausea. If you do experience any of these conditions, you should consult your doctor before continuing with your exercise program.
- Keep children and pets away from the equipment. The equipment is designed for adult use only.
- Use the equipment on a solid, flat level surface with a protective cover for your floor, or carpet. To ensure safety, the equipment should have at least 0.5 m/1.65 ft of free space all around it.
- Before using the equipment, check that the nuts and bolts are securely tightened.
-
The safety of the equipment, can only be maintained if it is regularly examined for damage and/or wear and tear.
-
Always using the equipment as indicated. If you find any defective components while assembling or checking the equipment. Or if you hear any unusual noise coming from the equipment during use, stop immediately. Don't use the equipment until the problem has been rectified.
-
Wear suitable clothing while using the equipment. Avoid wearing loose clothing that may get caught in the equipment or that may restrict or prevent movement.
-
The equipment is only for home use only. Max user weight is 120 kg/265 lbs only. Braking ability is independent of speed.
-
The equipment is not suitable for therapeutic use.
-
Please take care when lifting or moving the equipment so as not to injure your back. Always use proper lifting techniques and/or seek assistance if necessary.
Assembling Instructions
STEP 1
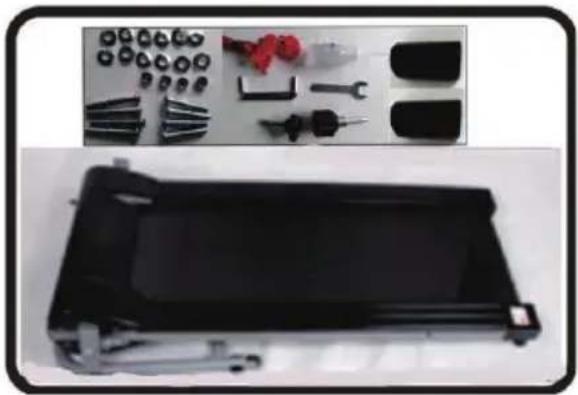
Open the carton, please confirm the product accessories are complete.
Accessories details:
-
Handrail decorative covers 2pcs
-
Lock screw M8X60 4pcs
3 Lock screw M8X50 4pcs
-
Multi-purpose wrench 1pc
-
Lock nut M10X25 1pc
-
Spring locking pin 1pc
-
Magnet safety switch 1pc
7.5 # Allen key 1pc
natural_image
Disassembled mechanical parts including screws, pliers, and a black plastic enclosure (no text or symbols visible)STEP 2
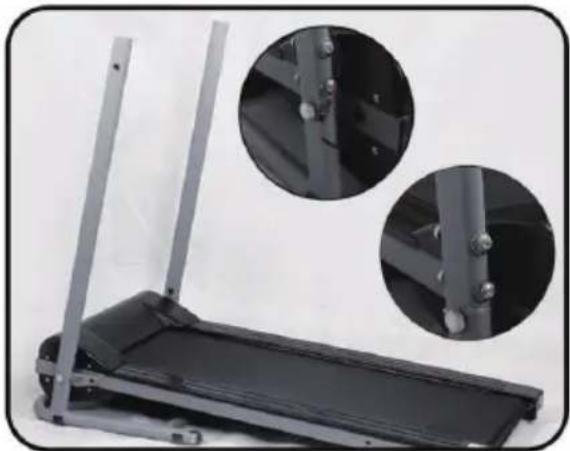
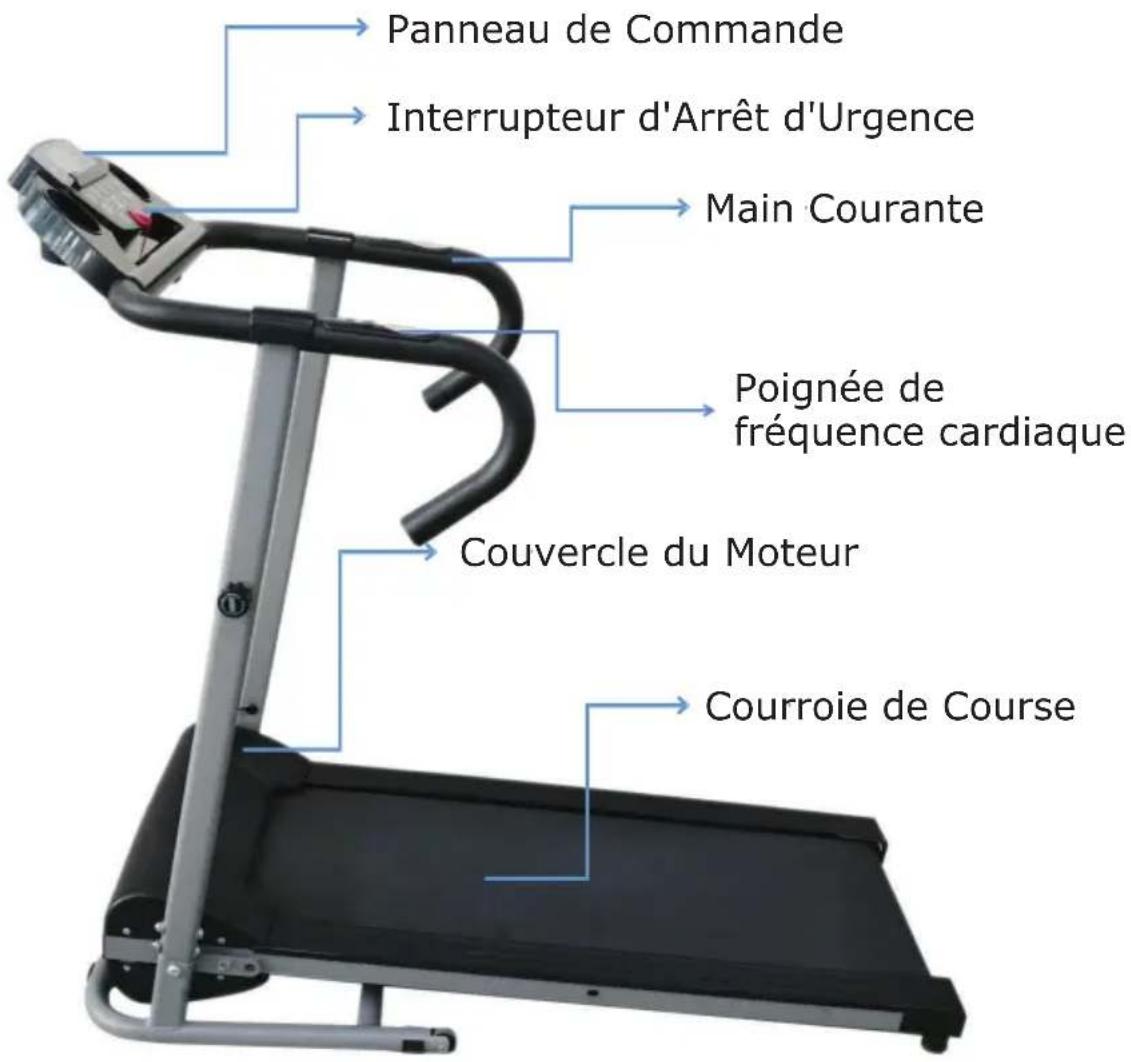
Connect the signal line, insert the pillar with the signal line inside into the right side base, and insert another pillar into the left side base.
Then use M8X60 screw locking.
natural_image
Close-up of a black treadmill with metal frame and two circular inset views showing mechanical components (no text or symbols visible)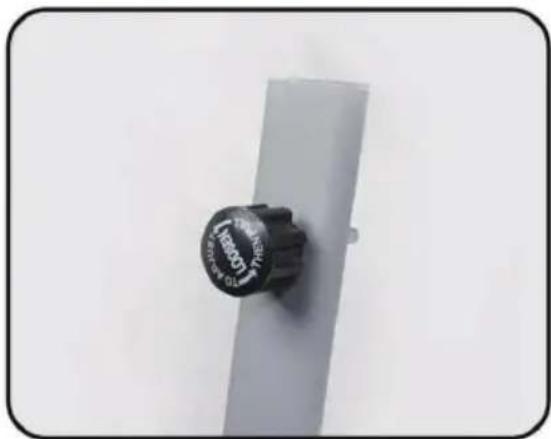
natural_image
Close-up of a black industrial knob labeled 'LENSON TO CHINE' on a white surface (no additional text or symbols visible)STEP 3
Screw into the spring pin.

natural_image
Close-up of a hand adjusting a mechanical component with a black tool (no visible text or symbols)STEP 4
Use M10X25 lock screw fix the handle frame on the base.
STEP 5
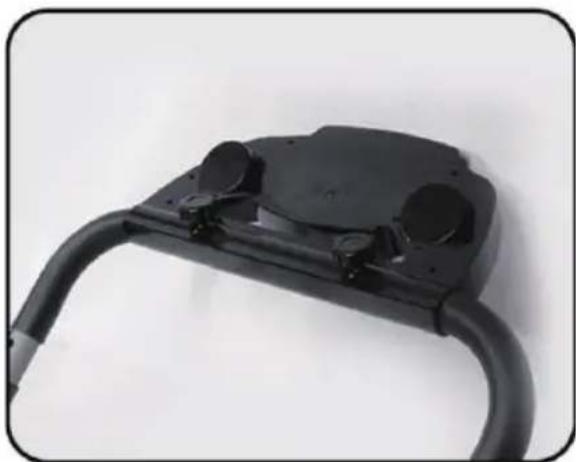
Adjust Control panel location, screw-in M 6X40 lock screw.
natural_image
Close-up of a black automotive electrical plug with attached cable (no text or symbols visible)STEP 6
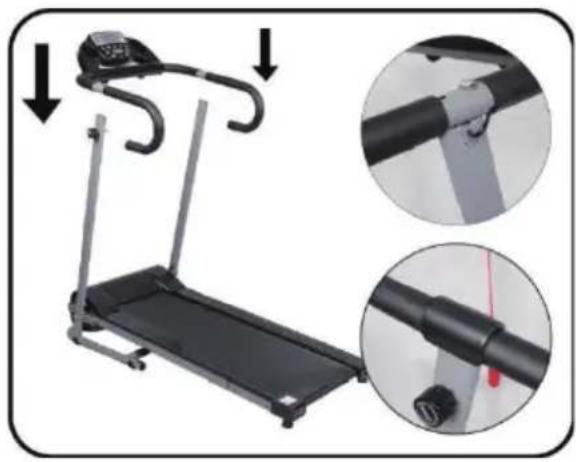
Put the handrails on the 2 columns, with four M8X50 screw fixed respectively, and put on a handrail decorative cover on the top of screws on each handle. Then insert the plug of signal lines into the socket.
natural_image
Treadmill with mechanical arms and a close-up inset showing hand positioning and cable insertion (no text or symbols)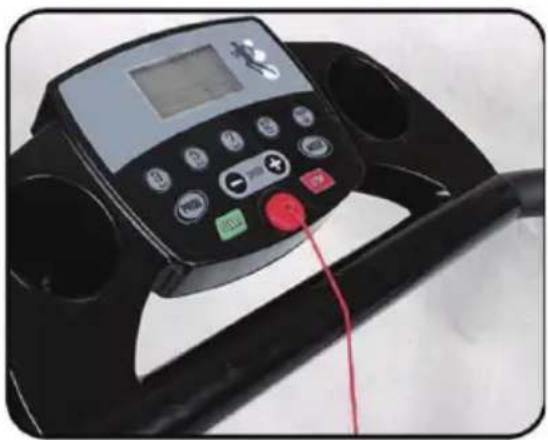
natural_image
Close-up of a black treadmill with a digital display and red control buttons (no visible text or symbols)STEP 7
Put the security magnetic safety switch into panel yellow area.
natural_image
Black treadmill with adjustable arm and headplate, shown in a simple view (no text or symbols visible)STEP 8
Finish the assembly.
FOLDING FOR STORAGE
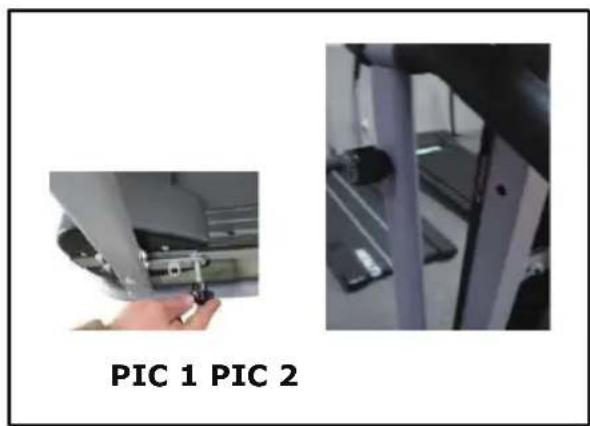
Please following the PIC 1, screw out the big screw that used to fix the base and handrail.
According to PIC2, gently pull the "Spring Screws" which was fixed on the handrail pole, and then release "Spring Screws".
Belt Adjustment
Your treadmill belt has been adjusted at the factory, but each user has a tendency to be "Right" or "Left" footed. If the belt moves to either side, it needs to be adjusted.
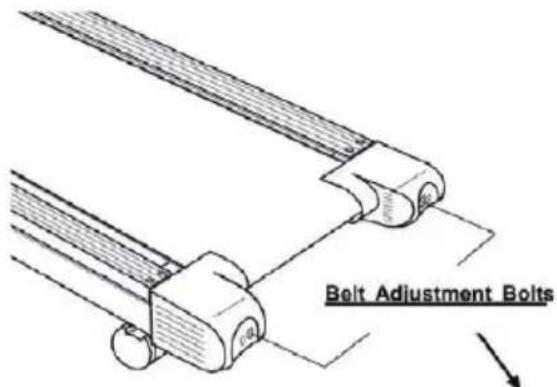
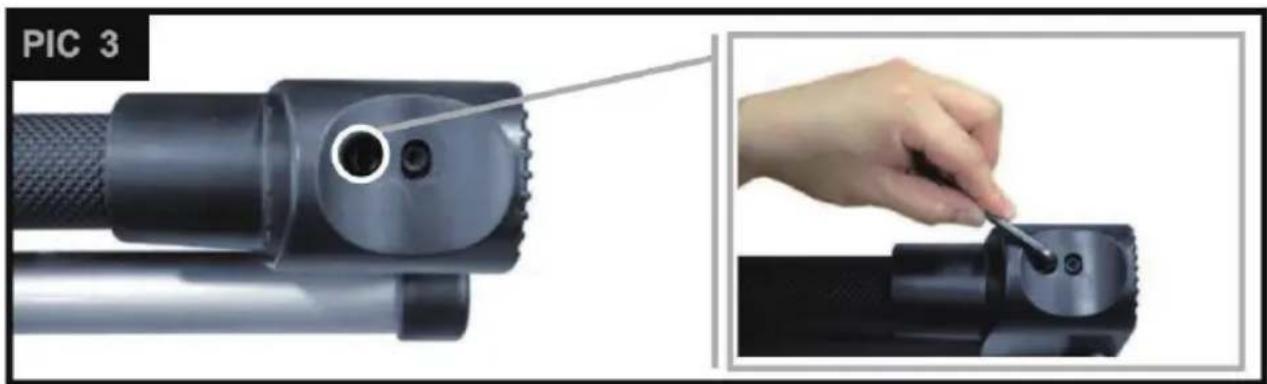
There are two adjustment bolts at the rear of the unit (see PIC.3) Tighten by half a turn the bolt on the side towards which the belt has shifted and correspondingly loosen the bolt on the other side. Rotate the belt smoothly to ensure that it is correctly centered-if not, repeat the adjustment.
natural_image
Close-up of a precision tool tip and its application in a mechanical assembly (no text or symbols visible)Maintenance
The belt may be cleaned by a mild soap and water. Be sure to remove any excess water after cleaning.
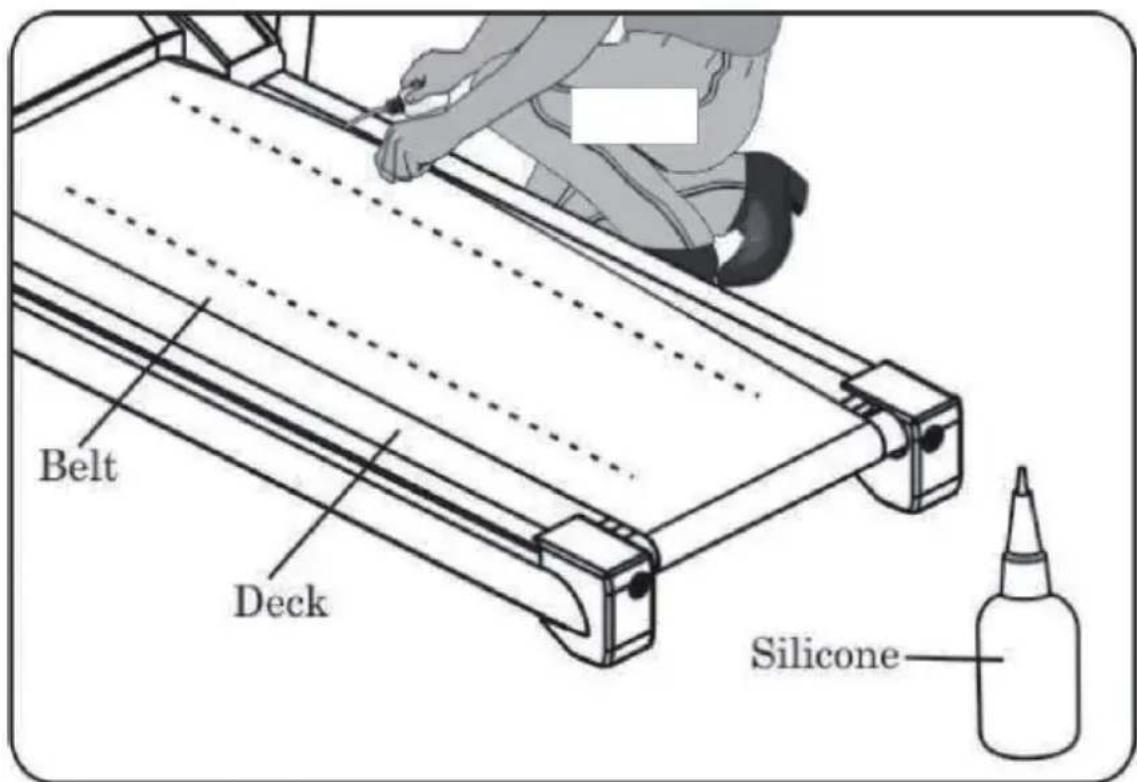
Clean the running board under the belt periodically with a household furniture polish. After cleaning, a small amount of silicone spray (available from motor shops) should be placed on the surface of the running board to allow the belt to slide more easily.
TO LUBRICATE THE DECK
ATTENTION! To reduce the risk of electrical shock, always remove the cable from the socket immediately after use and before cleaning.
1 - Raise the belt from the edge of one of the sides and clean the deck and belt by wiping a dry cloth over the deck and in internal surface of the belt. Move the belt backwards with the foot to clean the belt along its full length. Repeat on the other side of the belt.
2 - Place the vial between the belt and the board and hold the vial inclined.
3 - Apply a trickle of silicone from the front to the back of the treadmill on each side. Try to reach the center of the deck.
4 - Spread the silicone by running the treadmill at 1km/h(0.6 mph) and step delicately on the treadmill for some minutes to enable the silicone to spread on the belt.
CONTROL PANEL
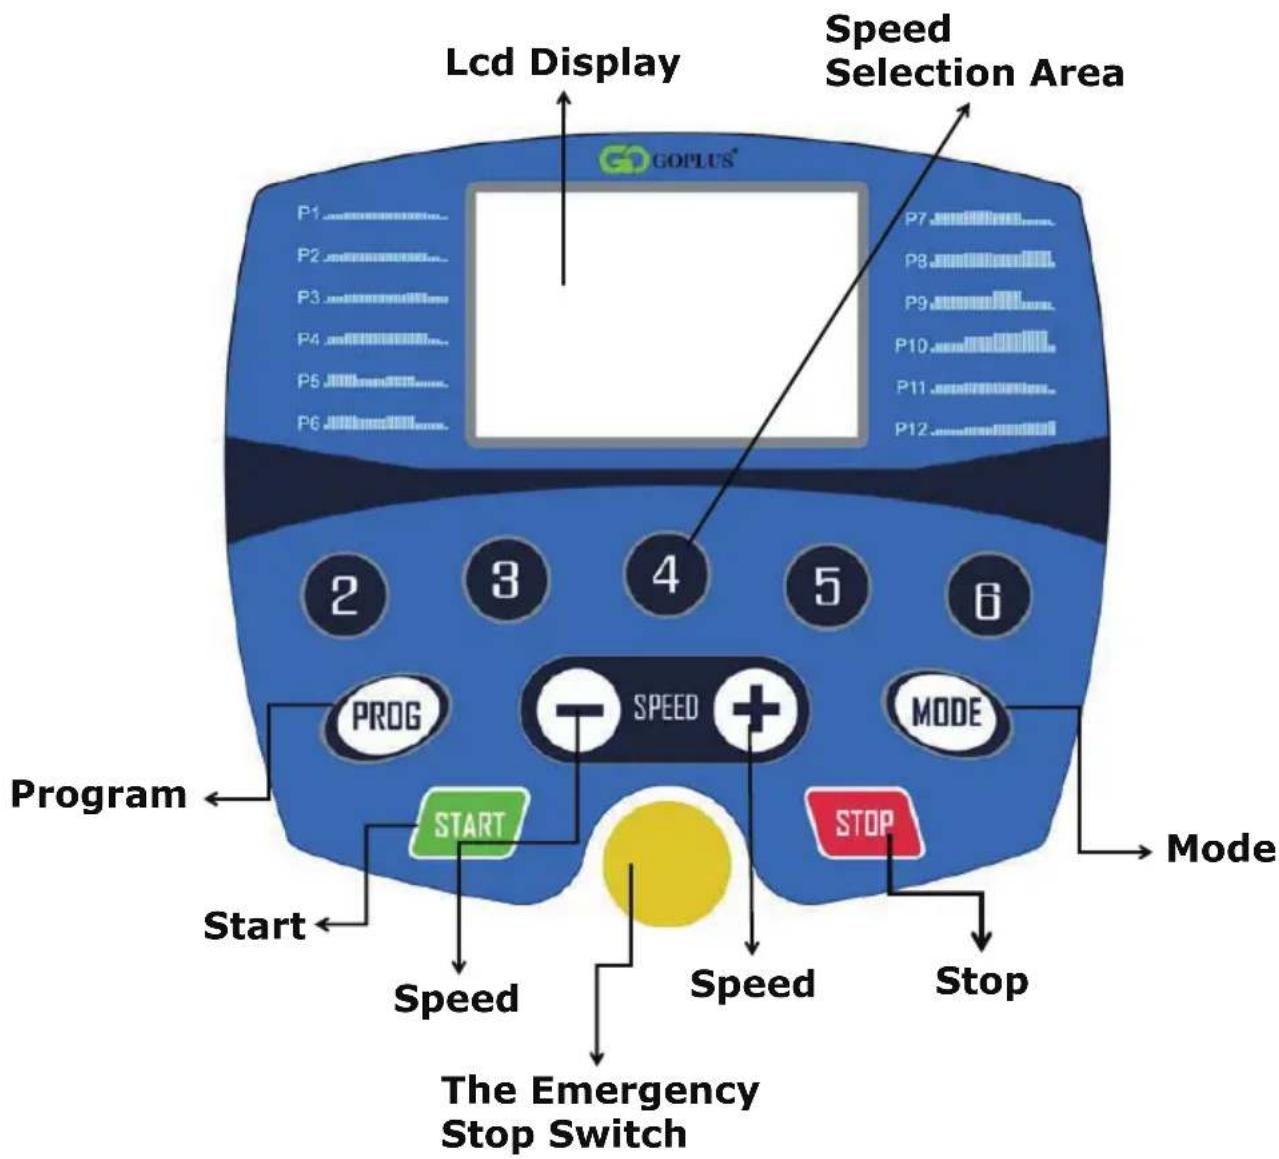
Function Instruction
-
Insert the plug, put the safety key into the control panel, open the power switch, full screen displays for 1 second after the beep sound to enter standby mode.
-
In the manual standby mode initially: SPEED displays 0.0 ; TIME displays 0:00; CAL displays 1; DIST displays 0.0; CAL displays 0;
-
In the manual standby mode, press the MODE key, you can respectively select the mode: normal, preset time or preset distance. If you choose count up timer, it will display ":" flash display; and count down, display the static status.
A. According to the normal, the time and distance are both count up, when the time to 60 minutes, it will stop.
B. According to the preset time, the original time is 30:00, and the speed can be adjusted from 5:00---99:00, and the time will count down until 0, the machine will stop.
C. According to the preset distance, the original distance is 1.00, you can adjust the speed from 0.50-1.00-1.50---99.5, each additional distance is 0.5km/0.3mile, DIST will count down until 0.
-
In the standby mode, click the program key, its P1-P12 auto program for choice, the time will show by count down, original time is 30:00, you can adjust the time from 5:00-- -99:00 by speed +/- key.
-
In the standby mode, all of shortcut key are useless, if click the stop key, all will come back to manual standby status.
-
When running all mode, it must be have 3 seconds count down (speed display), and buzz 3 seconds. In this mode, the mode key and program key are invalid.
-
In manual operation mode, you can adjust the speed from 0.8-6 miles. The original is 1.0, you also can choose speed (2, 3, 4, 5, 6 miles by the speed shortcut key.
-
In automatic mode; the speed button “+/-” and the speed shortcut key are also effective, and all auto-mode is 20 sequence shot. The details of automatic mode are as addendum.
-
In automatic mode, the machine will buzz 3 seconds earlier to prompt the user.
-
In the running status, press the "stop" key, the motor will reduce the speed until stop, and the mode into manual standby, every motion parameter keep remain show so that the user watch conveniently.
- When the safety key / Device left the control panel, the window shows “-”, others will not be shown.
- In standby mode or protected mode, no-operation continuously 10 minutes, the machine will turn off the display to sleep mode.
In sleep mode, press any key (protection switch must be closed) or to detect the heartbeat, the machine into standby immediately shows the initial.

CE
Exercise Computer
Function Button
Mode Press to select functions preset, or hold on can be total reset for all function values.
Functions
Scan Automatically scan through each model in sequence for every 5 seconds
Time Accumulates total working time up to 30:00.
Speed Accumulates current speed.
Distance Accumulates current working distance up to 99.99 miles
Calorie Accumulates calories consumption during exercise. Max value is 9999 Cal. (This data is a rough guide for comparison of different exercise sessions which cannot be used in medical treatment)
Note:
- Without any of signal for 4 minutes, the LCD display will shut off automatically.
- Turn on the monitor by pressing the button.
- Stop exercise to press model for selecting each function.
Troubleshooting
Computer not working correctly
If your computer is not working correctly, please check whether the computer sensor wire is plugged into the computer. If you have checked the above and the computer is still not working, then please make sure the Magnetic Switch is still working and that they are installed correctly in the computer.
Technical Specification
Production Name: Motorized Treadmill
Rated Voltage: 120V
Frequency: 60 Hz
Rated Power: 1100W
INSTRUCTION
TABLEAU DE PRODUIT
natural_image
Exterior view of a black plastic enclosure with various tools and components laid out on top (no visible text or symbols)ÉTAPE 2
natural_image
Treadmill with metal frame and two circular inset views showing mechanical components (no text or symbols)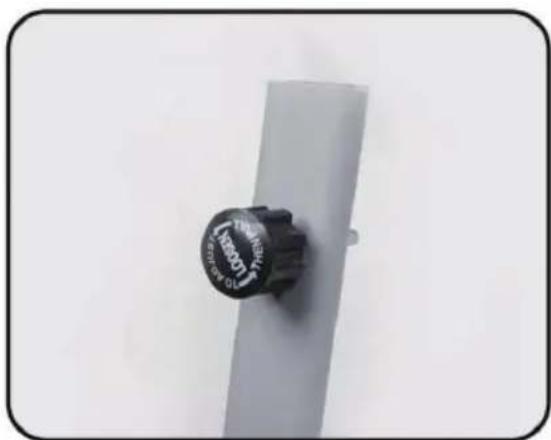
natural_image
Close-up of a black industrial rotary knob on a white surface (no visible text or symbols)ÉTAPE 3
natural_image
Close-up of a hand adjusting a mechanical component with a black tool (no visible text or symbols)ÉTAPE 4
natural_image
Close-up of a black electric vehicle charging plug with attached cable (no text or symbols visible)ÉTAPE 6
natural_image
Treadmill with mechanical arms and a close-up inset showing internal components (no text or symbols)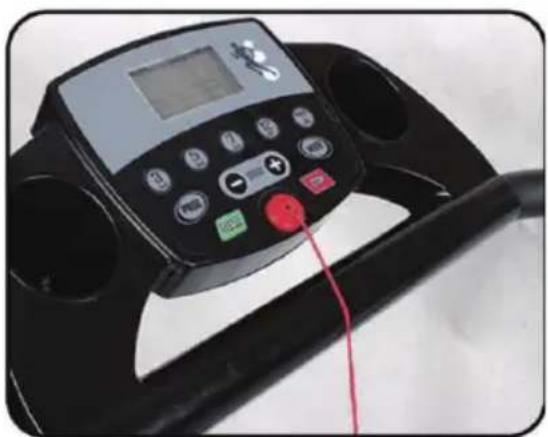
natural_image
Close-up of a black treadmill with a digital display and red control buttons (no visible text or symbols)ÉTAPE 7
natural_image
Black treadmill with adjustable arms and a head-mounted sensor (no visible text or symbols)ÉTAPE 8
natural_image
Two-panel image showing a hand inserting a component into a device, labeled Figure 1 and Figure 2 (no text or symbols on the devices themselves)RÉGLAGE DE LA COURROIE
natural_image
Close-up of a mechanical component with a hand adjusting a screwdriver tip, labeled as Figure 3 (no text or symbols on the diagram itself)Maintenance
With your inspiring rating, COSTWAY will be more consistent to offer you EASY SHOPPING EXPERIENCE, GOOD PRODUCTS and EFFICIENT SERVICE!
DE
AU office: Truganina
DE office: Hamburg
FR office: Saint Vigor d'Ymonville
PL office: Gdańsk

- USER'S MANUAL/MANUEL DE L'UTILISATEUR
- Parts Assembly
- CHART OF PRODUCT
- IMPORTANT SAFETY INFORMATION
- Assembling Instructions
- STEP 1
- STEP 2
- STEP 3
- STEP 4
- STEP 5
- STEP 6
- STEP 7
- STEP 8
- FOLDING FOR STORAGE
- Belt Adjustment
- Maintenance
- TO LUBRICATE THE DECK
- CONTROL PANEL
- Function Instruction
- CE
- Exercise Computer
- Function Button
- Functions
- Note:
- Troubleshooting
- Technical Specification
- INSTRUCTION
- TABLEAU DE PRODUIT
- ÉTAPE 2
- ÉTAPE 3
- ÉTAPE 4
- ÉTAPE 6
- ÉTAPE 7
- ÉTAPE 8
- RÉGLAGE DE LA COURROIE
- DE
Brand : COSTWAY
Model : SP35368
Category : Treadmills