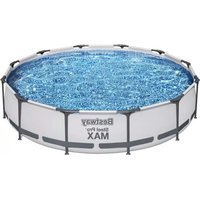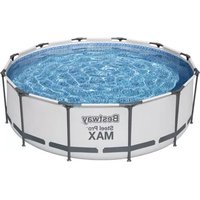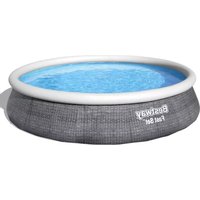
Fast Set 57376 - Above ground pool BESTWAY - Free user manual and instructions
Find the device manual for free Fast Set 57376 BESTWAY in PDF.


User questions about Fast Set 57376 BESTWAY
0 question about this device. Answer the ones you know or ask your own.
Ask a new question about this device
Download the instructions for your Above ground pool in PDF format for free! Find your manual Fast Set 57376 - BESTWAY and take your electronic device back in hand. On this page are published all the documents necessary for the use of your device. Fast Set 57376 by BESTWAY.
USER MANUAL Fast Set 57376 BESTWAY
text_image
Visit www.bestwaycorp.com/support for help WE SUGGEST NOT TO RETURN THE PRODUCT TO THE STORE QUESTIONS? PROBLEMS? MISSING PARTS? For FAQ, Manuals, Videos Or Spare Parts, Please Visit bestwaycorp.com/support58383
OWNER'S MANUAL
bestwaycorp.com/support
Visit Bestway YouTube channel YouTube
FILTER PUMP OWNER'S MANUAL
Visit Bestway YouTube channel
YouTube

text_image
Visit www.bestwaycorp.com/support for help WE SUGGEST NOT TO RETURN THE PRODUCT TO THE STORE QUESTIONS? PROBLEMS? MISSING PARTS? For FAQ, Manuals, Videos Or Spare Parts, Please Visit bestwaycorp.com/supportWARNING
IMPORTANT SAFETY INSTRUCTIONS READ AND FOLLOW ALL INSTRUCTIONS
WARNING - RISK OF ELECTRIC SHOCK - The pump is to be supplied by an isolating transformer or supplied through a residual current device (RCD) having a rated residual operating current not exceeding 30 mA.
The plug of pump shall be at least 3.50m away from the pool.
The appliance must be supplied by earthed power source.
Extension cords can't be used.
WARNING - RISK OF ELECTRIC SHOCK - The pump cannot be using while people are inside the pool. Forbid the access of the pool in case of damage of the filter pump.
DO NOT BURY CORD. Locate cord to minimize abuse from lawn mowers, hedge trimmers, and other equipment.
WARNING - The supply cord cannot be replaced. If the cord is damaged the appliance should be scrapped.
CAUTION - This pump is for use with storable pools only. Do not use with permanently-installed pools. A storable pool is constructed so that it is capable of being readily disassembled for storage and reassembled to its original integrity. A permanently-installed pool is constructed in or on the ground or in a building such that it cannot be readily disassembled for storage.
IMPORTANT - Using the pump with an unmatched electrical supply is dangerous and will result in catastrophic failure of pump.
RISK OF ELECTRICAL SHOCK - When working with electricity, turn the electrical power off at the circuit breaker and lock breaker door. Failure to do so will result in increased risk of shock, injury and possibly death.
DO NOT REMOVE THE GROUNDING PRONG OR MODIFY THE PLUG IN ANY WAY. DO NOT USE ADAPTOR PLUGS. Consult a qualified electrician for any questions related to the validity of your plugs grounding.
Handle the pump with care. Do not pull or carry the pump by the power cord. Never pull a plug from the outlet by yanking the power cord. Keep cord free
from abrasions. Sharp objects, oil, moving parts, and heat should never be exposed to the filter pump.
WARNING - This appliance can be used by children aged from 8 years and above and persons with reduced physical, sensory or mental capabilities or lack of experience and knowledge if they have been given supervision or instruction concerning use of the appliance in a safe way and understand the hazards involved. Children shall not play with the appliance. Cleaning and user maintenance shall not be made by children without supervision. (For EU market)
WARNING - This appliance is not intended for use by persons (including children) with reduced physical, sensory or mental capabilities, or lack of experience and knowledge, unless they have been given supervision or instruction concerning use of the appliance by a person responsible for their safety. Children should be supervised to ensure that they do not play with the appliance.
(For market other than EU)
Cleaning and user maintenance must be performed by an adult above 18 years old who is familiar with the risk of electric shock. When the appliance will be not used for a long time, such as in the winter, the pool set should be disassembled and stored indoor.
CAUTION - Read the instruction before using the appliance and installation/reassembly every time.
The appliance must be placed more than 2m away from the pool. (For France only). Electric installations should follow national wiring rules. Consult a qualified electrician for any questions.
Only the media provided or specified by the manufacturer is to be used with product installation.
It is essential to check that the suction openings are not obstructed.
It is advisable to stop the filtration during maintenance operations on the filtration system.
Regularly monitor the filter clogging level.
A weekly check is recommended for cleaning.
Minimum daily filtration operating time of 8 hours is recommended to ensure clear pool water.
It is essential to change any damaged element or set of elements as soon as possible. Use only parts approved by person responsible for placing the product on the market.
All filters and filter media shall be inspected regularly to ensure that there is not a build-up of detritus thus preventing good filtration. The disposal of any used filter media should also be in accordance with applicable regulations/legislation. In case of doubt on the pump or any circulation devices, contact a qualified
installer, or the manufacturer/importer/distributor.
The water circulation installation shall comply with the European as well as national/local regulations, especially when dealing with electrical issues.
Any change of valve position, pump size, grille size can cause a change of the flow and the suction velocity can be increased.
Mind all the safety requirements and recommendations described in the manual.
NOTE:
Please examine equipment before use. Notify Bestway at the customer service address listed on this manual for any manufacturing defect or missing parts at the time of purchase. Verify that the equipment components represent the filter pump model that you had intended to purchase.
NOTE:
Place pump on a solid and level ground. Pay attention to position of pool and pump so adequate ventilation, drainage, and access for cleaning is available.
Never place pump in an area that may accumulate water, or in an area where foot traffic will flow around the pool.
It is necessary to have the plug accessible after installation of the pool.
NOTE:
Atmospheric conditions may affect the performance and life span of your filter pump. Unnecessary wear and tear may occur during periods of cold, heat and exposure to sun. Whenever possible shelter pump from these conditions.
It is important to ensure the factory equipped stopper plugs for the inlet and outlet ports replace the screens before removal or maintenance on the pump is attempted.
NOTE:
Do not add chemicals in the filter pump.
Don't plug or unplug the appliance if hand is wet.
Always unplug the appliance:
- On raining days
- Before cleaning or other maintenance
- Leave it unattended on holidays
Safekeeping the instruction. For reconstruction the pool set every time, please always refer to the instructions.
- If instruction is missed, please contact with Bestway or search it in website:
www.bestwaycorp.com
NOTE: This product is not intended for commercial use.
Please read the instruction manual carefully and keep it for future reference.
SAVE THESE INSTRUCTIONS.
text_image
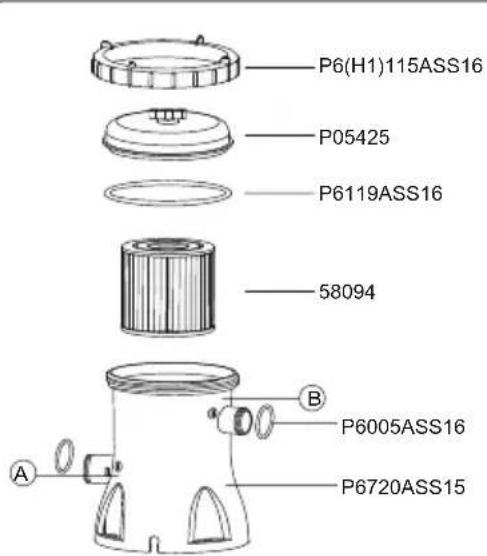
P6(H1)115ASS16 P05425 P6119ASS16 58094 B P6005ASS16 P6720ASS15 A| A | B | C | D | |
| P05425 | 1 | 1 | 1 | 1 |
| P6(H1)115ASS16 | 1 | 1 | 1 | 1 |
| P6119ASS16 | 1 | 1 | 1 | 1 |
| 58094 | 1 | 1 | 1 | 1 |
| P6720ASS15 | 1 | 1 | 1 | 1 |
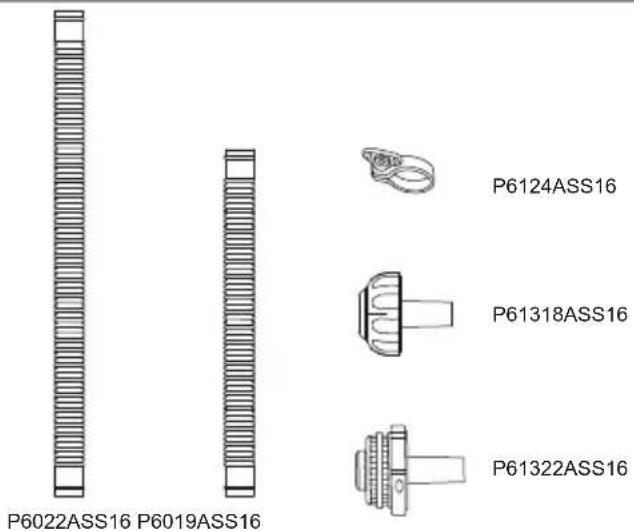
| P6022ASS16 | 0 | 2 | 0 | 2 |
| P6019ASS16 | 2 | 0 | 2 | 0 |
| P6124ASS16 | 4 | 4 | 2 | 2 |
| P6005ASS16 | 2 | 2 | 2 | 2 |
| P61322ASS16 | 1 | 1 | 0 | 0 |
| P61318ASS16 | 1 | 1 | 0 | 0 |
text_image
P6022ASS16 P6019ASS16 P6124ASS16 P61318ASS16 P61322ASS16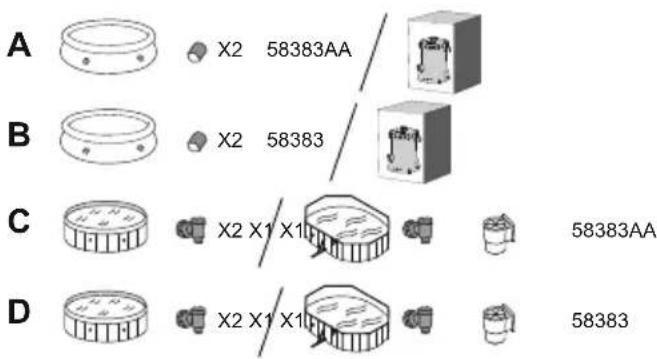
text_image
A X2 58383AA B X2 58383 C X2 X1 X1 58383AA D X2 X1 X1 58383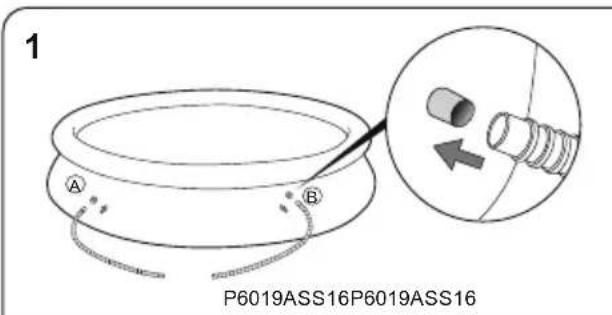
text_image
1 A B P6019ASS16P6019ASS16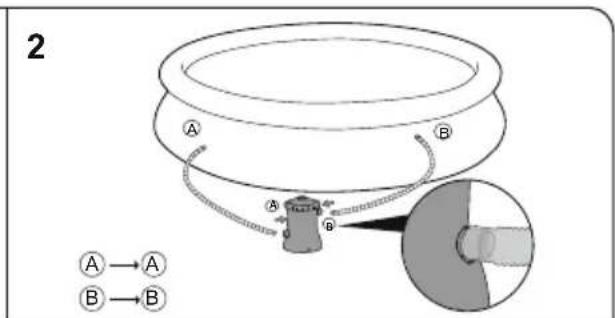
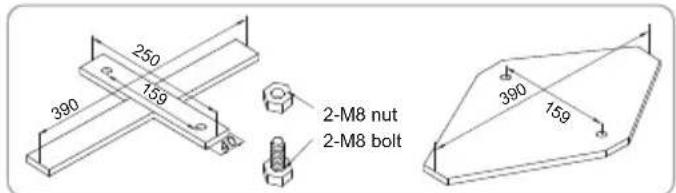
EN60335-2-41 TEST standard requires the filter pump to be vertically fixed on ground or a certain pedestal made of wood or concrete before use. There should be two holes 9mm in diameter on the pedestal, the space between which should be 159mm. Put filter pump on the pedestal and fix them together by fasten the bolts and nuts. All the pedestal parts should weigh over 18kgs at least to prevent the pump from accidentally falling.
text_image
250 390 159 40 2-M8 nut 2-M8 bolt 390 159NOTE: It is imperative to check that the hydraulic connectors are not obturated.
OPERATION
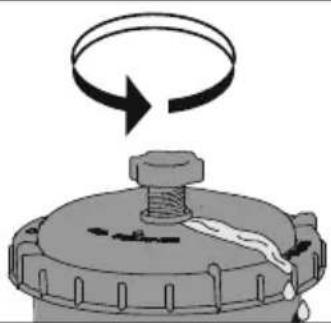
1) Open/unscrew the Air Purge Valve on the top of the Filter Pump; air is released as water fills the Filter Pump.
2) When water comes out of the Air Purge Valve screw it closed and wipe away any water.
3) To start the Filter Pump, insert the plug into a residual current device (RCD).
natural_image
Diagram of a mechanical component with a rotating arrow and spring, no text or symbols present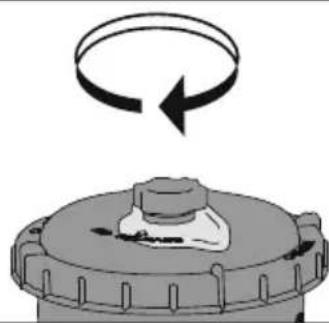
natural_image
Diagram of a mechanical component with a rotating arrow indicating rotational motion (no text or symbols)IMPORTANT: DO NOT DRY RUN THE FILTER PUMP – Make sure both the pool’s Inlet and Outlet valves are fully covered by water before operating the Filter Pump.
PUMP MAINTENANCE
CAUTION: YOU MUST ENSURE THE FILTER PUMP IS UNPLUGGED BEFORE ANY MAINTENANCE BEGINS OR SEVERE RISK OF INJURY OR DEATH EXISTS.
1) Unplug the Filter Pump.
2) Loosen the Hose Clamps on the pool's Inlet and Outlet Hoses by unscrewing the fly nut counter-clockwise.
3) Remove Debris Screens from inside of pool.
4) Replace the Debris Screens with the Stopper Plugs in the pool's Inlet and Outlet Valves.
5) Unscrew the Filter Cap Retainer and remove the Filter Cap.
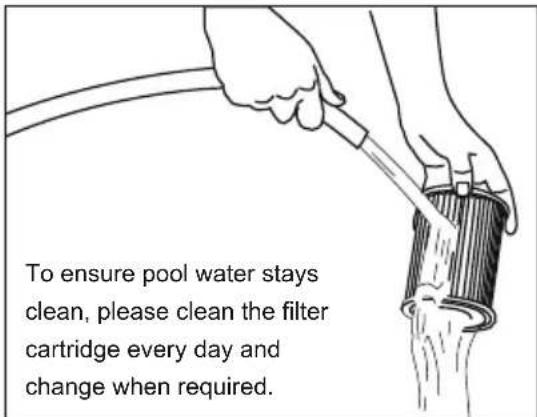
6) Clean the Filter Cartridge with a garden hose, if filter cartridge remains soiled or discolored, it is necessary to replace it with a new one.
7) Insert the cleaned (or new) Filter Cartridge; ensure it is centered in the Filter Pump.
8) Check that the Filter Cap Seal is in place.
9) Replace the Filter Cap and screw the Filter Cap Retainer into position.
10) Replace the Stopper Plugs with the Debris Screens in the pool's Inlet and Outlet Valves. Tighten the Hose Clamps. Water will now flow to the pump.
11) Follow the PUMP INSTALLATION DIRECTIONS section to prepare the system for use.
IMPORTANT: For sanitary reasons we suggest replacing the Filter Cartridge with a new one every two weeks.
PUMP STORAGE
1) Unplug the Filter Pump.
2) Follow the instructions as previously outlined to stop water flowing to the Filter Pump and to remove the Filter Cartridge.
3) Discard the Filter Cartridge.
4) Detach all Hoses.
5) Dry all components thoroughly.
6) Store the filter pump in a dry indoor location out of the reach of children. Storage temperature: 4-40°C (39.2-104°F)
text_image
To ensure pool water stays clean, please clean the filter cartridge every day and change when required.PUMP WARRANTY
For information concerning pump warranty please visit our website at: www.bestwaycorp.com
PUMP DISPOSAL

Waste electrical products should not be disposed of with household waste. Please recycle where facilities exist. Check with your local authority or retailer for recycling advice.
BOMBA DE FILTRO MANUAL DO USUÁRIO
Visite o canal da Bestway no YouTube
YouTube

natural_image
Diagram of a mechanical component with a rotating arrow indicating rotational motion (no text or symbols)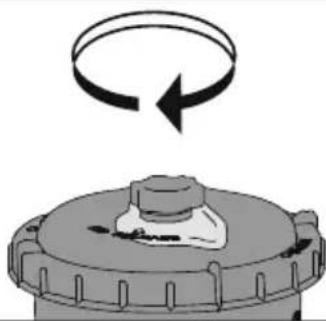
natural_image
Mechanical component diagram showing a rotating ring above a base with a central hub (no text or symbols)natural_image
Diagram of a mechanical component with a rotating arrow indicating rotational motion (no text or symbols)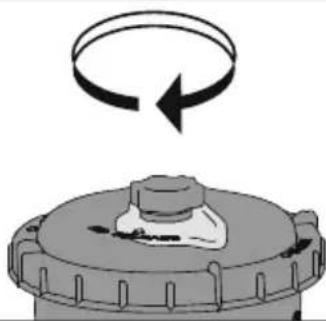
natural_image
Mechanical component diagram showing a rotating ring above a base with a central hub (no text or symbols)natural_image
Diagram of a mechanical component with a rotating arrow and internal structure (no text or symbols)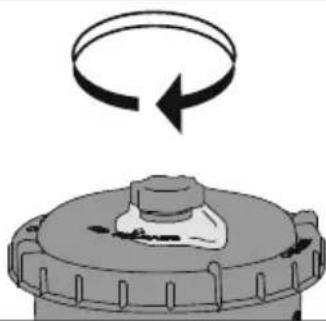
natural_image
Diagram of a mechanical component with a rotating arrow indicating clockwise motion (no text or symbols)natural_image
Diagram of a mechanical component with a rotating arrow indicating rotational motion (no text or symbols)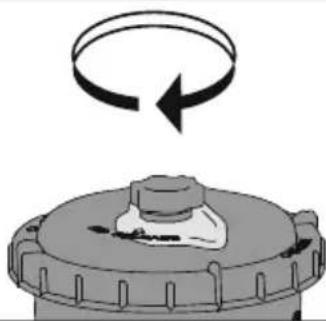
natural_image
Mechanical component diagram showing a rotating ring above a base with a central knob (no text or symbols)natural_image
Diagram of a mechanical component with a rotating arrow and a hanging rod (no text or symbols)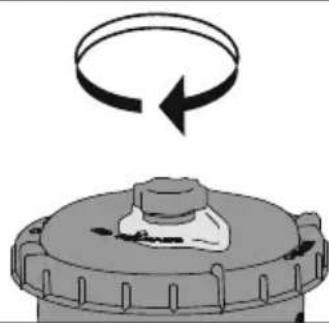
natural_image
Diagram of a mechanical component with a rotating arrow indicating rotational motion (no text or symbols)natural_image
Diagram of a mechanical component with a rotating arrow indicating rotational motion (no text or symbols)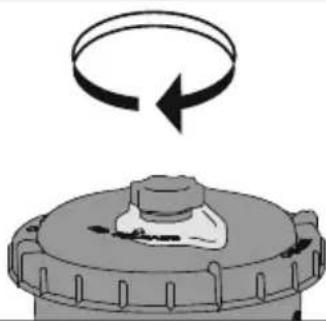
natural_image
Diagram of a mechanical component with a rotating arrow indicating clockwise motion (no text or symbols)natural_image
Diagram of a mechanical component with a rotating arrow and spring, no text or symbols present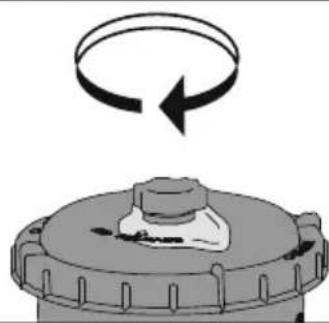
natural_image
Diagram of a mechanical component with a rotating arrow indicating rotational motion (no text or symbols)natural_image
Diagram of a mechanical component with a rotating arrow indicating rotational motion (no text or symbols)
natural_image
Diagram of a mechanical component with a rotating arrow indicating clockwise motion (no text or symbols)natural_image
Diagram of a mechanical component with a rotating arrow and internal structure (no text or symbols)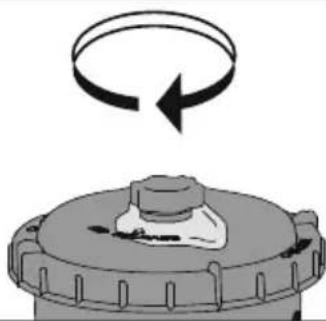
natural_image
Mechanical component diagram showing a rotating ring above a base with a central hub (no text or symbols)ВАЖНО! НИКОГДА НЕ ЗАПУСКАЙТЕ НАСОС БЕЗ ВОДЫ –
natural_image
Diagram of a mechanical component with a rotating arrow and textured base (no text or symbols)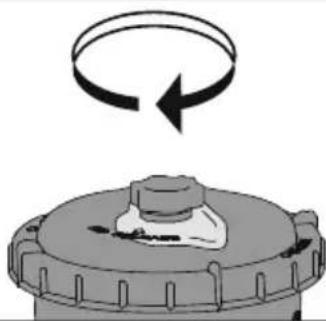
natural_image
Mechanical component diagram showing a rotating ring above a base with a central knob (no text or symbols)natural_image
Diagram of a mechanical component with a rotating arrow indicating rotational motion (no text or symbols)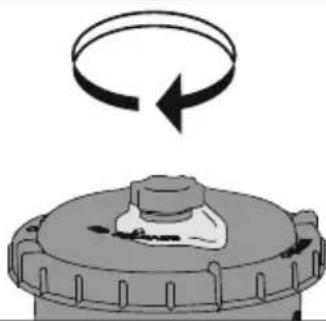
natural_image
Mechanical component diagram showing a rotating ring above a base with a central hub (no text or symbols)natural_image
Diagram of a mechanical component with a rotating arrow and a wavy line, no text or symbols present.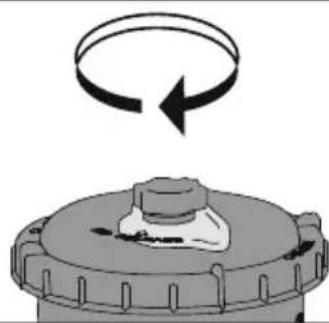
natural_image
Diagram of a mechanical component with a rotating arrow indicating rotational motion (no text or symbols)For support please visit us at:
bestwaycorp.com/support
©2021 Bestway Inflatables & Material Corp.
All rights reserved/Tous droits réservés/Todos los derechos reservados/Alle Rechte vorbehalten/Tutti i diritti riservati
Trademarks used in some countries under license from/
Manufactured, distributed and represented in the European Union by/
Bestway (USA) Inc., 3411 E. Harbour Drive, Phoenix, Arizona 85034, United States of America
Tel: +86 21 69135588 (For U.S. and Canada)
Distributed in Australia & New Zealand by Bestway Australia Pty Ltd, Unit 2/98-104 Carnarvon St Silverwater, NSW 2128, Australia
Tel: Australia: (+61) 29 0371 388; New Zealand: 0800 142 101
Distributed in United Kingdom by Bestway Corp UK Ltd. 8 Wentworth Road, Heathfield Industrial Estate, Newton Abbot, Devon, TQ12 6TL
Exported by/Exporté par/Exportado por/Exportiert von/Esportato da
Bestway (Hong Kong) International Ltd./Bestway Enterprise Company Limited
Suite 713, 7/Floor, East Wing, Tsim Sha Tsui Centre, 66 Mody Road, Kowloon, Hong Kong
www.bestwaycorp.com
Bestway®

text_image
Visit www.bestwaycorp.com/support for help WE SUGGEST NOT TO RETURN THE PRODUCT TO THE STORE QUESTIONS? PROBLEMS? MISSING PARTS? For FAQ, Manuals, Videos Or Spare Parts, Please Visit bestwaycorp.com/support
text_image
bestwaycorp.com/supportbestwaycorp.com/support Visit Bestway YouTube channel YouTube

EN
WARNING
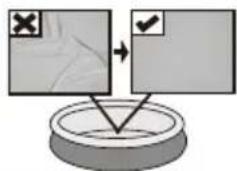
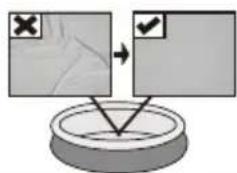
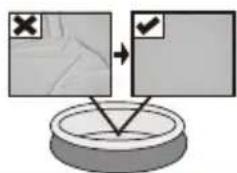
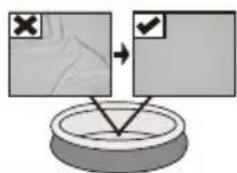
smooth out the bottom
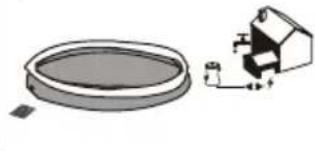
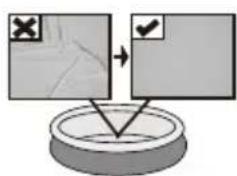
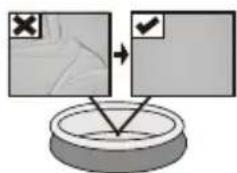
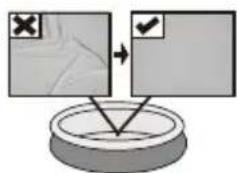
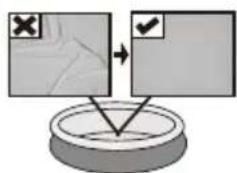
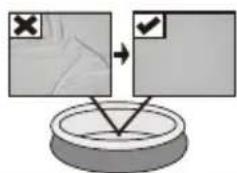
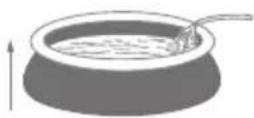
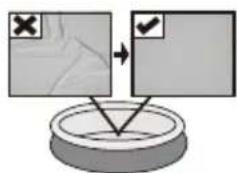
Put 1" to 2" water in the pool to cover the floor. Once pool floor is slightly covered, gently smooth out all wrinkles. Start in the center of the pool and work your way clockwise to the outside.
PT
ATENÇÃO
suavizar o fundo
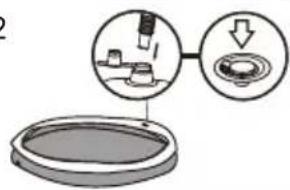
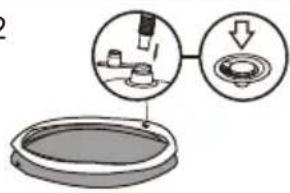
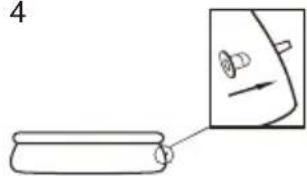
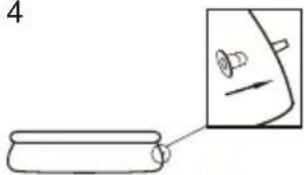
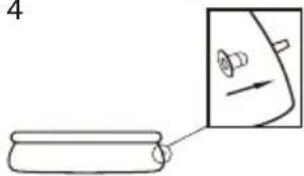
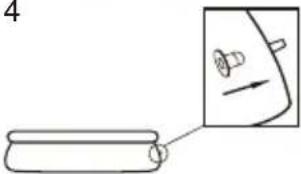
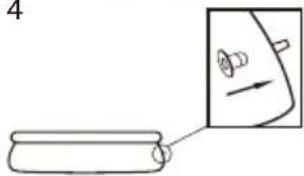
NOTE: Some parts already have been installed on the pool.
PT
natural_image
Simple line drawing of a mountainous shape with no text or symbols
natural_image
Technical line drawing of a threaded bolt component (no text or symbols)
natural_image
Simple line drawing of a rectangular box or container (no text or symbols)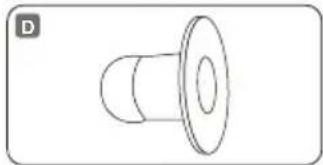
natural_image
Simple line drawing of a cylindrical object with a flared rim (no text or symbols)| FAST SETTM | 2.44 m x 61 cm(8' x 24") | 2.44 m x 66 cm(8' x 26") | 3.05 m x 66 cm(10' x 26") |
| 57448;57449;57450 | 57265;57267;57268 | 57456;57457;57458 | |
| A | x1 | x1 | x1 |
| B | x1 | x1 | x1 |
| C | x1 | x1 | x1 |
| D | x2 | x2 | x2 |
| FAST SETTM | 3.05 m x 76 cm(10' x 30") | 3.66 m x 76 cm(12' x 30") | 3.96 m x 84 cm(13' x 33") |
| 57266;57269;57270 | 57273;57274;57275;57443;57444;57445 | 57375;57376 | |
| A | x1 | x1 | x1 |
| B | x1 | x1 | x1 |
| C | x1 | x1 | x1 |
| D | x2 | x2 | x2 |
| FAST SETTM | 4.57 m x 84 cm(15' x 33") | 4.57 m x 1.07 m(15' x 42") | 4.57 m x 1.22 m(15' x 48") |
| 57313;57315 | 57371;57372 | 57289 | |
| A | x1 | x1 | x1 |
| B | x1 | x1 | x1 |
| C | x1 | x1 | x1 |
| D | x2 | x2 | x2 |

text_image
Visit www.bestwaycorp.com/support for help WE SUGGEST NOT TO RETURN THE PRODUCT TO THE STORE QUESTIONS? PROBLEMS? MISSING PARTS? For FAQ, Manuals, Videos Or Spare Parts, Please Visit bestwaycorp.com/supportFAST SET™ POOLS OWNER'S MANUAL
WARNING
Carefully read, understand, and follow all information in this user manual before installing and using the swimming pool. These warnings, instructions, and safety guidelines address some common risks of water recreation, but they cannot cover all risks and dangers in all cases. Always use caution, common sense, and good judgment when enjoying any water activity. Retain this information for future use.
Non Swimmers safety
- Continuous, active, and vigilant supervision of weak swimmers and non-swimmers by a competent adult is required at all times (remembering that children under five are at the highest risk of drowning).
- Designate a competent adult to supervise the pool each time it is being used.
- Weak swimmers or non-swimmers should wear personal protection equipment when using the pool.
- When the pool is not in use, or unsupervised, remove all toys from the swimming pool and its surrounding to avoid attracting children to the pool.
Safety devices
- In order to prevent children from drowning, it is recommended to secure the access to the pool with a protection device. In order to prevent children climbing from the inlet and outlet valve, it is recommended to install a barrier (and secure all doors and windows, where applicable) to prevent unauthorized access to the swimming pool.
- Barriers, pool covers, pool alarms, or similar safety devices are helpful aids, but they are not substitutes for continuous and competent adult supervision.
Safety equipment
- It is recommended to keep rescue equipment (e.g. a ring buoy) by the pool.
- Keep a working phone and a list of emergency phone numbers near the pool.
Safe use of the pool
- Encourage all users especially children to learn how to swim.
- Learn Basic Life Support (Cardiopulmonary Resuscitation - CPR) and refresh this knowledge regularly. This can make a life-saving difference in the event of an emergency.
- Instruct all pool users, including children, what to do in case of an emergency.
- Never dive into any shallow body of water. This can lead to serious injury or death.
- Do not use the swimming pool when using alcohol or medication that may impair your ability to safely use the pool.
- When pool covers are used, remove them completely from the water surface before entering the pool.
- Protect pool occupants from water related illnesses by keeping the pool water treated and practicing good hygiene. Consult the water treatment guidelines in the user's manual.
- Store chemicals (e.g. water treatment, cleaning or disinfection products) out of the reach of children.
- Use the signage as outlined below. Signage is to be displayed in a prominent position within 2m of the pool.



Keep children under supervision in the aquatic environment. No diving.
- Removable ladders shall be placed on a horizontal surface.
- Irrespective of materials used for swimming pool construction, accessible surfaces have to be checked regularly to avoid injuries.
- Regularly monitor bolts and screws. Remove splinters or any sharp edges to avoid injuries.
- ATTENTION: Do not leave the drained pool outside. The empty pool is liable to become deformed and/or displaced due to wind.
- If you have a filter pump, refer to the pump's manual for instructions.
- WARNING! The pump cannot be used while people are inside the pool!
- If you have a ladder, refer to the ladder's manual for instructions.
- WARNING! The use of a swimming pool implies compliance with the safety instructions described in the operating and maintenance guide. In order to prevent drowning or other serious injuries, pay particular attention to the possibility of unexpected access to the swimming pool by children under 5 years by securing the access to it, and, during the bathing period, keep them under constant adult supervision.
Please read carefully and keep for future reference
CHOOSE THE CORRECT LOCATION
The surface chosen to install the pool must respect the following technical characteristics:
- Because of the combined weight of the water inside the pool and the pool users, it is extremely important that the surface chosen to install the pool is capable of uniformly supporting the total weight for the entire time the pool is installed. When choosing the surface, take into consideration that water may come out of the pool when in use or in the rain. If the water softens the surface, it may lose its capability to support the pool weight.
- We recommend positioning the pool away from any objects children could use to climb into the pool.
- Position the pool near an adequate drainage system to deal with overflow or to discharge the pool.
- The surface must be flat and smooth. If the surface is inclined or uneven, it can create an unbalanced loading on the structure of the pool. This situation can damage the welding point of the liner. In the worst cases, the pool can collapse, causing serious personal injury and/or damage to personal property.
- The selected surface must be clear of any type of object. Due to the weight of the water, any object under the pool could damage or perforate the bottom of the pool.
-
The selected surface must be clear of aggressive plants and weed species. Those types of strong vegetation could grow through the liner and create water leakage. The grass or other vegetation that may cause odor or slime to develop have to be eliminated from the set-up location.
-
The selected location must not have overhead power lines or trees. Be sure the location does not contain underground utility pipes, lines or cables of any kind.
- The selected position must be far from house entrance. Do not position any equipment or other furniture around the pool. The water that comes out of the pool during the use or due to a faulty product can damage the furniture inside the house or surrounding the pool.
- The selected surface must be flat and without holes that can damage the material of the liner.
Follow the important instructions above to choose the correct surface and location to set up your pool. Damaged parts of the pool, due to the fact that the set-up surface and location does not match the instructions, will not be considered as manufacture defect and will avoid the warranty and any service claims.
Suggested set-up surfaces: grass, ground, concrete, and all other surfaces that respect the above set-up conditions.
Not suggested surfaces: mud, sand, gravel, deck, balcony, driveway, platform, soft/loose soil or other surface that does not meet the above set-up conditions.
NOTE: Check with your local city council for by-laws relating to fencing, barriers, lighting and safety requirements and ensure you comply with all laws.
NOTE: If have a filter pump, refer to the pump's manual for instructions.
NOTE: The ladder must match the pool size and should be used only for entering and exiting the pool. It is forbidden to exceed the permitted payload of the ladder. Check regularly if the ladder is properly assembled.
INSTALLATION
Installation usually takes approximately 10 minutes with 2-3 people excluding earthworks and filling.
Bestway will not be responsible for damage caused to the pool due to mishandling or failure to follow these instructions.
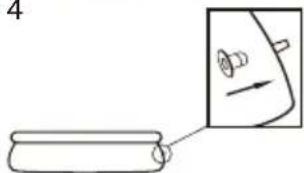
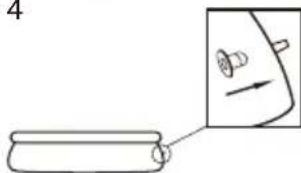
ATTENTION: Do not use a high pressure air hose or over-inflate the top ring, it should be slightly stiff to the touch.
NOTE: Do not use extension power cords to power your pump.
ATTENTION: Do not drag the pool on the ground, this can damage the pool.
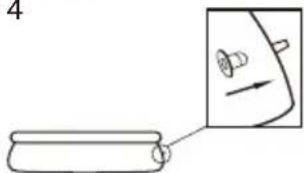
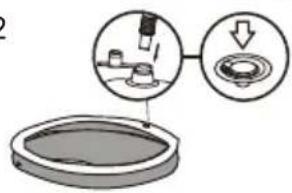
NOTE: The base or bottom of the pool should be laid out properly (flat without wrinkles).
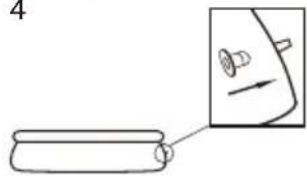
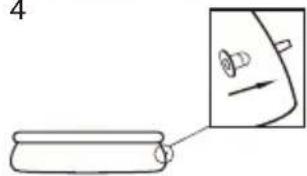
NOTE: Hot temperatures cause air to expand the ring and may cause damage. Leave some room for expansion. For assistance or FAQs, please visit the support section on our website, www.bestwaycorp.com.
NOTE: Drawings for illustration purposes only. May not reflect actual product. Not to scale.
1
natural_image
Illustration of a petri dish and a small house with pipes (no text or symbols)2
text_image
Diagram illustrating a laboratory procedure with labeled steps: adding liquid into a container and adding a ring to a test tube.3
flowchart
graph TD
    A["Input Box 1"] --> C{Decision}
    B["Input Box 2"] --> C
    C --> D["Output Box"]
4
natural_image
Simple line drawing of a cylindrical object with a small inset showing a curved object (no text or symbols)5

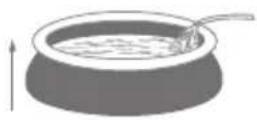
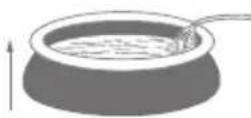
FILLING POOL WITH WATER
ATTENTION: Do not leave pool unattended while filling with water.
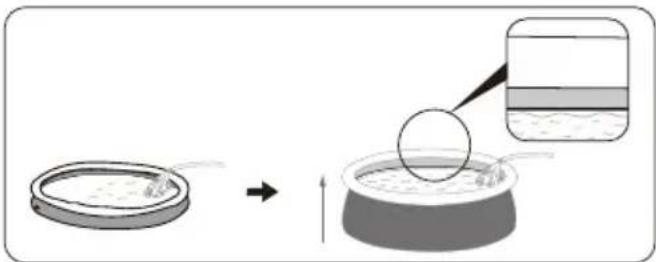
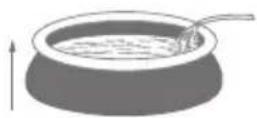
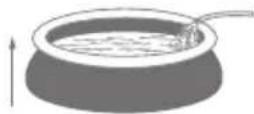
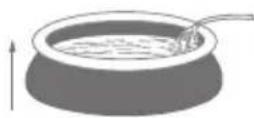
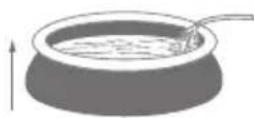
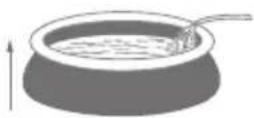
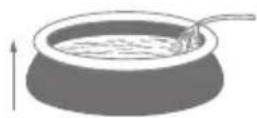
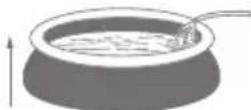
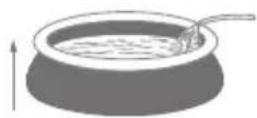
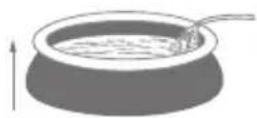
- Fill the water until the wall is straight up, and the water reaches the welding line. DO NOT OVERFILL as this could cause the pool to collapse. In times of heavy rainfall you may need to empty some of the water to ensure the level is correct.
text_image
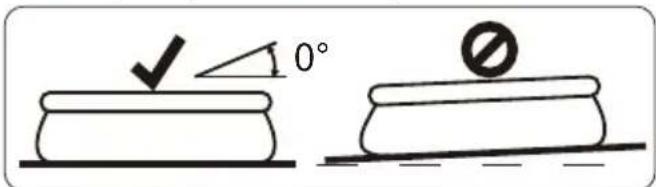
Diagram illustrating a chemical process with a container being added to a liquid-filled container, showing step-by-step transformation.- When filling the pool is completed, check that the water is not collecting on any side to ensure the pool is level.
text_image
0°IMPORTANT: If pool is not level, drain water and re-level ground by digging out. Never attempt to move the pool with water in it, serious personal injury or damage to the pool may result.
WARNING: Your pool may contain a great deal of pressure. If your pool has any bulge or uneven side, then the pool is not level, the sides may burst and the water may discharge suddenly causing serious personal injury and/or damage to property.
POOL MAINTENANCE
If you do not adhere to the maintenance guidelines below, your health might be at risk, especially that of your children.
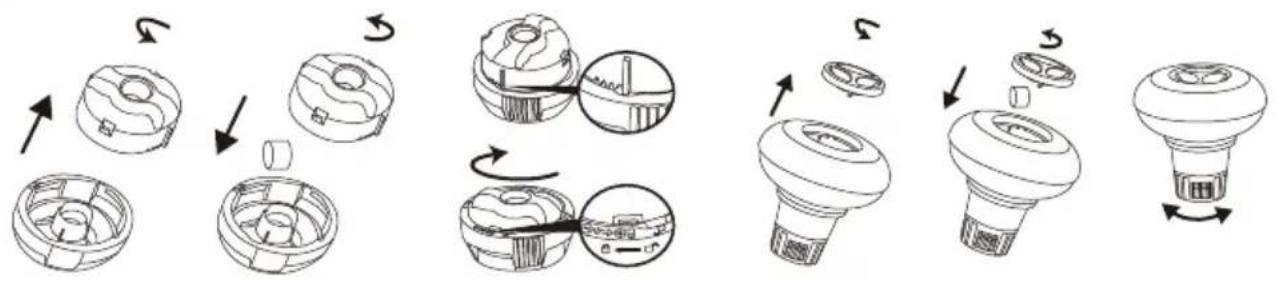
Using chemical tablets (not included):
NOTE: Chemconnect or Chemical Floater must be used when you perform chemical maintenance with tablets. Your purchased item may not include any of those dispensers, in this case you can purchase it by visiting our website www.bestwaycorp.com or at the nearest pool dealer.
flowchart
graph TD
    A["Internal Components"] --> B["Assembly"]
    B --> C["Reassembly"]
    C --> D["Final Packaging with Bulb"]
    D --> E["Final Component with Cover"]
IMPORTANT: Don't use granulate tablets or throw the tablet directly in the water. The chemicals can deposit on the bottom, damage the material and discolor the PVC.
Using chemical liquid (not included):
IMPORTANT: Add chemical liquid in small doses and in the center of the pool to avoid direct contact between the chemicals and the PVC surface. Direct contact can damage the material and discolor the surface.
NOTE: Remove the chemical dispenser from pool when the pool is in use.
IMPORTANT: After performing chemical maintenance and before using the pool, use a test kit (not included) to test the water chemistry. We recommend maintaining your water according to the following table.
| Parameters | Values |
| Water clarity | clear view of the pool bottom |
| Colour of the water | no colour should be observed |
| Turbidity in FNU/NTU | max. 1,5 (preferably less than 0,5) |
| Nitrate concentration above that of fill water in mg/l | max. 20 |
| Total organic carbon (TOC) in mg/l | max. 4,0 |
| Redox potential against Ag/AgCl 3,5 m KCl in mV | min. 650 |
| pH value | 6,8 to 7,6 |
| Free active chlorine (without cyanuric acid) in mg/l | 0,3 to 1,5 |
| Free chlorine used in combination with cyanuric acid in mg/l | 1,0 to 3,0 |
| Cyanuric acid in mg/l | max. 100 |
| Combined chlorine in mg/l | max. 0,5 (preferably close to 0,0 mg/l) |
NOTE: Damage resulting from chemical imbalance is not covered by the warranty. Pool chemicals are potentially toxic and should be handled with care. There are serious health risks from chemical vapors and the incorrect labeling and storage of chemical containers. Please consult your local pool supply retailer for more information about chemical maintenance. Pay close attention to the chemical manufacturer's instructions. Pool damage resulting from misuse of chemicals and mismanagement of pool water is not covered by the warranty.
IMPORTANT: Over usage of chemicals can discolor the printing and all points of the pool material. It can also damage the structure of the pool liner.
To keep your pool clean:
- Contact your local pool supply shop for advice and purchase of chemicals and pH kits. One of the most important factors to increase the life of the liner is to keep continuously clean and healthy water. Please strictly follow the instructions from professional technicians for the water treatment through the use of chemicals.
- Locate a bucket of water next to pool to clean users' feet before entering pool.
- Cover the pool when not in use.
- Skim pool regularly to avoid settled dirt.
- Check and wash the filter cartridge regularly.
- Gently clean any scum from below the top ring with a clean cloth.
- Please be careful in case of rain water, kindly check that the water level is not higher than the expected. If so, YOU HAVE TO DISCHARGE THE EXCESS WATER.
- If it rains, check that the water level is not higher than the specified level. If water exceeds the specified levels, drain the pool to the specified level.
Proper maintenance can maximize the life of your pool.
During the season of use of the swimming pool, the filtration system must be necessarily put into service every day, enough time to assure at least a complete renewal of the volume of water.
NOTE: The pump is used to circulate the water and to filter small particles. In order to keep your pool water clean and hygienic, you must also add chemicals.
REPAIR
In the event of a leak, patch your pool using the underwater adhesive repair patch provided. You can find the instructions in FAQs on the support section of our website, www.bestwaycorp.com.
DISMANTLING
- Unscrew the drain valve cap counter-clockwise and remove.
- Connect the adaptor to the hose and put the other end of the hose in the area where you are going to drain your pool. (Check local regulations for drainage by-laws).
- Screw the control ring of the hose adaptor clockwise onto the drain valve. The drain valve will be open and water will start to drain automatically. Open the drain valve to the maximum position.
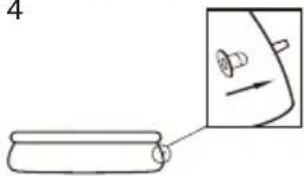
- Deflate the top ring by squeezing the air valve.
- When the top ring is fully deflated, press the top ring down, and tilt it to drain the pool easily. Completely drain the water in the pool.
- When draining is finished, unscrew the control ring to close the valve.
- Disconnect the hose.
- Screw the cap back onto the drain valve.
- Air dry pool.
STORAGE
- Please remove all the accessories and spare parts of the pool and store them clean and dry.
- Once pool is completely dry, sprinkle with talcum powder to prevent pool from sticking together, fold pool carefully. If pool is not completely dry, mold may result and will damage the pool liner.
- Store liner and accessories in a dry place with a moderate temperature between 5°C / 41°F and 38°C / 100°F.
- During the rainy season, pool and accessories should be stored as per above instructions also.
- Improper draining of the pool might cause serious personal injury and/or damage to personal property.
- We strongly recommend the pool is disassembled during the off season (winter months). Store in a dry location out of children's reach.
PISCINAS FAST SET™ MANUAL DO PROPRIETÁRIO

natural_image
Simple line drawing of a container and a mechanical device (no text or symbols)2
text_image
Diagram illustrating a laboratory procedure with labeled steps and a magnified view of the step being performed.3
text_image
Diagram showing two overlapping boxes with checkmarks and a cross symbol, connected by arrows to a circular base.4
natural_image
Simple line drawing of a cylindrical object with an arrow pointing to it, next to a magnified inset showing a curved object (no text or symbols)5
text_image
Diagram illustrating a step-by-step process of a container being added to a liquid-filled container, with an arrow indicating the process.flowchart
graph TD
    A["Internal Components"] --> B["Assembly"]
    B --> C["Reassembly"]
    C --> D["Final Packaging"]
text_image
Diagram showing two overlapping document boxes with a checkmark and an 'X' symbol, connected by arrows to a circular base.4
natural_image
Simple line drawing of a container with a small circle and an inset showing a curved object (no text or symbols)5
natural_image
Diagram showing a container being added to a liquid-filled container, with an arrow indicating process (no text or symbols)text_image
Diagram illustrating a lab procedure with labeled components and a magnified view of the test tube.3
text_image
Diagram showing two overlapping document boxes with a checkmark and a cross symbol, connected by arrows to a circular base.4
natural_image
Simple line drawing of a container connected to a magnified view of a curved object (no text or symbols)5
FÜLLEN DES POOLS MIT WASSER
natural_image
Diagram showing a container being added to a liquid-filled container, with an arrow indicating the process (no text or symbols present)text_image
Diagram illustrating a laboratory procedure with labeled components and directional arrows indicating process steps.3
flowchart
graph TD
    A["Input Box 1"] --> C["Output Box 1"]
    style A fill:#f9f,stroke:#333
    style C fill:#bbf,stroke:#333
4

natural_image
Simple line drawing of a container connected to a curved object with an arrow (no text or symbols)5
text_image
Diagram illustrating a chemical process with a container being added to a liquid-filled container, showing step-by-step transformation.text_image
Diagram illustrating a laboratory procedure with labeled components and a magnified view of the setup.3
text_image
Diagram showing two labeled boxes with checkmarks and a cross, connected by arrows to a circular base, likely illustrating a process or transformation.4

natural_image
Simple line drawing of a cylindrical object with a separate inset showing a curved object and a directional arrow (no text or symbols)5
HET ZWEMBAD VULLEN MET WATER
text_image
Diagram illustrating a chemical process involving a petri dish, a reaction step, and a container with liquid being poured into a container.text_image
Diagram showing two labeled boxes with checkmarks and a cross, connected by arrows to a circular base.4
natural_image
Simple line drawing of a cylindrical object with an arrow pointing to a curved panel (no text or symbols)5
RIEMPIMENTO DELLA PISCINA CON ACQUA
text_image
Diagram illustrating a step-by-step process of a container being added to a container, with an arrow indicating the direction.text_image
Three black-and-white pictograms showing people in different poses: swimming, no crossing, and walking.natural_image
Diagram of a mechanical device with a circular component and a housing, no visible text or symbols2
text_image
Diagram illustrating a laboratory procedure with labeled components and directional arrows indicating process flow.3
text_image
Diagram showing a process with two labeled boxes and arrows indicating transformation or alignment, possibly from a document or diagram.4
natural_image
Simple line drawing of a cylindrical object with an arrow pointing to it, next to a magnified inset showing a curved object (no text or symbols)5
REMLIR D'EAU LA PISCINE
text_image
Diagram illustrating a step-by-step process of a container being added to a liquid-filled container, with an arrow indicating the process.flowchart
graph TD
    A["Top Left: Inner casing with internal components"] --> B["Step 1: Insert a housing"]
    B --> C["Step 2: Insert a component with internal parts"]
    C --> D["Step 3: Insert a light bulb with internal components"]
    D --> E["Step 4: Insert a light bulb with internal components"]
    E --> F["Step 5: Insert a light bulb with internal components"]
    F --> G["Final Lamp with internal components"]
text_image
Diagram showing two overlapping document boxes with a cross and checkmark, connected by arrows to a circular base.4
natural_image
Simple line drawing of a cylindrical object with a small inset showing a curved arrow and a separate rectangular shape (no text or symbols)5
text_image
Diagram illustrating a chemical process with labeled components and directional arrows, showing a reaction step and resulting product.text_image
Diagram illustrating a mechanical or laboratory procedure with labeled components and directional arrows indicating process flow.3
text_image
Diagram showing two labeled boxes with checkmarks and a cross, connected by arrows to a circular base, likely illustrating a process or transformation.4
natural_image
Simple line drawing of a cylindrical object with an arrow pointing to a curved object (no text or symbols)5
text_image
Diagram illustrating a chemical process involving a container and a reaction step, with a magnified inset showing the resulting container.text_image
Diagram illustrating a laboratory procedure with labeled components and directional arrows indicating process flow.3
text_image
Diagram showing a process with a cross and checkmark, indicating a transformation or adjustment of a surface.4
natural_image
Simple line drawing of a cylindrical object with a separate inset showing a curved object with an arrow (no text or symbols)5
NAPEŁNIANIE BASENU
text_image
Diagram illustrating a chemical process with a container being added to a liquid-filled container, showing step-by-step transformation.text_image
Diagram illustrating a mechanical or laboratory procedure with labeled components and directional arrows indicating process flow.3
text_image
Diagram showing a process with a cross and checkmark, indicating a transformation or confirmation step.4
natural_image
Simple line drawing of a cylindrical object with an arrow pointing to a curved surface (no text or symbols)5
A MEDENCE FELTÖLTÉSE VÍZZEL
text_image
Diagram illustrating a chemical process with a container being added to a liquid-filled container, showing step-by-step transformation.text_image
Diagram illustrating a mechanical or industrial process with labeled components and directional arrows indicating flow or movement.3
text_image
Diagram showing two labeled boxes with checkmarks and an 'X' symbol, connected by arrows to a circular base.4
natural_image
Simple line drawing of a container connected to a curved object with an arrow (no text or symbols)5
ATT FYLLA POOLEN MED VATTEN
text_image
Diagram illustrating a chemical process with a container, reaction arrow, and resulting container with liquid.For support please visit us at:
bestwaycorp.com/support
©2021 Bestway Inflatables & Material Corp.
All rights reserved/Tous droits réservés/Todos los derechos reservados/Alle Rechte vorbehalten/Tutti i diritti riservati
Trademarks used in some countries under license from/
Manufactured, distributed and represented in the European Union by/
Distributed in Australia & New Zealand by Bestway Australia Pty Ltd, Unit 2/98-104 Carnarvon St Silverwater, NSW 2128, Australia
Tel: Australia: (+61) 29 0371 388; New Zealand: 0800 142 101
Distributed in United Kingdom by Bestway Corp UK Ltd. 8 Wentworth Road, Heathfield Industrial Estate, Newton Abbot, Devon, TQ12 6TL
Exported by/Exporté par/Exportado por/Exportiert von/Esportato da
Bestway (Hong Kong) International Ltd./Bestway Enterprise Company Limited
Suite 713, 7/Floor, East Wing, Tsim Sha Tsui Centre, 66 Mody Road, Kowloon, Hong Kong
Tel: +86 21 69135588 (For U.S. and Canada)
www.bestwaycorp.com