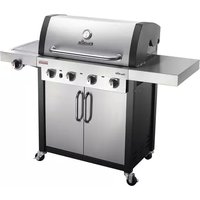
Professional Line - Grill plate Char-Broil - Free user manual and instructions
Find the device manual for free Professional Line Char-Broil in PDF.


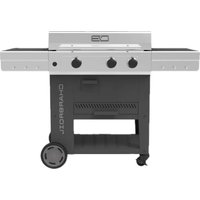
| Product Type | Gas Barbecue / Gas Grill |
| Brand | Char-Broil |
| Model | Professional Line |
| Category | Grill Plate |
| Number of Main Burners | 3 |
| Hot Plate Burner | 1 (side) |
| Total Power | 10.84 kW (788.8 g/h) |
| Gas Type | Butane, Propane or their mixtures |
| Gas Pressure | 50 mbar |
| Ignition | Electronic and by match |
| Main Material | Stainless Steel |
| Cooking Grid Material | Porcelain |
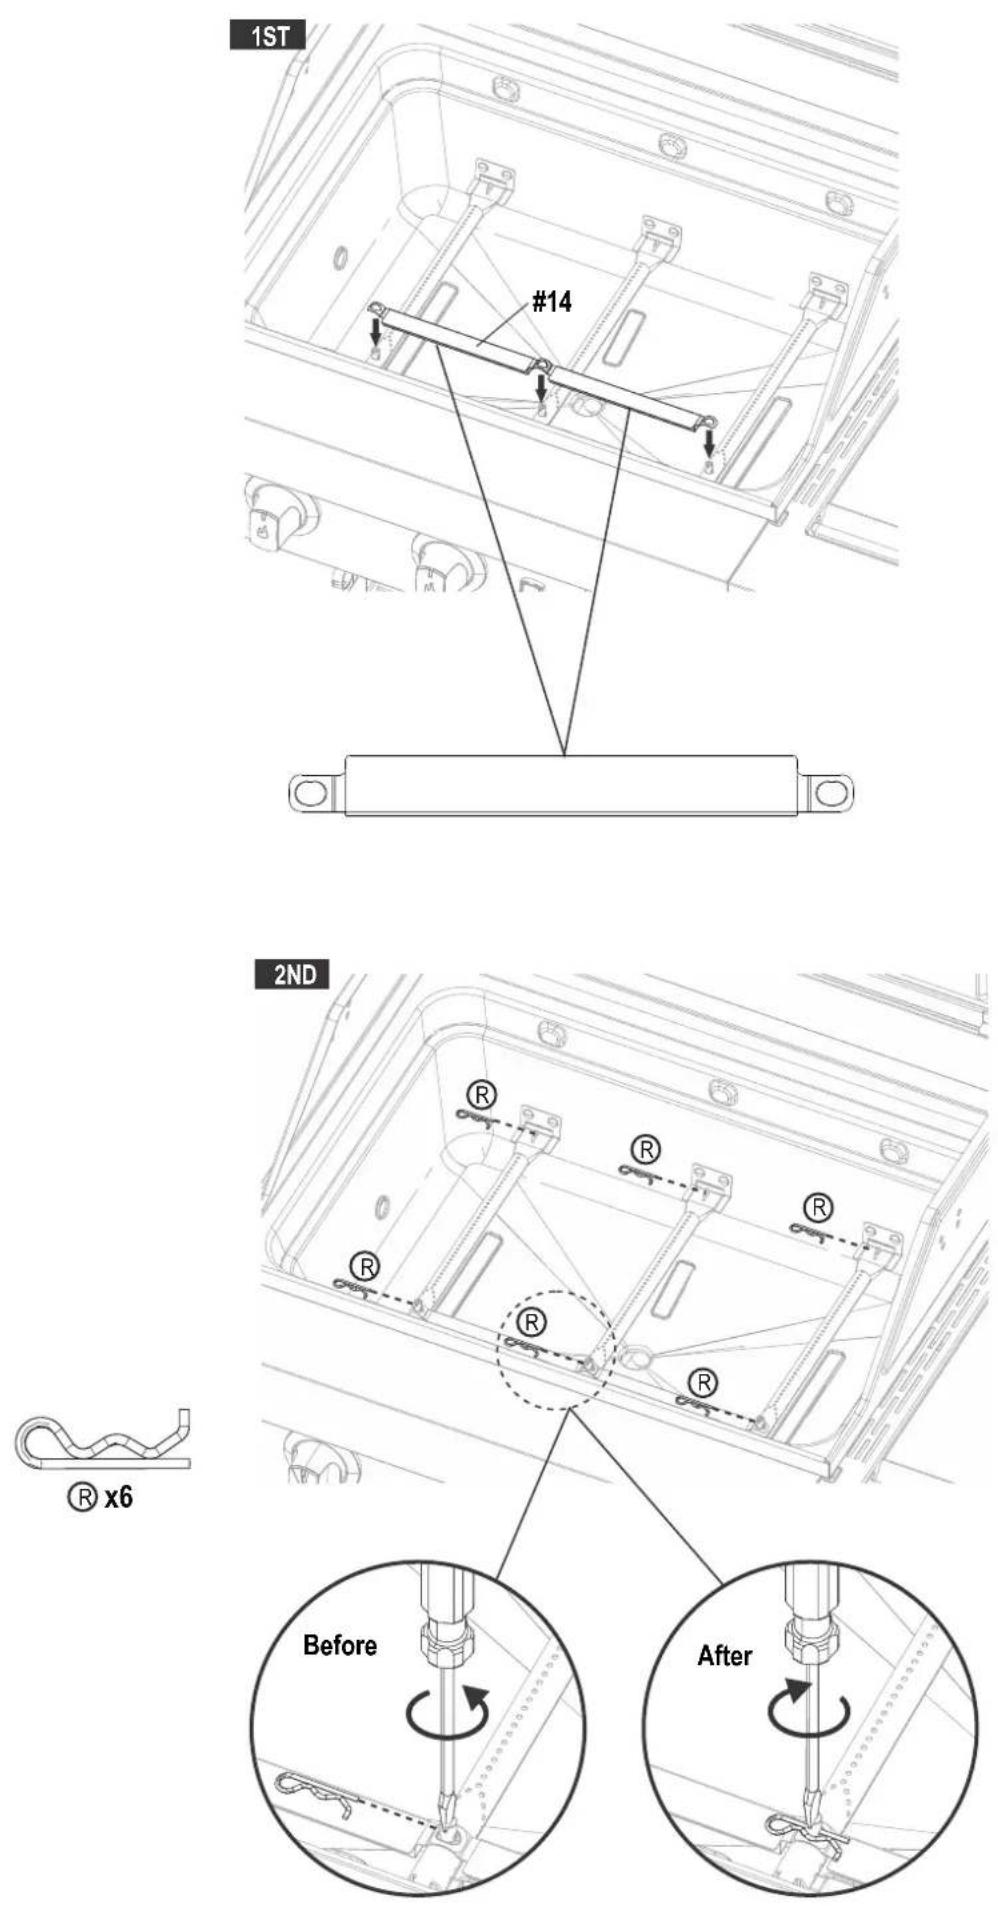
| Usage | Outdoor only |
| Minimum Safety Distance | 1 m from walls, 3 m from flammable materials |
| Burner Warranty | 10 years |
| Grid and Emitter Warranty | 3 years |
| Other Parts Warranty | 2 years |
| Destination Country (CH model) | Switzerland |
| Nominal Heat Input | 10.84 kW |
| Main Injector (ø mm) | 0.66 x 3 |
| Hot Plate Injector (ø mm) | 0.81 x 1 |
| Cleaning | Regular: stainless steel surfaces, porcelain, plastic; burners to clean periodically |
| Safety | Leak test before each use; turn off gas after use; do not use indoors |
Frequently Asked Questions - Professional Line Char-Broil
User questions about Professional Line Char-Broil
0 question about this device. Answer the ones you know or ask your own.
Ask a new question about this device
Download the instructions for your Grill plate in PDF format for free! Find your manual Professional Line - Char-Broil and take your electronic device back in hand. On this page are published all the documents necessary for the use of your device. Professional Line by Char-Broil.
USER MANUAL Professional Line Char-Broil
natural_image
Line drawing of a standard gray outdoor grill with control panel and side-mounted dish (no text or symbols)GB Operating Instructions, 2-6
Assembly Instructions, 82-102
natural_image
Symbol of a trash bin with crossed lines indicating no waste, and a solid black rectangle below (no text or labels)CE
2531CS 0048
INSTALLER/ASSEMBLER:
Leave this manual with consumer.
CONSUMER:
Keep this manual for future reference.
Questions:
If you have questions during assembly or use of this appliance contact your local dealer.

DANGER

If you smell gas:
- Shut off gas to the appliance.
- Extinguish any open flames.
- Open lid.
- If odor continues, keep away from the appliance and immediately call your gas supplier or your fire department.

WARNING

- Do not store or use petrol or other flammable liquids in the vicinity of this or any other appliance.
- A gas cylinder not connected for use shall not be stored in the vicinity of this or any other appliance.

CAUTION

- Read and follow all safety statements, assembly instructions and use and care directions before attempting to assemble and cook.
- Some parts may contain sharp edges. Wearing protective gloves is recommended.
Grease Fires
- Putting out grease fires by closing the lid is not possible. Barbecues are well ventilated for safety reasons.
- Do not use water on a grease fire, Personal injury may result. If a persistent grease fire develops, turn knobs and gas cylinder off.
- If appliance has not been regularly cleaned, a grease fire can occur that may damage the product. Pay close attention while preheating or burning off food residue to insure that a grease fire does not develop. Follow instructions on general appliance cleaning and cleaning the burner assembly to prevent grease fires. The best way to prevent grease fires is regular cleaning of the appliance.
- Do not leave barbecue unattended while preheating or burning off food residue on HI. If barbecue has not been regularly cleaned, a grease fire can occur that may damage the product.

WARNING

For Safe Use of Your Appliance and to Avoid Serious Injury:
- USE OUTDOORS ONLY. NEVER USE INDOORS.
Read the instructions before using the appliance.
Always follow these instructions.
- Do not move the appliance during use.
- Accessible parts may be very hot. Keep young children away. Do not let children operate or play near appliance.
- Turn off the gas supply at the cylinder after use.
- This appliance must be kept away from flammable materials during use.
- Do not block holes in sides or back of appliance.
- Check burner flames regularly.
- Do not block venturi openings on burner.
- Use appliance only in well-ventilated space. NEVER use in enclosed space such as carport, garage, porch, covered patio, or under an overhead structure of any kind.
- Do not use charcoal or ceramic briquets in a gas appliance.
- DO NOT cover grates with aluminum foil or any other material. This will block burner ventilation and create a potentially dangerous condition resulting in property damage and/or personal injury.
• Use appliance at least 1m from any wall or surface.
- Maintain 3m clearance to objects that can catch fire or sources of ignition such as pilot lights on water heaters, live electrical appliances, etc.
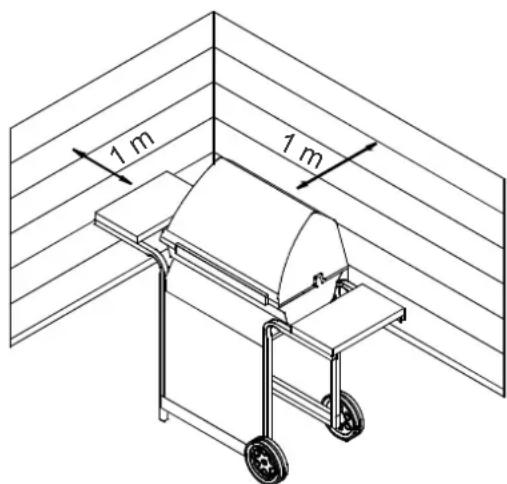
- NEVER attempt to light burner with lid closed. A buildup of non-ignited gas inside a closed appliance is hazardous.
- Always turn off gas at cylinder and disconnect regulator before moving gas cylinder from specified operating position.
- Never operate appliance with gas cylinder out of correct position specified.
- Do not modify the appliance. Any modifications is strictly prohibited. Sealed parts are not to be manipulated by the user. Do not disassemble injectors.
Safety Tips
- Before opening gas cylinder valve, check the regulator for tightness.
- When appliance is not in use, turn off all control knobs and gas.
- Use long-handled barbecue utensils and oven mitts to avoid burns and splatters. Use protective gloves when handling hot components.
- Maximum load for hot plate, if equipped, and side shelf is 4.5 Kg. Cooking vessel minimum dia 200mm and maximum dia. 260 mm. NOTE: Your barbecue may NOT be equipped with a Hot plate!
- The grease cup (if equipped) must be inserted into appliance and emptied after each use. Do not remove grease cup until appliance has completely cooled.
- Be very careful when you open the lid, since hot steam may escape.
- Be very careful when children, the elderly, or pets are nearby.
- If you notice grease or other hot material dripping from appliance onto valve, hose or regulator, turn off gas supply at once. Determine the cause, correct it, then clean and inspect valve, hose, and regulator before continuing. Perform a leak test.
- Do not store objects or materials inside the appliance cart enclosure that would block the flow of combustion air to the underside of either the control panel or the firebox bowl.
- DO NOT disconnect or change gas container within 3m of an open flame or other ignition source.
Cylinder Placement
Cylinder of 6 kg or less may be placed on the ground under the side shelf or inside the appliance in place provided. Larger cylinders are to be placed under side shelf or behind the barbecue only. Cylinders placed in the appliance shall have a maximum diameter of 340mm and maximum height of 400mm. Cylinders placed on the ground shall not be placed under the hot plate.
Regulator Requirements
A regulator must be used with this appliance. Use only gas regulator supplied with your barbeque. If a regulator is not supplied then use only regulator certified according to EN16129 (Flow rate max. 1.5 kg/h) and approved for your country and gas specified in Technical Data.
Hose Requirements
Use only approved hose which is certified to appropriate EN standard and does not exceed 1.5m length. For Finland, the hose length shall not exceed 1.2m.
Before each use, check to see if hoses are cut or worn. Make sure hose is not kinked. Make sure that when connected hose does not touch any warm surfaces. Replace damaged hoses before using appliance. Replace hose as required by national requirements.
Ignitor Lighting
- Do not lean over barbecue while lighting.
- Turn gas burner control valves to O(off).
- Open lid during lighting or re-lighting.
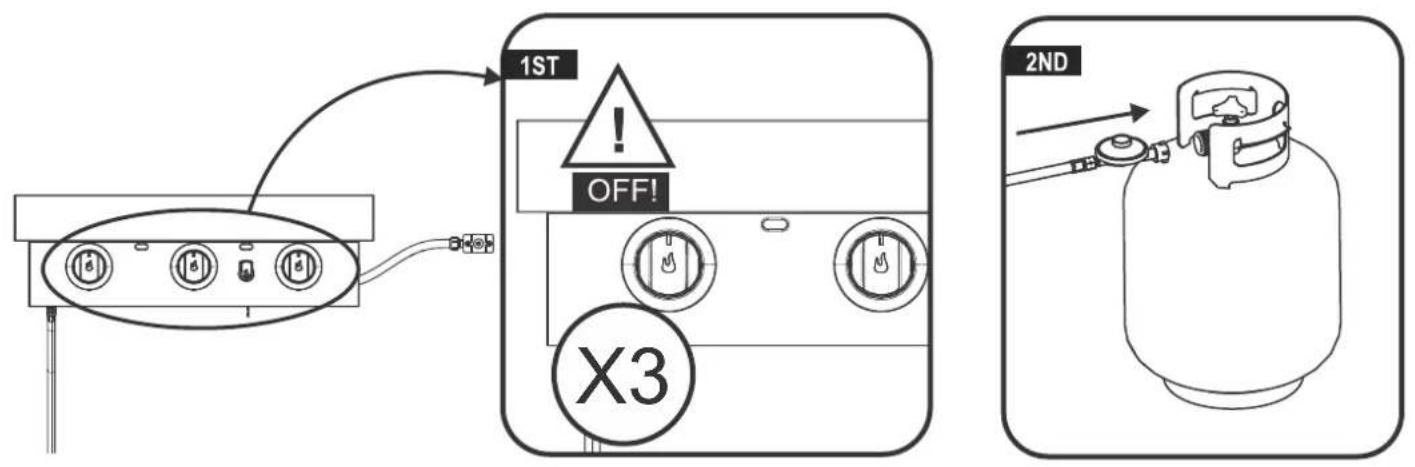
- Turn ON gas at LP cylinder.
- To ignite, push and turn burner knob to 🔊 HIGH. Immediately, push and hold ELECTRONIC IGNITOR button until the burner lights.
- If ignition does NOT occur in 5 seconds, turn the burner controls off O, wait 5 minutes and repeat the lighting procedure.
- Repeat steps 4 and 5 to light other main burners.

WARNING

Turn controls and gas cylinder off when not in use.

CAUTION

If ignition does NOT occur in 5 seconds, turn the burner controls ○ off, wait 5 minutes and repeat the lighting procedure. If the burner does not ignite with the valve open, gas will continue to flow out of the burner and could accidentally ignite with risk of injury.
Match-Lighting
- Do not lean over barbecue while lighting.
- Turn gas burner control valves to O(off).
- Open lid during lighting or re-lighting.
- Turn ON gas at LP cylinder.
- Place match into match holder (hanging from side panel of barbecue). Light match; then light burner by placing match through the match light hole on side of barbecue. Immediately push in and turn burner knob to the 🔊 HIGH position. Be sure burner lights and stays lit.
- Light adjacent burners in sequence by pushing knobs in and turning to the 🔊 HIGH position.
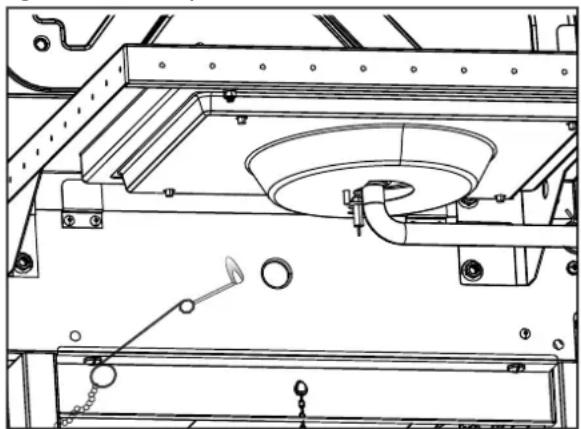
natural_image
Technical line drawing of a mechanical assembly with no visible text or symbolsNOTE: Your barbecue may NOT be equipped with a Hot plate!
Hot plate Ignitor Lighting
- Do not lean over barbecue while lighting.
-
Turn gas burner control valves to O(off).
-
Open lid during lighting or re-lighting.
-
Turn ON gas at LP cylinder.
-
Turn hot plate knob to the 🔊 HIGH position, push and hold ELECTRONIC IGNITOR button.
-
If hot plate does NOT light within 5 seconds, turn knob to (off), wait 5 minutes, then repeat lighting procedure.
Hot plate Match Lighting
- Do not lean over barbecue while lighting.
-
Turn gas burner control valves to O(off).
-
Open lid during lighting or re-lighting.
-
Turn ON gas at LP cylinder.
-
Place lit match near burner. Immediately turn hot plate knob to the ⬆ HIGH position. Be sure burner lights and stays lit.
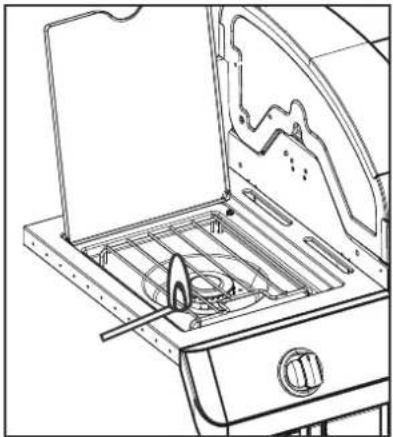
natural_image
Line drawing of an open oven with internal compartments and a handle (no text or symbols)Leak Testing Valves, Hose and Regulator
Leak test before first use, at least once a year, and every time the cylinder is changed or disconnected.
- Turn all appliance control knobs to O.
- Be sure regulator is tightly connected to gas cylinder.
-
Turn on Gas. If you hear a rushing sound, turn gas off immediately. There is a major leak at the connection. Correct before proceeding.
-
Brush soapy solution (mixture of half soap and half water) onto hose connections.
-
If growing bubbles appear, there is a leak. Turn off gas at cylinder immediately and check tightness of connections. If leak cannot be stopped do not try to repair. Call for replacement parts.
-
Always turn off gas at cylinder after performing leak test.
IF APPLIANCE FAILS TO LIGHT
• Make sure gas is turned on at cylinder.
• Make sure there is gas in the cylinder.
• Does the ignitor make a sparking noise?
If yes check for spark at burner.
If no spark check for damaged or loose wires.
- If wires are OK check for cracked or broken electrode, replace if needed.
- If wire or electrodes are covered by cooking residue, clean electrode tip with alcohol wipe if needed.
• If needed replace wires.
• If no sound check battery.
• Make sure battery is installed correctly.
- Check for loose wire connection at module and switch.
• If ignitor continues to not work then use match.

CAUTION

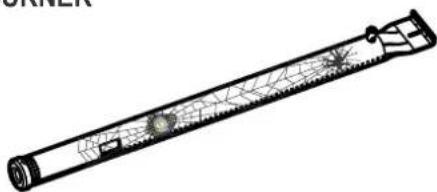
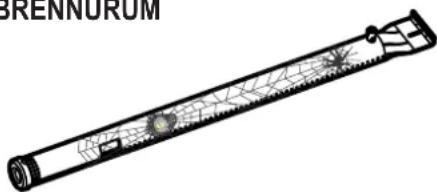
SPIDER ALERT!
SPIDER AND WEBS INSIDE BURNER
natural_image
Technical line drawing of a cylindrical mechanical component with internal grid structure (no text or symbols)If your barbeque is getting hard to light or the flame is weak, check and clean the venturis and burners.
Spiders or small insects are known to create "flashback" problems by building nests and laying eggs in the barbeque's venturi or burner obstructing the flow of gas. The backed-up gas can ignite behind the control panel. This flashback can damage your barbeque and cause injury. To prevent flashbacks and ensure good performance, the burner and venturi tube assembly should be removed and cleaned whenever the barbeque has been idle for an extended period of time.
Cleaning the Burner Assembly
Follow these instructions to clean and/or replace parts of burner assembly or if you have trouble igniting barbecue.
- Turn gas off at control knobs and LP cylinder.
- Remove cooking grates and heat tents.
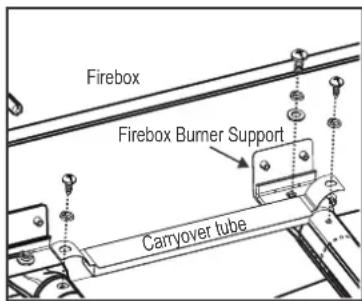
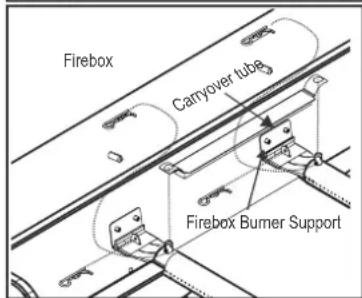
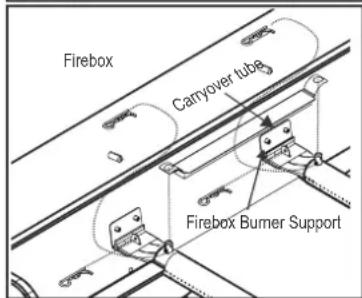
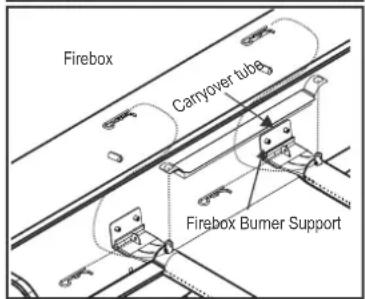
- Remove carryover tubes and hardware securing burners.
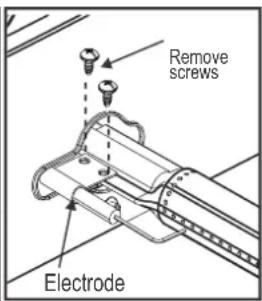
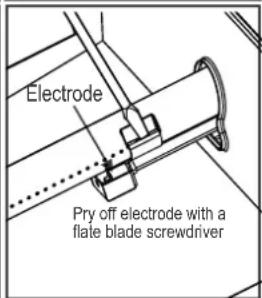
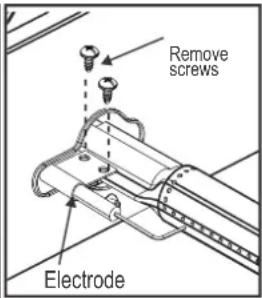
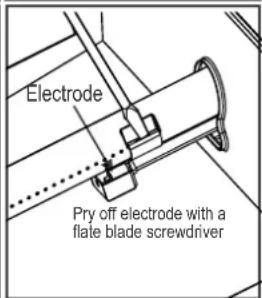
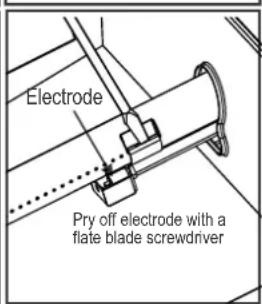
- Detach electrode from burner.
NOTE: Removal/Detachment method will depend on the burner configuration. See different configurations in illustrations below.
- Carefully lift each burner up and away from valve openings. We suggest three ways to clean the burner tubes. Use the one easiest for you.
A. Bend a stiff wire (a light weight coat hanger works well) into a small hook. Run the hook through each burner tube several times.

B. Use a narrow bottle brush with a flexible handle (do not use a brass wire brush). Run the brush through each burner tube several times.
C. Wear eye protection: Use an air hose to force air into the burner tube and out the burner ports. Check each port to make sure air comes out each hole.
- Wire brush entire outer surface of burner to remove food residue and dirt.
- Clean any blocked ports with a stiff wire such as an open paper clip.
- Check burner for damage due to normal wear and corrosion, some holes may become enlarged. If any large cracks or holes are found, replace burner.
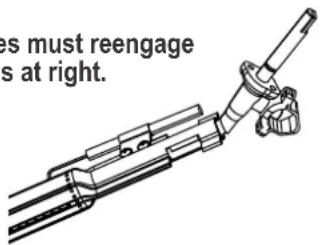
VERY IMPORTANT: Burner tubes must reengage valve openings. See illustrations at right.
Correct burner-to-valve engagement
- Attach electrode to burner.
- Carefully replace burners.
- Attach burners to brackets on firebox.
- Reposition carryover tubes and attach to burners. Replace heat tents and cooking grates.
- Before cooking again on barbecue, perform a "Leak Test" and "Burner Flame Check".
Storing Your Appliance
- Clean cooking grates.
- Store in dry location.
- When gas cylinder is connected to appliance, store outdoors in a well-ventilated space and out of reach of children.
• Cover appliance if stored outdoors. - Store appliance indoors ONLY if gas cylinder is turned off and disconnected, removed from appliance and stored outdoors.
- When removing appliance from storage check for burner obstructions.
General Appliance Cleaning
- Clean appliance often, preferably after each cookout. If a bristle brush is used to clean any of the appliance cooking surfaces, ensure no loose bristles remain on cooking surfaces prior to barbecueing. It is not recommended to clean cooking surface while appliance is hot. Appliance should be cleaned at least once a year.
- Do not mistake brown or black accumulation of grease and smoke for paint. Interiors of gas barbecues are not painted at the factory (and should never be painted). Apply a strong solution of detergent and water or use a appliance cleaner with scrub brush on insides of appliance lid and bottom. Rinse and allow to completely air dry. Do not apply caustic appliance/oven cleaner to painted surfaces.
- Plastic parts: Wash with warm soapy water and wipe dry.
- Do not use citrisol, abrasive cleaners, degreasers or a concentrated appliance cleaner on plastic parts. Damage to and failure of parts can result.
- Porcelain surfaces: Because of glass-like composition, most residue can be wiped away with baking soda/water solution or specially formulated cleaner. Use nonabrasive scouring powder for stubborn stains.
- Painted surfaces: Wash with mild detergent or nonabrasive cleaner and warm soapy water. Wipe dry with a soft nonabrasive cloth.
- Stainless steel surfaces: To maintain your appliance's high quality appearance, wash with mild detergent and warm soapy water and wipe dry with a soft cloth after each use. Baked-on grease deposits may require the use of an abrasive plastic cleaning pad. Use only in direction of brushed finish to avoid damage. Do not use abrasive pad on areas with graphics.
- Cooking surfaces: If a bristle brush is used to clean any of the appliance cooking surfaces, ensure no loose bristles remain on cooking surfaces prior to barbecueing. It is not recommended to clean cooking surfaces while appliance is hot.
| TECHNICAL DATACHAR-BROIL, LLC | ||||
| Appliance Name | Gas Barbeque/Gas Grill | |||
| Total Nominal Heat Input | 12,16 kW (885 g/h) | 10,84 kW (788,8 g/h) | ||
| Gas Category | I3+(28-30/37) | I3B/P(30) | I3B/P(50) | |
| Model No. | 468810017 | 468710017 | ||
| Gas Type | Butane | Propane | Butane, Propane or their mixtures | Butane, Propane or their mixtures |
| Gas Pressure | 28-30 mbar | 37 mbar | 30 mbar | 50 mbar |
| Injector Size (Dia. mm) | Barbecue: 0,81 x 3 pcs Barbecue: 0,81 x 3 pcs | Barbecue: 0,66 x 3 pcs | ||
| Hotplate: 0,91 x 1 pcs | Hotplate: 0,91 x 1 pcs | Hotplate: 0,81 x 1 pcs | ||
| Destination Countries | GB, FR, BE, ES, IT, PT, CZ, SK | DK, NO, NL, SE, FI, IS, CZ, IT, SK | AT, DE, CH, LU | |
Stainless steel
There are many different types (alloys) of materials that are regarded as stainless steel.
A common trait of these different types is that they may corrode (oxidize), depending on the conditions they are subjected to.
This applies to your new barbecue as well.
To ensure your barbecue retains its looks and functionality for many years, please follow the advice below.
1) If the barbecue has become wet or damp, make sure to wipe it dry using a cloth in order to prevent surface corrosion.
2) Stainless steel can rust under certain conditions. This can be caused by environmental conditions such as chlorine or salt water, or improper cleaning tools such as wire or steel wool. It can also discolor due to heat, chemicals, or grease build-up.
3) To maintain your appliance's high quality appearance, wash with mild detergent and warm soapy water and wipe dry with a soft cloth after each use. Baked-on grease deposits may require the use of an abrasive plastic cleaning pad. Use only in direction of brushed finish to avoid damage. Do not use abrasive pad on areas with graphics.
4) Grease the internal parts of the barbecue and the grids with cooking oil.
Please note:
To avoid scratching the surface and providing a basis for rust, never use steel wool or similar when cleaning stainless steel. Char-Broil recommends our Eco-Safe Stainless Steel Cleaner Spray, model #5278185, or our Simply Soy Grill Wipes, model 4629294.
When cleaning, work in the same direction the stainless steel was brushed in – 'with the grain'.
Cleaning with abrasives may leave scratches.
Storing the barbecue near a coast, swimming pool or spa will cause the barbecue to corrode (oxidize).
Cover your barbecue for rust protection.
INSTALLATEUR/ASSEMBLEUR :
natural_image
Technical line drawing of a mechanical assembly with no visible text or symbolsnatural_image
Line drawing of an open oven with internal grating and a handle (no text or symbols)natural_image
Technical line drawing of a mechanical assembly with no visible text or symbolsnatural_image
Line drawing of an open portable stove or oven with internal compartments and a handle (no text or symbols)natural_image
Technical line drawing of a cylindrical mechanical component with internal grid structure (no text or symbols)natural_image
Technical line drawing of a mechanical assembly with no visible text or symbolsnatural_image
Line drawing of a door frame with internal components and a handle, no text or symbols presentnatural_image
Technical line drawing of a mechanical assembly with no visible text or symbolsnatural_image
Line drawing of an open oven with internal compartments and a handle (no text or symbols)Lektest Kleppen, Slang en Regelaar
Leak test before first use, at least once a year, and every time the cylinder is changed or disconnected.
natural_image
Technical line drawing of a mechanical assembly with no visible text or symbolsnatural_image
Line drawing of an open electric stove with internal components and a handle (no text or symbols)natural_image
Technical line drawing of a cylindrical mechanical component with internal grid structure (no text or symbols)natural_image
Technical line drawing of a mechanical assembly with no visible text or symbolsnatural_image
Line drawing of a mechanical device with internal components and a handle (no text or symbols)natural_image
Technical line drawing of a mechanical assembly with no visible text or symbolsnatural_image
Line drawing of an open oven with internal compartments and a handle (no text or symbols)natural_image
Diagram of a cylindrical device with internal grid structure and two small circular components (no text or symbols)natural_image
Technical line drawing of a mechanical assembly with no visible text or symbolsnatural_image
Line drawing of a portable stove interior with grilles and doors (no text or symbols)natural_image
Technical line drawing of a cylindrical mechanical component with internal grid structure (no text or symbols)natural_image
Technical line drawing of a mechanical assembly with no visible text or symbolsnatural_image
Line drawing of an open industrial machine with internal components (no text or symbols)Lækagetestning af ventiler, slange og regulator
natural_image
Technical line drawing of a cylindrical mechanical component with internal grid structure (no text or symbols)Krav for regulatorer
natural_image
Technical line drawing of a mechanical assembly with no visible text or symbolsnatural_image
Line drawing of a mechanical device with internal components and a handle (no text or symbols)natural_image
Technical line drawing of a mechanical assembly with no visible text or symbolsnatural_image
Line drawing of an open refrigerator with internal compartments and a handle (no text or symbols)Skúška tesnosti ventilov, hadice a ovládača
natural_image
Technical line drawing of a cylindrical mechanical component with internal grid structure (no text or symbols)natural_image
Technical line drawing of a mechanical assembly with no visible text or symbolsnatural_image
Technical line drawing of a mechanical device with internal components and mounting bracket (no text or symbols)Lekapróf á lokum, slöngu og stilli
KÖNGULÆR OG VEFIR
INNAN Í BRENNURUM
natural_image
Diagram of a cylindrical device with internal grid structure and labeled 'BRENNORUM' (no other text or symbols)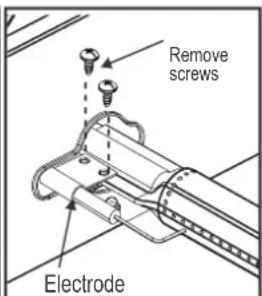
Geymsla á grillinu
natural_image
Technical line drawing of a mechanical assembly with no visible text or symbolsnatural_image
Technical line drawing of an open electrical cabinet with internal components and a handle (no text or symbols)natural_image
Diagram of a cylindrical device with internal grid structure and labeled 'MORAKO' in the top-left corner (no other text or symbols)natural_image
Technical line drawing of a mechanical assembly with no visible text or symbolsתְקַרָה בְּשָׁ
natural_image
Technical line drawing of a cylindrical mechanical component with internal mesh structure (no text or symbols)natural_image
Technical line drawing of an open appliance with internal components and mounting base (no text or symbols).הכלההוּרָהוּרָהוּרָהוּרָהוּרָהוּרָהוּרָהוּרָהוּרָהוּרָהוּרָהוּרָהוּרָהוּרָהוּרָה
| Key | Description | Picture | Qty |
| A | Knob | 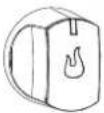 | 1 |
| B | Bezel, Knob | 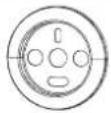 | 1 |
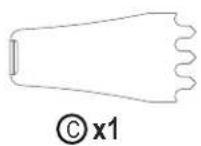
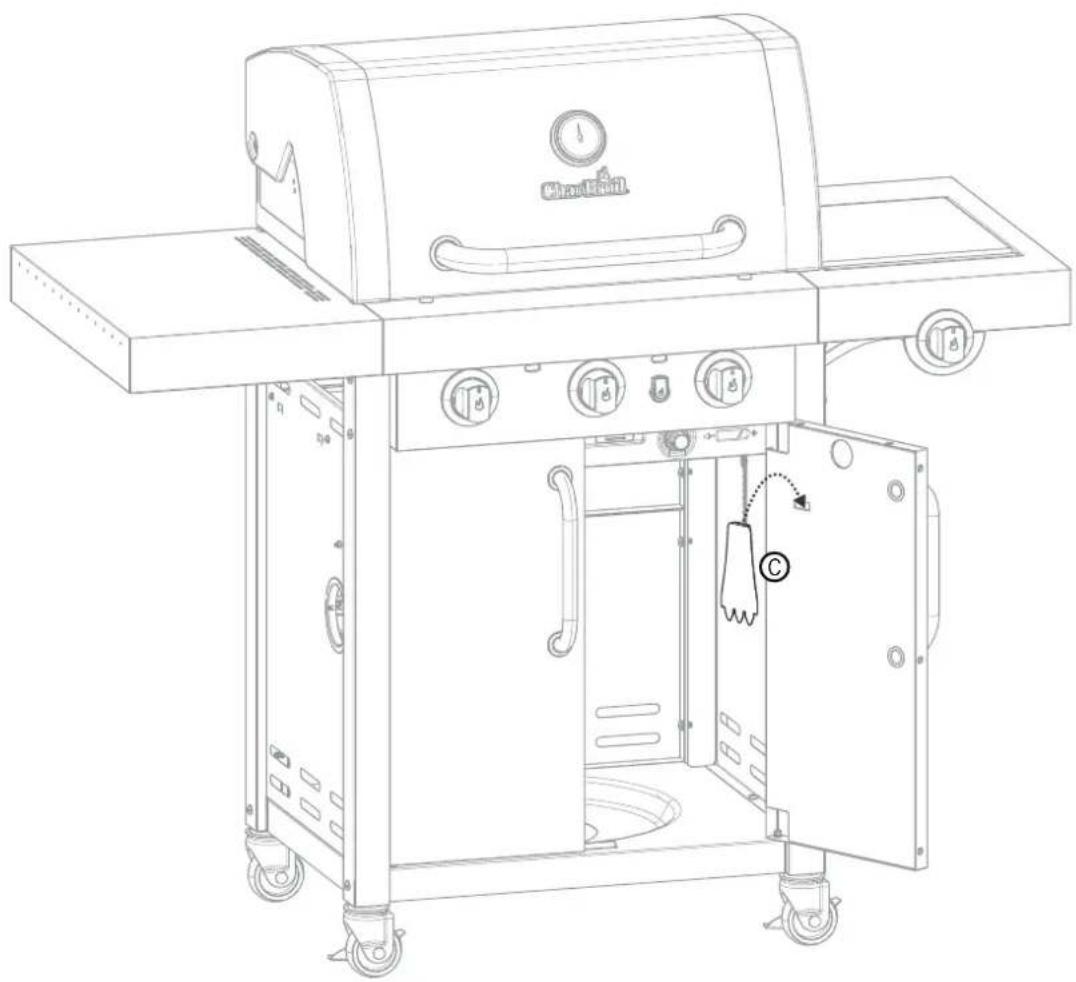
| C | Cleaning Tool | 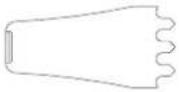 | 1 |
| D | 1/4" Nut |  | 4 |
| E | #8-32x3/8" Screw | 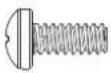 | 2 |
| F | No.10-24UNC Nut |  | 1 |
| G | M4 Wing Nut | 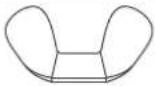 | 1 |
| H | Hose Clip |  | 1 |
| J | 1/4-20x2-3/8" Screw | 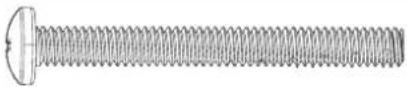 | 6 |
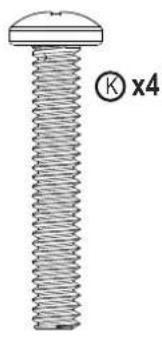
| K | 1/4-20x1 1⁄2" Screw | 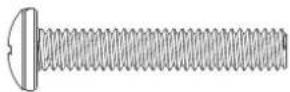 | 4 |
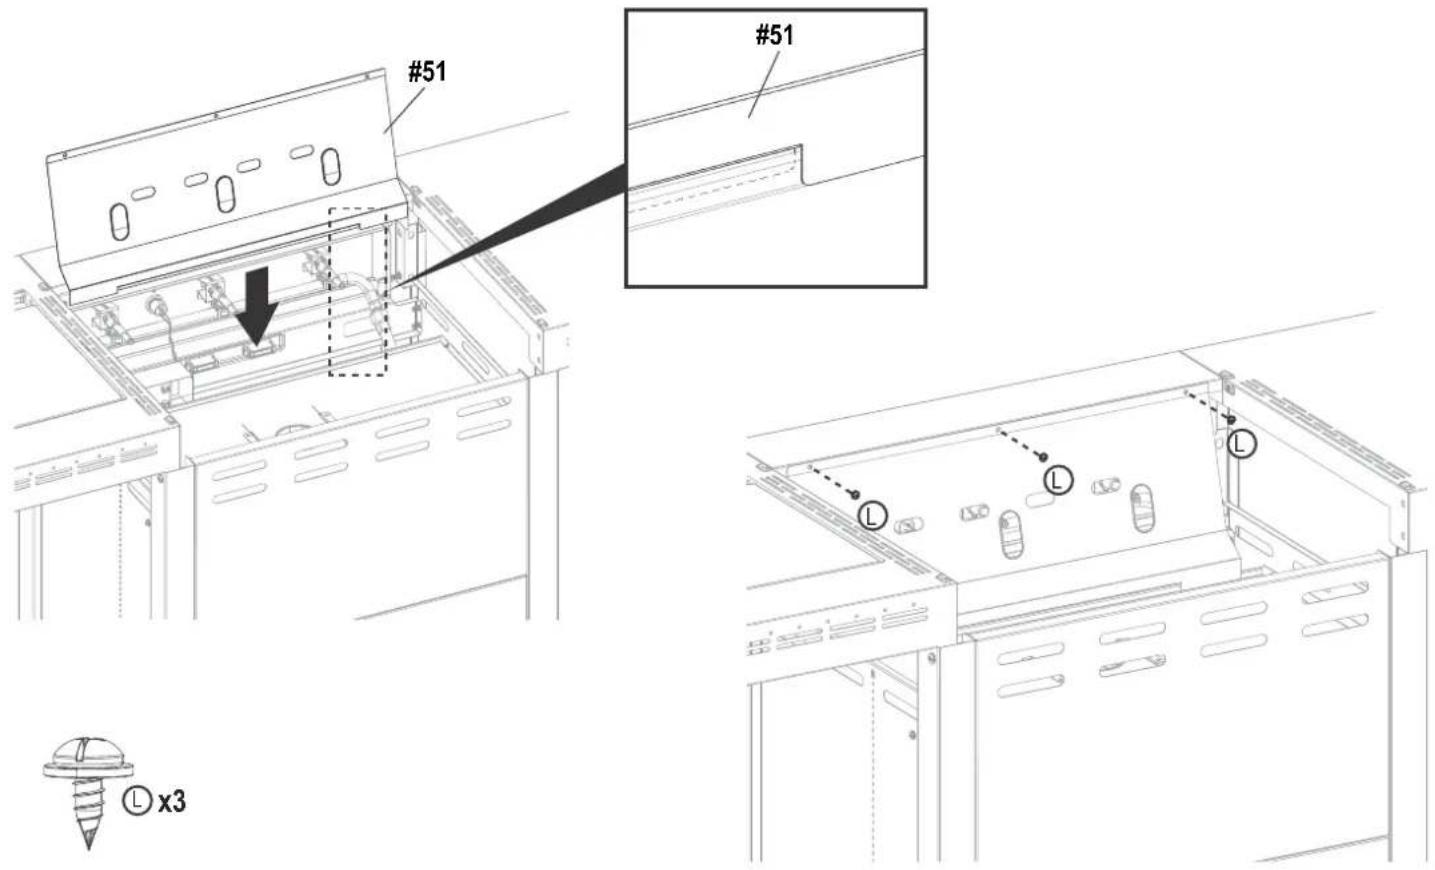
| L | #8x3/8" self-tapping Screw | 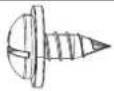 | 9 |
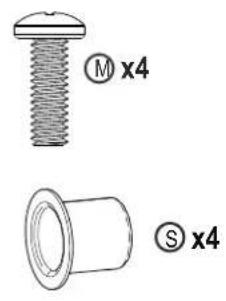
| M | #10-24x3/4" Screw | 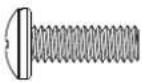 | 4 |
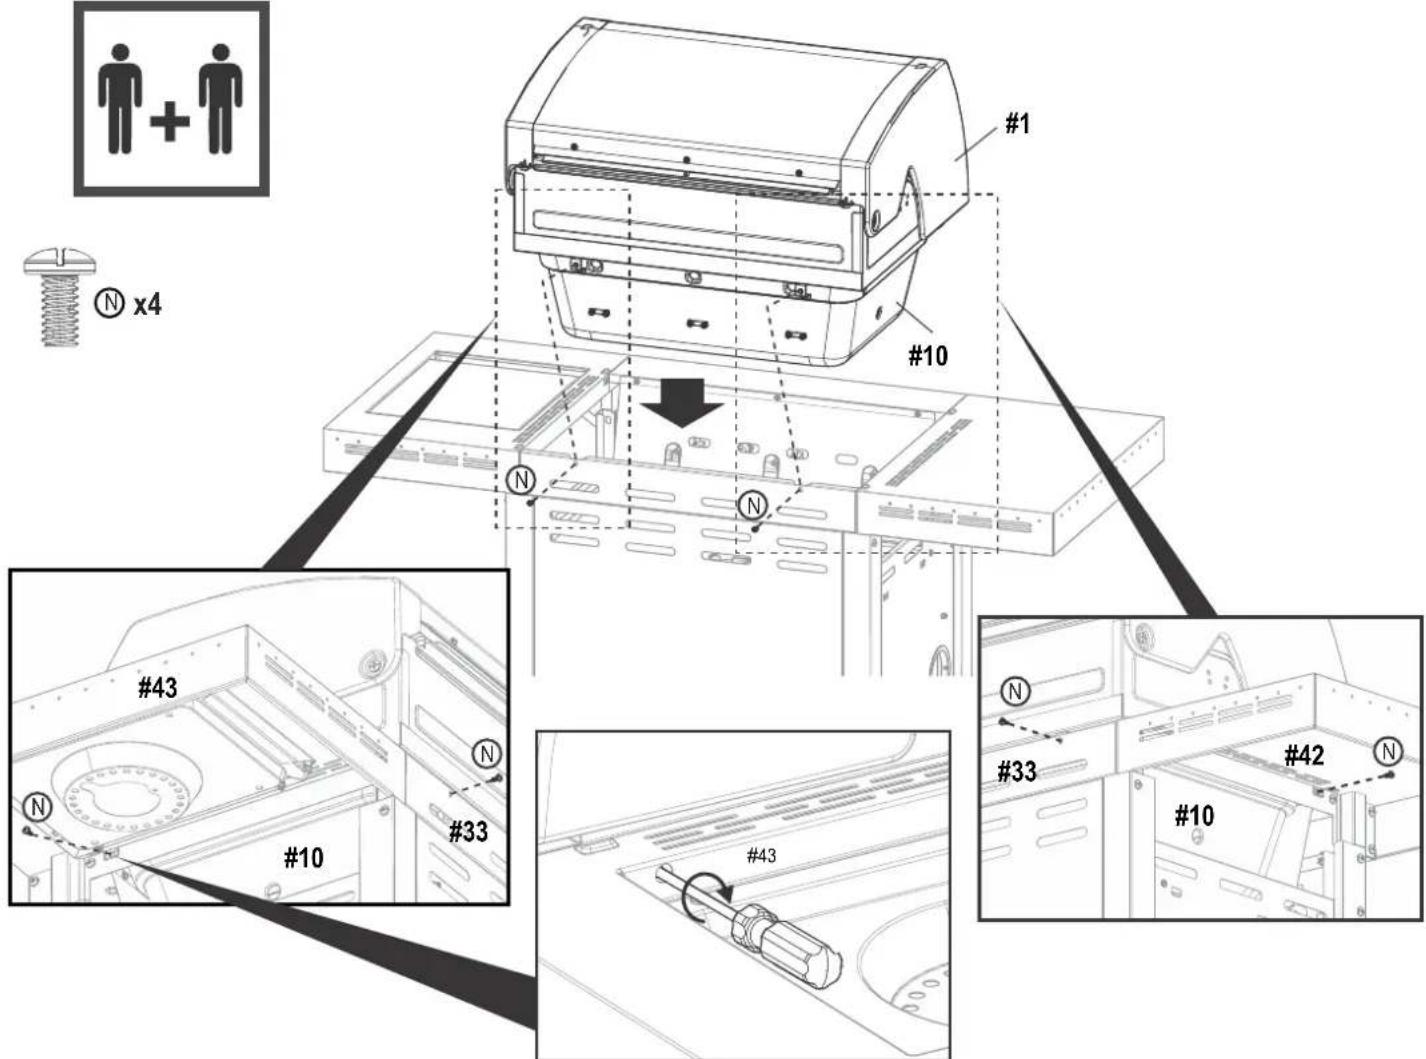
| N | #10-24x3/8" Screw | 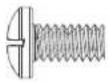 | 7 |
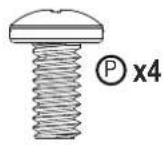
| P | 1/4-20x1/2" Screw | 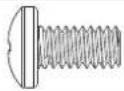 | 28 |
| R | Hitch Pin Clip | 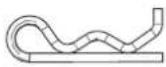 | 6 |
| S | Door Bushing |  | 4 |
PARTS DIAGRAM - 468710017 / 468710017CH / 468810017DK
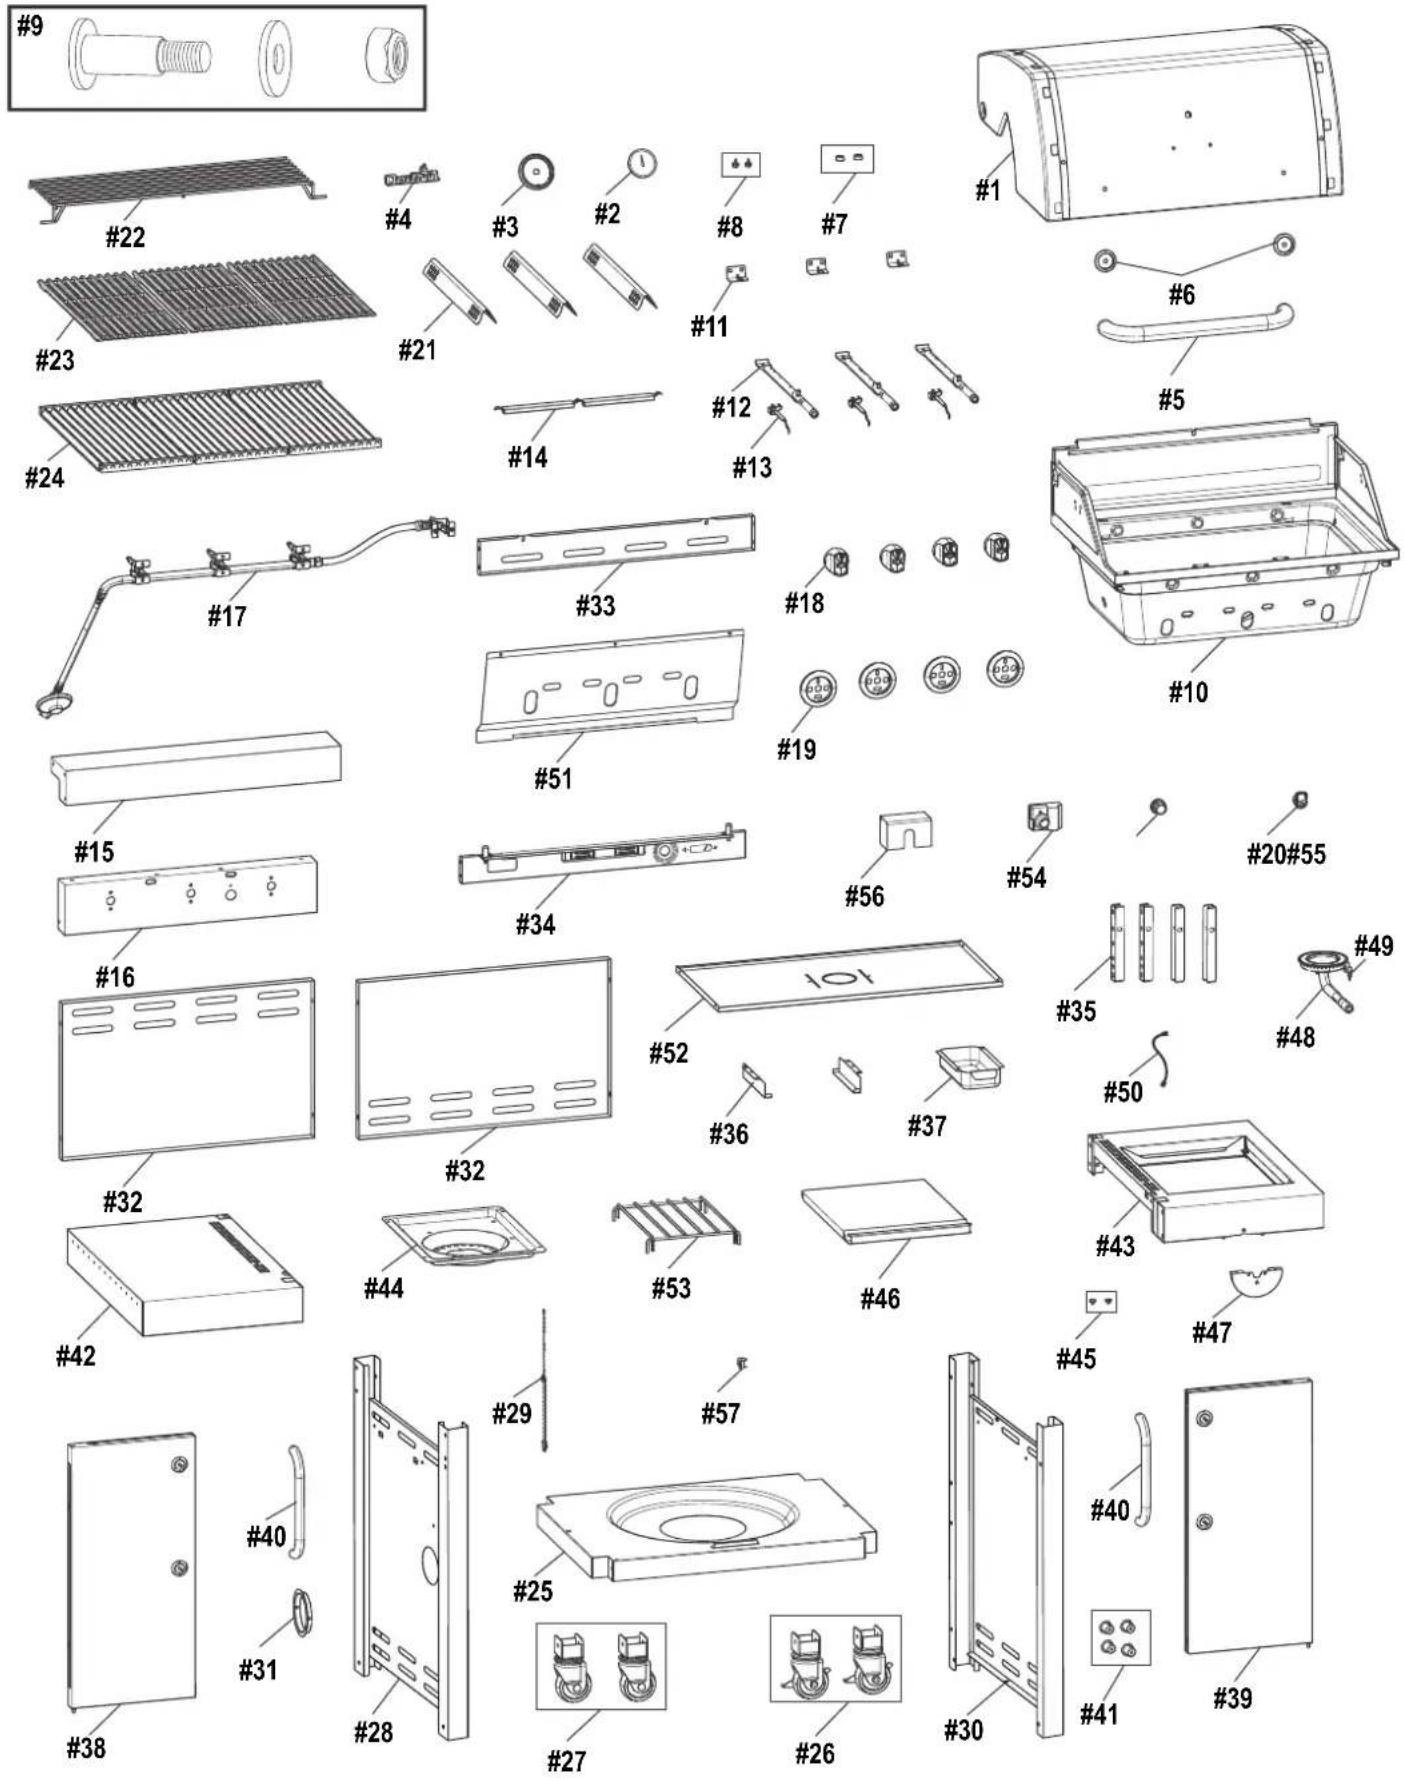
PARTS DIAGRAM - 468810017
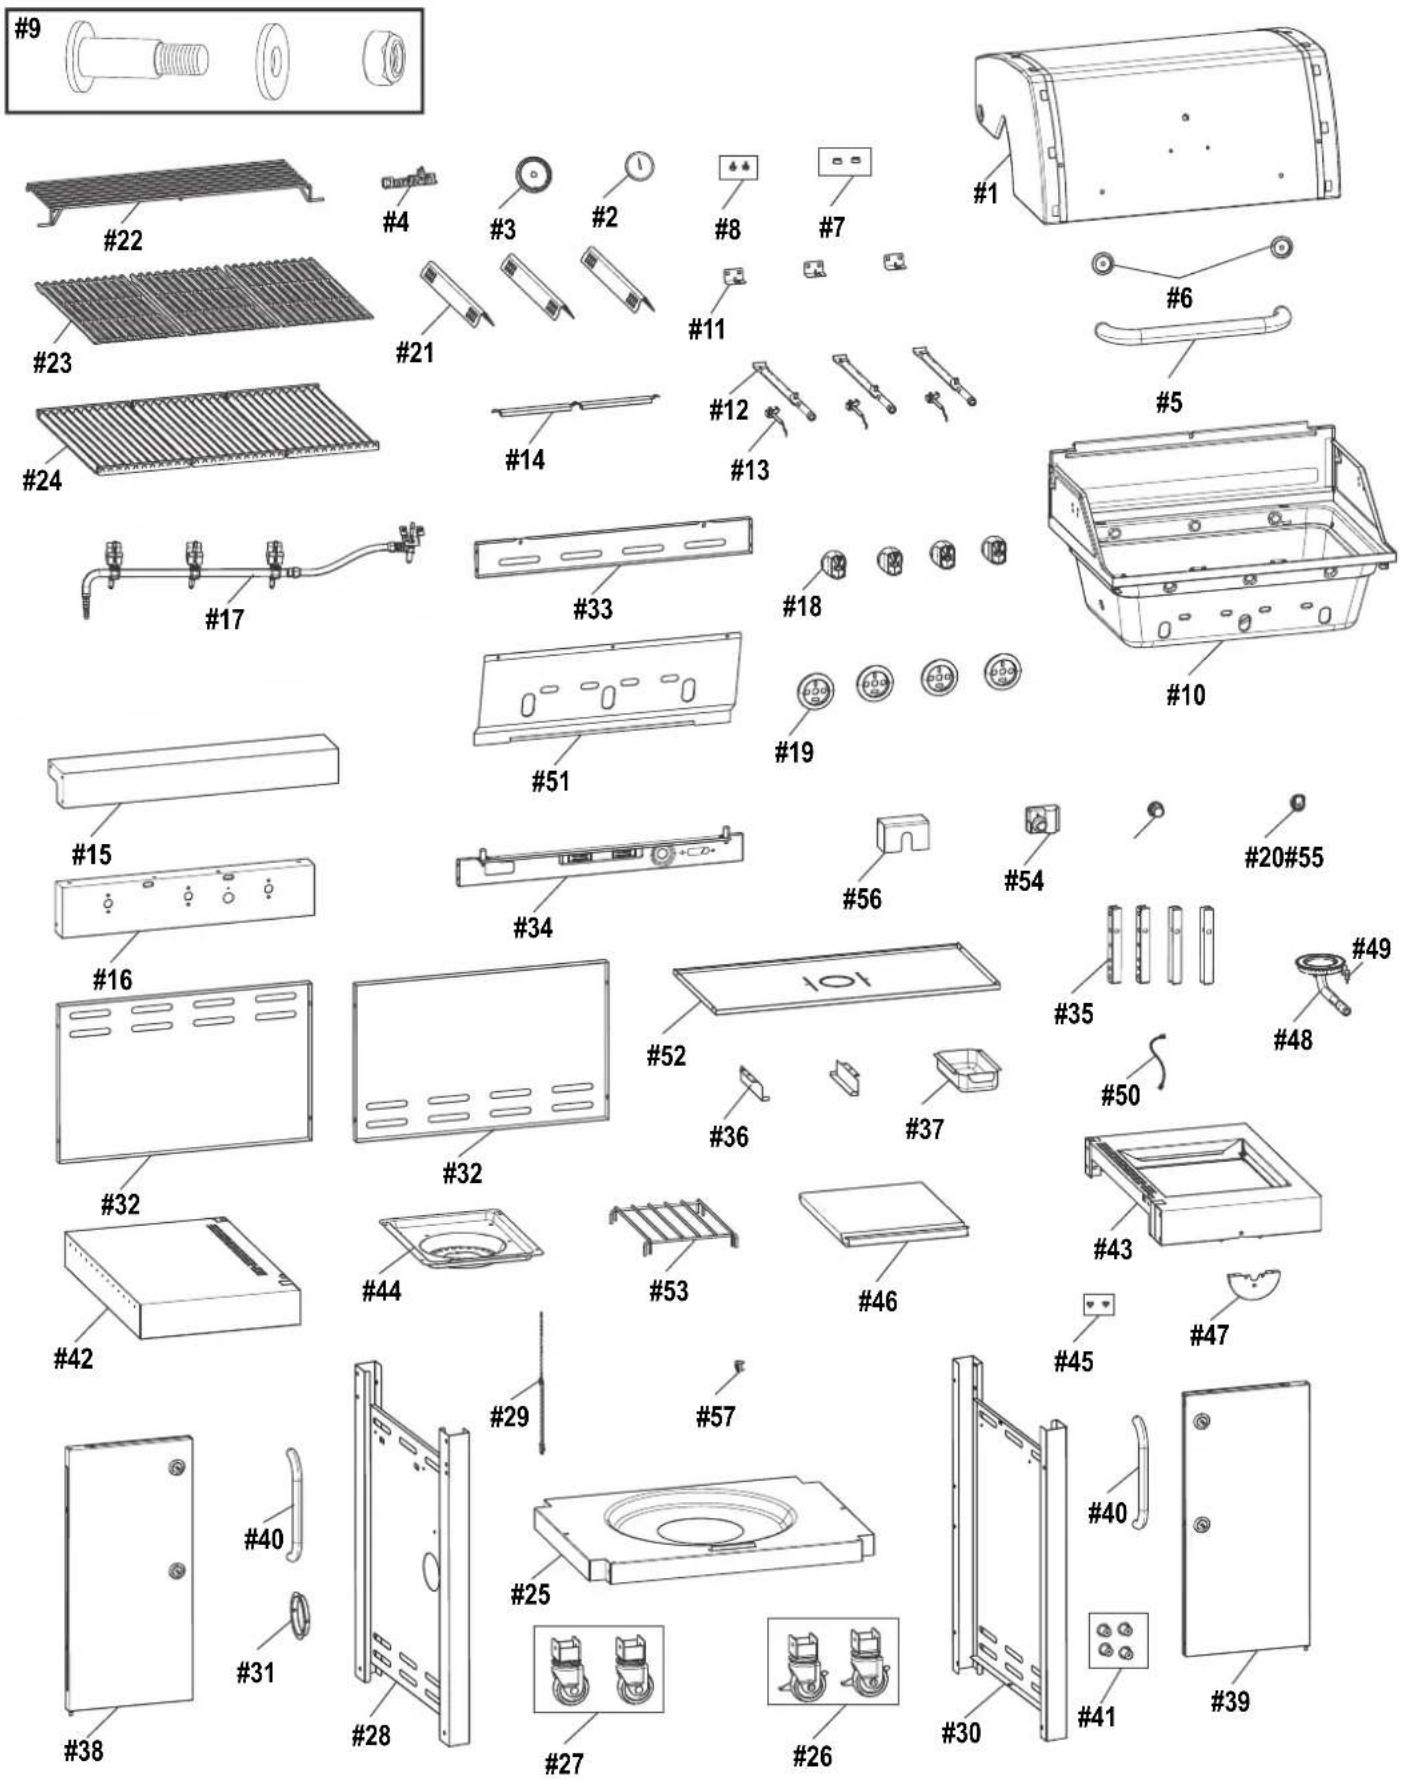
PARTS LIST - 468710017 / 468710017CH / 468810017DK
| Key Qty Description | |
| 1 1 TOP LID | |
| 2 1 TEMPERATURE GAUGE | |
| 3 1 BEZEL, F/ TEMP GAUGE | |
| 4 1 LOGO PLATE | |
| 5 1 HANDLE F/ TOP LID | |
| 6 2 BEZEL, F/ HANDLE | |
| 7 2 RUBBER BUMPER, W/ HOLE, F/ TOP LID | |
| 8 2 RUBBER BUMPER, ROUND | |
| 9 1 TOP LID HARDWARE | |
| 10 1 FIREBOX | |
| 11 3 BURNER BRACE | |
| 12 3 MAIN BURNER TUBE, NO ELECTRODE | |
| 13 3 ELECTRODE SET, F/ MAIN BURNER | |
| 14 2 FLAME CARRY OVER TUBE | |
| 15 1 MAIN CONTROL PANEL, TOP | |
| 16 1 MAIN CONTROL PANEL, BOTTOM | |
| 17 1 HOSE VALVE REGULATOR | |
| 18 4 CONTROL KNOB | |
| 19 4 BEZEL, KNOB | |
| 20 1 IGNITER SWITCH MODULE | |
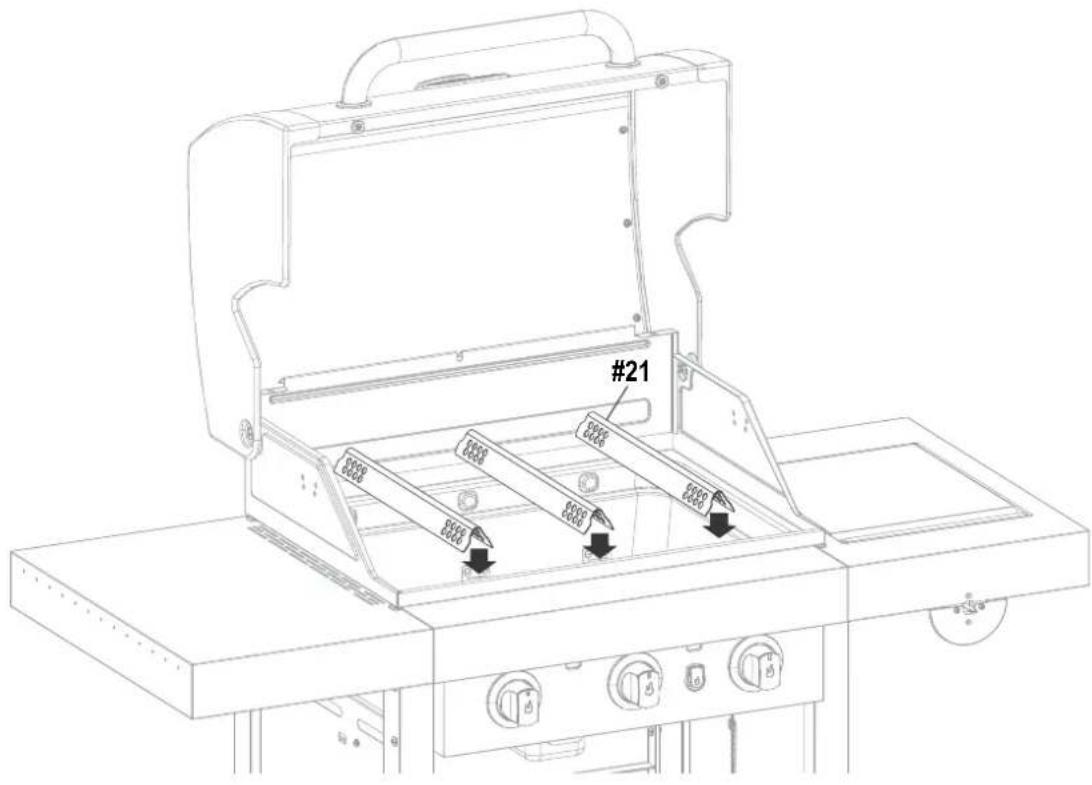
| 21 3 HEAT TENT | |
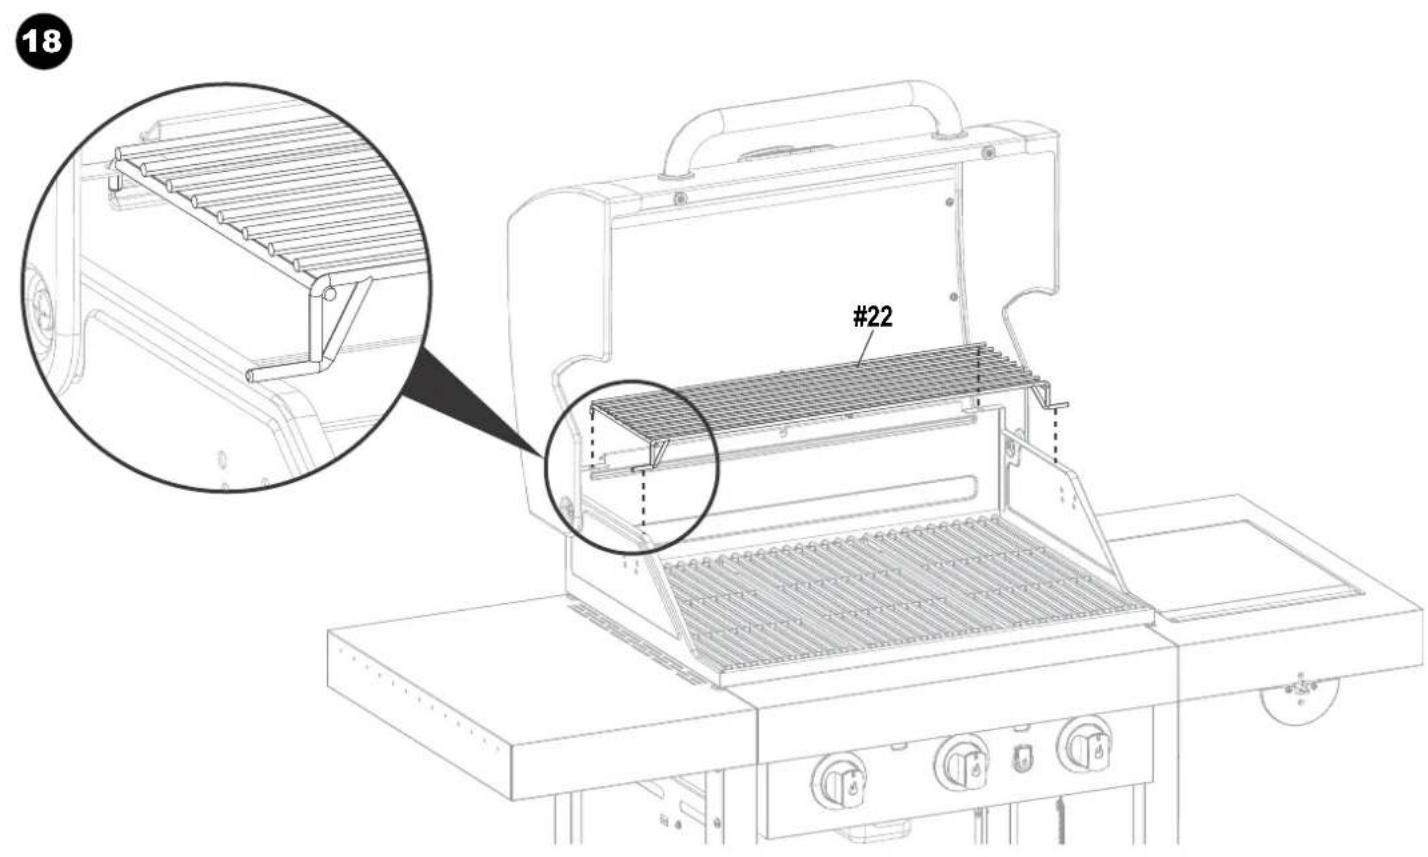
| 22 1 WARMING RACK | |
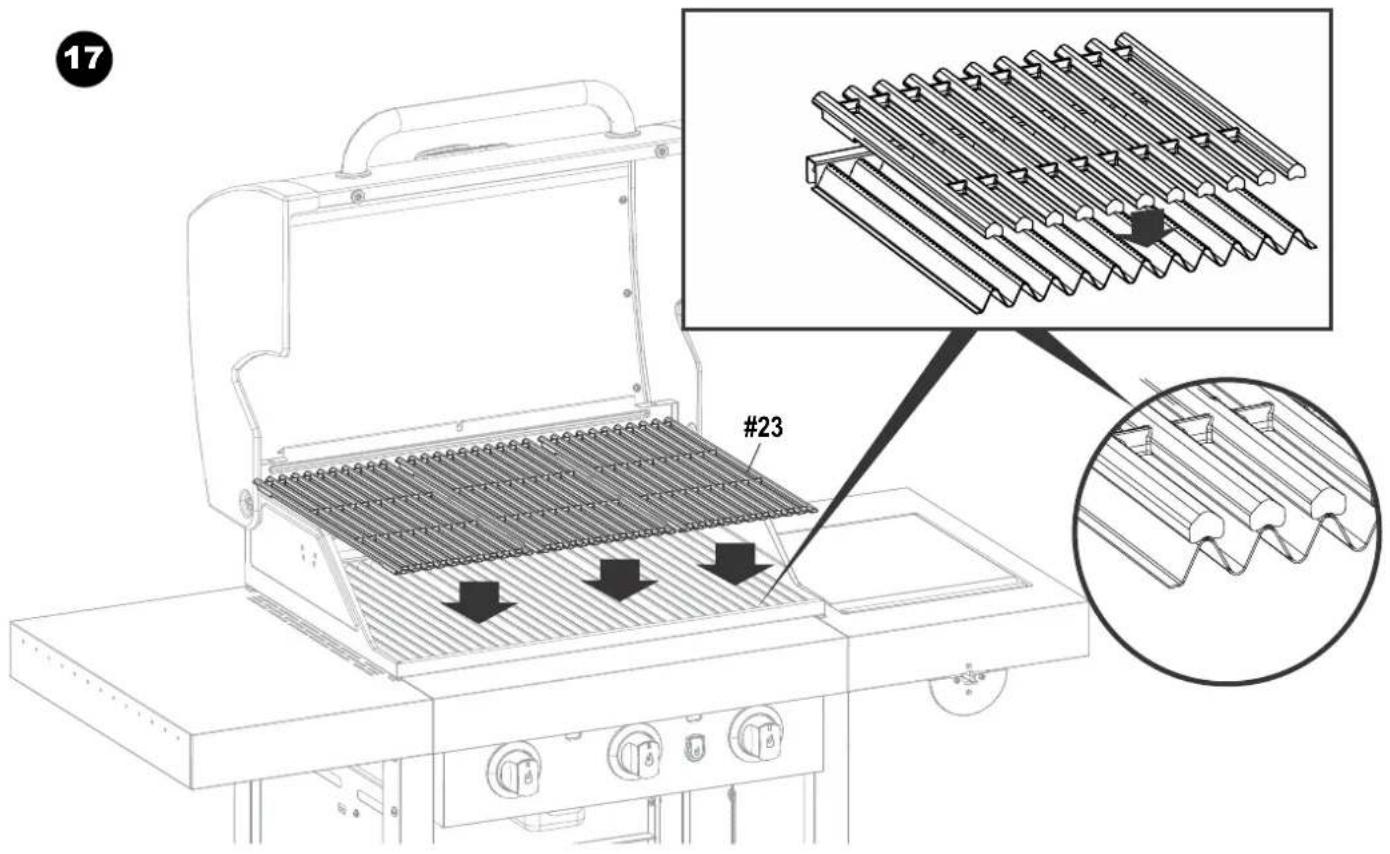
| 23 3 COOKING GRATE | |
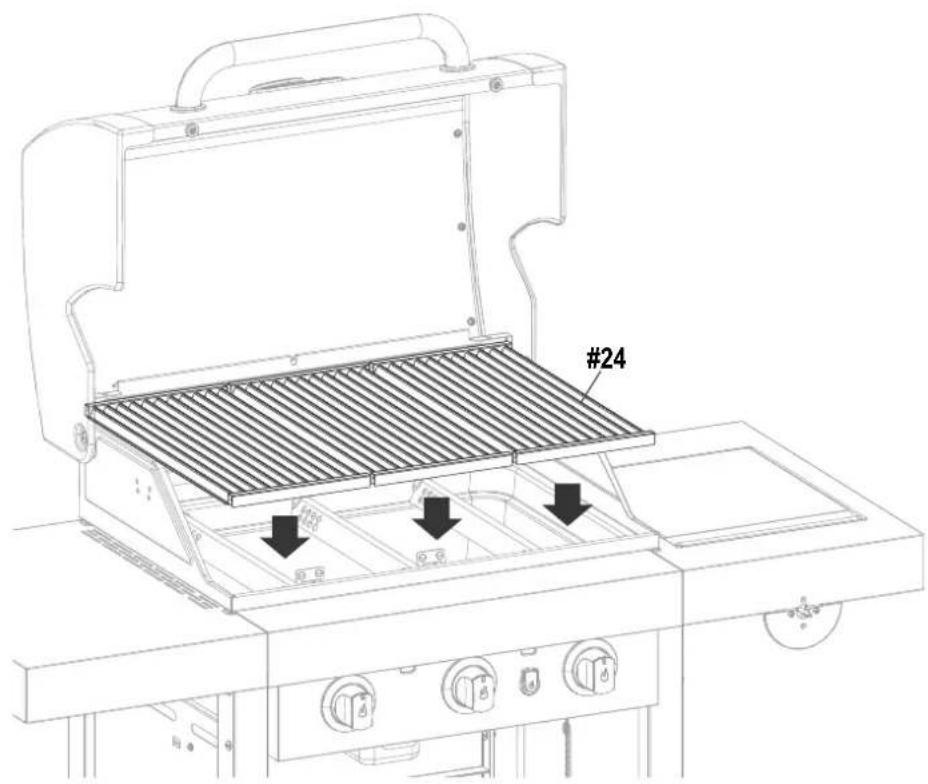
| 24 3 COOKING GRATE, INFRARED EMITTER | |
| 25 1 BOTTOM SHELF | |
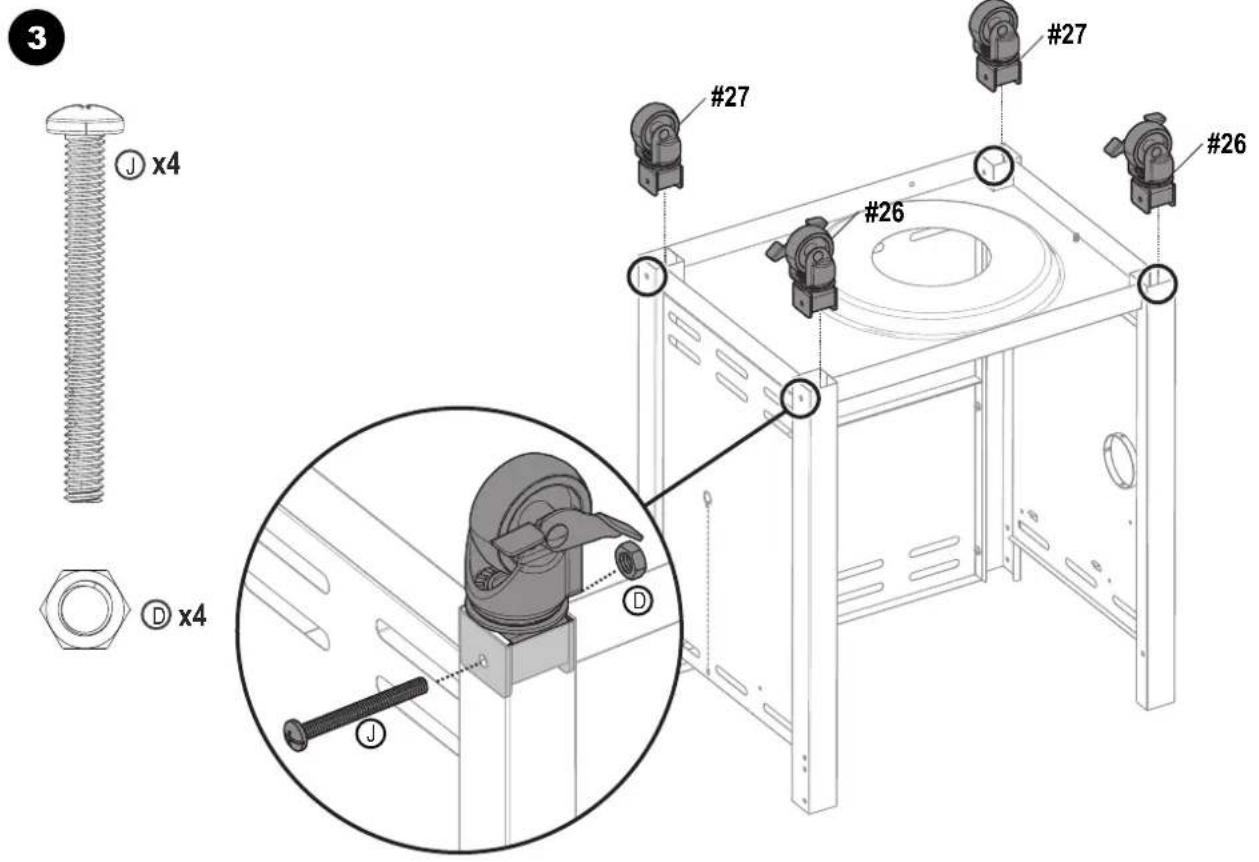
| 26 2 CASTER, LOCKING | |
| 27 2 CASTER, FIXED | |
| 28 1 LEFT CART ASSEMBLY | |
| 29 1 MATCH HOLDER | |
| 30 1 RIGHT CART ASSEMBLY | |
| 31 1 GROMMET | |
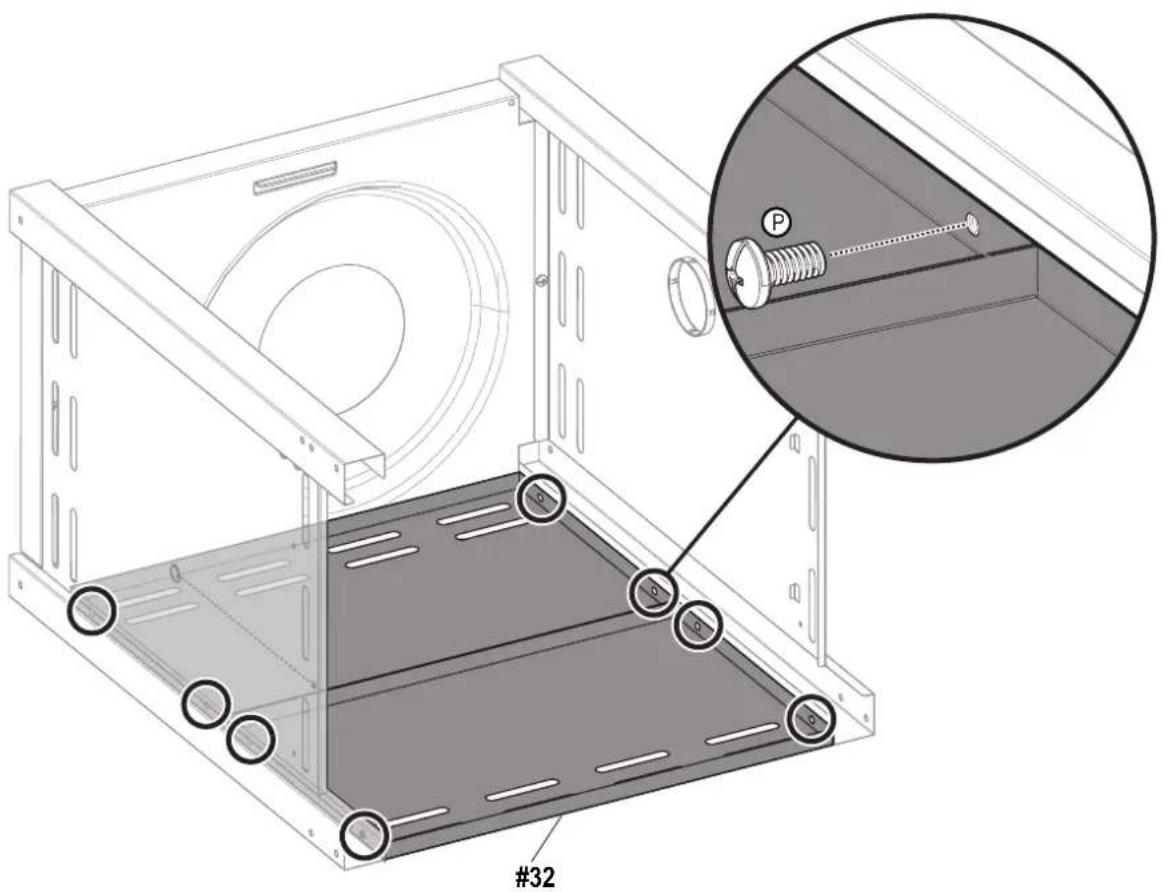
| 32 2 REAR PANEL LOWER | |
| 33 1 REAR PANEL UPPER | |
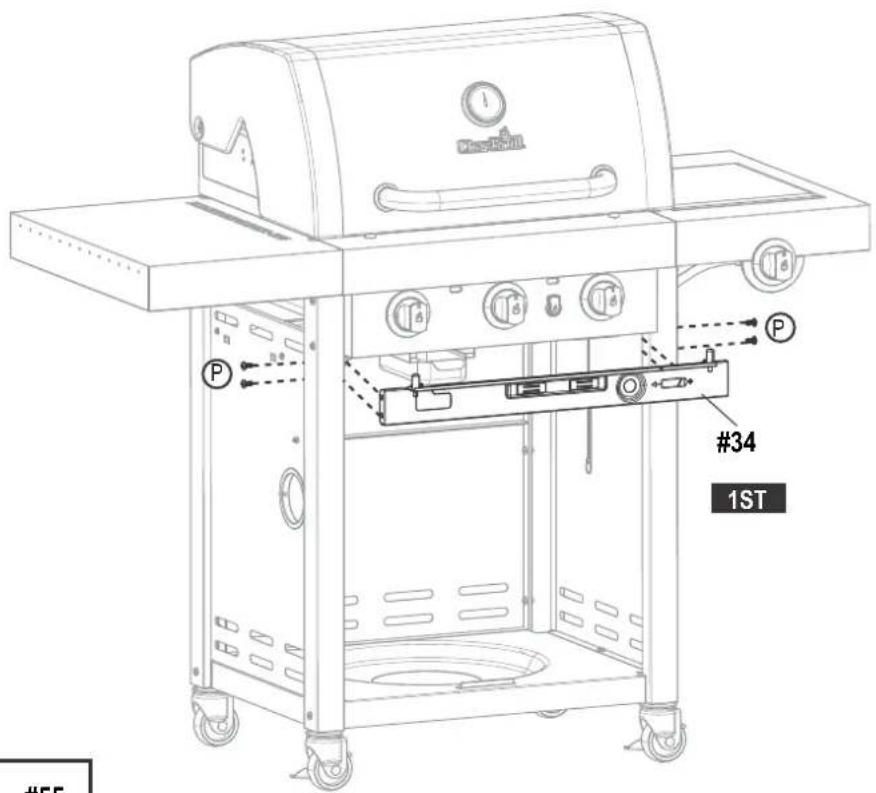
| 34 1 FRONT DOOR BRACE | |
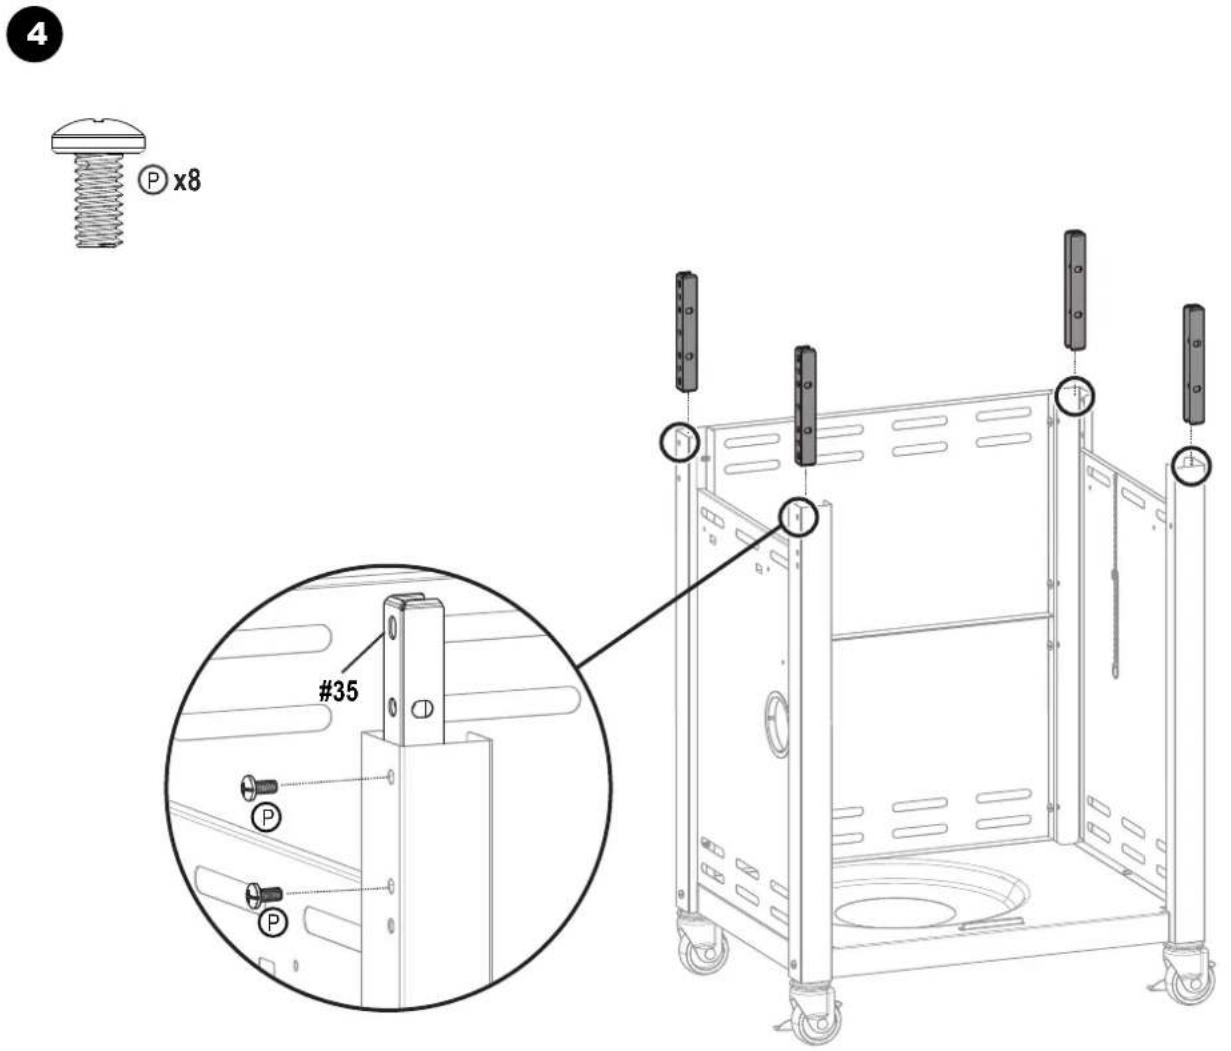
| 35 4 SIDE SHELF CONNECTION BRACE | |
| 36 2 RAIL, F' GREASE TRAY | |
| 37 1 GREASE TRAY | |
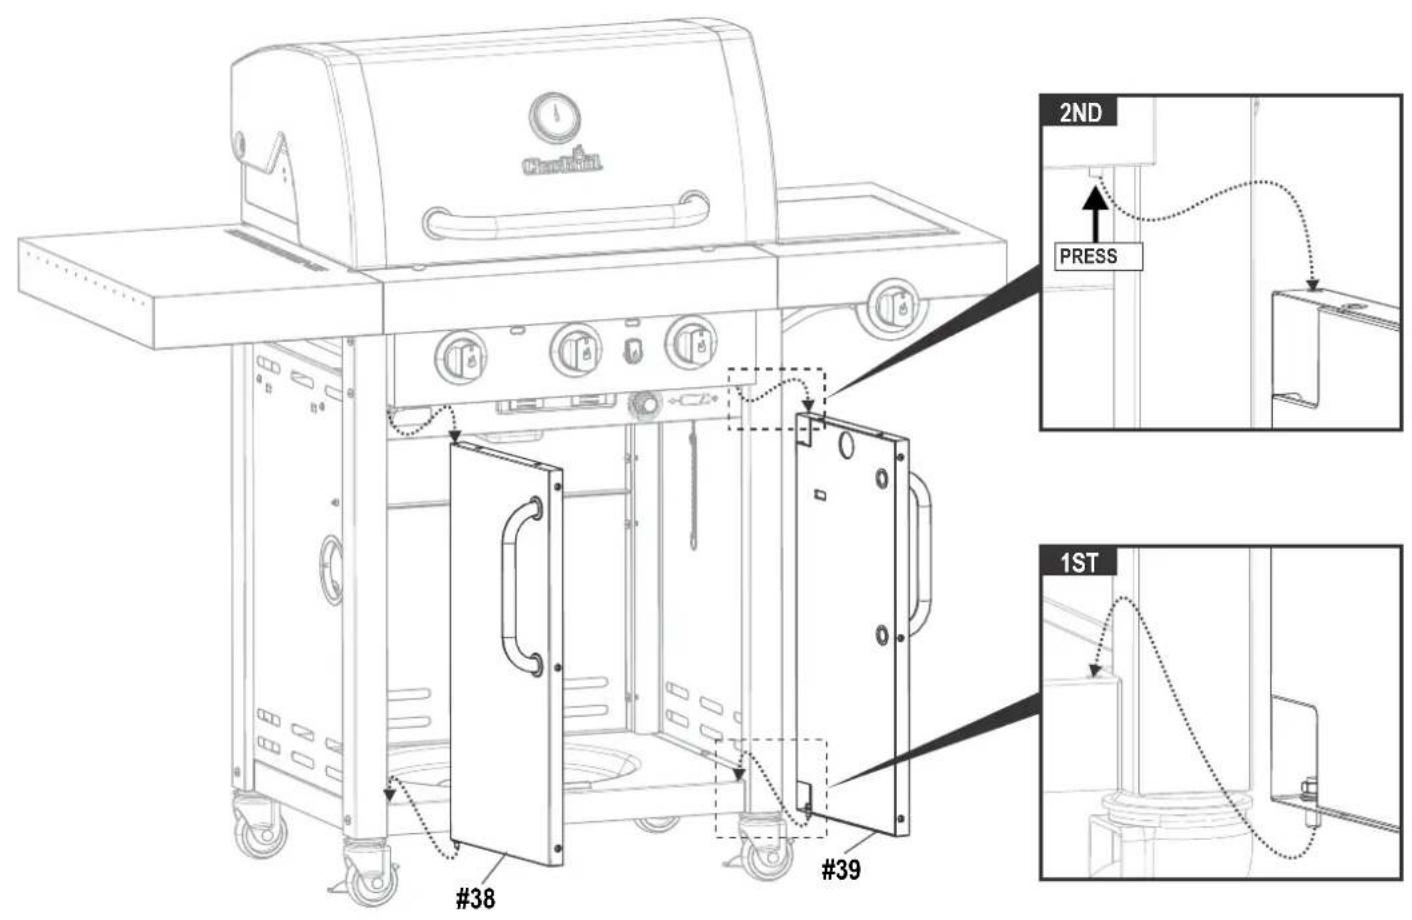
| 38 1 LEFT DOOR, NO HANDLE | |
| 39 1 RIGHT DOOR, NO HANDLE | |
| Key Qty Description | |
| 40 2 | HANDLE, F/ DOOR |
| 41 4 | DOOR BUSHING, F/ HANDLE |
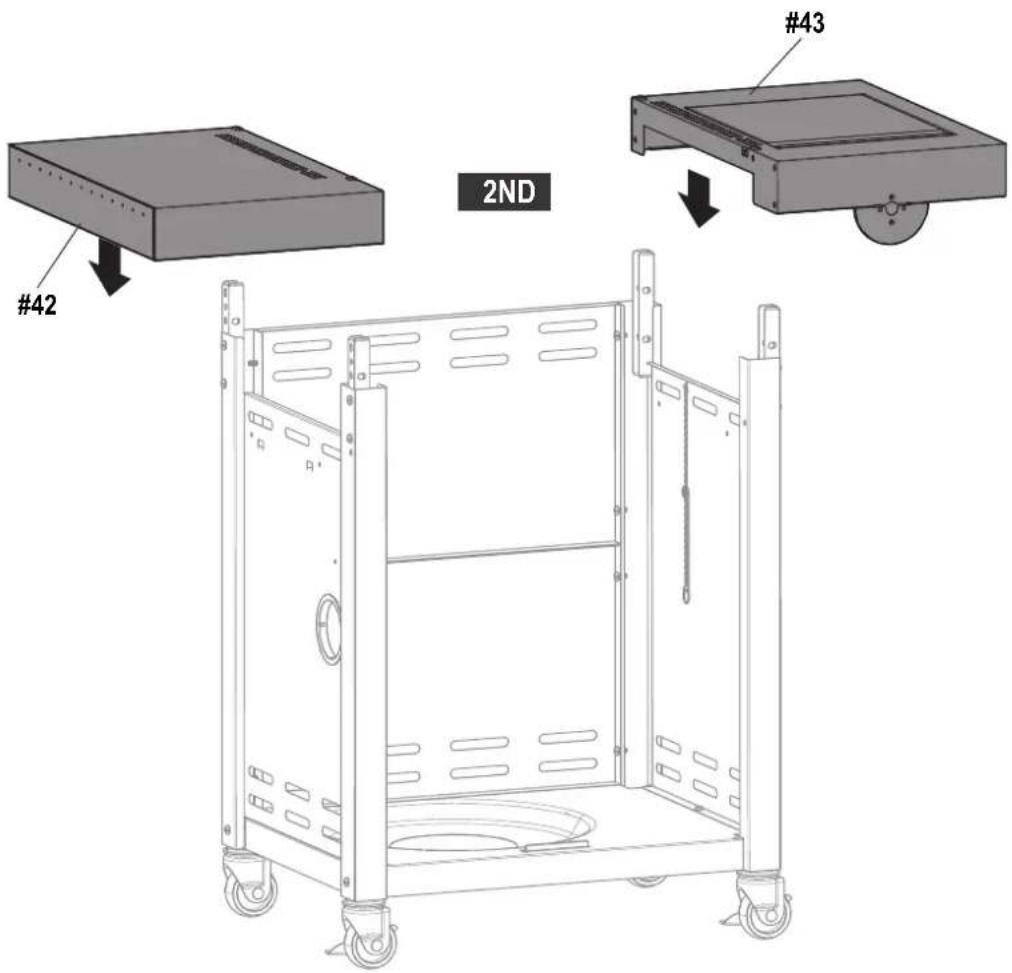
| 42 1 | LEFT SIDE SHELF |
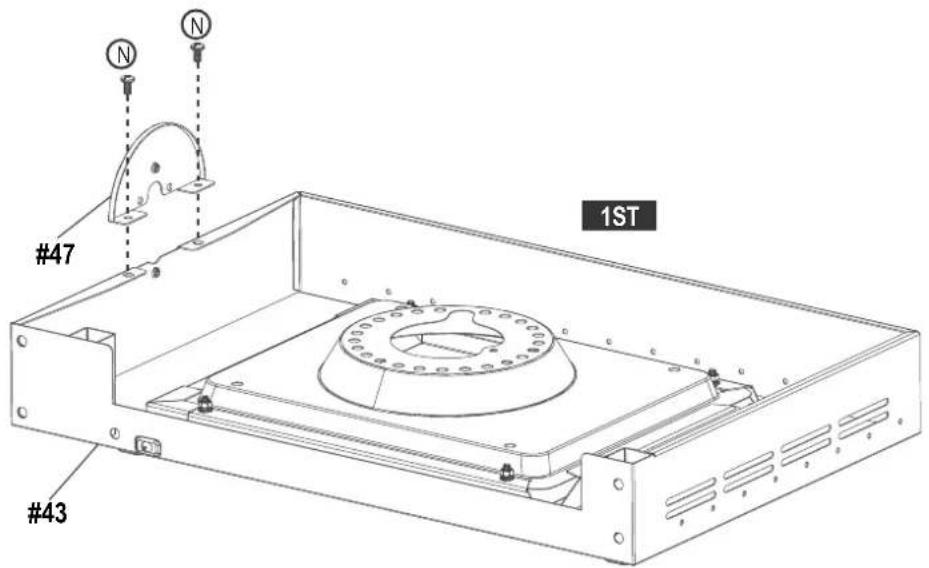
| 43 1 | HOT PLATE SHELF |
| 44 1 | DRIP PAN, F/ HOT PLATE |
| 45 2 | SILICONE RUBBER BUMPER, F/ HOT PLATE |
| 46 1 | HOT PLATE LID |
| 47 1 | CONTROL PANEL, F/ HOT PLATE SHELF |
| 48 1 | HOT PLATE |
| 49 1 | ELECTRODE, F/ HOT PLATE |
| 50 1 | WIRE, F/ HOT PLATE ELECTRODE |
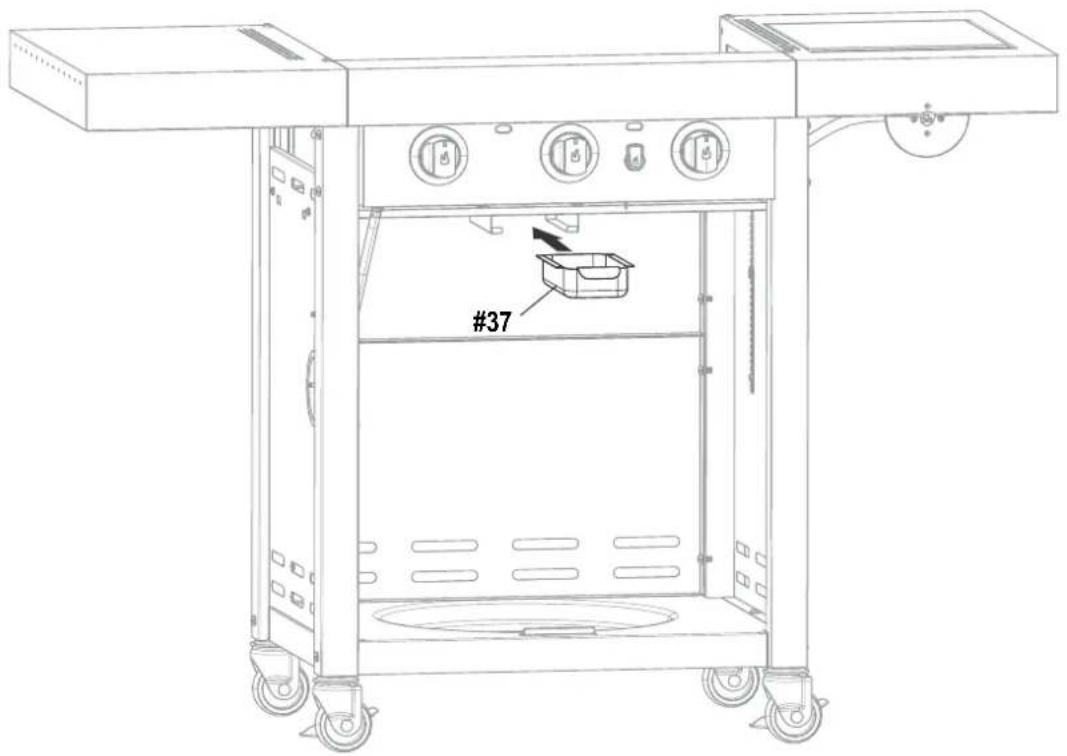
| 51 1 | HEAT SHIELD, FIREBOX |
| 52 1 | HEAT SHIELD, F/ TANK |
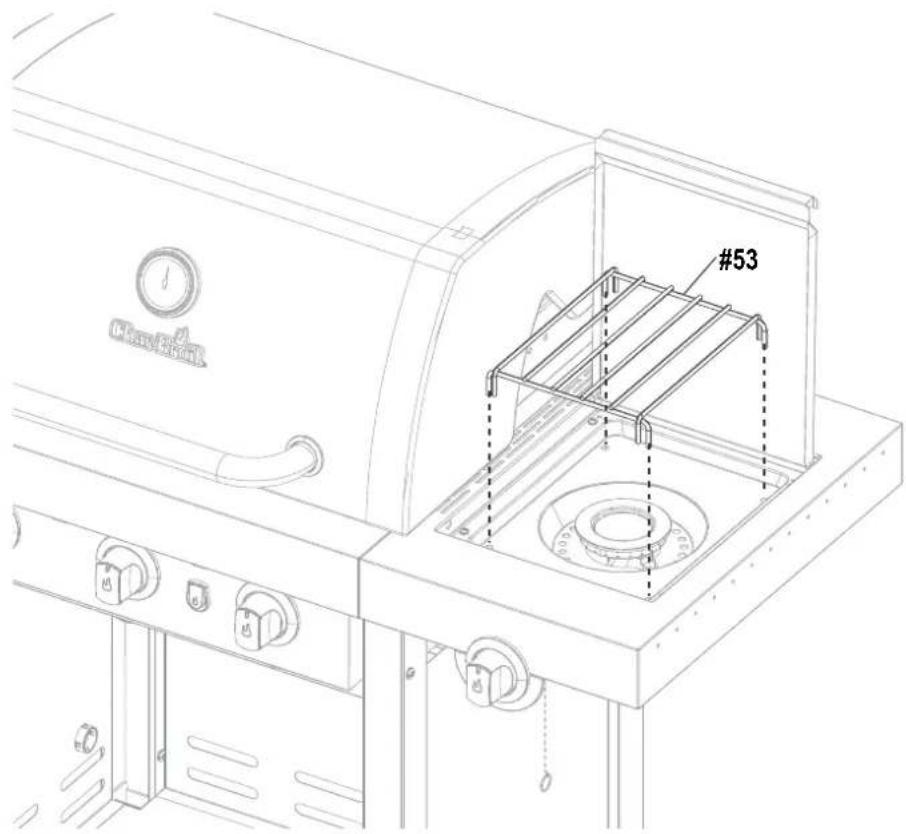
| 53 1 | GRATE, F/ HOT PLATE |
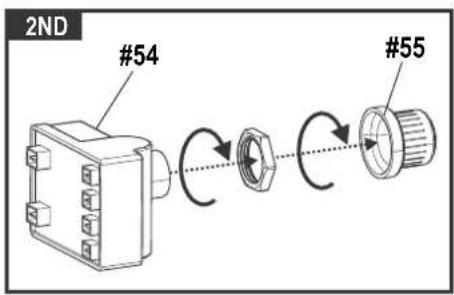
| 54 1 | ELECTRONIC IGNITION MODULE |
| 55 1 | CAP, F/ EI MODULE |
| 56 1 | HEAT SHIELD, F/ IGNITION MODULE |
| 57 1 | REGULATOR HOSE CLIP |
NOT Pictured
| ... 2 MAGNET | |
| ... 1 PRODUCT GUIDE, EUROPE | |
| ... 1 HARDWARE PACK | |
| 1 IR CLEANING TOOL | |
NOTE: Some grill parts shown in the assembly steps may differ slightly in appearance from those on your particular grill model. However, the method of assembly remains the same.
PARTS LIST - 468810017
| Key Qty Description | |
| 1 1 TOP LID | |
| 2 1 TEMPERATURE GAUGE | |
| 3 1 BEZEL, F/ TEMP GAUGE | |
| 4 1 LOGO PLATE | |
| 5 1 HANDLE F/ TOP LID | |
| 6 2 BEZEL, F/ HANDLE | |
| 7 2 RUBBER BUMPER, W/ HOLE, F/ TOP LID | |
| 8 2 RUBBER BUMPER, ROUND | |
| 9 1 TOP LID HARDWARE | |
| 10 1 FIREBOX | |
| 11 3 BURNER BRACE | |
| 12 3 MAIN BURNER TUBE, NO ELECTRODE | |
| 13 3 ELECTRODE SET, F/ MAIN BURNER | |
| 14 2 FLAME CARRY OVER TUBE | |
| 15 1 MAIN CONTROL PANEL, TOP | |
| 16 1 MAIN CONTROL PANEL, BOTTOM | |
| 17 1 HOSE VALVE | |
| 18 4 CONTROL KNOB | |
| 19 4 BEZEL, KNOB | |
| 20 1 IGNITER SWITCH MODULE | |
| 21 3 HEAT TENT | |
| 22 1 WARMING RACK | |
| 23 3 COOKING GRATE | |
| 24 3 COOKING GRATE, INFRARED EMITTER | |
| 25 1 BOTTOM SHELF | |
| 26 2 CASTER, LOCKING | |
| 27 2 CASTER, FIXED | |
| 28 1 LEFT CART ASSEMBLY | |
| 29 1 MATCH HOLDER | |
| 30 1 RIGHT CART ASSEMBLY | |
| 31 1 GROMMET | |
| 32 2 REAR PANEL LOWER | |
| 33 1 REAR PANEL UPPER | |
| 34 1 FRONT DOOR BRACE | |
| 35 4 SIDE SHELF CONNECTION BRACE | |
| 36 2 RAIL, F/ GREASE TRAY | |
| 37 1 GREASE TRAY | |
| 38 1 LEFT DOOR, NO HANDLE | |
| 39 1 RIGHT DOOR, NO HANDLE | |
| Key Qty Description | |
| 40 2 | HANDLE, F/ DOOR |
| 41 4 | DOOR BUSHING, F/ HANDLE |
| 42 1 | LEFT S DE SHELF |
| 43 1 | HOT PLATE SHELF |
| 44 1 | DRIP PAN, F/ HOT PLATE |
| 45 2 | SILICONE RUBBER BUMPER, F/ HOT PLATE |
| 46 1 | HOT PLATE LID |
| 47 1 | CONTROL PANEL, F/ HOT PLATE SHELF |
| 48 1 | HOT PLATE |
| 49 1 | ELECTRODE, F/ HOT PLATE |
| 50 1 | WIRE, F/ HOT PLATE ELECTRODE |
| 51 1 | HEAT SHIELD, FIREBOX |
| 52 1 | HEAT SHIELD, F/ TANK |
| 53 1 | GRATE, F/ HOT PLATE |
| 54 1 | ELECTRONIC IGNITION MODULE |
| 55 1 | CAP, F/ EI MODULE |
| 56 1 | HEAT SHIELD, F/ IGNITION MODULE |
| 57 1 | REGULATOR HOSE CLIP |
NOT Pictured
| ... 2 MAGNET |
| ... 1 PRODUCT GUIDE, EUROPE |
| ... 1 HARDWARE PACK |
| ... 1 IR CLEANING TOOL |
NOTE: Some grill parts shown in the assembly steps may differ slightly in appearance from those on your particular grill model. However, the method of assembly remains the same.
ASSEMBLY
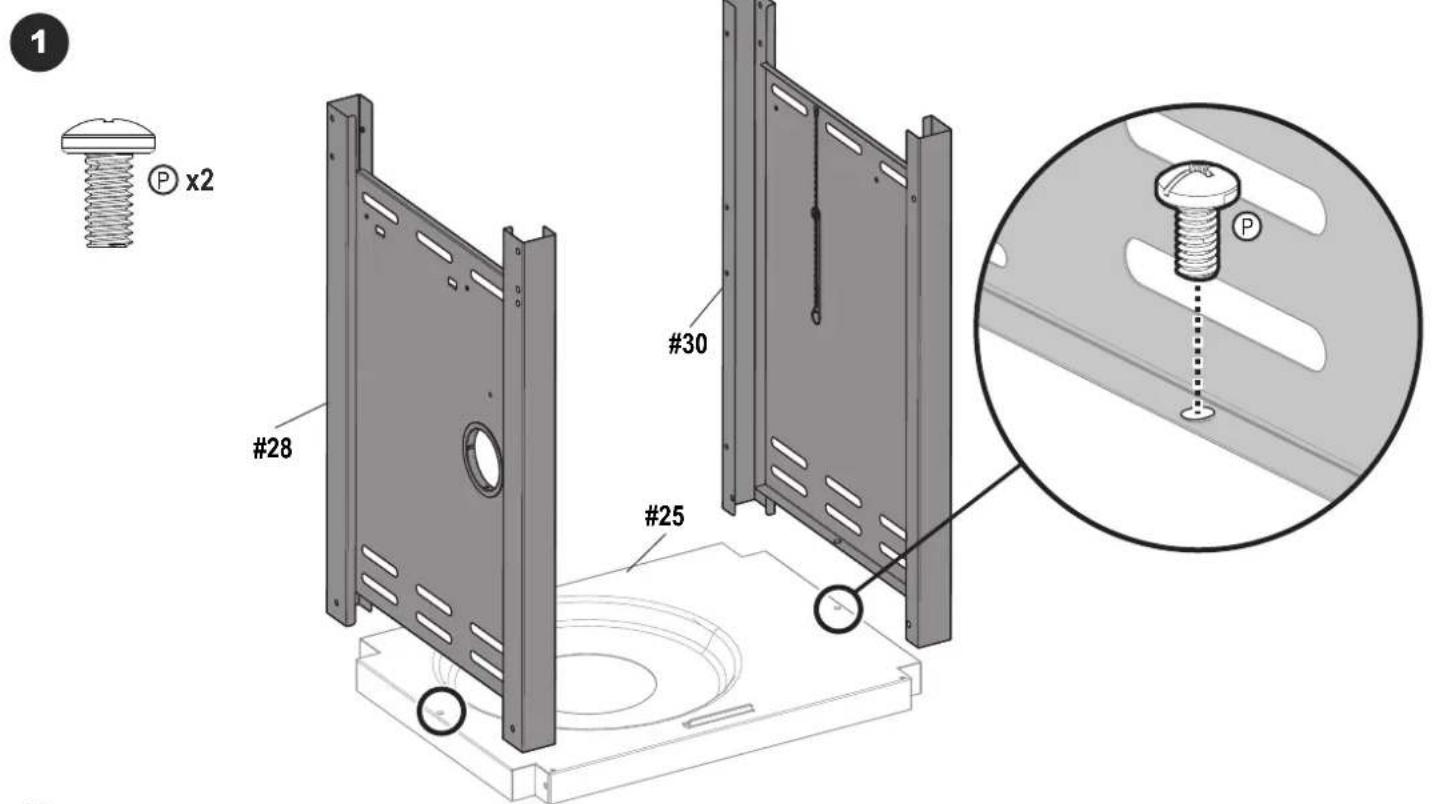
2
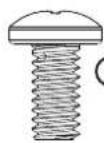
P x8

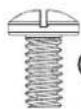
N x2
natural_image
Technical line drawing of a gas storage device with pipe connections and component details (no text or symbols)
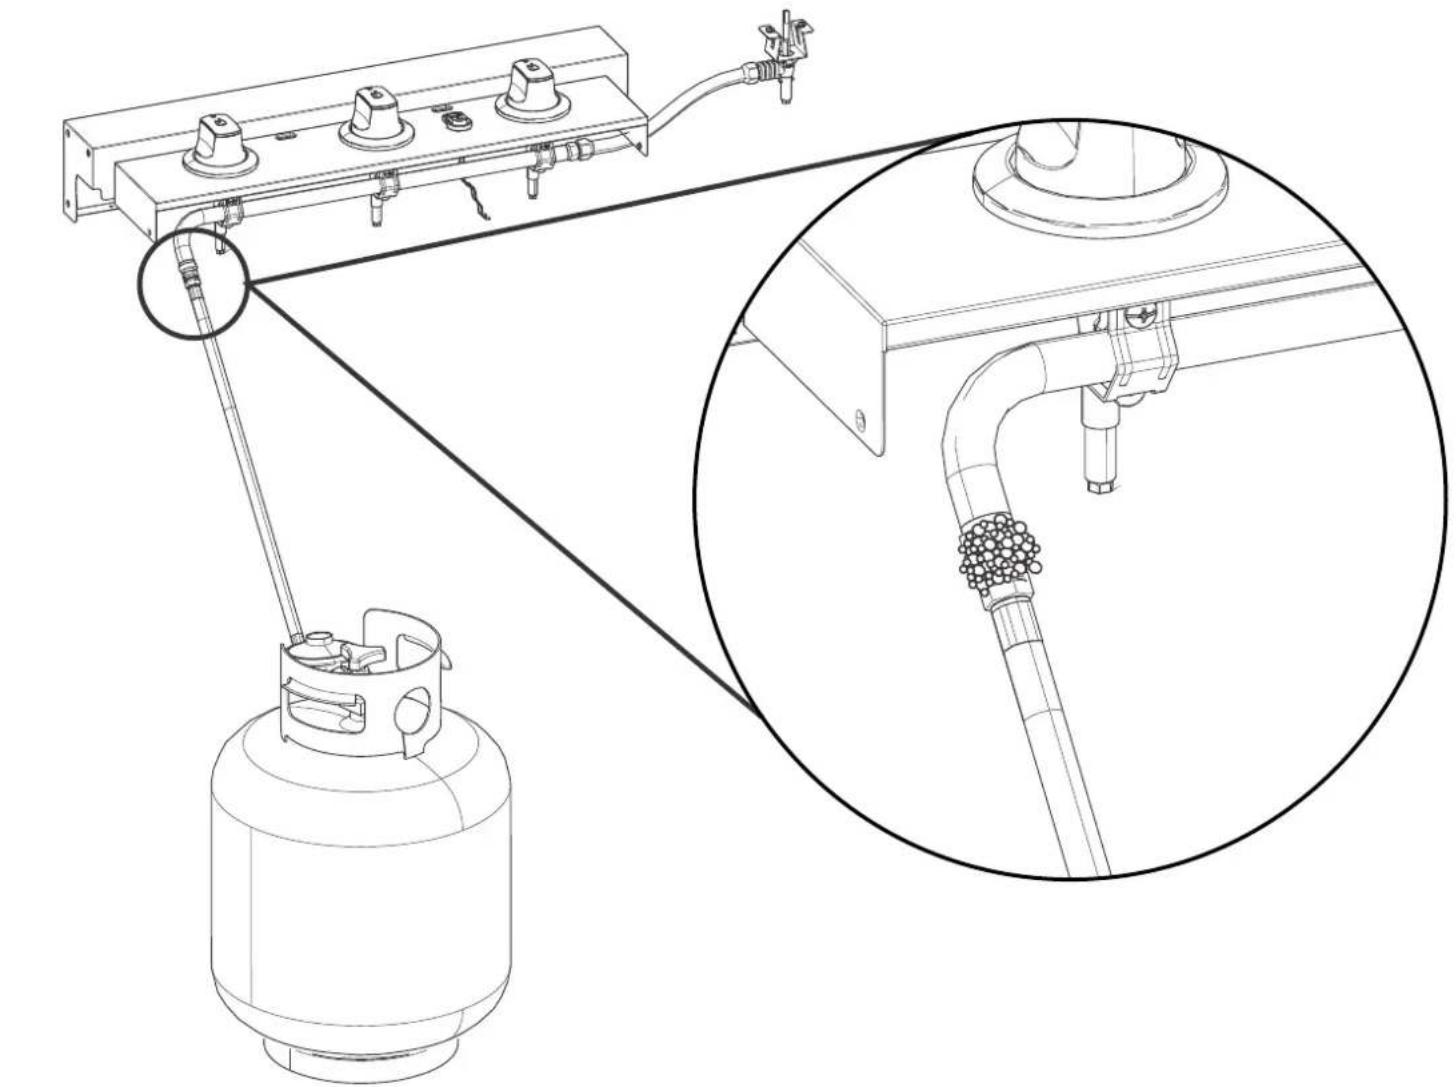
Disconnect the tank after this check! Ontkoppel de gastank na deze controle! Koppla från tanken efter denna kontroll! Koble fra beholderen etter denne kontrollen! Po kontrole nádobu odpojte! Po této kontrole odpojte nádrž! Irrota säiliö tämän tarkistuksen jälkeen! Framontér tanken efter denne kontrol!
Klemmen Sie den Tank nach dieser Prüfung ab! Scollegare il serbatoio dopo questo controllo! ¡Desconecte el tanque luego de esta comprobación! Desligue a botija depois desta verificação! Déconnectez le réservoir après cette vérification! Aftengdu tankinn eftir pessa skoðun!
natural_image
Technical line drawing of a gas storage device with attached piping and a gas cylinder (no text or symbols)
Disconnect the tank after this check! Ontkoppel de gastank na deze controle! Koppla från tanken efter denna kontroll! Koble fra beholderen etter denne kontrollen! Po kontrole nádobu odpojte! Po této kontrole odpojte nádrž! Irrota säiliö tämän tarkistuksen jälkeen! Framontér tanken efter denne kontrol!
Klemmen Sie den Tank nach dieser Prüfung ab! Scollegare il serbatoio dopo questo controllo! ¡Desconecte el tanque luego de esta comprobación! Desligue a botija depois desta verificação! Déconnectez le réservoir après cette vérification! Aftengdu tankinn eftir pessa skoðun!
9
10
11
natural_image
Close-up of a metallic screw with a flat head and threaded shaft, labeled 'K x4' (no other text or symbols)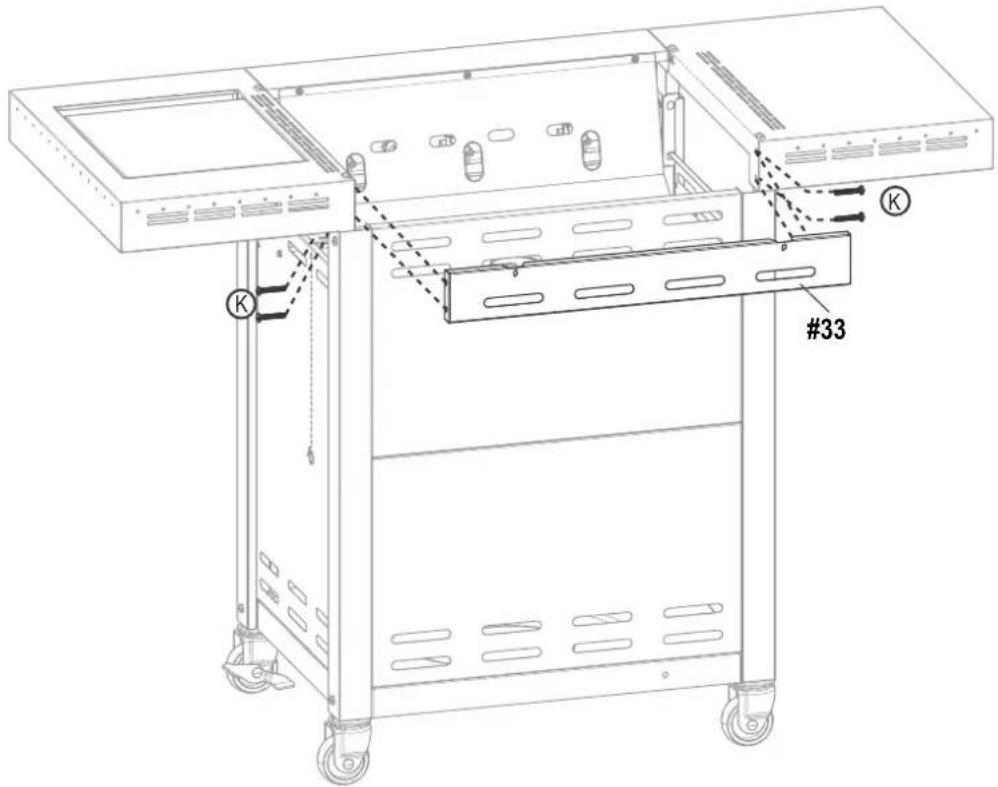
12

natural_image
Two human figures with a plus sign, no text or symbols present
13
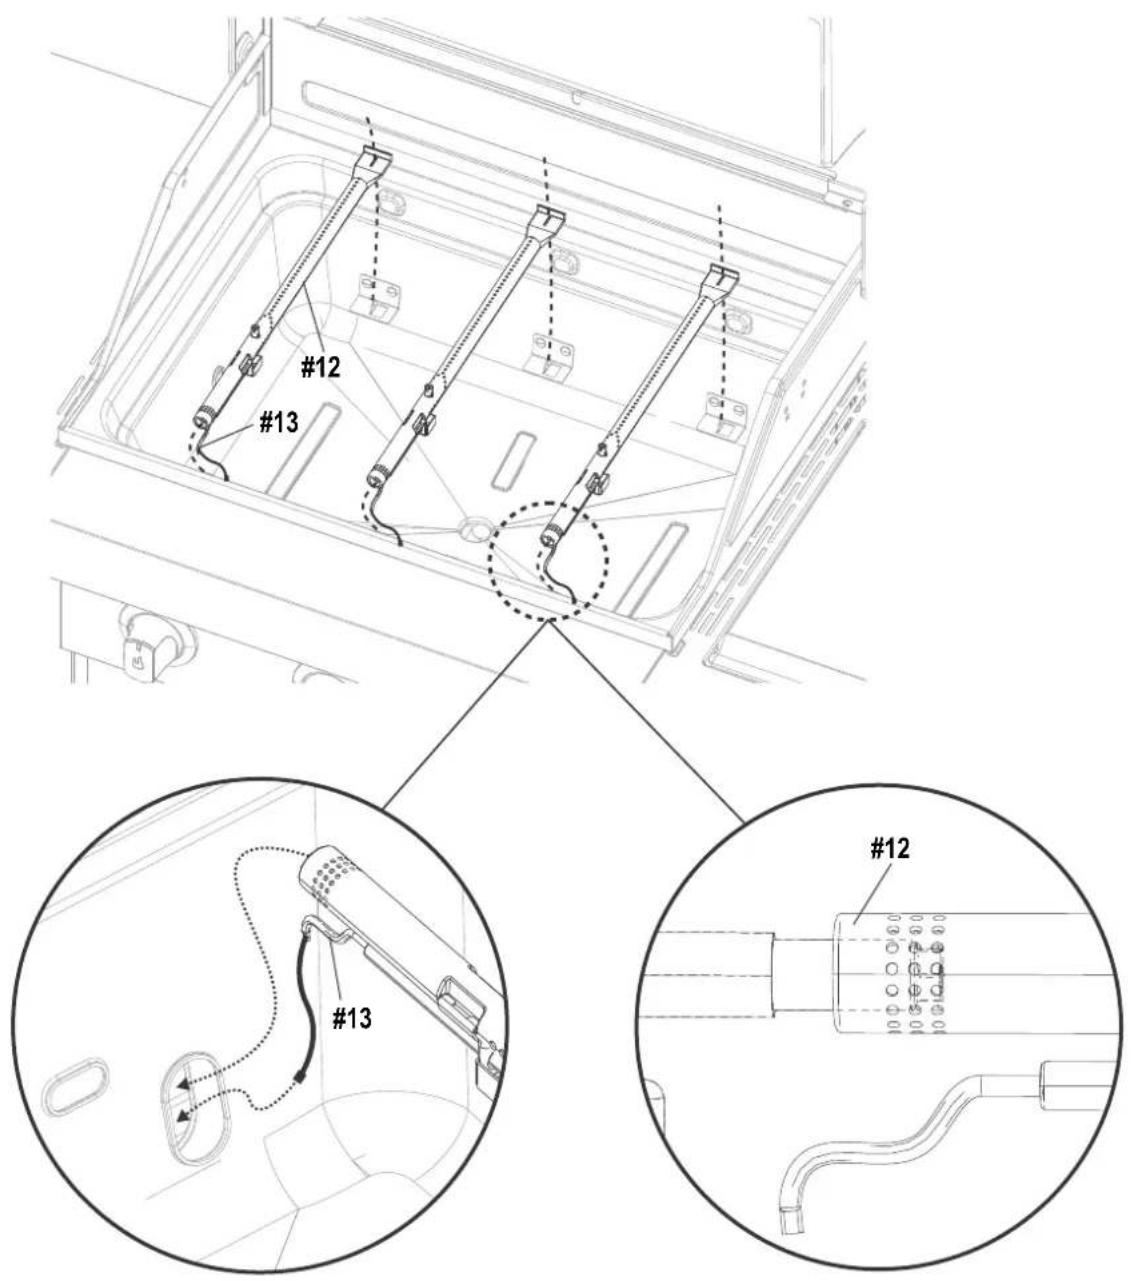

WARNING

Burner must properly engage valve as shown. Failure to engage valve as shown may result in personal injury and/or property damage.
14
15
16
19
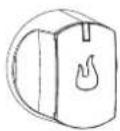
A x1
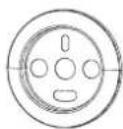
B x1
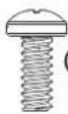
E×2
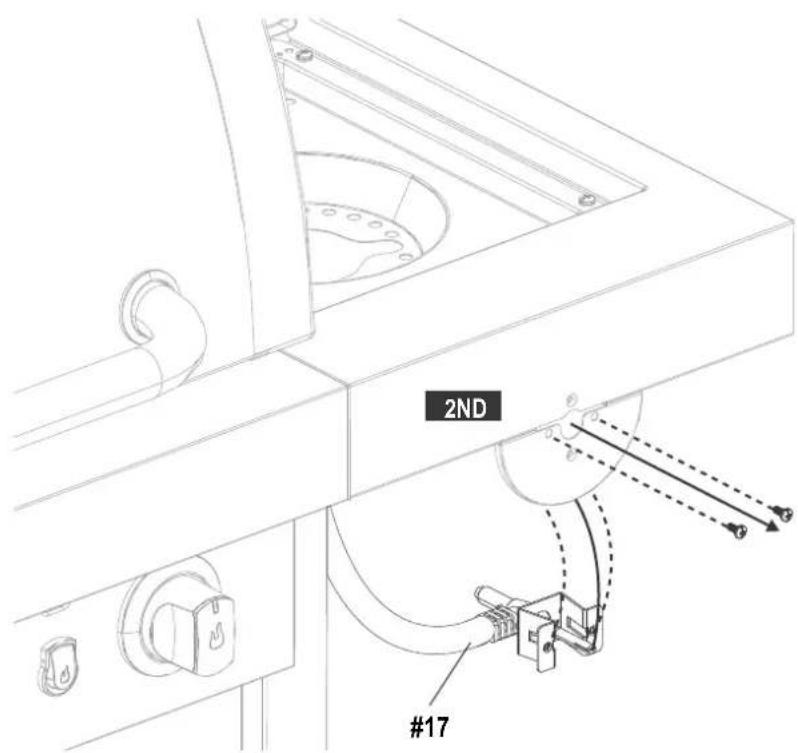
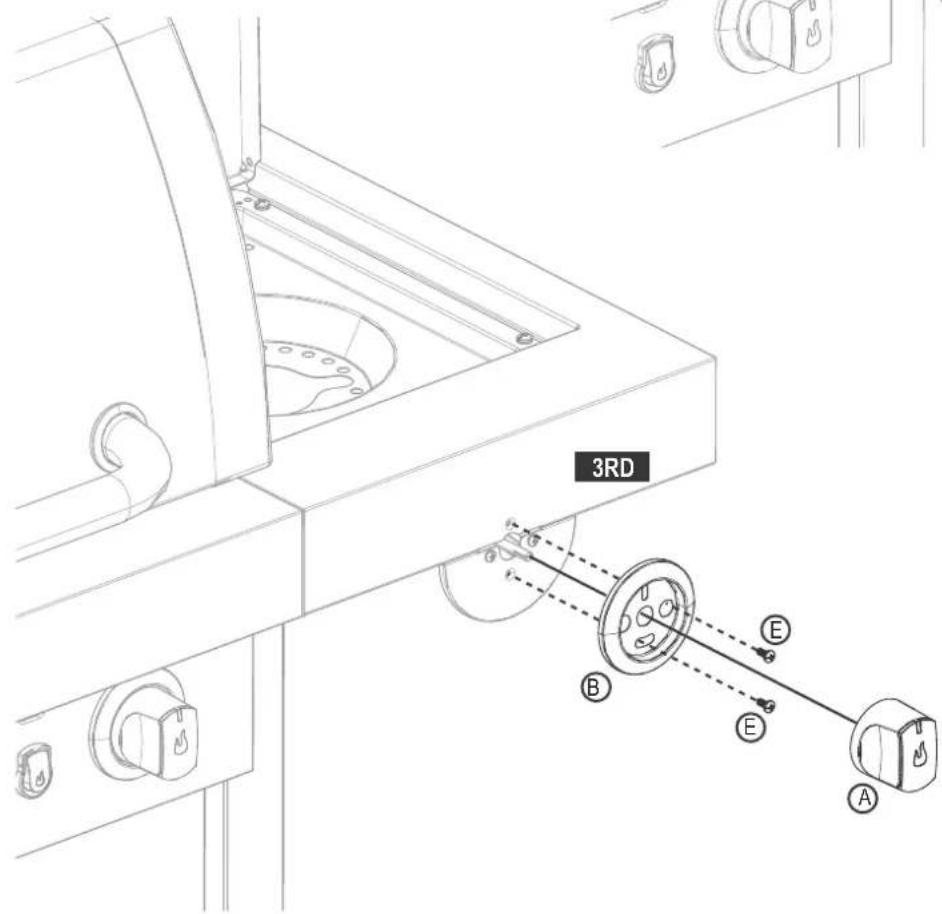
20
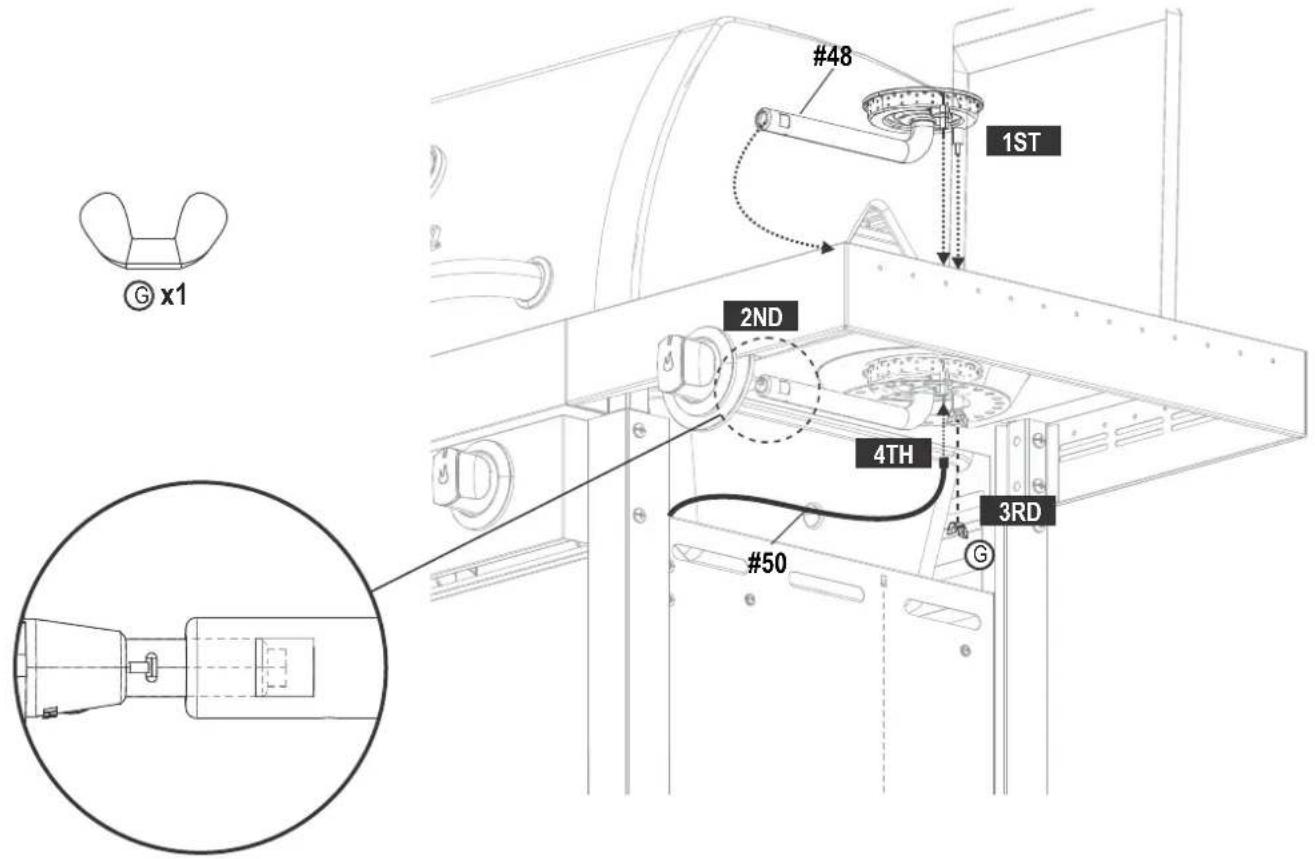
21
22
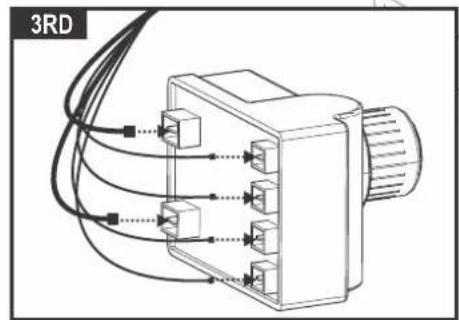
natural_image
Pure electrical circuit lines without any symbols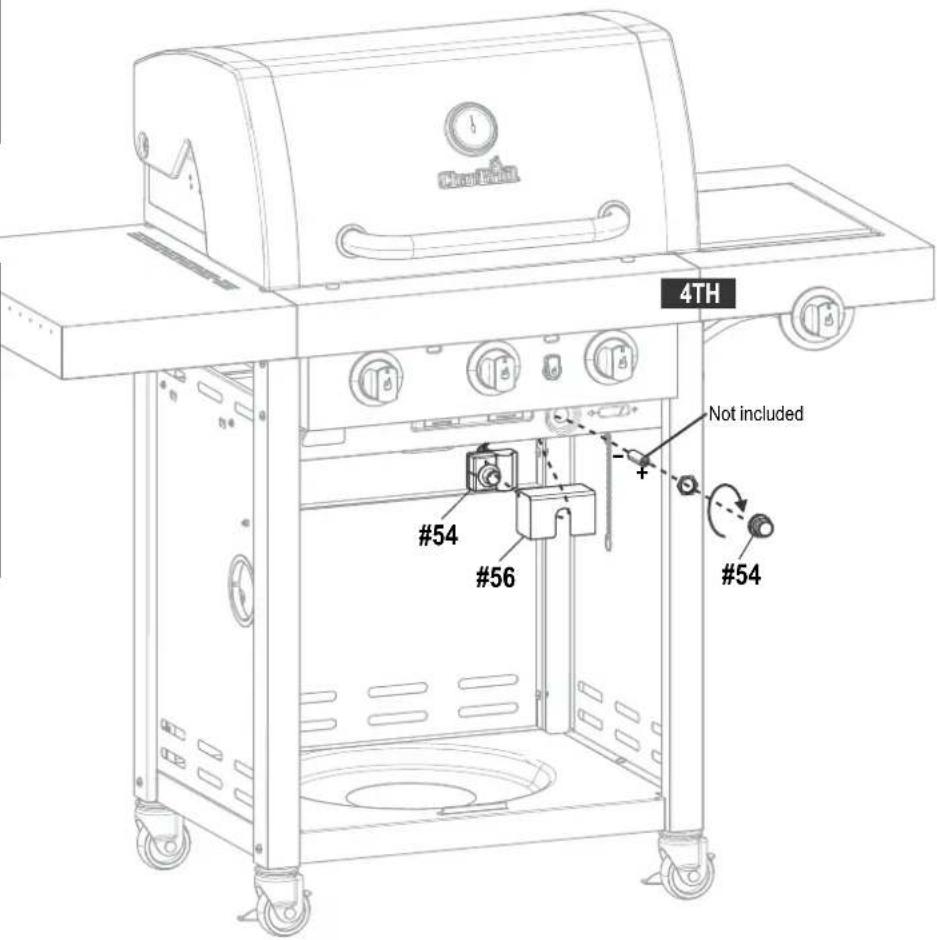
23

24
25
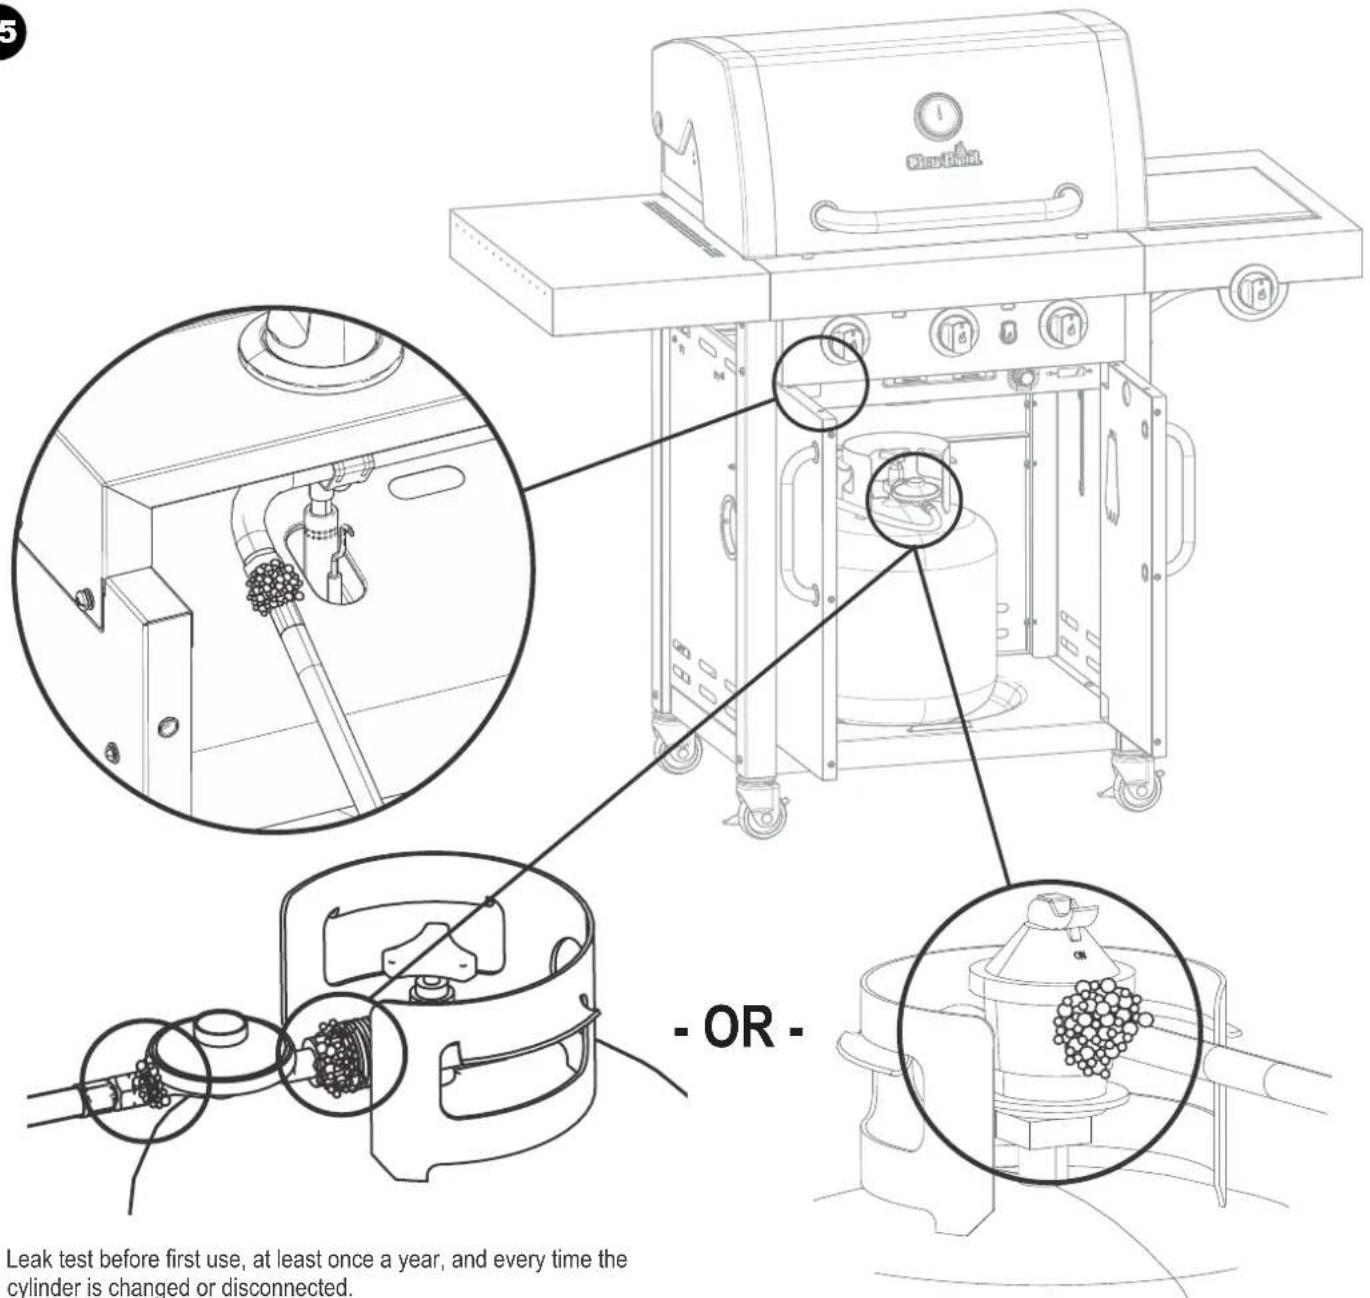
en Leak test before first use, at least once a year, and every time the cylinder is changed or disconnected.
,הכלההוּרָה,הכלההוּרָה,הכלההוּרָה,הכלההוּרָה,הכלההוּרָה,הכלההוּרָה,הכלההוּרָה,הכלההוּרָה,הכלההוּרָה,הכchia
pt Faça um teste para verificar se não há vazamentos pelo menos uma vez por ano e sempre que o cilindro for trocado ou desconectado.
da Tæthedsprøvning af ventiler, slanger og regulator skal ske før første ibrugtagning, mindst en gang om året, og hver gang gasflasken er enten skiftet eller afbrudt.
no Framkvæmið lekaprófun fyrir fyrstu notkun, að minnsta kosti árlega, og í hvert sinn sem skipt er um hylki eða pað er aftengt.
sk Test tesnosti uskutočnite pred prvým použitím, raz za rok a pri každej výmene alebo odpojení fľaše.
is Framkvæmið lekaprófun fyrir fyrstu notkun, að minnsta kosti árlega, og í hvert sinn sem skipt er um hylki eða það er aftengt.
ro Testați scurgerile înainte de prima utilizare, cel puțin o dată pe an și de fiecare dată când se schimbă sau se deconectează bateria.
cs Proved'te zkoušku těsnosti před prvním použitím, minimálně jednou za rok a při každé výměně nebo odpojení zásobníku.
pl Przeprowadzić test szczelności przed pierwszym użyciem, co najmniej raz w roku oraz w przypadku zmiany lub odłączeniem zbiornika.
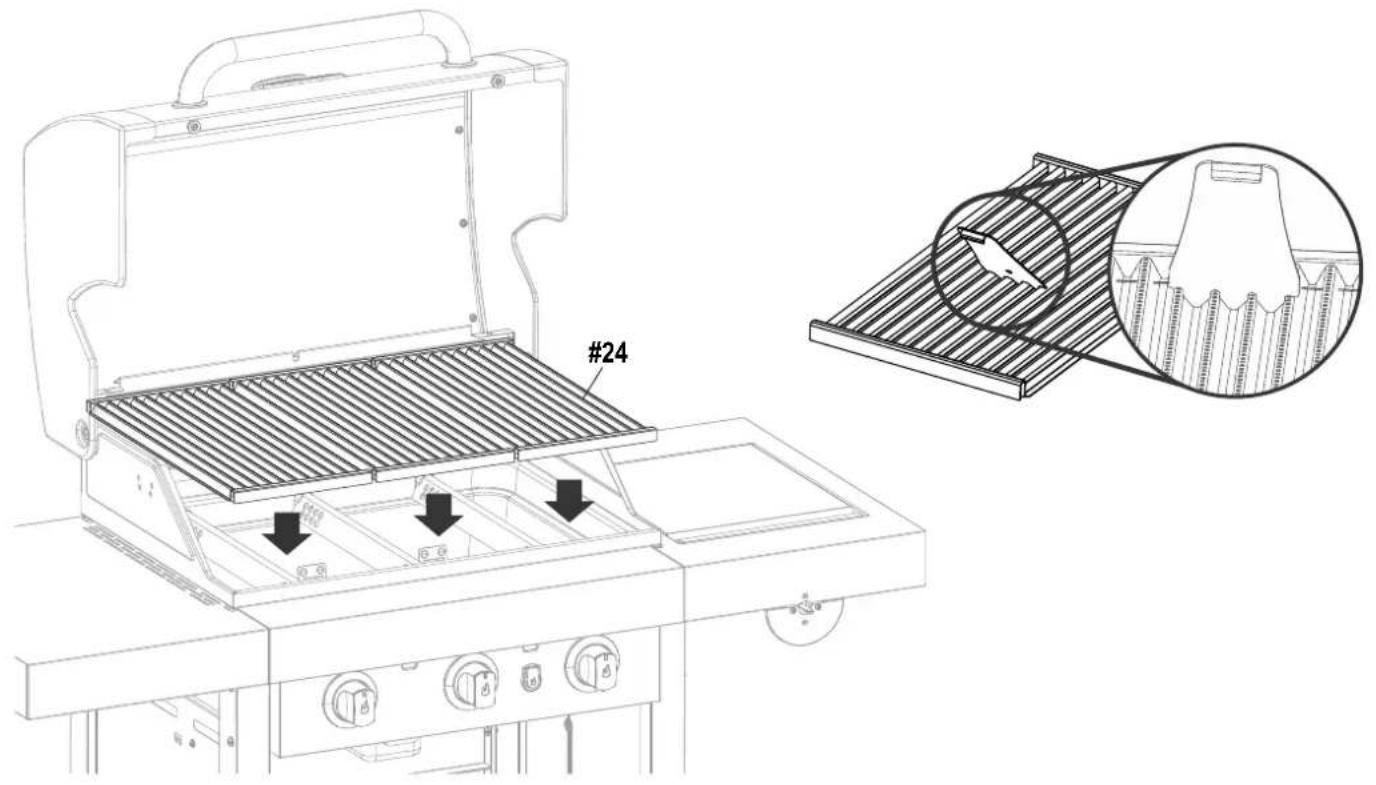
no Inspiser den infrarøde risten før hver bruk for å sikre at åpninger dekkes ikke med rusk. Se Grillveiledning for detaljerte instruksjoner om rengjøring.
sk Pred každým použitím skontrolujte rošt infračerveného grilu a uistite sa, že otvory nie sú upchané nečistotami. Podrobné pokyny týkajúce sa čistenia nájdete v návode na grilovanie
is Skoðið innrauðu grindina fyrir hverja notkun til að tryggja að götin séu ekki þakin leifum. Sjá grillleiðbeiningar til að fá ítarlegar hreinsileiðbeiningar.
ro Inspectați grătarul cu infraroșii înainte de fiecare utilizare, pentru a vă asigura că deschiderile nu sunt acoperite de reziduuri. Citiți Ghidul de Frigere pentru instrucțiuni detaliate de curățare.
cz Před každým použitím zkontrolujte infračervený rošt, abyste ověřili, zda otvory nejsou pokryty nečistotami. Viz podrobnější pokyny k čištění v Průvodci ke grilování.
pl Sprawdź, czy na ruszt podczerwieni przed każdym użyciem, aby upewnić się, że otwory nie są pokryte gruzem. Żobacz grillowanie Guide Szczegółowe instrukcje czyszczenia.
Char-Broil Europe GmbH of Gasstraße 6 - Haus L 4 Obergeschoß, D-22761 Hamburg, (Char-Broil) warrants to the PURCHASER of this Char-Broil product that it will be free of defects in material and workmanship from the date of purchase as follows:
| Gas Grills | |
| Burners | 10 years |
| Cooking Grates/Emitters | 3 years |
| All Other Parts (EURO minimum) | 2 years |
Char-Broil or the seller of the product may require reasonable proof of your date of purchase. THEREFORE, YOU SHOULD RETAIN YOUR SALES RECEIPT OR INVOICE.
[France only: All products sold by the Seller are covered by the legal warranties provided in Articles 1641 and followings of the Civil Code (warranty against hidden defects) and Articles L. 217-1 to L. 217-14 and L. 411-1 to L. 411-2 of the Consumer Code (warranty of conformity).]
This Warranty includes the right of repair or replacement of the product or parts of the product that prove defective under normal use and service. Before returning any parts, you should promptly contact Char-Broil using the contact information on our website. In case of a defect, Char-Broil will elect to replace or repair the product or such parts without charge. . Char-Broil will return the product or parts of the product to the purchaser, freight or postage prepaid. If Char-Broil elects to repair the product or such defective parts of the product and this repair fails, you are entitled, pursuant to your statutory legal rights, to reduce the purchase price or to withdraw from the contract and receive a refund.
This Warranty does not cover any failures or operating difficulties due to accident, abuse, misuse, alteration, misapplication, vandalism, improper installation or improper maintenance or service, or failure to perform normal and routine maintenance, including but not limited to damage caused by insects within the burner tubes, as set out in this owner's manual. Exceptions may apply, so please contact Char-Broil or your seller in case you have any questions on whether this Warranty applies to your specific case or not.
Deterioration or damage due to severe weather conditions such as hail, hurricanes, earthquakes or tornadoes, discoloration due to exposure to chemicals either directly or in the atmosphere, is not covered by this Warranty, and are not normally covered by your statutory legal rights.
Char-Broil is not liable for any unforeseeable losses (i.e. loss or damage that neither you nor Char-Broil or the seller contemplated at the time of purchase), or any damage caused by you, save for that Char-Broil's liability for fraud or death or personal injury caused by its negligence is not limited.
Char-Broil does not authorize any person or company to assume for it any other obligation or liability in connection with the sale, installation, use, removal, return, or replacement of its equipment; and no such representations are binding on Char-Broil.
This Warranty applies only to products sold at retail to individuals (as opposed to businesses) within the European Union.
This Warranty does not affect any of your statutory legal rights under the applicable consumer laws of your resident country.
For warranty service, contact Char-Broil at info-eu@charbroil.com.
[France only: All products sold by the Seller are covered by the legal warranties provided in Articles 1641 and followings of the Civil Code (warranty against hidden defects) and Articles L. 217-1 to L. 217-14 and L. 411-1 to L. 411-2 of the Consumer Code (warranty of conformity.)]
[France only: All products sold by the Seller are covered by the legal warranties provided in Articles 1641 and followings of the Civil Code (warranty against hidden defects) and Articles L. 217-1 to L. 217-14 and L. 411-1 to L. 411-2 of the Consumer Code (warranty of conformity.)]
[France only: All products sold by the Seller are covered by the legal warranties provided in Articles 1641 and followings of the Civil Code (warranty against hidden defects) and Articles L. 217-1 to L. 217-14 and L. 411-1 to L. 411-2 of the Consumer Code (warranty of conformity.)]
[France only: All products sold by the Seller are covered by the legal warranties provided in Articles 1641 and followings of the Civil Code (warranty against hidden defects) and Articles L. 217-1 to L. 217-14 and L. 411-1 to L. 411-2 of the Consumer Code (warranty of conformity.)]
[France only: All products sold by the Seller are covered by the legal warranties provided in Articles 1641 and followings of the Civil Code (warranty against hidden defects) and Articles L. 217-1 to L. 217-14 and L. 411-1 to L. 411-2 of the Consumer Code (warranty of conformity.)]
[France only: All products sold by the Seller are covered by the legal warranties provided in Articles 1641 and followings of the Civil Code (warranty against hidden defects) and Articles L. 217-1 to L. 217-14 and L. 411-1 to L. 411-2 of the Consumer Code (warranty of conformity.)]
[France only: All products sold by the Seller are covered by the legal warranties provided in Articles 1641 and followings of the Civil Code (warranty against hidden defects) and Articles L. 217-1 to L. 217-14 and L. 411-1 to L. 411-2 of the Consumer Code (warranty of conformity.)]
[France only: All products sold by the Seller are covered by the legal warranties provided in Articles 1641 and followings of the Civil Code (warranty against hidden defects) and Articles L. 217-1 to L. 217-14 and L. 411-1 to L. 411-2 of the Consumer Code (warranty of conformity.)]
[France only: All products sold by the Seller are covered by the legal warranties provided in Articles 1641 and followings of the Civil Code (warranty against hidden defects) and Articles L. 217-1 to L. 217-14 and L. 411-1 to L. 411-2 of the Consumer Code (warranty of conformity.)]
NOTE: This information is a guide only. Items included in your BBQ specification may differ depending on region or specific dealer specification.
All specifications are subject to change without notice.
© 2017 Char-Broil, LLC
Columbus, GA 31902, U.S.A. charbroil.eu

- INSTALLER/ASSEMBLER:
- CONSUMER:
- Questions:
- DANGER
- If you smell gas:
- WARNING
- CAUTION
- Grease Fires
- For Safe Use of Your Appliance and to Avoid Serious Injury:
- Always follow these instructions.
- Safety Tips
- Cylinder Placement
- Regulator Requirements
- Hose Requirements
- Ignitor Lighting
- Match-Lighting
- NOTE: Your barbecue may NOT be equipped with a Hot plate!
- Hot plate Ignitor Lighting
- Hot plate Match Lighting
- Leak Testing Valves, Hose and Regulator
- IF APPLIANCE FAILS TO LIGHT
- SPIDER ALERT!
- SPIDER AND WEBS INSIDE BURNER
- Cleaning the Burner Assembly
- VERY IMPORTANT: Burner tubes must reengage valve openings. See illustrations at right.
- Correct burner-to-valve engagement
- Storing Your Appliance
- General Appliance Cleaning
- Stainless steel
- Please note:
- INSTALLATEUR/ASSEMBLEUR :
- Lektest Kleppen, Slang en Regelaar
- Lækagetestning af ventiler, slange og regulator
- Krav for regulatorer
- Skúška tesnosti ventilov, hadice a ovládača
- Lekapróf á lokum, slöngu og stilli
- Geymsla á grillinu
- תְקַרָה בְּשָׁ
- PARTS LIST - 468810017
- ASSEMBLY
Brand : Char-Broil
Model : Professional Line
Category : Grill plate