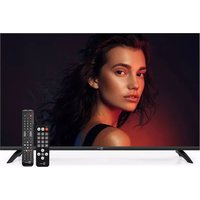
PALCO32 FL10 - Television TELE System - Free user manual and instructions
Find the device manual for free PALCO32 FL10 TELE System in PDF.


| Product type | LED TV HD Ready |
| Brand | TELE System |
| Model | PALCO32 FL10 |
| Screen diagonal | 31.5 inches (80 cm) |
| Resolution | 1366 x 768 pixels (HD Ready) |
| Supported video formats | MPEG-2, MPEG-4, H.265 (AVI, MP4, MKV) |
| Connectors | 2 x HDMI, 2 x USB, YPbPr + Audio, Coaxial audio output, Headphone output, Terrestrial antenna input (IEC), Satellite antenna input (Type F) |
| Audio power | 2 x 10 Watt |
| Power consumption | < 56 W in operation, < 0.5 W in standby |
| Power supply | 100-240 V ~ 50/60 Hz |
| Dimensions with stand | 723 x 463 x 167 mm |
| Dimensions without stand | 723 x 431 x 81 mm |
| Wall mount | VESA 100 x 100 (M4*L8) |
| Tuner | DVB-T2 (terrestrial) and DVB-S (satellite) |
| Main functions | Automatic channel search, parental control, USB Media Player, program guide |
| Included accessories | Standard remote control, simplified remote control, user manual |
| Care and cleaning | Unplug before cleaning, use a soft dry cloth |
| Safety | Do not block ventilation slots, do not expose to rain or moisture |
| Operating conditions | Room temperature, domestic use |
Frequently Asked Questions - PALCO32 FL10 TELE System
User questions about PALCO32 FL10 TELE System
0 question about this device. Answer the ones you know or ask your own.
Ask a new question about this device
Download the instructions for your Television in PDF format for free! Find your manual PALCO32 FL10 - TELE System and take your electronic device back in hand. On this page are published all the documents necessary for the use of your device. PALCO32 FL10 by TELE System.
USER MANUAL PALCO32 FL10 TELE System
On the rear side of TV, the available I/O connections are:
- Earphone output (jack 3,5 mm)
- YPbPr Video + Audio (AV in)
- Slot Common Interface (CI / CI+)
- USB port x 2 (Mediaplayer function)
- Coaxial digital audio output (COAXIAL)
- HDMI input (x2)
- SATELLITE RF Antenna (Tipo F)
- TERRESTRIAL RF Antenna (IEC)
- Power supply 220V AC
Connections
Antenna Connection
In order to watch live TV programs, connect the TV to an terrestrial and/or satellite antenna. In both cases, connect the antenna cable (75 ) to RF inputs on the rear of TV set.
External device connection
Via RCA: be sure that both TV and external device are off. Use RCA/SCART adaptor to connect the external device via SCART to the AV input of TV set. Turn on the devices, press SOURCE → AV.
Via HDMI: be sure that both TV and external device are off. Connect the cable from source to TV set and turn on the devices; Turn on the devices, press SOURCE → HDMI.
Batteries insertion
You have to replace or install the batteries when:
- You buy the product.
• the remote control does not work properly.
Once you open the battery door located on the back of the remote, insert the 2 batteries (AAA) in the compartment, making sure to respect the correct polarity as indicated.
Remove the used batteries, which must be disposed of separately from household waste taking them to any store or collection point and then repeat the operations for insertion.
To avoid damaging the remote control with the leakage of corrosive liquid, you should remove the batteries if you plan not to use the device for a long period of time. Avoid using different types of batteries or dead and new batteries at the same time.
Main menu description
Press the MENU key to bring up the main menu and use the arrow keys ▲ / ▼ and ◀ / ▶ to navigate through the titles of menu. Press the MENU button to return to the
previous menu or EXIT to exit. The menus are: Channels, Images, Sound, Time, Security, Settings.
First Installation
At the first installation, select the OSD language and the country, enter the PIN (4 digits) and confirm it to proceed. Select the signa type (DVB-T2 or Satellite) to launch the channel scanning and press OK.
Automatic channel search
Press MENU → Channel → Auto Tuning and confirm with OK button. Select the country (default ITALY) and press OK to launch the scanning.
At any time, pressing EXIT or Menu, the scanning can be stopped.
WARNING! Automatic channel searching deletes all channel lists previously saved.
DVB-C mode (via cable) is available to receive the digital channels, select DVB-C and press OK to launch the scanning.
WARNING! Make sure to not select this mode in case of traditional terrestrial antenna system.
WARNING! The reception and therefore the viewing of digital terrestrial channels depends on the level and the quality of the antenna signal available. The signal varies according to the area in which you live, to the correct orientation/functioning of the antenna system and to the quality of the signal transmitted by the digital terrestrial repeaters
Channel list editing.
Press MENU → Channel → Edit Program and confirm pressing OK. Once displayed the list, the options are:
RED (Delete): select one or more channels, delete them pressing RED button.
Blue (Skip): select the channel and press BLUE button, once activated the channel can be selected with the numeric keys of remote control unit.
Yellow (Move): to move a channel, select the channel you want to move, press the Yellow button, use arrow keys to move the channel to the desired position or enter the desired position number, then press OK to confirm.
Satellite mode
If you choose satellite, you can choose to load a default satellite channels list by pressing OK and confirming Yes (left arrow) to the confirmation request; or proceed with normal installations, once the satellite parameters are set, scan type, channel type and type of service, by pressing OK and choosing No (right arrow) on the next screen.
To activate the digital channel reception mode, press the Source → Satellite. You can scan the frequencies available with your satellite antenna system, automatically searching for all the satellite channels from the first installation or through an automatic scanning available in the Channels menu.
the basic settings to allow the use of the TV with a single Universal LNB (Low Noise Block converter) system (commonly used for satellite systems in Italy); in the event your system is done with a different configuration, you must appropriately change the antenna settings.
WARNING! The wrong antenna configuration can result in the failure to load some or all channels. If you do not know the characteristics of your antenna system and/or are unable to properly configure the receiver yourself, you may want to consult a professional installer for advice. The power and signal quality indicators refer to the first transponder of the chosen satellite list
This function allows you to restore factory settings. To do so, select Restore settings ... and on the new screen, select YES. The television will be restored to its factory settings.
WARNING! Restoring the factory settings starts the installation wizard (see section "First Installation"), and also clears all previously memorized channels and settings set by the user.
Technical specs
| Display | Diagonal 31,5” (80 cm) 16:9 Wide | |
| Resolution | 1366(H) x 768(V) - HD READY | |
| Contrast ratio | 700:1 | |
| Brightness | 180 (cd/m2) | |
| Angle of view | 178°/178° (H/V) | |
| Inputs | A/V in | YPbPr + Audio |
| HDMI | 2 | |
| Audio out | Coaxial | |
| USB | 2 -Mediaplayer | |
| Earphone | 1 | |
| TV Signal | RF input DVB-T | 75 Ω - VHF/UHF - 7MHz/8MHz |
| RF input DVB-S | 1 tipo F | |
| Video | MPEG-2, MPEG-4, H.265.Main@L4.1-1920*1080@60fps | |
| Audio | MPEG1 layer1/2; DD; DD+; AAC; HE-AAC | |
| Speaker | 2 x 10 Watt | |
| Specs | Power supply | 100V - 240V ~ 50/60Hz |
| Consumption | <0,5W in Stand-by; <56W Max | |
| Supported format | AVI/MP4/MKV (compatible H.265) | |
| Size (w x h x d) | With stand | 723 x 463 x 167 mm |
| Without stand | 723 x 431 x 81 mm | |
| Wall mount support | VESA 100 / M4*L8 | |
| Accessories | Standard Remote control, Easy remote control, User manual. |
Simplified EU conformity declaration
The manufacturer, TELE System Digital s.r.l., states that the radio equipment type of TV named PALC032 FL10 complies with the 2014/53/EU directive. The full text of the EU compliance declaration is available at the following Internet address:
https://www.telesystem.it/CE
Description TV
For detailed information, please visit the TELE System Digital Srl website
Covered by one or more claims of the patents listed at patentlist.hevcadvance.com
TELE System Digital Srl


Brand : TELE System
Model : PALCO32 FL10
Category : Television