
Warmigo - Heating Eurom - Free user manual and instructions
Find the device manual for free Warmigo Eurom in PDF.

| Product type | Double-zone rechargeable heating cushion |
| Brand | Eurom |
| Model | Warmigo Dual Heat Zone (Art.nr. 346640) |
| Dimensions | 144 x 46 x 3,5 cm |
| Weight | 1200 g (excluding powerbanks) |
| Cover material | 100% water-repellent polyester |
| Power supply | 5 V / 2 x 2,4 A (via powerbanks) |
| Powerbank included | 2 x Varta 20 000 mAh |
| Heating zones | Backrest (20 x 25 cm) and seat (25 x 30 cm) |
| Backrest temperature settings | Low 50°C, Medium 60°C, High 75°C |
| Seat temperature settings | Low 40°C, Medium 50°C, High 60°C |
| Battery life (1 powerbank) | 5 h (high), 7 h (medium), 10 h (low) |
| Automatic shut-off | Yes, from 85°C |
| Thermal protection | Yes (powerbank and mat) |
| Washing | Machine-washable cover at 30°C (heating mat not washable) |
| Protection class | III |
| Usage | Indoor or dry outdoor |
| Warranty | 36 months (excluding powerbank), powerbank 2 years |
| Included accessories | 2 powerbanks, 2 USB charging cables, 2 connection cables, outer cover |
Frequently Asked Questions - Warmigo Eurom
User questions about Warmigo Eurom
0 question about this device. Answer the ones you know or ask your own.
Ask a new question about this device
Download the instructions for your Heating in PDF format for free! Find your manual Warmigo - Eurom and take your electronic device back in hand. On this page are published all the documents necessary for the use of your device. Warmigo by Eurom.
USER MANUAL Warmigo Eurom
Warmigo Dual Heat Zone
User manual
NL 3
EN 17
DE 31
FR 45
natural_image
Line drawing of a folding chair with backrest and seat, no text or symbols presentModel: Product code:
Warmigo Dual Heat Zone 346640
Varta powerbank and speed charger
Model: Product code:
Varta powerbank 20,000 mAh 346961
Varta speed charger 5V/3A 346978
Order links
Varta powerbank 20,000 mAh Varta speed charger 5 V/3 A


Figuur 2.
Figuur 4.
Vervoer en opslag
Figuur 5.
Figuur 6.
Figuur 7.
Figuur 8.
natural_image
Line drawing of a simple chair with backrest and seat, no text or symbols presentFiguur 9.
natural_image
3D rendered diagram of a folded garment or cushion with layered structure and a numbered point (1) at the top center, no text or symbols present.Figuur 10.
Werking
natural_image
Illustration of a gray backpack with a numbered label pointing to the side (no text or symbols on the backpack itself)Figuur 11.
Onderhoud

LET OP
Figuur 12.
Figuur 13.
Please read and understand these safety instructions. Incorrect use can cause injury and/or property damage and will void EUROM's warranty. Keep this instructions for further use. The manual is an essential part of the product and must be given to the new owner upon resale or exchange.
- Children under the age of 3 years are not to use this product due to their inability to react to overheating. (Maximum temperature from the outer cover is 80^ Celsius)
- This product can be used by children older than 3 years and younger than 8 years under supervision and with the control always set to minimum temperature value (white light).
•Children aged from 3 years and less than 8 years shall only switch on/off this product provided that it has been placed or installed in its intended normal operating position and they have been given supervision or instruction concerning use of the product in a safe way and understand the hazards involved. Children aged from 3 years and less than 8 years shall not plug in the powerbank, regulate and clean the product or perform user maintenance.
- This product can be used by children aged from 8 years and above and persons with reduced physical, sensory or mental capabilities or lack of experience and knowledge if they have been given supervision or instruction concerning use of the product in a safe way and understand the hazards involved.
•Children shall not play with product.
- Cleaning and user maintenance shall not be made by children without supervision.
- This product must not be used by persons insensitive to heat and vulnerable persons who are unable to react to overheating. (Maximum temperature from the outer cover is 80^ Celsius)
- Never leave vulnerable persons and young children alone while using the product.
- It is not recommended to use this product directly on the skin to avoid the skin irritation caused by prolonged contact with high temperatures. (Maximum temperature from the outer cover is 80^ Celsius)
- When the product is likely to be used for an extended period, for instance by the user falling asleep, the controller should be adjusted to 'low' temperature (white light).
Safety warnings powerbank
- Do not use or store the powerbank near heat sources such as fire or heaters.
- Do not leave the powerbank in an enclosed vehicle.
• Install both powerbanks only in the powerbank storage pockets when using the heated seat cushion. The storage pockets are in the overhanging part of the cushion located at the backside of the chair. In this way, the powerbanks are not heated by the heating elements. Never use the product with the powerbanks not securely placed in the powerbank storage pockets from the product.
- When charging the powerbanks, remove the powerbanks from the storage pockets and from the heated seat cushion. The powerbank gets hot during charging, so make sure the powerbank can safely release this heat to the surrounding air during charging.
- Use the powerbank only with the supplied charging cable.
- Keep the powerbank away from water or humid environments.
- Do not disassemble, damage, jolt or pierce the powerbank.
- Do not use the powerbank below 0^ Celsius or above 50^ Celsius, otherwise the charge and discharge function of the powerbank will be disabled due to an internal safety mechanism.
- Keep the powerbank away from children.
- Recommended operating and storage temperature from powerbank: 10^ - 30^ Celsius.
- The powerbank's optimal state of charge is between 30% and 70%.
- If the powerbank is not used for a long time, store it with a charge status of about 70% and charge and discharge it every 3-6 months and place it in a cool, dry place. Otherwise, the performance of the powerbank will decrease or the powerbank's life will be shorter.
- Never try to open the powerbank. In case of misuse, the battery might emit a liquid. If you come in contact with this unintentionally, rinse the affected area with water. If the liquid comes in contact with eyes, then rinse with water and seek medical assistance. Liquid from a battery can cause irritation or burns.
- Never burn the powerbank, even if they are damaged and can no longer be charged. Batteries explode when they are burned.
- If the charging cable is damaged, it must be replaced by an original replacement cable.
- If the powerbank is damaged, or no longer working, it must be replaced by an identical original replacement powerbank.
Safety warnings heated seat cushions
•This product is not intended for medical use.
- Be careful with using this product on an adjustable chair (or bed), prevent the powerbank from becoming trapped and crushed.
- Fold the product only on the folding seams. Never on other positions. Be sure the product is powered off, completely cooled down and the powerbanks are removed from the storage pockets before folding the product.
- Do not charge the powerbank at the same time when the product is used with same power bank.
- Do not rub the product with force.
- Do not iron the product.
- Do not place heavy objects or apply excessive pressure on the product.
- Do not insert metal objects into the product.
- Do not pierce with sharp objects.
- Even though the outer cover from the product is water repellent, do not place the product on wet surfaces. Make sure that the product cannot fall into water and do NOT expose it to hard or brutal waterjets. This product is only to be used indoors or in outside dry conditions.
- Examine the product (including cables and connectors) frequently for signs of weak or damage. If there are such signs, if the product has been misused, has any abnormal conditions or does not work, return it to supplier before switching it on again. Do not attempt to repair the product yourselves. If the cable becomes loose, frayed or damaged, stop using the product immediately. The cable must be replaced by the manufacturer, its service agent or similarly qualified personnel to avoid danger.
- Do not use the product near gas appliances, fireplaces.
- Keep product away from fire and do not expose them to direct sunlight.
- Never use the product near flammable or explosive substances or fuels. Flammable or explosive substances or fuels may cause an explosion. Only use the product in a clean and well-ventilated area.
- Never immerse the product (including the charging cable, USB-C mains adapter) in water or other liquids and never touch the product, cord or plug with wet hands or feet.
- Never pull the cable to disconnect it from the socket. Always grasp the plug and pull.
- Disconnect the product from the powerbank and immediately switch off the product when you hear strange noises, smell or see smoke.
- Do not leave the product operating unsupervised.
•Always disconnect the product from the powerbanks after use.
- First turn off the product and then disconnect it from the powerbank before moving, cleaning or carrying out maintenance.
- Do not store or use the product: - in locations where it could become wet or fall into water; - near flammable, explosive or gaseous substances; - near acids, alkalis, oil or other corrosive substances.
- This device should only be used in the way as set out in the booklet. Any other usage may be dangerous (could cause fire, injury, damage, electric shock etc.), and will invalidate the guarantee.
Overheating protection
The product is equipped with an overheating protection from 85 °C, which switches it off automatically in case of internal overheating. Switch the product off, remove the source of overheating, let the product cool down and use as normal. Do not use the product if the source of overheating cannot be traced or if the problem persists, but always contact your supplier.
To ensure user safety, there is also a temperature sensor in the powerbank. When the temperature of the powerbank exceeds 50 °C , the powerbank will stop working. Once this situation occurs, you can wait for the powerbank to cool down and then press and hold the cushion controller again to turn on again.
The powerbank features a current protection; if the power consumption exceeds the limit, the powerbank is automatically switched off.
Warranty
EUROM offers a 36-month warranty on this device (excluding the powerbank) from the date of purchase. The VARTA powerbank has a 2-year factory warranty. The warranty does not cover wear and tear from normal use. The warranty expires if a defect is the result of unintentional or careless use of the device. The manufacturer, importer and supplier are not liable for incorrect connections.
Introduction
Thank you for choosing this EUROM device. You have purchased a quality device that you will enjoy for many years. Using this device with respect and care will reduce the risk of personal injury or material damage.

CAUTION
It is important to read and understand this instruction manual before assembling, installing and using the device.
This manual describes the correct and safe use of this device. Keep this manual for future reference. The manual is an essential part of the device and must be given to the new owner upon resale or exchange. This manual has been compiled with the utmost care. Nevertheless, we reserve the right to improve and adjust this manual at any time. The images used may differ.
The following symbols and terms are used in this manual to alert the reader to safety issues and important information:

WARNING
Indicates a hazardous situation which, if the safety instructions are not followed, can lead to injuries to the operator or bystanders, light and/or moderate damage to the product or to the environment.

CAUTION
Indicates a hazardous situation which, if the safety instructions are not followed, can lead to light and/or moderate damage to the product or to the environment.
Identification
| EUROM®POWERFUL PRODUCTS SINCE 1974 | Warmigo Dual Heat ZoneArt.nr. 346640Batch B***** | |
| 5VDC - 2x12 Watt - 2x2,4 A | ||
 |  |  |
| EUROM - KOKOSSTRAAT 20 -8281 JC - GENEMUIDEN - NETHERLANDS - Info@eurom.nl | ||
Figure 14.
Specifications
| Type Warmigo Dual Heat Zone | |
| Heat settings back area: Low: 50 °C / Medium: 60 °C / High: 75 °C | |
| Heat settings seat area: Low: 40 °C / Medium: 50 °C / High: 60 °C | |
| Size: 144 x 46 x 3.5 cm (excl. switch) | |
| Weight: 1200 gr (excluding powerbanks) | |
| Material of outer cover: 100% polyester with water proof treatment | |
| Voltage: 5 V / 2 x 2.4 A | |
| Number of heating zones: Back: 20 x 25 cm; Seat: 25 x 30 cm | |
| Automatic switch-off: Over 85 °C | |
| Machine washable: Outer cover is (machine) washable. Never wash the heating mat. The heating mat contains the heating wire and electrical connections. | |
| Heating time on 1 fully charged powerbank: | •5 hours on High heat setting•7 hours on Medium heat setting•10 hours on Low heat setting |
| Protection class: III | |
Description
The Warmigo Dual Heat Zone is a rechargeable heated seat cushion with double heating area. One for the back and one for the seating area. Both heating areas can be controlled separately with three heat settings. The heating element is located on the front of the cushion, so it makes direct contact with your body. Thanks to two included powerbanks, you can enjoy the comfortable warmth for hours. With the included universal 5V powerbanks, it is also possible to charge your smartphone or other devices.
Unboxing

WARNING
Biodegradable bags can be dangerous. To avoid danger of suffocation, keep these bags away from babies and children.
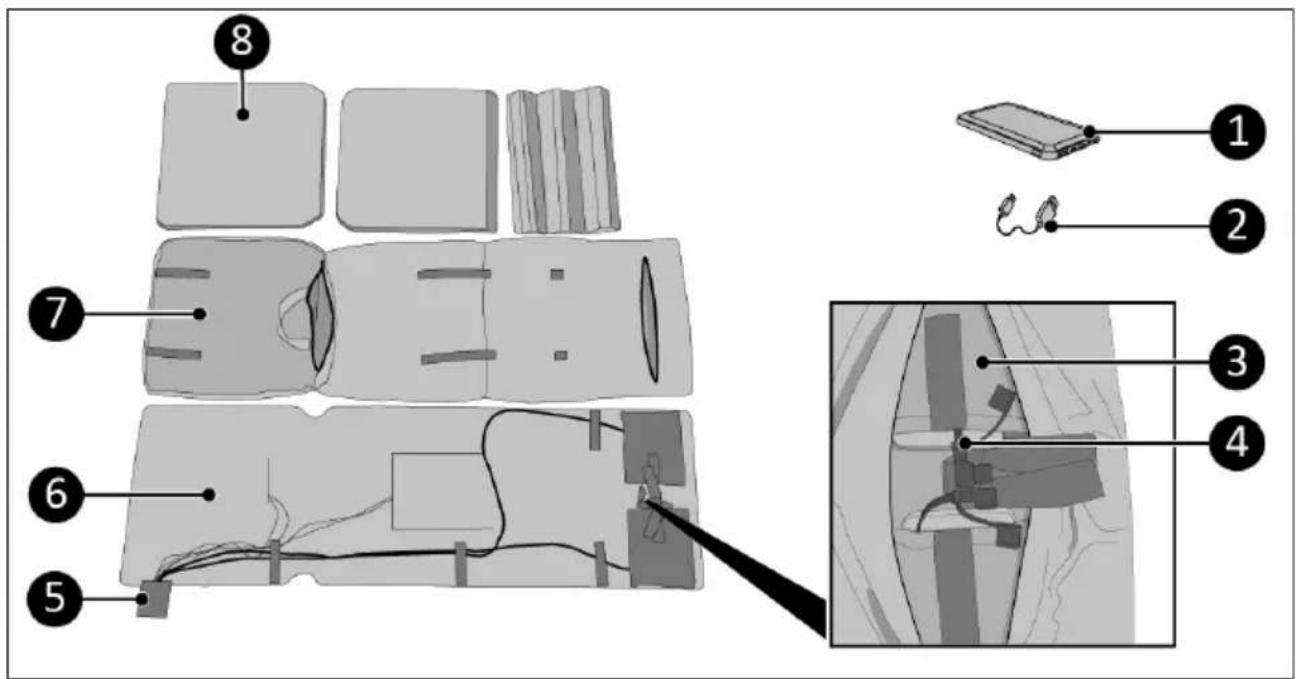
Figure 15.
| No. | Description No. Description | ||
| 1 Varta powerbank 20,000 mAh (2x) 5 Control buttons | |||
| 2 Powerbank charging cable (USB-A/USB-C) (2x) | 6 Heating mat with 2 heating elements | ||
| 3 Powerbank storage pocket (2x) 7 Outer cover | |||
| 4 Connection cable (2x) 8 Inner cushion (3x) (seating area, back area low, back area high) | |||
Control buttons
- ON/OFF button and heat settings button (Low/Medium/High) for seat heating area
- ON/OFF button and heat settings button (Low/Medium/High) for back heating area
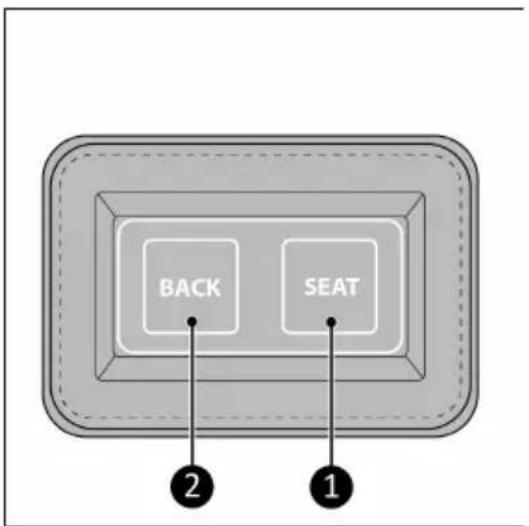
Figure 16.
Powerbank
- ON/OFF button
- USB A port (output)
- Micro USB port (input)
- USB C port (input/output)
- USB A port (output)
- Charging status lights
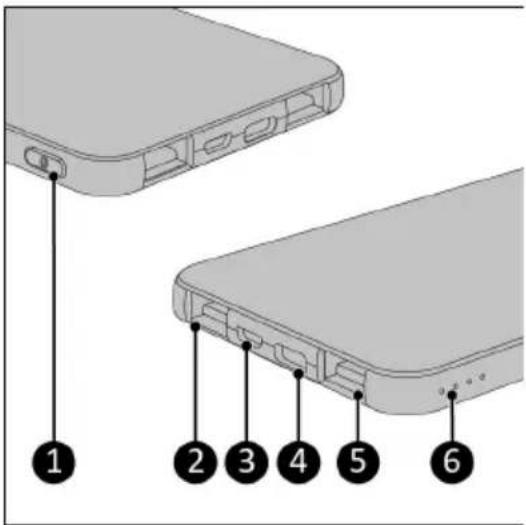
Figure 17.
Transport and storage
- Clean the device before storing it.
- Do not crease the product by placing items on top of it during storage.
- Let the product cool down before storing it.
- If the product remains unused for a long time, the powerbanks should always be removed.
- Store this product in a ventilated, dry and cool place.
- Avoid heat and prolonged exposure to direct light.
Installation

WARNING
The product should only be used with the supplied powerbanks. To charge the powerbanks, use only the charging cable supplied. Using any other powerbank or power cable may cause irreparable damage to the product and the environment and may be dangerous.

WARNING
Read the separate manual from the powerbank before charging and using it.

WARNING
Use only the included Varta powerbank for optimal and safe use. Never connect the product on a voltage higher than 5 Volt.
Charging the powerbank

WARNING
The product cannot be used while the powerbank is charging. The powerbank has built-in protection. When the powerbank is charged, the outputs are automatically switched off.
- Push the ON/OFF button on the powerbank (Figure 17, pos. 1) to check the battery charging status (Figure 17, pos. 6):
°4 lights: 100%.
°3 lights: 75%.
°2 lights: 50%.
- 1 light: 25% (charging is recommended).
-
Connect the included charging cable to the USB C port of the powerbank (Figure 17, pos. 4).
-
Connect the other end of the power cable to a power adapter (not supplied).
°Use a power adapter that is suitable (USB-A connector) and has an output of 5 V DC and between 0.5 -3.0 amps. The amperage affects the required charging time of the power bank. If the Varta Speed Charger is used, the charging time will be shortened to approx. 6 hours.
- Plug the adapter into a 230V socket.
°If one of the lights starts flashing, the powerbank is charging.
- When all the lights are on continuously, the powerbank is fully charged.
It takes 6 hours to charge the 20,000 mAh Varta powerbank with a Varta Speed Charger.
Installing the powerbank

WARNING
Use only the included Varta powerbank for optimal and safe use. Never connect the product on a voltage higher the 5 Volt.
- Open the zipper on the backside of the outer cover (Figure 18, pos. 1).
- Place the powerbanks (Figure 18, pos. 2) in the powerbank storage pockets (Figure 18, pos. 3).
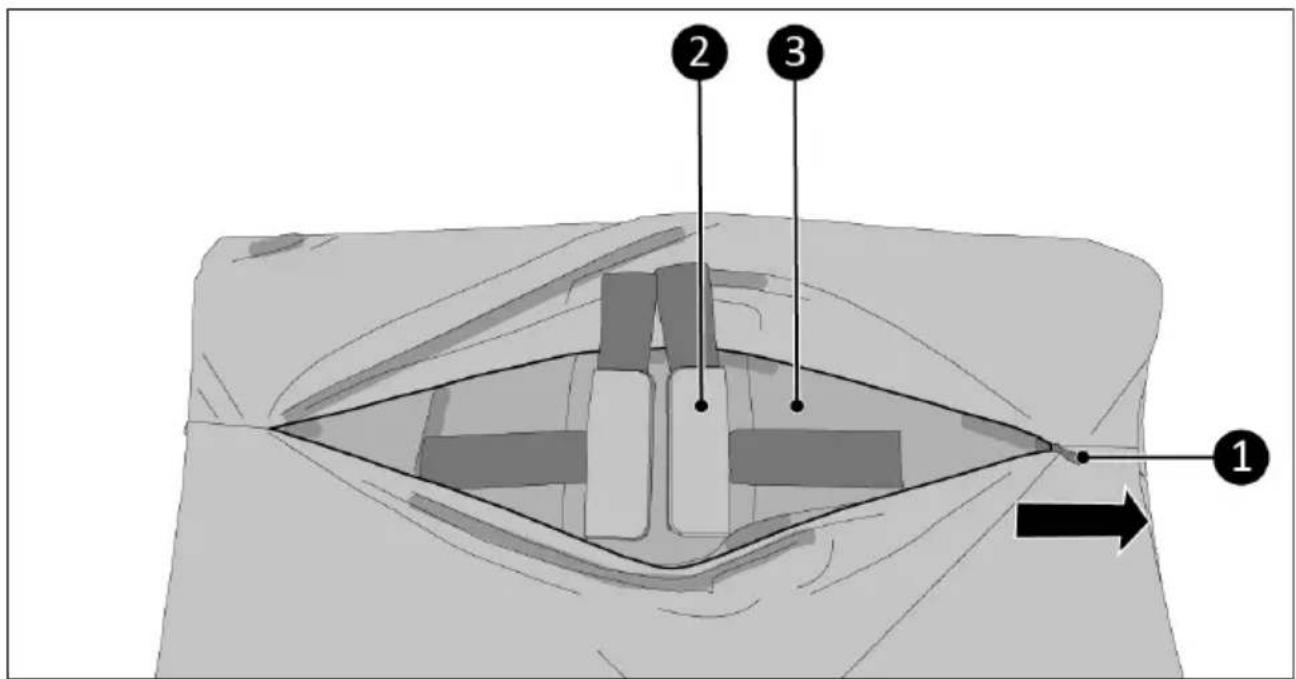
Figure 18.
-
Remove the protection caps (Figure 19, pos. 1) from the connection cables (Figure 19, pos. 2).
-
Plug both connection cables into the powerbanks (Figure 19, pos. 3).
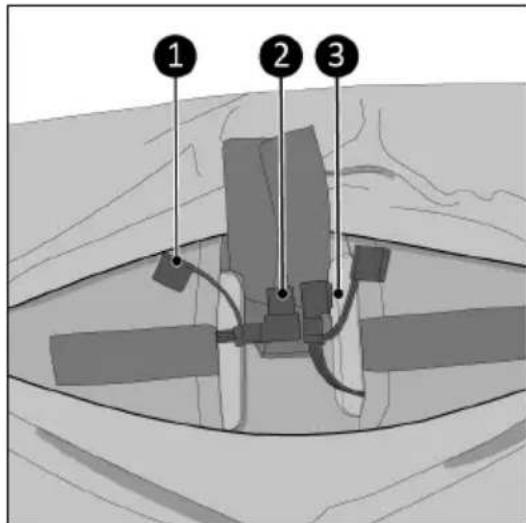
Figure 19.
- Make sure the angle of the power cable points towards the powerbank (Figure 20).
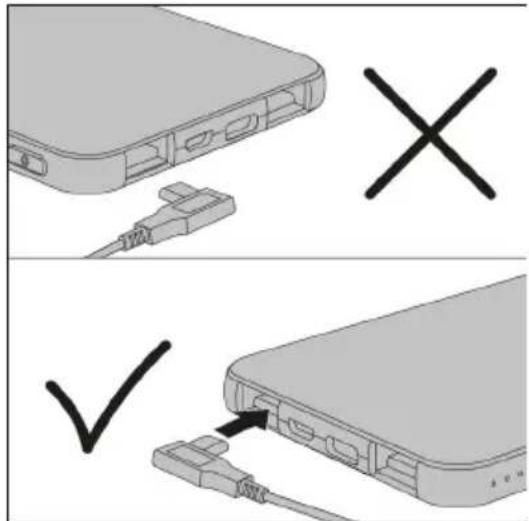
Figure 20.
- Close both storage pockets with the Velcro closures (Figure 21, pos. 1).
- Close the zipper (Figure 21, pos. 2) on the backside of the outer cover.
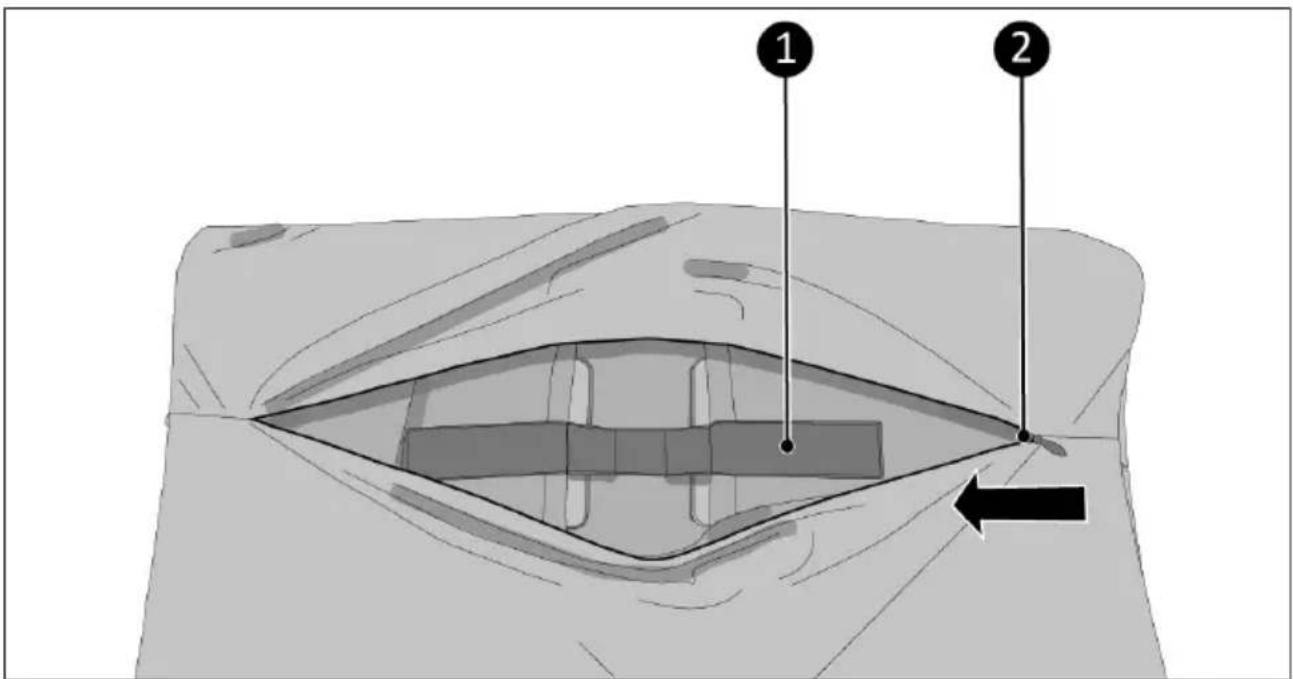
Figure 21.
Installing on the chair
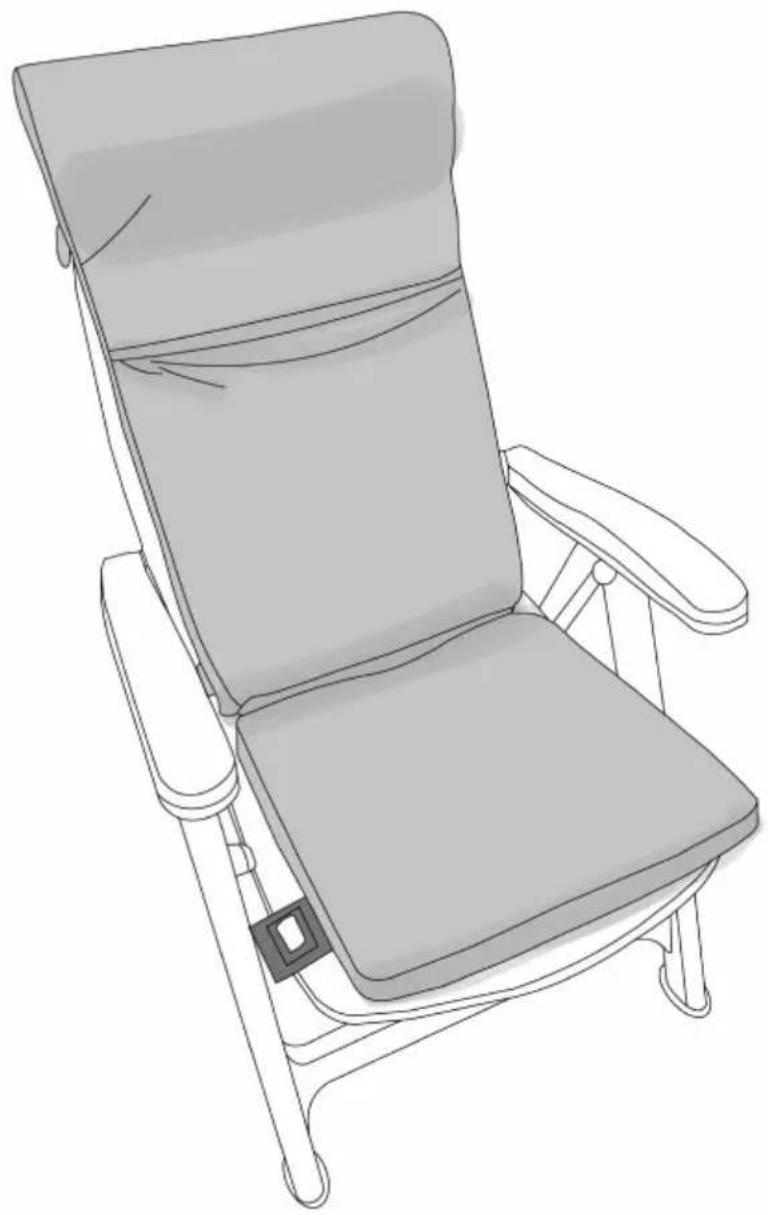
The heated seat cushion is suitable for chairs with a low backrest and chairs with a high backrest.
- Place the heated seat cushion in the chair and fold the top section over the backrest to the back so that the powerbanks are located at the back of the backrest.

natural_image
Line drawing of a simple chair with backrest and seat, no text or symbols presentFigure 22.
-
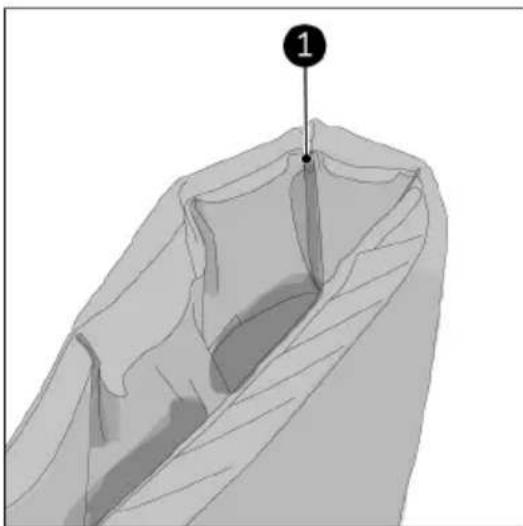
The back of the heated seat cushion has multiple fold seams (Figure 23, pos. 1). Never fold on other positions.
-
Choose the fold seam depending on the height of the chair backrest. The weight of the powerbank will pull the folded portion down and hold the cushion in place.
natural_image
3D rendered diagram of a folded garment or cushion with layered structure and a numbered point (1) at the top center, no text or symbols present.Figure 23.
Operation
- Press the ON/OFF button briefly to activate the powerbank. The light will shortly shine red/orange and white.
- Press and hold the ON/OFF button for 3 seconds.
•The ON/OFF button will light-up red.
•The cushion starts heating in the high heat setting.
- Press the ON/OFF button briefly to change the heat setting:
| Heat setting | Temperature back area | Temperature seat area | Battery duration |
| Low (white light) 50 °C 40 °C 10 hours | |||
| Medium (orange light) 60 °C 50 °C 7 hours | |||
| High (red light) 75 °C 60 °C 5 hours |
- Repeat starting from step 1 for other heating area.
After operation
To turn off the product:
- Press and hold the ON/OFF button for both heating areas (seat and back) for 3 seconds. The light of the ON/OFF button goes out.
- Open the zipper of the outer cover.
- Unplug the connection cables from the powerbanks.
- Remove the powerbanks from the storage pockets.
- Wait until both heating areas are completely cooled down.
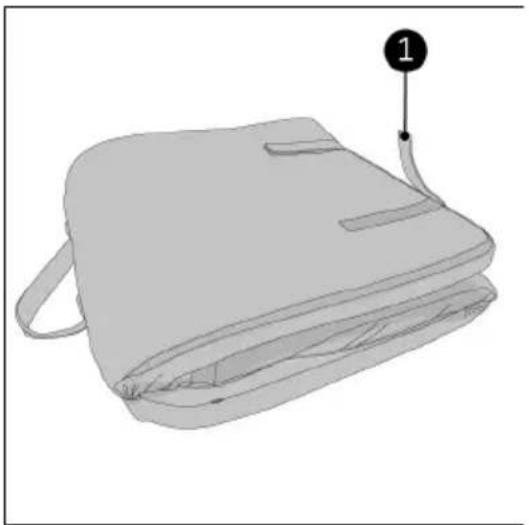
- If desired, fold the product into an handy package (Figure 24).
- Secure with the Velcro strips (Figure 24, pos. 1).
natural_image
Illustration of a gray backpack with a numbered label pointing to the side (no text or symbols on the backpack itself)Figure 24.
Maintenance

CAUTION
If the product is not used for an extended period of time, the powerbank should always be removed. Charge the powerbank to about 75% and charge and discharge it every 3-6 months. Otherwise, the performance of the powerbank decreases and the life of the powerbank is shortened.
Cleaning

WARNING
Never iron or wash the heating mat. The heating mat contains the heating wires and electrical connections.

CAUTION
Be careful when removing components from the outer cover to prevent damage to the wiring.
- Switch off the product (both heating areas).
- Remove the two powerbanks.
- Wait until both heating areas are completely cooled down.
- Remove the high back area inner cushion and the low back area inner cushion through the opening where the powerbanks are removed (Figure 25, pos. 1).
- Open the zipper on the backside of the seat area (Figure 25, pos. 2) and remove the seat area inner cushion.
- Remove the heating mat from the outer cover. Be careful with the electric wiring.
- Wash the outer cover.
- To reassemble the product, perform the above steps in reverse order.
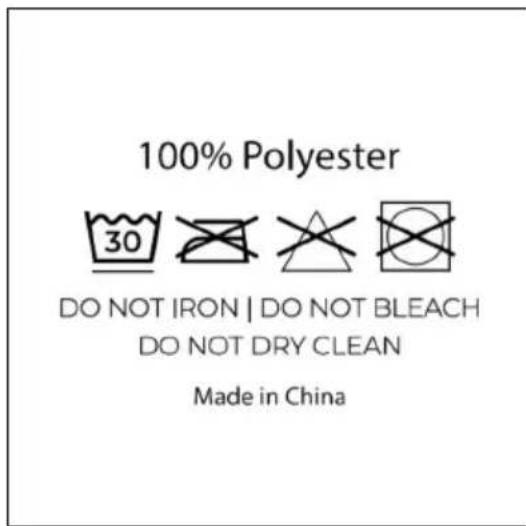
Washing the outer cover
- Wash at 30 °C max.
- Do not iron.
- Do not bleach.
- Do not dry clean.
Water resistance decreases after several washes.
To restore the waterproofness, use impregnating agent for polyester fabrics.
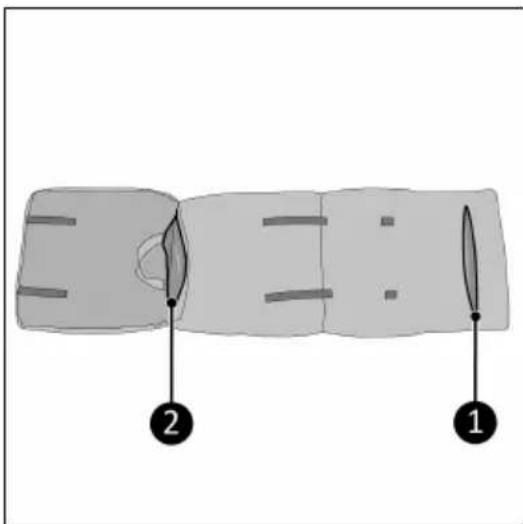
Figure 25.
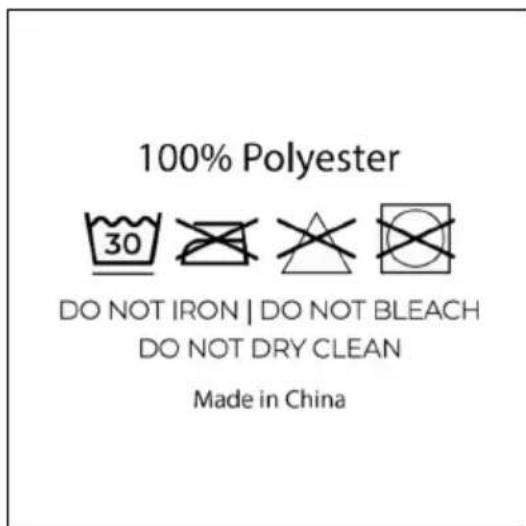
Figure 26.
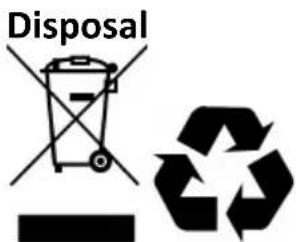
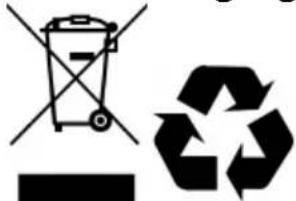
This marking indicates that this product should not be disposed of with other household waste throughout the EU. To prevent possible harm to the environment or human health from uncontrolled waste disposal, recycle it responsibly to promote the sustainable reuse of material. Dispose of the product in accordance with the local ordinances of your place of residence.
Batteries, rechargeable batteries that are not permanently installed in the product must be removed before disposal and disposed of separately.
Abbildung 28.
Abbildung 30.
Abbildung 31.
Abbildung 32.
Abbildung 33.
Abbildung 34.
natural_image
Line drawing of a simple chair with backrest and seat, no text or symbols presentAbbildung 35.
natural_image
3D model of a folded garment with layered structure and a numbered point (1) pointing to a specific section (no text or symbols present)Abbildung 36.
Betrieb
natural_image
Line drawing of a backpack with a labeled point (1) pointing to the side of the pocket (no text or symbols on the backpack itself)Abbildung 37.
Wartung

VORSICHT
Abbildung 38.
100% Polyester

DO NOT IRON | DO NOT BLEACH DO NOT DRY CLEAN
Made in China
Abbildung 39.
Abfallentsorgung
natural_image
Symbolic representation of a trash bin and a recycling symbol (no text or labels)Figure 41.
Figure 43.
Figure 44.
Figure 45.
Figure 46.
Figure 47.
natural_image
Line drawing of a simple chair with backrest and seat, no text or symbols presentFigure 48.
natural_image
3D rendered diagram of a folded garment or cushion with layered structure and a numbered point (1) at the top center, no text or symbols present.Figure 49.
Utilisation
natural_image
Illustration of a gray backpack with a numbered label pointing to the side (no text or symbols on the backpack itself)Figure 50.
Entretien

PRUDENCE
Figure 51.
natural_image
Symbolic representation of a bin with a crossed-out paper and a recycling symbol (no text or labels)Model: Warmigo Dual Heat Zone
Date: 03/04/2025
Version: v1.0

- Warmigo Dual Heat Zone
- Varta powerbank and speed charger
- Order links
- Vervoer en opslag
- Werking
- Onderhoud
- LET OP
- Safety warnings powerbank
- Safety warnings heated seat cushions
- Overheating protection
- Warranty
- Introduction
- CAUTION
- WARNING
- Description
- Unboxing
- Control buttons
- Powerbank
- Transport and storage
- Installation
- Charging the powerbank
- Installing the powerbank
- Installing on the chair
- Operation
- After operation
- Maintenance
- Cleaning
- Washing the outer cover
- Abbildung 31.
- Betrieb
- Wartung
- VORSICHT
- Abfallentsorgung
- Utilisation
- Entretien
- PRUDENCE
Brand : Eurom
Model : Warmigo
Category : Heating