
YOKO13 - Grill plate H.KOENIG - Free user manual and instructions
Find the device manual for free YOKO13 H.KOENIG in PDF.

Pick your language and provide your email: we'll send you a specifically translated version.
| Product type | Kamado Barbecue (ceramic grill plate) |
| Brand | H.Koenig |
| Model | YOKO13 |
| Use | Outdoor only |
| Dimensions (approximate) | Outer diameter approx. 45 cm, height approx. 70 cm (with wheels) |
| Weight | Approx. 20 kg |
| Main material | Ceramic dome, felt and wool insulating gasket |
| Energy source | Charcoal or briquettes (compliant with EN 1860-3) |
| Maximum temperature | Up to 370 °C for direct cooking |
| Functions | Grilling, slow cooking, smoking, roasting, low and high temperature cooking |
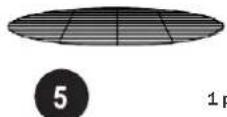
| Cooking surface | Chrome-plated metal cooking grid (diameter approx. 45 cm) |
| Thermometer | Integrated on the dome, pre-assembled |
| Ventilation | Adjustable air intake at bottom, adjustable air outlet at top |
| Included accessories | 4 legs, 2 lockable wheels, 2 normal wheels, side tables (x2), hook, ash basket, ash recovery kit, assembly tools |
| Care and cleaning | Self-cleaning: heat to 260 °C for 30 minutes; do not use water inside; clean exterior with damp cloth and mild detergent |
| Safety | Minimum safety distance of 3 meters around and above; do not use indoors; do not move during use; use heat protective gloves |
| Warranty | 2 years from date of purchase |
| Repairability | Spare parts available (felt gasket, grid, etc.); online after-sales support |
| Standards | Fire starters and charcoal compliant with EN 1860-3 |
| Country of origin | China (French brand) |
Frequently Asked Questions - YOKO13 H.KOENIG
How to light the Kamado YOKO13 barbecue?
Place solid fire starters (compliant with EN 1860-3) on the charcoal plate. Add 2 to 3 handfuls of lump charcoal on top. Open the bottom vent and light with a long lighter or safety matches. Leave the lid open for about 10 minutes until embers form.
What is the ideal temperature for slow cooking?
For slow cooking or smoking, maintain a temperature between 110 °C and 135 °C. Close the bottom vent completely and adjust the top vent to stabilize.
Can the Kamado be used indoors?
No, the YOKO13 barbecue is designed exclusively for outdoor use. Using it in an enclosed space poses a risk of fire and carbon monoxide poisoning.
How to extinguish the fire properly?
To extinguish, stop adding fuel and close all vents and the lid. The fire will go out naturally due to lack of oxygen. Never use water to extinguish the charcoal.
How to clean the inside of the Kamado?
The Kamado is self-cleaning: heat it to 260 °C for 30 minutes to burn off food residues. Do not use water or chemicals inside, as the porous ceramic could crack.
What types of charcoal are recommended?
Use lump charcoal or barbecue briquettes complying with EN 1860-3. Avoid liquid fuels like gasoline or alcohol.
How to replace the felt gasket?
The gasket should be replaced when smoke leaks between the dome and base. Remove the old gasket, clean the surface, then apply a new specific Kamado felt gasket. Follow the instructions in the manual.
What safety distance to observe?
Maintain a minimum distance of 3 meters above and around the barbecue from any flammable structure (walls, railings, etc.). The barbecue must be placed on a heat-resistant surface.
How to maintain the side tables?
The side tables support a maximum load of 5 kg. Clean them with a damp cloth and mild detergent. Protect them from prolonged moisture to prevent rust.
Where to find spare parts for the YOKO13?
Spare parts (gasket, grid, wheels, etc.) are available on the H.Koenig after-sales website: https://sav.hkoenig.com. The 2-year warranty covers manufacturing defects but not normal wear.
User questions about YOKO13 H.KOENIG
0 question about this device. Answer the ones you know or ask your own.
Ask a new question about this device
No questions yet. Be the first to ask one.
Download the instructions for your Grill plate in PDF format for free! Find your manual YOKO13 - H.KOENIG and take your electronic device back in hand. On this page are published all the documents necessary for the use of your device. YOKO13 by H.KOENIG.
USER MANUAL YOKO13 H.KOENIG
H
Instruction Manual
Manuel d'instructions
Bedienungsanleitung
Gebruiksaanwijzing
Manual de instrucciones
Manuale d'uso
Manual do usuario
Manual de instruções

natural_image
Line drawing of a Koenig heat exchanger with wheels and top panel (no text or symbols on the device itself)
Kamado Japanese barbecue 18"
Barbecue Japonais Kamado 18" Japanischer Barbecue-Grill Kamado 18" Kamado 18" Japanese barbecue Barbacoa japonesa Kamado 18 Kamado 18" barbecue giapponese Kamado 18" barbecue japonês

ENGLISH

 4 pcs
4 pcs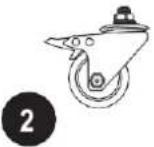 2 pcs
2 pcs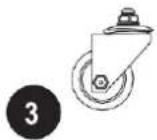 2 pcs
2 pcs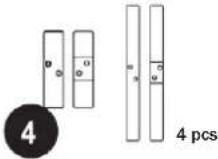
 ics
ics 1 pcs
1 pcs 1 pcs
1 pcs 1 pcs
1 pcs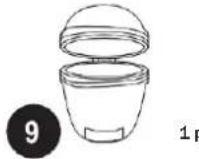 ics
ics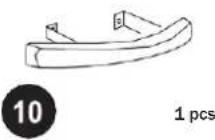

 12 pcs
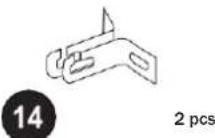
 16
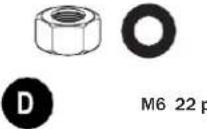
16[845B]A M6-14 2 pcs [BYAS]B M6 2 pcs  C M6-20 22 pcs
 D M6 22 pcs
 E 4 pcs
 F 1 pcs
 G 1 pcs
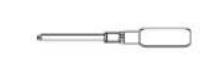 H 1 pcs
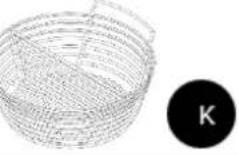
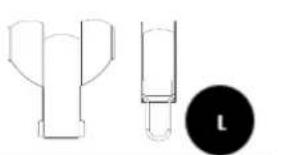
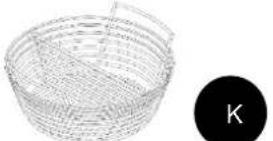
[XXXW]I M5-40 2 pcs [XSD4]J M5 2 pcs [BY4X]K  L
L
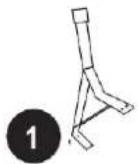
1 Legs (x4)
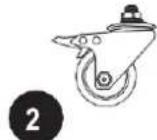
2 Lockable Wheels (x2)
3 Normal Wheels (x2)
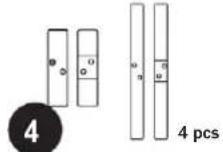
4 Cross Stick (x4)
5 Cooking Grill (x1)
6 Fire Ring (x1)
7 Charcoal Grate (x1)
8 Fire Box (x1)
9 Ceramic Lid & Dome (x1)
10 Lid Handle (x1)
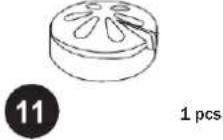
11 Top Vent (x1)
12 Side Table (x2)
13 Side Table Bracket (x2)
14 Side Table Bracket (x2)
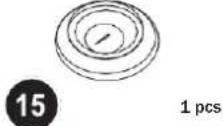
15 Thermometer (x1) -Pre-assembled
16 Hook
A Screw M6-14 (x2) - Spare parts
B Nut M6 (x2) - Spare parts
C Screw M6-20(x22 -2 of them are spare parts)
D Nut M6 & Spring washer (x22 -2 of them are spare parts)
E Rubber sleeve (x4)
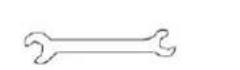
F Multifunctional Wrench (x1)
G Rugar Wrench (x1)
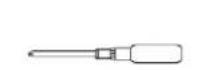
H Screw-driver (x1)
I Screw M5-40(x2) -Pre-assembled
J Nut M5(x2) -Pre-assembled
K Ash basket
L Ash tool set


flowchart
graph TD
    A["③"] --> B["④"]
    B --> C["①"]
    C --> D["②"]
    D --> E["③"]
    style A fill:#f9f,stroke:#333
    style B fill:#ccf,stroke:#333
    style C fill:#cfc,stroke:#333
    style D fill:#fcc,stroke:#333
    style E fill:#ffc,stroke:#333


natural_image
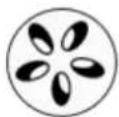
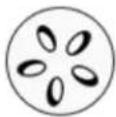
Simple line drawing of a circular device with a flower-like pattern on the top, mounted on a base with no text or symbols.

natural_image
Line drawing of a portable grill with a dome top and wheels, no text or symbols present
Read carefully!
WARNING! This barbecue will become very hot, do not move it during operation
Do not use indoors!
WARNING! Do not use spirit or petrol for lighting or relight-ing!
Use only firelighters complying to EN 1860-3!
WARNING! Keep children and pets away
Warning notice

Read this manual and all safety information carefully before first use. Failure to do so could result in serious injury or death or damage to property.
Pay attention to a proper assembly of the grill. Stick to the mounting instructions supplied with the grill. Use the grill only after it is fully assembled
The grill must be positioned on a safe flat surface before use.
Use the grill exclusively on heat-resistant and fire-resistant undergrounds.
Please ensure before first use, that the grill is heated one time for 30 minutes without any food.
Use only approved Grill charcoal or barbecue briquet- tes which comply with EN 1860-3. Cover the fire grate with combustible material without stacking it.
Only use approved solid fire starters which comply with EN 1860-3. Stick to the enclosed instructions on the proper use of the product. Seal the fire starters immediately after use and do not store them near the grill.
Do not cook before the fuel has a coating of ash.
Do not use the grill to heat substances and materials other
than food.
Do not use the grill as a heater.
The wheel with brake should be in front.
Do not use the grill in closed rooms, garages, tents or other closed places. The resulting heat and sparks may cause fire.
The development of carbon monoxide may cause asphyxiation in closed rooms.
Do not use the grill under flammable roofs, shelters and similar places.
Make sure to keep the grill in a safety distance of 2 meters away from flammable materials. These could be ignited by heat generation or flying sparks.
Never leave the hot grill unattended.
Attention: before protecting your grill with a suitable cover, it must be completely cooled! Otherwise, there is a risk of fire and flammability!
Keep sure to always wear oven mitts when touching the grill during operation, e.g. opening the air vents or putting more charcoal into grill.
Don't wear too far or loose clothing that could come into contact with the coals or fire when grilling.
Never use the grill in extreme weather.
Never use water to extinguish burning charcoal. Instead, close the vents and the lid until the fire is extinguished.
This grill is only intended for private use!
WARNING Choking hazard! The barbecue is intended for outdoor use only. It must not be used in a building, garage or any other enclosed space. Toxic fumes may be formed that cause suffocation.
Safety distance :

Maintain a minimum distance of 3m from elevated structures, walls, ramps and other structures.
How does it work?

Curing The Kamado
To start a fire place some lighter cubes or solid firelighters on the charcoal plate in the base of the Kamado. Then place 2 or 3 handfuls of lump charcoal over the top of the them.
Caution! do not use petrol, white spirit, lighter fluid, alcohol or other similar chemicals for lighting or relighting.
Caution! do not overload the unit with fuel. If the fire is too intense this could damage the Kamado.
Open the bottom vent and light the firelighters using a long nosed lighter or safety matches.
Do not open or release the top lid vigorously. Leave until all the fuel is used and extinguished.
If the fire burns too high it could damage the felt gasket seal before it has had the chance to mature properly.
After first use inspect all fasteners for tightness. The metal band connecting your lid to the base will expand from the heat and this could become loose. It is recommended you check and if necessary tighten the band with a spanner.
Now your Kamado is ready for use.
Extinguishing
To extinguish unit, simply stop adding fuel and close all the vents and the lid to allow the fire to die naturally.
Caution! do not use water to extinguish.
Storage
When not in use, please store it in dry place, and cover the Kamado once completely cooled with suitable rain cover.
Do not leave it outside to get wet when it rains.
When using the Kamado push down on both of the locking wheels to stop the unit moving about during use.
Over winter It is recommended to store the Kamado in a garage, a closed room or shed for complete protection.
Cleaning
Always clean the Kamado when it is fully cooled.
The Kamado is self cleaning. Heat it up to 260°C for 30 minutes and it will scorch off all of the food and debris.
Caution! DO NOT use water or any other types of cleaning products to clean the inside of your Kamado. The walls are porous and will absorb the liquids, this could cause the Kamado to crack.
If the soot or ashes become excessive then use a wire brush to scrape off the carbon remnants before the next use.
To clean the grates use a non-abrasive cleaner once the unit has fully cooled.
To clean the outer surface wait until the Kamado is cool, Please do not flush the surface directly with water, it is recommend to use a damp cloth with a mild detergent.
During the cleaning, please handle with care when moving the fire ring and fire box.
Maintenance
Please check regularly all connections, and tighten them if necessary.
Tighten the bands and oil the hinge 2 times a year or more if needed.
To avoid making a long exposure to the sidetable also ensure to make it in a dry condition. Rated load within 5 kg.
To replace the felt gasket regularly (It is generally believed that the felt gasket should be replaced when smoke comes out of the gap between the ceramic furnace body).
Lighting, Usage & Care Information
Ensure the Kamado is positioned on a permanent, flat, level, heat resistant non-flammable surface away from flammable items (no combustible materials nearby).
Ensure the Kamado has a minimum of 2m over head clearance. The grill should be 2m away from all objects above it and in the surrounding area.
To start a fire place some lighter cubes or solid firelighters on the charcoal plate in the base of the Kamado. Then place 2 or 3 handfuls of lump charcoal over the top of the firelight- ers.
Caution! do not use petrol, white spirit, lighter fluid, alcohol or other similar chemicals for lighting or relighting.
Caution! do not cook before the fuel has a coating of ash.
Open the bottom vent and light the firelighters using a long nosed lihter or safety matches. Once it has caught, leave the
bottom vent and lid open for about 10 minutes to build a small bed of hot embers.
It is recommended you don't stoke or turn the coals once they are alight. This allows the charcoals to burn more uniformly and efficient.
Always use only heat resistant gloves when handling hot ceramics or cooking surfaces.
Low Temperature Cooking Guide
Light the lump charcoal according to the instructions above.
Open the bottom vent fully and leave the lid open for about 10 minutes to build a small bed of hot embers.
Monitor the Kamado until it has risen to the desired temperature.
Fully close the bottom vent to maintain the temperature. You are now ready to use the Kamado for cooking on.
Caution! When opening the lid at high temperatures it is essential to lift the lid only slightly, allowing air to enter slowly and safely, preventing any backdraft or flare-ups that may cause injury.
Always use heat resistant gloves when handling hot ceramics or cooking surfaces.
Smoking Guide
Follow the instructions above as if you were starting a slow cook (Low Temperature Cooking Guide).
Monitor the Kamado until it has risen to the desired temperature.
Leave the bottom vent slightly open.
Close the top vent and continue to check the temperature for a few more minutes.
Using heat resistant gloves sprinkle the wood chips in a circle over the hot charcoal.
You are now ready to use the Kamado to smoke on.
High Temperature Cooking Guide
Light the lump charcoal according to the instructions. Close the lid and fully open the top and bottom vents.
Monitor the Kamado until it has risen to the desired temperature.
Close the top vent half way and continue to check the temperature for a few more minutes.
You are now ready to use the Kamado for cooking on.
Always use heat resistant gloves when handling hot ceramics or cooking surfaces.
Refueling
With the vents closed, the Kamado stays at a high temperature for several hours. If you require a longer cooking time (e.g when roasting a whole joint or slow smoking), it may be necessary to add more charcoal. Just add some additional charcoal and continue as above.
Cooking Temperature Guide
Slow Cooking / Smoking (110°C - 135°C)
Briskt 2 h per kg Pulled pork 2 - 4 h per kg Whole broiler 3 - 4 h Ribs 3 - 5 h Roast 9 + h
Bottom vent

Top vent

Grilling (160°C - 185°C)
Fish 15 - 20 min Pork tenderloin 15 - 30 min Broiler parts and 30 - 45 min Whole broiler 1 - 1.5 h Leg of lamb 3 - 4 h Turkey 2 - 4 h Pork shoulder / ham 2 - 5 h
Bottom vent

Top vent

Grilling (260°C - 370°C)
Steaks 5 - 8 min Pork chops 6 - 10 min Burgers 6 - 10 min Sausages 6 - 10 min
Bottom vent

Top vent

Open ○
Closed

WARRANTY
The warranty period for our products is 2 years, unless otherwise stated, starting from the date of initial purchase or the date of delivery.
If you have any problems or questions, you can easily access our help pages, troubleshooting tips, FAQ, and user manuals on our service site: https://sav.hkoenig.com.
By typing the reference name of your device in the search bar, you can access all available online support, designed to best meet your needs.
If you still cannot find an answer to your question or problem, then click on "Did the answer solve your problem?".
This will direct you to the Customer Support Request Form, which you can fill out to validate your request and get help.
WARRANTY CONDITIONS
The warranty covers all failures occurring under normal use, in accordance with the usage and specifications in the user's manual.
This warranty does not apply to packaging or transportation problems during shipment of the product by the owner. It also does not include normal wear and tear of the product, nor maintenance or replacement of consumable parts.
EXCLUSION OF WARRANTY
- Accessories and wearing parts (\*).
- Normal maintenance of the device.
- All breakdowns resulting from improper use (shocks, failure to comply with power supply recommendations, poor conditions of use, etc.), insufficient maintenance or misuse of the device, as well as the use of unsuitable accessories.
- Damage of external origin: fire, water damage, electrical surge, etc.
- Any equipment that has been disassembled, even partially, by persons other than those authorized to do so (notably the user).
- The products whose serial number would be missing, deteriorated or illegible that would not allow its identification.
- The products subjected to leasing, demonstration, or exhibition.
(\*) Some parts of your device, called wear parts or consumables, deteriorate with time and frequency of use of your device. This wear and tear are normal but can be accentuated by poor conditions of use or maintenance of your device. These parts are therefore not covered by the warranty.
The accessories supplied with the device are also excluded from the warranty. They cannot be exchanged or refunded. However, some accessories can be purchased directly through our website: https://sav.hkoenig.com/.
ENVIRONMENT
CAUTION:
Do not dispose of this product as it has with other household products. There is a separation

of this waste product into communities, you will need to inform your local authorities about the places where you can return this product. In fact, electrical and electronic products contain hazardous substances that have harmful effects on the environment or human health and should be recycled. The symbol here indicates that electrical and electronic equipment should be
chosen carefully, a wheeled waste container is marked with a cross.
Adeva SAS / H.Koenig Europe - 8 rue Marc Seguin - 77290 Mitry Mory - France www.hkoenig.com - sav@hkoenig.com - contact@hkoenig.com - Tél: +33 1 64 67 00 05
FRANÇAIS

 4 pcs
4 pcs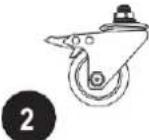 2 pcs
2 pcs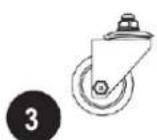 2 pcs
2 pcs[XYZ]s  ics
ics 1 pcs
1 pcs 1 pcs
1 pcs s
s ics
ics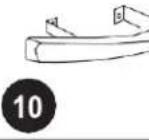 1 pcs
1 pcs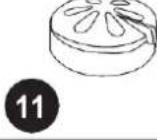 1 pcs
1 pcs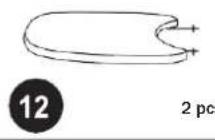 s
s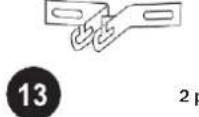 ics
ics 2 pcs
2 pcs 1 pcs
1 pcs 1cs
1cs 2 pcs
2 pcs M6 2 pcs
 -20 22 pcs
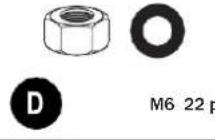 ics
ics 4 pcs
4 pcs 1 pcs
1 pcs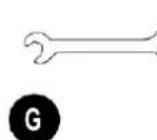 1 pcs
1 pcs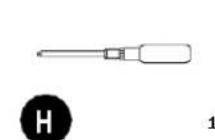 .pcs
.pcs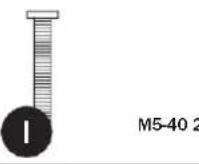 ! pcs
! pcs M5 2 pcs
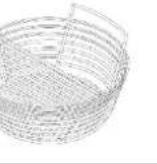 K
K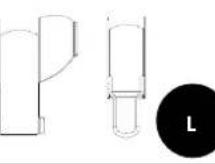
1 Pieds (x4)
2 Roues verrouillables (x2)
3 roues normales (x2)
4 Stabilisateurs (x4)
5 Grille de cuisson (x1)
6 Anneau de Feu (x1)
7 Bac à cendres (x1)
8 Boîte à Feu (x1)
9 Couvercle et dôme en
céramique (x1)
10 poignée (x1)
11 Event supérieur (x1)
12 Table d'Appoint (x2)
13 Support de table d'appoint (x2)
14 Support de table
d'appoint (x2)
15 Thermomètre (x1) -Pré-assemblé
16 Crochet pour ustensiles
de cuisine
A Vis M6-14 (x2) - Pièces détachées
B Ecrous M6 (x2) - Pièces détachées
C Vis M6-20 (x22 -2 d'entre eux sont des pièces de rechange)
D Ecrous M6 et rondelles élastiques (x22 -2 d'entre eux sont des pièces de rechange)
E Manchon en caoutchouc
(x4)
F Clé multifonction (x1)
G Clé à molette (x1)
H Tournevis (x1)
I Vis M5-40(x2) -Pré-assemblé
J Écrous M5(x2) -Pré-assemblé
K Panier à cendres
L Kit de récupération des
cendres


flowchart
graph TD
    A["④ Pinning"] --> B["Step C"]
    B --> C["Step D"]
    C --> D["Step 4"]
    D --> E["Step E"]
    E --> F["Step 1"]
    F --> G["③ Mounting"]
    style A fill:#f9f,stroke:#333
    style E fill:#ccf,stroke:#333
    style G fill:#cfc,stroke:#333


natural_image
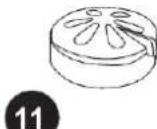
Top-down schematic of a circular device with a central flower-like symbol and control knobs, labeled with number 11 (no text or symbols on the diagram itself)

natural_image
Line drawing of a portable rice cooker with wheels and a dome top (no text or symbols)
Lire attentivement!
ATTENTION! Ce barbecue deviendra très chaud, ne le déplacez pas pendant le fonctionnement Ne pas utiliser à l'intérieur !
ATTENTION! N'utilisez pas d'alcool ou d'essence pour l'allumage ou le rallumage ! Utilisez uniquement des allume-feu conformes à la norme EN 1860-3 !
ATTENTION! Éloignez les enfants et les animaux domestiques
Avertissement

Lisez attentivement ce manuel et toutes les informations de sécurité avant la première utilisation. Ne pas le faire pourrait entraîner des blessures graves ou la mort ou des dommages matériels.
Faites attention à un montage correct du gril. Respectez les instructions de montage fournies avec le gril. N'utilisez le gril qu'après l'avoir entièrement assemblé
Le gril doit être placé sur une surface plane et sûre avant utilisation. Utilisez le gril exclusivement sur des sols résistants à la chaleur et au feu.
Avant la première utilisation, assurez-vous que le gril est chauffé une fois pendant 30 minutes sans aucun aliment.
N'utilisez que du charbon de bois ou des briquettes pour gril
approuvés et conformes à la norme EN 1860-3. Couvrir la grille de feu avec un matériau combustible sans l'empiler.
N'utilisez que des allume-feux solides homologués conformes à la norme EN 1860-3. Respectez les instructions ci-jointes sur l'utilisation correcte du produit. Scellez les allume-feux immédiatement après utilisation et ne les rangez pas près du gril.
Ne cuisinez pas avant que le combustible ne soit recouvert d'une couche de cendre.
N'utilisez pas le gril pour chauffer des substances et des matériaux autres que des aliments.
N'utilisez pas le gril comme appareil de chauffage.
La roue avec frein doit être devant.
N'utilisez pas le gril dans des pièces fermées, des garages, des tentes ou d'autres endroits fermés. La chaleur et les étincelles qui en résultent peuvent provoquer un incendie. Le développement de monoxyde de carbone peut provoquer une asphyxie dans les pièces fermées.
N'utilisez pas le gril sous des toits inflammables, des abris et des endroits similaires.
Assurez-vous de garder le gril à une distance de sécurité de 2 mètres des matériaux inflammables. Ceux-ci pourraient être enflammés par la génération de chaleur ou des étincelles volantes.
Ne laissez jamais le gril chaud sans surveillance.
Attention : avant de protéger votre gril avec une housse adaptée, il doit être complètement refroidi ! Sinon, il y a risque d'incendie et d'inflammabilité !
Assurez-vous de toujours porter des gants de cuisine lorsque vous touchez le gril pendant le fonctionnement, par ex. ouvrir
les bouches d'aération ou mettre plus de charbon de bois dans le gril.
Ne portez pas de vêtements trop amples ou amples qui pourraient entrer en contact avec les braises ou le feu lors de la cuisson.
N'utilisez jamais le gril par temps extrême.
N'utilisez jamais d'eau pour éteindre le charbon de bois brûlant. Au lieu de cela, fermez les évents et le couvercle jusqu'à ce que le feu soit éteint.
Ce gril est uniquement destiné à un usage privé !
MISE EN GARDE Risque d'étouffement ! Le barbecue est destiné à un usage en extérieur uniquement. Il ne doit pas être utilisé dans un bâtiment, un garage ou tout autre espace clos. Il peut se former des vapeurs toxiques qui provoquent la suffocation.
Distance de sécurité :

Maintenez une distance minimale de 3m des structures surélevées, des murs, des rampes et d'autres structures.
Comment ça fonctionne ?

Prendre soin du Kamado
Pour allumer un feu, placez des cubes plus légers ou des allume-feu solides sur la plaque de charbon de bois à la base du Kamado. Ensuite, placez 2 ou 3 poignées de charbon de bois en morceaux sur le dessus.
Mise en garde! n'utilisez pas d'essence, de white spirit, d'essence à briquet, d'alcool ou d'autres produits chimiques similaires pour l'allumage ou le rallumage.
Mise en garde! ne surchargez pas l'appareil avec du carburant. Si le feu est trop intense, cela pourrait endommager le Kamado.
Ouvrez l'évent inférieur et allumez les allume-feux à l'aide d'un briquet à long bec ou d'allumettes de sûreté.
N'ouvrez pas ou ne relâchez pas le couvercle supérieur vigoureusement. Laisser jusqu'à ce que tout le carburant soit utilisé et éteint.
Si le feu brûle trop haut, cela pourrait endommager le joint d'étanchéité en feutre avant qu'il n'ait eu la chance de mûrir correctement.
Après la première utilisation, inspectez toutes les fixations pour vous assurer qu'elles sont bien serrées.
La bande métallique reliant votre couvercle à la base se dilatera sous l'effet de la chaleur et pourrait se détacher. Il est recommandé de vérifier et, si nécessaire, de serrer la bande avec une clé.
Votre Kamado est maintenant prêt à l'emploi.
Extincteur
Pour éteindre l'appareil, arrêtez simplement d'ajouter du carburant et fermez tous les évents et le couvercle pour permettre au feu de s'éteindre naturellement.
Mise en garde! ne pas utiliser d'eau pour éteindre.
Stockage
Lorsqu'il n'est pas utilisé, veuillez le ranger dans un endroit sec et couvrir le Kamado une fois complètement refroidi avec une housse de pluie appropriée.
Ne le laissez pas dehors se mouiller quand il pleut.
Lorsque vous utilisez le Kamado, appuyez sur les deux roues de verrouillage pour empêcher l'appareil de se déplacer pendant l'utilisation.
Pendant l'hiver, il est recommandé de ranger le Kamado dans un garage, une pièce fermée ou un cabanon pour une protection complète.
Nettoyage
Nettoyez toujours le Kamado lorsqu'il est complètement refroidi.
Le Kamado est autonettoyant. Chauffez-le à 260 °C pendant 30 minutes et il brûlera tous les aliments et les débris.
Mise en garde! N'UTILISEZ PAS d'eau ou tout autre type de produit de nettoyage pour nettoyer l'intérieur de votre Kamado.
Les parois sont poreuses et vont absorber les liquides, cela pourrait faire craquer le Kamado.
Si la suie ou les cendres deviennent excessives, utilisez une brosse métallique pour gratter les restes de carbone avant la prochaine utilisation.
Pour nettoyer les grilles, utilisez un nettoyant non abrasif une fois que l'appareil a complètement refroidi.
Pour nettoyer la surface extérieure, attendez que le Kamado soit froid. Veuillez ne pas rincer la surface directement avec de l'eau, il est recommandé d'utiliser un chiffon humide avec un détergent doux.
Pendant le nettoyage, veuillez manipuler avec précaution lorsque vous déplacez l'anneau de feu et le foyer.
Entretien
Veuillez vérifier régulièrement toutes les connexions et les resserrer si nécessaire.
Serrez les bandes et huilez la charnière 2 fois par an ou plus si nécessaire.
Pour éviter de faire une longue exposition à la table d'appoint, assurez-vous également de la rendre sèche. Charge nominale inférieure à 5 kg.
Remplacer régulièrement le joint en feutre (on pense généralement que le joint en feutre doit être remplacé lorsque de la fumée s'échappe de l'espace entre le corps du four à céramique).
Informations d'utilisation et d'entretien
Assurez-vous que le Kamado est placé sur une surface ininflammable permanente, plane, de niveau et résistante à la chaleur, à l'écart des objets inflammables (pas de matériaux combustibles à proximité).
Assurez-vous que le Kamado a un minimum de 2 m de dégagement au-dessus de la tête. Le gril doit être à 2 m de tous les objets au-dessus de lui et dans la zone environnante. Pour allumer un feu, placez des cubes plus légers ou des allume-feu solides sur la plaque de charbon de bois à la base du Kamado. Placez ensuite 2 ou 3 poignées de charbon de bois en morceaux sur le dessus des allume-feux.
Mise en garde! n'utilisez pas d'essence, de white spirit, d'essence à briquet, d'alcool ou d'autres produits chimiques similaires pour l'allumage ou le rallumage.
Mise en garde! ne faites pas cuire avant que le combustible ne soit recouvert d'une couche de cendre.
Ouvrez l'évent inférieur et allumez les allume-feux à l'aide d'un briquet à long bec ou d'allumettes de sûreté. Une fois qu'il a attrapé, laissez l'évent inférieur et le couvercle ouverts pendant environ 10 minutes pour construire un petit lit de braises chaudes.
Il est recommandé de ne pas attiser ou tourner les charbons une fois qu'ils sont allumés. Cela permet aux charbons de brûler de manière plus uniforme et efficace.
Utilisez toujours uniquement des gants résistants à la chaleur lorsque vous manipulez des céramiques ou des surfaces de cuisson chaudes.
Guide de cuisson à basse température
Allumez le charbon de bois en morceaux selon les instructions ci-dessus.
Ouvrez complètement l'évent inférieur et laissez le couvercle ouvert pendant environ 10 minutes pour former un petit lit de braises chaudes.
Surveillez le Kamado jusqu'à ce qu'il atteigne la température souhaitée.
Fermez complètement l'évent inférieur pour maintenir la température. Vous êtes maintenant prêt à utiliser le Kamado pour cuisiner.
Mise en garde! Lors de l'ouverture du couvercle à des températures élevées, il est essentiel de ne soulever que légèrement le couvercle, permettant à l'air d'entrer lentement et en toute sécurité, en évitant tout refoulement ou poussée pouvant causer des blessures.
Utilisez toujours des gants résistants à la chaleur lorsque vous manipulez de la céramique chaude ou des surfaces de cuisson.
Fumoir
Suivez les instructions ci-dessus comme si vous démarriez une cuisson lente (Guide de cuisson à basse température).
Surveillez le Kamado jusqu'à ce qu'il atteigne la température souhaitée.
Laissez l'évent inférieur légèrement ouvert.
Fermez l'évent supérieur et continuez à vérifier la température pendant quelques minutes de plus.
À l'aide de gants résistants à la chaleur, saupoudrez les copeaux de bois en cercle sur le charbon de bois chaud.
Vous êtes maintenant prêt à utiliser le Kamado.
Guide de cuisson à haute température
Allumez le charbon de bois en morceaux selon les instructions. Fermez le couvercle et ouvrez complètement les évents supérieur et inférieur.
Surveillez le Kamado jusqu'à ce qu'il atteigne la température souhaitée.
Fermez l'évent supérieur à moitié et continuez à vérifier la température pendant quelques minutes de plus.
Vous êtes maintenant prêt à utiliser le Kamado pour cuisiner.
Utilisez toujours des gants résistants à la chaleur lorsque vous manipulez de la céramique chaude ou des surfaces de cuisson.
Ravitaillement
Avec les évents fermés, le Kamado reste à haute température pendant plusieurs heures. Si vous avez besoin d'un temps de cuisson plus long (par exemple, lorsque vous faites rôtir un rôti entier ou fumez lentement), il peut être nécessaire d'ajouter plus de charbon de bois. Ajoutez simplement un peu de charbon de bois supplémentaire et continuez comme ci-dessus.
Guide des températures de cuisson
Basse température / Fumer (110°C - 135°C)
Briskt 2 h par kg Porc éffiloché 2 - 4 h par kg Poulet rôti 3 - 4 h Côte 3 - 5 h Rôti 9 + h
Ouverture Inférieure Ouverture supérieure


Griller (160°C - 185°C)
Poisson 15 - 20 min Filet de porc 15 - 30 min Parties à rôtirRôti 30 - 45 min entier 1 - 1.5 h Gigot d'agneau 3 - 4 h Dinde 2 - 4 h Epaule de porc / Jambon 2 - 5 h
Ouverture Inférieure

Ouverture supérieure

Griller (260°C - 370°C)
Steaks 5 - 8 min Côtelette de porc 6 - 10 min Burgers 6 - 10 min Saucisses 6 - 10 min
Ouverture Inférieure Ouverture supérieure


Ouvert

Fermé

GARANTIE
La durée de garantie de nos produits est de 2 ans, sauf décret en vigueur, à compter de la date d'achat initiale ou la date de livraison.
En cas de problèmes ou d'interrogations, vous pouvez facilement accéder à nos pages d'aides, conseils de dépannage, FAQ et modes d'emplois sur notre site SAV : https://sav.hkoenig.com.
En tapant le nom de référence de votre appareil dans la barre de recherche, vous accédez à tous les supports en ligne disponibles, conçus pour vous répondre au mieux à vos besoins.
Si vous ne trouvez toujours pas de réponse à votre question ou votre problème, alors cliquez sur « Est-ce que la réponse a résolu votre problème ? ». Vous accéderez alors au formulaire de demande d'assistance SAV, qu'il vous suffira de compléter pour valider votre demande et obtenir de l'aide.
CONDITIONS DE GARANTIE
La garantie couvre l'ensemble des pannes survenant dans le cadre d'une utilisation normale, conforme aux usages et spécifications présentes sur le manuel d'utilisation.
Cette garantie ne s'applique pas aux problèmes d'emballage ou de transport pendant l'expédition du produit par son propriétaire. Elle n'inclut également pas l'usure normale du produit, ni la maintenance ou le remplacement de pièces consommables.
EXCLUSION DE GARANTIE
- Les accessoires et les pièces d'usure (\*).
- L'entretien normal de l'appareil.
- Toutes pannes survenant par suite d'une mauvaise utilisation (chocs, non-respect des préconisations d'alimentation électrique, mauvaises conditions d'utilisation, etc.), d'un entretien insuffisant ou d'un détournement de fonction de l'appareil, ainsi que l'usage d'accessoires non appropriés.
- Les dommages d'origine externe : incendie, dégâts des eaux, surtension électrique, etc.
- Tout matériel qui aura été démonté même partiellement par des personnes autres que celles habilitées (notamment l'utilisateur).
- Les produits dont le numéro de série serait absent, détérioré ou illisible que ne permettrait pas son identification.
- Les produits soumis à la location, à la démonstration ou à l'exposition.
(\*) Certaines pièces de votre appareil dites pièces d'usure ou consommables se détériorent avec le temps et la fréquence d'usage de votre appareil. Cette usure est normale, mais peut être accentuée par des mauvaises conditions d'utilisation ou entretien de votre appareil. Ces pièces ne sont donc pas couvertes par la garantie. Les accessoires fournis avec l'appareil sont également exclus du champ de la garantie. Ils ne peuvent donc être ni échangés, ni remboursés. Toutefois, certains accessoires peuvent être directement achetés via notre site : https://sav.hkoenig.com/.
ENVIRONNEMENT
ATTENTION :

Ne jetez pas cet appareil avec d'autres produits ménagers. Il existe un tri sélectif de ces déchets dans les municipalités. Demandez-leur quels sont les endroits où vous pouvez jeter cet appareil. En fait, les produits électriques et électroniques contiennent des substances dangereuses qui ont des effets nocifs sur l'environnement et la santé humaine, c'est pour cette raison qu'il doit être recyclé. Le symbole ici, un conteneur à déchets sur roues marqué d'une croix, indique que les équipements électriques et électroniques doivent être choisis avec soin.
Adeva SAS / H.Koenig Europe - 8 rue Marc Seguin - 77290 Mitry Mory - France www.hkoenig.com - sav@hkoenig.com - contact@hkoenig.com - Tél: +33 1 64 67 00 05
DEUTSCH

 4 pcs
4 pcs 2 pcs
2 pcs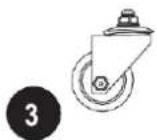 2 pcs
2 pcs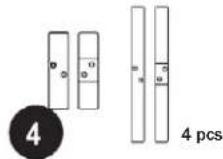
 ics
ics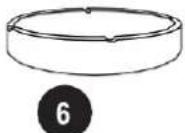 1 pcs
1 pcs 1 pcs
1 pcs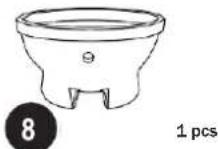
 1 pcs
1 pcs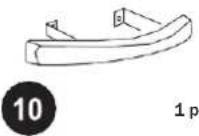 cs
cs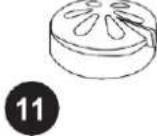 1 pcs
1 pcs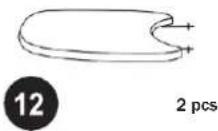
 2 pcs
2 pcs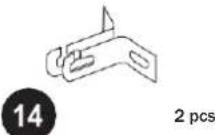

[KKSH]A M6-14 2 pcs 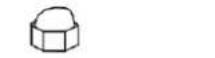 B M6 2 pcs
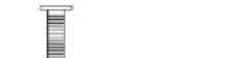 C M6-20 22 pcs
 D M6 22 pcs
 (CD64) 4 pcs
 (SDCZ) CS
 (2AK2)
 (875C)
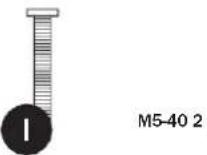 pcs
pcs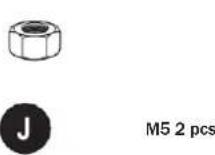
1 Beine (x4)
2 feststellbare Räder (x2)
3 normale Räder (x2)
4 Kreuzstab (x4)
5 Kochgrill (x1)
6 Feuerring (x1)
7 Kohlerost (x1)
8 Feuerbox (x1)
9 Keramikdeckel & Kuppel (x1)
10 Deckelgriff (x1)
11 Obere Belüftung (x1)
12 Beistelltisch (x2)
13 Seitentischhalterung (x2)
14 Seitentischhalterung (x2)
15 Thermometer (x1) -
Vormontiert
16 Haken für Küchenutensilien
A Schraube M6-14 (x2) - Ersatzteile
B-Mutter M6 (x2) - Ersatzteile
C Schraube M6-20 (x22 -2 davon sind Ersatzteile)
D Mutter M6 & Federscheibe (x22 -2 davon sind Ersatzteile)
E Gummimanschette (x4)
F Multifunktionsschlüssel (x1)
G Rugular Schraubenschlüssel (x1)
H-Schraubendreher (x1)
I Schraube M5-40 (x2) -
Vormontiert
J-Mutter M5(x2) – vormontiert
K Aschenkorb
L Aschesammelset


flowchart
graph TD
    A["③"] --> B["④"]
    B --> C["①"]
    C --> D["②"]
    D --> E["③"]
    style A fill:#f9f,stroke:#333
    style B fill:#ccf,stroke:#333
    style C fill:#cfc,stroke:#333
    style D fill:#fcc,stroke:#333
    style E fill:#ffc,stroke:#333


natural_image
Line drawing of a mechanical component with labeled parts (10 and 12), no readable text or symbols beyond labels

natural_image
Simple line drawing of a circular device with a flower-like pattern on the top, mounted on a base with no text or symbols.
12

natural_image
Line drawing of a portable grill with dome top and wheels (no text or symbols)
Gründlich lesen!
WARNUNG! Dieser Grill wird sehr heiß, bewegen Sie ihn nicht während des Betriebs! Nicht im Innenbereich verwenden!
WARNUNG! Keinen Spiritus oder Benzin zum Anzünden oder Nachzünden verwenden! Nur Feueranzünder nach EN 1860-3 verwenden!
WARNUNG! Halten Sie Kinder und Haustiere fern.
Warnung

Lesen Sie dieses Handbuch und alle Sicherheitsinformationen vor dem ersten Gebrauch sorgfältig durch. Andernfalls kann es zu schweren oder tödlichen Verletzungen oder Sachschäden kommen.
Achten Sie auf eine ordnungsgemäße Montage des Grills.
Halten Sie sich an die dem Grill beiliegende
Montageanleitung. Verwenden Sie den Grill nur, wenn er vollständig zusammengebaut ist
Der Grill muss vor der Verwendung auf einer sicheren, ebenen Fläche aufgestellt werden. Verwenden Sie den Grill ausschließlich auf hitzebeständigen und feuerfesten Untergründen.
Bitte stellen Sie vor dem ersten Gebrauch sicher, dass der Grill ohne Lebensmittel einmal für 30 Minuten aufgeheizt wird.
Verwenden Sie nur zugelassene Grillholzkohle oder Grillbriketts, die der EN 1860-3 entsprechen. Decken Sie den Feuerrost mit brennbarem Material ab, ohne ihn zu stapeln.
Verwenden Sie nur zugelassene feste Anzündhilfen, die der EN 1860-3 entsprechen. Halten Sie sich an die beiliegenden Anweisungen zur bestimmungsgemäßen Verwendung des Produkts. Verschließen Sie die Anzünder sofort nach Gebrauch und lagern Sie sie nicht in der Nähe des Grills.
Grillen Sie nicht, bevor der Brennstoff eine Ascheschicht aufweist.
Verwenden Sie den Grill nicht, um andere Substanzen und Materialien als Lebensmittel zu erhitzen.
Verwenden Sie den Grill nicht als Heizung.
Das Rad mit Bremse sollte vorne sein.
Verwenden Sie den Grill nicht in geschlossenen Räumen, Garagen, Zelten oder anderen geschlossenen Orten. Die dabei entstehende Hitze und Funken können einen Brand verursachen. Die Entwicklung von Kohlenmonoxid kann in geschlossenen Räumen zum Ersticken führen.
Verwenden Sie den Grill nicht unter brennbaren Dächern, Unterständen und ähnlichen Orten.
Achten Sie darauf, den Grill in einem Sicherheitsabstand von 2 Metern zu brennbaren Materialien zu halten. Diese könnten durch Hitzeentwicklung oder Funkenflug entzündet werden.
Lassen Sie den heißen Grill niemals unbeaufsichtigt.
Achtung: Bevor Sie Ihren Grill mit einer geeigneten Abdeckung schützen, muss er vollständig abgekühlt sein! Andernfalls besteht Brand- und Entflammbarkeitsgefahr!
Achten Sie darauf, beim Berühren des Grills während des Betriebs immer Ofenhandschuhe zu tragen, z. Öffnen Sie die Lüftungsschlitze oder legen Sie mehr Holzkohle in den Grill. Tragen Sie beim Grillen keine zu weite oder lockere Kleidung, die mit der Kohle oder dem Feuer in Berührung kommen könnte.
Verwenden Sie den Grill niemals bei extremem Wetter.
Verwenden Sie niemals Wasser, um brennende Holzkohle zu löschen. Schließen Sie stattdessen die Belüftungsöffnungen und den Deckel, bis das Feuer gelöscht ist.
Dieser Grill ist nur für den privaten Gebrauch bestimmt!
WARNUNG Erstickungsgefahr! Der Grill ist nur für den
Gebrauch im Freien bestimmt. Er darf nicht in einem Gebäude, einer Garage oder einem anderen geschlossenen Raum verwendet werden. Es können sich giftige Dämpfe bilden, die zum Ersticken führen.
Sicherheitsabstand :

Halten Sie einen Mindestabstand von 3 m zu erhöhten Strukturen, Mauern, Rampen und anderen Strukturen ein.
Wie es funktionniert ?

Kamado starten
Um ein Feuer zu entzünden, legen Sie einige Anzündwürfel oder feste Anzünder auf die Kohleplatte im Sockel des Kamado. Legen Sie dann 2 oder 3 Handvoll Holzkohlestücke darüber.
Vorsicht! Verwenden Sie kein Benzin, Testbenzin, Feuerzeugbenzin, Alkohol oder andere ähnliche Chemikalien zum Anzünden oder Wiederanzünden.
Vorsicht! Überladen Sie das Gerät nicht mit Brennstoff. Wenn das Feuer zu stark ist, kann dies den Kamado beschädigen.
Öffnen Sie die untere Entlüftung und zünden Sie die Feueranzünder mit einem langen Feuerzeug oder Sicherheitsstreichhölzern an.
Öffnen oder lösen Sie den oberen Deckel nicht mit Gewalt. Warten, bis der gesamte Brennstoff verbraucht und erloschen ist.
Wenn das Feuer zu hoch brennt, könnte es die Filzdichtung beschädigen, bevor sie richtig ausgereift ist.
Überprüfen Sie nach dem ersten Gebrauch alle Befestigungselemente auf festen Sitz. Das Metallband, das Ihren Deckel mit der Basis verbindet, dehnt sich durch die Hitze aus und kann sich lösen. Es wird empfohlen, das Band zu überprüfen und gegebenenfalls mit einem Schraubenschlüssel festzuziehen. Jetzt ist Ihr Kamado einsatzbereit.
Löschen
Um das Feuer zu löschen, hören Sie einfach auf, Brennstoff nachzufüllen, und schließen Sie alle Lüftungsöffnungen und den Deckel, damit das Feuer auf natürliche Weise erlöschen kann.
Vorsicht! Kein Wasser zum Löschen verwenden.
Lagerung
Wenn Sie den Grill nicht verwenden, lagern Sie ihn bitte an einem trockenen Ort und decken Sie den Kamado nach dem vollständigen Abkühlen mit einer geeigneten Regenhülle ab.
Lassen Sie ihn nicht draußen stehen, damit er nicht bei Regen nass wird.
Wenn Sie den Kamado verwenden, drücken Sie beide Feststellräder nach unten, um zu verhindern,
dass sich das Gerät während des Gebrauchs bewegt.
Uber den Winter: Es wird empfohlen, den Kamado zum vollständigen Schutz in einer Garage, einem geschlossenen Raum oder Schuppen aufzubewahren.
Reinigung
Reinigen Sie den Kamado immer, wenn er vollständig abgekühlt ist.
Der Kamado ist selbstreinigend. Erhitzen Sie ihn 30 Minuten lang auf 260°C und er wird alle Lebensmittel und Rückstände verbrennen.
Vorsicht! Verwenden Sie KEIN Wasser oder andere Arten von Reinigungsmitteln, um das Innere Ihres Kamado zu reinigen. Die Wände sind porös und absorbieren die Flüssigkeiten, dies könnte dazu führen, dass der Kamado bricht.
Wenn der Ruß oder die Asche übermäßig wird, verwenden Sie eine Drahtbürste, um die Kohlenstoffreste vor dem nächsten Gebrauch abzukratzen.
Verwenden Sie zum Reinigen der Gitter einen nicht scheuernden Reiniger, sobald das Gerät vollständig abgekühlt ist.
Um die äußere Oberfläche zu reinigen, warten Sie, bis der Kamado abgekühlt ist. Bitte spülen Sie die Oberfläche nicht direkt mit Wasser ab, es wird empfohlen, ein feuchtes Tuch mit einem milden Reinigungsmittel zu verwenden.
Gehen Sie während der Reinigung vorsichtig vor, wenn Sie den Feuerring und den Grill bewegen
Instandhaltung
Bitte überprüfen Sie regelmäßig alle Verbindungen und ziehen Sie diese ggf. nach.
Ziehen Sie die Bänder fest und ölen Sie das Scharnier 2 Mal im Jahr oder öfter, falls erforderlich.
Um zu vermeiden, dass der Beistelltisch lange hält, sorgen Sie auch dafür, dass er in einem trockenen Zustand ist. Nennlast innerhalb von 5 kg.
Die Filzdichtung regelmäßig ersetzen (Es wird allgemein angenommen, dass die Filzdichtung ersetzt werden sollte, wenn Rauch aus dem Spalt zwischen dem keramischen Ofenkörper austritt).
Nutzungs- und Pflegeinformationen
Stellen Sie sicher, dass der Kamado auf einer dauerhaften, flachen, ebenen, hitzebeständigen, nicht brennbaren Oberfläche und fern von brennbaren Gegenständen aufgestellt wird (keine brennbaren Materialien in der Nähe).
Stellen Sie sicher, dass der Kamado mindestens 2 m über dem Gerät frei ist. Der Grill sollte 2m von allen Gegenständen darüber und in der Umgebung entfernt sein.
Um ein Feuer zu entzünden, legen Sie einige Anzündwürfel oder feste Anzünder auf die Kohleplatte im Sockel des Kamado. Legen Sie dann 2 oder 3 Handvoll Stück Holzkohle über die Oberseite der Anzünder.
Vorsicht! Verwenden Sie kein Benzin, Testbenzin, Feuerzeugbenzin, Alkohol oder andere ähnliche Chemikalien zum Anzünden oder Wiederanzünden.
Vorsicht! Grillen Sie nicht, bevor der Brennstoff eine Ascheschicht aufweist.
Öffnen Sie die untere Lüftungsöffnung und zünden Sie die Feueranzünder mit einem langnasigen Feuerzeug oder
Streichhölzern an. Lassen Sie die untere Entlüftung und den Deckel nach dem Entfachen etwa 10 Minuten lang geöffnet, um eine kleine Schicht aus heißer Glut zu bilden.
Es wird empfohlen, die Kohlen nicht zu schüren oder zu wenden, sobald sie angezündet sind. Dadurch brennt die Holzkohle gleichmäßiger und effizienter.
Verwenden Sie immer nur hitzebeständige Handschuhe, wenn Sie mit heißer Keramik oder Kochflächen hantieren.
Leitfaden zum Kochen bei niedrigen Temperaturen
Zünden Sie die Holzkohle gemäß den obigen Anweisungen an.
Öffnen Sie die untere Entlüftung vollständig und lassen Sie den Deckel etwa 10 Minuten lang geöffnet, um eine kleine Schicht aus heißer Glut zu bilden.
Überwachen Sie den Kamado, bis er die gewünschte Temperatur erreicht hat.
Schließen Sie die untere Entlüftung vollständig, um die Temperatur zu halten. Sie können den Kamado jetzt zum Grillen verwenden.
Vorsicht! Beim Öffnen des Deckels bei hohen Temperaturen ist es wichtig, den Deckel nur leicht anzuheben, damit die Luft langsam und sicher eintreten kann, um Rückzug oder Aufflammen zu vermeiden, die Verletzungen verursachen können.
Tragen Sie immer hitzebeständige Handschuhe, wenn Sie mit heißer Keramik oder Kochflächen hantieren.
Räucherei
Befolgen Sie die obigen Anweisungen, als würden Sie einen langsamen Garvorgang starten (Anleitung zum Garen bei niedriger Temperatur).
Uberwachen Sie den Kamado, bis er die gewünschte Temperatur erreicht hat.
Lassen Sie die untere Entlüftung leicht geöffnet.
Schließen Sie die obere Belüftungsöffnung und überprüfen Sie die Temperatur noch einige Minuten lang.
Streuen Sie die Holzspäne mit hitzebeständigen Handschuhen kreisförmig über die heiße Holzkohle.
Sie können den Kamado jetzt verwenden.
Leitfaden zum Kochen bei hohen Temperaturen
Zünden Sie die Holzkohle gemäß den Anweisungen an. Schließen Sie den Deckel und öffnen Sie die oberen und unteren Belüftungsöffnungen vollständig.
Uberwachen Sie den Kamado, bis er die gewünschte Temperatur erreicht hat.
Schließen Sie die obere Entlüftung halb und überprüfen Sie die Temperatur noch einige Minuten lang.
Sie können den Kamado jetzt zum Kochen verwenden.
Tragen Sie immer hitzebeständige Handschuhe, wenn Sie mit heißer Keramik oder Kochflächen hantieren.
Nachfüllen
Bei geschlossenen Belüftungsöffnungen bleibt der Kamado mehrere Stunden auf hoher Temperatur. Wenn Sie eine längere Garzeit benötigen (z. B. beim Braten eines ganzen Bratens oder langsames Räuchern), müssen Sie möglicherweise mehr Holzkohle hinzufügen. Fügen Sie einfach etwas zusätzliche Holzkohle hinzu und fahren Sie wie oben fort.
Leitfaden für die Kochtemperatur
Langsames Garen / Räuchern (110°C - 135°C) Untere Entlüftung Obere Entlüftung Brust 2 Std pro kg Gezogenes 2 - 4 Std pro kg 
Schweinefleisch 3 - 4 Std Ganze Broiler 3 - 5 Std Rippen 9 + Std Braten Grillen (160°C - 185°C) Untere Entlüftung Obere Entlüftung Fisch 15 - 20 min Schweinefilet 15 - 30 min Broiler-Teile 30 - 45 min Ganze Broiler 1 - 1.5 Std 
Lammkeule Truthahn 3 - 4 Std Schweineschulter / Schinken 2 - 4 Std 2 - 5 Std Grillen (260°C - 370°C) Untere Entlüftung Obere Entlüftung Steaks 5 - 8 min Schweine 6 - 10 min 
koteletts 6 - 10 min Burger 6 - 10 min 

GARANTIE
Die Garantiezeit für unsere Produkte beträgt 2 Jahre, sofern keine anderen Bestimmungen gelten, ab dem Datum des ursprünglichen Kaufs oder ab dem Lieferdatum.
Bei Problemen oder Fragen können Sie sich an unsere Hilfeseiten, Tipps zur Fehlerbehebung, FAQs und Bedienungsanleitungen auf unserer Kundendienst-Website wenden: https://sav.hkoenig.com.
Wenn Sie den Referenznamen Ihres Geräts in die Suchleiste eingeben, erhalten Sie Zugang zu allen verfügbaren Online-Supports.
Wenn Sie immer noch keine Antwort auf Ihre Frage oder Ihr Problem finden, dann klicken Sie auf "Hat die Antwort Ihr Problem gelöst?". Sie können dieses Formular ausfüllen, um Ihre Anfrage zu bestätigen und Hilfe zu erhalten.
GARANTIEBEDINGUNGEN
Die Garantie deckt alle Defekte ab, die bei normalem, bestimmungsgemäßem Gebrauch und den in der Bedienungsanleitung enthaltenen Spezifikationen auftreten.
Diese Garantie gilt nicht für Probleme mit der Verpackung oder dem Transport während des Versands des Produkts durch den Eigentümer. Sie umfasst auch nicht den normalen Verschleiß des Produkts, die Wartung oder den Austausch von Verschleißteilen.
AUSSCHLUSS DER GARANTIE
- Zubehör und Verschleißteile (\*).
- Die normale Wartung des Geräts.
- Alle Defekte, die durch unsachgemäßen Gebrauch (Stöße, Nichteinhaltung der empfohlenen Stromzufuhr, schlechte Nutzungsbedingungen usw.), unzureichende Wartung oder Zweckentfremdung des Geräts auftreten, sowie die Verwendung von ungeeignetem Zubehör.
- Schäden durch äußere Einflüsse: Brand, Wasserschäden, elektrische Überspannung usw.
- Alle Geräte, die von anderen als den befugten Personen (insbesondere dem Nutzer) auch nur teilweise auseinandergebaut wurden.
- Produkte, deren Seriennummer fehlt, beschädigt oder unleserlich ist, sodass sie nicht identifiziert werden können.
- Produkte, die vermietet, vorgeführt oder ausgestellt werden.
(\*) Einige Teile Ihres Geräts, die als Verschleißteile oder Verbrauchsmaterialien bezeichnet werden, verschleiißen mit der Zeit und der Häufigkeit der Nutzung Ihres Geräts. Diese Abnutzung ist normal, kann aber durch falsche Nutzung oder Pflege Ihres Geräts noch verstärkt werden. Diese Teile sind daher nicht durch die Garantie abgedeckt.
Das mit dem Gerät gelieferte Zubehör ist ebenfalls von der Garantie ausgeschlossen. Sie können daher weder umgetauscht noch erstattet werden. Einige Zubehörteile können jedoch direkt über unsere Website https://sav.hkoenig.com/ erworben werden.
UMWELT
ACHTUNG:

Entsorgen Sie dieses Produkt nicht mit anderen Haushaltsgegenständen. Dieses Produkt muss separat bei bestimmten Stellen entsorgt werden, informieren Sie sich bei lokalen Behörden über die Stellen, wohin das Produkt gebracht werden kann. In der Tat, elektrische und elektronische Produkte beinhalten gefährliche Stoffe, die eine schädliche Auswirkung auf die Umwelt und menschliche Gesundheit haben und recycelt werden müssen. Dieses Symbol bedeutet, dass elektrische und elektronische Geräte vorsichtig gewählt werden müssen, die Rollcontainer werden mit einem Kreuz markiert.
Adeva SAS / H.Koenig Europe - 8 rue Marc Seguin - 77290 Mitry Mory - France www.hkoenig.com - sav@hkoenig.com - contact@hkoenig.com - Tél: +33 1 64 67 00 05
NEDERLANDS


2 pcs 2 pcs 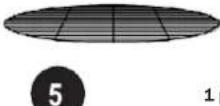 pcs
pcs 1 pcs
1 pcs 1 pcs
1 pcs ;
; 1 pcs
1 pcs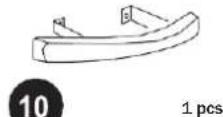
 1 pcs
1 pcs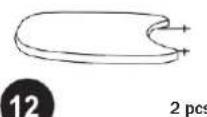 ;
; 13 2 pcs
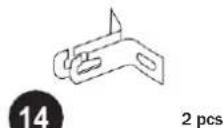
 1 pcs
1 pcs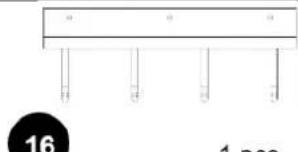 1 pcs
1 pcs
 4 pcs
4 pcs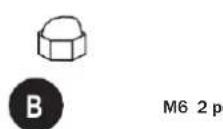 cs
cs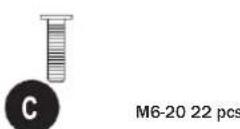
 ics
ics
 cs
cs
 pcs
pcs M5-40 2 pcs
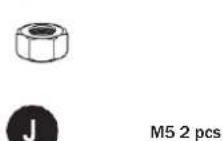
1 Poten (x4)
2 vergrendelbare wielen (x2)
3 normale wielen (x2)
4 kruisstokken (x4)
5 Kookgrill (x1)
6 Vuurring (x1)
7 houtskoolrooster (x1)
8 Vuurbox (x1)
9 keramische deksel en koepel (x1)
10 Dekselhandvat (x1)
11 bovenventilatie (x1)
12 bijzettafels (x2)
13 bijzettafelbeugel (x2)
14 bijzettafelbeugels (x2)
15 Thermometer (x1) -Voorgemonteer
16 haak voor keukengerei
A Schroef M6-14 (x2) - Reserveonderdelen
B Moer M6 (x2) - Reserveonderdelen
C Schroef M6-20 (x22 -2 daarvan zijn reserveonderdelen)
D-moer M6 & veerring (x22 -2 daarvan zijn reserveonderdelen)
E Rubberen hoes (x4)
F multifunctionele sleutel (x1)
G Rugular-sleutel (x1)
H Schroevendraaier (x1)
I Schroef M5-40(x2) -Voorgemonteerd
J Moer M5(x2) -Voorgemonteerd
K as mand
L as gereedschapset


flowchart
graph TD
    A["③"] --> B["④"]
    B --> C["①"]
    C --> D["②"]
    D --> E["③"]
    style A fill:#f9f,stroke:#333
    style B fill:#ccf,stroke:#333
    style C fill:#cfc,stroke:#333
    style D fill:#fcc,stroke:#333
    style E fill:#ffc,stroke:#333


natural_image
Technical line drawing of a mechanical component with labeled parts (10 and 12), no readable text or symbols beyond labels

natural_image
Simple line drawing of a circular device with a flower-like symbol on the top, mounted on a base with no text or symbols.

natural_image
Line drawing of a portable rice cooker with wheels and top dome (no text or symbols)
Lees aandachtig!
WAARSCHUWING! Deze barbecue wordt erg heet, verplaats hem niet tijdens gebruik
Niet binnenshuis gebruiken!
WAARSCHUWING! Gebruik geen spiritus of benzine voor het aansteken of heraansteken! Gebruik alleen aanmaakblokjes die voldoen aan EN 1860-3!
WAARSCHUWING! Houd kinderen en huisdieren uit de buurt
Waarschuwingsbericht

Lees voor het eerste gebruik deze handleiding en alle veiligheidsinformatie aandachtig door. Als u dit niet doet, kan dit leiden tot ernstig of dodelijk letsel of schade aan eigendommen.
Let op een juiste montage van de grill. Houd u aan de montage-instructies die bij de grill zijn geleverd. Gebruik de barbecue pas nadat deze volledig is gemonteerd
De grill moet vóór gebruik op een veilige, vlakke ondergrond worden geplaatst. Gebruik de grill uitsluitend op hittebestendige en brandwerende ondergronden.
Zorg ervoor dat de grill voor het eerste gebruik een keer 30 minuten wordt verwarmd zonder voedsel.
Gebruik alleen goedgekeurde barbecue-houtskool of barbecuebriketten die voldoen aan EN 1860-3. Bedek het vuurrooster met brandbaar materiaal zonder het te stapelen.
Gebruik alleen goedgekeurde solide aanmaakblokjes die
voldoen aan EN 1860-3. Houd u aan de bijgevoegde instructies voor het juiste gebruik van het product. Sluit de aanmaakblokjes direct na gebruik af en bewaar ze niet in de buurt van de barbecue.
Niet koken voordat de brandstof een laagje as heeft.
Gebruik de grill niet om andere stoffen en materialen dan voedsel te verhitten.
Gebruik de barbecue niet als verwarming.
Het wiel met rem moet vooraan staan.
Gebruik de grill niet in gesloten ruimtes, garages, tenten of andere gesloten plaatsen. De resulterende hitte en vonken kunnen brand veroorzaken. De ontwikkeling van koolmonoxide kan verstikking veroorzaken in gesloten ruimten.
Gebruik de grill niet onder brandbare daken, schuilplaatsen en
soortgelijke plaatsen.
Zorg ervoor dat u de barbecue op een veilige afstand van 2 meter van brandbare materialen houdt. Deze kunnen worden ontstoken door warmteontwikkeling of rondvliegende vonken. Laat de hete barbecue nooit onbeheerd achter.
Let op: voordat u uw grill met een geschikte hoes beschermt, moet deze volledig zijn afgekoeld! Anders bestaat er gevaar voor brand en ontvlambaarheid!
Zorg ervoor dat u altijd ovenwanten draagt wanneer u de grill tijdens gebruik aanraakt, b.v. het openen van de ventilatieopeningen of het plaatsen van meer houtskool in de grill.
Draag geen te wijde of losse kleding die tijdens het grillen in contact kan komen met de kolen of het vuur.
Gebruik de barbecue nooit bij extreem weer.
Gebruik nooit water om brandende houtskool te blussen. Sluit in plaats daarvan de ventilatieopeningen en het deksel totdat het vuur is gedoofd.
Deze barbecue is alleen bedoeld voor privégebruik!
Deze barbecue is alleen bedoeld voor privégebruik!
WAARSCHUWING Verstikkingsgevaar! De barbecue is uitsluitend bestemd voor gebruik buitenshuis. Hij mag niet worden gebruikt in een gebouw, een garage of een andere gesloten ruimte. Er kunnen giftige dampen ontstaan die verstikking veroorzaken.
Veiligheidsafstand :

Bewaar een
minimumafstand van 3
m tot verhoogde
structuren, muren,
hellingen en andere
structuren.
Hoe het werkt ?

De kamado genezen
Om een vuurtje te maken plaats je wat aanmaakblokjes of stevige aanmaakblokjes op de houtskoolplaat in de basis van de Kamado. Leg er dan 2 of 3 handenvol houtskoolbrokken bovenop.
Voorzichtigheid! gebruik geen benzine, terpentine, aanstekervloeistof, alcohol of andere vergelijkbare chemicaliën voor het aansteken of opnieuw aansteken.
Voorzichtigheid! overlaad het apparaat niet met brandstof. Als het vuur te intens is, kan dit de Kamado beschadigen.
Open de onderste opening en steek de aanmaakblokjes aan met een aansteker met lange neus of veiligheidslucifers.
Open of laat het bovendeksel niet krachtig los. Laat staan totdat alle brandstof is verbruikt en gedoofd. Als het vuur te hoog brandt, kan dit de vilten pakking beschadigen voordat deze de kans heeft gehad om goed te rijpen.
Inspecteer na het eerste gebruik alle bevestigingen op vastheid. De metalen band die uw deksel met de bodem verbindt, zet uit door de hitte en kan losraken. Het wordt aanbevolen om de band te controleren en indien nodig aan te halen met een sleutel.
Nu is je Kamado klaar voor gebruik.
Blussen
Om het apparaat te doven, stopt u gewoon met het toevoegen van brandstof en sluit u alle ventilatieopeningen en het deksel zodat het vuur op natuurlijke wijze kan doven.
Voorzichtigheid! gebruik geen water om te blussen.
Opslag
Bewaar hem op een droge plaats wanneer hij niet wordt gebruikt en bedek de Kamado zodra deze volledig is afgekoeld met een geschikte regenhoes.
Laat het niet buiten staan om nat te worden als het regent.
Wanneer u de Kamado gebruikt, duwt u beide vergrendelwielen naar beneden om te voorkomen dat het apparaat tijdens het gebruik gaat bewegen.
Overwinteren Het wordt aanbevolen om de Kamado in een garage, een afgesloten ruimte of schuur op te slaan voor volledige bescherming.
Schoonmaak
Maak de Kamado altijd schoon als deze volledig is afgekoeld. De Kamado is zelfreinigend. Verwarm het gedurende 30 minuten tot 260°C en het zal al het voedsel en vuil wegschroeien.
Voorzichtigheid! Gebruik GEEN water of andere reinigingsproducten om de binnenkant van uw Kamado schoon te maken. De wanden zijn poreus en zullen de vloeistoffen absorberen, hierdoor kan de Kamado barsten.
Als het roet of de as overmatig wordt, gebruik dan een staalborstel om de koolstofresten weg te schrapen voor het volgende gebruik.
Gebruik een niet-schurend reinigingsmiddel om de roosters schoon te maken zodra het apparaat volledig is afgekoeld. Wacht met het reinigen van de buitenkant tot de Kamado is afgekoeld. Spoel het oppervlak niet direct met water af, het wordt aanbevolen om een vochtige doek met een mild reinigingsmiddel te gebruiken.
Wees tijdens het schoonmaken voorzichtig bij het verplaatsen van de vuurring en de vuurkist.
Onderhoud
Controleer regelmatig alle aansluitingen en draai ze indien nodig vast.
Span de banden aan en olie het scharnier 2 keer per jaar of
meer indien nodig.
Om een lange blootstelling aan de bijzettafel te voorkomen, moet u ervoor zorgen dat deze ook in een droge toestand wordt gemaakt. Nominale belasting binnen 5 kg.
Om de vilten pakking regelmatig te vervangen (algemeen wordt aangenomen dat de vilten pakking moet worden vervangen wanneer er rook uit de opening tussen het keramische ovenlichaam komt).
Informatie over gebruik en onderhoud
Zorg ervoor dat de Kamado op een permanent, vlak, waterpas, hittebestendig, niet-ontvlambaar oppervlak staat, uit de buurt van brandbare voorwerpen (geen brandbare materialen in de buurt).
Zorg ervoor dat de Kamado een vrije ruimte van minimaal 2 meter boven het hoofd heeft. De grill moet 2 meter verwijderd zijn van alle objecten erboven en in de omgeving.
Om een vuurtje te maken plaats je wat aanmaakblokjes of stevige aanmaakblokjes op de houtskoolplaat in de basis van de Kamado. Plaats vervolgens 2 of 3 handenvol houtskoolklompen bovenop de aanmaakblokjes.
Voorzichtigheid! gebruik geen benzine, terpentine, aanstekervloeistof, alcohol of andere vergelijkbare chemicaliën voor het aansteken of opnieuw aansteken.
Voorzichtigheid! kook niet voordat de brandstof een laagje as heeft.
Open de onderste ventilatieopening en steek de aanmaakblokjes aan met een lange neusaansteker of veiligheidslucifers. Laat de onderste ventilatieopening en het
deksel ongeveer 10 minuten openstaan om een klein bed van
hete sintels te maken.
Het wordt aanbevolen om de kolen niet op te stoken of om te draaien als ze eenmaal branden. Hierdoor kunnen de houtskool gelijkmatiger en efficiënter branden.
Gebruik altijd alleen hittebestendige handschoenen bij het hanteren van hete keramiek of kookoppervlakken.
Gids voor koken op lage temperatuur
Steek de houtskoolklomp aan volgens bovenstaande instructies.
Open de onderste ventilatieopening volledig en laat het deksel ongeveer 10 minuten openstaan om een klein bed van hete sintels te maken.
Houd de Kamado in de gaten totdat deze de gewenste temperatuur heeft bereikt.
Sluit de onderste ventilatieopening volledig om de temperatuur op peil te houden. Je bent nu klaar om de Kamado te gebruiken om op te koken.
Voorzichtigheid! Bij het openen van het deksel bij hoge temperaturen is het essentieel om het deksel slechts een klein stukje op te tillen, zodat de lucht langzaam en veilig kan binnendringen en backdraft of opflakkeringen die letsel kunnen veroorzaken, wordt voorkomen.
Gebruik altijd hittebestendige handschoenen bij het hanteren van hete keramiek of kookoppervlakken.
Rokerij
Volg de bovenstaande instructies alsof u een slowcooking start (Gids voor koken op lage temperatuur).
Houd de Kamado in de gaten totdat deze de gewenste temperatuur heeft bereikt.
Laat de onderste ventilatieopening een beetje open.
Sluit de bovenste ventilatieopening en blijf de temperatuur nog een paar minuten controleren.
Strooi met hittebestendige handschoenen de houtsnippers in een cirkel over de hete houtskool.
Je bent nu klaar om de Kamado te gebruiken.
Gids voor koken op hoge temperatuur
Steek de brok houtskool aan volgens de instructies. Sluit het deksel en open de ventilatieopeningen aan de boven- en onderkant volledig.
Houd de Kamado in de gaten totdat deze de gewenste temperatuur heeft bereikt.
Sluit de bovenste ventilatieopening halverwege en blijf de temperatuur nog een paar minuten controleren.
Je bent nu klaar om de Kamado te gebruiken om op te koken.
Gebruik altijd hittebestendige handschoenen bij het hanteren van hete keramiek of kookoppervlakken.
Tanken
Met gesloten ventilatieopeningen blijft de Kamado enkele uren op hoge temperatuur. Als je een langere kooktijd nodig hebt (bijvoorbeeld bij het braden van een heel stuk vlees of langzaam roken), kan het nodig zijn om meer houtskool toe te voegen. Voeg gewoon wat extra houtskool toe en ga verder zoals hierboven.
Kooktemperatuurgids
Langzaam koken / roken (110 °C - 135 °C) Onderste ventilatieopening Bovenste ventilatieopening Borst 2 uur per kg Varkensvlees 2 - 4 uur per kg 

Hele vleeskuikens 3 - 4 uur Ribben 3 - 5 uur Gebraden 9 + uur Grillen (160 °C - 185 °C) Onderste ventilatieopening Bovenste ventilatieopening Vis 15 - 20 min Varkenshaas 15 - 30 min Vleeskuikens onderdelen 30 - 45 min Hele vleeskuikens 1 - 1.5 uur 
Lamsbout Turkije 3 - 4 uur Varkensschouder / ham 2 - 4 uur 2 - 5 uur Grillen (260 °C - 370 °C) Onderste ventilatieopening Bovenste ventilatieopening Steaks 5 - 8 min Varkenskarbonades 6 - 10 min 
Hamburgers 6 - 10 min Worsten 6 - 10 min Open ○ Gesloten ●
GARANTIE
De garantieperiode op onze producten is 2 jaar, tenzij anders vermeld, beginnend vanaf de datum van de initiele aankoop of bezorgdatum.
Als u problemen of vragen heeft, kunt u eenvoudig onze hulppagina's bezoeken voor tips om problemen op te lossen, de FAQ's en andere gebruikershandleidingen op onze website: https://sav.hkoenig.com.
Door de referentienaam van uw apparaat in de zoekbalk te typen, krijgt u toegang tot alle beschikbare online hulpmiddelen, ontworpen om aan uw behoeften te voldoen.
Als u toch niet geen antwoord op uw vraag kunt vinden, klik dan op "Heeft het antwoord uw probleem opgelost?
Hierdoor gaat u naar het Aanvraagformulier voor Klantenondersteuning, dat u in kunt vullen om uw verzoek te valideren en hulp te ontvangen.
GARANTIEVOORWAARDEN
De garantie dekt alle mankementen die voortkomen uit normaal gebruik, volgens de sectie gebruik en specificaties in de gebruikershandleiding.
Deze garantie omvat niet verpakkings- of transportproblemen tijdens het vervoer van het product door de eigenaar. Het omvat ook niet de normale slijtage van het product, noch het onderhoud of vervangen van verbruiksartikelen.
UITSLUITINGEN VAN DE GARANTIE
- Accessoires en verbruiksartikelen (\*).
- Normaal onderhoud van het apparaat.
- Alle mankementen veroorzaakt door verkeerd gebruik (schokken, het niet opvolgen van de aanbevolen stroomvoorziening, in slechte omstandigheden gebruiken, etc.), onvoldoende onderhoud of ondeugdelijk gebruik van het apparaat, alsook het gebruik van ongeschikte accessoires.
- Schade van buitenaf: vuur, waterschade, elektrische stroompiek, etc.
- Apparaten die uit elkaar zijn gehaald, ook gedeeltelijk, door personen die niet er niet gekwalificeerd voor zijn (zoals de gebruiker).
- Producten waarvan het serienummer verdwenen, beschadigd of onleesbaar is, waardoor we het niet kunnen identificeren.
- Producten die verhuurd werden of ter demonstratie of showmodel waren.
(\*) Sommige onderdelen van uw apparaat, genaamd verbruiksartikelen, slijten naar verloop van tijd en bij veel gebruik van uw apparaat. Deze slijtage is normaal, maar kan verergerd worden door slechte omstandigheden of onderhoud van uw apparaat. Deze onderdelen worden daarom niet gedekt door de garantie.
De accessoires meegeleverd met het apparaat zijn ook uitgesloten van de garantie. Ze kunnen niet vervangen of gerestitueerd worden. Echter, sommige accessoires zijn te koop via onze website: https://sav.hkoenig.com/.
MILIEU
LET OP:

Gooi dit apparaat niet weg als normaal huishoudelijk afval. Er is een scheiding voor afgedankte elektrische apparaten, vraag uw lokale overheid waar u dit apparaat kunt inleveren. Elektrische producten bevatten gevaarlijke stoffen die schadelijk kunnen zijn voor het milieu of mensen en dienen te worden gerecycled. Dit symbool geeft aan dat elektrische apparaten niet bij normaal afval mag, een rolcontainer gemarkeerd met een kruis.
Adeva SAS / H.Koenig Europe - 8 rue Marc Seguin - 77290 Mitry Mory - France www.hkoenig.com - sav@hkoenig.com - contact@hkoenig.com - Tél: +33 1 64 67 00 05
ESPANOL

 4 pcs
4 pcs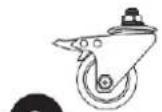 2 2 pcs
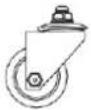 3 2 pcs
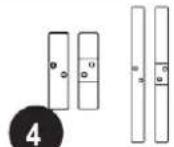 4 pcs
4 pcs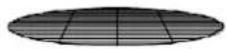 5 1 pcs
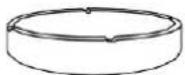 6 1 pcs
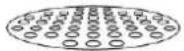 7 1 pcs
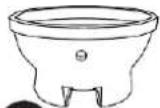 8 1 pcs
 1 pcs
1 pcs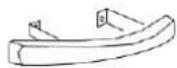 10 1 pcs
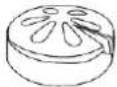 11 1 pcs
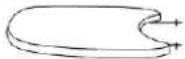 12 2 pcs
 13 2 pcs
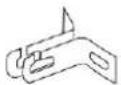 14 2 pcs
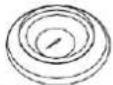 15 1 pcs
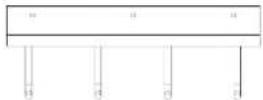 16 1 pcs
[22DW]A M6-14 2 pcs  B M6 2 pcs
 C M6-20 22 pcs
 D M6 22 pcs
[CV6T]E 4 pcs [HTKC]F 1 pcs 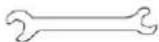 G 1 pcs
 H 1 pcs
 M5-40 2 pcs
 J M5 2 pcs
 K
K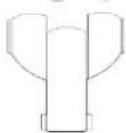
1 Patas (x4)
2 ruedas bloqueables (x2)
3 Ruedas Normales (x2)
4 palos cruzados (x4)
5 parrillas para cocinar (x1)
6 Anillo de fuego (x1)
7 Rejilla de carbón (x1)
8 caja de fuego (x1)
9 Tapa y Cúpula de Cerámica
(x1)
10 Manija de la tapa (x1)
11 ventilación superior (x1)
12 Mesa Auxiliar (x2)
13 Soporte de mesa auxiliar (x2)
14 Soporte de mesa auxiliar (x2)
15 Termómetro (x1) - Premontado
16 gancho para utensilios de cocina
A Tornillo M6-14 (x2) - Repuestos
B Tuerca M6 (x2) - Repuestos
C Tornillo M6-20(x22 -2 de ellos son repuestos)
D Tuerca M6 y arandela elástica (x22 -2 de ellos son piezas de repuesto)
E Manguito de goma (x4)
F Llave Multifuncional (x1)
Llave Rugular G (x1)
H Destornillador (x1)
I Tornillo M5-40(x2) - Premontado
Tuerca
J M5(x2) -Premontada
K Cesta de ceniza
L Kit de recolección de cenizas


flowchart
graph TD
    A["③"] --> B["④"]
    B --> C["①"]
    C --> D["②"]
    D --> E["③"]
    style A fill:#f9f,stroke:#333
    style B fill:#ccf,stroke:#333
    style C fill:#cfc,stroke:#333
    style D fill:#fcc,stroke:#333
    style E fill:#ffc,stroke:#333


natural_image
Simple line drawing of a circular device with a flower-like symbol on the top, mounted on a base with no text or symbols.

natural_image
Line drawing of a large cylindrical object with a dome top and wheels, labeled with number 12 (no text or symbols on the object itself)
¡Lea cuidadosamente!
¡ADVERTENCIA! Esta barbacoa se calentará mucho, no la mueva durante el funcionamiento
¡No lo use en interiores!
¡ADVERTENCIA! ¡No utilice alcohol ni gasolina para
encender o volver a encender! ¡Utilice únicamente
encendedores que cumplan con la norma EN 1860-3!
¡ADVERTENCIA! Mantenga a los niños y las mascotas alejados
Aviso de advertencia

Lea detenidamente este manual y toda la información de seguridad antes del primer uso. El no hacerlo podría resultar en lesiones graves o la muerte o daños a la propiedad.
Preste atención a un correcto montaje de la parrilla. Siga las instrucciones de montaje suministradas con la parrilla. Use la parrilla solo después de que esté completamente ensamblada.
La parrilla debe colocarse sobre una superficie plana y segura antes de su uso. Utilice la parrilla exclusivamente sobre suelos resistentes al calor y al fuego.
Antes del primer uso, asegúrese de que la parrilla se calienta una vez durante 30 minutos sin alimentos.
Utilice únicamente carbón para asar aprobado o briquetas para barbacoa que cumplan con la norma EN 1860-3. Cubra la parrilla de fuego con material combustible sin apilarla.
Utilice únicamente iniciadores de fuego sólidos aprobados que cumplan con EN 1860-3. Respete las instrucciones adjuntas sobre el uso correcto del producto. Selle los iniciadores de fuego inmediatamente después de su uso y no los guarde cerca de la parrilla.
No cocine antes de que el combustible tenga una capa de ceniza.
No utilice la parrilla para calentar sustancias y materiales que no sean alimentos.
No utilice la parrilla como calentador.
La rueda con freno debe estar al frente.
No utilice la parrilla en habitaciones cerradas, garajes, tiendas de campaña u otros lugares cerrados. El calor y las chispas resultantes pueden provocar un incendio. El desarrollo de monóxido de carbono puede causar asfixia en habitaciones cerradas.
No use la parrilla debajo de techos inflamables, refugios y lugares similares.
Asegúrese de mantener la parrilla a una distancia de seguridad de 2 metros de materiales inflamables. Estos podrían encenderse por generación de calor o chispas voladoras.
Nunca deje desatendida la parrilla caliente.
Atención: antes de proteger su parrilla con una cubierta adecuada, ¡debe estar completamente fría! ¡De lo contrario, existe riesgo de incendio e inflamabilidad!
Asegúrese de usar siempre guantes para horno cuando toque la parrilla durante el funcionamiento, p. abriendo las rejillas de ventilación o poniendo más carbón en la parrilla. No use ropa demasiado larga o suelta que pueda entrar en contacto con las brasas o el fuego al asar.
Nunca use la parrilla en condiciones climáticas extremas.
Nunca use agua para extinguir el carbón encendido. En su lugar, cierre las rejillas de ventilación y la tapa hasta que se extinga el fuego.
¡Esta parrilla solo está diseñada para uso privado!
ADVERTENCIA ¡Peligro de asfixia! La barbacoa está destinada exclusivamente al uso en exteriores. No debe utilizarse en un edificio, garaje o cualquier otro espacio cerrado. Pueden formarse humos tóxicos que provoquen asfixia.
Distancia de seguridad :

Mantenga una distancia mínima de 3 m de estructuras elevadas, muros, rampas y otras estructuras.
Cómo funciona ?

Curando el Kamado
Para encender un fuego, coloque algunos cubos de encendedor o encendedores sólidos en la placa de carbón en la base del Kamado. Luego coloque 2 o 3 puñados de carbón en trozos encima de ellos.
¡Precaución! no utilice gasolina, aguarrás, líquido para encendedores, alcohol u otros productos químicos similares para encender o volver a encender.
¡Precaución! no sobrecargue la unidad con combustible. Si el fuego es demasiado
intenso, podría dañar el Kamado.
Abra el respiradero inferior y encienda los encendedores con un encendedor de punta
larga o fósforos de seguridad.
No abra ni suelte la tapa superior con fuerza. Dejar hasta que todo el combustible se consuma y se apague.
Si el fuego arde demasiado, podría dañar el sello de la junta de fieltro antes de que haya tenido la oportunidad de madurar adecuadamente.
Después del primer uso, inspeccione todos los sujetadores para ver si están apretados.
La banda de metal que conecta la tapa con la base se expandirá por el calor y podría aflojarse. Se recomienda revisar y, si es necesario, apretar la banda con una llave. Ahora su Kamado está listo para usar.
Extinción
Para extinguir la unidad, simplemente deje de agregar combustible y cierre todas las ventilaciones y la tapa para permitir que el fuego se extinga naturalmente.
¡Precaución! no use agua para extinguir.
Almacenamiento
Cuando no esté en uso, guárdelo en un lugar seco y cubra el Kamado una vez que se haya enfriado por completo con una cubierta impermeable adecuada.
No lo dejes afuera para que se moje cuando llueva.
Cuando use el Kamado, empuje hacia abajo ambas ruedas de bloqueo para evitar que
la unidad se mueva durante el uso.
Durante el invierno, se recomienda almacenar el Kamado en un garaje, una habitación cerrada o un cobertizo para una protección completa.
Limpieza
Limpie siempre el Kamado cuando esté completamente frío. El Kamado es autolimpiante. Caliéntelo a 260°C durante 30 minutos y quemará toda la comida y los desechos.
¡Precaución! NO use agua ni ningún otro tipo de producto de limpieza para limpiar el interior de su Kamado. Las paredes son porosas y absorberán los líquidos, esto podría causar que el Kamado se agriete.
Si el hollín o las cenizas se vuelven excesivos, use un cepillo de alambre para raspar los restos de carbón antes del próximo uso.
Para limpiar las rejillas, use un limpiador no abrasivo una vez que la unidad se haya enfriado por completo.
Para limpiar la superficie exterior, espere hasta que el Kamado se enfríe. No enjuague la superficie directamente con agua, se recomienda usar un paño húmedo con un
detergente suave.
Durante la limpieza, manéjelo con cuidado al mover el aro de fuego y la caja de fuego.
Mantenimiento
Compruebe regularmente todas las conexiones y apriételas si es necesario.
Apriete las bandas y lubrique la bisagra 2 veces al año o más si es necesario.
Para evitar una exposición prolongada a la mesa auxiliar, también asegúrese de hacerlo en condiciones secas. Carga nominal dentro de 5 kg.
Reemplazar la junta de fieltro regularmente (generalmente se cree que la junta de fieltro debe reemplazarse cuando sale humo del espacio entre el cuerpo del horno de cerámica).
Información de uso y cuidado
Asegúrese de que el Kamado esté colocado sobre una superficie permanente, plana, nivelada, resistente al calor y no inflamable, lejos de elementos inflamables (sin materiales combustibles cerca).
Asegúrese de que el Kamado tenga un mínimo de 2 m de espacio libre sobre la cabeza. La parrilla debe estar a 2 m de distancia de todos los objetos que se encuentren sobre ella y en el área circundante.
Para encender un fuego, coloque algunos cubos de
encendedor o encendedores sólidos en la placa de carbón en
la base del Kamado. Luego coloque 2 o 3 puñados de carbón
en trozos sobre la parte superior de los encendedores.
¡Precaución! no utilice gasolina, aguarrás, líquido para encendedores, alcohol u otros productos químicos similares para encender o volver a encender.
¡Precaución! no cocine antes de que el combustible tenga una capa de ceniza.
Abra el respiradero inferior y encienda los encendedores con un encendedor de punta larga o fósforos de seguridad. Una vez que se haya prendido, deje el respiradero inferior y la tapa abiertos durante unos 10 minutos para construir una pequeña cama de brasas calientes.
Se recomienda no avivar ni girar las brasas una vez que estén encendidas. Esto permite que los carbones se quemen de manera más uniforme y eficiente.
Utilice siempre guantes resistentes al calor cuando manipule cerámica o superficies de cocción calientes.
Guía de cocción a baja temperatura
Encienda el carbón en trozos de acuerdo con las instrucciones anteriores.
Abra completamente el respiradero inferior y deje la tapa abierta durante unos 10 minutos para construir una pequeña cama de brasas calientes.
Supervise el Kamado hasta que alcance la temperatura deseada.
Cierre completamente la ventilación inferior para mantener la temperatura. Ahora está listo para usar el Kamado para cocinar.
¡Precaución! Al abrir la tapa a altas temperaturas, es esencial levantar la tapa solo un poco, permitiendo que el aire entre de forma lenta y segura, evitando cualquier retroceso o llamarada que pueda causar lesiones.
Siempre use guantes resistentes al calor cuando manipule cerámica caliente o superficies para cocinar.
Ahumador
Siga las instrucciones anteriores como si estuviera comenzando una cocción lenta (Guía de cocción a baja temperatura).
Supervise el Kamado hasta que alcance la temperatura deseada.
Deje el respiradero inferior ligeramente abierto.
Cierre el respiradero superior y continúe revisando la temperatura durante unos minutos más.
Usando guantes resistentes al calor, espolvorea las virutas de madera en un círculo sobre el carbón caliente.
Ahora está listo para usar el Kamado.
Guía de cocción a alta temperatura
Encienda el carbón en trozos de acuerdo con las instrucciones. Cierre la tapa y abra completamente las rejillas de ventilación superior e inferior.
Supervise el Kamado hasta que alcance la temperatura deseada.
Cierre el respiradero superior a la mitad y continúe revisando la temperatura durante unos minutos más.
Ahora está listo para usar el Kamado para cocinar.
Siempre use guantes resistentes al calor cuando manipule cerámica caliente o superficies para cocinar.
Repostaje
Con las rejillas de ventilación cerradas, el Kamado permanece a alta temperatura durante varias horas. Si necesita un tiempo de cocción más prolongado (p. ej., al asar un porro entero o ahumarlo lentamente), puede que sea necesario añadir más carbón. Simplemente agregue un poco de carbón adicional y continúe como se indicó anteriormente.
Guía de temperatura de cocción

other
Cocción lenta / Ahumado (110 °C - 135 °C) Ventilación inferior Ventilación superior
Seno 2 h por kg
Cerdo desmenuzado 2 - 4 h por kg
Pollo entero 3 - 4 h
Costillas 3 - 5 h
Asar 9 + h
Asar a la parrilla (160 °C - 185 °C) Ventilación inferior Ventilación superior
Pez 15 - 20 min
Lomo de cerdo 15 - 30 min
Partes de pollos de engorde 30 - 45 min
Pollo entero 1 - 1.5 h
Piema de cordero Pavo 3 - 4 h
Paletilla de cerdo / jamón 2 - 4 h
Asar a la parrilla (260 °C - 370 °C) Ventilación inferior Ventilación superior
bistecs 5 - 8 min
chuletas 6 - 10 min
de cerdo 6 - 10 min
Hamburg 6 - 10 min
Abierto Cerrado
GARANTÍA
El periodo de garantía de nuestros productos es de 2 años, salvo que la ley estipule lo contrario, a partir de la fecha de la compra inicial o de la fecha de entrega.
Si tiene algún problema o pregunta, puede acceder fácilmente a nuestras páginas de ayuda, consejos para solucionar problemas, preguntas frecuentes y manuales de usuario en nuestro sitio de servicio: https://sav.hkoenig.com.
Al escribir el nombre de referencia de su dispositivo en la barra de búsqueda, puede acceder a toda la asistencia en línea disponible, diseñada para satisfacer mejor sus necesidades.
Si sigue sin encontrar una respuesta a su pregunta o problema, haga clic en "¿La respuesta ha resuelto su problema? Esto le llevará al formulario de solicitud de asistencia posventa, que puede rellenar para validar su solicitud y obtener ayuda.
CONDICIONES DE GARANTÍA
La garantía cubre todos los fallos que se produzcan en el contexto de un uso normal, de acuerdo con los usos y especificaciones del manual de usuario.
Esta garantía no se aplica a los problemas de embalaje o transporte durante el envío del producto por parte del propietario. Tampoco incluye el desgaste normal del producto, ni el mantenimiento o la sustitución de piezas consumibles.
EXCLUSIÓN DE GARANTÍA
- Accesorios y piezas de desgaste (\*).
- Mantenimiento normal del aparato.
- Todas las averías derivadas de un uso incorrecto (golpes, incumplimiento de las recomendaciones de alimentación eléctrica, malas condiciones de uso, etc.), de un mantenimiento insuficiente o de un mal uso del aparato, así como del uso de accesorios inadecuados.
- Daños de origen externo: incendio, daños por agua, sobrecarga eléctrica, etc.
- Cualquier equipo que haya sido desmontado, incluso parcialmente, por personas que no estén autorizadas a hacerlo (en particular el usuario).
- Productos cuyo número de serie falte, esté dañado o sea ilegible, lo que no permitiría su identificación.
- Productos sujetos a alquiler, demostración o exposición.
(\*) Algunas piezas de su aparato, conocidas como piezas de desgaste o consumibles, se deterioran con el tiempo y la frecuencia de uso de su aparato. Este desgaste es normal, pero puede acentuarse por las malas condiciones de uso o de mantenimiento de su aparato. Por lo tanto, estas piezas no están cubiertas por la garantía.
Los accesorios suministrados con el aparato también están excluidos de la garantía. No se pueden cambiar ni reembolsar. No obstante, algunos accesorios pueden adquirirse directamente en nuestro sitio web: https://sav.hkoenig.com/
MEDIO AMBIENTE
ELIMINACIÓN APROPIADA DE ESTE APARATO

Esta marca indica que el producto no debe desecharse en la basura doméstica, porque las sustancias peligrosas pueden filtrarse en el agua subterránea y entrar en la cadena alimentaria, dañando su salud y bienestar. Para reciclarlo utilice los sistemas de devolución y recolección de su localidad o póngase en
contacto con el distribuidor donde adquirió el aparato. Al reemplazar los electrodomésticos antiguos por otros nuevos, el minorista está legalmente obligado a recuperar sus electrodomésticos viejos de forma gratuita.
Adeva SAS / H.Koenig Europe - 8 rue Marc Seguin - 77290 Mitry Mory - France www.hkoenig.com - sav@hkoenig.com - contact@hkoenig.com - Tél: +33 1 64 67 00 0
ITALIANO

 4 pcs
4 pcs 2 pcs
2 pcs 2 pcs
2 pcs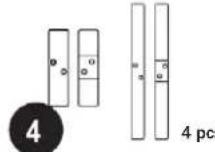 s
s ics
ics 1 pcs
1 pcs 1 pcs
1 pcs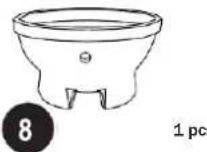 s
s ics
ics 1 pcs
1 pcs 1 pcs
1 pcs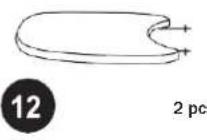 s
s ics
ics 2 pcs
2 pcs 1 pcs
1 pcs 16cs
16cs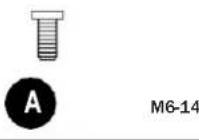 2 pcs
2 pcs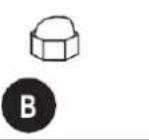 M6 2 pcs
 20 22 pcs
 ics
ics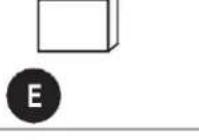 4 pcs
4 pcs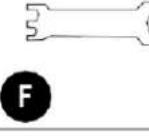 1 pcs
1 pcs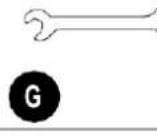 1 pcs
1 pcs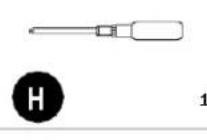 pcs
pcs 1 pcs
1 pcs W5 2 pcs
 K
K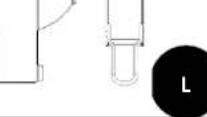
1 gambe (x4)
2 ruote bloccabili (x2)
3 ruote normali (x2)
4 bastoncini incrociati (x4)
5 griglie di cottura (x1)
6 anelli di fuoco (x1)
7 griglia per carbone (x1)
8 braciere (x1)
9 Coperchio e cupola in ceramica (x1)
10 maniglia del coperchio (x1)
11 Presa d'aria superiore (x1)
12 tavolini (x2)
13 Attacchi per tavolo laterale (x2)
14 Attacchi per tavolo laterale
(x2)
15 Termometro (x1) -Premontato
16 gancio per utensili da cucina
A Vite M6-14 (x2) - Pezzi di ricambio
B Dado M6 (x2) - Pezzi di ricambio
C Vite M6-20 (x22 -2 di esse sono pezzi di ricambio)
D Dado M6 e rondella elastica (x22 -2 di loro sono pezzi di ricambio)
E Manicotto in gomma (x4)
Chiave multifunzionale F (x1)
Chiave inglese G (x1)
H Cacciavite (x1)
I Vite M5-40(x2) -Premontato
J Dado M5(x2) -Premontato
K cesto di cenere
L set di strumenti di cenere


flowchart
graph TD
    A["③"] --> B["④"]
    B --> C["①"]
    C --> D["②"]
    D --> E["③"]
    style A fill:#f9f,stroke:#333
    style B fill:#ccf,stroke:#333
    style C fill:#cfc,stroke:#333
    style D fill:#fcc,stroke:#333
    style E fill:#ffc,stroke:#333


natural_image
Simple line drawing of a circular device with a flower-like pattern on the top, mounted on a base with no text or symbols.
12

natural_image
Line drawing of a portable grill with wheels and top panel (no text or symbols)
Attentamente!
AVVERTIMENTO! Questo barbecue diventerà molto caldo, non spostarlo durante il funzionamento Non utilizzare all'interno!
AVVERTIMENTO! Non utilizzare alcool o benzina per accendere o riaccendere! Utilizzare solo accendifuoco conformi alla norma EN 1860-3!
AVVERTIMENTO! Tenere lontani bambini e animali domestici
Avviso di avvertimento

Leggere attentamente questo manuale e tutte le informazioni sulla sicurezza prima del primo utilizzo. In caso contrario, potrebbero verificarsi lesioni gravi o morte o danni alla proprietà.
Prestare attenzione ad un corretto montaggio della griglia. Attenersi alle istruzioni di montaggio fornite con la griglia. Utilizzare la griglia solo dopo che è stata completamente assemblata
La griglia deve essere posizionata su una superficie piana e sicura prima dell'uso. Utilizzare la griglia esclusivamente su superfici resistenti al calore e al fuoco.
Si prega di assicurarsi prima del primo utilizzo, che la griglia
sia riscaldata una volta per 30 minuti senza cibo.
Utilizzare solo carbone per griglia o bricchetti per barbecue approvati conformi alla norma EN 1860-3. Coprire la grata del fuoco con materiale combustibile senza impilarla.
Utilizzare solo accendifuoco solidi approvati conformi alla norma EN 1860-3. Attenersi alle istruzioni allegate sull'uso corretto del prodotto. Sigillare gli accendifuoco subito dopo l'uso e non conservarli vicino alla griglia.
Non cuocere prima che il combustibile abbia uno strato di cenere.
Non utilizzare il grill per riscaldare sostanze e materiali diversi dagli alimenti.
Non utilizzare la griglia come riscaldatore.
La ruota con il freno dovrebbe essere davanti.
Non utilizzare il barbecue in ambienti chiusi, garage, tende o altri luoghi chiusi. Il calore e le scintille risultanti possono causare incendi. Lo sviluppo di monossido di carbonio può causare asfissia in ambienti chiusi.
Non utilizzare la griglia sotto tetti infiammabili, ripari e luoghi simili.
Assicurarsi di mantenere la griglia a una distanza di sicurezza di 2 metri da materiali infiammabili. Questi potrebbero essere incendiati dalla generazione di calore o da scintille volanti.
Non lasciare mai incustodita la griglia calda.
Attenzione: prima di proteggere la vostra griglia con una copertura adeguata, deve essere completamente raffreddata! In caso contrario sussiste il rischio di incendio e infiammabilità! Assicurarsi di indossare sempre guanti da forno quando si tocca la griglia durante il funzionamento, ad es. aprendo le prese d'aria o mettendo più carbone nella griglia.
Non indossare indumenti troppo larghi o larghi che potrebbero entrare in contatto con le braci o il fuoco durante la cottura alla griglia.
Non utilizzare mai la griglia in condizioni climatiche estreme.
Non usare mai acqua per spegnere il carbone ardente.
Chiudere invece le prese d'aria e il coperchio fino a quando il fuoco non si spegne.
Questa griglia è destinata esclusivamente all'uso privato!
AVVERTENZA Pericolo di soffocamento! Il barbecue è destinato esclusivamente all'uso esterno. Non deve essere utilizzato in un edificio, in un garage o in qualsiasi altro spazio chiuso. Possono formarsi fumi tossici che causano soffocamento.
Distanza di sicurezza :

Mantenere una
distanza minima di
3 m da strutture
sopraelevate, muri,
rampe e altre
strutture.
Come funziona ?

Uso corretto del Kamado
Per accendere un fuoco, posiziona alcuni cubi più accendini o solidi accendifuoco sulla piastra di carbone alla base del Kamado. Quindi posizionare 2 o 3 manciate di carbone di legna sopra di esse.
Attenzione! non utilizzare benzina, acquaragia, liquidi per accendini, alcol o altri prodotti chimici simili per l'accensione o la riaccensione.
Attenzione! non sovraccaricare l'unità con carburante. Se il fuoco è troppo intenso potrebbe danneggiare il Kamado.
Apri lo presa d'aria inferiore e accendi gli accendifuoco usando un accendino dal naso lungo o dei fiammiferi di sicurezza.
Non aprire o rilasciare il coperchio superiore con forza. Lasciare fino a quando tutto il carburante non viene utilizzato e spento.
Se il fuoco brucia troppo forte potrebbe danneggiare la guarnizione di tenuta in feltro prima che abbia avuto la possibilità di maturare correttamente.
Dopo il primo utilizzo, ispezionare tutti i dispositivi di fissaggio per verificarne la tenuta. La fascia metallica che collega il coperchio alla base si espanderà a causa del calore e potrebbe allentarsi. Si consiglia di controllare ed eventualmente stringere la fascetta con una chiave.
Ora il tuo Kamado è pronto per l'uso.
Spegnimento del fuoco
Per spegnere l'unità, basta semplicemente smettere di aggiungere carburante e chiudere tutte le prese d'aria e il coperchio per consentire al fuoco di spegnersi naturalmente.
Attenzione! non usare acqua per spegnere il fuoco.
Conservazione
Quando non in uso, conservarlo in un luogo asciutto e coprire il Kamado una volta completamente raffreddato con un'adeguata copertura antipioggia.
Non lasciarlo fuori a bagnarsi quando piove.
Quando si utilizza il Kamado, spingere verso il basso su entrambe le ruote di bloccaggio per impedire all'unità di muoversi durante l'uso.
Durante l'inverno Si consiglia di conservare il Kamado in un garage, una stanza chiusa o un capannone per una protezione completa.
Pulizia
Pulisci sempre il Kamado quando è completamente
raffreddato.
Il Kamado è autopulente. Riscaldalo fino a 260°C per 30 minuti e brucerà tutto il cibo e i detriti.
Attenzione! NON utilizzare acqua o altri tipi di prodotti per la pulizia per pulire l'interno del Kamado. Le pareti sono porose e assorbiranno i liquidi, questo potrebbe causare la rottura del Kamado.
Se la fuliggine o la cenere diventano eccessive, utilizzare una spazzola metallica per raschiare via i residui di carbonio prima dell'uso successivo.
Per pulire le griglie utilizzare un detergente non abrasivo una volta che l'unità si è completamente raffreddata.
Per pulire la superficie esterna attendere che il Kamado si raffreddi, si prega di non lavare la superficie direttamente con acqua, si consiglia di utilizzare un panno umido con un detergente delicato.
Durante la pulizia, maneggiare con cura quando si sposta l'anello di fuoco e il focolare.
Manutenzione
Si prega di controllare regolarmente tutti i collegamenti e serrarli se necessario.
Stringere le fascette e oliare la cerniera 2 volte all'anno o più se necessario.
Per evitare di fare una lunga esposizione al sidetable, assicurati anche di farlo in condizioni asciutte. Carico nominale entro 5 kg.
Sostituire regolarmente la guarnizione in feltro (Si ritiene generalmente che la guarnizione in feltro debba essere sostituita quando esce del fumo dallo spazio tra il corpo del forno per ceramica).
Informazioni sull'uso e sulla cura
Assicurarsi che il Kamado sia posizionato su una superficie non infiammabile permanente, piana, piana e resistente al calore, lontano da oggetti infiammabili (nessun materiale combustibile nelle vicinanze).
Assicurarsi che il Kamado abbia uno spazio sopra la testa minimo di 2 m. La griglia dovrebbe essere a 2 m di distanza da tutti gli oggetti sopra di essa e nell'area circostante.
Per accendere un fuoco, posiziona alcuni cubi più accendini o solidi accendifuoco sulla piastra di carbone alla base del Kamado. Quindi posizionare 2 o 3 manciate di carbone di legna sopra gli accendifuoco.
Attenzione! non utilizzare benzina, acquaragia, liquidi per
accendini, alcol o altri prodotti chimici simili per l'accensione o
la riaccensione.
Attenzione! non cuocere prima che il combustibile abbia uno strato di cenere.
Apri lo presa d'aria inferiore e accendi gli accendifuoco usando un accendino dal naso lungo o fiammiferi di sicurezza. Una volta catturato, lasciare aperto lo presa d'aria inferiore e il coperchio per circa 10 minuti per creare un piccolo letto di braci ardenti.
Si consiglia di non alimentare o accendere i carboni una volta che sono accesi. Ciò consente ai carboncini di bruciare in modo più uniforme ed efficiente.
Utilizzare sempre solo guanti resistenti al calore quando si maneggiano ceramiche calde o superfici di cottura.
Guida alla cottura a bassa temperatura
Accendi il carbone di legna secondo le istruzioni sopra.
Aprire completamente lo presa d'aria inferiore e lasciare aperto il coperchio per circa 10 minuti per creare un piccolo letto di braci ardenti.
Monitora il Kamado finché non raggiunge la temperatura desiderata.
Chiudere completamente lo presa d'aria inferiore per mantenere la temperatura. Ora sei pronto per usare il Kamado per cucinare.
Attenzione! Quando si apre il coperchio ad alte temperature è essenziale sollevare solo leggermente il coperchio, consentendo all'aria di entrare lentamente e in sicurezza, evitando correnti d'aria o fiammate che potrebbero causare lesioni.
Usare sempre guanti resistenti al calore quando si maneggiano ceramiche calde o superfici di cottura.
Affumicatoio
Segui le istruzioni sopra come se stessi iniziando una cottura lenta (Guida alla cottura a bassa temperatura).
Monitora il Kamado finché non raggiunge la temperatura desiderata.
Lascia lo presa d'aria inferiore leggermente aperto.
Chiudi lo presa d'aria superiore e continua a controllare la temperatura per qualche altro minuto.
Usando guanti resistenti al calore cospargere i trucioli di legno in cerchio sopra il carbone caldo.
Ora sei pronto per usare il Kamado.
Guida alla cottura ad alta temperatura
Accendi il carbone di legna secondo le istruzioni. Chiudere il coperchio e aprire completamente le prese d'aria superiore e inferiore.
Monitora il Kamado finché non raggiunge la temperatura desiderata.
Chiudi lo presa d'aria superiore a metà e continua a controllare la temperatura per qualche altro minuto.
Ora sei pronto per usare il Kamado per cucinare.
Usare sempre guanti resistenti al calore quando si maneggiano ceramiche calde o superfici di cottura.
Rifornimento
Con le prese d'aria chiuse, il Kamado rimane ad alta temperatura per diverse ore. Se è necessario un tempo di cottura più lungo (ad es. quando si arrostisce un intero pezzo o si affumica lentamente), potrebbe essere necessario aggiungere più carbone. Basta aggiungere del carbone aggiuntivo e continuare come sopra.
Guida alla temperatura di cottur
Cottura lenta / Fumo (110°C - 135°C) Presa d'aria inferiore Presa d'aria superiore Petto 2 ora al kg Maiale sminuzzato 2 - 4 ora al kg Pollo intero 3 - 4 ora 
Costolette 3 - 5 ora Arrosto 9 + ora Grigliare (160°C - 185°C) Presa d'aria inferiore Presa d'aria superiore Pesce 15 - 20 min Filetto di maiale 15 - 30 min Pezzi di pollo 30 - 45 min Pollo intero 1 - 1.5 ora 
Cosciotto di agnello/tacchino 3 - 4 ora Spalla/prosciutto di maiale 2 - 4 ora 2 - 5 ora Grigliare (260°C - 370°C) Presa d'aria inferiore Presa d'aria superiore Bistecche 5 - 8 min Braciole di maiale 6 - 10 min 
Hamburger 6 - 10 min Salsicce 6 - 10 min  Chiuso
GARANZIA
Il periodo di garanzia per i nostri prodotti è di 2 anni, se non diversamente stabilito dalla legge, a partire dalla data di acquisto iniziale o di consegna.
Se avete problemi o domande, potete facilmente accedere alle nostre pagine di aiuto, consigli per la risoluzione dei problemi, FAQ e manuali d'uso sul nostro sito post-vendita: https://sav.hkoenig.com. Digitando il nome di riferimento del tuo dispositivo nella barra di ricerca, puoi accedere a tutto il supporto online disponibile, progettato per soddisfare al meglio le tue esigenze.
Se ancora non riesci a trovare una risposta alla tua domanda o al tuo problema, allora clicca su "La risposta ha risolto il tuo problema? Questo vi porterà al modulo di richiesta di supporto post-vendita, che potete completare per convalidare la vostra richiesta e ottenere aiuto.
CONDIZIONI DI GARANZIA
La garanzia copre tutti i guasti derivanti da un uso normale, in conformità con gli usi e le specifiche del manuale utente.
Questa garanzia non si applica a problemi di imballaggio o di trasporto durante la spedizione del prodotto da parte del proprietario. Non include inoltre la normale usura del prodotto, né la manutenzione o la sostituzione delle parti di consumo.
ESCLUSIONE DELLA GARANZIA
- Accessori e parti soggette a usura (\*).
- Normale manutenzione dell'apparecchio.
- Tutti i guasti derivanti da un uso improprio (urti, mancato rispetto delle raccomandazioni sull'alimentazione, cattive condizioni d'uso, ecc.), da una manutenzione inadeguata o da un uso improprio dell'apparecchio, nonché dall'uso di accessori inadeguati.
- Danni di origine esterna: incendio, danni d'acqua, sovratensione elettrica, ecc.
- Qualsiasi attrezzatura che sia stata smontata, anche parzialmente, da persone diverse da quelle autorizzate a farlo (in particolare l'utente).
- Prodotti per i quali il numero di serie è mancante, danneggiato o illeggibile, il che non permetterebbe la sua identificazione.
- Prodotti soggetti a noleggio, dimostrazione o esposizione.
(\*) Alcune parti del suo apparecchio, note come parti soggette a usura o materiali di consumo, si deteriorano con il tempo e la frequenza d'uso del suo apparecchio. Questa usura è normale, ma può essere accentuata da cattive condizioni d'uso o di manutenzione del vostro apparecchio. Queste parti non sono quindi coperte dalla garanzia.
Anche gli accessori forniti con l'apparecchio sono esclusi dalla garanzia. Non possono essere scambiati o rimborsati. Tuttavia, alcuni accessori possono essere acquistati direttamente dal nostro sito web: https://sav.hkoenig.com/.
AMBIENTE
TUTELA AMBIENTALE:
Non gettare questo prodotto come gli altri prodotti per la casa. È necessario smaltire

questo prodotto come da norme locali, è necessario informarsi presso le autorità locali sui luoghi in cui è possibile consegnare questo prodotto. Questo perché, i prodotti elettrici ed elettronici contengono
sostanze pericolose che hanno effetti dannosi sull'ambiente o sulla salute umana e dovrebbero essere riciclati. Il simbolo qui accanto (un contenitore per rifiuti con route, contrassegnato da una croce) indica che le apparecchiature elettriche ed elettroniche dovrebbero essere smaltite con cura.
Adeva SAS / H.Koenig Europa - 8 rue Marc Seguin - 77290 Mitry Mory - Francia www.hkoenig.com - sav@hkoenig.com - contact@hkoenig.com - Tél: +33 1 64 67 00 05
PORTUGUES

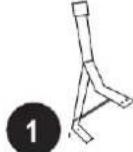 4 pcs
4 pcs 2 pcs
2 pcs 2 pcs
2 pcs s
s ics
ics 1 pcs
1 pcs 1 pcs
1 pcs s
s ics
ics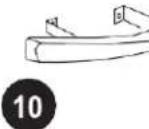 1 pcs
1 pcs 1 pcs
1 pcs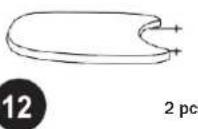 s
s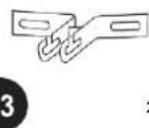 2 pcs
2 pcs 2 pcs
2 pcs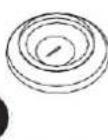 1 pcs
1 pcs
[X7DX]M6-14 2 pcs [620Z]M6 2 pcs [XYAS]20 22 pcs 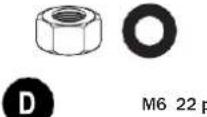 ics
ics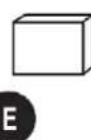 4 pcs
4 pcs 1 pcs
1 pcs 1 pcs
1 pcs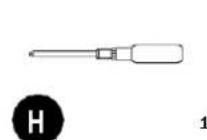 .pcs
.pcs M5-40 2 pcs
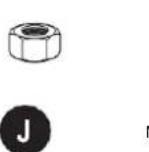 M5 2 pcs
 K
K[KBYW]
1 Pernas (x4)
2 rodas bloqueáveis (x2)
3 Rodas Normais (x2)
4 Bastões Cruzados (x4)
5 Grelha para Cozinhar (x1)
6 Anel de Fogo (x1)
7 Grelha de Carvão (x1)
8 Caixa de Incêndio (x1)
9 Tampa e cúpula de cerâmica (x1)
10 alça da tampa (x1)
11 Ventilação Superior (x1)
12 Mesa Lateral (x2)
13 Suporte de mesa lateral (x2)
14 Suporte de mesa lateral (x2)
15 Termômetro (x1) -Pré-montado
16 utensílio de cozinha gancho
A Parafuso M6-14 (x2) - Peças de reposição
B Porca M6 (x2) - Peças de reposição
C Parafuso M6-20(x22 -2 deles são peças de reposição)
D Porca M6 e arruela de pressão (x22 -2 deles são peças de reposição)
E Manga de borracha (x4)
F Chave Multifuncional (x1)
G Chave Rugular (x1)
H Chave de fenda (x1)
I Parafuso M5-40(x2) -Pré-montado Porca
J M5(x2) -Pré-montado
K cesto de cinzas
L Kit de coleta de cinzas


flowchart
graph TD
    A["③"] --> B["④"]
    B --> C["⑤"]
    C --> D["⑥"]
    D --> E["⑦"]
    E --> F["⑧"]
    F --> G["⑨"]
    G --> H["⑩"]
    H --> I["⑪"]
    I --> J["⑫"]


natural_image
Line drawing of a mechanical component with labeled parts (10 and 12), no readable text or symbols beyond labels

natural_image
Simple line drawing of a circular device with a flower-like pattern on the top, mounted on a base with no text or symbols.

natural_image
Line drawing of a portable grill with a dome top and wheels, no text or symbols present
Leia cuidadosamente!
AVISO! Esta churrasqueira ficará muito quente, não a mova durante a operação
Não use dentro de casa!
AVISO! Não use álcool ou gasolina para acender ou reacender! Use apenas acendalhas em conformidade com EN 1860-3!
AVISO! Mantenha crianças e animais de estimação afastados
Aviso de aviso

Leia este manual e todas as informações de segurança cuidadosamente antes do primeiro uso. Não fazer isso pode resultar em ferimentos graves ou morte ou danos à propriedade.
Preste atenção a uma montagem adequada da grelha. Siga as instruções de montagem fornecidas com a grelha. Use a grelha somente depois de totalmente montada
A grelha deve ser posicionada em uma superfície plana e segura antes do uso. Use a grelha exclusivamente em subsolos resistentes ao calor e ao fogo.
Antes da primeira utilização, certifique-se de que o grelhador é aquecido uma vez durante 30 minutos sem alimentos.
Utilize apenas carvão para grelhar ou briquetes de churrasco aprovados que cumpram a norma EN 1860-3. Cubra a grelha de fogo com material combustível sem empilhá-la.
Utilize apenas iniciadores sólidos aprovados que cumpram a
norma EN 1860-3. Siga as instruções anexas sobre o uso adequado do produto. Feche os acendedores de fogo imediatamente após o uso e não os guarde perto da grelha.
Não cozinhe antes que o combustível tenha uma camada de cinzas.
Não use a grelha para aquecer substâncias e materiais que não sejam alimentos.
Não use a grelha como aquecedor.
A roda com freio deve ficar na frente.
Não utilize o grelhador em divisões fechadas, garagens, tendas ou outros locais fechados. O calor e as faíscas resultantes podem causar incêndio. O desenvolvimento de monóxido de carbono pode causar asfixia em ambientes fechados.
Não utilize o grelhador sob telhados inflamáveis, abrigos e locais semelhantes.
Certifique-se de manter a grelha a uma distância de segurança de 2 metros de materiais inflamáveis. Estes podem ser inflamados por geração de calor ou faíscas.
Nunca deixe a grelha quente sem vigilância.
Atenção: antes de proteger sua churrasqueira com uma capa adequada, ela deve estar completamente resfriada! Caso contrário, existe risco de incêndio e inflamabilidade!
Certifique-se de sempre usar luvas de forno ao tocar na grelha durante a operação, por ex. abrindo as saídas de ar ou colocando mais carvão na grelha.
Não use roupas muito largas ou largas que possam entrar em contato com as brasas ou fogo ao grelhar.
Nunca use a churrasqueira em climas extremos.
Nunca use água para extinguir o carvão em brasa. Em vez disso, feche as aberturas e a tampa até que o fogo se apague. Este grelhador destina-se apenas a uso privado!
AVISO Perigo de asfixia! O barbecue destina-se apenas a uso exterior. Não deve ser utilizado num edifício, garagem ou qualquer outro espaço fechado. Podem formar-se fumos tóxicos que causam asfixia.
Distância de segurança :

Manter uma distância mínima de 3m de estruturas elevadas, paredes, rampas e outras estruturas.
Como funciona ?

Curando o Kamado
Para iniciar o fogo coloque alguns cubos de isqueiro ou acendalhas sólidas na placa de carvão na base do Kamado. Em seguida, coloque 2 ou 3 punhados de carvão em pedaços por cima deles.
Cuidado! não use gasolina, álcool branco, fluido de isqueiro, álcool ou outros produtos químicos semelhantes para acender ou reacender.
Cuidado! não sobrecarregue a unidade com combustível. Se o fogo for muito intenso pode danificar o Kamado.
Abra a ventilação inferior e acenda as acendalhas usando um isqueiro de ponta longa ou fósforos de segurança.
Não abra ou solte a tampa superior vigorosamente. Deixe até que todo o combustível seja usado e extinto.
Se o fogo queimar muito alto, pode danificar a vedação da gaxeta de feltro antes que ela tenha amadurecido adequadamente.
Após o primeiro uso, inspecione todos os fixadores quanto ao aperto. A faixa de metal que conecta a tampa à base se expande com o calor e pode se soltar. Recomenda-se verificar e, se necessário, apertar a cinta com uma chave de boca.
Agora seu Kamado está pronto para uso.
Extinguindo
Para extinguir a unidade, simplesmente pare de adicionar combustível e feche todas as aberturas e a tampa para permitir que o fogo apague naturalmente.
Cuidado! não use água para extinguir.
Armazenar
Quando não estiver em uso, guarde-o em local seco e cubra o Kamado quando estiver completamente resfriado com uma capa de chuva adequada.
Não o deixe do lado de fora para se molhar quando chover.
Ao usar o Kamado, pressione ambas as rodas de travamento para impedir que a unidade se mova durante o uso.
Durante o inverno Recomenda-se guardar o Kamado em uma garagem, cômodo fechado ou galpão para proteção total.
Limpeza
Sempre limpe o Kamado quando estiver totalmente resfriado. O Kamado é autolimpante. Aqueça a 260°C por 30 minutos e vai queimar todos os alimentos e detritos.
Cuidado! NÃO use água ou qualquer outro tipo de produto de limpeza para limpar o interior do seu Kamado. As paredes são porosas e vão absorver os líquidos, isso pode fazer com que o Kamado rache.
Se a fuligem ou as cinzas se tornarem excessivas, use uma escova de aço para raspar os restos de carvão antes do próximo uso.
Para limpar as grelhas, use um limpador não abrasivo quando a unidade estiver totalmente resfriada.
Para limpar a superfície externa, espere até que o Kamado esfrie. Por favor, não lave a superfície diretamente com água, é recomendável usar um pano úmido com detergente neutro. Durante a limpeza, manuseie com cuidado ao mover o anel de incêndio e a caixa de incêndio.
Manutenção
Verifique regularmente todas as conexões e aperte-as se necessário.
Aperte as bandas e lubrifique a dobradiça 2 vezes por ano ou mais, se necessário.
Para evitar uma longa exposição à mesa lateral, certifique-se também de fazê-la seca. Carga nominal dentro de 5 kg.
Substituir a junta de feltro regularmente (Acredita-se geralmente que a junta de feltro deve ser substituída quando sai fumaça do espaço entre o corpo do forno de cerâmica).
Informações de uso e cuidados
Certifique-se de que o Kamado esteja posicionado em uma superfície permanente, plana, nivelada e resistente ao calor, não inflamável, longe de itens inflamáveis (sem materiais combustíveis próximos).
Assegure-se de que o Kamado tenha um mínimo de 2m de folga acima da cabeça. A grelha deve estar a 2m de distância de todos os objetos acima dela e na área ao redor.
Para iniciar o fogo coloque alguns cubos de isqueiro ou acendalhas sólidas na placa de carvão na base do Kamado.
Em seguida, coloque 2 ou 3 punhados de carvão em pedaços por cima das acendalhas.
Cuidado! não use gasolina, álcool branco, fluido de isqueiro, álcool ou outros produtos químicos semelhantes para acender ou reacender.
Cuidado! não cozinhe antes que o combustível tenha uma camada de cinzas.
Abra a ventilação inferior e acenda as acendalhas usando um isqueiro de ponta longa ou fósforos de segurança. Depois de pegar, deixe a ventilação inferior e a tampa abertas por cerca de 10 minutos para construir uma pequena cama de brasas
quentes.
Recomenda-se não atiçar ou virar as brasas depois de acesas. Isso permite que os carvões queimem de maneira mais uniforme e eficiente.
Sempre use apenas luvas resistentes ao calor ao manusear cerâmica quente ou superfícies de cozimento.
Guia de cozimento em baixa temperatura
Acenda o carvão vegetal de acordo com as instruções acima.
Abra totalmente a ventilação inferior e deixe a tampa aberta por cerca de 10 minutos para formar uma pequena cama de brasas quentes.
Monitore o Kamado até que ele atinja a temperatura desejada.
Fecha totalmente a ventilação inferior para manter a temperatura. Agora você está pronto para usar o Kamado para cozinhar.
Cuidado! Ao abrir a tampa em altas temperaturas é essencial levantá-la apenas um pouco, permitindo que o ar entre lentamente e com segurança, evitando qualquer retrocesso ou surtos que possam causar ferimentos.
Sempre use luvas resistentes ao calor ao manusear cerâmica quente ou superfícies de
cozimento.
Fumeiro
Siga as instruções acima como se estivesse iniciando um cozimento lento (Guia de cozimento em baixa temperatura).
Monitore o Kamado até que ele atinja a temperatura desejada.
Deixe a ventilação inferior ligeiramente aberta.
Fecha a ventilação superior e continue a verificar a temperatura por mais alguns minutos.
Usando luvas resistentes ao calor, polvilhe as lascas de madeira em um círculo sobre o carvão quente.
Agora você está pronto para usar o Kamado.
Guia de cozimento em alta temperatura
Acenda o carvão vegetal de acordo com as instruções. Feche a tampa e abra totalmente as aberturas superior e inferior.
Monitore o Kamado até que ele atinja a temperatura desejada.
Fecha a ventilação superior até a metade e continue a verificar a temperatura por mais alguns minutos.
Agora você está pronto para usar o Kamado para cozinhar.
Sempre use luvas resistentes ao calor ao manusear cerâmica quente ou superfícies de
cozimento.
Reabastecimento
Com os respiros fechados, o Kamado fica em alta temperatura por várias horas. Se precisar de um tempo de cozimento mais longo (por exemplo, ao assar um assado inteiro ou fumar lentamente), pode ser necessário adicionar mais carvão. Basta adicionar um pouco de carvão adicional e continuar como acima.
de temperatura de cozimento
Cozimento Lento / Defumação (110 °C - 135 °C) Ventilação inferior Ventilação superior Seio 2 h por kg came de porco 2 - 4 h por kg 

desfiada 3 - 4 h frango inteiro costelas 3 - 5 h Assar 9 + h Grelhar (160 °C - 185 °C) Ventilação inferior Ventilação superior Peixe 15 - 20 min Lombo de porco 15 - 30 min peças de frango 30 - 45 min frango inteiro 1 - 1.5 h 
Perna de Cordeiro 3 - 4 h Turquia 2 - 4 h Pernil / paleta de porco 2 - 5 h Grelhar (260 °C - 370 °C) Ventilação inferior Ventilação superior bifes 5 - 8 min Costeletas de porco 6 - 10 min 

Hambúrgueres 6 - 10 min Salsichas 6 - 10 min Abrir 
Fechado 
GARANTIA
O período de garantia dos nossos produtos é de 2 anos, salvo indicação em contrário, a partir da data da compra inicial ou da data de entrega.
Se tiver quaisquer problemas ou perguntas, pode aceder facilmente às nossas páginas de ajuda, dicas de resolução de problemas, FAQ, e manuais do utilizador no nosso site de serviços: https://sav.hkoenig.com.
Ao escrever o nome de referência do seu dispositivo na barra de pesquisa, pode aceder a todo o suporte online disponível, concebido para melhor satisfazer as suas necessidades.
Se ainda não encontrar uma resposta para a sua pergunta ou problema, então clique em "A resposta resolveu o seu problema?". Isto irá encaminhá-lo para o Formulário de Pedido de Apoio ao Cliente, que poderá preencher para validar o seu pedido e obter ajuda.
CONDIÇÕES DE GARANTIA
A garantia cobre todas as falhas que ocorram sob utilização normal, de acordo com a utilização e especificações do manual do utilizador.
Esta garantia não se aplica a problemas de embalagem ou transporte durante a expedição do produto pelo proprietário. Também não inclui o desgaste normal do produto, nem a manutenção ou substituição de peças consumíveis.
EXCLUSÃO DE GARANTIA
- Acessórios e peças de desgaste (\*).
- Manutenção normal do dispositivo.
- Todas as avarias resultantes de utilização inadequada (choques, não cumprimento das recomendações de alimentação, más condições de utilização, etc.), manutenção insuficiente ou má utilização do dispositivo, bem como a utilização de acessórios inadequados.
- Danos de origem externa: incêndio, danos causados pela água, surtos eléctricos, etc.
- Qualquer equipamento que tenha sido desmontado, mesmo parcialmente, por outras pessoas para além das autorizadas para o efeito (nomeadamente o utilizador).
- Os produtos cujo número de série estaria em falta, deteriorado ou ilegível, que não permitiriam a sua identificação.
- Os produtos sujeitos a leasing, demonstração, ou exposição.
(\*) Algumas partes do seu dispositivo, chamadas peças de desgaste ou consumíveis, deterioram-se com o tempo e a frequência de utilização do seu dispositivo. Este desgaste é normal mas pode ser acentuado por más condições de utilização ou manutenção do seu dispositivo. Estas peças não estão, portanto, cobertas pela garantia.
Os acessórios fornecidos com o dispositivo também estão excluídos da garantia. Não podem ser trocados ou reembolsados. No entanto, alguns acessórios podem ser adquiridos directamente através do nosso website: https://sav.hkoenig.com/.
MEIO AMBIENTE
CUIDADO:
Não se desfaçam deste produto como o fizeram com outros produtos domésticos. Há uma separação deste produto residual nas comunidades, terá de informar as suas autoridades locais sobre os locais onde se pode devolver este produto. De facto, os produtos eléctricos e electrónicos contêm substâncias perigosas que têm efeitos nocivos sobre o ambiente ou a saúde humana e devem ser reciclados. O símbolo aqui indica que o equipamento eléctrico e electrónico deve ser escolhido cuidadosamente, um contentor de resíduos com rodas é marcado com uma cruz.
Instruction Manual
Manuel d'instructions Bedienungsanleitung Gebruiksaanwijzing Manual de instrucciones Manuale d'uso Manual do usuario Manual de instruções natural_image
Line drawing of a Koenig heat exchanger with wheels and top panel (no text or symbols on the device itself)Kamado Japanese barbecue 18"
Barbecue Japonais Kamado 18" Japanischer Barbecue-Grill Kamado 18" Kamado 18" Japanese barbecue Barbacoa japonesa Kamado 18 Kamado 18" barbecue giapponese Kamado 18" barbecue japonês ENGLISH
| 4 pcs | 2 pcs | 2 pcs | |
| ics | 1 pcs | 1 pcs | 1 pcs |
| ics | | | |
| 12 pcs | | | 16 |
| [845B]A M6-14 2 pcs | [BYAS]B M6 2 pcs | C M6-20 22 pcs | D M6 22 pcs |
| E 4 pcs | F 1 pcs | G 1 pcs | H 1 pcs |
| [XXXW]I M5-40 2 pcs | [XSD4]J M5 2 pcs | [BY4X]K | L |
flowchart
graph TD
A["③"] --> B["④"]
B --> C["①"]
C --> D["②"]
D --> E["③"]
style A fill:#f9f,stroke:#333
style B fill:#ccf,stroke:#333
style C fill:#cfc,stroke:#333
style D fill:#fcc,stroke:#333
style E fill:#ffc,stroke:#333
natural_image
Simple line drawing of a circular device with a flower-like pattern on the top, mounted on a base with no text or symbols.natural_image
Line drawing of a portable grill with a dome top and wheels, no text or symbols presentRead carefully!
WARNING! This barbecue will become very hot, do not move it during operation Do not use indoors! WARNING! Do not use spirit or petrol for lighting or relight-ing! Use only firelighters complying to EN 1860-3! WARNING! Keep children and pets awayWarning notice
 Read this manual and all safety information carefully before first use. Failure to do so could result in serious injury or death or damage to property. Pay attention to a proper assembly of the grill. Stick to the mounting instructions supplied with the grill. Use the grill only after it is fully assembled The grill must be positioned on a safe flat surface before use. Use the grill exclusively on heat-resistant and fire-resistant undergrounds. Please ensure before first use, that the grill is heated one time for 30 minutes without any food. Use only approved Grill charcoal or barbecue briquet- tes which comply with EN 1860-3. Cover the fire grate with combustible material without stacking it. Only use approved solid fire starters which comply with EN 1860-3. Stick to the enclosed instructions on the proper use of the product. Seal the fire starters immediately after use and do not store them near the grill. Do not cook before the fuel has a coating of ash. Do not use the grill to heat substances and materials other than food. Do not use the grill as a heater. The wheel with brake should be in front. Do not use the grill in closed rooms, garages, tents or other closed places. The resulting heat and sparks may cause fire. The development of carbon monoxide may cause asphyxiation in closed rooms. Do not use the grill under flammable roofs, shelters and similar places. Make sure to keep the grill in a safety distance of 2 meters away from flammable materials. These could be ignited by heat generation or flying sparks. Never leave the hot grill unattended. Attention: before protecting your grill with a suitable cover, it must be completely cooled! Otherwise, there is a risk of fire and flammability! Keep sure to always wear oven mitts when touching the grill during operation, e.g. opening the air vents or putting more charcoal into grill. Don't wear too far or loose clothing that could come into contact with the coals or fire when grilling. Never use the grill in extreme weather. Never use water to extinguish burning charcoal. Instead, close the vents and the lid until the fire is extinguished. This grill is only intended for private use! WARNING Choking hazard! The barbecue is intended for outdoor use only. It must not be used in a building, garage or any other enclosed space. Toxic fumes may be formed that cause suffocation.Safety distance :
 Maintain a minimum distance of 3m from elevated structures, walls, ramps and other structures.How does it work?
Curing The Kamado
To start a fire place some lighter cubes or solid firelighters on the charcoal plate in the base of the Kamado. Then place 2 or 3 handfuls of lump charcoal over the top of the them. Caution! do not use petrol, white spirit, lighter fluid, alcohol or other similar chemicals for lighting or relighting. Caution! do not overload the unit with fuel. If the fire is too intense this could damage the Kamado. Open the bottom vent and light the firelighters using a long nosed lighter or safety matches. Do not open or release the top lid vigorously. Leave until all the fuel is used and extinguished. If the fire burns too high it could damage the felt gasket seal before it has had the chance to mature properly. After first use inspect all fasteners for tightness. The metal band connecting your lid to the base will expand from the heat and this could become loose. It is recommended you check and if necessary tighten the band with a spanner. Now your Kamado is ready for use.Extinguishing
To extinguish unit, simply stop adding fuel and close all the vents and the lid to allow the fire to die naturally. Caution! do not use water to extinguish.Storage
When not in use, please store it in dry place, and cover the Kamado once completely cooled with suitable rain cover. Do not leave it outside to get wet when it rains. When using the Kamado push down on both of the locking wheels to stop the unit moving about during use. Over winter It is recommended to store the Kamado in a garage, a closed room or shed for complete protection.Cleaning
Always clean the Kamado when it is fully cooled. The Kamado is self cleaning. Heat it up to 260°C for 30 minutes and it will scorch off all of the food and debris. Caution! DO NOT use water or any other types of cleaning products to clean the inside of your Kamado. The walls are porous and will absorb the liquids, this could cause the Kamado to crack. If the soot or ashes become excessive then use a wire brush to scrape off the carbon remnants before the next use. To clean the grates use a non-abrasive cleaner once the unit has fully cooled. To clean the outer surface wait until the Kamado is cool, Please do not flush the surface directly with water, it is recommend to use a damp cloth with a mild detergent. During the cleaning, please handle with care when moving the fire ring and fire box.Maintenance
Please check regularly all connections, and tighten them if necessary. Tighten the bands and oil the hinge 2 times a year or more if needed. To avoid making a long exposure to the sidetable also ensure to make it in a dry condition. Rated load within 5 kg. To replace the felt gasket regularly (It is generally believed that the felt gasket should be replaced when smoke comes out of the gap between the ceramic furnace body).Lighting, Usage & Care Information
Ensure the Kamado is positioned on a permanent, flat, level, heat resistant non-flammable surface away from flammable items (no combustible materials nearby). Ensure the Kamado has a minimum of 2m over head clearance. The grill should be 2m away from all objects above it and in the surrounding area. To start a fire place some lighter cubes or solid firelighters on the charcoal plate in the base of the Kamado. Then place 2 or 3 handfuls of lump charcoal over the top of the firelight- ers. Caution! do not use petrol, white spirit, lighter fluid, alcohol or other similar chemicals for lighting or relighting. Caution! do not cook before the fuel has a coating of ash. Open the bottom vent and light the firelighters using a long nosed lihter or safety matches. Once it has caught, leave the bottom vent and lid open for about 10 minutes to build a small bed of hot embers. It is recommended you don't stoke or turn the coals once they are alight. This allows the charcoals to burn more uniformly and efficient. Always use only heat resistant gloves when handling hot ceramics or cooking surfaces.Low Temperature Cooking Guide
Light the lump charcoal according to the instructions above. Open the bottom vent fully and leave the lid open for about 10 minutes to build a small bed of hot embers. Monitor the Kamado until it has risen to the desired temperature. Fully close the bottom vent to maintain the temperature. You are now ready to use the Kamado for cooking on. Caution! When opening the lid at high temperatures it is essential to lift the lid only slightly, allowing air to enter slowly and safely, preventing any backdraft or flare-ups that may cause injury. Always use heat resistant gloves when handling hot ceramics or cooking surfaces.Smoking Guide
Follow the instructions above as if you were starting a slow cook (Low Temperature Cooking Guide). Monitor the Kamado until it has risen to the desired temperature. Leave the bottom vent slightly open. Close the top vent and continue to check the temperature for a few more minutes. Using heat resistant gloves sprinkle the wood chips in a circle over the hot charcoal. You are now ready to use the Kamado to smoke on.High Temperature Cooking Guide
Light the lump charcoal according to the instructions. Close the lid and fully open the top and bottom vents. Monitor the Kamado until it has risen to the desired temperature. Close the top vent half way and continue to check the temperature for a few more minutes. You are now ready to use the Kamado for cooking on. Always use heat resistant gloves when handling hot ceramics or cooking surfaces.Refueling
With the vents closed, the Kamado stays at a high temperature for several hours. If you require a longer cooking time (e.g when roasting a whole joint or slow smoking), it may be necessary to add more charcoal. Just add some additional charcoal and continue as above.Cooking Temperature Guide
Slow Cooking / Smoking (110°C - 135°C)| Briskt | 2 h per kg |
| Pulled pork | 2 - 4 h per kg |
| Whole broiler | 3 - 4 h |
| Ribs | 3 - 5 h |
| Roast | 9 + h |
| Fish | 15 - 20 min |
| Pork tenderloin | 15 - 30 min |
| Broiler parts and | 30 - 45 min |
| Whole broiler | 1 - 1.5 h |
| Leg of lamb | 3 - 4 h |
| Turkey | 2 - 4 h |
| Pork shoulder / ham | 2 - 5 h |
| Steaks | 5 - 8 min |
| Pork chops | 6 - 10 min |
| Burgers | 6 - 10 min |
| Sausages | 6 - 10 min |
WARRANTY
The warranty period for our products is 2 years, unless otherwise stated, starting from the date of initial purchase or the date of delivery. If you have any problems or questions, you can easily access our help pages, troubleshooting tips, FAQ, and user manuals on our service site: https://sav.hkoenig.com. By typing the reference name of your device in the search bar, you can access all available online support, designed to best meet your needs. If you still cannot find an answer to your question or problem, then click on "Did the answer solve your problem?". This will direct you to the Customer Support Request Form, which you can fill out to validate your request and get help.WARRANTY CONDITIONS
The warranty covers all failures occurring under normal use, in accordance with the usage and specifications in the user's manual. This warranty does not apply to packaging or transportation problems during shipment of the product by the owner. It also does not include normal wear and tear of the product, nor maintenance or replacement of consumable parts.EXCLUSION OF WARRANTY
- Accessories and wearing parts (\*). - Normal maintenance of the device. - All breakdowns resulting from improper use (shocks, failure to comply with power supply recommendations, poor conditions of use, etc.), insufficient maintenance or misuse of the device, as well as the use of unsuitable accessories. - Damage of external origin: fire, water damage, electrical surge, etc. - Any equipment that has been disassembled, even partially, by persons other than those authorized to do so (notably the user). - The products whose serial number would be missing, deteriorated or illegible that would not allow its identification. - The products subjected to leasing, demonstration, or exhibition. (\*) Some parts of your device, called wear parts or consumables, deteriorate with time and frequency of use of your device. This wear and tear are normal but can be accentuated by poor conditions of use or maintenance of your device. These parts are therefore not covered by the warranty. The accessories supplied with the device are also excluded from the warranty. They cannot be exchanged or refunded. However, some accessories can be purchased directly through our website: https://sav.hkoenig.com/.ENVIRONMENT
CAUTION:
Do not dispose of this product as it has with other household products. There is a separation  of this waste product into communities, you will need to inform your local authorities about the places where you can return this product. In fact, electrical and electronic products contain hazardous substances that have harmful effects on the environment or human health and should be recycled. The symbol here indicates that electrical and electronic equipment should be chosen carefully, a wheeled waste container is marked with a cross. Adeva SAS / H.Koenig Europe - 8 rue Marc Seguin - 77290 Mitry Mory - France www.hkoenig.com - sav@hkoenig.com - contact@hkoenig.com - Tél: +33 1 64 67 00 05FRANÇAIS
| 4 pcs | 2 pcs | 2 pcs | [XYZ]s |
| ics | 1 pcs | 1 pcs | s |
| ics | 1 pcs | 1 pcs | s |
| ics | 2 pcs | 1 pcs | 1cs |
| 2 pcs | M6 2 pcs | -20 22 pcs | ics |
| 4 pcs | 1 pcs | 1 pcs | .pcs |
| ! pcs | M5 2 pcs | K | |
flowchart
graph TD
A["④ Pinning"] --> B["Step C"]
B --> C["Step D"]
C --> D["Step 4"]
D --> E["Step E"]
E --> F["Step 1"]
F --> G["③ Mounting"]
style A fill:#f9f,stroke:#333
style E fill:#ccf,stroke:#333
style G fill:#cfc,stroke:#333
natural_image
Top-down schematic of a circular device with a central flower-like symbol and control knobs, labeled with number 11 (no text or symbols on the diagram itself)natural_image
Line drawing of a portable rice cooker with wheels and a dome top (no text or symbols)Lire attentivement!
ATTENTION! Ce barbecue deviendra très chaud, ne le déplacez pas pendant le fonctionnement Ne pas utiliser à l'intérieur ! ATTENTION! N'utilisez pas d'alcool ou d'essence pour l'allumage ou le rallumage ! Utilisez uniquement des allume-feu conformes à la norme EN 1860-3 ! ATTENTION! Éloignez les enfants et les animaux domestiquesAvertissement
 Lisez attentivement ce manuel et toutes les informations de sécurité avant la première utilisation. Ne pas le faire pourrait entraîner des blessures graves ou la mort ou des dommages matériels. Faites attention à un montage correct du gril. Respectez les instructions de montage fournies avec le gril. N'utilisez le gril qu'après l'avoir entièrement assemblé Le gril doit être placé sur une surface plane et sûre avant utilisation. Utilisez le gril exclusivement sur des sols résistants à la chaleur et au feu. Avant la première utilisation, assurez-vous que le gril est chauffé une fois pendant 30 minutes sans aucun aliment. N'utilisez que du charbon de bois ou des briquettes pour gril approuvés et conformes à la norme EN 1860-3. Couvrir la grille de feu avec un matériau combustible sans l'empiler. N'utilisez que des allume-feux solides homologués conformes à la norme EN 1860-3. Respectez les instructions ci-jointes sur l'utilisation correcte du produit. Scellez les allume-feux immédiatement après utilisation et ne les rangez pas près du gril. Ne cuisinez pas avant que le combustible ne soit recouvert d'une couche de cendre. N'utilisez pas le gril pour chauffer des substances et des matériaux autres que des aliments. N'utilisez pas le gril comme appareil de chauffage. La roue avec frein doit être devant. N'utilisez pas le gril dans des pièces fermées, des garages, des tentes ou d'autres endroits fermés. La chaleur et les étincelles qui en résultent peuvent provoquer un incendie. Le développement de monoxyde de carbone peut provoquer une asphyxie dans les pièces fermées. N'utilisez pas le gril sous des toits inflammables, des abris et des endroits similaires. Assurez-vous de garder le gril à une distance de sécurité de 2 mètres des matériaux inflammables. Ceux-ci pourraient être enflammés par la génération de chaleur ou des étincelles volantes. Ne laissez jamais le gril chaud sans surveillance. Attention : avant de protéger votre gril avec une housse adaptée, il doit être complètement refroidi ! Sinon, il y a risque d'incendie et d'inflammabilité ! Assurez-vous de toujours porter des gants de cuisine lorsque vous touchez le gril pendant le fonctionnement, par ex. ouvrir les bouches d'aération ou mettre plus de charbon de bois dans le gril. Ne portez pas de vêtements trop amples ou amples qui pourraient entrer en contact avec les braises ou le feu lors de la cuisson. N'utilisez jamais le gril par temps extrême. N'utilisez jamais d'eau pour éteindre le charbon de bois brûlant. Au lieu de cela, fermez les évents et le couvercle jusqu'à ce que le feu soit éteint. Ce gril est uniquement destiné à un usage privé ! MISE EN GARDE Risque d'étouffement ! Le barbecue est destiné à un usage en extérieur uniquement. Il ne doit pas être utilisé dans un bâtiment, un garage ou tout autre espace clos. Il peut se former des vapeurs toxiques qui provoquent la suffocation. Distance de sécurité :  Maintenez une distance minimale de 3m des structures surélevées, des murs, des rampes et d'autres structures.Comment ça fonctionne ?
Prendre soin du Kamado
Pour allumer un feu, placez des cubes plus légers ou des allume-feu solides sur la plaque de charbon de bois à la base du Kamado. Ensuite, placez 2 ou 3 poignées de charbon de bois en morceaux sur le dessus. Mise en garde! n'utilisez pas d'essence, de white spirit, d'essence à briquet, d'alcool ou d'autres produits chimiques similaires pour l'allumage ou le rallumage. Mise en garde! ne surchargez pas l'appareil avec du carburant. Si le feu est trop intense, cela pourrait endommager le Kamado. Ouvrez l'évent inférieur et allumez les allume-feux à l'aide d'un briquet à long bec ou d'allumettes de sûreté. N'ouvrez pas ou ne relâchez pas le couvercle supérieur vigoureusement. Laisser jusqu'à ce que tout le carburant soit utilisé et éteint. Si le feu brûle trop haut, cela pourrait endommager le joint d'étanchéité en feutre avant qu'il n'ait eu la chance de mûrir correctement. Après la première utilisation, inspectez toutes les fixations pour vous assurer qu'elles sont bien serrées. La bande métallique reliant votre couvercle à la base se dilatera sous l'effet de la chaleur et pourrait se détacher. Il est recommandé de vérifier et, si nécessaire, de serrer la bande avec une clé. Votre Kamado est maintenant prêt à l'emploi.Extincteur
Pour éteindre l'appareil, arrêtez simplement d'ajouter du carburant et fermez tous les évents et le couvercle pour permettre au feu de s'éteindre naturellement. Mise en garde! ne pas utiliser d'eau pour éteindre.Stockage
Lorsqu'il n'est pas utilisé, veuillez le ranger dans un endroit sec et couvrir le Kamado une fois complètement refroidi avec une housse de pluie appropriée. Ne le laissez pas dehors se mouiller quand il pleut. Lorsque vous utilisez le Kamado, appuyez sur les deux roues de verrouillage pour empêcher l'appareil de se déplacer pendant l'utilisation. Pendant l'hiver, il est recommandé de ranger le Kamado dans un garage, une pièce fermée ou un cabanon pour une protection complète.Nettoyage
Nettoyez toujours le Kamado lorsqu'il est complètement refroidi. Le Kamado est autonettoyant. Chauffez-le à 260 °C pendant 30 minutes et il brûlera tous les aliments et les débris. Mise en garde! N'UTILISEZ PAS d'eau ou tout autre type de produit de nettoyage pour nettoyer l'intérieur de votre Kamado. Les parois sont poreuses et vont absorber les liquides, cela pourrait faire craquer le Kamado. Si la suie ou les cendres deviennent excessives, utilisez une brosse métallique pour gratter les restes de carbone avant la prochaine utilisation. Pour nettoyer les grilles, utilisez un nettoyant non abrasif une fois que l'appareil a complètement refroidi. Pour nettoyer la surface extérieure, attendez que le Kamado soit froid. Veuillez ne pas rincer la surface directement avec de l'eau, il est recommandé d'utiliser un chiffon humide avec un détergent doux. Pendant le nettoyage, veuillez manipuler avec précaution lorsque vous déplacez l'anneau de feu et le foyer.Entretien
Veuillez vérifier régulièrement toutes les connexions et les resserrer si nécessaire. Serrez les bandes et huilez la charnière 2 fois par an ou plus si nécessaire. Pour éviter de faire une longue exposition à la table d'appoint, assurez-vous également de la rendre sèche. Charge nominale inférieure à 5 kg. Remplacer régulièrement le joint en feutre (on pense généralement que le joint en feutre doit être remplacé lorsque de la fumée s'échappe de l'espace entre le corps du four à céramique).Informations d'utilisation et d'entretien
Assurez-vous que le Kamado est placé sur une surface ininflammable permanente, plane, de niveau et résistante à la chaleur, à l'écart des objets inflammables (pas de matériaux combustibles à proximité). Assurez-vous que le Kamado a un minimum de 2 m de dégagement au-dessus de la tête. Le gril doit être à 2 m de tous les objets au-dessus de lui et dans la zone environnante. Pour allumer un feu, placez des cubes plus légers ou des allume-feu solides sur la plaque de charbon de bois à la base du Kamado. Placez ensuite 2 ou 3 poignées de charbon de bois en morceaux sur le dessus des allume-feux. Mise en garde! n'utilisez pas d'essence, de white spirit, d'essence à briquet, d'alcool ou d'autres produits chimiques similaires pour l'allumage ou le rallumage. Mise en garde! ne faites pas cuire avant que le combustible ne soit recouvert d'une couche de cendre. Ouvrez l'évent inférieur et allumez les allume-feux à l'aide d'un briquet à long bec ou d'allumettes de sûreté. Une fois qu'il a attrapé, laissez l'évent inférieur et le couvercle ouverts pendant environ 10 minutes pour construire un petit lit de braises chaudes. Il est recommandé de ne pas attiser ou tourner les charbons une fois qu'ils sont allumés. Cela permet aux charbons de brûler de manière plus uniforme et efficace. Utilisez toujours uniquement des gants résistants à la chaleur lorsque vous manipulez des céramiques ou des surfaces de cuisson chaudes.Guide de cuisson à basse température
Allumez le charbon de bois en morceaux selon les instructions ci-dessus. Ouvrez complètement l'évent inférieur et laissez le couvercle ouvert pendant environ 10 minutes pour former un petit lit de braises chaudes. Surveillez le Kamado jusqu'à ce qu'il atteigne la température souhaitée. Fermez complètement l'évent inférieur pour maintenir la température. Vous êtes maintenant prêt à utiliser le Kamado pour cuisiner. Mise en garde! Lors de l'ouverture du couvercle à des températures élevées, il est essentiel de ne soulever que légèrement le couvercle, permettant à l'air d'entrer lentement et en toute sécurité, en évitant tout refoulement ou poussée pouvant causer des blessures. Utilisez toujours des gants résistants à la chaleur lorsque vous manipulez de la céramique chaude ou des surfaces de cuisson.Fumoir
Suivez les instructions ci-dessus comme si vous démarriez une cuisson lente (Guide de cuisson à basse température). Surveillez le Kamado jusqu'à ce qu'il atteigne la température souhaitée. Laissez l'évent inférieur légèrement ouvert. Fermez l'évent supérieur et continuez à vérifier la température pendant quelques minutes de plus. À l'aide de gants résistants à la chaleur, saupoudrez les copeaux de bois en cercle sur le charbon de bois chaud. Vous êtes maintenant prêt à utiliser le Kamado.Guide de cuisson à haute température
Allumez le charbon de bois en morceaux selon les instructions. Fermez le couvercle et ouvrez complètement les évents supérieur et inférieur. Surveillez le Kamado jusqu'à ce qu'il atteigne la température souhaitée. Fermez l'évent supérieur à moitié et continuez à vérifier la température pendant quelques minutes de plus. Vous êtes maintenant prêt à utiliser le Kamado pour cuisiner. Utilisez toujours des gants résistants à la chaleur lorsque vous manipulez de la céramique chaude ou des surfaces de cuisson.Ravitaillement
Avec les évents fermés, le Kamado reste à haute température pendant plusieurs heures. Si vous avez besoin d'un temps de cuisson plus long (par exemple, lorsque vous faites rôtir un rôti entier ou fumez lentement), il peut être nécessaire d'ajouter plus de charbon de bois. Ajoutez simplement un peu de charbon de bois supplémentaire et continuez comme ci-dessus.Guide des températures de cuisson
Basse température / Fumer (110°C - 135°C)| Briskt | 2 h par kg |
| Porc éffiloché | 2 - 4 h par kg |
| Poulet rôti | 3 - 4 h |
| Côte | 3 - 5 h |
| Rôti | 9 + h |
| Poisson | 15 - 20 min |
| Filet de porc | 15 - 30 min |
| Parties à rôtirRôti | 30 - 45 min |
| entier | 1 - 1.5 h |
| Gigot d'agneau | 3 - 4 h |
| Dinde | 2 - 4 h |
| Epaule de porc / Jambon | 2 - 5 h |
| Steaks | 5 - 8 min |
| Côtelette de porc | 6 - 10 min |
| Burgers | 6 - 10 min |
| Saucisses | 6 - 10 min |
GARANTIE
La durée de garantie de nos produits est de 2 ans, sauf décret en vigueur, à compter de la date d'achat initiale ou la date de livraison. En cas de problèmes ou d'interrogations, vous pouvez facilement accéder à nos pages d'aides, conseils de dépannage, FAQ et modes d'emplois sur notre site SAV : https://sav.hkoenig.com. En tapant le nom de référence de votre appareil dans la barre de recherche, vous accédez à tous les supports en ligne disponibles, conçus pour vous répondre au mieux à vos besoins. Si vous ne trouvez toujours pas de réponse à votre question ou votre problème, alors cliquez sur « Est-ce que la réponse a résolu votre problème ? ». Vous accéderez alors au formulaire de demande d'assistance SAV, qu'il vous suffira de compléter pour valider votre demande et obtenir de l'aide.CONDITIONS DE GARANTIE
La garantie couvre l'ensemble des pannes survenant dans le cadre d'une utilisation normale, conforme aux usages et spécifications présentes sur le manuel d'utilisation. Cette garantie ne s'applique pas aux problèmes d'emballage ou de transport pendant l'expédition du produit par son propriétaire. Elle n'inclut également pas l'usure normale du produit, ni la maintenance ou le remplacement de pièces consommables.EXCLUSION DE GARANTIE
- Les accessoires et les pièces d'usure (\*). - L'entretien normal de l'appareil. - Toutes pannes survenant par suite d'une mauvaise utilisation (chocs, non-respect des préconisations d'alimentation électrique, mauvaises conditions d'utilisation, etc.), d'un entretien insuffisant ou d'un détournement de fonction de l'appareil, ainsi que l'usage d'accessoires non appropriés. - Les dommages d'origine externe : incendie, dégâts des eaux, surtension électrique, etc. - Tout matériel qui aura été démonté même partiellement par des personnes autres que celles habilitées (notamment l'utilisateur). - Les produits dont le numéro de série serait absent, détérioré ou illisible que ne permettrait pas son identification. - Les produits soumis à la location, à la démonstration ou à l'exposition. (\*) Certaines pièces de votre appareil dites pièces d'usure ou consommables se détériorent avec le temps et la fréquence d'usage de votre appareil. Cette usure est normale, mais peut être accentuée par des mauvaises conditions d'utilisation ou entretien de votre appareil. Ces pièces ne sont donc pas couvertes par la garantie. Les accessoires fournis avec l'appareil sont également exclus du champ de la garantie. Ils ne peuvent donc être ni échangés, ni remboursés. Toutefois, certains accessoires peuvent être directement achetés via notre site : https://sav.hkoenig.com/.ENVIRONNEMENT
ATTENTION :
 Ne jetez pas cet appareil avec d'autres produits ménagers. Il existe un tri sélectif de ces déchets dans les municipalités. Demandez-leur quels sont les endroits où vous pouvez jeter cet appareil. En fait, les produits électriques et électroniques contiennent des substances dangereuses qui ont des effets nocifs sur l'environnement et la santé humaine, c'est pour cette raison qu'il doit être recyclé. Le symbole ici, un conteneur à déchets sur roues marqué d'une croix, indique que les équipements électriques et électroniques doivent être choisis avec soin. Adeva SAS / H.Koenig Europe - 8 rue Marc Seguin - 77290 Mitry Mory - France www.hkoenig.com - sav@hkoenig.com - contact@hkoenig.com - Tél: +33 1 64 67 00 05DEUTSCH
| 4 pcs | 2 pcs | 2 pcs | |
| ics | 1 pcs | 1 pcs | |
| 1 pcs | cs | 1 pcs | |
| 2 pcs | | | |
| [KKSH]A M6-14 2 pcs | B M6 2 pcs | C M6-20 22 pcs | D M6 22 pcs |
| (CD64) 4 pcs | (SDCZ) CS | (2AK2) | (875C) |
| pcs | | | |
flowchart
graph TD
A["③"] --> B["④"]
B --> C["①"]
C --> D["②"]
D --> E["③"]
style A fill:#f9f,stroke:#333
style B fill:#ccf,stroke:#333
style C fill:#cfc,stroke:#333
style D fill:#fcc,stroke:#333
style E fill:#ffc,stroke:#333
natural_image
Line drawing of a mechanical component with labeled parts (10 and 12), no readable text or symbols beyond labelsnatural_image
Simple line drawing of a circular device with a flower-like pattern on the top, mounted on a base with no text or symbols.natural_image
Line drawing of a portable grill with dome top and wheels (no text or symbols)Gründlich lesen!
WARNUNG! Dieser Grill wird sehr heiß, bewegen Sie ihn nicht während des Betriebs! Nicht im Innenbereich verwenden! WARNUNG! Keinen Spiritus oder Benzin zum Anzünden oder Nachzünden verwenden! Nur Feueranzünder nach EN 1860-3 verwenden! WARNUNG! Halten Sie Kinder und Haustiere fern.Warnung
 Lesen Sie dieses Handbuch und alle Sicherheitsinformationen vor dem ersten Gebrauch sorgfältig durch. Andernfalls kann es zu schweren oder tödlichen Verletzungen oder Sachschäden kommen. Achten Sie auf eine ordnungsgemäße Montage des Grills. Halten Sie sich an die dem Grill beiliegende Montageanleitung. Verwenden Sie den Grill nur, wenn er vollständig zusammengebaut ist Der Grill muss vor der Verwendung auf einer sicheren, ebenen Fläche aufgestellt werden. Verwenden Sie den Grill ausschließlich auf hitzebeständigen und feuerfesten Untergründen. Bitte stellen Sie vor dem ersten Gebrauch sicher, dass der Grill ohne Lebensmittel einmal für 30 Minuten aufgeheizt wird. Verwenden Sie nur zugelassene Grillholzkohle oder Grillbriketts, die der EN 1860-3 entsprechen. Decken Sie den Feuerrost mit brennbarem Material ab, ohne ihn zu stapeln. Verwenden Sie nur zugelassene feste Anzündhilfen, die der EN 1860-3 entsprechen. Halten Sie sich an die beiliegenden Anweisungen zur bestimmungsgemäßen Verwendung des Produkts. Verschließen Sie die Anzünder sofort nach Gebrauch und lagern Sie sie nicht in der Nähe des Grills. Grillen Sie nicht, bevor der Brennstoff eine Ascheschicht aufweist. Verwenden Sie den Grill nicht, um andere Substanzen und Materialien als Lebensmittel zu erhitzen. Verwenden Sie den Grill nicht als Heizung. Das Rad mit Bremse sollte vorne sein. Verwenden Sie den Grill nicht in geschlossenen Räumen, Garagen, Zelten oder anderen geschlossenen Orten. Die dabei entstehende Hitze und Funken können einen Brand verursachen. Die Entwicklung von Kohlenmonoxid kann in geschlossenen Räumen zum Ersticken führen. Verwenden Sie den Grill nicht unter brennbaren Dächern, Unterständen und ähnlichen Orten. Achten Sie darauf, den Grill in einem Sicherheitsabstand von 2 Metern zu brennbaren Materialien zu halten. Diese könnten durch Hitzeentwicklung oder Funkenflug entzündet werden. Lassen Sie den heißen Grill niemals unbeaufsichtigt. Achtung: Bevor Sie Ihren Grill mit einer geeigneten Abdeckung schützen, muss er vollständig abgekühlt sein! Andernfalls besteht Brand- und Entflammbarkeitsgefahr! Achten Sie darauf, beim Berühren des Grills während des Betriebs immer Ofenhandschuhe zu tragen, z. Öffnen Sie die Lüftungsschlitze oder legen Sie mehr Holzkohle in den Grill. Tragen Sie beim Grillen keine zu weite oder lockere Kleidung, die mit der Kohle oder dem Feuer in Berührung kommen könnte. Verwenden Sie den Grill niemals bei extremem Wetter. Verwenden Sie niemals Wasser, um brennende Holzkohle zu löschen. Schließen Sie stattdessen die Belüftungsöffnungen und den Deckel, bis das Feuer gelöscht ist. Dieser Grill ist nur für den privaten Gebrauch bestimmt!WARNUNG Erstickungsgefahr! Der Grill ist nur für den
Gebrauch im Freien bestimmt. Er darf nicht in einem Gebäude, einer Garage oder einem anderen geschlossenen Raum verwendet werden. Es können sich giftige Dämpfe bilden, die zum Ersticken führen. Sicherheitsabstand :  Halten Sie einen Mindestabstand von 3 m zu erhöhten Strukturen, Mauern, Rampen und anderen Strukturen ein.Wie es funktionniert ?
Kamado starten
Um ein Feuer zu entzünden, legen Sie einige Anzündwürfel oder feste Anzünder auf die Kohleplatte im Sockel des Kamado. Legen Sie dann 2 oder 3 Handvoll Holzkohlestücke darüber. Vorsicht! Verwenden Sie kein Benzin, Testbenzin, Feuerzeugbenzin, Alkohol oder andere ähnliche Chemikalien zum Anzünden oder Wiederanzünden. Vorsicht! Überladen Sie das Gerät nicht mit Brennstoff. Wenn das Feuer zu stark ist, kann dies den Kamado beschädigen. Öffnen Sie die untere Entlüftung und zünden Sie die Feueranzünder mit einem langen Feuerzeug oder Sicherheitsstreichhölzern an. Öffnen oder lösen Sie den oberen Deckel nicht mit Gewalt. Warten, bis der gesamte Brennstoff verbraucht und erloschen ist. Wenn das Feuer zu hoch brennt, könnte es die Filzdichtung beschädigen, bevor sie richtig ausgereift ist. Überprüfen Sie nach dem ersten Gebrauch alle Befestigungselemente auf festen Sitz. Das Metallband, das Ihren Deckel mit der Basis verbindet, dehnt sich durch die Hitze aus und kann sich lösen. Es wird empfohlen, das Band zu überprüfen und gegebenenfalls mit einem Schraubenschlüssel festzuziehen. Jetzt ist Ihr Kamado einsatzbereit.Löschen
Um das Feuer zu löschen, hören Sie einfach auf, Brennstoff nachzufüllen, und schließen Sie alle Lüftungsöffnungen und den Deckel, damit das Feuer auf natürliche Weise erlöschen kann. Vorsicht! Kein Wasser zum Löschen verwenden.Lagerung
Wenn Sie den Grill nicht verwenden, lagern Sie ihn bitte an einem trockenen Ort und decken Sie den Kamado nach dem vollständigen Abkühlen mit einer geeigneten Regenhülle ab. Lassen Sie ihn nicht draußen stehen, damit er nicht bei Regen nass wird. Wenn Sie den Kamado verwenden, drücken Sie beide Feststellräder nach unten, um zu verhindern, dass sich das Gerät während des Gebrauchs bewegt. Uber den Winter: Es wird empfohlen, den Kamado zum vollständigen Schutz in einer Garage, einem geschlossenen Raum oder Schuppen aufzubewahren.Reinigung
Reinigen Sie den Kamado immer, wenn er vollständig abgekühlt ist. Der Kamado ist selbstreinigend. Erhitzen Sie ihn 30 Minuten lang auf 260°C und er wird alle Lebensmittel und Rückstände verbrennen. Vorsicht! Verwenden Sie KEIN Wasser oder andere Arten von Reinigungsmitteln, um das Innere Ihres Kamado zu reinigen. Die Wände sind porös und absorbieren die Flüssigkeiten, dies könnte dazu führen, dass der Kamado bricht. Wenn der Ruß oder die Asche übermäßig wird, verwenden Sie eine Drahtbürste, um die Kohlenstoffreste vor dem nächsten Gebrauch abzukratzen. Verwenden Sie zum Reinigen der Gitter einen nicht scheuernden Reiniger, sobald das Gerät vollständig abgekühlt ist. Um die äußere Oberfläche zu reinigen, warten Sie, bis der Kamado abgekühlt ist. Bitte spülen Sie die Oberfläche nicht direkt mit Wasser ab, es wird empfohlen, ein feuchtes Tuch mit einem milden Reinigungsmittel zu verwenden. Gehen Sie während der Reinigung vorsichtig vor, wenn Sie den Feuerring und den Grill bewegenInstandhaltung
Bitte überprüfen Sie regelmäßig alle Verbindungen und ziehen Sie diese ggf. nach. Ziehen Sie die Bänder fest und ölen Sie das Scharnier 2 Mal im Jahr oder öfter, falls erforderlich. Um zu vermeiden, dass der Beistelltisch lange hält, sorgen Sie auch dafür, dass er in einem trockenen Zustand ist. Nennlast innerhalb von 5 kg. Die Filzdichtung regelmäßig ersetzen (Es wird allgemein angenommen, dass die Filzdichtung ersetzt werden sollte, wenn Rauch aus dem Spalt zwischen dem keramischen Ofenkörper austritt).Nutzungs- und Pflegeinformationen
Stellen Sie sicher, dass der Kamado auf einer dauerhaften, flachen, ebenen, hitzebeständigen, nicht brennbaren Oberfläche und fern von brennbaren Gegenständen aufgestellt wird (keine brennbaren Materialien in der Nähe). Stellen Sie sicher, dass der Kamado mindestens 2 m über dem Gerät frei ist. Der Grill sollte 2m von allen Gegenständen darüber und in der Umgebung entfernt sein. Um ein Feuer zu entzünden, legen Sie einige Anzündwürfel oder feste Anzünder auf die Kohleplatte im Sockel des Kamado. Legen Sie dann 2 oder 3 Handvoll Stück Holzkohle über die Oberseite der Anzünder. Vorsicht! Verwenden Sie kein Benzin, Testbenzin, Feuerzeugbenzin, Alkohol oder andere ähnliche Chemikalien zum Anzünden oder Wiederanzünden. Vorsicht! Grillen Sie nicht, bevor der Brennstoff eine Ascheschicht aufweist. Öffnen Sie die untere Lüftungsöffnung und zünden Sie die Feueranzünder mit einem langnasigen Feuerzeug oder Streichhölzern an. Lassen Sie die untere Entlüftung und den Deckel nach dem Entfachen etwa 10 Minuten lang geöffnet, um eine kleine Schicht aus heißer Glut zu bilden. Es wird empfohlen, die Kohlen nicht zu schüren oder zu wenden, sobald sie angezündet sind. Dadurch brennt die Holzkohle gleichmäßiger und effizienter. Verwenden Sie immer nur hitzebeständige Handschuhe, wenn Sie mit heißer Keramik oder Kochflächen hantieren.Leitfaden zum Kochen bei niedrigen Temperaturen
Zünden Sie die Holzkohle gemäß den obigen Anweisungen an. Öffnen Sie die untere Entlüftung vollständig und lassen Sie den Deckel etwa 10 Minuten lang geöffnet, um eine kleine Schicht aus heißer Glut zu bilden. Überwachen Sie den Kamado, bis er die gewünschte Temperatur erreicht hat. Schließen Sie die untere Entlüftung vollständig, um die Temperatur zu halten. Sie können den Kamado jetzt zum Grillen verwenden. Vorsicht! Beim Öffnen des Deckels bei hohen Temperaturen ist es wichtig, den Deckel nur leicht anzuheben, damit die Luft langsam und sicher eintreten kann, um Rückzug oder Aufflammen zu vermeiden, die Verletzungen verursachen können. Tragen Sie immer hitzebeständige Handschuhe, wenn Sie mit heißer Keramik oder Kochflächen hantieren.Räucherei
Befolgen Sie die obigen Anweisungen, als würden Sie einen langsamen Garvorgang starten (Anleitung zum Garen bei niedriger Temperatur). Uberwachen Sie den Kamado, bis er die gewünschte Temperatur erreicht hat. Lassen Sie die untere Entlüftung leicht geöffnet. Schließen Sie die obere Belüftungsöffnung und überprüfen Sie die Temperatur noch einige Minuten lang. Streuen Sie die Holzspäne mit hitzebeständigen Handschuhen kreisförmig über die heiße Holzkohle. Sie können den Kamado jetzt verwenden.Leitfaden zum Kochen bei hohen Temperaturen
Zünden Sie die Holzkohle gemäß den Anweisungen an. Schließen Sie den Deckel und öffnen Sie die oberen und unteren Belüftungsöffnungen vollständig. Uberwachen Sie den Kamado, bis er die gewünschte Temperatur erreicht hat. Schließen Sie die obere Entlüftung halb und überprüfen Sie die Temperatur noch einige Minuten lang. Sie können den Kamado jetzt zum Kochen verwenden. Tragen Sie immer hitzebeständige Handschuhe, wenn Sie mit heißer Keramik oder Kochflächen hantieren.Nachfüllen
Bei geschlossenen Belüftungsöffnungen bleibt der Kamado mehrere Stunden auf hoher Temperatur. Wenn Sie eine längere Garzeit benötigen (z. B. beim Braten eines ganzen Bratens oder langsames Räuchern), müssen Sie möglicherweise mehr Holzkohle hinzufügen. Fügen Sie einfach etwas zusätzliche Holzkohle hinzu und fahren Sie wie oben fort. Leitfaden für die Kochtemperatur| Langsames Garen / Räuchern (110°C - 135°C) | Untere Entlüftung | Obere Entlüftung | |
| Brust | 2 Std pro kg | ||
| Gezogenes | 2 - 4 Std pro kg | | |
| Schweinefleisch | 3 - 4 Std | ||
| Ganze Broiler | 3 - 5 Std | ||
| Rippen | 9 + Std | ||
| Braten | |||
| Grillen (160°C - 185°C) | Untere Entlüftung | Obere Entlüftung | |
| Fisch | 15 - 20 min | ||
| Schweinefilet | 15 - 30 min | ||
| Broiler-Teile | 30 - 45 min | ||
| Ganze Broiler | 1 - 1.5 Std | | |
| Lammkeule Truthahn | 3 - 4 Std | ||
| Schweineschulter / Schinken | 2 - 4 Std | ||
| 2 - 5 Std | |||
| Grillen (260°C - 370°C) | Untere Entlüftung | Obere Entlüftung | |
| Steaks | 5 - 8 min | ||
| Schweine | 6 - 10 min | | |
| koteletts | 6 - 10 min | ||
| Burger | 6 - 10 min | ||
| | ||
GARANTIE
Die Garantiezeit für unsere Produkte beträgt 2 Jahre, sofern keine anderen Bestimmungen gelten, ab dem Datum des ursprünglichen Kaufs oder ab dem Lieferdatum. Bei Problemen oder Fragen können Sie sich an unsere Hilfeseiten, Tipps zur Fehlerbehebung, FAQs und Bedienungsanleitungen auf unserer Kundendienst-Website wenden: https://sav.hkoenig.com. Wenn Sie den Referenznamen Ihres Geräts in die Suchleiste eingeben, erhalten Sie Zugang zu allen verfügbaren Online-Supports. Wenn Sie immer noch keine Antwort auf Ihre Frage oder Ihr Problem finden, dann klicken Sie auf "Hat die Antwort Ihr Problem gelöst?". Sie können dieses Formular ausfüllen, um Ihre Anfrage zu bestätigen und Hilfe zu erhalten.GARANTIEBEDINGUNGEN
Die Garantie deckt alle Defekte ab, die bei normalem, bestimmungsgemäßem Gebrauch und den in der Bedienungsanleitung enthaltenen Spezifikationen auftreten. Diese Garantie gilt nicht für Probleme mit der Verpackung oder dem Transport während des Versands des Produkts durch den Eigentümer. Sie umfasst auch nicht den normalen Verschleiß des Produkts, die Wartung oder den Austausch von Verschleißteilen.AUSSCHLUSS DER GARANTIE
- Zubehör und Verschleißteile (\*). - Die normale Wartung des Geräts. - Alle Defekte, die durch unsachgemäßen Gebrauch (Stöße, Nichteinhaltung der empfohlenen Stromzufuhr, schlechte Nutzungsbedingungen usw.), unzureichende Wartung oder Zweckentfremdung des Geräts auftreten, sowie die Verwendung von ungeeignetem Zubehör. - Schäden durch äußere Einflüsse: Brand, Wasserschäden, elektrische Überspannung usw. - Alle Geräte, die von anderen als den befugten Personen (insbesondere dem Nutzer) auch nur teilweise auseinandergebaut wurden. - Produkte, deren Seriennummer fehlt, beschädigt oder unleserlich ist, sodass sie nicht identifiziert werden können. - Produkte, die vermietet, vorgeführt oder ausgestellt werden. (\*) Einige Teile Ihres Geräts, die als Verschleißteile oder Verbrauchsmaterialien bezeichnet werden, verschleiißen mit der Zeit und der Häufigkeit der Nutzung Ihres Geräts. Diese Abnutzung ist normal, kann aber durch falsche Nutzung oder Pflege Ihres Geräts noch verstärkt werden. Diese Teile sind daher nicht durch die Garantie abgedeckt. Das mit dem Gerät gelieferte Zubehör ist ebenfalls von der Garantie ausgeschlossen. Sie können daher weder umgetauscht noch erstattet werden. Einige Zubehörteile können jedoch direkt über unsere Website https://sav.hkoenig.com/ erworben werden.UMWELT
ACHTUNG:
 Entsorgen Sie dieses Produkt nicht mit anderen Haushaltsgegenständen. Dieses Produkt muss separat bei bestimmten Stellen entsorgt werden, informieren Sie sich bei lokalen Behörden über die Stellen, wohin das Produkt gebracht werden kann. In der Tat, elektrische und elektronische Produkte beinhalten gefährliche Stoffe, die eine schädliche Auswirkung auf die Umwelt und menschliche Gesundheit haben und recycelt werden müssen. Dieses Symbol bedeutet, dass elektrische und elektronische Geräte vorsichtig gewählt werden müssen, die Rollcontainer werden mit einem Kreuz markiert. Adeva SAS / H.Koenig Europe - 8 rue Marc Seguin - 77290 Mitry Mory - France www.hkoenig.com - sav@hkoenig.com - contact@hkoenig.com - Tél: +33 1 64 67 00 05NEDERLANDS
 | | | |
| 2 pcs | 2 pcs | ||
| pcs | 1 pcs | 1 pcs | ; |
| 1 pcs | | 1 pcs | ; |
| 13 2 pcs | | 1 pcs | 1 pcs |
| 4 pcs | cs | | ics |
| | | |
| cs | | pcs | |
| M5-40 2 pcs | | | |
flowchart
graph TD
A["③"] --> B["④"]
B --> C["①"]
C --> D["②"]
D --> E["③"]
style A fill:#f9f,stroke:#333
style B fill:#ccf,stroke:#333
style C fill:#cfc,stroke:#333
style D fill:#fcc,stroke:#333
style E fill:#ffc,stroke:#333
natural_image
Technical line drawing of a mechanical component with labeled parts (10 and 12), no readable text or symbols beyond labelsnatural_image
Simple line drawing of a circular device with a flower-like symbol on the top, mounted on a base with no text or symbols.natural_image
Line drawing of a portable rice cooker with wheels and top dome (no text or symbols)Lees aandachtig!
WAARSCHUWING! Deze barbecue wordt erg heet, verplaats hem niet tijdens gebruik Niet binnenshuis gebruiken! WAARSCHUWING! Gebruik geen spiritus of benzine voor het aansteken of heraansteken! Gebruik alleen aanmaakblokjes die voldoen aan EN 1860-3! WAARSCHUWING! Houd kinderen en huisdieren uit de buurtWaarschuwingsbericht
 Lees voor het eerste gebruik deze handleiding en alle veiligheidsinformatie aandachtig door. Als u dit niet doet, kan dit leiden tot ernstig of dodelijk letsel of schade aan eigendommen. Let op een juiste montage van de grill. Houd u aan de montage-instructies die bij de grill zijn geleverd. Gebruik de barbecue pas nadat deze volledig is gemonteerd De grill moet vóór gebruik op een veilige, vlakke ondergrond worden geplaatst. Gebruik de grill uitsluitend op hittebestendige en brandwerende ondergronden. Zorg ervoor dat de grill voor het eerste gebruik een keer 30 minuten wordt verwarmd zonder voedsel. Gebruik alleen goedgekeurde barbecue-houtskool of barbecuebriketten die voldoen aan EN 1860-3. Bedek het vuurrooster met brandbaar materiaal zonder het te stapelen. Gebruik alleen goedgekeurde solide aanmaakblokjes die voldoen aan EN 1860-3. Houd u aan de bijgevoegde instructies voor het juiste gebruik van het product. Sluit de aanmaakblokjes direct na gebruik af en bewaar ze niet in de buurt van de barbecue. Niet koken voordat de brandstof een laagje as heeft. Gebruik de grill niet om andere stoffen en materialen dan voedsel te verhitten. Gebruik de barbecue niet als verwarming. Het wiel met rem moet vooraan staan. Gebruik de grill niet in gesloten ruimtes, garages, tenten of andere gesloten plaatsen. De resulterende hitte en vonken kunnen brand veroorzaken. De ontwikkeling van koolmonoxide kan verstikking veroorzaken in gesloten ruimten. Gebruik de grill niet onder brandbare daken, schuilplaatsen en soortgelijke plaatsen. Zorg ervoor dat u de barbecue op een veilige afstand van 2 meter van brandbare materialen houdt. Deze kunnen worden ontstoken door warmteontwikkeling of rondvliegende vonken. Laat de hete barbecue nooit onbeheerd achter. Let op: voordat u uw grill met een geschikte hoes beschermt, moet deze volledig zijn afgekoeld! Anders bestaat er gevaar voor brand en ontvlambaarheid! Zorg ervoor dat u altijd ovenwanten draagt wanneer u de grill tijdens gebruik aanraakt, b.v. het openen van de ventilatieopeningen of het plaatsen van meer houtskool in de grill. Draag geen te wijde of losse kleding die tijdens het grillen in contact kan komen met de kolen of het vuur. Gebruik de barbecue nooit bij extreem weer. Gebruik nooit water om brandende houtskool te blussen. Sluit in plaats daarvan de ventilatieopeningen en het deksel totdat het vuur is gedoofd. Deze barbecue is alleen bedoeld voor privégebruik! Deze barbecue is alleen bedoeld voor privégebruik! WAARSCHUWING Verstikkingsgevaar! De barbecue is uitsluitend bestemd voor gebruik buitenshuis. Hij mag niet worden gebruikt in een gebouw, een garage of een andere gesloten ruimte. Er kunnen giftige dampen ontstaan die verstikking veroorzaken. Veiligheidsafstand :  Bewaar een minimumafstand van 3 m tot verhoogde structuren, muren, hellingen en andere structuren.Hoe het werkt ?
De kamado genezen
Om een vuurtje te maken plaats je wat aanmaakblokjes of stevige aanmaakblokjes op de houtskoolplaat in de basis van de Kamado. Leg er dan 2 of 3 handenvol houtskoolbrokken bovenop. Voorzichtigheid! gebruik geen benzine, terpentine, aanstekervloeistof, alcohol of andere vergelijkbare chemicaliën voor het aansteken of opnieuw aansteken. Voorzichtigheid! overlaad het apparaat niet met brandstof. Als het vuur te intens is, kan dit de Kamado beschadigen. Open de onderste opening en steek de aanmaakblokjes aan met een aansteker met lange neus of veiligheidslucifers. Open of laat het bovendeksel niet krachtig los. Laat staan totdat alle brandstof is verbruikt en gedoofd. Als het vuur te hoog brandt, kan dit de vilten pakking beschadigen voordat deze de kans heeft gehad om goed te rijpen. Inspecteer na het eerste gebruik alle bevestigingen op vastheid. De metalen band die uw deksel met de bodem verbindt, zet uit door de hitte en kan losraken. Het wordt aanbevolen om de band te controleren en indien nodig aan te halen met een sleutel. Nu is je Kamado klaar voor gebruik.Blussen
Om het apparaat te doven, stopt u gewoon met het toevoegen van brandstof en sluit u alle ventilatieopeningen en het deksel zodat het vuur op natuurlijke wijze kan doven. Voorzichtigheid! gebruik geen water om te blussen.Opslag
Bewaar hem op een droge plaats wanneer hij niet wordt gebruikt en bedek de Kamado zodra deze volledig is afgekoeld met een geschikte regenhoes. Laat het niet buiten staan om nat te worden als het regent. Wanneer u de Kamado gebruikt, duwt u beide vergrendelwielen naar beneden om te voorkomen dat het apparaat tijdens het gebruik gaat bewegen. Overwinteren Het wordt aanbevolen om de Kamado in een garage, een afgesloten ruimte of schuur op te slaan voor volledige bescherming.Schoonmaak
Maak de Kamado altijd schoon als deze volledig is afgekoeld. De Kamado is zelfreinigend. Verwarm het gedurende 30 minuten tot 260°C en het zal al het voedsel en vuil wegschroeien. Voorzichtigheid! Gebruik GEEN water of andere reinigingsproducten om de binnenkant van uw Kamado schoon te maken. De wanden zijn poreus en zullen de vloeistoffen absorberen, hierdoor kan de Kamado barsten. Als het roet of de as overmatig wordt, gebruik dan een staalborstel om de koolstofresten weg te schrapen voor het volgende gebruik. Gebruik een niet-schurend reinigingsmiddel om de roosters schoon te maken zodra het apparaat volledig is afgekoeld. Wacht met het reinigen van de buitenkant tot de Kamado is afgekoeld. Spoel het oppervlak niet direct met water af, het wordt aanbevolen om een vochtige doek met een mild reinigingsmiddel te gebruiken. Wees tijdens het schoonmaken voorzichtig bij het verplaatsen van de vuurring en de vuurkist.Onderhoud
Controleer regelmatig alle aansluitingen en draai ze indien nodig vast. Span de banden aan en olie het scharnier 2 keer per jaar of meer indien nodig. Om een lange blootstelling aan de bijzettafel te voorkomen, moet u ervoor zorgen dat deze ook in een droge toestand wordt gemaakt. Nominale belasting binnen 5 kg. Om de vilten pakking regelmatig te vervangen (algemeen wordt aangenomen dat de vilten pakking moet worden vervangen wanneer er rook uit de opening tussen het keramische ovenlichaam komt).Informatie over gebruik en onderhoud
Zorg ervoor dat de Kamado op een permanent, vlak, waterpas, hittebestendig, niet-ontvlambaar oppervlak staat, uit de buurt van brandbare voorwerpen (geen brandbare materialen in de buurt). Zorg ervoor dat de Kamado een vrije ruimte van minimaal 2 meter boven het hoofd heeft. De grill moet 2 meter verwijderd zijn van alle objecten erboven en in de omgeving. Om een vuurtje te maken plaats je wat aanmaakblokjes of stevige aanmaakblokjes op de houtskoolplaat in de basis van de Kamado. Plaats vervolgens 2 of 3 handenvol houtskoolklompen bovenop de aanmaakblokjes. Voorzichtigheid! gebruik geen benzine, terpentine, aanstekervloeistof, alcohol of andere vergelijkbare chemicaliën voor het aansteken of opnieuw aansteken. Voorzichtigheid! kook niet voordat de brandstof een laagje as heeft. Open de onderste ventilatieopening en steek de aanmaakblokjes aan met een lange neusaansteker of veiligheidslucifers. Laat de onderste ventilatieopening en het deksel ongeveer 10 minuten openstaan om een klein bed van hete sintels te maken. Het wordt aanbevolen om de kolen niet op te stoken of om te draaien als ze eenmaal branden. Hierdoor kunnen de houtskool gelijkmatiger en efficiënter branden. Gebruik altijd alleen hittebestendige handschoenen bij het hanteren van hete keramiek of kookoppervlakken.Gids voor koken op lage temperatuur
Steek de houtskoolklomp aan volgens bovenstaande instructies. Open de onderste ventilatieopening volledig en laat het deksel ongeveer 10 minuten openstaan om een klein bed van hete sintels te maken. Houd de Kamado in de gaten totdat deze de gewenste temperatuur heeft bereikt. Sluit de onderste ventilatieopening volledig om de temperatuur op peil te houden. Je bent nu klaar om de Kamado te gebruiken om op te koken. Voorzichtigheid! Bij het openen van het deksel bij hoge temperaturen is het essentieel om het deksel slechts een klein stukje op te tillen, zodat de lucht langzaam en veilig kan binnendringen en backdraft of opflakkeringen die letsel kunnen veroorzaken, wordt voorkomen. Gebruik altijd hittebestendige handschoenen bij het hanteren van hete keramiek of kookoppervlakken.Rokerij
Volg de bovenstaande instructies alsof u een slowcooking start (Gids voor koken op lage temperatuur). Houd de Kamado in de gaten totdat deze de gewenste temperatuur heeft bereikt. Laat de onderste ventilatieopening een beetje open. Sluit de bovenste ventilatieopening en blijf de temperatuur nog een paar minuten controleren. Strooi met hittebestendige handschoenen de houtsnippers in een cirkel over de hete houtskool. Je bent nu klaar om de Kamado te gebruiken.Gids voor koken op hoge temperatuur
Steek de brok houtskool aan volgens de instructies. Sluit het deksel en open de ventilatieopeningen aan de boven- en onderkant volledig. Houd de Kamado in de gaten totdat deze de gewenste temperatuur heeft bereikt. Sluit de bovenste ventilatieopening halverwege en blijf de temperatuur nog een paar minuten controleren. Je bent nu klaar om de Kamado te gebruiken om op te koken. Gebruik altijd hittebestendige handschoenen bij het hanteren van hete keramiek of kookoppervlakken.Tanken
Met gesloten ventilatieopeningen blijft de Kamado enkele uren op hoge temperatuur. Als je een langere kooktijd nodig hebt (bijvoorbeeld bij het braden van een heel stuk vlees of langzaam roken), kan het nodig zijn om meer houtskool toe te voegen. Voeg gewoon wat extra houtskool toe en ga verder zoals hierboven.Kooktemperatuurgids
| Langzaam koken / roken (110 °C - 135 °C) | Onderste ventilatieopening | Bovenste ventilatieopening | |
| Borst | 2 uur per kg | ||
| Varkensvlees | 2 - 4 uur per kg | | |
| Hele vleeskuikens | 3 - 4 uur | ||
| Ribben | 3 - 5 uur | ||
| Gebraden | 9 + uur | ||
| Grillen (160 °C - 185 °C) | Onderste ventilatieopening | Bovenste ventilatieopening | |
| Vis | 15 - 20 min | ||
| Varkenshaas | 15 - 30 min | ||
| Vleeskuikens onderdelen | 30 - 45 min | ||
| Hele vleeskuikens | 1 - 1.5 uur | | |
| Lamsbout Turkije | 3 - 4 uur | ||
| Varkensschouder / ham | 2 - 4 uur | ||
| 2 - 5 uur | |||
| Grillen (260 °C - 370 °C) | Onderste ventilatieopening | Bovenste ventilatieopening | |
| Steaks | 5 - 8 min | ||
| Varkenskarbonades | 6 - 10 min | | |
| Hamburgers | 6 - 10 min | ||
| Worsten | 6 - 10 min | ||
| Open ○ Gesloten ● | |||
GARANTIE
De garantieperiode op onze producten is 2 jaar, tenzij anders vermeld, beginnend vanaf de datum van de initiele aankoop of bezorgdatum. Als u problemen of vragen heeft, kunt u eenvoudig onze hulppagina's bezoeken voor tips om problemen op te lossen, de FAQ's en andere gebruikershandleidingen op onze website: https://sav.hkoenig.com. Door de referentienaam van uw apparaat in de zoekbalk te typen, krijgt u toegang tot alle beschikbare online hulpmiddelen, ontworpen om aan uw behoeften te voldoen. Als u toch niet geen antwoord op uw vraag kunt vinden, klik dan op "Heeft het antwoord uw probleem opgelost? Hierdoor gaat u naar het Aanvraagformulier voor Klantenondersteuning, dat u in kunt vullen om uw verzoek te valideren en hulp te ontvangen.GARANTIEVOORWAARDEN
De garantie dekt alle mankementen die voortkomen uit normaal gebruik, volgens de sectie gebruik en specificaties in de gebruikershandleiding. Deze garantie omvat niet verpakkings- of transportproblemen tijdens het vervoer van het product door de eigenaar. Het omvat ook niet de normale slijtage van het product, noch het onderhoud of vervangen van verbruiksartikelen.UITSLUITINGEN VAN DE GARANTIE
- Accessoires en verbruiksartikelen (\*). - Normaal onderhoud van het apparaat. - Alle mankementen veroorzaakt door verkeerd gebruik (schokken, het niet opvolgen van de aanbevolen stroomvoorziening, in slechte omstandigheden gebruiken, etc.), onvoldoende onderhoud of ondeugdelijk gebruik van het apparaat, alsook het gebruik van ongeschikte accessoires. - Schade van buitenaf: vuur, waterschade, elektrische stroompiek, etc. - Apparaten die uit elkaar zijn gehaald, ook gedeeltelijk, door personen die niet er niet gekwalificeerd voor zijn (zoals de gebruiker). - Producten waarvan het serienummer verdwenen, beschadigd of onleesbaar is, waardoor we het niet kunnen identificeren. - Producten die verhuurd werden of ter demonstratie of showmodel waren. (\*) Sommige onderdelen van uw apparaat, genaamd verbruiksartikelen, slijten naar verloop van tijd en bij veel gebruik van uw apparaat. Deze slijtage is normaal, maar kan verergerd worden door slechte omstandigheden of onderhoud van uw apparaat. Deze onderdelen worden daarom niet gedekt door de garantie. De accessoires meegeleverd met het apparaat zijn ook uitgesloten van de garantie. Ze kunnen niet vervangen of gerestitueerd worden. Echter, sommige accessoires zijn te koop via onze website: https://sav.hkoenig.com/.MILIEU
LET OP:
 Gooi dit apparaat niet weg als normaal huishoudelijk afval. Er is een scheiding voor afgedankte elektrische apparaten, vraag uw lokale overheid waar u dit apparaat kunt inleveren. Elektrische producten bevatten gevaarlijke stoffen die schadelijk kunnen zijn voor het milieu of mensen en dienen te worden gerecycled. Dit symbool geeft aan dat elektrische apparaten niet bij normaal afval mag, een rolcontainer gemarkeerd met een kruis. Adeva SAS / H.Koenig Europe - 8 rue Marc Seguin - 77290 Mitry Mory - France www.hkoenig.com - sav@hkoenig.com - contact@hkoenig.com - Tél: +33 1 64 67 00 05ESPANOL
| 4 pcs | 2 2 pcs | 3 2 pcs | 4 pcs |
| 5 1 pcs | 6 1 pcs | 7 1 pcs | 8 1 pcs |
| 1 pcs | 10 1 pcs | 11 1 pcs | 12 2 pcs |
| 13 2 pcs | 14 2 pcs | 15 1 pcs | 16 1 pcs |
| [22DW]A M6-14 2 pcs | B M6 2 pcs | C M6-20 22 pcs | D M6 22 pcs |
| [CV6T]E 4 pcs | [HTKC]F 1 pcs | G 1 pcs | H 1 pcs |
| M5-40 2 pcs | J M5 2 pcs | K | |
flowchart
graph TD
A["③"] --> B["④"]
B --> C["①"]
C --> D["②"]
D --> E["③"]
style A fill:#f9f,stroke:#333
style B fill:#ccf,stroke:#333
style C fill:#cfc,stroke:#333
style D fill:#fcc,stroke:#333
style E fill:#ffc,stroke:#333
natural_image
Simple line drawing of a circular device with a flower-like symbol on the top, mounted on a base with no text or symbols.natural_image
Line drawing of a large cylindrical object with a dome top and wheels, labeled with number 12 (no text or symbols on the object itself)Aviso de advertencia
 Lea detenidamente este manual y toda la información de seguridad antes del primer uso. El no hacerlo podría resultar en lesiones graves o la muerte o daños a la propiedad. Preste atención a un correcto montaje de la parrilla. Siga las instrucciones de montaje suministradas con la parrilla. Use la parrilla solo después de que esté completamente ensamblada. La parrilla debe colocarse sobre una superficie plana y segura antes de su uso. Utilice la parrilla exclusivamente sobre suelos resistentes al calor y al fuego. Antes del primer uso, asegúrese de que la parrilla se calienta una vez durante 30 minutos sin alimentos. Utilice únicamente carbón para asar aprobado o briquetas para barbacoa que cumplan con la norma EN 1860-3. Cubra la parrilla de fuego con material combustible sin apilarla. Utilice únicamente iniciadores de fuego sólidos aprobados que cumplan con EN 1860-3. Respete las instrucciones adjuntas sobre el uso correcto del producto. Selle los iniciadores de fuego inmediatamente después de su uso y no los guarde cerca de la parrilla. No cocine antes de que el combustible tenga una capa de ceniza. No utilice la parrilla para calentar sustancias y materiales que no sean alimentos. No utilice la parrilla como calentador. La rueda con freno debe estar al frente. No utilice la parrilla en habitaciones cerradas, garajes, tiendas de campaña u otros lugares cerrados. El calor y las chispas resultantes pueden provocar un incendio. El desarrollo de monóxido de carbono puede causar asfixia en habitaciones cerradas. No use la parrilla debajo de techos inflamables, refugios y lugares similares. Asegúrese de mantener la parrilla a una distancia de seguridad de 2 metros de materiales inflamables. Estos podrían encenderse por generación de calor o chispas voladoras. Nunca deje desatendida la parrilla caliente. Atención: antes de proteger su parrilla con una cubierta adecuada, ¡debe estar completamente fría! ¡De lo contrario, existe riesgo de incendio e inflamabilidad! Asegúrese de usar siempre guantes para horno cuando toque la parrilla durante el funcionamiento, p. abriendo las rejillas de ventilación o poniendo más carbón en la parrilla. No use ropa demasiado larga o suelta que pueda entrar en contacto con las brasas o el fuego al asar. Nunca use la parrilla en condiciones climáticas extremas. Nunca use agua para extinguir el carbón encendido. En su lugar, cierre las rejillas de ventilación y la tapa hasta que se extinga el fuego. ¡Esta parrilla solo está diseñada para uso privado! ADVERTENCIA ¡Peligro de asfixia! La barbacoa está destinada exclusivamente al uso en exteriores. No debe utilizarse en un edificio, garaje o cualquier otro espacio cerrado. Pueden formarse humos tóxicos que provoquen asfixia. Distancia de seguridad :  Mantenga una distancia mínima de 3 m de estructuras elevadas, muros, rampas y otras estructuras.Cómo funciona ?
Curando el Kamado
Para encender un fuego, coloque algunos cubos de encendedor o encendedores sólidos en la placa de carbón en la base del Kamado. Luego coloque 2 o 3 puñados de carbón en trozos encima de ellos. ¡Precaución! no utilice gasolina, aguarrás, líquido para encendedores, alcohol u otros productos químicos similares para encender o volver a encender. ¡Precaución! no sobrecargue la unidad con combustible. Si el fuego es demasiado intenso, podría dañar el Kamado. Abra el respiradero inferior y encienda los encendedores con un encendedor de punta larga o fósforos de seguridad. No abra ni suelte la tapa superior con fuerza. Dejar hasta que todo el combustible se consuma y se apague. Si el fuego arde demasiado, podría dañar el sello de la junta de fieltro antes de que haya tenido la oportunidad de madurar adecuadamente. Después del primer uso, inspeccione todos los sujetadores para ver si están apretados. La banda de metal que conecta la tapa con la base se expandirá por el calor y podría aflojarse. Se recomienda revisar y, si es necesario, apretar la banda con una llave. Ahora su Kamado está listo para usar.Extinción
Para extinguir la unidad, simplemente deje de agregar combustible y cierre todas las ventilaciones y la tapa para permitir que el fuego se extinga naturalmente. ¡Precaución! no use agua para extinguir.Almacenamiento
Cuando no esté en uso, guárdelo en un lugar seco y cubra el Kamado una vez que se haya enfriado por completo con una cubierta impermeable adecuada. No lo dejes afuera para que se moje cuando llueva. Cuando use el Kamado, empuje hacia abajo ambas ruedas de bloqueo para evitar que la unidad se mueva durante el uso. Durante el invierno, se recomienda almacenar el Kamado en un garaje, una habitación cerrada o un cobertizo para una protección completa.Limpieza
Limpie siempre el Kamado cuando esté completamente frío. El Kamado es autolimpiante. Caliéntelo a 260°C durante 30 minutos y quemará toda la comida y los desechos. ¡Precaución! NO use agua ni ningún otro tipo de producto de limpieza para limpiar el interior de su Kamado. Las paredes son porosas y absorberán los líquidos, esto podría causar que el Kamado se agriete. Si el hollín o las cenizas se vuelven excesivos, use un cepillo de alambre para raspar los restos de carbón antes del próximo uso. Para limpiar las rejillas, use un limpiador no abrasivo una vez que la unidad se haya enfriado por completo. Para limpiar la superficie exterior, espere hasta que el Kamado se enfríe. No enjuague la superficie directamente con agua, se recomienda usar un paño húmedo con un detergente suave. Durante la limpieza, manéjelo con cuidado al mover el aro de fuego y la caja de fuego.Mantenimiento
Compruebe regularmente todas las conexiones y apriételas si es necesario. Apriete las bandas y lubrique la bisagra 2 veces al año o más si es necesario. Para evitar una exposición prolongada a la mesa auxiliar, también asegúrese de hacerlo en condiciones secas. Carga nominal dentro de 5 kg. Reemplazar la junta de fieltro regularmente (generalmente se cree que la junta de fieltro debe reemplazarse cuando sale humo del espacio entre el cuerpo del horno de cerámica).Información de uso y cuidado
Asegúrese de que el Kamado esté colocado sobre una superficie permanente, plana, nivelada, resistente al calor y no inflamable, lejos de elementos inflamables (sin materiales combustibles cerca). Asegúrese de que el Kamado tenga un mínimo de 2 m de espacio libre sobre la cabeza. La parrilla debe estar a 2 m de distancia de todos los objetos que se encuentren sobre ella y en el área circundante. Para encender un fuego, coloque algunos cubos de encendedor o encendedores sólidos en la placa de carbón en la base del Kamado. Luego coloque 2 o 3 puñados de carbón en trozos sobre la parte superior de los encendedores. ¡Precaución! no utilice gasolina, aguarrás, líquido para encendedores, alcohol u otros productos químicos similares para encender o volver a encender. ¡Precaución! no cocine antes de que el combustible tenga una capa de ceniza. Abra el respiradero inferior y encienda los encendedores con un encendedor de punta larga o fósforos de seguridad. Una vez que se haya prendido, deje el respiradero inferior y la tapa abiertos durante unos 10 minutos para construir una pequeña cama de brasas calientes. Se recomienda no avivar ni girar las brasas una vez que estén encendidas. Esto permite que los carbones se quemen de manera más uniforme y eficiente. Utilice siempre guantes resistentes al calor cuando manipule cerámica o superficies de cocción calientes.Guía de cocción a baja temperatura
Encienda el carbón en trozos de acuerdo con las instrucciones anteriores. Abra completamente el respiradero inferior y deje la tapa abierta durante unos 10 minutos para construir una pequeña cama de brasas calientes. Supervise el Kamado hasta que alcance la temperatura deseada. Cierre completamente la ventilación inferior para mantener la temperatura. Ahora está listo para usar el Kamado para cocinar. ¡Precaución! Al abrir la tapa a altas temperaturas, es esencial levantar la tapa solo un poco, permitiendo que el aire entre de forma lenta y segura, evitando cualquier retroceso o llamarada que pueda causar lesiones. Siempre use guantes resistentes al calor cuando manipule cerámica caliente o superficies para cocinar.Ahumador
Siga las instrucciones anteriores como si estuviera comenzando una cocción lenta (Guía de cocción a baja temperatura). Supervise el Kamado hasta que alcance la temperatura deseada. Deje el respiradero inferior ligeramente abierto. Cierre el respiradero superior y continúe revisando la temperatura durante unos minutos más. Usando guantes resistentes al calor, espolvorea las virutas de madera en un círculo sobre el carbón caliente. Ahora está listo para usar el Kamado.Guía de cocción a alta temperatura
Encienda el carbón en trozos de acuerdo con las instrucciones. Cierre la tapa y abra completamente las rejillas de ventilación superior e inferior. Supervise el Kamado hasta que alcance la temperatura deseada. Cierre el respiradero superior a la mitad y continúe revisando la temperatura durante unos minutos más. Ahora está listo para usar el Kamado para cocinar. Siempre use guantes resistentes al calor cuando manipule cerámica caliente o superficies para cocinar.Repostaje
Con las rejillas de ventilación cerradas, el Kamado permanece a alta temperatura durante varias horas. Si necesita un tiempo de cocción más prolongado (p. ej., al asar un porro entero o ahumarlo lentamente), puede que sea necesario añadir más carbón. Simplemente agregue un poco de carbón adicional y continúe como se indicó anteriormente.Guía de temperatura de cocción
other
Cocción lenta / Ahumado (110 °C - 135 °C) Ventilación inferior Ventilación superior Seno 2 h por kg Cerdo desmenuzado 2 - 4 h por kg Pollo entero 3 - 4 h Costillas 3 - 5 h Asar 9 + h Asar a la parrilla (160 °C - 185 °C) Ventilación inferior Ventilación superior Pez 15 - 20 min Lomo de cerdo 15 - 30 min Partes de pollos de engorde 30 - 45 min Pollo entero 1 - 1.5 h Piema de cordero Pavo 3 - 4 h Paletilla de cerdo / jamón 2 - 4 h Asar a la parrilla (260 °C - 370 °C) Ventilación inferior Ventilación superior bistecs 5 - 8 min chuletas 6 - 10 min de cerdo 6 - 10 min Hamburg 6 - 10 min Abierto CerradoGARANTÍA
El periodo de garantía de nuestros productos es de 2 años, salvo que la ley estipule lo contrario, a partir de la fecha de la compra inicial o de la fecha de entrega. Si tiene algún problema o pregunta, puede acceder fácilmente a nuestras páginas de ayuda, consejos para solucionar problemas, preguntas frecuentes y manuales de usuario en nuestro sitio de servicio: https://sav.hkoenig.com. Al escribir el nombre de referencia de su dispositivo en la barra de búsqueda, puede acceder a toda la asistencia en línea disponible, diseñada para satisfacer mejor sus necesidades. Si sigue sin encontrar una respuesta a su pregunta o problema, haga clic en "¿La respuesta ha resuelto su problema? Esto le llevará al formulario de solicitud de asistencia posventa, que puede rellenar para validar su solicitud y obtener ayuda.CONDICIONES DE GARANTÍA
La garantía cubre todos los fallos que se produzcan en el contexto de un uso normal, de acuerdo con los usos y especificaciones del manual de usuario. Esta garantía no se aplica a los problemas de embalaje o transporte durante el envío del producto por parte del propietario. Tampoco incluye el desgaste normal del producto, ni el mantenimiento o la sustitución de piezas consumibles.EXCLUSIÓN DE GARANTÍA
- Accesorios y piezas de desgaste (\*). - Mantenimiento normal del aparato. - Todas las averías derivadas de un uso incorrecto (golpes, incumplimiento de las recomendaciones de alimentación eléctrica, malas condiciones de uso, etc.), de un mantenimiento insuficiente o de un mal uso del aparato, así como del uso de accesorios inadecuados. - Daños de origen externo: incendio, daños por agua, sobrecarga eléctrica, etc. - Cualquier equipo que haya sido desmontado, incluso parcialmente, por personas que no estén autorizadas a hacerlo (en particular el usuario). - Productos cuyo número de serie falte, esté dañado o sea ilegible, lo que no permitiría su identificación. - Productos sujetos a alquiler, demostración o exposición. (\*) Algunas piezas de su aparato, conocidas como piezas de desgaste o consumibles, se deterioran con el tiempo y la frecuencia de uso de su aparato. Este desgaste es normal, pero puede acentuarse por las malas condiciones de uso o de mantenimiento de su aparato. Por lo tanto, estas piezas no están cubiertas por la garantía. Los accesorios suministrados con el aparato también están excluidos de la garantía. No se pueden cambiar ni reembolsar. No obstante, algunos accesorios pueden adquirirse directamente en nuestro sitio web: https://sav.hkoenig.com/MEDIO AMBIENTE
ELIMINACIÓN APROPIADA DE ESTE APARATO  Esta marca indica que el producto no debe desecharse en la basura doméstica, porque las sustancias peligrosas pueden filtrarse en el agua subterránea y entrar en la cadena alimentaria, dañando su salud y bienestar. Para reciclarlo utilice los sistemas de devolución y recolección de su localidad o póngase en contacto con el distribuidor donde adquirió el aparato. Al reemplazar los electrodomésticos antiguos por otros nuevos, el minorista está legalmente obligado a recuperar sus electrodomésticos viejos de forma gratuita. Adeva SAS / H.Koenig Europe - 8 rue Marc Seguin - 77290 Mitry Mory - France www.hkoenig.com - sav@hkoenig.com - contact@hkoenig.com - Tél: +33 1 64 67 00 0ITALIANO
| 4 pcs | 2 pcs | 2 pcs | s |
| ics | 1 pcs | 1 pcs | s |
| ics | 1 pcs | 1 pcs | s |
| ics | 2 pcs | 1 pcs | 16cs |
| 2 pcs | M6 2 pcs | 20 22 pcs | ics |
| 4 pcs | 1 pcs | 1 pcs | pcs |
| 1 pcs | W5 2 pcs | K | |
flowchart
graph TD
A["③"] --> B["④"]
B --> C["①"]
C --> D["②"]
D --> E["③"]
style A fill:#f9f,stroke:#333
style B fill:#ccf,stroke:#333
style C fill:#cfc,stroke:#333
style D fill:#fcc,stroke:#333
style E fill:#ffc,stroke:#333
natural_image
Simple line drawing of a circular device with a flower-like pattern on the top, mounted on a base with no text or symbols.natural_image
Line drawing of a portable grill with wheels and top panel (no text or symbols)Attentamente!
AVVERTIMENTO! Questo barbecue diventerà molto caldo, non spostarlo durante il funzionamento Non utilizzare all'interno! AVVERTIMENTO! Non utilizzare alcool o benzina per accendere o riaccendere! Utilizzare solo accendifuoco conformi alla norma EN 1860-3! AVVERTIMENTO! Tenere lontani bambini e animali domesticiAvviso di avvertimento
 Leggere attentamente questo manuale e tutte le informazioni sulla sicurezza prima del primo utilizzo. In caso contrario, potrebbero verificarsi lesioni gravi o morte o danni alla proprietà. Prestare attenzione ad un corretto montaggio della griglia. Attenersi alle istruzioni di montaggio fornite con la griglia. Utilizzare la griglia solo dopo che è stata completamente assemblata La griglia deve essere posizionata su una superficie piana e sicura prima dell'uso. Utilizzare la griglia esclusivamente su superfici resistenti al calore e al fuoco. Si prega di assicurarsi prima del primo utilizzo, che la griglia sia riscaldata una volta per 30 minuti senza cibo. Utilizzare solo carbone per griglia o bricchetti per barbecue approvati conformi alla norma EN 1860-3. Coprire la grata del fuoco con materiale combustibile senza impilarla. Utilizzare solo accendifuoco solidi approvati conformi alla norma EN 1860-3. Attenersi alle istruzioni allegate sull'uso corretto del prodotto. Sigillare gli accendifuoco subito dopo l'uso e non conservarli vicino alla griglia. Non cuocere prima che il combustibile abbia uno strato di cenere. Non utilizzare il grill per riscaldare sostanze e materiali diversi dagli alimenti. Non utilizzare la griglia come riscaldatore. La ruota con il freno dovrebbe essere davanti. Non utilizzare il barbecue in ambienti chiusi, garage, tende o altri luoghi chiusi. Il calore e le scintille risultanti possono causare incendi. Lo sviluppo di monossido di carbonio può causare asfissia in ambienti chiusi. Non utilizzare la griglia sotto tetti infiammabili, ripari e luoghi simili. Assicurarsi di mantenere la griglia a una distanza di sicurezza di 2 metri da materiali infiammabili. Questi potrebbero essere incendiati dalla generazione di calore o da scintille volanti. Non lasciare mai incustodita la griglia calda. Attenzione: prima di proteggere la vostra griglia con una copertura adeguata, deve essere completamente raffreddata! In caso contrario sussiste il rischio di incendio e infiammabilità! Assicurarsi di indossare sempre guanti da forno quando si tocca la griglia durante il funzionamento, ad es. aprendo le prese d'aria o mettendo più carbone nella griglia. Non indossare indumenti troppo larghi o larghi che potrebbero entrare in contatto con le braci o il fuoco durante la cottura alla griglia. Non utilizzare mai la griglia in condizioni climatiche estreme. Non usare mai acqua per spegnere il carbone ardente. Chiudere invece le prese d'aria e il coperchio fino a quando il fuoco non si spegne. Questa griglia è destinata esclusivamente all'uso privato! AVVERTENZA Pericolo di soffocamento! Il barbecue è destinato esclusivamente all'uso esterno. Non deve essere utilizzato in un edificio, in un garage o in qualsiasi altro spazio chiuso. Possono formarsi fumi tossici che causano soffocamento. Distanza di sicurezza :  Mantenere una distanza minima di 3 m da strutture sopraelevate, muri, rampe e altre strutture.Come funziona ?
Uso corretto del Kamado
Per accendere un fuoco, posiziona alcuni cubi più accendini o solidi accendifuoco sulla piastra di carbone alla base del Kamado. Quindi posizionare 2 o 3 manciate di carbone di legna sopra di esse. Attenzione! non utilizzare benzina, acquaragia, liquidi per accendini, alcol o altri prodotti chimici simili per l'accensione o la riaccensione. Attenzione! non sovraccaricare l'unità con carburante. Se il fuoco è troppo intenso potrebbe danneggiare il Kamado. Apri lo presa d'aria inferiore e accendi gli accendifuoco usando un accendino dal naso lungo o dei fiammiferi di sicurezza. Non aprire o rilasciare il coperchio superiore con forza. Lasciare fino a quando tutto il carburante non viene utilizzato e spento. Se il fuoco brucia troppo forte potrebbe danneggiare la guarnizione di tenuta in feltro prima che abbia avuto la possibilità di maturare correttamente. Dopo il primo utilizzo, ispezionare tutti i dispositivi di fissaggio per verificarne la tenuta. La fascia metallica che collega il coperchio alla base si espanderà a causa del calore e potrebbe allentarsi. Si consiglia di controllare ed eventualmente stringere la fascetta con una chiave. Ora il tuo Kamado è pronto per l'uso.Spegnimento del fuoco
Per spegnere l'unità, basta semplicemente smettere di aggiungere carburante e chiudere tutte le prese d'aria e il coperchio per consentire al fuoco di spegnersi naturalmente. Attenzione! non usare acqua per spegnere il fuoco.Conservazione
Quando non in uso, conservarlo in un luogo asciutto e coprire il Kamado una volta completamente raffreddato con un'adeguata copertura antipioggia. Non lasciarlo fuori a bagnarsi quando piove. Quando si utilizza il Kamado, spingere verso il basso su entrambe le ruote di bloccaggio per impedire all'unità di muoversi durante l'uso. Durante l'inverno Si consiglia di conservare il Kamado in un garage, una stanza chiusa o un capannone per una protezione completa.Pulizia
Pulisci sempre il Kamado quando è completamente raffreddato. Il Kamado è autopulente. Riscaldalo fino a 260°C per 30 minuti e brucerà tutto il cibo e i detriti. Attenzione! NON utilizzare acqua o altri tipi di prodotti per la pulizia per pulire l'interno del Kamado. Le pareti sono porose e assorbiranno i liquidi, questo potrebbe causare la rottura del Kamado. Se la fuliggine o la cenere diventano eccessive, utilizzare una spazzola metallica per raschiare via i residui di carbonio prima dell'uso successivo. Per pulire le griglie utilizzare un detergente non abrasivo una volta che l'unità si è completamente raffreddata. Per pulire la superficie esterna attendere che il Kamado si raffreddi, si prega di non lavare la superficie direttamente con acqua, si consiglia di utilizzare un panno umido con un detergente delicato. Durante la pulizia, maneggiare con cura quando si sposta l'anello di fuoco e il focolare.Manutenzione
Si prega di controllare regolarmente tutti i collegamenti e serrarli se necessario. Stringere le fascette e oliare la cerniera 2 volte all'anno o più se necessario. Per evitare di fare una lunga esposizione al sidetable, assicurati anche di farlo in condizioni asciutte. Carico nominale entro 5 kg. Sostituire regolarmente la guarnizione in feltro (Si ritiene generalmente che la guarnizione in feltro debba essere sostituita quando esce del fumo dallo spazio tra il corpo del forno per ceramica).Informazioni sull'uso e sulla cura
Assicurarsi che il Kamado sia posizionato su una superficie non infiammabile permanente, piana, piana e resistente al calore, lontano da oggetti infiammabili (nessun materiale combustibile nelle vicinanze). Assicurarsi che il Kamado abbia uno spazio sopra la testa minimo di 2 m. La griglia dovrebbe essere a 2 m di distanza da tutti gli oggetti sopra di essa e nell'area circostante. Per accendere un fuoco, posiziona alcuni cubi più accendini o solidi accendifuoco sulla piastra di carbone alla base del Kamado. Quindi posizionare 2 o 3 manciate di carbone di legna sopra gli accendifuoco. Attenzione! non utilizzare benzina, acquaragia, liquidi per accendini, alcol o altri prodotti chimici simili per l'accensione o la riaccensione. Attenzione! non cuocere prima che il combustibile abbia uno strato di cenere. Apri lo presa d'aria inferiore e accendi gli accendifuoco usando un accendino dal naso lungo o fiammiferi di sicurezza. Una volta catturato, lasciare aperto lo presa d'aria inferiore e il coperchio per circa 10 minuti per creare un piccolo letto di braci ardenti. Si consiglia di non alimentare o accendere i carboni una volta che sono accesi. Ciò consente ai carboncini di bruciare in modo più uniforme ed efficiente. Utilizzare sempre solo guanti resistenti al calore quando si maneggiano ceramiche calde o superfici di cottura.Guida alla cottura a bassa temperatura
Accendi il carbone di legna secondo le istruzioni sopra. Aprire completamente lo presa d'aria inferiore e lasciare aperto il coperchio per circa 10 minuti per creare un piccolo letto di braci ardenti. Monitora il Kamado finché non raggiunge la temperatura desiderata. Chiudere completamente lo presa d'aria inferiore per mantenere la temperatura. Ora sei pronto per usare il Kamado per cucinare. Attenzione! Quando si apre il coperchio ad alte temperature è essenziale sollevare solo leggermente il coperchio, consentendo all'aria di entrare lentamente e in sicurezza, evitando correnti d'aria o fiammate che potrebbero causare lesioni. Usare sempre guanti resistenti al calore quando si maneggiano ceramiche calde o superfici di cottura.Affumicatoio
Segui le istruzioni sopra come se stessi iniziando una cottura lenta (Guida alla cottura a bassa temperatura). Monitora il Kamado finché non raggiunge la temperatura desiderata. Lascia lo presa d'aria inferiore leggermente aperto. Chiudi lo presa d'aria superiore e continua a controllare la temperatura per qualche altro minuto. Usando guanti resistenti al calore cospargere i trucioli di legno in cerchio sopra il carbone caldo. Ora sei pronto per usare il Kamado.Guida alla cottura ad alta temperatura
Accendi il carbone di legna secondo le istruzioni. Chiudere il coperchio e aprire completamente le prese d'aria superiore e inferiore. Monitora il Kamado finché non raggiunge la temperatura desiderata. Chiudi lo presa d'aria superiore a metà e continua a controllare la temperatura per qualche altro minuto. Ora sei pronto per usare il Kamado per cucinare. Usare sempre guanti resistenti al calore quando si maneggiano ceramiche calde o superfici di cottura.Rifornimento
Con le prese d'aria chiuse, il Kamado rimane ad alta temperatura per diverse ore. Se è necessario un tempo di cottura più lungo (ad es. quando si arrostisce un intero pezzo o si affumica lentamente), potrebbe essere necessario aggiungere più carbone. Basta aggiungere del carbone aggiuntivo e continuare come sopra.Guida alla temperatura di cottur
| Cottura lenta / Fumo (110°C - 135°C) | Presa d'aria inferiore | Presa d'aria superiore | |
| Petto | 2 ora al kg | ||
| Maiale sminuzzato | 2 - 4 ora al kg | ||
| Pollo intero | 3 - 4 ora | | |
| Costolette | 3 - 5 ora | ||
| Arrosto | 9 + ora | ||
| Grigliare (160°C - 185°C) | Presa d'aria inferiore | Presa d'aria superiore | |
| Pesce | 15 - 20 min | ||
| Filetto di maiale | 15 - 30 min | ||
| Pezzi di pollo | 30 - 45 min | ||
| Pollo intero | 1 - 1.5 ora | | |
| Cosciotto di agnello/tacchino | 3 - 4 ora | ||
| Spalla/prosciutto di maiale | 2 - 4 ora | ||
| 2 - 5 ora | |||
| Grigliare (260°C - 370°C) | Presa d'aria inferiore | Presa d'aria superiore | |
| Bistecche | 5 - 8 min | ||
| Braciole di maiale | 6 - 10 min | | |
| Hamburger | 6 - 10 min | ||
| Salsicce | 6 - 10 min | ||
| Chiuso | |||
GARANZIA
Il periodo di garanzia per i nostri prodotti è di 2 anni, se non diversamente stabilito dalla legge, a partire dalla data di acquisto iniziale o di consegna. Se avete problemi o domande, potete facilmente accedere alle nostre pagine di aiuto, consigli per la risoluzione dei problemi, FAQ e manuali d'uso sul nostro sito post-vendita: https://sav.hkoenig.com. Digitando il nome di riferimento del tuo dispositivo nella barra di ricerca, puoi accedere a tutto il supporto online disponibile, progettato per soddisfare al meglio le tue esigenze. Se ancora non riesci a trovare una risposta alla tua domanda o al tuo problema, allora clicca su "La risposta ha risolto il tuo problema? Questo vi porterà al modulo di richiesta di supporto post-vendita, che potete completare per convalidare la vostra richiesta e ottenere aiuto.CONDIZIONI DI GARANZIA
La garanzia copre tutti i guasti derivanti da un uso normale, in conformità con gli usi e le specifiche del manuale utente. Questa garanzia non si applica a problemi di imballaggio o di trasporto durante la spedizione del prodotto da parte del proprietario. Non include inoltre la normale usura del prodotto, né la manutenzione o la sostituzione delle parti di consumo.ESCLUSIONE DELLA GARANZIA
- Accessori e parti soggette a usura (\*). - Normale manutenzione dell'apparecchio. - Tutti i guasti derivanti da un uso improprio (urti, mancato rispetto delle raccomandazioni sull'alimentazione, cattive condizioni d'uso, ecc.), da una manutenzione inadeguata o da un uso improprio dell'apparecchio, nonché dall'uso di accessori inadeguati. - Danni di origine esterna: incendio, danni d'acqua, sovratensione elettrica, ecc. - Qualsiasi attrezzatura che sia stata smontata, anche parzialmente, da persone diverse da quelle autorizzate a farlo (in particolare l'utente). - Prodotti per i quali il numero di serie è mancante, danneggiato o illeggibile, il che non permetterebbe la sua identificazione. - Prodotti soggetti a noleggio, dimostrazione o esposizione. (\*) Alcune parti del suo apparecchio, note come parti soggette a usura o materiali di consumo, si deteriorano con il tempo e la frequenza d'uso del suo apparecchio. Questa usura è normale, ma può essere accentuata da cattive condizioni d'uso o di manutenzione del vostro apparecchio. Queste parti non sono quindi coperte dalla garanzia. Anche gli accessori forniti con l'apparecchio sono esclusi dalla garanzia. Non possono essere scambiati o rimborsati. Tuttavia, alcuni accessori possono essere acquistati direttamente dal nostro sito web: https://sav.hkoenig.com/.AMBIENTE
TUTELA AMBIENTALE:
Non gettare questo prodotto come gli altri prodotti per la casa. È necessario smaltire  questo prodotto come da norme locali, è necessario informarsi presso le autorità locali sui luoghi in cui è possibile consegnare questo prodotto. Questo perché, i prodotti elettrici ed elettronici contengono sostanze pericolose che hanno effetti dannosi sull'ambiente o sulla salute umana e dovrebbero essere riciclati. Il simbolo qui accanto (un contenitore per rifiuti con route, contrassegnato da una croce) indica che le apparecchiature elettriche ed elettroniche dovrebbero essere smaltite con cura. Adeva SAS / H.Koenig Europa - 8 rue Marc Seguin - 77290 Mitry Mory - Francia www.hkoenig.com - sav@hkoenig.com - contact@hkoenig.com - Tél: +33 1 64 67 00 05PORTUGUES
| 4 pcs | 2 pcs | 2 pcs | s |
| ics | 1 pcs | 1 pcs | s |
| ics | 1 pcs | 1 pcs | s |
| 2 pcs | 2 pcs | 1 pcs | |
| [X7DX]M6-14 2 pcs | [620Z]M6 2 pcs | [XYAS]20 22 pcs | ics |
| 4 pcs | 1 pcs | 1 pcs | .pcs |
| M5-40 2 pcs | M5 2 pcs | K | [KBYW] |
flowchart
graph TD
A["③"] --> B["④"]
B --> C["⑤"]
C --> D["⑥"]
D --> E["⑦"]
E --> F["⑧"]
F --> G["⑨"]
G --> H["⑩"]
H --> I["⑪"]
I --> J["⑫"]
natural_image
Line drawing of a mechanical component with labeled parts (10 and 12), no readable text or symbols beyond labelsnatural_image
Simple line drawing of a circular device with a flower-like pattern on the top, mounted on a base with no text or symbols.natural_image
Line drawing of a portable grill with a dome top and wheels, no text or symbols presentLeia cuidadosamente!
AVISO! Esta churrasqueira ficará muito quente, não a mova durante a operação Não use dentro de casa! AVISO! Não use álcool ou gasolina para acender ou reacender! Use apenas acendalhas em conformidade com EN 1860-3! AVISO! Mantenha crianças e animais de estimação afastadosAviso de aviso
 Leia este manual e todas as informações de segurança cuidadosamente antes do primeiro uso. Não fazer isso pode resultar em ferimentos graves ou morte ou danos à propriedade. Preste atenção a uma montagem adequada da grelha. Siga as instruções de montagem fornecidas com a grelha. Use a grelha somente depois de totalmente montada A grelha deve ser posicionada em uma superfície plana e segura antes do uso. Use a grelha exclusivamente em subsolos resistentes ao calor e ao fogo. Antes da primeira utilização, certifique-se de que o grelhador é aquecido uma vez durante 30 minutos sem alimentos. Utilize apenas carvão para grelhar ou briquetes de churrasco aprovados que cumpram a norma EN 1860-3. Cubra a grelha de fogo com material combustível sem empilhá-la. Utilize apenas iniciadores sólidos aprovados que cumpram a norma EN 1860-3. Siga as instruções anexas sobre o uso adequado do produto. Feche os acendedores de fogo imediatamente após o uso e não os guarde perto da grelha. Não cozinhe antes que o combustível tenha uma camada de cinzas. Não use a grelha para aquecer substâncias e materiais que não sejam alimentos. Não use a grelha como aquecedor. A roda com freio deve ficar na frente. Não utilize o grelhador em divisões fechadas, garagens, tendas ou outros locais fechados. O calor e as faíscas resultantes podem causar incêndio. O desenvolvimento de monóxido de carbono pode causar asfixia em ambientes fechados. Não utilize o grelhador sob telhados inflamáveis, abrigos e locais semelhantes. Certifique-se de manter a grelha a uma distância de segurança de 2 metros de materiais inflamáveis. Estes podem ser inflamados por geração de calor ou faíscas. Nunca deixe a grelha quente sem vigilância. Atenção: antes de proteger sua churrasqueira com uma capa adequada, ela deve estar completamente resfriada! Caso contrário, existe risco de incêndio e inflamabilidade! Certifique-se de sempre usar luvas de forno ao tocar na grelha durante a operação, por ex. abrindo as saídas de ar ou colocando mais carvão na grelha. Não use roupas muito largas ou largas que possam entrar em contato com as brasas ou fogo ao grelhar. Nunca use a churrasqueira em climas extremos. Nunca use água para extinguir o carvão em brasa. Em vez disso, feche as aberturas e a tampa até que o fogo se apague. Este grelhador destina-se apenas a uso privado! AVISO Perigo de asfixia! O barbecue destina-se apenas a uso exterior. Não deve ser utilizado num edifício, garagem ou qualquer outro espaço fechado. Podem formar-se fumos tóxicos que causam asfixia. Distância de segurança :  Manter uma distância mínima de 3m de estruturas elevadas, paredes, rampas e outras estruturas.Como funciona ?
Curando o Kamado
Para iniciar o fogo coloque alguns cubos de isqueiro ou acendalhas sólidas na placa de carvão na base do Kamado. Em seguida, coloque 2 ou 3 punhados de carvão em pedaços por cima deles. Cuidado! não use gasolina, álcool branco, fluido de isqueiro, álcool ou outros produtos químicos semelhantes para acender ou reacender. Cuidado! não sobrecarregue a unidade com combustível. Se o fogo for muito intenso pode danificar o Kamado. Abra a ventilação inferior e acenda as acendalhas usando um isqueiro de ponta longa ou fósforos de segurança. Não abra ou solte a tampa superior vigorosamente. Deixe até que todo o combustível seja usado e extinto. Se o fogo queimar muito alto, pode danificar a vedação da gaxeta de feltro antes que ela tenha amadurecido adequadamente. Após o primeiro uso, inspecione todos os fixadores quanto ao aperto. A faixa de metal que conecta a tampa à base se expande com o calor e pode se soltar. Recomenda-se verificar e, se necessário, apertar a cinta com uma chave de boca. Agora seu Kamado está pronto para uso.Extinguindo
Para extinguir a unidade, simplesmente pare de adicionar combustível e feche todas as aberturas e a tampa para permitir que o fogo apague naturalmente. Cuidado! não use água para extinguir.Armazenar
Quando não estiver em uso, guarde-o em local seco e cubra o Kamado quando estiver completamente resfriado com uma capa de chuva adequada. Não o deixe do lado de fora para se molhar quando chover. Ao usar o Kamado, pressione ambas as rodas de travamento para impedir que a unidade se mova durante o uso. Durante o inverno Recomenda-se guardar o Kamado em uma garagem, cômodo fechado ou galpão para proteção total.Limpeza
Sempre limpe o Kamado quando estiver totalmente resfriado. O Kamado é autolimpante. Aqueça a 260°C por 30 minutos e vai queimar todos os alimentos e detritos. Cuidado! NÃO use água ou qualquer outro tipo de produto de limpeza para limpar o interior do seu Kamado. As paredes são porosas e vão absorver os líquidos, isso pode fazer com que o Kamado rache. Se a fuligem ou as cinzas se tornarem excessivas, use uma escova de aço para raspar os restos de carvão antes do próximo uso. Para limpar as grelhas, use um limpador não abrasivo quando a unidade estiver totalmente resfriada. Para limpar a superfície externa, espere até que o Kamado esfrie. Por favor, não lave a superfície diretamente com água, é recomendável usar um pano úmido com detergente neutro. Durante a limpeza, manuseie com cuidado ao mover o anel de incêndio e a caixa de incêndio.Manutenção
Verifique regularmente todas as conexões e aperte-as se necessário. Aperte as bandas e lubrifique a dobradiça 2 vezes por ano ou mais, se necessário. Para evitar uma longa exposição à mesa lateral, certifique-se também de fazê-la seca. Carga nominal dentro de 5 kg. Substituir a junta de feltro regularmente (Acredita-se geralmente que a junta de feltro deve ser substituída quando sai fumaça do espaço entre o corpo do forno de cerâmica).Informações de uso e cuidados
Certifique-se de que o Kamado esteja posicionado em uma superfície permanente, plana, nivelada e resistente ao calor, não inflamável, longe de itens inflamáveis (sem materiais combustíveis próximos). Assegure-se de que o Kamado tenha um mínimo de 2m de folga acima da cabeça. A grelha deve estar a 2m de distância de todos os objetos acima dela e na área ao redor. Para iniciar o fogo coloque alguns cubos de isqueiro ou acendalhas sólidas na placa de carvão na base do Kamado. Em seguida, coloque 2 ou 3 punhados de carvão em pedaços por cima das acendalhas. Cuidado! não use gasolina, álcool branco, fluido de isqueiro, álcool ou outros produtos químicos semelhantes para acender ou reacender. Cuidado! não cozinhe antes que o combustível tenha uma camada de cinzas. Abra a ventilação inferior e acenda as acendalhas usando um isqueiro de ponta longa ou fósforos de segurança. Depois de pegar, deixe a ventilação inferior e a tampa abertas por cerca de 10 minutos para construir uma pequena cama de brasas quentes. Recomenda-se não atiçar ou virar as brasas depois de acesas. Isso permite que os carvões queimem de maneira mais uniforme e eficiente. Sempre use apenas luvas resistentes ao calor ao manusear cerâmica quente ou superfícies de cozimento.Guia de cozimento em baixa temperatura
Acenda o carvão vegetal de acordo com as instruções acima. Abra totalmente a ventilação inferior e deixe a tampa aberta por cerca de 10 minutos para formar uma pequena cama de brasas quentes. Monitore o Kamado até que ele atinja a temperatura desejada. Fecha totalmente a ventilação inferior para manter a temperatura. Agora você está pronto para usar o Kamado para cozinhar. Cuidado! Ao abrir a tampa em altas temperaturas é essencial levantá-la apenas um pouco, permitindo que o ar entre lentamente e com segurança, evitando qualquer retrocesso ou surtos que possam causar ferimentos. Sempre use luvas resistentes ao calor ao manusear cerâmica quente ou superfícies de cozimento.Fumeiro
Siga as instruções acima como se estivesse iniciando um cozimento lento (Guia de cozimento em baixa temperatura). Monitore o Kamado até que ele atinja a temperatura desejada. Deixe a ventilação inferior ligeiramente aberta. Fecha a ventilação superior e continue a verificar a temperatura por mais alguns minutos. Usando luvas resistentes ao calor, polvilhe as lascas de madeira em um círculo sobre o carvão quente. Agora você está pronto para usar o Kamado.Guia de cozimento em alta temperatura
Acenda o carvão vegetal de acordo com as instruções. Feche a tampa e abra totalmente as aberturas superior e inferior. Monitore o Kamado até que ele atinja a temperatura desejada. Fecha a ventilação superior até a metade e continue a verificar a temperatura por mais alguns minutos. Agora você está pronto para usar o Kamado para cozinhar. Sempre use luvas resistentes ao calor ao manusear cerâmica quente ou superfícies de cozimento.Reabastecimento
Com os respiros fechados, o Kamado fica em alta temperatura por várias horas. Se precisar de um tempo de cozimento mais longo (por exemplo, ao assar um assado inteiro ou fumar lentamente), pode ser necessário adicionar mais carvão. Basta adicionar um pouco de carvão adicional e continuar como acima. de temperatura de cozimento| Cozimento Lento / Defumação (110 °C - 135 °C) | Ventilação inferior | Ventilação superior | |
| Seio | 2 h por kg | ||
| came de porco | 2 - 4 h por kg | | |
| desfiada | 3 - 4 h | ||
| frango inteiro costelas | 3 - 5 h | ||
| Assar | 9 + h | ||
| Grelhar (160 °C - 185 °C) | Ventilação inferior | Ventilação superior | |
| Peixe | 15 - 20 min | ||
| Lombo de porco | 15 - 30 min | ||
| peças de frango | 30 - 45 min | ||
| frango inteiro | 1 - 1.5 h | | |
| Perna de Cordeiro | 3 - 4 h | ||
| Turquia | 2 - 4 h | ||
| Pernil / paleta de porco | 2 - 5 h | ||
| Grelhar (260 °C - 370 °C) | Ventilação inferior | Ventilação superior | |
| bifes | 5 - 8 min | ||
| Costeletas de porco | 6 - 10 min | | |
| Hambúrgueres | 6 - 10 min | ||
| Salsichas | 6 - 10 min | ||
| Abrir | Fechado | ||
GARANTIA
O período de garantia dos nossos produtos é de 2 anos, salvo indicação em contrário, a partir da data da compra inicial ou da data de entrega. Se tiver quaisquer problemas ou perguntas, pode aceder facilmente às nossas páginas de ajuda, dicas de resolução de problemas, FAQ, e manuais do utilizador no nosso site de serviços: https://sav.hkoenig.com. Ao escrever o nome de referência do seu dispositivo na barra de pesquisa, pode aceder a todo o suporte online disponível, concebido para melhor satisfazer as suas necessidades. Se ainda não encontrar uma resposta para a sua pergunta ou problema, então clique em "A resposta resolveu o seu problema?". Isto irá encaminhá-lo para o Formulário de Pedido de Apoio ao Cliente, que poderá preencher para validar o seu pedido e obter ajuda.CONDIÇÕES DE GARANTIA
A garantia cobre todas as falhas que ocorram sob utilização normal, de acordo com a utilização e especificações do manual do utilizador. Esta garantia não se aplica a problemas de embalagem ou transporte durante a expedição do produto pelo proprietário. Também não inclui o desgaste normal do produto, nem a manutenção ou substituição de peças consumíveis.EXCLUSÃO DE GARANTIA
- Acessórios e peças de desgaste (\*). - Manutenção normal do dispositivo. - Todas as avarias resultantes de utilização inadequada (choques, não cumprimento das recomendações de alimentação, más condições de utilização, etc.), manutenção insuficiente ou má utilização do dispositivo, bem como a utilização de acessórios inadequados. - Danos de origem externa: incêndio, danos causados pela água, surtos eléctricos, etc. - Qualquer equipamento que tenha sido desmontado, mesmo parcialmente, por outras pessoas para além das autorizadas para o efeito (nomeadamente o utilizador). - Os produtos cujo número de série estaria em falta, deteriorado ou ilegível, que não permitiriam a sua identificação. - Os produtos sujeitos a leasing, demonstração, ou exposição. (\*) Algumas partes do seu dispositivo, chamadas peças de desgaste ou consumíveis, deterioram-se com o tempo e a frequência de utilização do seu dispositivo. Este desgaste é normal mas pode ser acentuado por más condições de utilização ou manutenção do seu dispositivo. Estas peças não estão, portanto, cobertas pela garantia. Os acessórios fornecidos com o dispositivo também estão excluídos da garantia. Não podem ser trocados ou reembolsados. No entanto, alguns acessórios podem ser adquiridos directamente através do nosso website: https://sav.hkoenig.com/.MEIO AMBIENTE
CUIDADO: Não se desfaçam deste produto como o fizeram com outros produtos domésticos. Há uma separação deste produto residual nas comunidades, terá de informar as suas autoridades locais sobre os locais onde se pode devolver este produto. De facto, os produtos eléctricos e electrónicos contêm substâncias perigosas que têm efeitos nocivos sobre o ambiente ou a saúde humana e devem ser reciclados. O símbolo aqui indica que o equipamento eléctrico e electrónico deve ser escolhido cuidadosamente, um contentor de resíduos com rodas é marcado com uma cruz.
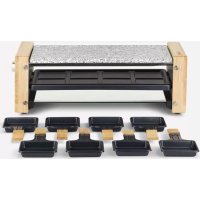

Table of contents
Click a title to access it
- H Instruction Manual
- Kamado Japanese barbecue 18"
- ENGLISH
- Read carefully!
- Warning notice
- Safety distance :
- How does it work?
- Curing The Kamado
- Extinguishing
- Storage
- Cleaning
- Maintenance
- Lighting, Usage & Care Information
- Low Temperature Cooking Guide
- Smoking Guide
- High Temperature Cooking Guide
- Refueling
- Cooking Temperature Guide
- WARRANTY
- WARRANTY CONDITIONS
- EXCLUSION OF WARRANTY
- ENVIRONMENT
- CAUTION:
- FRANÇAIS
- Lire attentivement!
- Avertissement
- Comment ça fonctionne ?
- Prendre soin du Kamado
- Extincteur
- Stockage
- Nettoyage
- Entretien
- Informations d'utilisation et d'entretien
- Guide de cuisson à basse température
- Fumoir
- Guide de cuisson à haute température
- Ravitaillement
- Guide des températures de cuisson
- GARANTIE
- CONDITIONS DE GARANTIE
- EXCLUSION DE GARANTIE
- ENVIRONNEMENT
- ATTENTION :
- DEUTSCH
- Gründlich lesen!
- Warnung
- WARNUNG Erstickungsgefahr! Der Grill ist nur für den
- Wie es funktionniert ?
- Kamado starten
- Löschen
- Lagerung
- Reinigung
- Instandhaltung
- Nutzungs- und Pflegeinformationen
- Leitfaden zum Kochen bei niedrigen Temperaturen
- Räucherei
- Leitfaden zum Kochen bei hohen Temperaturen
- Nachfüllen
- GARANTIEBEDINGUNGEN
- AUSSCHLUSS DER GARANTIE
- UMWELT
- ACHTUNG:
- NEDERLANDS
- Lees aandachtig!
- Waarschuwingsbericht
- Hoe het werkt ?
- De kamado genezen
- Blussen
- Opslag
- Schoonmaak
- Onderhoud
- Informatie over gebruik en onderhoud
- Gids voor koken op lage temperatuur
- Rokerij
- Gids voor koken op hoge temperatuur
- Tanken
- Kooktemperatuurgids
- GARANTIEVOORWAARDEN
- UITSLUITINGEN VAN DE GARANTIE
- MILIEU
- LET OP:
- ESPANOL
- Aviso de advertencia
- Cómo funciona ?
- Curando el Kamado
- Extinción
- Almacenamiento
- Limpieza
- Mantenimiento
- Información de uso y cuidado
- Guía de cocción a baja temperatura
- Ahumador
- Guía de cocción a alta temperatura
- Repostaje
- Guía de temperatura de cocción
- GARANTÍA
- CONDICIONES DE GARANTÍA
- EXCLUSIÓN DE GARANTÍA
- MEDIO AMBIENTE
- ITALIANO
- Attentamente!
- Avviso di avvertimento
- Come funziona ?
- Uso corretto del Kamado
- Spegnimento del fuoco
- Conservazione
- Pulizia
- Manutenzione
- Informazioni sull'uso e sulla cura
- Guida alla cottura a bassa temperatura
- Affumicatoio
- Guida alla cottura ad alta temperatura
- Rifornimento
- Guida alla temperatura di cottur
- GARANZIA
- CONDIZIONI DI GARANZIA
- ESCLUSIONE DELLA GARANZIA
- AMBIENTE
- TUTELA AMBIENTALE:
- PORTUGUES
- Leia cuidadosamente!
- Aviso de aviso
- Como funciona ?
- Curando o Kamado
- Extinguindo
- Armazenar
- Limpeza
- Manutenção
- Informações de uso e cuidados
- Guia de cozimento em baixa temperatura
- Fumeiro
- Guia de cozimento em alta temperatura
- Reabastecimento
- GARANTIA
- CONDIÇÕES DE GARANTIA
- EXCLUSÃO DE GARANTIA
- MEIO AMBIENTE
Manual assistant
Powered by Anthropic
Waiting for your message
Product information
Brand : H.KOENIG
Model : YOKO13
Category : Grill plate