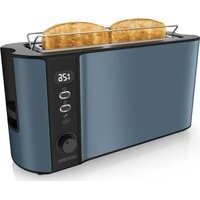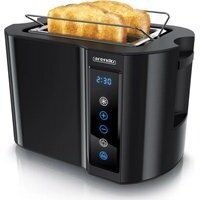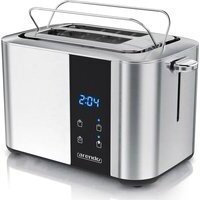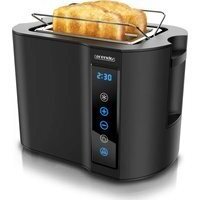
Touch Compact 305934 - Toaster Arendo - Free user manual and instructions
Find the device manual for free Touch Compact 305934 Arendo in PDF.


User questions about Touch Compact 305934 Arendo
0 question about this device. Answer the ones you know or ask your own.
Ask a new question about this device
Download the instructions for your Toaster in PDF format for free! Find your manual Touch Compact 305934 - Arendo and take your electronic device back in hand. On this page are published all the documents necessary for the use of your device. Touch Compact 305934 by Arendo.
USER MANUAL Touch Compact 305934 Arendo
text_image
QR code image containing encoded data, no visible human-readable textENG: Current drivers, user manuals and other relevant documents for this product can be found on our homepage.
text_image
Warning symbols for temperature deviation, showing an exclamation mark and a warning triangle with steam.Important safety guidelines for this appliance
- Please read the following user manual carefully and ensure that you understand the instructions.
- Operate the toaster in accordance with the voltage specified on the identification label of the appliance.
- Do not touch the surface when in operation under any circumstances. There is a risk of burns!
- In order to protect against electric shock, please do not immerse the cable, the plug or any part of the appliance in water or in any other liquid.
- Supervision is necessary when the appliance is being used by children or being used in the vicinity of children.
- Remove the plug from the power socket when the appliance is not in use or when you intend to clean it.
- Do not use this appliance with a damaged cable or plug, or when in a faulty condition. If the power cord is damaged, it has to be replaced by the manufacturer, a customer service agency or an adequately qualified person.
- Keep the power cord away from hot surfaces. Never let the power cord hang over the edge of a table.
- The appliance must not be kept or used on or near hot surfaces (such as, for example, hotplates) or open gas flames.
- Use the product only for intended applications.
- The introduction of any other material, such as metal foils or other utensils, is strictly prohibited, as this could lead to fire or electric shock. Use the appliance only to brown toasted bread and bread slices or to warm up bread rolls.
- Bread may burn if it is toasted several times, or touches one of the heating elements. Therefore, never place the appliance close to or below flammable materials. The appliance has to be under constant supervision when in operation.
- The use of accessories which are not recommended by the manufacturer of the appliance could lead to injuries.
- Always keep the toaster on a heat-resistant and level surface. Ensure that the toaster does not topple over!
- Immediately remove the power plug from the power socket if you notice smoke or fire!
- Do not insert fingers or objects into the short slot under any circumstances. The heating elements conduct voltage! There is a risk of injury!
- Make sure that you remove the bread very carefully after toasting is complete, in order to avoid injury.
- Do not use this appliance with external timers or separate remote controls.
- Children should be supervised to ensure that they do not play with the appliance.
- This appliance may be used by children above the age of 8 years and by persons with impaired physical, sensory or mental capabilities or
lack of experience and knowledge, only if they are supervised or have been instructed about the use of the appliance and have understood the hazards involved. Cleaning and user maintenances should not be performed by children.
- Keep the appliance and the power cord out of the reach of children below 8 years of age.
- Do not use the toaster outdoors!
- The toaster is suitable for use in households and similar environments, such as, for example:
- staff kitchens in businesses, offices and other working environments
- on farms
- by customers in hotels, inns and other residential areas
- in guest houses.
[arende
- Read through the user manual carefully and keep it in a safe place, as it contains important details!
- Use only standard toast sizes. If the toast is too small, you may burn your fingers when removing the toast!
Thank you for choosing an Arendo product. Please read the following user manual carefully so as to get the most from the product you have purchased. Before using the product, first check that the delivered item is complete, accurate and undamaged.
1. Scope of delivery
- Short-slot toaster
- User manual
2. Technical data
| Power supply 220-240 V AC 50/60 Hz | |
| Power consumption 800 W | |
| Features • adjustable degree of | browning (7 levels)Defrosting modeLCD display with sensor buttonsFunction for reheating already toasted bread/toastCrumb collectorintegrated bread roll attachment |
| Ambient temperature 0-40°C | |
3. Initial use
Note: When using the toaster for the first time, there may be a burning smell and / or slight smoke generation when the heating elements heat up. This is not a hazard or a defect. Wait until the appliance heats up and the smell disappears. When using the toaster for the first time, it is advisable to operate the toaster without inserting any toast.
Check if the product and the components are intact and if the appliance is working properly when using it for the first time. Take the appliance out of the package and remove all the packaging material. Before using the toaster for the first use time, connect it to a properly wired power socket. Switch on the toaster by pressing the slide switch down and adjust the degree of browning to the maximum level (7) using the "Degree of toasting "+" button. Repeat this procedure until the burning smell is no longer noticeable. To interrupt toasting, press the "CANCEL" button.
- Product details
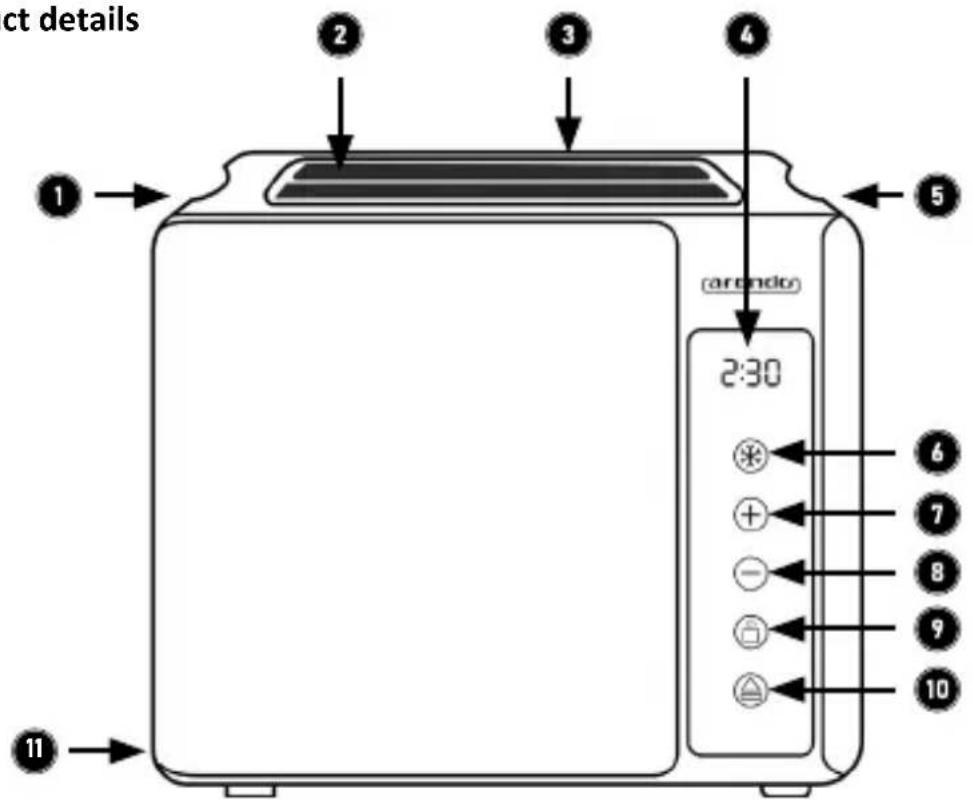
text_image
ct details ① ② ③ ④ ⑤ (arondo) 2:30 ⑥ ⑦ ⑧ ⑨ ⑩ ⑪| 1 Lever for | bread roll attachment |
| 2 Toast slot | |
| 3 Bread roll | attachment |
| 4 Display (display of remaining time + degree of toasting) | |
| 5 Slide switch | |
| 6 "DEFROST" button | |
| 7 Degree of | toasting "+" button |
| 8 Degree of | toasting "-" button |
| 9 "REHEAT" | button (heat / reheat) |
| 10 "CANCEL" | button (stop toasting) |
| 11 Crumb collector | |
5. Commissioning and use
Connect the power cord to a properly wired power socket. First proceed as described in Section "3 Commissioning".
Ensure that the power plug has been inserted. Insert up to two toast slices into the toast slot. Press the "Slide switch" down until it clicks into place. Then press the Degree of toasting "+" or the Degree of toasting "-" button to adjust the desired degree of toasting. The heating elements warm up and the toasting process begins.
Note: The last configured degree of toasting is saved in the appliance.
Once the process is complete, the "slide switch" automatically jumps back to its original position. This means that the toasting process has finished and the bread slices can be taken out carefully.
If the degree of toasting is not satisfactory, adjust it using the degree of roasting "+" or degree of toasting "-" buttons and repeat the toasting again. In this case, ensure that the toast does not get burnt. If the desired degree of toasting has already been attained, you may then end the process at any time by pressing the "CANCEL" key.
6. Bread roll attachment
Bread rolls, baguettes and loaves are too large to place in the toasting slot. Always use the integrated bread roll warming rack for this purpose. Use the lever for the bread roll warming rack to open it.
Note: Ensure that the crumb collector has been inserted correctly.
Before toasting on the bread roll attachment, ensure that the toaster has cooled down completely. Ensure that no toast has been inserted into the "toast slot" when using the bread roll warming rack, as otherwise this can result in fire.
If you do not wish to use the bread roll warming rack, remove it by folding it.
Generally, more time is required to achieve the desired degree of browning when using the bread roll warming rack. It is advisable to turn the items on the bread roll attachment.
7. Adjusting the Degree of toasting
Using the Degree of toasting "+" and degree of toasting "-" buttons, you can specify the duration after which the toaster should automatically switched off. The longer the appliance is switched on, the darker will be the bread at the end of the browning time.
| Level Browning | |
| 1-2 low browning | |
| 3-4 medium browning | |
| 5-7 high browning |
Note: In order to get optimal browning results, we recommend that you use only settings 1 to 4 for toast and sandwiches. The higher browning settings 5-7 should be used only if, for example, you want to use the bead roll attachment for baguettes, bagels or rolls, since otherwise roasted toasts and sandwiches may get burnt quickly at the higher settings.
8. Heating / Reheating
The toaster can be used to reheat the bread slices if they cool down too quickly. To do this, press down the "slide switch" until it clicks in place and press the "REHEAT" button. When bread which has already been toasted becomes too cool or has been forgotten about, the toaster can be used to reheat it without affecting the degree of browning too much.
9. Defrosting
Frozen toast bread can be defrosted directly in the toaster. To do this, insert the frozen toast into the "toast slot" and then press down the "slide switch" until it reaches the limit stop. Switch the appliance to the defrosting mode using the "DE-FROST" button. To set the duration of the defrosting process, use the rotary switch provided for adjusting the degree of browning.
10. Interrupting the toasting
If the bread starts to smoke or you want to stop the toasting process, you can press the "CANCEL" button. In this case, the toaster interrupts the toasting process immediately.
11. Cleaning and Care
Before cleaning the toaster, unplug it completely from the mains by removing the power plug. Wait until the appliance has cooled down completely. Clean only the surface with a slightly damp cloth. Never use a metal polish for this purpose! Please do not immerse the appliance in water under any circumstances!
Ensure that crumbs do not collect in the toaster. Bread crumbs can be removed by taking the crumb collector out of the toaster and cleaning it with a damp cloth. Ensure that you afterwards re-insert the crumb collector correctly.
Caution! Remember to empty the crumb collector on a regular basis. If a large amount of crumbs are allowed to build up, this may lead to a fire! It is also advisable to turn the toaster upside down and shake it, since crumbs may accumulate outside the crumb collector in case of frequent use. Occasionally shake the toaster upside down over a sink when it is disconnected to remove any bread crumbs.
The internal components of the toaster can be easily damaged. Do not touch the components with tools or other objects under any circumstances!
12. Troubleshooting
| Possible Faults Solution | |
| The toaster does not function | Insert the mains plug into the power socket If there is no improvement, have the appliance checked by a specialist! |
| The toast is too bright or too dark after toasting | Select a different degree of browning. |
| Smoke is emitted from the toaster during toasting | ·The degree of browning you have selected is too high for the type of bread used. Immediately press the "CANCEL" button to stop toasting.·The toaster is dirty. A piece of toast has been caught in the heating surfaces. Clean the appliance.·The crumb collector is overfull and crumbs begin to smoke. Empty the collector or shake the toaster to remove crumbs! |
| The toast is immediately ejected after toasting has started | ·Ensure that you have engaged the slide switch correctly in the lowest position.·Bread crumbs in the toaster can prevent the slide from locking. Also check if the slide can move straight in the guide on the other side.If the appliance still ejects the toast in the same way at the next attempt, please contact a technician or the manufacturer of the appliance. |
| The power cord is damaged | In this case, you should no longer use the appliance!Contact an authorised technician or the manufacturer of the appliance, in order to have the cable properly replaced! |
13. Safety instructions and disclaimer
Please do not try to open the product to carry out repairs or modifications. Avoid contact with the mains voltage. Do not short-circuit the product. The appliance is not waterproof, therefore please use it only in dry surroundings. Protect it from high humidity, water and snow. Keep the product away from high temperatures.
Do not expose the product to sudden changes in temperature or strong vibrations, as this could damage the electronic components. Check the appliance for damage before using it. The product should not be used if it was subject to impact or has
been damaged in some other manner. Please comply with the local regulations and restrictions.
Do not use the product for purposes other than those described in the user manual. This product is not a toy. Keep it out of the reach of children or mentally disabled persons. Any repair or modification to the product, which is not carried out by the original supplier, will void any warranty and guarantee claims.
The product should only be used by those who have read and understood this user manual. The specifications of the product may be changed without any special prior notification.
The filaments do not glow uniformly red or orange everywhere.
This is not a defect, but depends on the airflow around them. If entire sections are not working, please contact our customer service department.
14. Disposal instructions
In line with the European WEEE directive, electrical and electronic products should not be disposed of along with domestic waste. Their components have to be separately sent for recycling or disposal, because improper disposal of toxic and dangerous components may permanently damage the environment.
According to the electrical and electronic equipment act (ElektroG), you are obliged (as a consumer) to return (free of charge) electrical and electronic products to the manufacturer, the point of sale or public collection points at the end of their service life.
The relevant local laws regulate the details in this regard. The symbol displayed on the product, in the user manual or/and on the packaging refers to these regulations. With this manner of sorting, recycling and disposal of used products, you make an important contribution towards protecting our environment.
WEEE directive 2012/19/EU WEEE Register no.: DE 67896761
The company WD Plus GmbH hereby certifies that the appliance 305933 ; 305934; 305935 complies with the fundamental requirements and the other relevant stipulations of the directive. A complete conformity statement can be obtained from: WD Plus GmbH, Wohlenbergstraße 16, 30179 Hannover
ATTENTION!
text_image
Warning symbols: triangular warning triangle with exclamation mark and smoke symbol inside triangleMO-FR 9:30am - 18pm CET
text_image
QR code image containing encoded data, no visible human-readable textwww.arendo.de