DOM486 - Fan LIVOO - Free user manual and instructions
Find the device manual for free DOM486 LIVOO in PDF.

| Product type | Automatic stand fan |
| Brand | Livoo |
| Model | DOM486 |
| Supply voltage | 220-240 V ~ 50/60 Hz |
| Power | 70 W |
| Airflow | 390 m³/min |
| Number of speeds | 3 (F1, F2, F3) |
| Oscillation | Horizontal (left-right) and vertical (up-down) |
| Timer | Yes, programmable up to 12 hours |
| Remote control | Yes, with included CR2025 battery |
| Aroma diffuser | Yes, for essential oils |
| Control type | Touch panel and remote control |
| Display | LED screen with automatic standby after 3 minutes |
| Adjustable height | Yes, via telescopic tube |
| Approximate weight | 3.5 kg |
| Materials | Plastic and metal |
| Use | Domestic, indoor |
| Maintenance and cleaning | Clean with a brush vacuum, do not use abrasive products |
| Safety | Protection grille, automatic stop recommended, do not use near water |
| Spare parts | Available from after-sales service |
Frequently Asked Questions - DOM486 LIVOO
User questions about DOM486 LIVOO
0 question about this device. Answer the ones you know or ask your own.
Ask a new question about this device
Download the instructions for your Fan in PDF format for free! Find your manual DOM486 - LIVOO and take your electronic device back in hand. On this page are published all the documents necessary for the use of your device. DOM486 by LIVOO.
USER MANUAL DOM486 LIVOO
natural_image
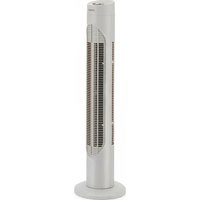
Modern black and white outdoor fan with a vertical post and stand (no visible text or symbols)Livoo
Version : v.l.1
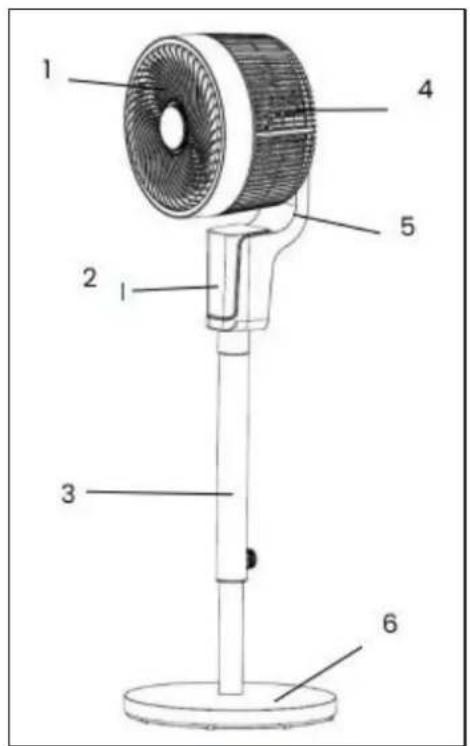
Figure 1
flowchart
graph TD
    A["Device"] --> B{Transition}
    B --> C["State 1"]
    B --> D["State 2"]
    B --> E["State 3"]
Figure 2

flowchart
graph LR
    A["Top fan"] <--> B["Top circular component"]
    B --> C["Bottom fan with liquid and bottle"]
Figure 3
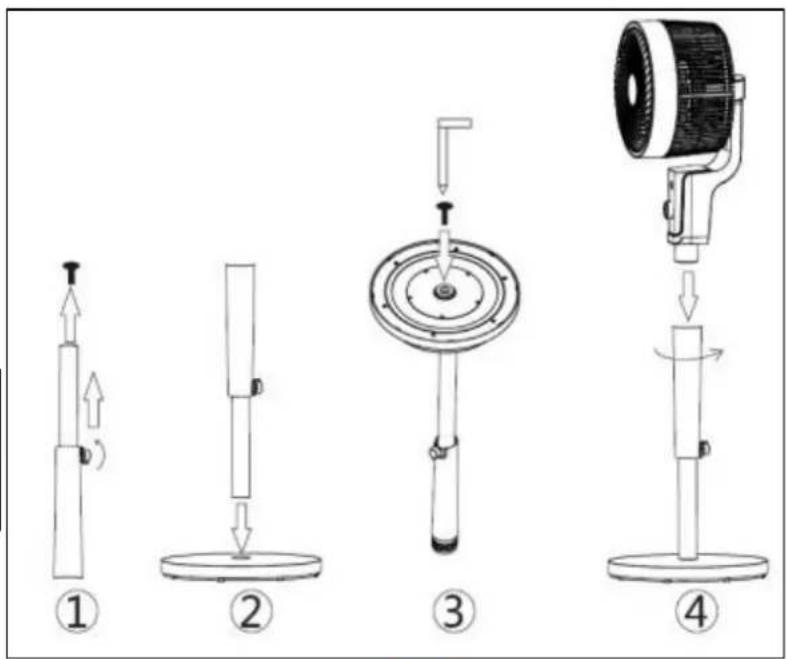
Figure 4
Thank you for choosing a Livoo product!
Your blender, your barbecue, and your headphones are not just objects, they are extensions of yourself, allowing you to get closer to your friends and family, to bring them together, to laugh and to share experiences. Livoo's aim is to help you live your life to the fullest, whatever wishes you have throughout the
year. Winter raclette, summer barbecue. Or the other way around. It's up to you. Take advantage of this freedom for feel good moments every day.
That's why we're constantly innovating and creating clever products full of zest, but most of all, accessible. Find our entire collection on our website www.livoo.en.
Livoo, your daily companion till social networks

@Livoo

@livoo_officiel

@Livoo
Safety Instructions
Please, take time to read well the instruction sheet before the first use and keep them for a future use.
A misuse of the appliance can damage it or hurt the user. Assure that you use the appliance for the use for which it is designed. We refuse any responsibilities as for the damages by an incorrect use or a bad manipulation.
- Before connecting your appliance, verify that the supply voltage indicated on the indicator plate of the appliance corresponds properly to that of your electrical installation.
- No responsibility may be assumed in case of damages caused by non-compliance of this manual by the user or by faulty use or handling.
- This appliance is meant for ONLY DOMESTIC USE and FOR INTERNAL USE.
- Use this appliance only as indicated in the instruction manual.
- Before each use, ensure that the supply cord is in good condition.
- If the supply cord is damaged, it must be replaced by the manufacturer, its service agent or
similarly qualified persons (*) in order to avoid a hazard.
- Never plunge the appliance, its supply cord or the plug in water or any other liquid.
- Do not handle the plug on the appliance with wet hands.
- This appliance can be used by children aged from 8 years and above and persons with reduced physical, sensory or mental capabilities, or lack of experience and knowledge if they have been given supervision or instruction concerning use of the appliance in a safe way and understand the hazards involved. Children shall not play with the appliance. Cleaning and user maintenance shall not be made by children without supervision.
- Young children, old people or disabled people must not be directly exposed to the air from the fan for long periods.
- When you disconnect the supply cord, always remove it from the plug. Do not pull on the cord itself.
-
Always disconnect the appliance from its plug point when the appliance is not used, before moving it or cleaning it.
-
Ensure that the fan is switched off from the supply mains before removing the guard.
- Never insert your fingers, crayons or any other object across the ventilation grills.
- Ensure that the fan is always placed on a flat surface, dry and stable.
- Do not use your fan close to a window. Rain may cause risks of electric shocks.
- Do not use chemical products or abrasive detergents for cleaning, which may easily damage or deform your appliance.
- Do not place either the fan or its parts near an over, a cooking appliance or any other source of heat.
- Do not use the appliance in the presence of explosive or inflammable vapours.
- Never try to disassemble or repair your appliance yourself. In case of repair by an unqualified person, the guarantee is cancelled.
- For reducing the risk of electric shock, never use this product with wet hands, never spill a liquid on the product or submerge it in water.
-
Direct surveillance is necessary when your appliance is used near children or disabled persons.
-
Never leave the appliance working without surveillance.
- Avoid overheating the device by preventing the blocking of entry and exit of air. Clean all the entries and exits from time to time to remove the accumulated dust.
- Leave a safe space of 50 cm around the fan, on above and on the sides, and a safe space of 120 cm on the front.
- This appliance is not designed to be used with an external timer or a separate remote control system.
-
This appliance is intended to be used in household and similar applications such as:
-
staff kitchen areas in shops, offices and other working environments
- farm houses
- by clients in hotels, motels and other residential type environments
- bed and breakfast type environments.
Information :
NEVER COVER THE APPLIANCE, even temporarily, because it may overheat and generate a risk of fire. Do not use the fan near a shower, bathtub or a swimming pool.
Technical Specifications
Voltage: 220-240V\~50-60Hz. Power: 70 W. Air flow: 390 m3/min
Drawing of the device
Figure 1
| 1 | Front grill | 4 | Back grill |
| 2 | Control panel | 5 | Support |
| 3 | Ajustable tube | 6 | Base |
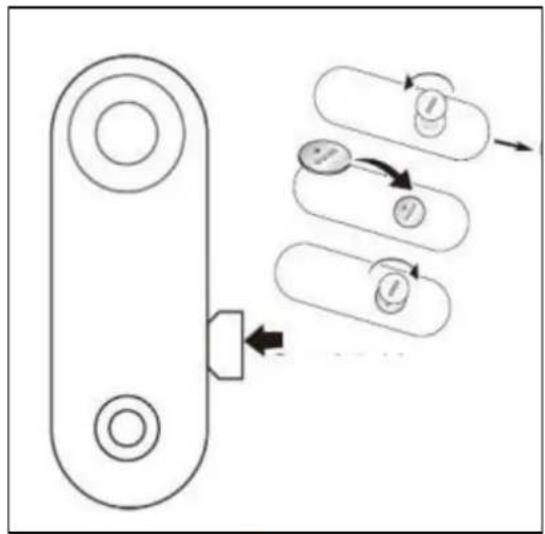
Fan Assembly : (Figure 4)
Remove the hidden screw at the bottom of the adjustable mast.
Insert the mast into the hole in the base.
Flip the entire assembly and screw the base onto the mast.
Flip the base + mast assembly to place it on the floor.
Attach the fan head to the mast by turning it clockwise.
Remote Control: (Figure 2) Insert a CR2025 battery into the designated slot, ensuring proper polarity.
Aromatherapy Diffuser: (Figure 3) On the back of the fan head, in the center, turn the cover counterclockwise. Pour a few drops of essential oil onto the pad, then close the cover by turning it clockwise.
Use of the device
Display Screen: The screen shows the fan speed and timer. The screen turns off after 3 minutes of inactivity and reactivates by touching any button.
Press the power On/Off button. The fan emits a beep and turns on. All buttons flash once and go into standby mode.
Oscillation: Activate left-to-right oscillation with a quick press. Hold the button to activate or deactivate up-and-down oscillation.
Speed: The default speed is 'F1' when the fan is turned on. You can increase the speed by one level with each press, up to level 3. An additional press returns you to level 1.
Timer: You can set the remaining operating time for your fan. Each press of this button increases the remaining operating time by one hour, up to a maximum of 12 hours.
Cleaning and maintenance
Caution: Always switch off and unplug the fan before performing any cleaning. Do not disassemble the grid. Do not use harsh detergents, chemical cleaners or solvents as they may damage the surfaces of the fan. Use a vacuum cleaner with a brush attachment to clean the grill. Use a soft duster to dust off all the surfaces.
natural_image
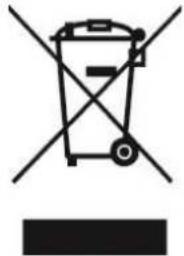
Symbol of a trash bin crossed with two crossed lines, no text or labels presentCorrect disposal of the unit (Electrical and Electronic Equipment).
(Applicable in the European Union and the rest of Europe that have adopted separate collection systems countries). The European Directive 2012/19/EU on Waste Electrical and Electronic Equipment (WEEE), requires that old household electrical appliances must not be disposed of in the normal household waste stream. Old appliances must be collected separately in order to optimize the recovery and recycling of the materials they contain and reduce the impact on human health and the environment. The symbol of the crossed out dustbin is marked on all products to remind the obligations of separate collection. Consumers should contact their local authority or retailer for information concerning the correct disposal of their product.
• Non contractual illustration
- Product information is subject to change without prior notice.