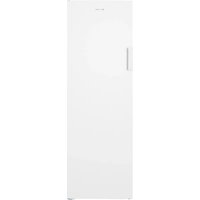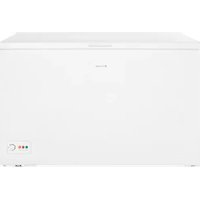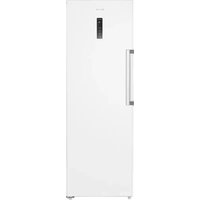
WBVR186NFE - Freezer Wisberg - Free user manual and instructions
Find the device manual for free WBVR186NFE Wisberg in PDF.


| Brand | Wisberg |
| Model | WBVR186NFE |
| Product type | Chest freezer |
| Defrost | Automatic (No Frost) |
| Freezing capacity | 17 kg/24h |
| Refrigerant | R600a (freon-free) |
| Climate class | SN, N, ST, T (from +10°C to +43°C) |
| Power supply | 220-240 V ~ 50 Hz |
| Adjustable temperature range | -14°C to -22°C |
| Super mode | Yes (temperature drops to -25°C) |
| Eco mode | Yes |
| Door alarm | Yes (after 90 seconds) |
| Temperature alarm | Yes (HT display) |
| Interior lighting | LED (class G) |
| Door reversibility | Yes |
| Warranty | 2 years |
| Customer service | wisberghome.com |
| Cleaning | With soft cloth and soapy water |
| Included accessories | Shelves, door bins, drawers |
Frequently Asked Questions - WBVR186NFE Wisberg
User questions about WBVR186NFE Wisberg
0 question about this device. Answer the ones you know or ask your own.
Ask a new question about this device
Download the instructions for your Freezer in PDF format for free! Find your manual WBVR186NFE - Wisberg and take your electronic device back in hand. On this page are published all the documents necessary for the use of your device. WBVR186NFE by Wisberg.
USER MANUAL WBVR186NFE Wisberg
| Climate classification SN / N / ST / T | |
| Freezer compartment volume 274L | |
| Fourstar compartment volume 274L | |
| Voltage 220-240V~ | |
| Frequency 50Hz | |
| Rated current 1.3A | |
| Security class I | |
| Power usage 140W | |
| Defrost power 160W | |
| Energy consumption E16 0.409 kWh/24h | |
| Energy consumption E32 0.805 kWh/24h | |
| Temperature rise time 9h | |
| Refrigerant 8600c,74g | |
| Insulating agent | Cyclopentone |
| Freezing capacity (Kg/24h) | 17 |
| Product code | 942084 |
Wisepick Productions B.V.
Weena 664
3012CN, Rotterdam
The Netherlands
Made in China
2142315
WISBERG
WBVR186NFD
Freezer
text_image
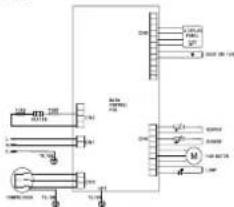
Electrical schematic diagram showing motor control circuit with labeled components and wiring connectionsSerial Number:
Batchpads:
| Climate classification SN / N / ST / I | |
| Freezer compartment volume 274L | |
| Fourstar compartment volume 274L | |
| Voltage 220-240V~ | |
| Frequency 50Hz | |
| Rated current 1.3A | |
| Security class I | |
| Power usage 140W | |
| Defrost power 160W | |
| Energy consumption E16 0.32 kWh/24h | |
| Energy consumption E32 0.65 kWh/24h | |
| Temperature rise time 9h | |
| Refrigerant R600a,60g | |
| Insulating agent | Cyclopentone |
| Freezing capacity (Kg/24h) | 17 |
| Product code | 942087 |
Wisopick Productions B.V.
Wcena 664
3012CN, Rotterdam
The Netherlands
Made in China


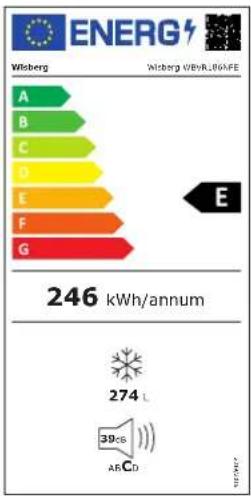
ENERG
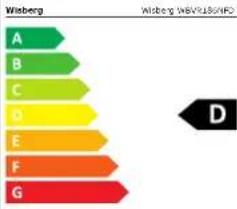
bar
| Rating | Value | |---|---| | A | 10 | | B | 12 | | C | 14 | | D | 16 | | E | 18 | | F | 20 | | G | 22 |197 kWh/annum

274

2019年
| Climate classification - | Klimaatklasse / Classification climatique / Klimaklassifizierung |
| Freezer storage volume - | Opslagvolume vriezer / Volume de stockage du congélateur / Gefrierspeichervolumen |
| Fourstar storage volume - | Fourstar-opslagvolume / Volume de stockage Fourstar / Vier-Sterne-Speichervolumen |
| Voltage - | Spanning / Tension / Spannung |
| Frequency - | Frequentie / Fréquence / Frequenz |
| Rated current - | Nominale spanning / Tension nominale / Nennspannung |
| Security class - | Veiligheids klasse / Classe de sécurité / Sicherheitsklasse |
| Power usage - | Stroomverbruik / Consommation d'énergie / Stromverbrauch |
| Energy consumption E16 - | Energieverbruik E16 / Consommation d'énergie E16 / Energieverbrauch E16 |
| Energy consumption E32 - | Energieverbruik E32 / Consommation d'énergie E32 / Energieverbrauch E32 |
| Temperature rise time - | Temperatuur stijging tijd / Temps de montée en température / Temperaturanstiegszeit |
| Refrigerant - | Koelmiddel / Réfrigérant / Kältemittel |
| Insulating agent - | solatiemiddel / Agent isolant / Isoliermittel |
| Freezing capacity - | Vriescapaciteit / Capacité de congélation / Gefriervermögen |
| Product code - | Productcode / Code produit / Produktcode |
INHOUDSOPGAVE
VOORWOORD
4
1. VEILIGHEID 5
Wisepick Productions B.V.
Weena 664
3012 CN Rotterdam
Nederland
Made in China
1. VEILIGHEID
1.2 VEILIGHEIDSWAARSCHUWINGEN EN -VOORSCHRIFTEN

WAARSCHUWING!
natural_image
Simple line drawing of a vertical container with a black checkmark on the side (no text or symbols)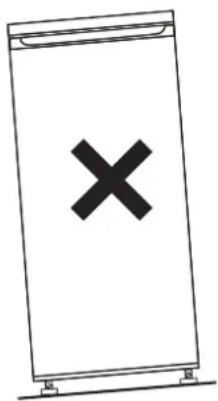
text_image
Diagram showing a device with a black 'X' symbol on its screen, indicating cancellation or error.5. Wacht
natural_image
Line drawing of a hand installing or adjusting a shelf panel on a metal shelf (no text or symbols)
natural_image
Diagram of a two-panel rack or shelf with upward arrows indicating movement (no text or symbols)3.2 DE DRAAIRICHTING VAN DE DEUR OMKEREN
natural_image
Line drawing of a screwdriver with a pointed tip (no text or symbols)natural_image
Line drawing of an adjustable wrench with a handle and screw (no text or symbols)natural_image
Line drawing of a screwdriver with no text or symbolsnatural_image
Technical line drawing of a vertical metal bracket with mounting flanges (no text or symbols)natural_image
Technical line drawing of a mechanical bracket with mounting holes and a separate bracket component (no text or symbols)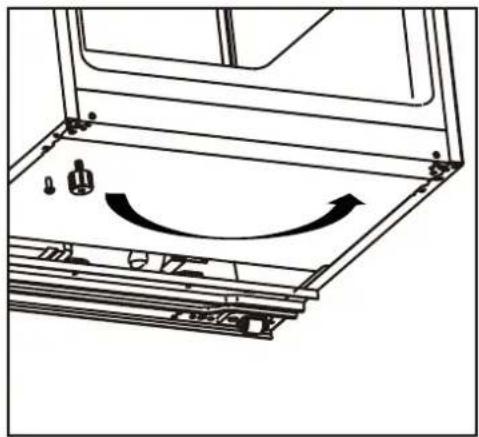
natural_image
Technical line drawing of a mechanical assembly with no visible text or symbolsnatural_image
Mechanical assembly diagram showing a shaft and housing with a bolt and nut, no text or symbols present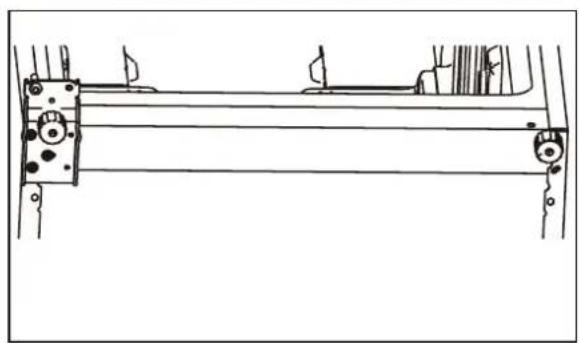
natural_image
Technical line drawing of a mechanical assembly with mounting brackets and levers (no text or symbols)natural_image
Technical line drawing of a mechanical bracket with two cylindrical components and a curved arrow indicating rotation (no text or symbols)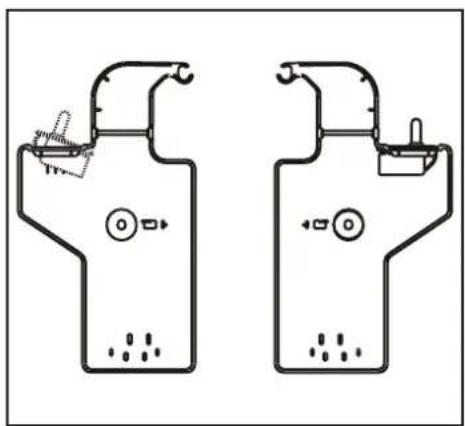
text_image
Diagram of two identical electrical or mechanical device layouts with labeled components and connectionsnatural_image
Simple line drawing of a mechanical device mounted on a bracket (no text or symbols)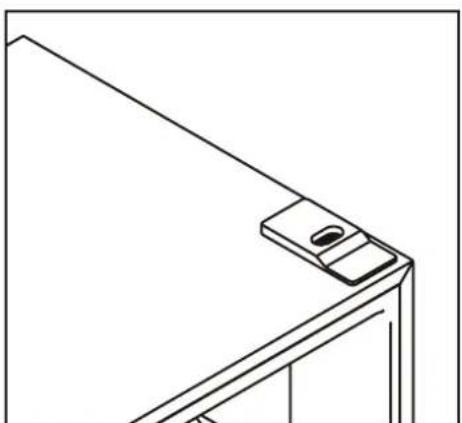
natural_image
Line drawing of a corner-mounted device with a small screen and mounting bracket (no text or symbols)natural_image
Diagram of a document with arrows indicating rotational movement, no text or symbols present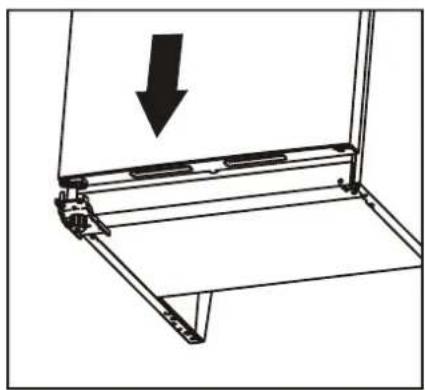
natural_image
Technical line drawing of a mechanical assembly with an arrow indicating downward motion (no text or symbols present)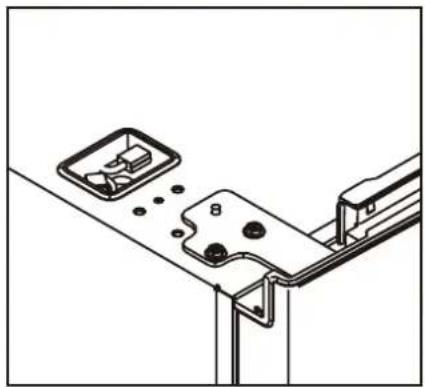
natural_image
Technical line drawing of a mechanical bracket assembly with mounting holes and a labeled component (no text or symbols)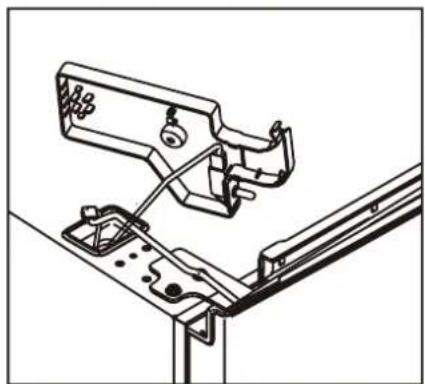
natural_image
Technical line drawing of a mechanical assembly with no visible text or symbols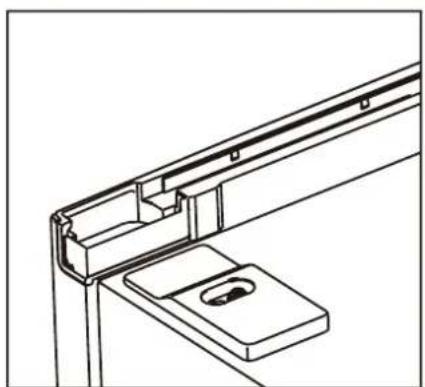
natural_image
Technical line drawing of a mechanical bracket assembly (no text or symbols)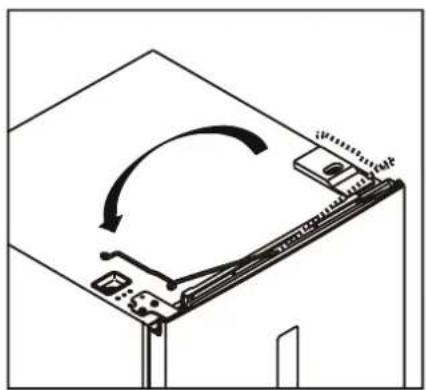
natural_image
Diagram of a mechanical device with an arrow indicating rotational motion (no text or symbols)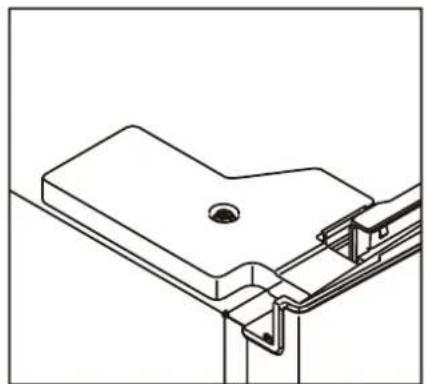
natural_image
Technical line drawing of a mechanical bracket assembly (no text or symbols)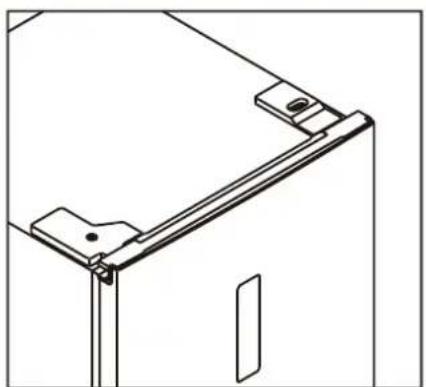
natural_image
Technical line drawing of a mechanical bracket or frame assembly (no text or symbols)Handgreep installeren
natural_image
Line drawing of a screwdriver with a circular head and threaded shaft (no text or symbols)natural_image
Technical line drawing of a mechanical bracket or mounting bracket with a pencil inserted, no text or symbols presenttext_image
Technical diagram showing two labeled components (① and ②) with directional arrows indicating movement or force.3.3 VERVANGEN VAN DE LED-VERLICHTING
text_image
Technical diagram illustrating lock and unlock mechanism of a mechanical component, with labeled parts and directional arrows.4.3 OPSLAG VAN VOEDSEL
Wisepick Productions B.V.
Weena 664
3012 CN Rotterdam
Nederland
Made in China
INSTRUCTIONS FOR USE
FREEZER
WBVR186NFE
WBVR186NFD

WISBERG
TABLE OF CONTENTS
FOREWORD
26
1. SAFETY 27
1.1 Intended use and anticipated unintended use 27
1.2 Safety warnings and regulations 27
1.3 Safety instructions: installation 28
1.4 Safety instructions: use 29
2. PRODUCT FEATURES 30
2.1 Dimensions 30
2.2 Guarantee 31
2.3 Technical Data 31
3. INSTALLATION 32
3.1 Installing the appliance 32
3.2 Door reversal instructions 33
3.3 Replacing the LED lighting 37
4. USE 38
4.1 Precautions for use 38
4.2 Setting the temperature 38
4.3 Storage of food 40
5. MAINTENANCE AND CLEANING 41
6. TROUBLESHOOTING 42
7. TAKING OUT OF SERVICE 44
8. SAFE DISPOSAL 44
FOREWORD
About this document
- This manual contains all information for the correct, efficient and safe use of the appliance.
- This manual is intended for the end user and/or buyer of this appliance.
- Make sure you have read and understood the instructions in this manual completely before installing or using the appliance. Keep this document for future use as long as you use and/or own the appliance.
- Wisepick Productions B.V. cannot in any way be held liable for material or immaterial damage to you or to others, the appliance, your other belongings or belongings of others caused by not following the instructions in this manual.
- The warnings and safety instructions in this manual do not cover all possible circumstances and situations.
- If you contact our customer service, make sure you have the model number ready. The information can be found on the type plate or on the front of this manual.
Original instructions
This manual was originally written in Dutch. All other languages are translated documents. In the case of translation errors, the Dutch version is leading.
Symbols used
| SYMBOL DESCRIPTION | |
 DANGER! DANGER! | Fire hazard and/or flammable materials |
 WARNING! WARNING! | Indicates a dangerous situation which, if not avoided, may result in serious immaterial damage to you or others. |
 CAUTION! CAUTION! | Indicates a dangerous situation which, if not avoided, may result in slight immaterial damage to you or others. |
 ATTENTION! ATTENTION! | Indicates a situation related to material damage. |
| [2276] NOTE | Indicates useful additional information. |

NOTE
You can also find the latest version of this manual online, at wisberghome.com if you search for the article number.
Copyright
The data depicted in this manual, including texts, photographs, graphic drawings, trademarks, (trade) names and logos, are the property of Wisepick Productions B.V. and are protected by copyright, trademark law and/or any other intellectual property right, unless these data belong to a third party. You are never allowed to reproduce, transfer, distribute, store or make the contents of the manual available to third parties, in whole or in part, without the prior written consent of Wisepick Productions B.V. and/or the third party to whom the data belong.
Wisberg contact details
Customer service can be reached at: wisberghome.com
Wisepick Productions B.V.
Weena 664
3012 CN Rotterdam
The Netherlands
Made in China
1. SAFETY
1.1 INTENDED USE AND ANTICIPATED UNINTENDED USE
- This appliance is only intended for use indoors.
- This appliance is not intended for use as a built-in appliance.
- This appliance is intended for domestic use and similar applications such as: - staff kitchens in shops, offices and other work environments; - farms and guests in hotels, motels, B&B and other residential environments; - catering and similar non-retail applications.
- This appliance is not intended for use by persons (including children) with limited physical, sensory or mental capabilities or lack of experience and knowledge, unless they have been given supervision or instructions concerning use of the appliance by a person responsible for their safety.
- Any use of the appliance other than as described in this manual is considered to be unintended use and may result in property and immaterial damage to you or to others, the appliance, your other property or other people's property and the expiry of the warranty.
1.2 SAFETY WARNINGS AND REGULATIONS

WARNING!
- Keep the vents in the appliance housing open.
- Do not use mechanical devices, electrical appliances (such as a hairdryer or heater) or other means to defrost your freezer.
- Ensure that no components of the cooling circuit are damaged during transport and installation of the appliance.
- Do not place electrical appliances in the food storage compartments of the freezer (such as ice cream machines) unless they are of a type expressly declared suitable by the manufacturer.
- Never open the appliance and do not perform any repairs to the appliance that are not described in this manual. The appliance may only be opened for maintenance by an authorised service technician.
- It is dangerous to change the characteristics or specifications of the appliance or to try to modify this product in any way.

DANGER!
- Do not use this appliance with extension leads or power strips.
- Never use a timer, inverter or a separate remote control that automatically turns the appliance on or off. Do not connect the appliance to an earthed power socket that is regularly switched on or off.
- Do not twist or kink the power cable or roll the cable up. Do not clamp the power cable between the surface and the appliance. This can damage the cable's insulation.
- Never pull on the power cable to move the appliance or to unplug it from the earthed socket.
- Keep the power cable away from heat, oil, sharp edges or moving parts.
- Do not use the appliance if the power cable is damaged. Never replace the power cable yourself. The power cable may only be replaced by an authorised service technician.
- Before use, check that the voltage on the socket you want to use matches that on the type plate of the appliance (220-240V\~ 50Hz). Only connect the appliance to an earthed power socket. Damage caused by faulty voltage is not covered by the guarantee.
- Do not store containers containing flammable materials, propellant or explosive substances such as aerosols, refill cartridges for fire extinguishers, etc. in the appliance.
ELECTROCUTION HAZARD DUE TO SHORT CIRCUIT
- Do not use the appliance if any of its components are damaged or faulty. Replace a damaged or faulty appliance immediately. Remove the plug from the earthed socket and contact customer service.
• Always place the appliance on a moisture-resistant and dry surface. - Never use the appliance in a damp room, such as a bathroom, or in the vicinity of a bath, shower or swimming pool.
- Do not touch the appliance or power cable with wet hands.
1.3 SAFETY INSTRUCTIONS: INSTALLATION

CAUTION!
- Never leave the power cable in such a way that someone could trip over it or accidentally pull it.
- Always move the appliance with two people. Use two hands when moving, lifting or turning the appliance.

ATTENTION!
- Use only the original accessories provided for the installation.
- Make sure that the power cable is not stuck or damaged during installation or positioning the appliance.
- Never clean the appliance with aggressive or abrasive cleaners, or sharp objects.
- Cleaning and user maintenance must not be carried out by children without supervision.
- Never drop the appliance and avoid bumping. Dropping or bumping the appliance may affect the proper operation of the appliance. Do not use the appliance if it has been dropped.
• Make sure that the power cable of the installed appliance is always easily accessible. - Ensure that air can circulate around the appliance.
- Pull the plug out of the socket before carrying out any actions on the appliance (e.g. turning the door).
-
The correct operation of the appliance can only be guaranteed if the specified temperature range is respected. If, as a result of another installation, the correct ventilation requirements are not met, the appliance will function correctly, but energy consumption may increase slightly.
-
Do not install the appliance near radiators, stoves, ovens or hobs.
- Do not install the appliance in direct sunlight.
- If you want to avoid forming a combustible gas-air mixture in the event of a leak in the cooling circuit, consider the size of the space in which the appliance is located and the amount of refrigerant used.
- The total volume of the space in which the appliance is installed divided by the amount of refrigerant of the appliance must not be less than 8 g/m3. The amount of refrigerant contained in the appliance can be found on the type plate.
- The appliance may not operate optimally if it is in a place where the ambient temperature is below the minimum or above the maximum of the temperature range for which the appliance is designed for a longer period of time. Please refer to the "Climate Range" table.
Climate Range
The information about the climate range of the appliance is stated on the type plate. It indicates at which ambient temperature (or room temperature) the operation of the appliance is optimal (correct). This type of refrigerator has climate range SN, N, ST and T.
| CLIMATE RANGE PERMISSIBLE AMBIENT TEMPERATURE | |
| SN From +10°C to +32°C | |
| N From +16°C to +32°C | |
| ST From +16°C to +38°C | |
| T From +16°C to +43°C | |
1.4 SAFETY INSTRUCTIONS: USE

CAUTION!
- Do not place carbonated or sparkling drinks in the freezer compartment.
- Do not remove objects from the freezer compartment if your hands are wet/damp as this may cause grazes or frostbite.
- Food storage times recommended by the food manufacturer must be observed.
- When the door is open for a long time, the temperature in the compartments of the appliance can rise considerably.
- Clean surfaces that may come into contact with food and accessible drainage systems regularly.
- Store raw meat and fish airtight in suitable containers or freezer bags in the appliance so that they do not come into contact with or drip on other foods.
- If the appliance remains empty for a long time, switch it off, clean and dry it and leave the door open to prevent mould forming in the appliance.
2. PRODUCT FEATURES
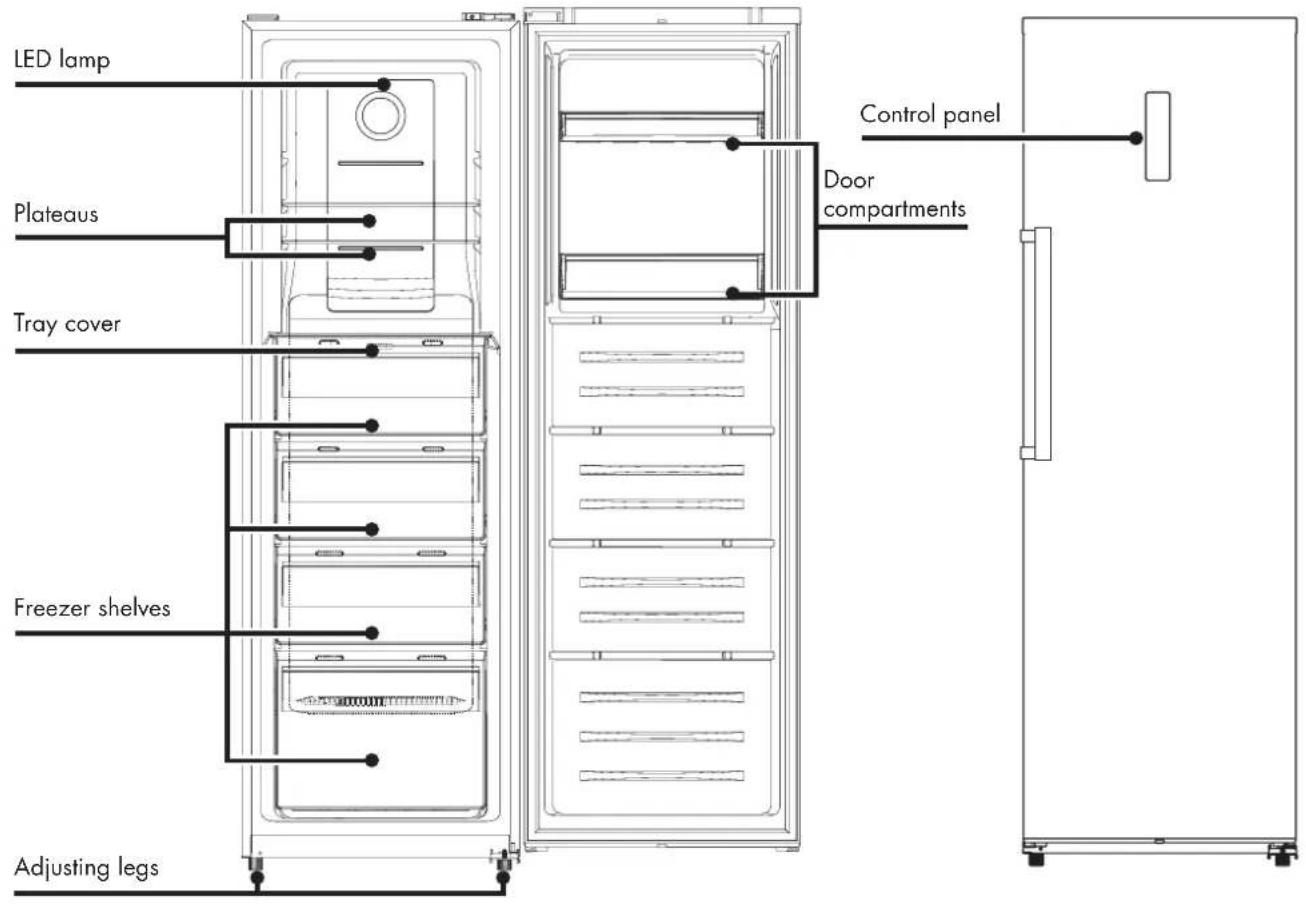
2.1 DIMENSIONS
text_image
LED lamp Plateaus Tray cover Freezer shelves Adjusting legs Control panel Door compartments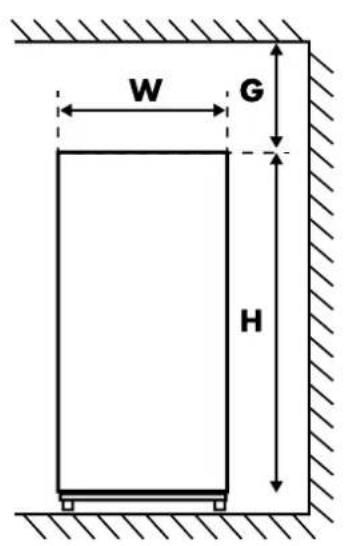
text_image
W G H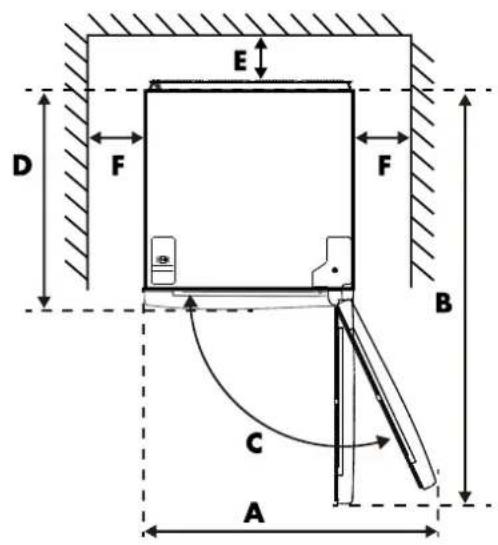
text_image
E D F F B C A• Figure 1. Front view • Figure 2. Top view
| W D H A B C(°) E F G | ||||||||
| 60cm 65cm | 185cm 83 | ,5cm 132,3 | cm 115 min. | 5cm min. | 5cm | min. | 5cm | |
*Figures 1 and 2 illustrate the space required for the appliance.
2.2 GUARANTEE
This appliance comes with a guarantee period of two years after purchase. For more information on guarantee conditions, please visit wisberghome.com. In any case, you must have the purchase order with purchase and/or delivery date in order to be able to claim the guarantee. If you place the appliance in an ambient temperature that is colder than the minimum temperature, the guarantee lapses.
Spare parts
Spare parts for this appliance are available. To order or find out more, visit wisberghome.com.
2.3 TECHNICAL DATA
Does not contain freon
The freon-free freezerrant (R600a) and the environmentally friendly foam insulation (cyclopentane) used for the appliance do not affect the ozone layer and have a very small impact on global warming.
Technical data and energy label
The technical data is indicated on the type plate on the inside of the appliance and on the energy label (both also printed on page 2). The QR code on the energy label provided with the appliance provides a web link to the information related to the appliance performance in the EU EPREL database. Keep the energy label for reference together with the user manual and any other documents provided with this appliance. It is also possible to find the same information in EPREL via the link https://eprel.ec.europa.eu and the model name and product number that can be found on the type plate of the appliance. See link www.theenergylabel.eu for detailed information on the energy label.
3. INSTALLATION
3.1 INSTALLING THE APPLIANCE
Before installing the appliance, carefully review the safety information (chapter 1).
1. Unpack
Remove the packaging materials and dispose of them properly. Check that the appliance is not damaged. Do not connect the appliance if it is damaged. Report any damage immediately to the salesperson via customer service. In that case, keep the packaging.
2. Location
- The location where you place your appliance should be well ventilated.
• Always move the appliance with two people. Use two hands when moving, lifting or turning the appliance. - Do not place the appliance near a heat source, such as a stove or boiler, and avoid direct sunlight, so as to guarantee the cooling effect and save on energy consumption.
- Do not place the appliance in a damp place so that it cannot rust and there is no leakage current.
- Do not use the appliance outdoors. This appliance is only intended for use indoors.
3. Installation of the appliance
- This appliance is not intended for use as a built-in appliance.
- Use only the original accessories provided for the installation.
- To reverse the direction in which the door opens, go to section 3.2.
- During operation, the appliance emits heat to the environment. Therefore there must be at least 5 cm clearance on the top, at least 5 cm on both sides and at least 5 cm on the back of the appliance (see also section 2.1).
- Use the front adjusting legs to level the appliance. If the appliance is not level, it is possible that the door may not close properly, reducing the cooling performance of the appliance. If the appliance is not level, this can also lead to malfunctions.
- Make sure that the power cable is not stuck or damaged during installation or positioning the appliance.
- It must be possible to disconnect the appliance from the mains power supply. The plug must therefore be easily accessible after installation.
• Always place the appliance on a moisture-resistant and dry surface.
- Place the appliance on a firm and flat surface (floor) so that it is stable, otherwise vibrations and noise may occur. When placing the appliance on floor coverings such as carpets, straw mats or polyvinyl chloride (PVC), place a solid sheet or cover under the appliance to prevent colour change due to heat dissipation.
4. Clean
Before putting the appliance into use, clean the interior and all associated accessories with lukewarm water and neutral soap. Dry everything carefully. Do not use solvents or abrasive powders; these may damage the coating.
5. Wait
On first installation (or after turning the door) wait at least four hours before plugging in the appliance. This allows the oil to flow back into the compressor.
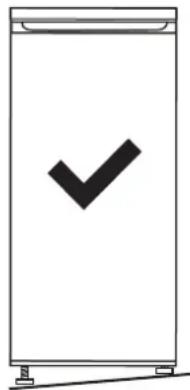
natural_image
Simple line drawing of a vertical container with a black checkmark on the side (no text or symbols)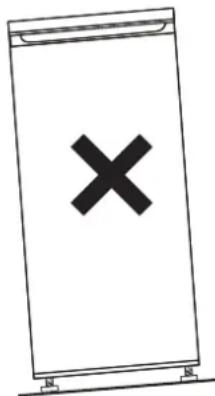
text_image
Simple line drawing of a device with a black 'X' symbol on the screen and a base, likely indicating cancellation or error.6. Switch on
Before plugging in the power cable, check that the voltage and frequency of the type plate match your power supply network. Only connect the appliance to an earthed power socket. After one hour, open the door of the appliance. If the temperature in the appliance is noticeably lower, this indicates that the cooling system is operating normally.
7. Mounting accessories
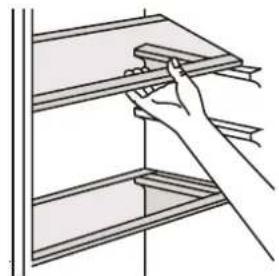
- Adjustable shelves
The walls of the appliance are equipped with a series of guide profiles so that the shelves can be inserted if desired.
- Installing the door compartments
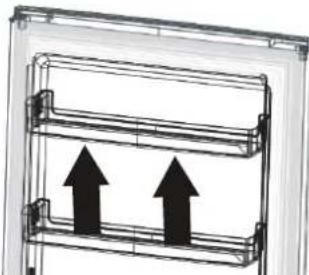
To store food of different sizes, the door compartments can be set to different heights. Proceed as follows: gradually pull the compartment in the direction of the arrows until it comes loose and put it in the desired position.
8. Storing food
See Section 4 "Use".
natural_image
Line drawing of a hand holding a shelf with a wooden board (no text or symbols)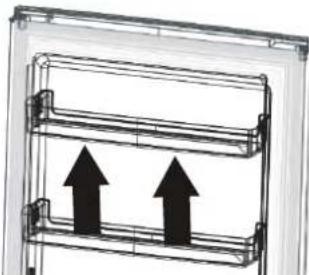
natural_image
Diagram of a mechanical or electrical component with two upward-pointing arrows, no text or symbols present.3.2 DOOR REVERSAL INSTRUCTIONS
- To remove the door, the appliance must be tilted backwards. We recommend doing this with two people. Rest the appliance on a firm surface so that it does not slip away as you reverse the door.
- Keep all removed parts to remount the door later.
- Do not lay the appliance down flat. This can damage the cooling system. If the appliance does have to be placed on its back or side for some time during this process, it must be able to stand upright for four hours before connecting it to prevent damage to the internal components.
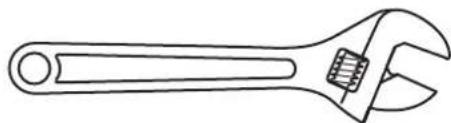
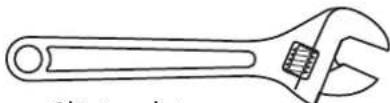
Necessary tools:

natural_image
Line drawing of a screwdriver with a pointed tip (no text or symbols)• Crosshead screwdriver
natural_image
Line drawing of an adjustable wrench with a handle and spring (no text or symbols)- Adjustable spanner

natural_image
Line drawing of a screwdriver with no text or symbols- Flat head screwdriver
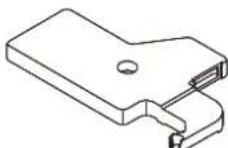
Supplied parts:
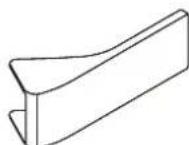
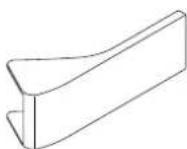
2 x Handle cover 2x Screws



natural_image
Technical line drawing of a vertical metal bracket with mounting flanges (no text or symbols)Left hinge cover 1xLeft closure guide1x 1x Handle
- Unplug and empty the appliance.
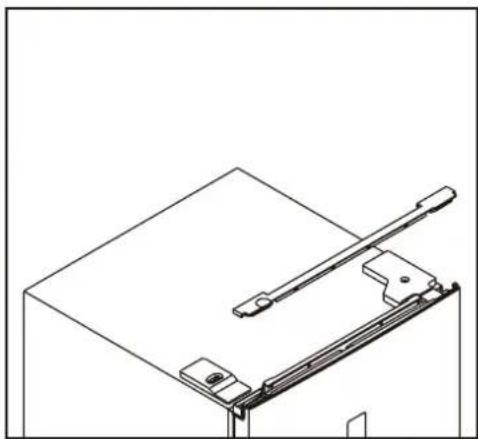
- Remove the wiring covers at the top of the door.
- Remove the wiring covers at the top of the door.
natural_image
Technical line drawing of a mechanical clamp or bracket assembly (no text or symbols)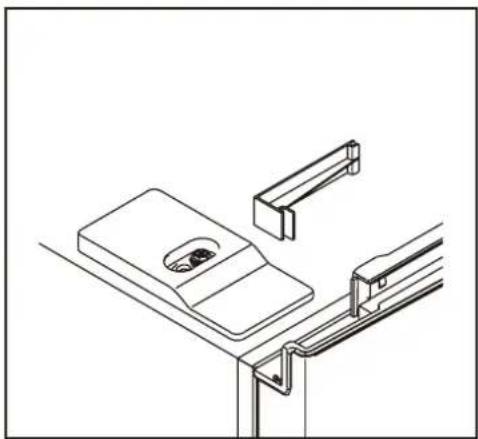
natural_image
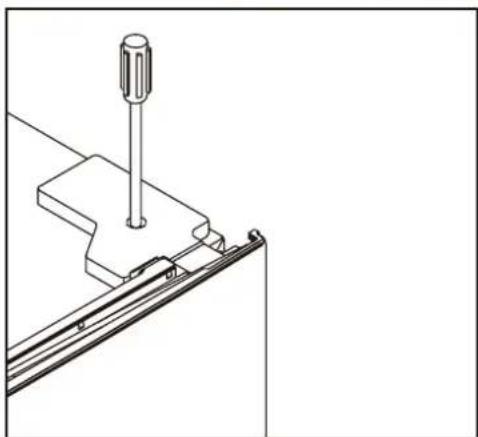
Technical line drawing of a mechanical assembly with no visible text or symbols- Unscrew the cover top right and disconnect the door switch connector and the display.
natural_image
Technical line drawing of a mechanical assembly with a screw and bracket (no text or symbols)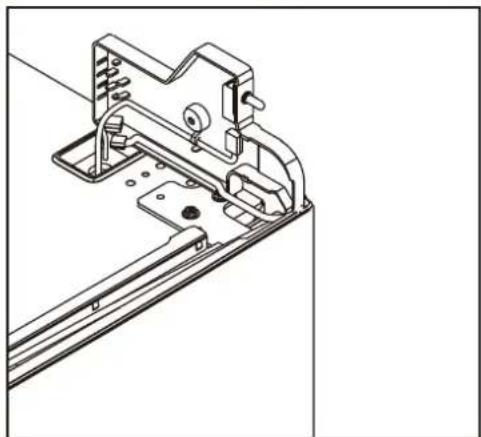
natural_image
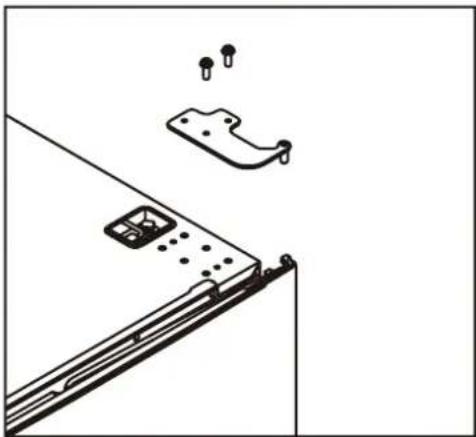
Technical line drawing of a mechanical bracket assembly (no text or symbols)- Unscrew the top hinge and remove the door.
natural_image
Technical line drawing of a mechanical assembly with mounting holes and a bracket (no text or symbols)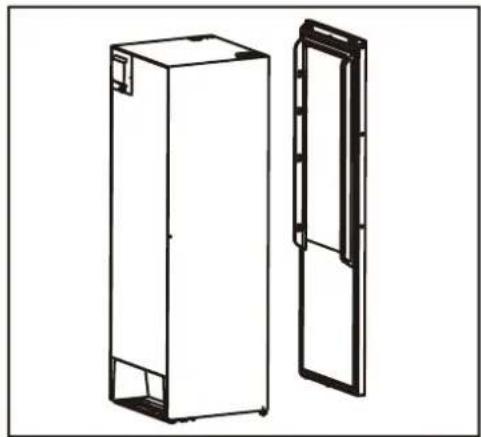
natural_image
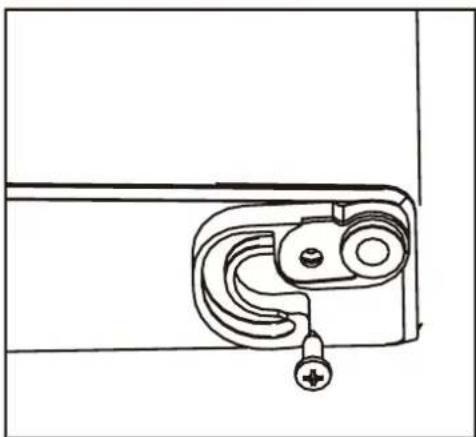
Technical line drawing of two rectangular metal enclosure units, one open and one closed, with no text or symbols present.- Remove the right closure guide and take the left safety closure included with the accessories supplied and install it on the left side.
natural_image
Line drawing of a mechanical latch or bracket with a handle and mounting base (no text or symbols)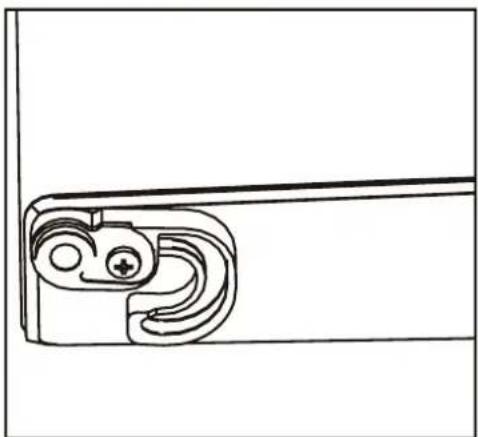
natural_image
Technical line drawing of a mechanical bracket or clamp (no text or symbols)
- Remove the lower hinge. Move the adjustable foot from the left to the right.
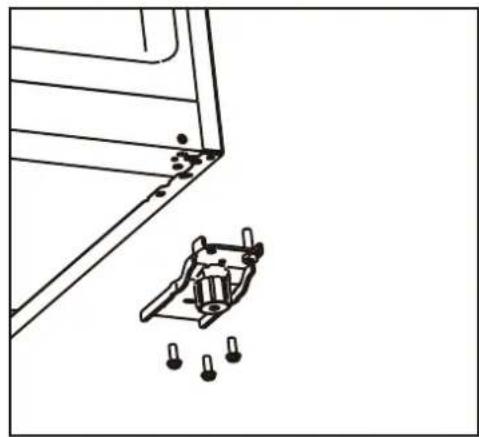
natural_image
Technical line drawing of a mechanical bracket with mounting holes and a separate bracket component (no text or symbols)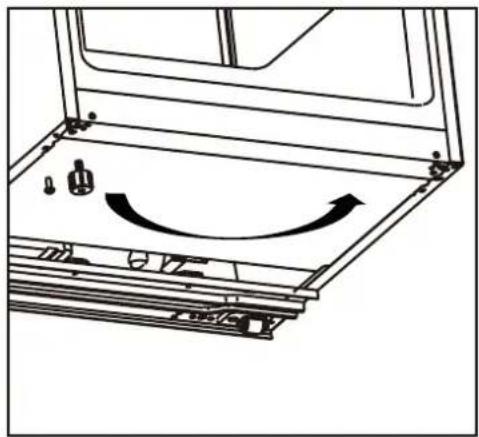
natural_image
Technical line drawing of a mechanical assembly with no visible text or symbols- Loosen the bottom hinge pin and move it from the right to the left. Now install the lower hinge on the left side of the appliance.
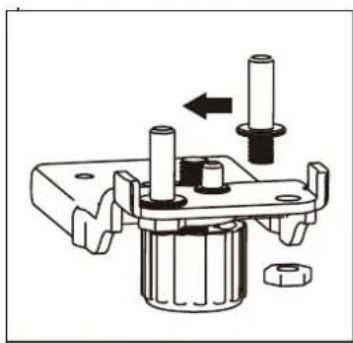
natural_image
Mechanical assembly diagram showing a shaft and housing with a bolt and nut, no text or symbols present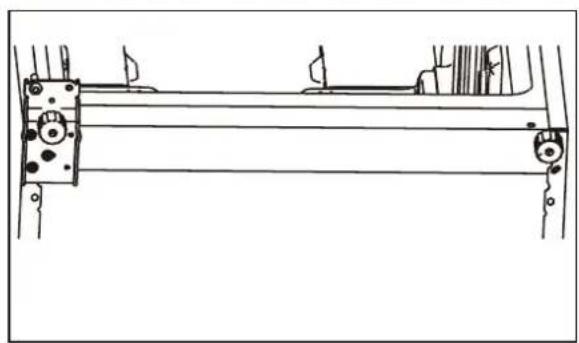
natural_image
Technical line drawing of a mechanical assembly with rollers and brackets (no text or symbols)- Loosen the top hinge pin and move it from the bottom to the top. Remove the door switch from the right hinge cover and install it in the left hinge cover included in the accessories supplied.
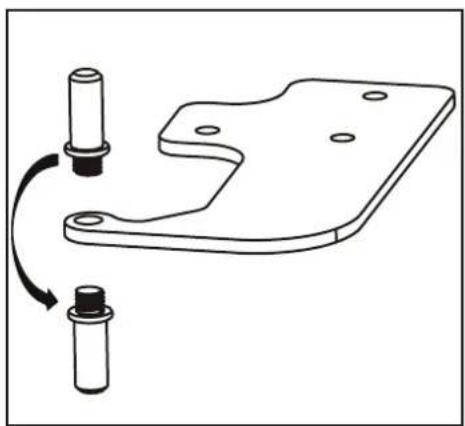
natural_image
Technical line drawing of a mechanical bracket with two cylindrical components and a curved arrow indicating rotation (no text or symbols)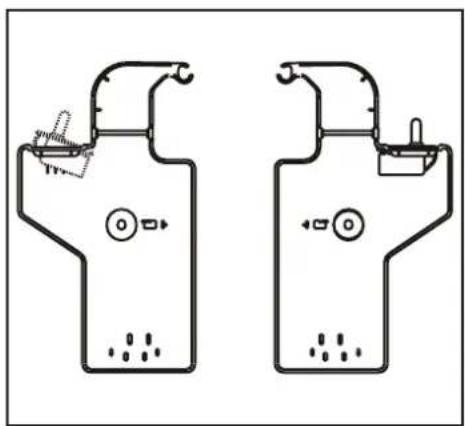
natural_image
Two identical line drawings of a showerhead with control valves and a water level indicator (no text or symbols)- Unscrew the top cover on the left, move it and install it on the right.
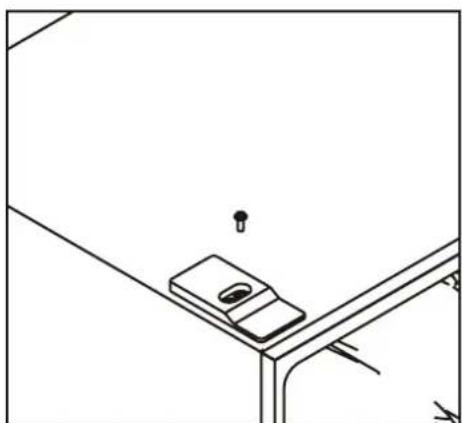
natural_image
Simple line drawing of a mechanical device mounted on a bracket (no text or symbols)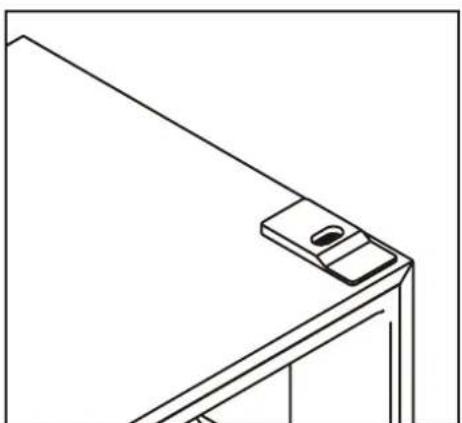
natural_image
Line drawing of a mechanical bracket or bracket with a small inset detail (no text or symbols)- Remove the refrigerator and freezer door gaskets, then rotate and reattach them.
- Install the door and move the connecting wires from the right to the left.
- Install the top hinge on the left, adjust the top hinge slightly during installation to ensure that the door seal is properly sealed.
- Connect the plug. Install the cover on the hinge.
- Install the wiring cover caps.
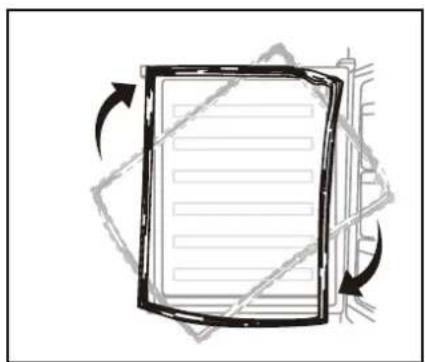
natural_image
Diagram of a document with arrows indicating rotational movement, no text or symbols present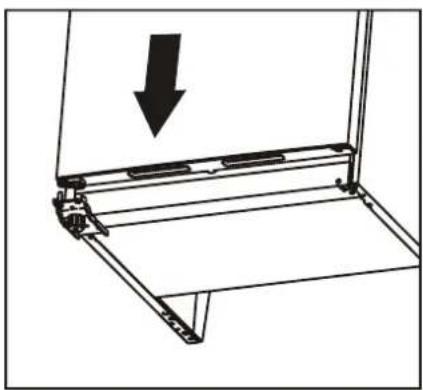
natural_image
Technical line drawing of a mechanical bracket with an arrow indicating downward motion (no text or symbols)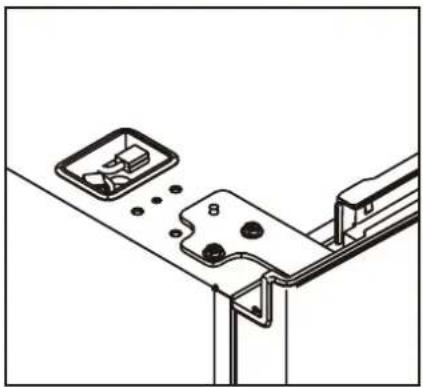
natural_image
Technical line drawing of a mechanical assembly with mounting brackets and a numbered component (no text or symbols)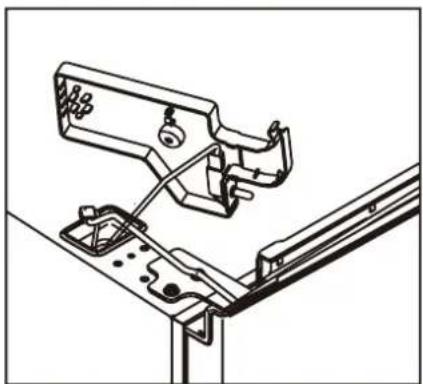
natural_image
Technical line drawing of a mechanical assembly with no visible text or symbols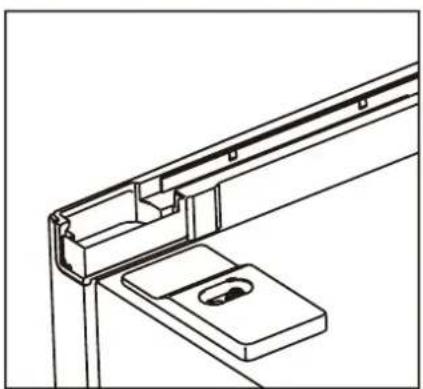
natural_image
Technical line drawing of a mechanical bracket assembly (no text or symbols)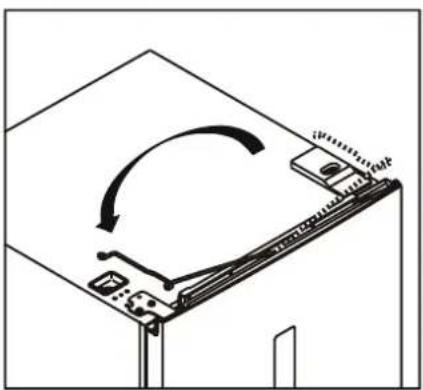
natural_image
Diagram of a mechanical device with an arrow indicating rotational motion (no text or symbols)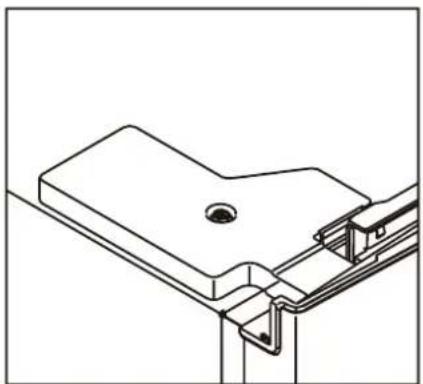
natural_image
Technical line drawing of a mechanical bracket assembly (no text or symbols)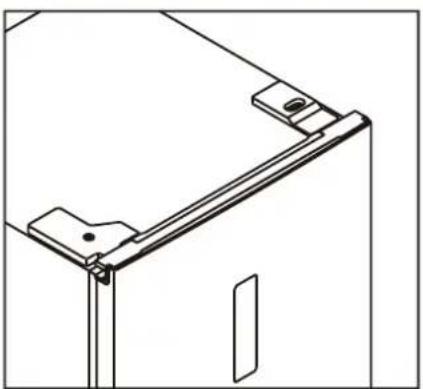
natural_image
Technical line drawing of a mechanical bracket or frame assembly (no text or symbols)Install the handle
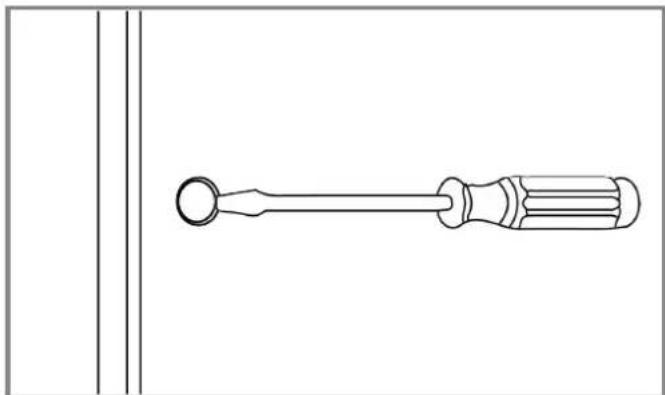
- Remove the covers from the screw holes.
natural_image
Line drawing of a screwdriver with a circular head and threaded shaft (no text or symbols)- The handle is in a freezer drawer. Screw the handle to the door using the screws supplied.
natural_image
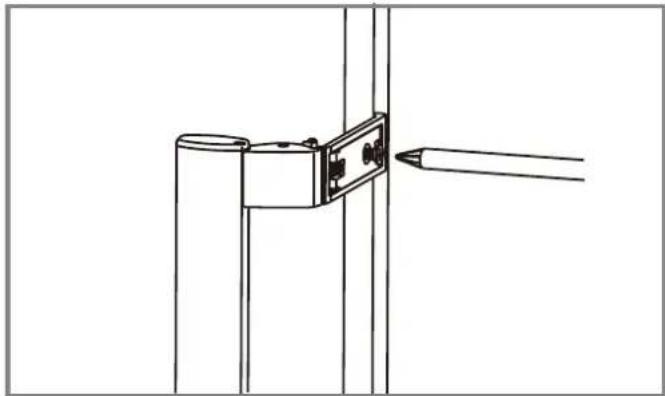
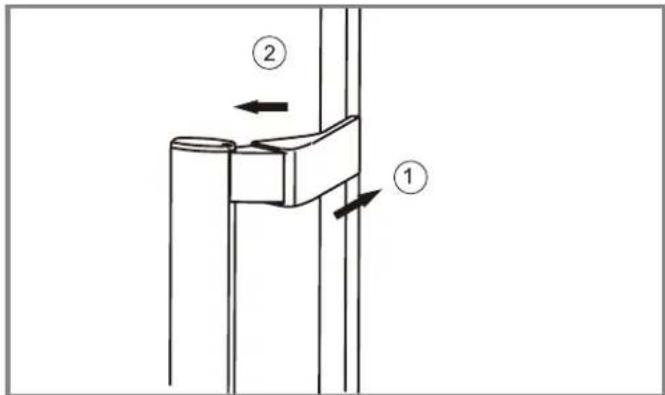
Technical line drawing of a mechanical bracket assembly with a tool inserted (no text or symbols)- Place the handle covers over the screws.
text_image
Technical diagram showing two labeled components (① and ②) with directional arrows indicating movement or force.3.3 REPLACING THE LED LIGHTING
This product contains a LED light source of energy efficiency class G. Replacement or maintenance of the LED lighting must be carried out by the manufacturer, its maintenance representative or an equivalent qualified person.
4. USE
4.1 PRECAUTIONS FOR USE
- On first use or after a long period of downtime: run the appliance for at least four hours at position '-22' before placing products in the freezer. After 24 hours, set the temperature control at '-18'.
- The appliance may not operate optimally (risk of thawing or too high a temperature in the freezer) if it is in a place where the ambient temperature is below the minimum of the temperature range for which the appliance is designed for a longer period of time. The information about the temperature range (climate type) of the appliance is stated on the type plate, which is explained in section 1.3.
- The interior temperature may be affected by factors such as the location of the cooling unit, the ambient temperature and the frequency with which the door is opened. Adjust the temperature setting if desired.
- If vibration noise occurs because the appliance is positioned against the wall or if the wall becomes black due to air circulation around the compressor, you should place the appliance away from the wall.
- Do not place filled glass or can packages in the freezer to avoid breakage due to volume expansion.
- Do not place electrical appliances in the freezer (such as ice cream machines) unless they are of a type expressly declared suitable by the manufacturer.
- Packaging with flammable gases or liquids may leak at low temperatures, do not store flammable gases or liquids in the appliance.
- Do not store containers containing flammable materials, propellant or explosive substances such as aerosols, refill cartridges for fire extinguishers, etc. in the appliance.
- Do not place carbonated or sparkling drinks in the freezer compartment.
- Do not use the appliance if any of its components are damaged or faulty. Replace a damaged or faulty appliance immediately. Remove the plug from the earthed socket and contact customer service.
- Only use the power cable installed on the appliance from the factory. Do not change the power cable. The power cable may only be replaced by an authorised service technician.
- Never use the appliance in a damp room, such as a bathroom, or in the vicinity of a bath, shower or swimming pool.
- Before use, check that the voltage on the socket you want to use matches that on the type plate of the appliance (220-240V\~ 50Hz). Only connect the appliance to an earthed power socket. Damage caused by faulty voltage is not covered by the guarantee.
4.2 SETTING THE TEMPERATURE
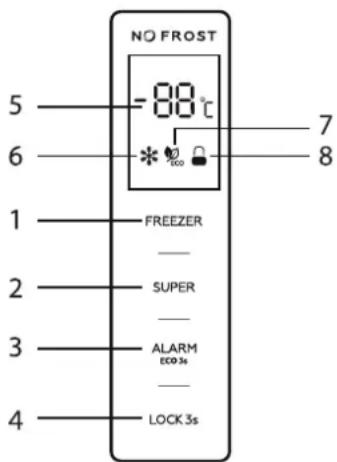
1. Control panel
- Controls
- FREEZER: Temperature control of the appliance
- SUPER: Switch 'Super mode' on or off
- ALARM/ECO: Switch door open alarm on or off, 'Eco-mode' on or off.
- LOCK: Lock and unlock the control panel.
- LED screen
- Display set temperature
- 'Supermodus' indicator
- 'Eco-mode' indicator
- 'Lock' indicator
text_image
NO FROST -88°C 5 6 7 8 1 FREEZER 2 SUPER 3 ALARM ECO 3s 4 LOCK 3s*The buttons only work when the appliance is unlocked. The buttons emit a beep when touched.
2. Temperature setting
The freezer temperature can be set by pressing the 'Freezer' button. After the most recent setting, the display will blink for five seconds. After this, the desired temperature is set and this is shown on the display. (5). The following settings are possible:
-14, -16, -18, -20 and -22 and 'Supermode'. The recommended setting is -18 °C.
3. Enable 'Supermode'
When the 'Supermode' function is enabled, the temperature in the box will be cooled quickly, which helps prevent any loss of the food's nutritional value and preserve its freshness. Press the 'Super' button (2) to select 'Supermode'.
After the 'Supermode' indicator has blinked for five seconds, 'Supermode' is enabled.
When 'Supermode' is selected, the 'Supermode' indicator will illuminate and display -25 °C. When 'Supermode' is enabled, the temperature of the appliance cannot be changed. In this case, the 'Supermode' indicator flashes three times. If the temperature needs to be changed, first switch off 'Supermode'. To switch off 'Supermode':
- Press the 'Super' button to switch off 'Supermode'.
- Once 'Supermode' is switched on, and the appliance is not reset, 'Supermode' will automatically switch off after 50 hours. The appliance returns to the last set temperature setting.
*In 'Supermode' the appliance will consume more energy than normal. The most energy-efficient mode for this appliance is -18 °C. In 'Supermode' the appliance may emit slightly more noise.
4. ECO mode
Press the 'Alarm / Eco' button for three seconds to select 'Eco-mode'. After the 'Eco' indicator on the display has blinked for five seconds, 'Eco-mode' is enabled. When 'Eco-mode' is selected, the 'Eco' indicator illuminates on the display. The appliance is now set to the most efficient temperature setting, based on the ambient temperature. The appliance will be set automatically according to the following situations.
| Ambient temperature (T _a ) Between 10°C and 27°C Between 28° and 34°C Above 35°C | |||
| Set temperature -18°C -16°C | -15°C | ||
When 'Eco-mode' is enabled, the temperature of the appliance cannot be changed.
If the temperature needs to be changed, first switch off 'Eco-mode' by pressing and holding the 'Eco' button for three seconds.
5. Door alarm
If the door remains open for more than 90 seconds, the door alarm goes off. You can disable it by closing the door properly or by pressing the 'Alarm / Eco' button.
6. Temperature alarm
If the temperature in the appliance becomes too high, the temperature alarm will go off. The display shows 'HT' (High Temperature), alternating with the current temperature in the appliance.
Briefly press the 'Alarm / Eco' button to turn off the temperature alarm. If the temperature in the appliance has dropped to the set temperature, the alarm will be disabled and 'HT' will automatically disappear from the display.
7. Unlock/Lock
Press the 'Lock' button for three seconds to lock the control panel. The display shows the lock and unlock symbol. When the lock is enabled, the appliance settings cannot be changed. In this case, the 'Lock' indicator blinks three times on the display. If the appliance needs to be configured, first disable the lock by pressing and holding the 'Lock' button for three seconds.
When the control is unlocked, all buttons are available. If no action is taken within 25 seconds the control panel automatically locks.
8. Daily use
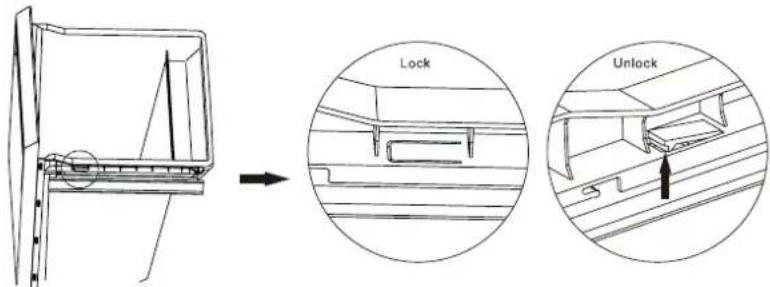
Removing the refrigerated drawer.
- Pull out the bottom drawer to the stop position.
- Push up the lock on both sides of the bottom drawer.
- Pull out the bottom drawer.
text_image
Technical diagram illustrating lock and unlock mechanism of a mechanical component with labeled parts and directional arrows4.3 STORAGE OF FOOD
- The freezer is suitable for freezing fresh food and storing frozen food for a long time.
• The maximum amount of food that can be frozen in 24 hours is for this appliance: 17 kg.
• The freezing process takes 24 hours. Do not add any other food to freeze during this period. - The temperature of the freezer is kept below -18°C if the thermostat is set at '-18'. This allows food to be stored for a long time. The storage period on the packaging must be observed.
- The ideal temperature setting for the freezer is -18°C. It is possible to set it colder, but in principle this is not necessary. A lower temperature does not mean that food will last longer, but every degree lower does mean more energy consumption.
- Allow hot food to cool to room temperature before putting it in the freezer.
- Only freeze fresh and thoroughly cleaned foods.
- Prepare the food in small portions so that it is soon completely frozen and can then be thawed in the desired amount.
- Do not allow fresh, non-frozen food to come into contact with food that has already been frozen, and prevent the temperature of the food that has already been frozen from rising.
- Lean foods are better and more durable than fatty foods; salt shortens the shelf life of food.
- Ice lollies, if eaten directly from the freezer, can cause frostbite.
- It is advisable to indicate the freezing date on each individual package in order to keep track of the shelf life.
- It is advisable to keep the time between buying the food and putting it in the freezer as short as possible.
- Pack the food airtight into food freshness bags before distributing it evenly over the freezer drawers.
- Packaging bags you use should be dry, in case several packaging bags are frozen together.
- Ensure there is sufficient space between foods. Putting them too close together blocks the cold airflow, affecting the cooling effect.
- To prevent cross-contamination and odour transfer, food should be packed in suitable materials that are sturdy, flavourless, impermeable to air and water, non-toxic and pollution-free.
Tips for buying frozen goods
- When you buy frozen products, read the storage guidelines on the packaging. You can store any frozen product for the period indicated by the star rating. This usually corresponds to the period stated as "best before" on the front of the package.
- Ensure that frozen food packaging is in perfect condition.
• Always buy frozen products at the end of your shopping trip or visit to the supermarket. - Try to keep frozen food together while shopping and on the way home as this helps to keep food cooler.
- Only buy frozen food if you can freeze it immediately. In most shops, you can buy special insulating bags. These keep frozen food cold for longer.
- Use good quality food and handle it as little as possible. When food is frozen in small quantities, it takes less time to freeze or thaw it.
- Estimate the amount of food to be frozen. When freezing large quantities of fresh food, set the temperature control knob to low mode, this sets the freezer temperature lower. This allows you to freeze the food quickly, keeping it fresh.
5. MAINTENANCE AND CLEANING
Before cleaning the appliance, carefully review the safety information (Section 1).

CAUTION!
• Always remove the plug from the earthed socket before cleaning the appliance.
- Cleaning and user maintenance must not be carried out by children without supervision.
- Never touch the plug with wet or moist hands because of the risk of electric shocks and injury.
- Do not remove objects from the freezer compartment if your hands are wet/damp as this
- may cause grazes or frostbite.
- Do not put your hands unprotected in the bottom of the appliance as the sharp metal corners can cause scratches.
- Do not use mechanical devices, electrical appliances (such as a hairdryer or heater) or other means to defrost your appliance.
- Do not use the appliance if any of its components are damaged or faulty. Replace a damaged or faulty appliance immediately. Remove the plug from the earthed socket and contact customer service.

ATTENTION!
- Clean surfaces that may come into contact with food and accessible drainage systems regularly.
- Never open the appliance. The appliance may only be opened for maintenance by an authorised service technician.
- Do not spill water directly onto the appliance to prevent rust, leakage and accidents.
- Do not use water jets and steam to clean the appliance.
- To prevent damage, do not use a hard brush, steel brush, detergent, soap powder, alkaline detergent, benzene, petrol, acids, chlorine, abrasive powders, hot water or other corrosive or soluble substances to clean the cabinet surface, door gasket or plastic decorative parts etc.
- The electrical parts of the appliance may only be cleaned with a dry cloth.

NOTE
Once in use, it is best to use the appliance continuously. Under normal circumstances it is best not to interrupt its use in order not to affect the lifetime of the appliance.
DEFROSTING
This freezer is a no-frost freezer. This means that defrosting is automatic. If ice does form in the freezer, please contact our customer service as this should not happen.
INTERIOR AND EXTERIOR CLEANING
- Food residues in the appliance can cause a bad smell. The appliance should therefore be cleaned regularly.
- Remove all drawers, shelves, door compartments etc. and clean with a soft cloth or sponge moistened with warm water or a neutral detergent.
- If you are using cleaning agents, clean with a soft cloth or sponge, and wipe dry.
• Regularly remove the dust from the back panel and side plates of the appliance. Use a dry cloth for this (no water). - If the appliance will not be used for several months, switch it off, unplug it from the socket, clean and dry it and leave the door open to prevent mould forming in the appliance. For more information on switching off and storage, see Section 7.
6. TROUBLESHOOTING
You can solve some problems easily yourself using the table below. If the following descriptions do not solve your problem, please contact our customer service: wisberghome.com
Only an authorised service technician may solve the malfunctions that are not listed in this manual. Repairs carried out by unauthorised persons may cause injury and/or serious damage to persons and property.
PROBLEM POSSIBLE CAUSE SOLUTIONS
| The appliance does not cool at all. | - The control knob for the temperature is wrong.- The plug is not inserted properly.- There is no voltage on the socket.- The fuse is blown or defective.- The appliance is installed in a place where the ambient temperature is less than 10°C, such as a balcony, garage or storage room.- The power has failed. | - Set the thermostat to another position.- Insert the plug properly.- Open the door and check if lamp is on. If the lamp is off, there may be no voltage on the socket. Have the socket repaired by an electrician.- Check the fuse and replace if necessary.- Install the appliance in a protected location where the ambient temperature is higher than 10°C. If the appliance is installed in a room with too low a temperature, the internal cooling system may not operate correctly.- Try to open the door of the appliance as little as possible to keep the food safe and fresh for hours. If you know about the power failure beforehand: Set the thermostat button in the high mode an hour in advance, so that the food is frozen completely. (Do not add any other food to freeze during this period!) Set the temperature mode back to the original setting in good time when the power supply is restored. |
| The temperature in the appliance is too low/high. | - The temperature is not set correctly.- The door is not closed properly.- The temperature of the food is too high.- Many products are stored at the same time.- The door has been opened too often. | - Set a higher/lower temperature.- Find the cause of the door not closing properly, remove or move possible obstacles.- Allow the food to cool to room temperature before preserving.- Preserve fewer products at the same time.- Only open the door if necessary. |
| Strange smell in the appliance. | - There is spoiled food in the appliance.- The appliance is not clean.- Food with a strong smell is present in the appliance. | - Throw away spoiled food.- Clean the appliance.- Pack food with a strong smell. |
| The door does not open easily. | - You tried to open the door immediately after closing. | - Wait a few seconds between closing and re-opening the door. |
PROBLEM POSSIBLE CAUSE SOLUTIONS
| The compressor works continuously. | - Too many products are stored at the same time.- The room temperature is too high.- The food placed in the appliance was too hot.- The door is not closed properly. | - Wait a few hours and then check the temperature again.- Please refer to Section 4.- Allow food to cool to room temperature before storing.- See the next section. |
| The alarm goes off. | - The door is open.- The temperature in the appliance is too high. The display shows the message 'HT' | - Make sure the door is completely closed and stays closed. Press the 'Alarm/Eco' button.- Reduce the ambient temperature by opening windows or doors or use sun blinds. Allow food to cool to room temperature before placing it in the appliance. Go to Section 6 of Chapter 4 for more information. |
| The side panels are hot. | - This is normal. The heat exchanger components are on the side of the appliance. Immediately after installation, the sides become hot, after the fridge reaches its internal temperature, the temperature of the side panels will decrease. | |
| The display shows 'HT'. | - The temperature in the appliance is too high. | - Lower the ambient temperature by opening windows or doors or use sun blinds. Allow food to cool to room temperature before placing it in the appliance. Do not place too much food in the appliance at the same time. A maximum of 17 kg can be frozen in 24 hours. Go to Section 6 of Chapter 4 for more information. |
| Abnormal noise | - The appliance is not stable/level.- The appliance is making contact with the wall or other objects.- 'Super mode' is enabled. | - Readjust the appliance's adjusting legs.- Move the appliance slightly.- This is normal. 'Super mode' uses the maximum power of the appliance. This means the temperature is temporarily set to -25°C. After 50 hours, 'Super-mode' is automatically disabled. |
| The temperature cannot be set. | - 'Super mode' is enabled.- 'Eco mode' is enabled.- The control panel is locked. | - Go to Chapter 4 'Use' to switch off the function and set the temperature. Check the symbol on the display to turn off the corresponding function. |
| The appliance freezes too much. | - The temperature of the appliance is set too high.- 'Super mode' is enabled. | - Go to Chapter 4 for information on setting the temperature. The recommended temperature setting for this appliance is -18°C.- Go to Section 3 of Chapter 4 to switch off 'Super mode'. |
| The lamp is broken. | - The lamp is broken. - Contact customer service. | |
7. TAKING OUT OF SERVICE
Switching off and storage
- If the appliance will not be used for several months, first switch it off and then pull the plug out of the socket.
• Make sure the appliance is completely thawed. - Clean the inside thoroughly and wipe dry. To prevent the formation of odours and moulds, leave the door open: block it.
- Clean the door gasket groove with soap and water and wipe everything dry with a soft cloth.
- Do not use a hard brush, steel brush, detergent, soap powder, alkaline detergent, benzene, gasoline, acids, hot water or other corrosive or soluble substances to clean the appliance.
- Store the cleaned appliance in a dry, ventilated place, away from a heat source. Make sure the appliance is on a level surface and do not place heavy objects on top.
- The appliance in storage must not be accessible to children playing.
8. SAFE DISPOSAL

DANGER!
Waste processing
- Refrigerants and the cyclopentane foam used for the appliance are flammable. When the appliance is disposed of, it must therefore be kept away from sources of fire and collected or returned to a qualified waste processing company.
- The appliance may not under any circumstances be incinerated to prevent damage to the environment or other damage.
- R-600a is used as a refrigerant in this appliance. Therefore, please contact local authorities regarding the safe disposal of this appliance.

The materials used in this appliance marked with this symbol are recyclable. This marking indicates that, throughout the EU, this product must not be disposed of with the household waste.

This symbol indicates that the device must not be disposed of with other household waste within the EU. By disposing of the device properly, you help to prevent possible dangers to the environment and human health. The recycling of materials contributes to the conservation of natural resources. Therefore, do not dispose of discarded electronic devices with household waste. When disposing of the device, follow the national and local regulations regarding the environmentally friendly disposal of electronic equipment. You can also contact Wisepick Productions B.V. if you no longer wish to use the device or to return the device.

ATTENTION!
- The refrigerants and insulation materials used in your appliance require special care. When draining, ensure that the pipes on the back of the appliance are not damaged.
- Avoid damaging the cooling unit, especially the heat exchanger.
Wisberg contact details
Customer service can be reached at: wisberghome.com
Wisepick Productions B.V.
Weena 664
3012 CN Rotterdam
The Netherlands
Made in China
MANUEL D'UTILISATION
CONGÉLATEUR
WBVR186NFE
WBVR186NFD

WISBERG
TABLE DES MATIÈRES
AVANT-PROPOS
47
1. SÉCURITÉ 48
Wisepick Productions B.V.
Weena 664
3012 CN Rotterdam
Les Pays-Bas
Made in China
1. SÉCURITÉ
1.1 UTILISATION PRÉVUE ET UTILISATION INVOLONTAIRE PRÉVISIBLE
natural_image
Simple line drawing of a rectangular container with a black checkmark on the side (no text or symbols)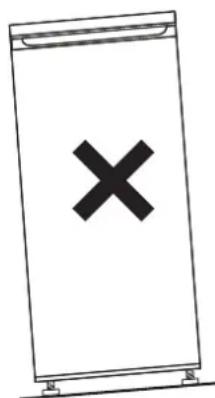
text_image
Simple line drawing of a rectangular sign with an 'X' symbol in the center, likely indicating cancellation or rejection.5. Attente
natural_image
Line drawing of a hand installing or adjusting a shelf panel on a rack (no text or symbols)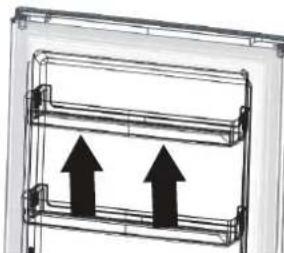
natural_image
Diagram of a mechanical or electrical component with two upward-pointing arrows, no text or symbols present.3.2 INVERSION DU SENS DE ROTATION DE LA PORTE
natural_image
Line drawing of a screwdriver with no text or symbols• Tournevis cruciforme
natural_image
Line drawing of an adjustable wrench with a handle and screw (no text or symbols)- Clé à molette

natural_image
Line drawing of a screwdriver with no text or symbols- Tournevis plat
Pièces fournies :
natural_image
Technical line drawing of a vertical metal bracket with mounting flanges (no text or symbols)natural_image
Technical line drawing of a mechanical clamp or bracket assembly (no text or symbols)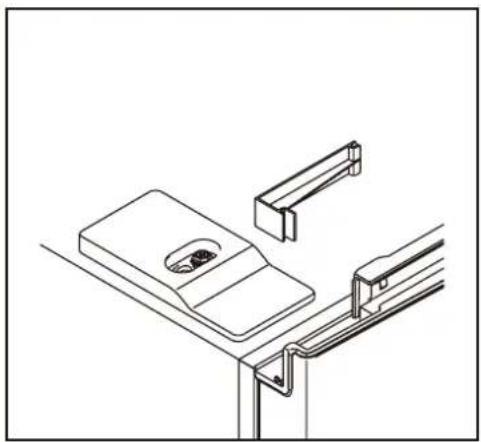
natural_image
Technical line drawing of a mechanical bracket assembly (no text or symbols)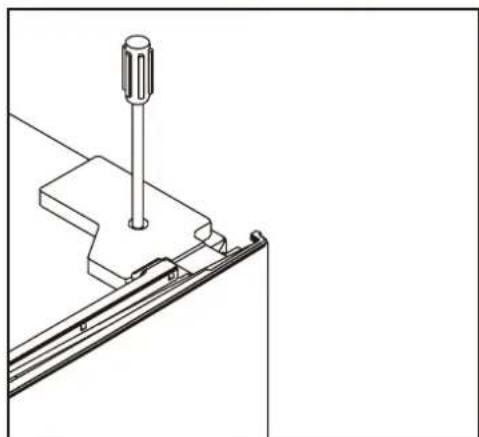
natural_image
Technical line drawing of a mechanical assembly with a screw and bracket (no text or symbols)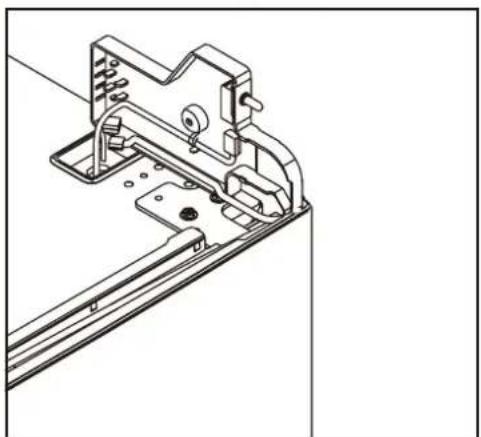
natural_image
Technical line drawing of a mechanical bracket assembly (no text or symbols)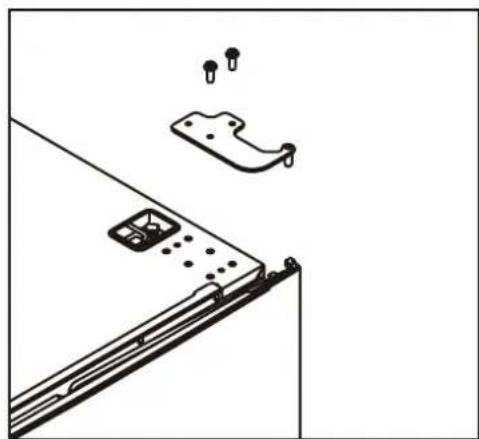
natural_image
Technical line drawing of a mechanical assembly with mounting holes and a bracket (no text or symbols)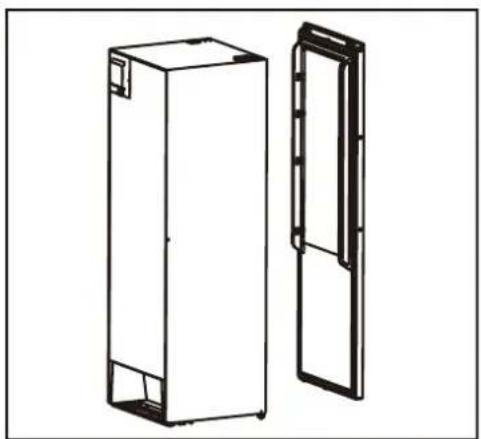
natural_image
Technical line drawing of two rectangular metal enclosure units, one open and one closed, with no visible text or symbols.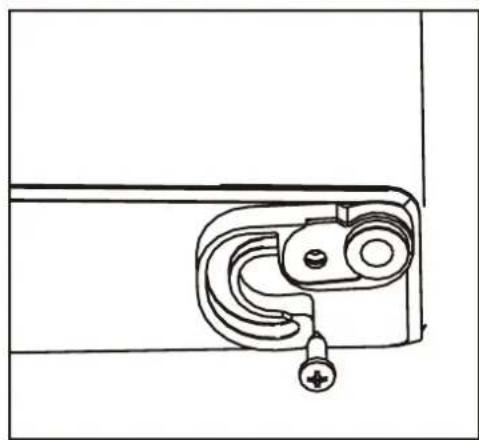
natural_image
Line drawing of a door latch mechanism with handle and mounting bracket (no text or symbols)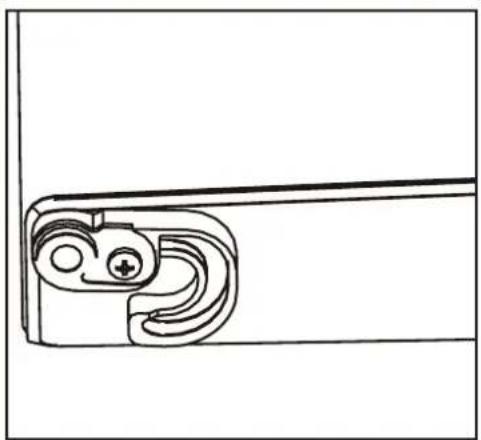
natural_image
Technical line drawing of a mechanical bracket or clamp (no text or symbols)natural_image
Technical line drawing of a mechanical bracket with mounting holes and a separate mounting bracket (no text or symbols)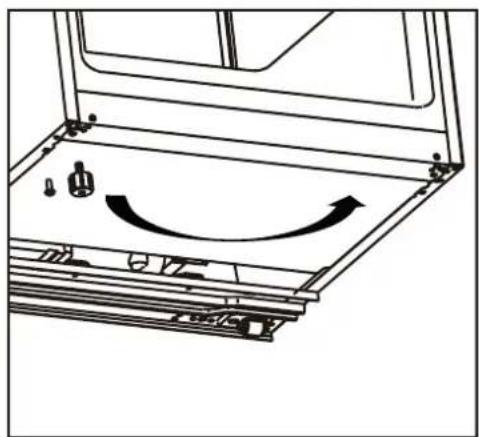
natural_image
Technical line drawing of a mechanical assembly with no visible text or symbolsnatural_image
Mechanical assembly diagram showing a shaft and nut assembly with a directional arrow indicating motion (no text or symbols)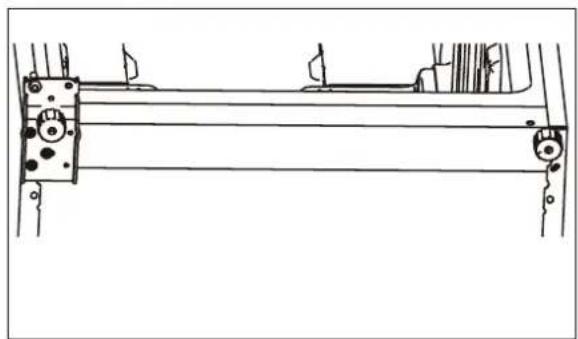
natural_image
Technical line drawing of a mechanical assembly with mounting brackets and a central rod (no text or symbols)natural_image
Technical line drawing of a mechanical bracket with two cylindrical components and a curved arrow indicating rotation (no text or symbols)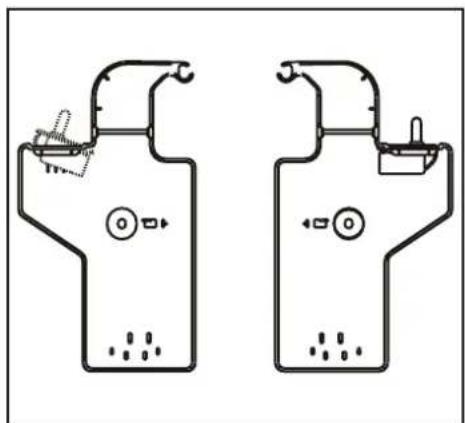
natural_image
Two identical line drawings of a showerhead with control valves and buttons, no text or symbols present.natural_image
Simple line drawing of a mechanical bracket with a small inset component (no text or symbols)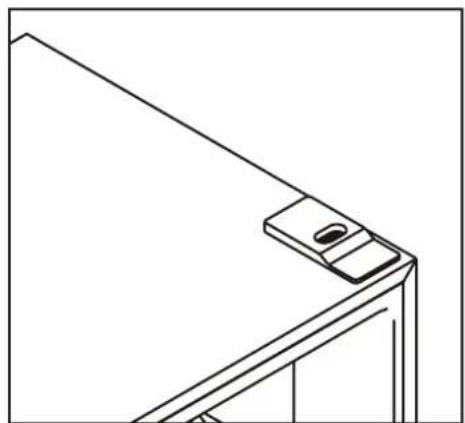
natural_image
Line drawing of a mechanical bracket or bracket with a small inset detail (no text or symbols)natural_image
Diagram of a document with arrows indicating rotational movement, no text or symbols present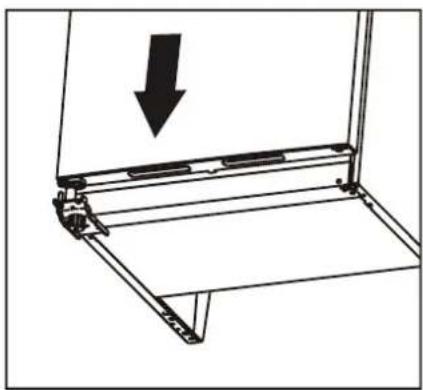
natural_image
Technical line drawing of a mechanical assembly with an arrow indicating downward motion (no text or symbols present)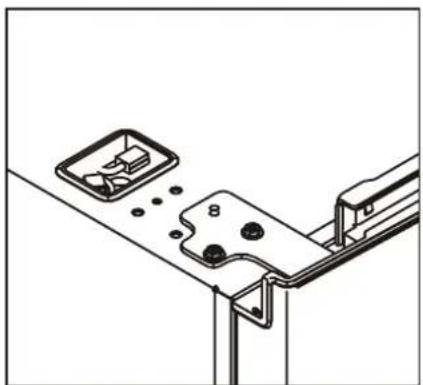
natural_image
Technical line drawing of a mechanical bracket assembly with mounting holes and a separate housing (no text or symbols)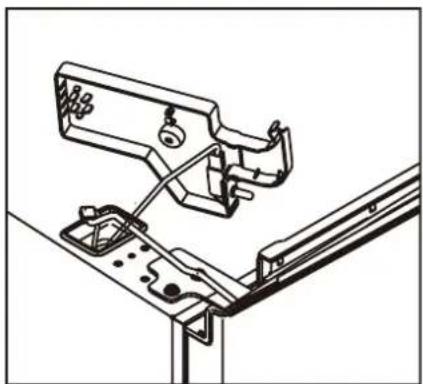
natural_image
Technical line drawing of a mechanical assembly with no visible text or symbols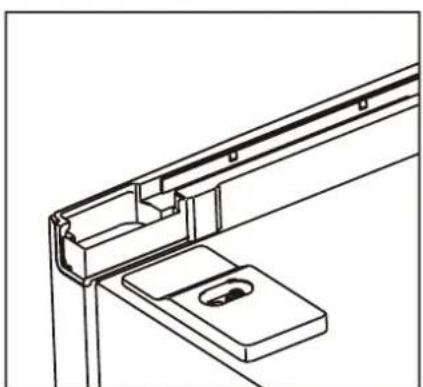
natural_image
Technical line drawing of a mechanical bracket assembly (no text or symbols)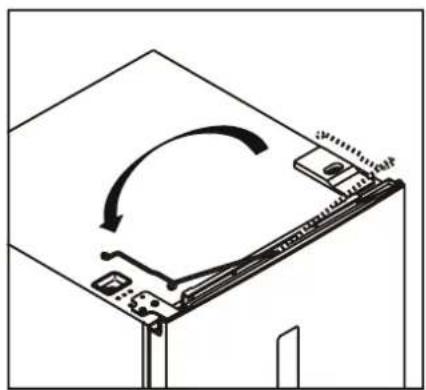
natural_image
Diagram of a computer monitor with an open lid and scroll, showing a circular arrow indicating rotation (no text or symbols present)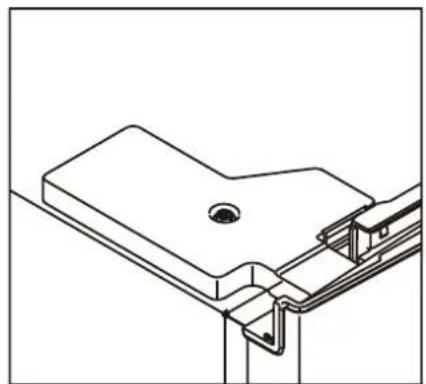
natural_image
Technical line drawing of a mechanical bracket assembly (no text or symbols)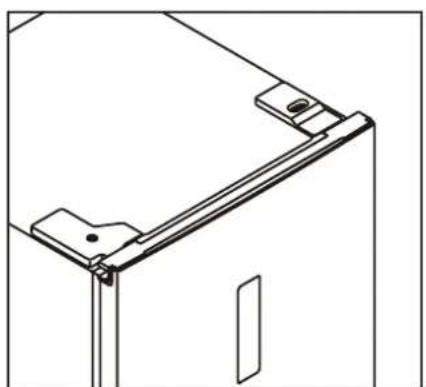
natural_image
Technical line drawing of a mechanical bracket or frame assembly (no text or symbols)natural_image
Line drawing of a screwdriver with a circular head and threaded shaft (no text or symbols)natural_image
Technical line drawing of a mechanical bracket or bracket assembly with a tool inserted (no text or symbols)text_image
Technical diagram showing two labeled components (① and ②) with directional arrows indicating movement or force.3.3 REMPLACEMENT DE L'ÉCLAIRAGE LED
text_image
Technical diagram illustrating lock and unlock mechanism of a cabinet or enclosure, with labeled parts and directional arrows.4.3 STOCKAGE DES ALIMENTS
PROBLÈME CAUSE POSSIBLE SOLUTIONS
Wisepick Productions B.V.
Weena 664
3012 CN Rotterdam
Les Pays-Bas
Made in China
GEBRAUCHSANLEITUNG
GEFRIERSCHRÄNK
WBVR186NFE
WBVR186NFD

WISBERG
INHALTSVERZEICHNIS
VORWORT
69
1. SICHERHEIT 70
Wisepick Productions B.V.
Weena 664
3012 CN Rotterdam
Die Niederlande
Made in China
1. SICHERHEIT
natural_image
Simple line drawing of a vertical container with a black checkmark on the side (no text or symbols)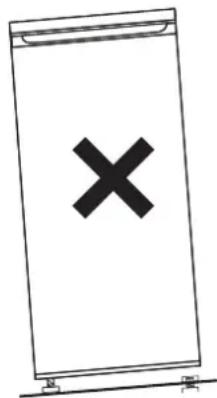
text_image
Diagram showing a device with a black 'X' symbol on its screen, indicating cancellation or error.5. Warten
natural_image
Line drawing of a hand installing or adjusting a wooden shelf panel (no text or symbols)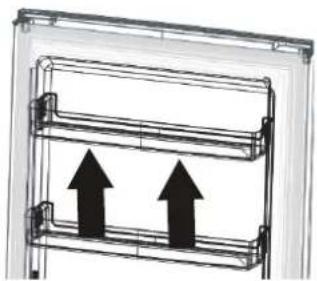
natural_image
Diagram of a mechanical or electrical component with two upward-pointing arrows, no text or symbols present.natural_image
Line drawing of a screwdriver with a pointed tip (no text or symbols)natural_image
Line drawing of an adjustable wrench with a handle and screw (no text or symbols)natural_image
Technical line drawing of a vertical metal bracket with mounting feet (no text or symbols)natural_image
Technical line drawing of a mechanical assembly with a lever and base mount (no text or symbols)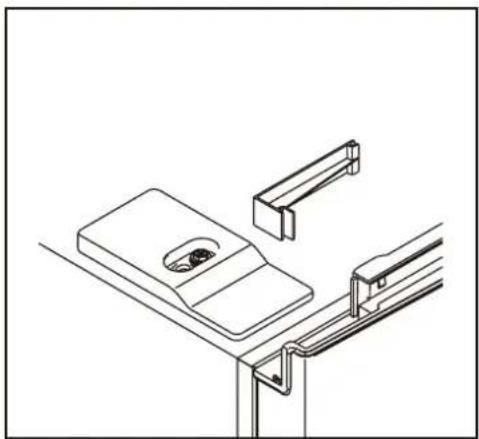
natural_image
Technical line drawing of a mechanical assembly with no visible text or symbolsnatural_image
Technical line drawing of a mechanical assembly with a screw and bracket (no text or symbols)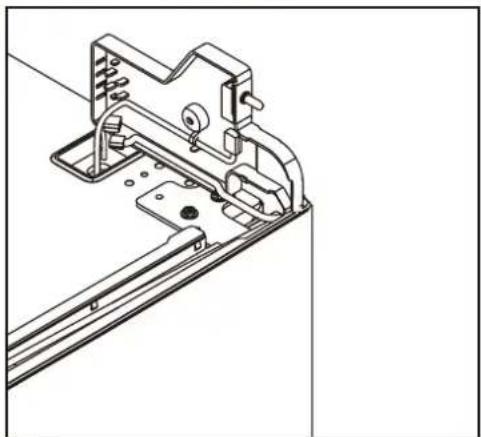
natural_image
Technical line drawing of a mechanical bracket assembly (no text or symbols)natural_image
Technical line drawing of a mechanical assembly with mounting holes and a bracket (no text or symbols)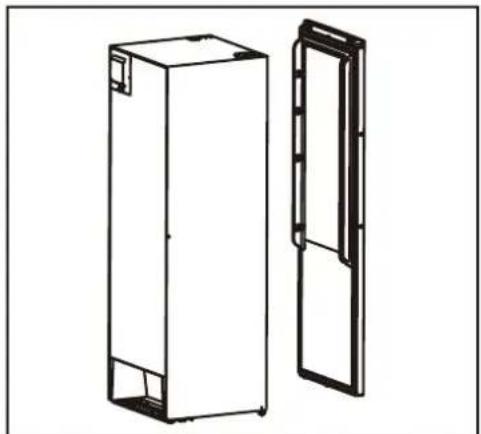
natural_image
Technical line drawing of two rectangular metal enclosure units, one open and one closed, with no visible text or symbols.natural_image
Line drawing of a door latch mechanism with handle and mounting bracket (no text or symbols)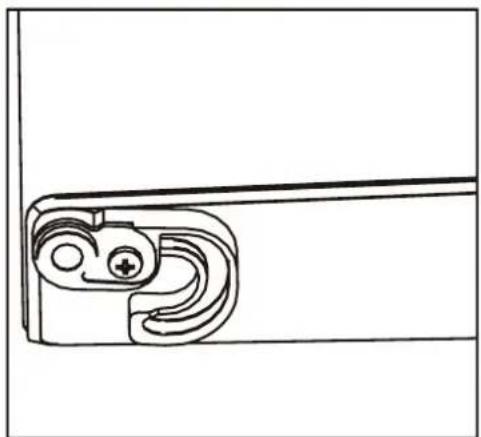
natural_image
Technical line drawing of a mechanical bracket or clamp (no text or symbols)
natural_image
Technical line drawing of a mechanical bracket with mounting holes and a separate bracket assembly (no text or symbols)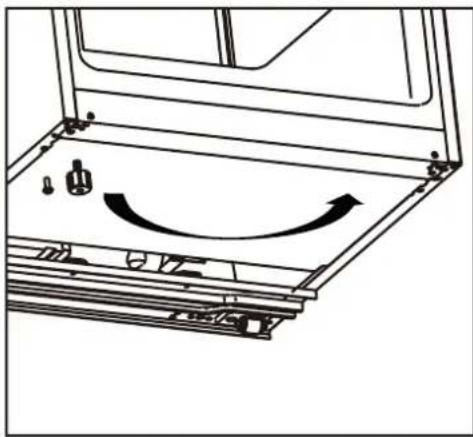
natural_image
Technical line drawing of a mechanical assembly with a curved arrow indicating motion or direction (no text or symbols)natural_image
Mechanical assembly diagram showing a bolted joint with two cylindrical components and a nut, no text or symbols present.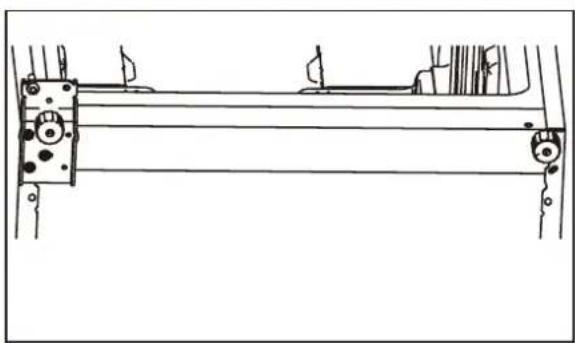
natural_image
Technical line drawing of a mechanical assembly with mounting holes and a central rod (no text or symbols)natural_image
Technical line drawing of a mechanical bracket with two cylindrical components and a curved arrow indicating rotation (no text or symbols)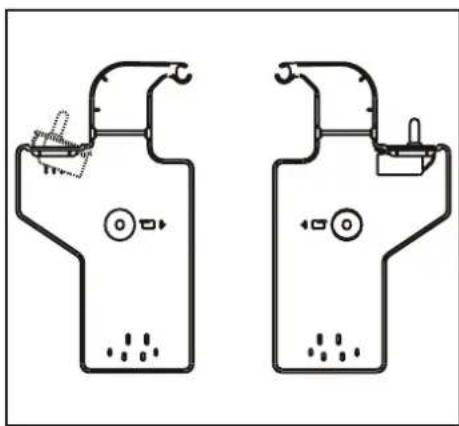
natural_image
Two identical line drawings of a showerhead with control valves and a valve, no text or symbols present.natural_image
Simple line drawing of a mechanical bracket with a small inset component (no text or symbols)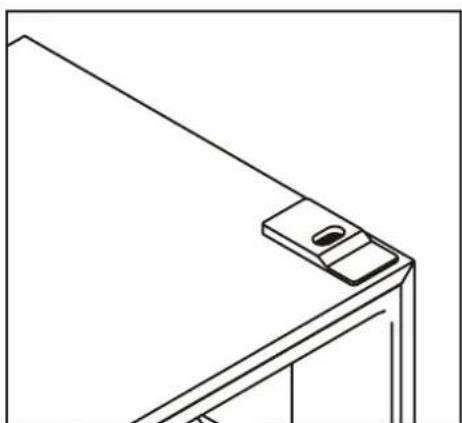
natural_image
Line drawing of a mechanical bracket or bracket with a small inset detail (no text or symbols)natural_image
Abstract diagram of a document with arrows indicating rotational movement (no text or symbols)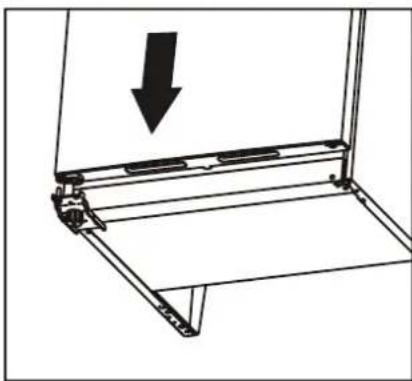
natural_image
Technical line drawing of a mechanical bracket with an arrow indicating downward motion (no text or symbols)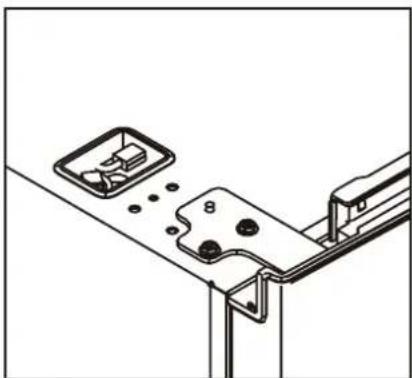
natural_image
Technical line drawing of a mechanical bracket assembly with mounting holes and mounting feet (no text or symbols)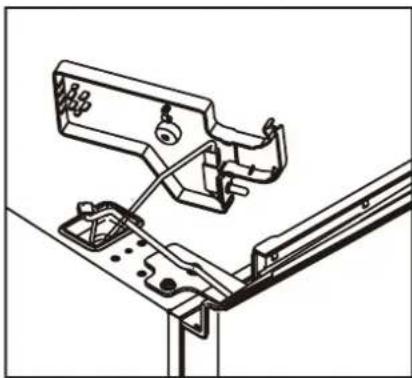
natural_image
Technical line drawing of a mechanical assembly with no visible text or symbols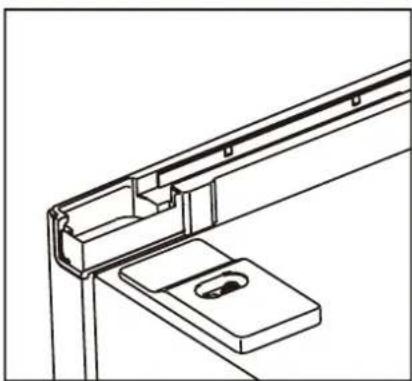
natural_image
Technical line drawing of a mechanical bracket assembly (no text or symbols)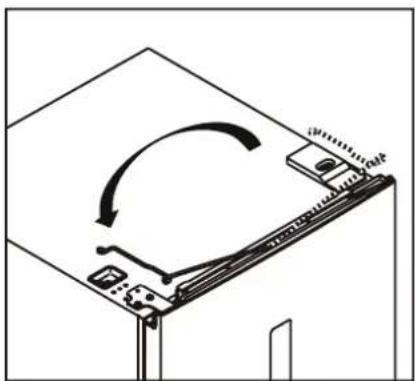
natural_image
Diagram of a computer monitor with an open screen and scroll, showing a circular arrow indicating rotation (no text or symbols present)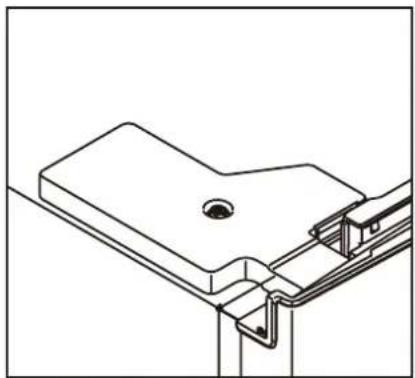
natural_image
Technical line drawing of a mechanical bracket assembly (no text or symbols)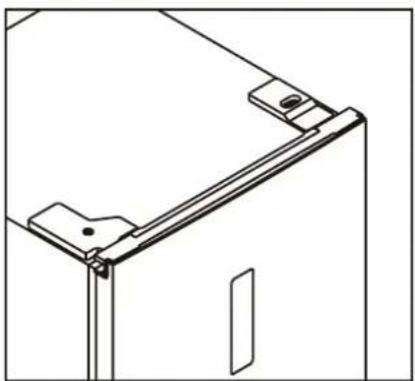
natural_image
Technical line drawing of a mechanical bracket or frame assembly (no text or symbols)
Handgriff anbauen
natural_image
Line drawing of a screwdriver with a circular head and threaded shaft (no text or symbols)natural_image
Technical line drawing of a mechanical bracket with a pencil inserted, no text or symbols presenttext_image
Technical diagram showing two labeled mechanical components with directional arrows indicating movement or forcetext_image
Technical diagram illustrating lock and unlock mechanism of a mechanical assembly, with labeled parts and directional arrows.Wisepick Productions B.V.
Weena 664
3012 CN Rotterdam
Die Niederlande
Made in China
Wisberg contact details
Wisepick Productions B.V.
Weena 664
3012 CN Rotterdam
The Netherlands
Made in China