
91-19000 - Microscope National Geographic - Free user manual and instructions
Find the device manual for free 91-19000 National Geographic in PDF.

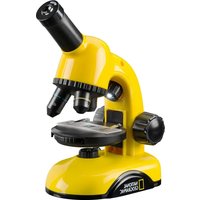
| Product type | Binocular stereo microscope |
| Brand | National Geographic |
| Model | 91-19000 |
| Power supply | 2 AA batteries (not included) |
| Lighting | Integrated LED with on/off switch |
| Eyepieces | 2 removable eyepieces (binocular) |
| Objective | Stereo |
| Microscope stage | With specimen plate and object clamp |
| Focusing | Focusing wheel |
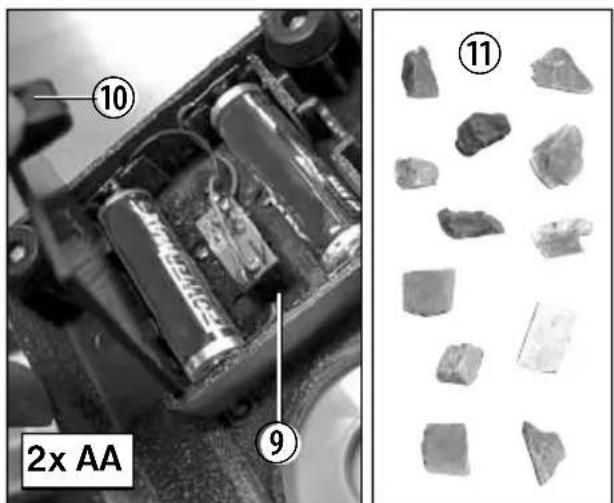
| Included material | Mineral specimens |
| Safety | Choking hazard (small parts), electric shock hazard, explosion/fire hazard, acid burn hazard due to battery leakage |
| Cleaning | Exterior with a dry cloth. Do not use liquids. |
| Warranty | 2 years, extension to 5 years subject to registration within 3 months at www.bresser.de/warranty |
| Customer service | Hotline: +49 (0) 2872 - 80 74-210 |
| Compliance | CE |
| Dimensions (estimated) | Approx. 30 x 20 x 40 cm |
| Weight (estimated) | Approx. 1 kg |
Frequently Asked Questions - 91-19000 National Geographic
User questions about 91-19000 National Geographic
0 question about this device. Answer the ones you know or ask your own.
Ask a new question about this device
Download the instructions for your Microscope in PDF format for free! Find your manual 91-19000 - National Geographic and take your electronic device back in hand. On this page are published all the documents necessary for the use of your device. 91-19000 by National Geographic.
USER MANUAL 91-19000 National Geographic
NATIONAL GEOGRAPHIC™
20X
STEREO-MIKROSKOP STEREO MICROSCOPE
DE Bedienungsanleitung
EN Operating instructions
FR Mode d'emploi
NL Handleiding
IT Istruzioni per l'uso
ES Instrucciones de uso
RU Руководство по эксплуатации
natural_image
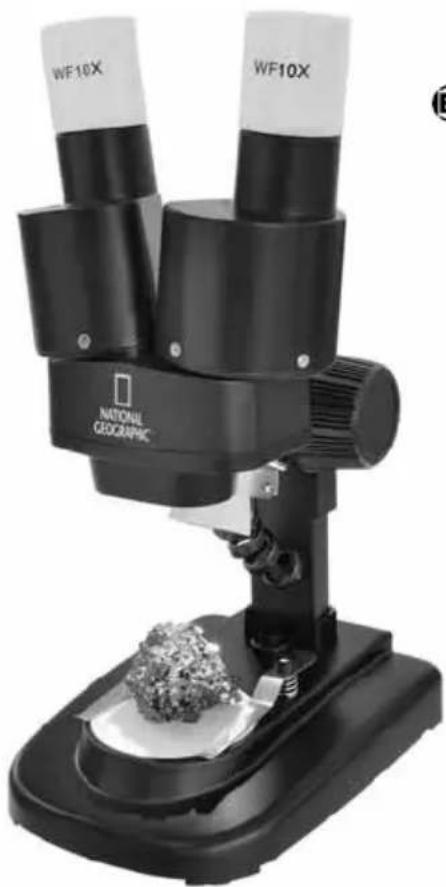
Black and white photo of a National Geographic microscope with two labeled tubes (WF10X) mounted on a base, no visible text or symbols on the device itself.
BRESSER

NATIONAL GEOGRAPHIC™
Wichtige Informationen für deine Eltern • Important information for your parents to read Important pour tes parents • Belangrijk voor je ouders • Informazioni importanti per i genitori Importante para tus padres • Важная информация для родителей
DE Bedienungsanleitung .... 4
EN Operating instructions 8
FR Mode d'emploi ....12
NL Handleiding 16
IT Istruzioni per l'uso ....20
ES Instrucciones de uso 24
RU Руководство по эксплуатации .....28

NATIONAL GEOGRAPHIC™

- Choking hazard — This product contains small parts that could be swallowed by children. This poses a choking hazard.
- Risk of electric shock — This device contains electronic components that operate via a power source (power supply and/or batteries). Only use the device as described in the manual, otherwise you run the risk of an electric shock.
- Risk of fire/explosion — Do not expose the device to high temperatures. Use only the recommended batteries. Do not short-circuit the device or batteries, or throw them into a fi re. Excessive heat or improper handling could trigger a short-circuit, a fi re or an explosion.
- Risk of chemical burn — Make sure you insert the batteries correctly. Empty or damaged batteries could cause burns if they come into contact with the skin. If necessary, wear adequate gloves for protection.
- Do not disassemble the device. In the event of a defect, please contact your dealer. The dealer will contact the Service Centre and can send the device in to be repaired, if necessary.
- Tools with sharp edges are often used when working with this device. Because there is a risk of injury from such tools, store this device and all tools and accessories in a location that is out of the reach of children.
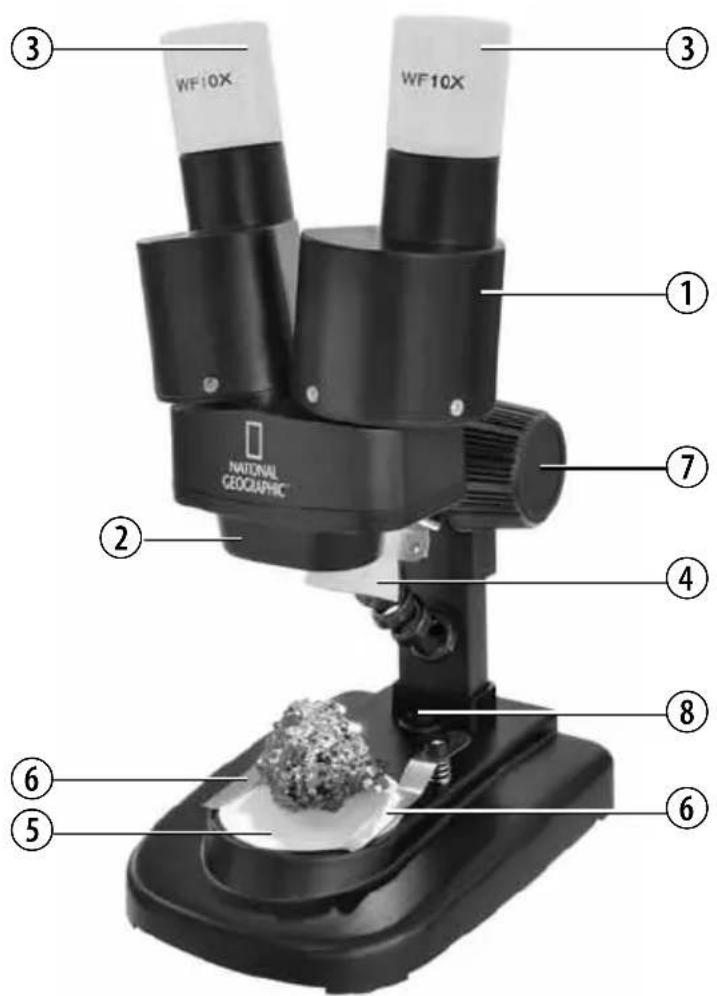
Parts overview
- Binocular view piece (with eyepiece supports)
- Stereo objective
- Eyepieces
- Illumination (LED)
- Microscope stage (with object plate)
- Stage clips
- Focus knob
- On/off switch (illumination)
- Battery compartment
- Battery compartment clamp closure
- Mineral samples
Location
Before you start, choose an ideal location for using your microscope. It is important that you have enough light available, such as from a window or desk lamp.
Simple Observation
Place the object to be observed (for example, a rock) in the middle of the microscope stage (5). When possible, it is best to fix the object to be observed in place with the stage clips (6).
Now, take a look through the binocular eye lens (1) and change the distance of the eyepiece (3) so that you see a circular, clear image.
Adjust the sharpness of the image by slowly turning the focus knob (7).
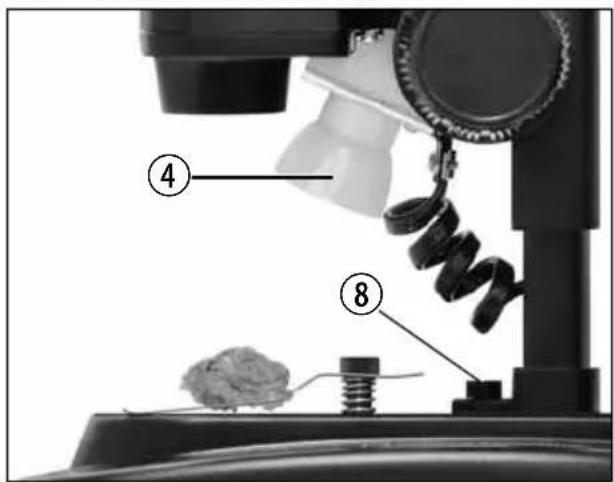
Illumination
To illuminate objects to be observed, remove both eyepieces (3) from the eyepiece supports (1) and turn the entire microscope over. In the base of the microscope there is a battery compartment (9). Push the clamp closure (10) and open the battery compartment by pulling the cover open diagonally.
Place the batteries in the compartment so that the fl at minus poles (-) press against the spring terminal and the plus poles (+) are touching the fl at contact sheets.
Close the battery compartment with the cover and turn the microscope around again. Place the eyepieces back on. You can now turn on the light (4) with the on/off switch (8) on the base of the microscope.
Notes on Cleaning
- Before cleaning the device, disconnect it from the power supply by removing the plug or batteries.
- Only use a dry cloth to clean the exterior of the device. To avoid damaging the electronics, do not use any cleaning fluid.
- Protect the device from dust and moisture. The batteries should be removed from the unit if it has not been used for a long time.
EC Declaration of Conformity
CE Bresser GmbH has issued a 'Declaration of Conformity' in accordance with applicable guidelines and corresponding standards. This can be viewed any time upon request.
Disposal

Dispose of the packaging materials properly, according to their type, such as paper or cardboard.
Contact your local waste-disposal service or environmental authority for information on the proper disposal.

NATIONAL GEOGRAPHIC™

Do not dispose of electronic devices in the household garbage!
As per Directive 2002/96/EC of the European
Parliament on waste electrical and electronic equipment and its adaptation into German law, used electronic devices must be collected separately and recycled in an environmentally friendly manner.
Empty, old batteries must be disposed of at battery collection points by the consumer. You can find out more information about the disposal of devices or batteries produced after 6 January 2006 from your local waste-disposal service or environmental authority.

In accordance with the regulations concerning batteries and rechargeable batteries, disposing of
them in the normal household waste is explicitly forbidden. Please make sure to dispose of your used batteries as required by law — at a local collection point or in the retail market. Disposal in domestic waste violates the Battery Directive.
Batteries that contain toxins are marked with a sign and a chemical symbol.

Cd ^1 Hg ^2 Pb ^3


^1 battery contains cadmium
^2 battery contains mercury
^3 battery contains lead
EN
Warranty and warranty term extension
The warranty term is two years from the date of purchase. Please keep your proof of purchase.
Register at www.bresser.de/warranty and fi ll out a brief questionnaire to get your warranty term extended to fi ve years. Registration must be completed within three months of purchase (date of receipt) to validate the warranty. If you register thereafter, the warranty term will not be extended.
If you have problems with your device, please contact our customer service fi rst. Do not send any products without consulting us fi rst by telephone. Many problems with your device can be solved over the phone. If the problem cannot be resolved by phone, we will take care of transporting your device to be repaired. If the problem occurred after the warranty ended or it is not covered by our warranty terms, you will receive an estimate of repair costs, free of charge.
Service Hotline: +49 (0) 2872 - 80 74-210
Important for any returns:
Please make sure to return the device carefully packed in the original packaging in order to prevent damage during transport. Also, please enclose your receipt for the device (or a copy) and a description of the defect. This warranty does not imply any restriction of your statutory rights.
Your dealer: ....
Art. No.: ....
Description of problem: ....
Name: ....
Street: ....
City/Postcode:
Telephone: ....
Date of purchase: ....
Signature: ....


Important for any returns:
National Geographic's net proceeds support vital exploration, conservation, research, and education programs.
Visit our website:
www.nationalgeographic.com
© 2013 National Geographic Society
NATIONAL GEOGRAPHIC and Yellow Border Design are trademarks of the National Geographic Society, used under license. All rights reserved.

BRESSER
Bresser GmbH
Gutenbergstr. 2 · DE-46414 Rhede
Errors and technical changes reserved.


Brand : National Geographic
Model : 91-19000
Category : Microscope