STM-4000BL - Steam cleaner Brentwood - Free user manual and instructions
Find the device manual for free STM-4000BL Brentwood in PDF.

User questions about STM-4000BL Brentwood
0 question about this device. Answer the ones you know or ask your own.
Ask a new question about this device
Download the instructions for your Steam cleaner in PDF format for free! Find your manual STM-4000BL - Brentwood and take your electronic device back in hand. On this page are published all the documents necessary for the use of your device. STM-4000BL by Brentwood.
USER MANUAL STM-4000BL Brentwood
Brentwood® Appliances
© 2021 Brentwood Appliances, Inc.
STEAM MOP
MOPA DE VAPOR / BALAI VAPEUR
ITEM NO.: STM-4000BK (BLACK) & STM-4000BL (BLUE)
natural_image
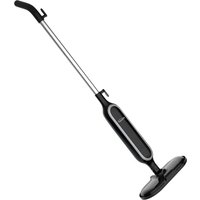
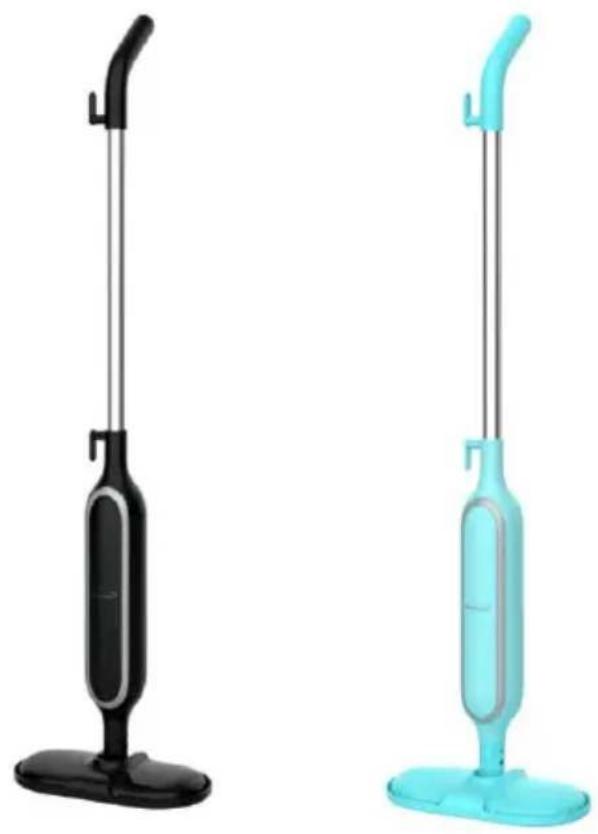
Two electric vacuum cleaner models shown in black and cyan, standing upright against white background (no text or symbols)Operating and Safety Instructions
FOR INDOOR HOUSEHOLD USE ONLY
When using this or any other electrical appliance, always follow these basic safe precautions, especially when children are present.
READ ALL INSTRUCTIONS BEFORE USE
WARNING-To reduce the risk of fire, electric shock, serious personal injury and prop damage please note the following:
- This product is not intended for use by children. Keep the product out of reach of children and pets. Extra caution is necessary when using this appliance near children.
- Always ensure the product is unplugged from the electrical outlet and allowed to cool down completely before draining the water tank; changing the mop pad; and cleaning for storage.
- Do not leave the product unattended while it is in use. Always unplug the product from the electrical outlet when not in use.
• To protect against electrical shock do not immerse probe, cord, or plug in water or other liquid
- This appliance is suited for cleaning heat-resistant surfaces only. The appliance is not suited for unsealed wooded flooring, soft plastic, glass, walls, counters, leather, unglazed ceramic floors, and wooden furniture. We recommend checking the use and care instructions from the floor manufacturer before using the appliance.
- Never operate the stem mop without water. Never fill the water reservoir beyond the maximum filling amount.
- Do not fill water tank with hot water, cleaning agent, scented perfumes, oils or any other chemicals. Doing so could destroy the appliance.
- Do not touch hot surfaces. Use handle or pole during use.
- Take proper precautions to prevent burns, or personal or property damage as this appliance generates heat and steam during use.
- Do not use attachments not sold by the manufacturer.
- Use appliance on a flat surface. Keep the product away from flammable materials. Do not use the appliance in rooms containing easily ignitable dust or poisonous and explosive fumes.
- Do not plug or unplug the product from the electrical outlet with a wet hand.
- This product is intended solely for non-commercial, non-industrial, household use only. Do not use the product outdoors or for any other purpose.
- Do not allow cord to touch hot surfaces.
- Do not operate any appliance with a damaged cord or plug or after the appliance malfunctions or has been damaged in any manner.
- This product has no user-serviceable parts. Do not attempt to examine or repair this product yourself. Please review the Warranty Policy on Page 10.
- Do not put any stress on the power cord where it connects to the product, as the power cord could fray and break.
- Using extension cord is not recommended to avoid hazards caused by overheating or overload.
- Before using the appliance always check the mop pad for wear or damage edges that may damage your flooring.
- Use the appliance only when it is completely assembled and operational. Make sure mop pad is firmly attached and water reservoir is full.
- Always test the appliance at a small, inconspicuous spot before cleaning. Do not place the appliance in the same spot for more than 10 seconds to avoid damage from heavy heating.
- Never direct the steam mop at people, animals, plants and or other sensitive objects.
- Do not touch the bottom of the appliance during operation.
- Do not tilt or turn the appliance over when in use. Only use on flat horizontal surfaces.
- Only use the accessories included and recommended by the manufacturer.
- Never use the appliance without the mop pad.
• Always work with sufficient lighting. - Store the appliance indoors in a cool, dry place.
SPECIAL INSTRUCTIONS:
- A long power supply cord is provided. An extension cord is not recommended for use with this product, but if one must be used:
- The marked electrical rating must be at least as great as that of the product.
- If the product is of a 3-prong grounding type, the extension cord must be a grounding-type 3-wire cord.
WARNING: This product is equipped with a polarized plug (one blade is wider than the other blade) to reduce the risk of electrical shock. This is a safety feature. The plug will fit into a polarized outlet only one way. If you are unable to insert the plug into the electrical outlet, try reversing the plug. If the plug still does not fit, contact a qualified electrician. Never use the plug with an extension cord unless you can fully insert the plug into the extension cord. Do not alter the plug. Do not attempt to defeat the safety purpose of the polarized plug.
SAVE THESE INSTRUCTIONS
FOR FUTURE REFERENCE
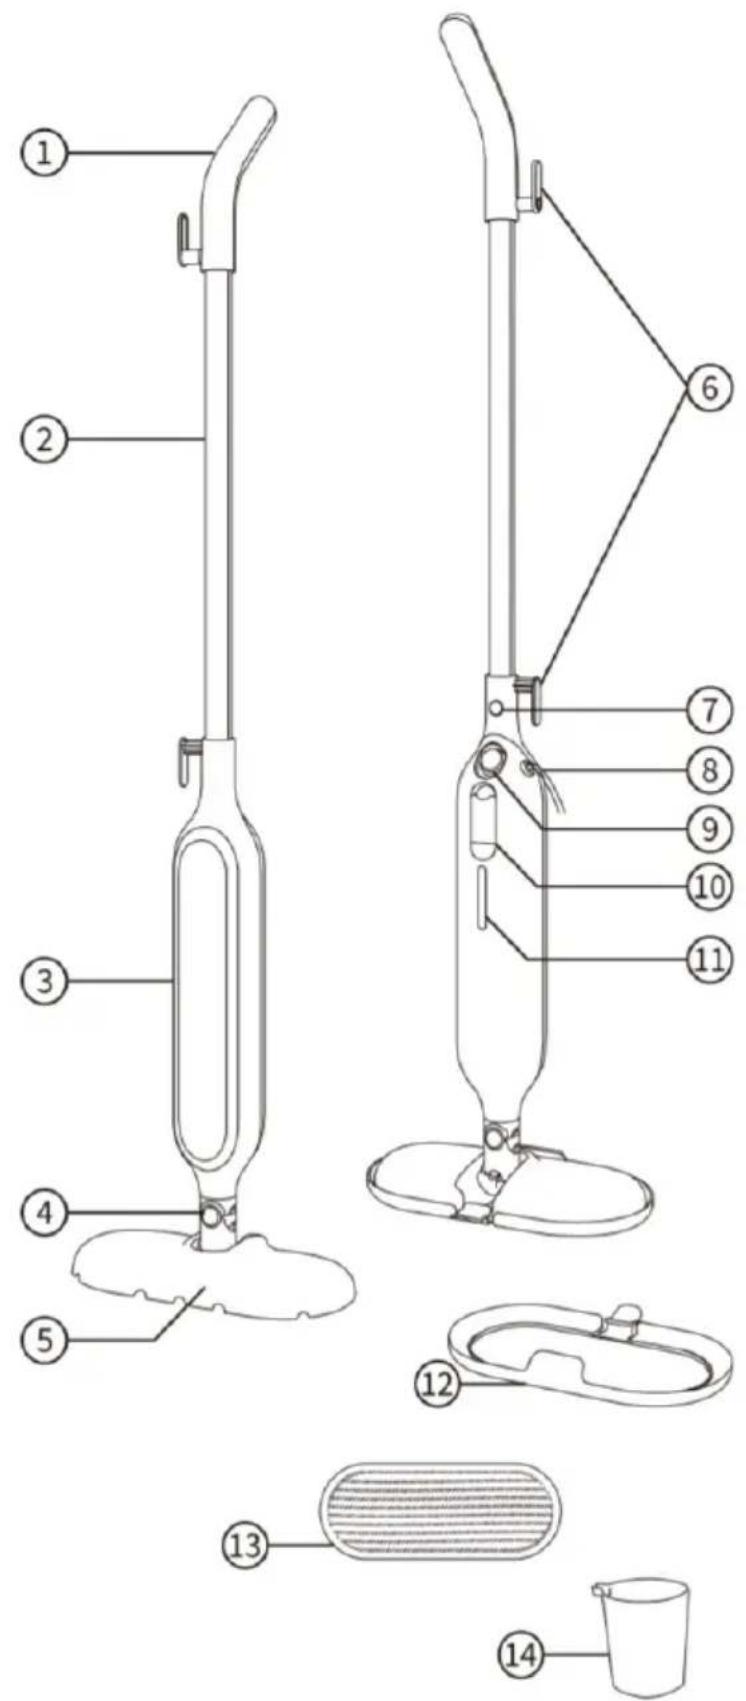
Parts/Components:
- Handle
- Pole
- Front Cover
- Rotating Shaft
- Mop Head
- Cord Hooks
- Pole Button
- Power cord
- On-off Switch
- Water Tank Cover
- Water Reservoir
- Carpet Glider
- Mop Pad
- Measuring Cup
INSTRUCTIONS FOR USE
text_image
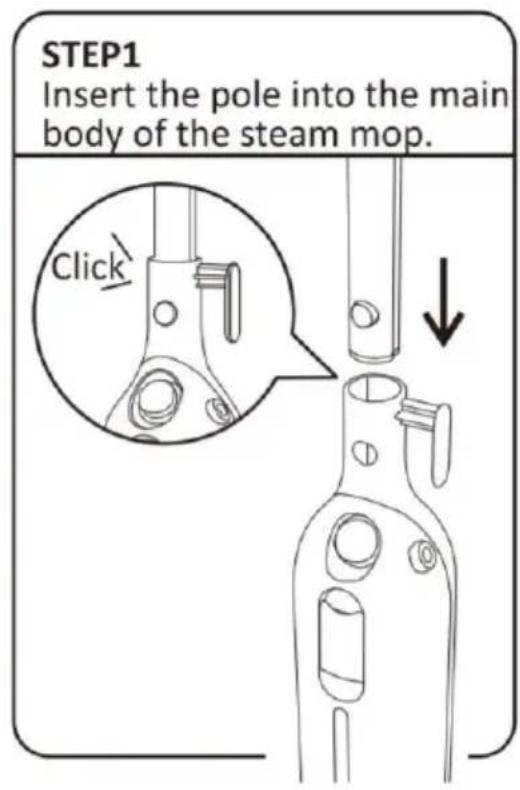
STEP1 Insert the pole into the main body of the steam mop. Click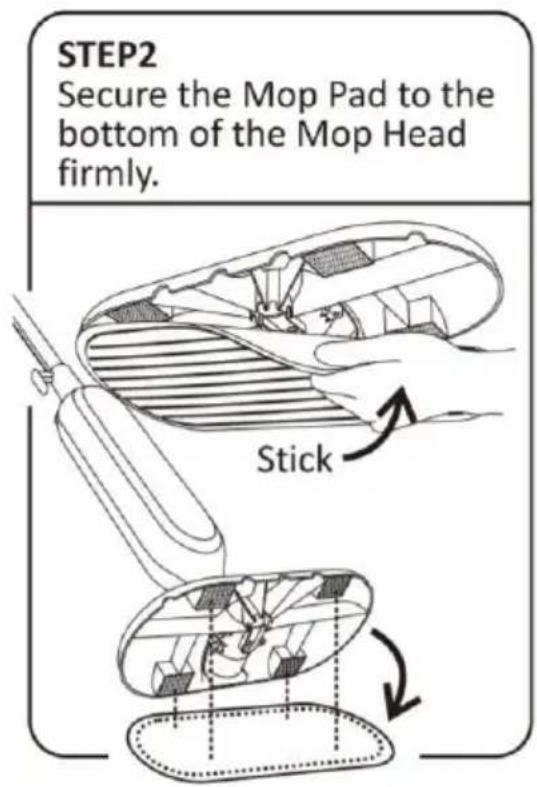
text_image
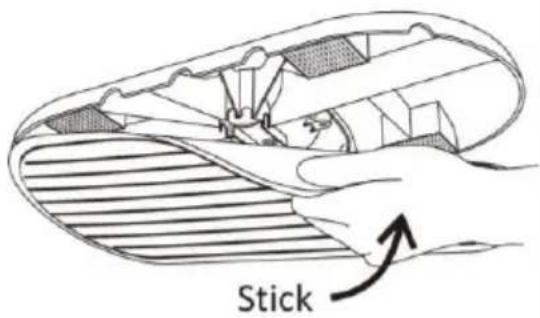
STEP2 Secure the Mop Pad to the bottom of the Mop Head firmly. Stick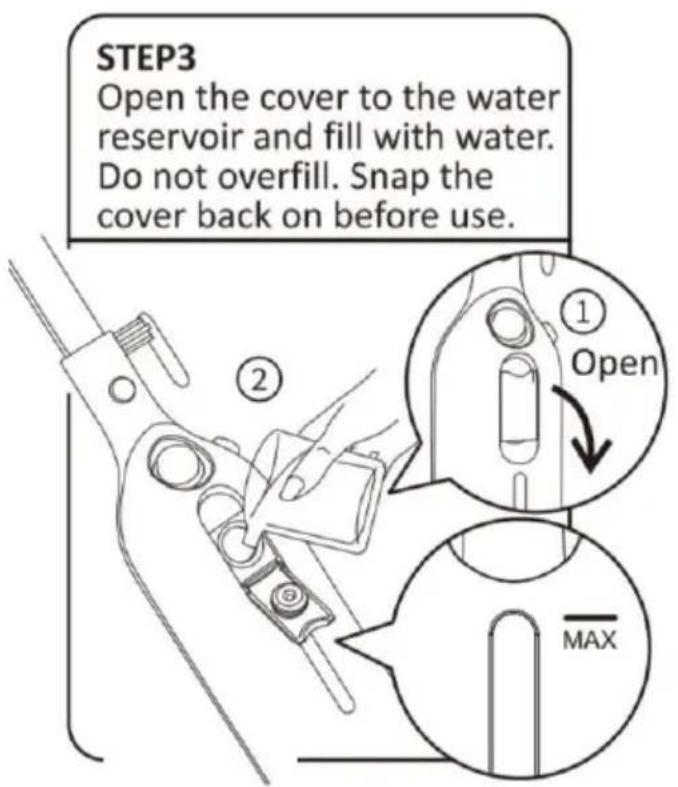
text_image
STEP3 Open the cover to the water reservoir and fill with water. Do not overfill. Snap the cover back on before use.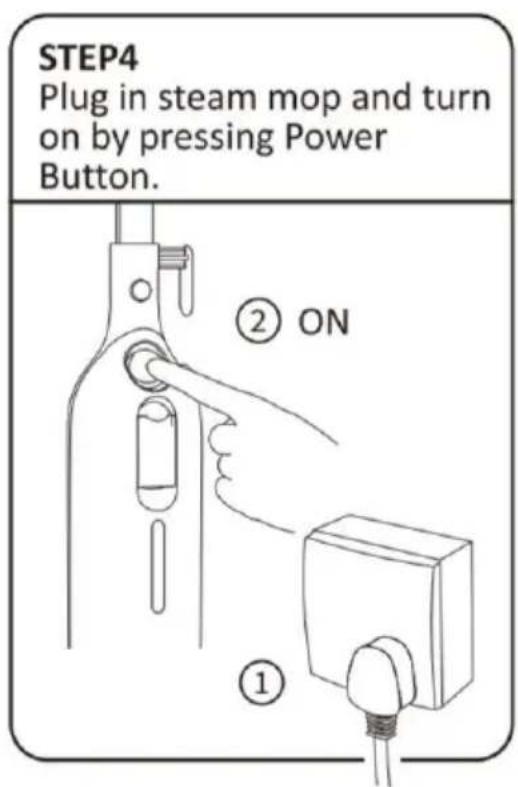
text_image
STEP4 Plug in steam mop and turn on by pressing Power Button. ② ON ①INSTRUCTIONS FOR USE
text_image
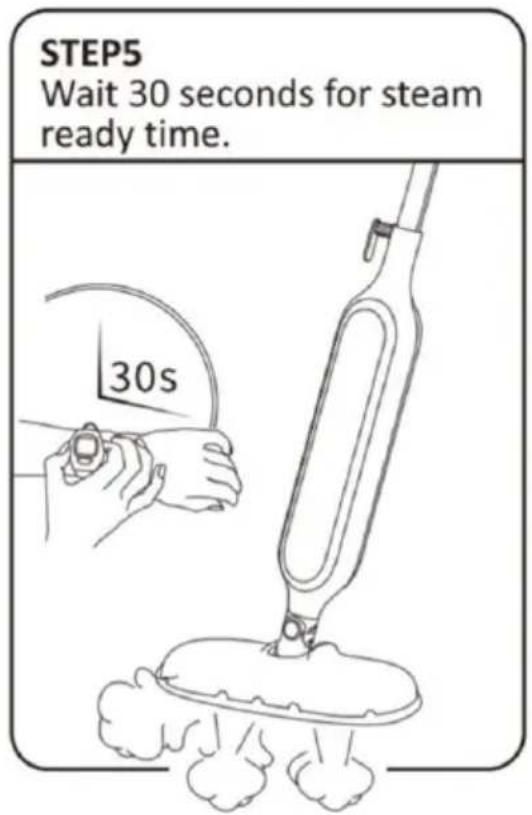
STEP5 Wait 30 seconds for steam ready time. 30s
text_image
STEP6 Steam mop is now ready for use. High temperature steam can kill up to 99.9% of germs and bacteria. Sterilized 99.9%MAINTENANCE AND CLEANING
text_image
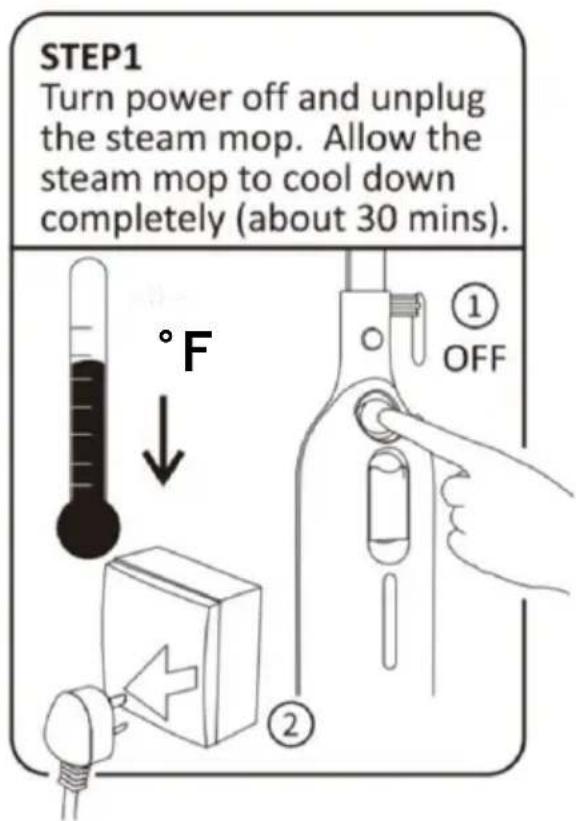
STEP1 Turn power off and unplug the steam mop. Allow the steam mop to cool down completely (about 30 mins). °F ① OFF ②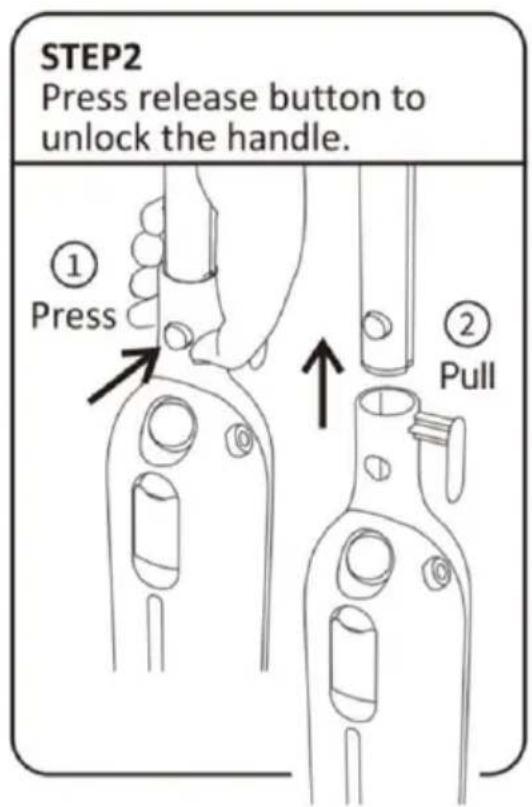
text_image
STEP2 Press release button to unlock the handle. ① Press ② PullMAINTENANCE AND CLEANING

text_image
STEP3 Open the water tank cover and draining out the residual water. ① Open ② Pour-out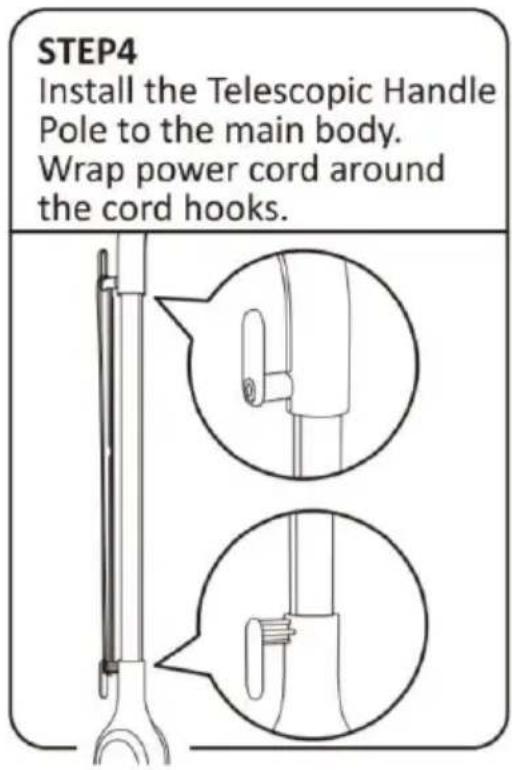
text_image
STEP4 Install the Telescopic Handle Pole to the main body. Wrap power cord around the cord hooks.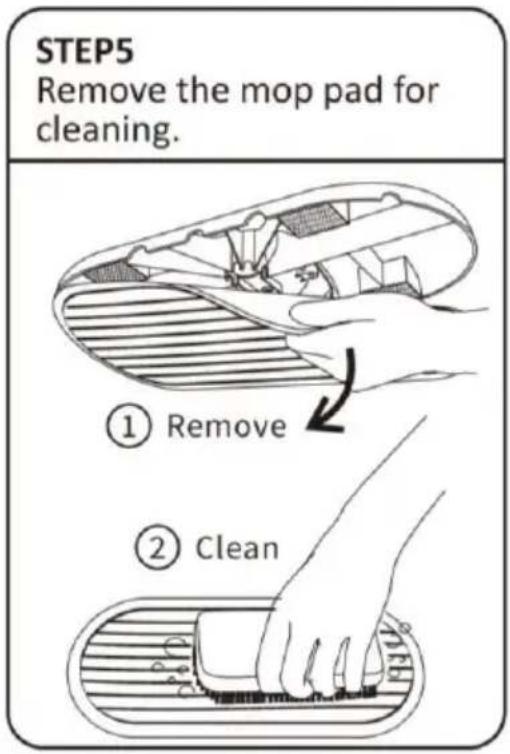
text_image
STEP5 Remove the mop pad for cleaning. ① Remove ② CleanACCESSORIES INSTRUCTION FOR USE
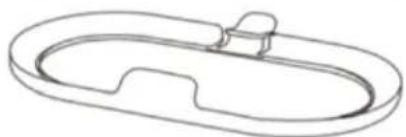
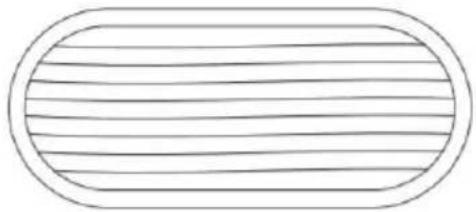
Mop Pad
natural_image
Simple line drawing of a rectangular object with horizontal lines inside, no text or symbols present.Attach the Mop Pad to the bottom of the Mop Head firmly.
text_image
Stick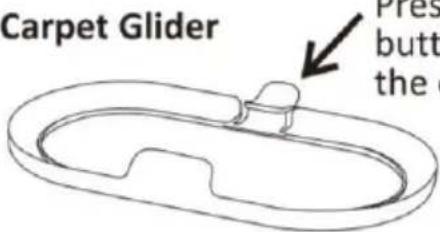
text_image
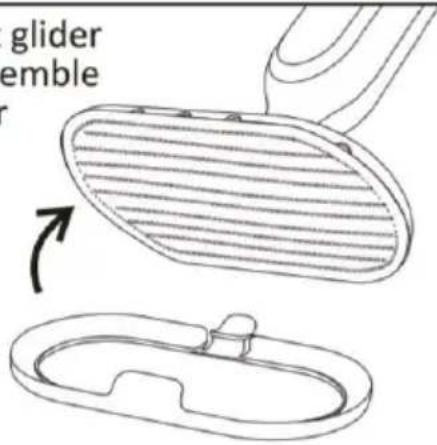
Carpet Glider Pres butt theFor carpet cleaning, make sure the Mop Pad is firmly attached to the Mop Head and place mop on top of the Carpet Glider.
Press the carpet glider button to disassemble the carpet glider
text_image
glider embleCord Hooks
Rotate the Cord Hook down for quick release of power cord.
①
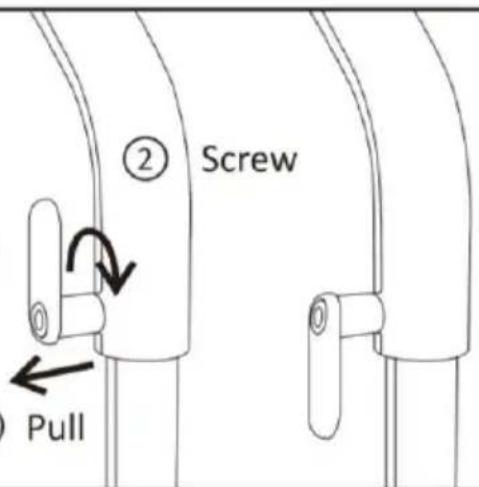
text_image
② Screw PullTROUBLE SHOOTING
| Problems | Reason | Solution | |
| The appliance is not turning on. The power indicating light does not light up. |  | 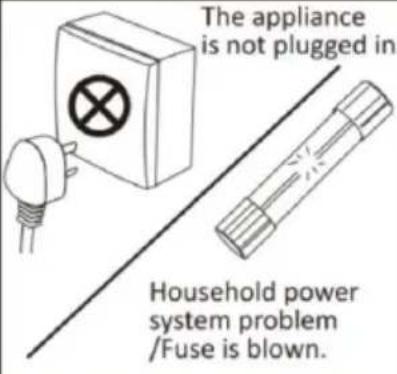 | 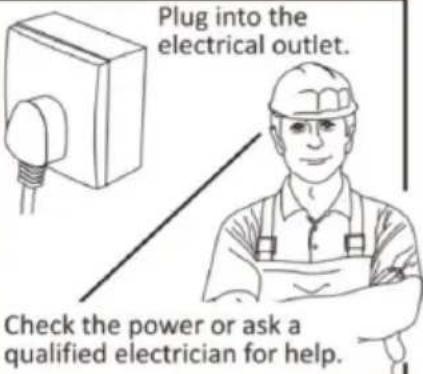 |
| The appliance fails to steam. The power indicating light is on. | 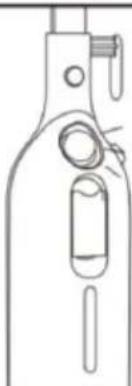 | 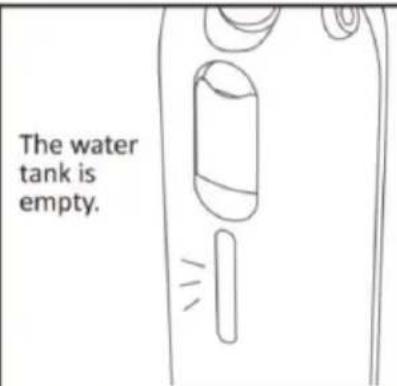 | 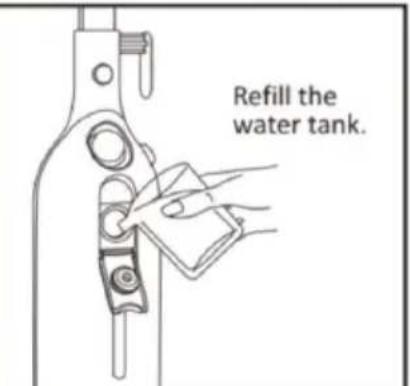 |
| The appliance fails to steam. The power indicating light is on. | 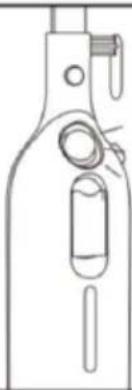 | 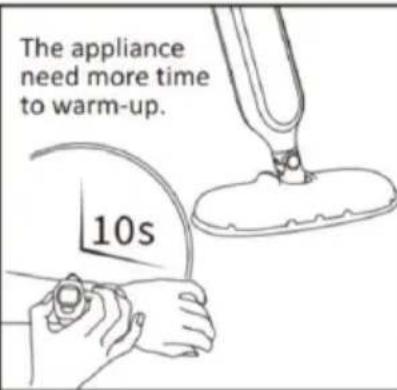 | 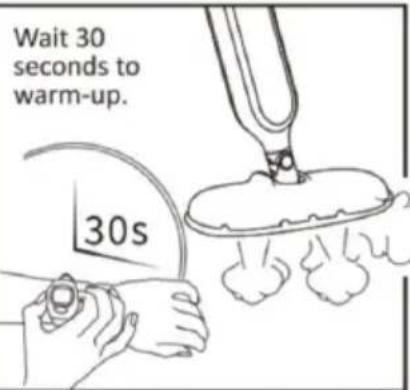 |
| The appliance fails to steam. The power indicating light is on. |  |  | 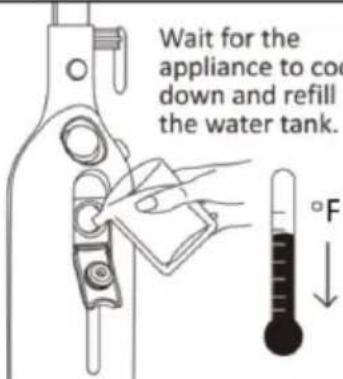 |
ONE YEAR LIMITED WARRANTY
Write down the following information about your appliance to better help you obtain assistance or service if you ever need it.
CUSTOMER RECORD
Date of Purchase ____ Store/Dealer ____
Model/Item No: ____
THIS WARRANTY APPLIES TO PRODUCTS PURCHASED AND USED IN THE CONTINENTAL U.S. AND CANADA ONLY. This is the only express warranty for this product and is in lieu of any other warranty or condition. This product is warranted to be free from defects in material and workmanship for a period of one (1) year from the date of original purchase. During this period, your exclusive remedy is repair or replacement of this product, at our option; however, you are responsible for all costs associated with returning the product to us and our returning a product or component under this warranty to you. If the product or component is no longer available, we will replace with a similar one of equal or greater value. This warranty does not cover glass, filters, wear from normal use, use not in conformity with the printed directions, or damage to the product resulting from accident, alteration, abuse, or misuse.
THIS WARRANTY EXTENDS ONLY TO THE ORIGINAL CONSUMER PURCHASER. KEEP THE ORIGINAL SALES RECEIPT, AS PROOF OF PURCHASE IS REQUIRED TO MAKE A WARRANTY CLAIM.
This warranty is void if the product is used for other than single-family household use or subjected to any voltage and waveform other than what is specified on the rating label (E.G., 120V\~60Hz). We exclude all claims for special, incidental, and consequential damages caused by breach of express or implied warranty. All liability is limited to the amount of the purchase price. Every implied warranty, including any statutory warranty or condition of merchantability or fitness for a particular purpose, is disclaimed except to the extent prohibited by law, in which case such warranty or condition is limited to the duration of this written warranty. This warranty gives you specific legal rights. You may have other legal rights that vary depending on where you live. Some states do not allow limitations on implied warranties or special, incidental, or consequential damages, so the foregoing limitations may not apply to you. To make a warranty claim do not return this appliance to the store.
TO OBTAIN WARRANTY SERVICE AND/OR TROUBLESHOOTING INFORMATION:
Call Customer Service at 1-888-903-0060 in the U.S.
Monday through Friday: 9:00 am – 5:00 pm PT
U.S. Customers Please Email: warranty@brentwoodus.com
Canadian Customers Please Email: canada.warranty@brentwoodus.com
Go online at www.brentwoodus.com
PRECAUCIONES IMPORTANTES

text_image
Technical diagram of a vacuum cleaner with numbered parts for identification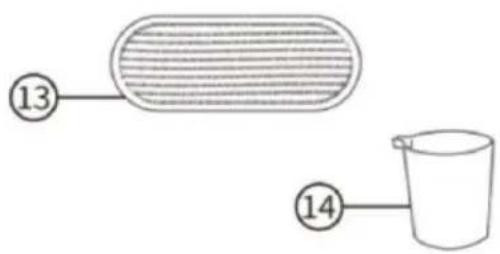
text_image
13 14INSTRUCCIONES DE USO
PASO 1
text_image
① Open ② MAXPASO 4
natural_image
Simple line drawing of a rectangular object with horizontal lines inside, no text or symbols present.natural_image
Line drawing of a U-shaped mechanical component with a small protrusion (no text or symbols)natural_image
Simple line drawing of a striped oval object with an arrow pointing downward (no text or symbols)