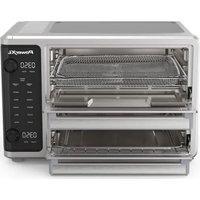
SmartSynx TO67D5-7SPTV - Deep fryer PowerXL - Free user manual and instructions
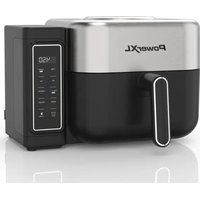
Find the device manual for free SmartSynx TO67D5-7SPTV PowerXL in PDF.


| Brand | PowerXL |
| Model | SmartSynx TO67D5-7SPTV |
| Product Type | Double Oven Air Fryer |
| Power | 1750 W |
| Temperature Range | 65 °C – 232 °C (150 °F – 450 °F) |
| External Dimensions | 47.1 cm (W) x 40.9 cm (D) x 31.4 cm (H) |
| Upper Oven Internal Dimensions | 32.3 cm (W) x 33.0 cm (D) x 12.6 cm (H) |
| Lower Oven Internal Dimensions | 32.3 cm (W) x 33.0 cm (D) x 9.6 cm (H) |
| Capacity | Up to 2.3 kg of food (depending on recipe) |
| Cooking Functions | SmartSynx, Bake, Air Fry, Convection Bake, Broil, Reheat, Warm, Roast, Grill, Toast, Pizza, Dehydrate |
| Number of Cooking Modes | 12 (including 2 exclusive to upper oven) |
| SmartSynx Programs | Synchronized cooking of both ovens |
| Included Accessories | Drip tray (x2), frying basket, oven rack, baking pan, grill plate |
| Main Material | Stainless steel, non-stick coating |
| Plug Type | 3-pin (grounded) |
| Cord Length | 61 cm (24 in) |
| Automatic Shut-Off | Yes, at end of cooking or in case of overheating |
| Safety | Overheat protection, automatic shut-off, hot surface indicator |
| Care and Cleaning | Hand washing recommended; accessories dishwasher safe |
| Warranty | 1 year (replacement) + 90 days money-back |
| Repairability | Spare parts available via customer service (not listed) |
Frequently Asked Questions - SmartSynx TO67D5-7SPTV PowerXL
User questions about SmartSynx TO67D5-7SPTV PowerXL
0 question about this device. Answer the ones you know or ask your own.
Ask a new question about this device
Download the instructions for your Deep fryer in PDF format for free! Find your manual SmartSynx TO67D5-7SPTV - PowerXL and take your electronic device back in hand. On this page are published all the documents necessary for the use of your device. SmartSynx TO67D5-7SPTV by PowerXL.
USER MANUAL SmartSynx TO67D5-7SPTV PowerXL
Scan the code for more recipes
OWNER'S MANUAL
MANUAL DE USO Y CUIDADO
GUIDE D'UTILISATION ET D'ENTRETIEN

PowerXL™
MODELS/MODELOS/MODÈLES:
TO67D5-6SPTV, TO67D5-7SPTV,
TO67D5-1SP, TO67D5-1SPC, TO67D5-1SPLA
Product may vary slightly from what is illustrated.
IMPORTANT SAFEGUARDS ....3
Quick Start Guide......6
Parts & Accessories....10
Using the Control Panel 12
Instructions for Use....14
General Cooking Guidelines....16
Cleaning & Storage 18
Troubleshooting 19
Money-Back Guarantee ....20
Appliance Specifications
| Model Numbers | TO67D5-6SPTV, TO67D5-7SPTV, TO67D5-1SP, TO67D5-1SPC, TO67D5-1SPLA |
| Wattage | 1750W |
| Temperature Range | 150° F-450° F |
| Exterior Dimensions | 18.54" (W) x 16.09" (D) x 12.38" (H) |
| Upper Oven Dimensions | 12.7" (W) x 13" (D) x 4.96" (H) |
| Lower Oven Dimensions | 12.7" (W)" x 13" (D) x 3.79" (H) |
| Power Cord Length | 24" |
| Plug Type | 3-prong |

WARNING
PREVENT INJURIES!
CAREFULLY READ ALL INSTRUCTIONS BEFORE USE!
When using electrical appliances, basic safety precautions should be followed, including the following:
1. READ ALL INSTRUCTIONS.
-
This appliance is not intended for use by people (including children) with reduced physical, sensory, or mental capabilities or lack of experience and knowledge unless they are given supervision or instruction concerning use of the appliance by a person responsible for their safety.
-
Close supervision is necessary when any appliance is used by or near children.
-
DO NOT place on or near a hot gas or electric burner or in a heated oven.
-
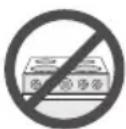
DO NOT place your appliance on a cooktop even if the cooktop is cool because you could accidentally turn the cooktop on, causing a fire, damaging the appliance, your cooktop, and your home.
-
DO NOT place or use this appliance near water.
-
When cooking, DO NOT place the appliance against a wall or within 5 inches of other appliances. DO NOT place anything on top of the appliance.
-
A fire may occur if this appliance is covered by or touching flammable material, including curtains, draperies, walls, and the like, when in operation.
-
DO NOT use outdoors.
-
DO NOT place the appliance in any container or small confined space while the appliance is heated or in operation.
-
ALWAYS operate the appliance on a horizontal surface that is level, stable, and noncombustible with adequate space for airflow.
-
Before using your appliance on any countertop surface or other fragile surface, such as a glass tabletop, check with your countertop manufacturer or installer for recommendations about using appliances on your surfaces. Some manufacturers and installers may recommend protecting your surface by placing a hot pad or trivet under the appliance for heat protection. Your manufacturer or installer may recommend that hot pans, pots, or electrical appliances should not be used directly on top of the countertop. If you are unsure, place a trivet or hot pad under the appliance before using it.
-
DO NOT operate any appliance if it has a damaged cord or plug, if it is not working properly, or if it has been damaged or dropped. Return the appliance to an authorized service facility for examination, repair, or adjustment.
-
This appliance should be serviced only by qualified service technicians. Contact Customer Service using the information located on the back of this manual.
-
NEVER immerse the main unit housing in water. If the appliance falls or accidentally becomes immersed in water, unplug the appliance from the electrical outlet immediately. Do not reach into liquid if the appliance is plugged in and immersed.
-
To protect against electrical shock, DO NOT immerse the cord or plugs or expose the electrical components to water or other liquid.
-
DO NOT plug in the power cord or operate the appliance controls with wet hands.
-
To disconnect, press the Stop Button to turn the appliance off and then remove the plug from the electrical outlet.
IMPORTANT SAFEGUARDS
- MAKE SURE the appliance is properly plugged into a dedicated electrical outlet without any other appliances on the same outlet.
- Keep the appliance and its power cord out of the reach of children when it is in operation or in the cooling down process.
- NEVER connect this appliance to an external timer switch or separate remote-control system.
- NEVER plug the appliance into an outlet below the surface where the appliance is placed.
- DO NOT let the power cord hang over the edge of a table or counter or touch hot surfaces.
- DO NOT clean with metal scouring pads. Pieces can break off the pad and touch electrical parts, creating risks of electric shock.
- Should the appliance emit smoke, UNPLUG IMMEDIATELY and wait for smoking to stop before handling the appliance. Allow the appliance to cool and wipe excess oil and grease from the appliance.
- Cooking appliances should be positioned in a stable location with the handles (if any) positioned to avoid the spillage of hot liquids.
- NEVER operate the appliance unattended.
- NEVER rest anything on the appliance's door while it is open.
- DO NOT leave the appliance's door open for an extended period.
- ALWAYS ensure that nothing is protruding out of the appliance before closing the appliance's door.
- ALWAYS close the appliance's door gently; NEVER slam the door closed. ALWAYS use the handle when opening and closing the appliance's door.
- NEVER operate the appliance with the door open. The use of accessory attachments not recommended by the appliance manufacturer may cause injuries.
-
Avoid touching moving parts.
-
Unplug the appliance from the electrical outlet when not in use and before cleaning. Allow 30 minutes to cool before handling, putting on or taking off parts, cleaning, or storing.
- DO NOT cover the air vents. Doing so will prevent even cooking and may overheat or damage the appliance.
- When in operation, hot air and steam are released through the Hot Air Outlet Vent. KEEP YOUR HANDS AND FACE at a safe distance from the Hot Air Outlet Vent and keep the Vent clear of obstructions.
- While cooking, the internal temperature of the appliance reaches several hundred degrees Fahrenheit. To avoid personal injury, NEVER place your hands inside the appliance unless it is thoroughly cooled.
- The appliance's outer surfaces and accessories may become hot during use. WEAR OVEN MITTS when handling the appliance during and after use and to protect against hot steam and air released when opening the appliance.
- DO NOT touch hot surfaces. Use handles or knobs.
- EXTREME CAUTION must be used when moving an appliance containing hot oil or other hot liquids or when removing accessories or disposing of hot grease. This appliance is not intended for deep-frying food.
- Oversized food, metal foil packages, or utensils MUST NOT be inserted in the appliance as they may involve a risk of fire or electric shock. DO NOT overfill the appliance.
- DO NOT store any materials other than manufacturer-recommended accessories in this appliance when not in use.
- EXTREME CAUTION should be exercised when using containers constructed of materials other than metal and glass.
- DO NOT place any of the following materials in the appliance: paper, cardboard, or plastic.
- NEVER pour oil into the appliance or accessories. Fire and personal injury could result.
IMPORTANT SAFEGUARDS
- DO NOT cover the Drip Tray or any part of the oven with metal foil. This will cause overheating of the oven.
- DO NOT use aerosol cooking sprays. These sprays will build up on cookware and become difficult to remove while reducing the nonstick cooking performance.
- DO NOT expose the appliance to corrosive chemicals or vapors.
- DO NOT use sharp utensils with the appliance. These implements can damage the appliance's protective nonstick coating.
-
This appliance is for home use only. If the appliance is used improperly or for professional or semi-professional purposes or if it is not used according to the instructions in the user manual, the guarantee becomes invalid and Empower Brands, LLC will not be held liable for damages. DO NOT use this appliance for anything other than its intended use.
-
This appliance is not intended for use by persons (including children) with reduced physical, sensory or mental capabilities, or lack of experience and knowledge, unless they have been given supervision or instructions concerning use of the appliance by a person responsible for their safety.
- Children should be supervised to ensure that they do not play with the appliance.
- The appliance is not intended to be operated by means of an external timer or separate remote-control system.
SAVE THESE INSTRUCTIONS - FOR HOUSEHOLD USE ONLY
Extension Cord
- A short power supply cord is provided to reduce the risk resulting from becoming entangled in or tripping over a longer cord.
- Extension cords are available and may be used if care is exercised in their use.
- If an extension cord is used:
a. The marked electrical rating of the extension cord should be at least as great as the electrical rating of the appliance;
b. If the appliance is of the grounded type, the extension cord should be a grounding-type 3-wire cord.
c. The cord should be arranged so that it will not drape over the countertop or tabletop where it can be pulled on by children or tripped over unintentionally.
Electric Power
This appliance should be operated on a dedicated electrical outlet. If the electrical outlet is overloaded with other appliances, your new appliance may not operate properly.
Automatic Shut-Off
The appliance has a built-in shut-off device that will automatically shut off the appliance when the cooking time has completed. You can manually switch off the appliance by pressing the Stop Button. The fan might continue running for 10–20 seconds to cool down the appliance.
Overheating Protection
Should the inner temperature control system fail, the overheating protection system will be activated and the appliance will not function. Should this happen, unplug the appliance and contact customer service using the information on the back of this manual.
QUICK START GUIDE
Pick an Oven
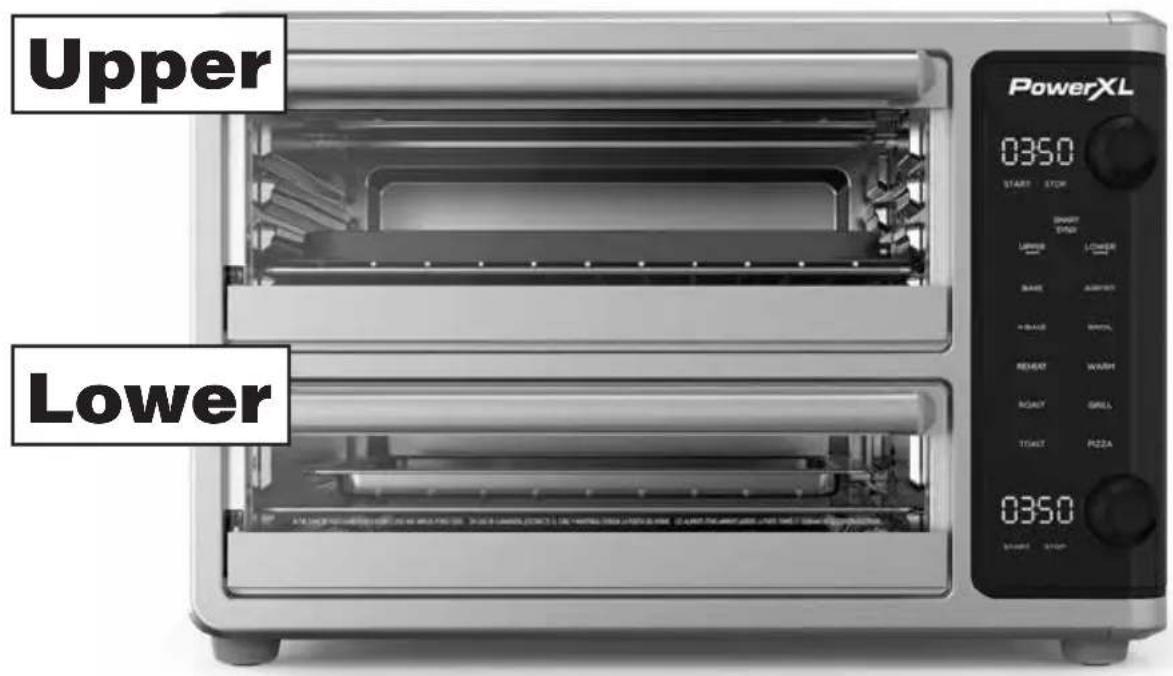
Upper Oven
Three rack locations with ten cooking functions.
If you're only cooking in one chamber, use this one.
It is also the best oven for baked items like desserts, pastries, and pizza.
Lower Oven
Two rack locations with seven cooking functions.
This chamber is great for cooking sides while your main course cooks and is especially good for air frying.
Both!
SmartSynx: Finish cooking in both ovens at the same time.
You can also cook in both ovens at the same time without using the
SmartSynx feature.
QUICK START GUIDE
Pick a Function
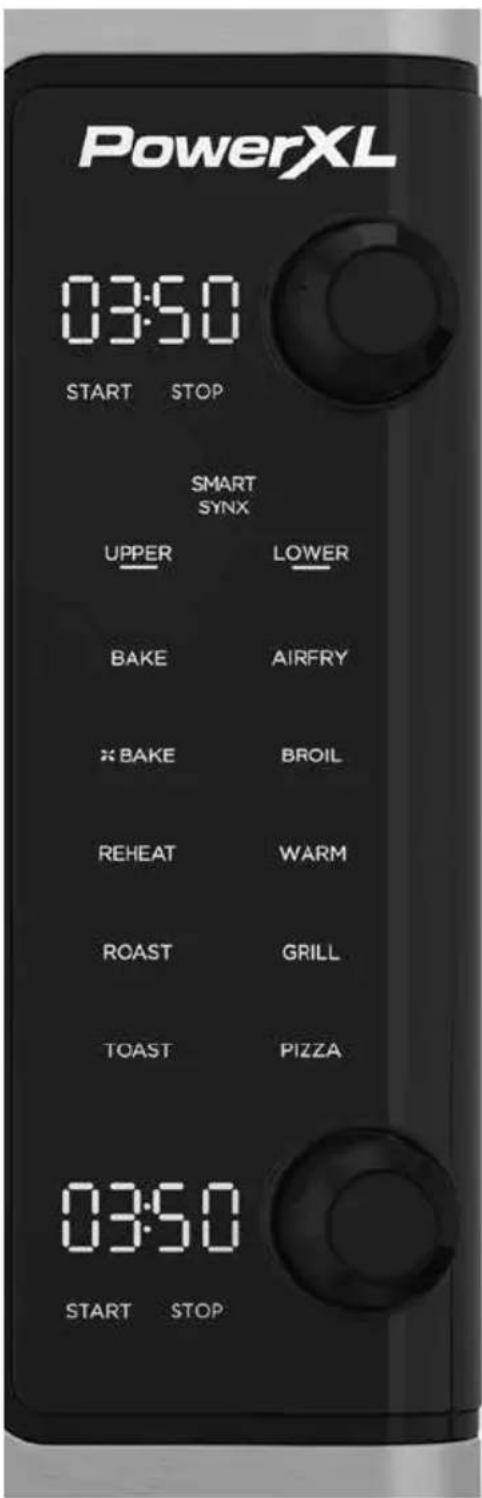
* The grill, toast, and pizza functions are only available in the Upper Oven. Grill function is not available on all models.
Bake
Great for cooking baked goods, like cakes and casseroles, without using the convection fan.
Air Fry
Surrounds food like French fries, chicken wings, and onion rings with a vortex of heat to get similar results to deep frying without using all the oil.
Convection Bake
Bakes food while cycling the fan on and off – perfect for food like cookies and pastries.
Broil
Especially good for broiling fish and food with cheese on top, like garlic bread, from the top at a high heat.
Reheat
Reheats leftovers quickly and evenly.
Warm
Keeps your food warm. When cooking in both ovens, use the lower oven for WARM function.
Roast
Roasts food like vegetables and roasts evenly without using the convection fan.
Grill*
Grills food like steak, chicken, pork or veal cutlets, and vegetables at a high temperature from the top and bottom.
Toast*
Toasts bread, bagels, and more to your desired level.
Pizza*
Cooks fresh or frozen pizza with gooey cheese and golden crust.
QUICK START GUIDE
Pick The Best Accessory
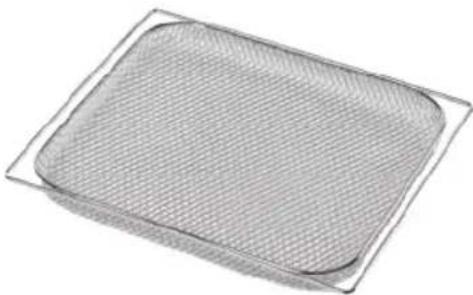
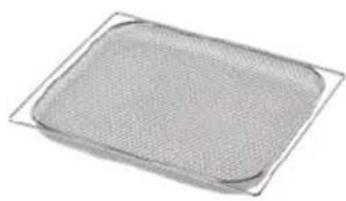
Crisper Tray
The holes in the mesh Crisper Tray let you surround your food with hot air.
Best Used with Functions: Air Fry
Optimal Rack Locations:
Upper Oven: Middle
Lower Oven: Top
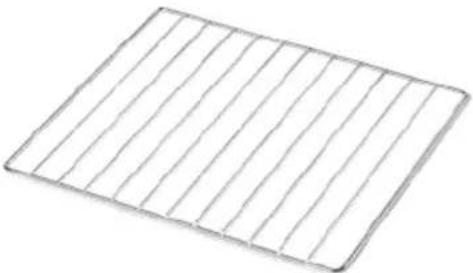
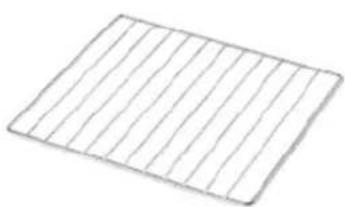
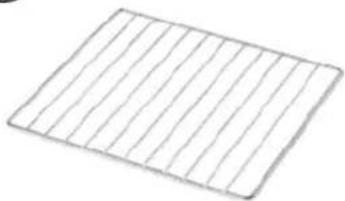
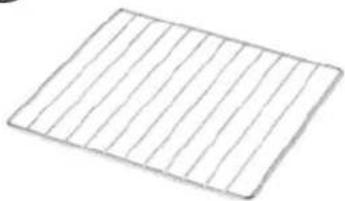
Oven Rack
Traditional oven-style cooking rack.
Best Used with Functions: Warm, Broil, Reheat, Roast, Toast
Optimal Rack Locations:
Upper Oven: Top (Broil Only), Middle, Bottom
Lower Oven: Top (Broil Only), Bottom
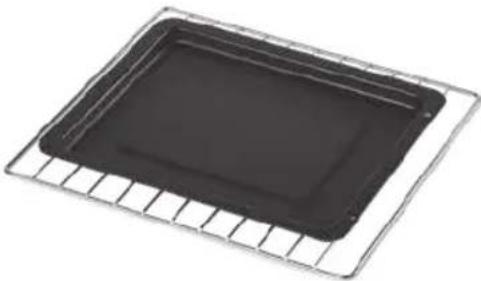
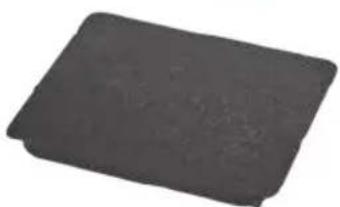
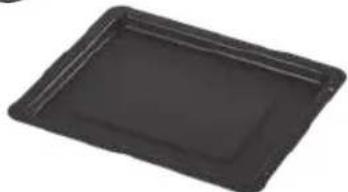
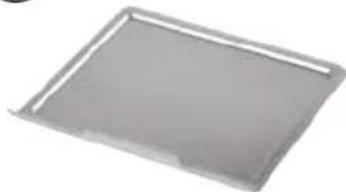
Baking Pan
Sits on top of the Oven Rack.
Best Used with Functions: Bake, Convection Bake, Pizza
Optimal Rack Locations:
Upper Oven: Middle
Lower Oven: Bottom
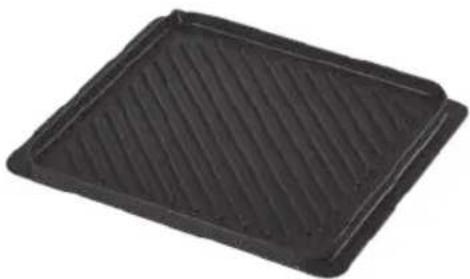
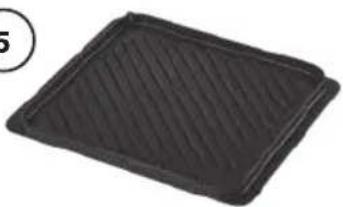
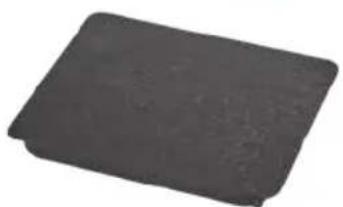
Grill Plate*
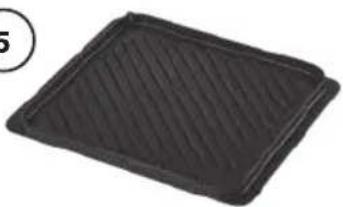
The top side leaves char-grill marks on your food.
Flip it over and use it as a pizza stone.
Best Used with Functions: Grill, Pizza
Optimal Rack Locations:
Upper Oven (Grilling): Bottom
Upper Oven (Pizza): Middle
QUICK START GUIDE
Cook Your First Meal with SmartSynx!
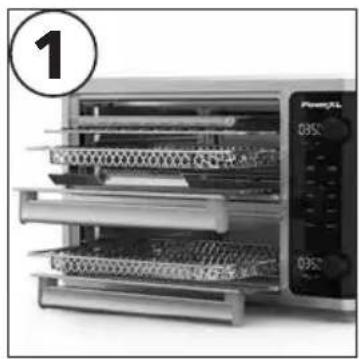
Place food on the accessories that best suit your recipe. Slide the accessories into the optimal rack locations in each oven.
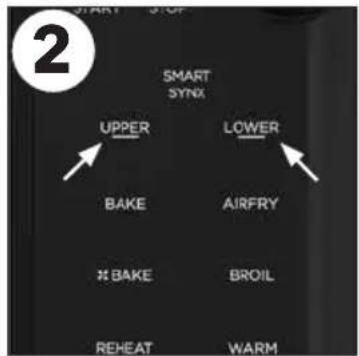
Press the Upper Oven Button. Then, press your desired cooking function for the Upper Oven.
Press the Lower Oven Button. Then, press your desired cooking function for the Lower Oven.

If you want to adjust the cooking time or temperature, turn the Control Knob adjacent to the oven you want to adjust.
Press the Control Knob to cycle between the cooking time and temperature.
TIP: Cooking times can vary slightly when cooking in both ovens at once. When cooking in both ovens simultaneously, add a few minutes to the cooking time and keep an eye on your food while it cooks.
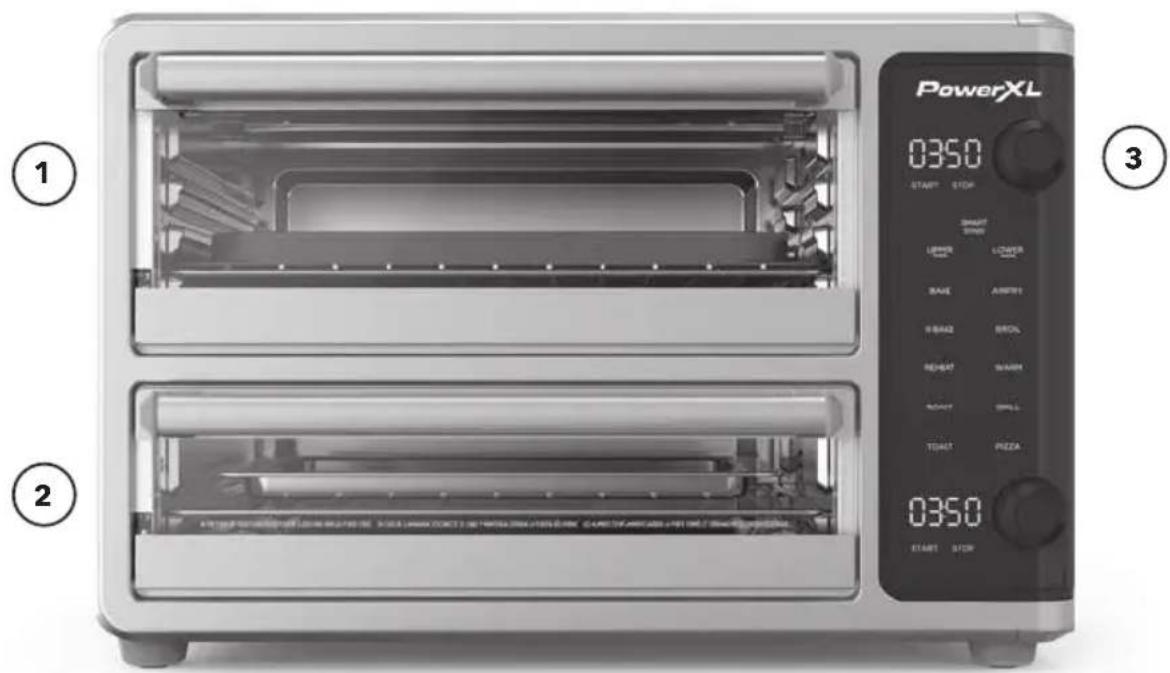
Press the SmartSynx Button to start the cooking process. The oven with the longer cooking time will start cooking first. When the cooking times of both chambers are the same, the second oven will begin cooking. Both ovens will finish cooking at the same time.
See the "Instructions for Use" section for detailed operating instructions.
Parts & Accessories
Accessories
4
5
7
8
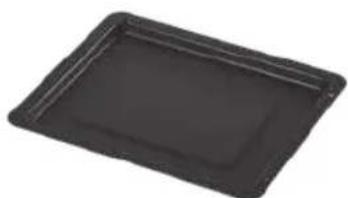
* Not available on all models. May be sold separately.
Using the Accessories
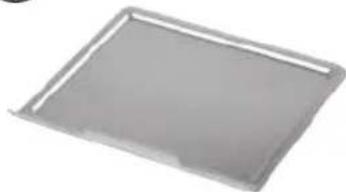
Drip Tray
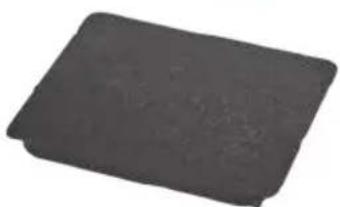
Each oven has its own Drip Tray. A Drip Tray should always be placed at the bottom of each oven. In the Upper Oven, the Drip Tray slides underneath the bottom heating elements. In the Lower Oven, the Drip Tray sits on the bottom of the oven.
Crisper Tray
The Crisper Tray slides into the rack locations in the ovens. For the Upper Oven, the Crisper Tray should be used in the top of middle rack location. For the Lower Oven, the Crisper Tray should be used in the top rack location.
Oven Rack
The Oven Rack slides into the rack locations in the ovens. The Oven Rack can be used with any rack location (the top rack location should only be used when using the Broil function).
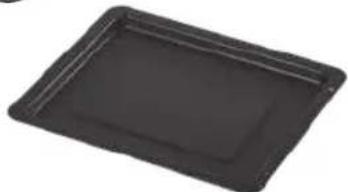
Baking Pan
The Baking Pan must be placed on an Oven Rack. Use the Baking Pan when cooking food that can drip onto the heating elements.
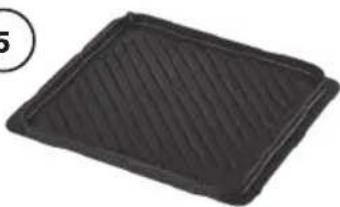
Grill Plate
Use with the ridges facing upward for grilling. When grilling, only use the Grill Plate in the bottom rack location of the Upper Oven.
Flip the Grill Plate over with the ridges facing downward to use it as a pizza stone. When using the Grill Plate as a pizza stone, slide the Grill Plate into the middle rack location of the Upper Oven.
The Grill Plate should always be preheated for 5 minutes before adding food. When grilling, use the Grill function. When cooking fresh pizza, use the Pizza function. When cooking frozen pizza, use the Bake function.
Rack Locations
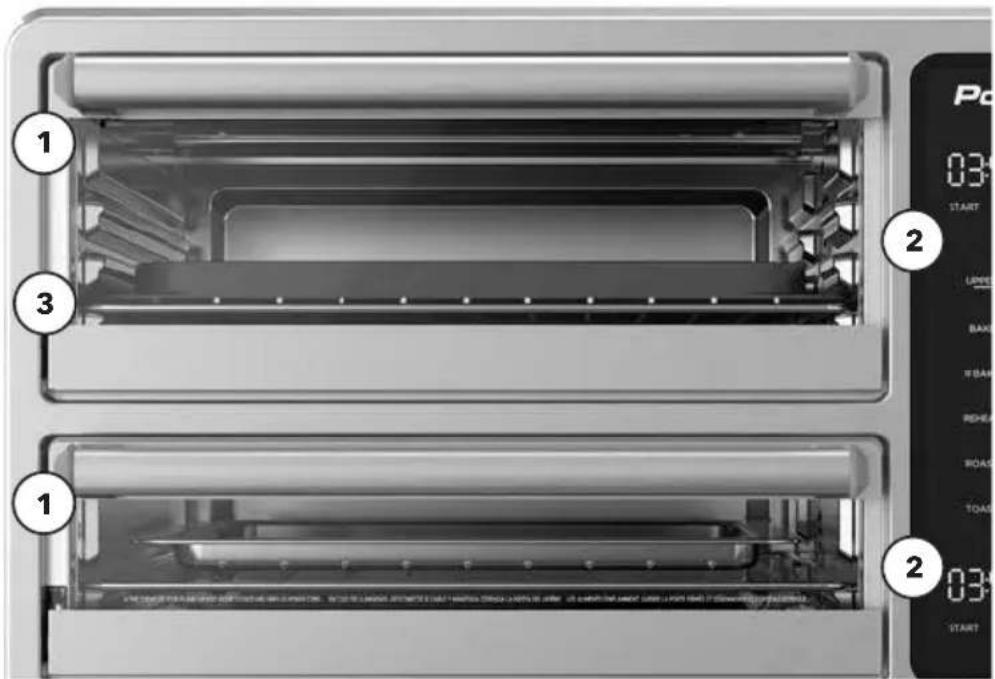
Using the Control Panel
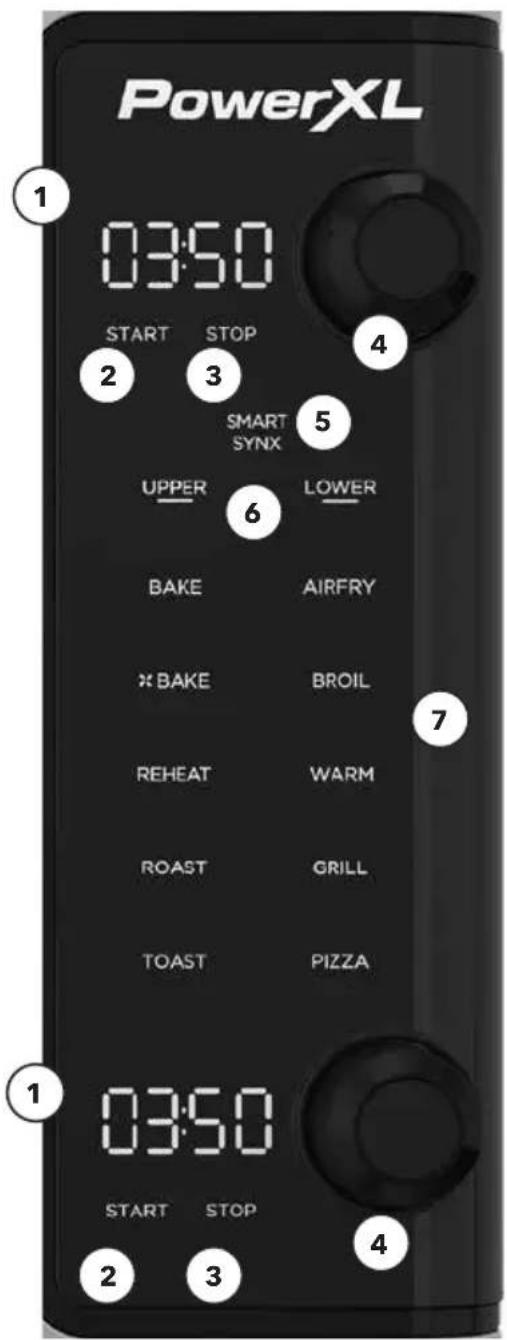
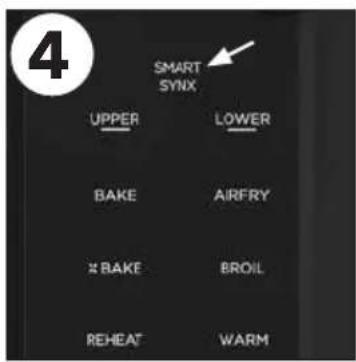
1. TIME AND TEMPERATURE DISPLAYS
Displays the cooking time and temperature of the associated oven. Press the Control Knob next to the Time and Temperature Display to alternate between displaying the time and the temperature.
2. START BUTTON
Once a cooking time and temperature have been selected, press the Start Button to begin cooking. The top Start Button controls the upper oven, and the bottom Start Button controls the lower oven. The Start Button will only illuminate once a function has been selected.
3. STOP BUTTON
Press the Stop Button to stop the cooking process in the adjacent oven. The top Stop Button controls the upper oven, and the bottom Stop Button controls the lower oven.
4. CONTROL KNOB
Press the Control Knob to alternate between displaying the cooking time and temperature. Turn the Control Knob to adjust the setting displayed on the Time and Temperature Display.
5. SMARTSYNX BUTTON
When cooking food in both ovens, press the SmartSynx Button instead of the Start Button to ensure that both ovens finish cooking at the same time.
6. OVEN BUTTONS
Press the Upper or Lower Button to select an oven. The word "UPPER" or "LOWER" will illuminate when selected.
7. COOKING FUNCTION BUTTONS
Press one of the Cooking Function Buttons to select a cooking function. The name of the function will illuminate to show which function has been selected. You can press the Upper or Lower Button to show which cooking function is selected for each oven.
NOTES:
- The Control Panel's lights will darken while not in use. Press or turn a Control Knob to illuminate the Control Panel.
- PrE: Oven is preheating and cooking timer will begin once preheat is complete. If using the GRILL or PIZZA function with SMART SYNX feature, the oven will preheat the upper oven first before starting any cooking timer.
- Hold: When using the SMART SYNX feature, the oven with the shorter cook time will display HOLD until it begins its cooking cycle.
- Sh #: When toasting, the upper oven will show the letters Sh and a number which represents the selected toast shade (1-7).
Function Chart
The Cooking Function Buttons set the appliance to a cooking time and temperature that is generally appropriate for the selected type of cooking. As you become more familiar with the appliance, you can adjust the set cooking time and temperature as needed.
| Function Name | Temperature (Range) | Time1 | Preheat2 |
| Warm4 | 150°F(150°F-250°F) | 30 mins. | No |
| Bake | 350°F(150°F-450°F) | 15 mins. | Yes |
| Convection Bake | 350°F(150°F-450°F) | 15 mins. | Yes |
| Broil | 475°F(400°F-500°F) | 10 mins. | No |
| Air Fry | 425°F(350°F-450°F) | 20 mins. | No |
| Reheat | 425°F(350°F-450°F) | 5 mins. | No |
| Roast | 350°F(150°F-450°F) | 30 mins. | Yes |
| Grill3 | 450°F(350°F-500°F) | 15 mins. | Yes |
| Toast3,5 | Varies by selected darkness level | Shade 4(Range: 1-7) | No |
| Pizza3 | 425°F(350°F-450°F) | 20 mins. | Yes |
| Dehydrate6 | 165°F(85°F-175°F) | 6 hours(1 hour-72 hours) | No |
Note: The temperature settings cannot exceed 150 degrees between the two ovens.
1 The time can be set between 1 and 60 minutes for all cooking functions except toast.
2 Preheat: Some cooking functions have a built-in preheating feature. When you select one of these functions, "PrE" will appear on the Time and Temperature Display while the appliance preheats. After preheating is complete, the cooking timer will start counting down. The cooking time and temperature are not adjustable while the appliance is preheating.
3 The Grill, Toast, and Pizza settings can only be used with the Upper Oven.
4 Upper oven temperature setting for WARM may be limited by lower oven temperature setting.
5 Lower oven cannot be used while toasting in upper oven.
6 When dehydrating, the other oven can only dehydrate due to low temperature requirements.
Instructions for Use
Before First Use
- Read all material, warning stickers, and labels.
- Remove all packing materials, stickers, and labels from the appliance.
- Please go to www.prodprotect.com/powerxl to register your warranty.
- Before initial use, wipe the inside and outside of the appliance with a warm, moist cloth and mild detergent. Handwash all cooking accessories.
- Place appliance on a heat-resistant surface or use heat protection. Do not place the appliance on a surface that is not heat resistant. Ensure that the appliance is used in an area with adequate air circulation. Do not place on the stove top.
- Before cooking food, preheat the appliance for a few minutes to allow the appliance to burn off the manufacturer's protective coating of oil. Wipe the appliance with warm, soapy water and a dishcloth after this burn-in cycle.
Using the Appliance
- Plug the appliance into a dedicated electrical outlet.
- Place your ingredients on your chosen accessory. Slide the accessory into one of the rack locations in one of the ovens. Close the appliance's door.
TIP: If you are using a cooking function that includes preheating, you can add food to the appliance after preheating has finished. - Press the Oven Button that matches the oven you want to use. Press one of the Cooking Function Buttons. You can turn the Control Knob left or right to adjust the cooking time and temperature if needed. Press the Control Knob to alternate between the cooking time and temperature. Use the top Control Knob for the Upper Oven, and use the bottom Control Knob for the Lower Oven.
- SMARTSYNX: If you are cooking food in both ovens and want the food to finish cooking at the same time, press the SmartSynx Button instead of pressing the Start Button. The oven with the longer cooking time will begin cooking food first, and 30 seconds before the timers cooking timers match, the appliance will beep six times to let you know to add food to the second oven.
- Press the Start Button next to the oven with food to begin the cooking process. You can press the Stop Button at any point to stop. Once stopped, pressing the Start Button again will resume the cooking process.
NOTE: Pressing the Stop Button will only stop the cooking process in the chamber adjacent to the Stop Button that is pressed. Press both Stop Buttons to stop the cooking processes in both chambers. - The appliance will beep when the cooking process is complete. The accessories will be hot, so use heat-resistant oven mitts to transfer the accessories to a heat-resistant surface.
Tips
- When cooking only one food, use the Upper Oven.
- You can cook almost any food that you would normally cook in an oven in this appliance.
- To help ensure even cooking, do not overload your accessories with food. Food should be cooked in a single layer. You can either divide your ingredients between the two ovens or cook multiple batches of food.
- Cooking times can vary slightly when cooking in both chambers at once compared to cooking in only one chamber. When cooking food in both chambers simultaneously, add a few minutes to the cooking time and keep an eye on your food while it cooks.
- When using the Grill Plate, leave the Grill Plate in the appliance while the appliance preheats. The Grill Plate should be hot when food is added.
- When using the Baking Pan, first slide an Oven Rack into an oven. The Baking Pan sits on the Oven Rack.
- Use the Baking Pan when cooking food that can drip onto the heating elements.
- Use premade dough to prepare filled snacks quickly and easily. Premade dough also requires a shorter cooking time.
- Adding a bit of vegetable oil to breaded items can help produce a crispier result. When adding oil, do so immediately before cooking and add only a small amount onto the breaded items.
Shaking Food
To ensure even cooking while air frying, you can turn your food over halfway through the cooking process.
- Press the Stop Button adjacent to the oven with the food you want to turn to stop the cooking process.
- Use oven mitts to remove the accessories and food. Place the accessories and food on a heat-resistant surface.
- Turn over the ingredients in the Crisper Tray.
- Return the accessories to the appliance. Close the door. Press the Start Button to resume the cooking process.
General Cooking Guidelines
NOTE: Keep in mind that these settings are guidelines. Since ingredients differ in origin, size, shape, and brand, we cannot guarantee the best settings for your ingredients. When cooking in both ovens, add a little time and monitor your food near the end of the cooking cycle.
| Food Size Temperature | Cook Time Preheat | Shake or Flip | Spray with Oil | |||
| FROZEN FOOD | ||||||
| Frozen pizza 425°F | 10-15 mins. | √ | ||||
| French fries 400°F | 20-24 mins. | √ | ||||
| Sweet potato fries 400°F | 20-24 mins. | √ | ||||
| Chicken nuggets 400°F | 14-16 mins. | √ | ||||
| CHICKEN | ||||||
| Breaded cutlets 6 oz 400°F | 10-15 mins. | √ | √ | √ | ||
| Wings 400°F | 20-24 mins. | √ | √ | |||
| Chicken breast 6 oz 400°F | 12-16 mins. | √ | ||||
| BEEF | ||||||
| Burgers 6 oz 400°F | 10-14 mins. | √ | √ | |||
| Hot dogs 8 pc 375°F | 5-8 mins. | √ | √ | |||
| NY strip steaks | 8 oz 400°F | 12-16 mins. | √ | √ | ||
| Meatballs, 1 inch | 1.5 lb 375°F | 10-15 mins. | √ | √ | ||
| PORK | ||||||
| Pork chops | 400°F | 12-16 mins. | √ | √ | ||
| Sausages | 350°F | 15-20 mins. | √ | √ | ||
| FISH | ||||||
| Salmon filets 6 oz 390°F | 12-16 mins. | √ | ||||
| Shrimp (16-20 size) | 12 oz 390°F | 10-15 mins. | √ | √ | ||
| VEGETABLES | ||||||
| Asparagus 1 lb 380°F | 8-12 min | √ | √ | |||
| Broccoli 8 oz 380°F | 10-15 min | √ | √ | |||
| Corn on the cob 2 pc 380°F | 8-12 min | √ | √ | |||
Internal Temperature Meat Chart
Use this chart and a food thermometer to ensure that meat, poultry, seafood, and other cooked food reach a safe minimum internal temperature.
*For maximum food safety, the U.S. Department of Agriculture recommends 165° F for all poultry; 160° F for ground beef, lamb, and pork; and 145° F, with a 3-minute resting period, for all other types of beef, lamb, and pork. Also review the USDA Food Safety Standards.
| Food Type | Internal Temp.* | |
| Beef & Veal | Ground | 160°F |
| Steaks, roasts: medium | 145°F | |
| Steaks, roasts: rare | 125°F | |
| Chicken & Turkey | Breasts | 165°F |
| Ground, stuffed | 165°F | |
| Whole bird, legs, thighs, wings | 165°F | |
| Fish & Shellfish | Any type | 145°F |
| Lamb | Ground | 160°F |
| Steaks, roasts: medium | 140°F | |
| Steaks, roasts: rare | 130°F | |
| Pork | Chops, ground, ribs, roasts | 160°F |
| Fully cooked ham | 140°F | |
Cleaning & Storage
Cleaning
Clean the appliance after each use. Some of the accessories are coated with a special nonstick surface. Never use abrasive cleaning materials or utensils on these surfaces.
- Unplug the Power Cord from the electrical outlet and be certain the appliance is thoroughly cooled before cleaning.
- Wipe the outside of the appliance, including the glass on the doors, with a warm, moist cloth and mild detergent.
- Clean the glass inside the appliance with a warm, moist cloth and mild detergent. Use hand protection in case the inside of the appliance is still hot.
- Clean the accessories, including the Drip Tray, with hot water, a mild detergent, and a nonabrasive sponge. The accessories are
dishwasher safe, but hand-washing is recommended. For difficult-to-remove food, soak in hot, soapy water for 10 minutes.
- Clean the inside of the appliance with hot water, a mild detergent, and a nonabrasive sponge.
- Rinse the appliance with a clean, damp cloth. Use a clean, dry cloth to dry the appliance interior. Do not leave standing water in the appliance.
- Once dry, make sure to return the Drip Trays to the bottom of the ovens.
- If any other service needs to be performed, contact Customer Service.
Storage
Place the cooled, dry appliance in a clean, dry place. Do not stack objects on top of the appliance.
Troubleshooting
Symptom Possible Cause Solution
| The appliance does not work. | The appliance is not plugged in. Plug the power cord into an outlet. | |
| The appliance is plugged into an outlet that is shared with other devices. | Plug the appliance into a dedicated electrical outlet. | |
| The appliance might have been turned off. If the Stop Button is pressed while cooking, the cooking process will be stopped. | Press the Start Button next to the appropriate oven to resume cooking. | |
| Food is not cooked. | Too much food is cooking at once. | Use smaller batches for more even cooking. |
| The temperature is set too low. | Raise the cooking temperature and continue cooking. | |
| Food is in the wrong oven. | When cooking in only one oven, use the Upper Oven. Make sure you set the cooking time and temperature for the Upper Oven. | |
| Food is not fried evenly. | Some types of food cook more evenly when turned over halfway through the cooking process. | See “Shaking Food” in the “Instructions for Use” section. |
| Smoke coming from appliance | Too much oil is being used. Wipe down to remove excess oil. | |
| The accessories or appliance have residue from the previous operation. | Clean appliance and accessories after each use. | |
| Liquid is dripping onto the heating elements. | Use the Baking Pan when cooking food that can drip onto the heating elements. | |
90-Day Money-Back Guarantee
The PowerXL™ SmartSynx Dual Door Oven is covered by a 90-day money-back guarantee. If you are not 100% satisfied with your product, return the product and request a replacement product or refund. Proof of purchase is required. Refunds will include the purchase price, less processing and handling. Follow the instructions in the Return Policy below to request a replacement or refund.
Replacement Guarantee Policy
Our products, when purchased from an authorized retailer, include a one-year replacement guarantee if your product or component part does not perform as expected, the guarantee extends only to the original purchaser and is not transferable. If you experience an issue with one of our products within one year of purchase, return the product or the component part for replacement with a functionally equivalent new product or part. The original proof of purchase is required, and you are responsible to pay to return the appliance to us. In the event a replacement appliance is issued, the guarantee coverage ends six months following the receipt date of the replacement appliance or the remainder of the existing guarantee, whichever is later. Empower Brands, LLC reserves the right to replace the appliance with one of equal or greater value.
Return Policy
If, for any reason, you would like to replace or return the product under the money-back guarantee, your order number can be used as the return merchandise authorization number (RMA). If the product was purchased in a retail store, use "RETAIL" as the RMA. Return your product to the address provided below for a replacement, which will incur no additional processing and handling fees, or for the refund of your purchase price, less processing, and handling. You are responsible for the cost of returning the product. You can locate your order number at www.customerstatus.com. You can call customer service at 973-287-5106 for any additional questions.
Pack the product carefully and include in the package a note with (1) your name, (2) mailing address, (3) phone number, (4) email address, (5) reason for return, and (6) proof of purchase or order number, and (7) specify on the note whether you are requesting a refund or replacement. Write the RMA on the outside of the package.
Send the product to the following return address:
PowerXL SmartSynx Dual Door Oven
Vivitech/Fosdick Returns
15392 Cobalt St.
Sylmar, CA 91342
If the replacement or refund request has not been acknowledged after two weeks, please contact Customer Service at 973-287-5106.
Refund
Refunds requested within the money-back guarantee timeframe will be issued to the payment method used at purchase if the item was purchased directly from Empower Brands, LLC. If the item was purchased from an authorized retailer, proof of purchase is required, and a check will be issued for the item and sales tax amount.
Processing and handling fees are non-refundable.
Contenido
Bandeja para Freír
Parrilla del horno
Bandeja para hornear
5
- HORNO SUPERIOR
- HORNO INFERIOR
- PANEL DE CONTROL
- BANDEJA PARA FREÍR
- PLACA PARA ASAR A LA PARRILLA/PIEDRA PARA PIZZA*
- BANDEJA DE GOTEO
- PARRILLA DEL HORNO
- BANDEJA PARA HORNEAR
6
7
8
Plateau à friture
Grille de four
Plat de cuisson
Plaque de gril*
5
- FOUR SUPÉRIEUR
- FOUR INFÉRIEUR
- PANNEAU DE COMMANDE
- PLATEAU À FRITURE
- PLAQUE DE GRIL/ PIERRE À PIZZA*
- PLATEAU D'ÉGOUTTAGE
- GRILLE DE FOUR
- PLAT DE CUISSON
6
7
8
- POWERXL™
- WARNING
- PREVENT INJURIES
- CAREFULLY READ ALL INSTRUCTIONS BEFORE USE
- READ ALL INSTRUCTIONS
- IMPORTANT SAFEGUARDS
- SAVE THESE INSTRUCTIONS - FOR HOUSEHOLD USE ONLY
- EXTENSION CORD
- ELECTRIC POWER
- AUTOMATIC SHUT-OFF
- OVERHEATING PROTECTION
- QUICK START GUIDE
- PICK AN OVEN
- UPPER OVEN
- LOWER OVEN
- BOTH
- PICK A FUNCTION
- BAKE
- AIR FRY
- CONVECTION BAKE
- BROIL
- REHEAT
- WARM
- ROAST
- GRILL
- TOAST
- PIZZA
- PICK THE BEST ACCESSORY
- CRISPER TRAY
- OVEN RACK
- BAKING PAN
- GRILL PLATE
- COOK YOUR FIRST MEAL WITH SMARTSYNX
- PARTS & ACCESSORIES
- ACCESSORIES
- USING THE ACCESSORIES
- DRIP TRAY
- RACK LOCATIONS
- USING THE CONTROL PANEL
- TIME AND TEMPERATURE DISPLAYS
- START BUTTON
- STOP BUTTON
- CONTROL KNOB
- SMARTSYNX BUTTON
- OVEN BUTTONS
- COOKING FUNCTION BUTTONS
- NOTES
- FUNCTION CHART
- INSTRUCTIONS FOR USE
- BEFORE FIRST USE
- USING THE APPLIANCE
- TIPS
- SHAKING FOOD
- GENERAL COOKING GUIDELINES
- INTERNAL TEMPERATURE MEAT CHART
- CLEANING & STORAGE
- CLEANING
- STORAGE
- TROUBLESHOOTING
- 90-DAY MONEY-BACK GUARANTEE
- REPLACEMENT GUARANTEE POLICY
- RETURN POLICY
- REFUND
- CONTENIDO
- BANDEJA PARA FREÍR
- PARRILLA DEL HORNO
- BANDEJA PARA HORNEAR
- PLATEAU À FRITURE
- GRILLE DE FOUR
- PLAT DE CUISSON
- PLAQUE DE GRIL
Brand : PowerXL
Model : SmartSynx TO67D5-7SPTV
Category : Deep fryer