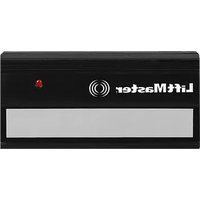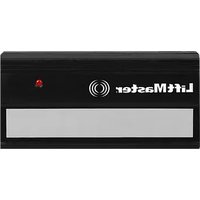
66LM - Remote control LiftMaster - Free user manual and instructions
Find the device manual for free 66LM LiftMaster in PDF.


User questions about 66LM LiftMaster
0 question about this device. Answer the ones you know or ask your own.
Ask a new question about this device
Download the instructions for your Remote control in PDF format for free! Find your manual 66LM - LiftMaster and take your electronic device back in hand. On this page are published all the documents necessary for the use of your device. 66LM by LiftMaster.
USER MANUAL 66LM LiftMaster
- ALWAYS keep remote controls out of reach of children. NEVER permit children to operate, or play with remote control transmitters.
- Activate gate or door ONLY when it can be seen clearly, is properly adjusted, and there are no obstructions to door travel.
- ALWAYS keep gate or garage door in sight until completely closed. NEVER permit anyone to cross path of moving gate or door.

WARNING: This product can expose you to chemicals including lead, which are known to the State of California to cause cancer or birth defects or other reproductive harm. For more information go to www.P65Warnings.ca.gov
INTRODUCTION
This product is for use with gate operators, commercial door operators and any LiftMaster® product that uses a 390 MHz fixed code. The single-button remote control will activate one device, the 2-button remote control will activate up to 2 devices, and the 3-button remote control will activate up to 3 devices.
BEFORE YOU BEGIN
Locate the dip switches on your remote control
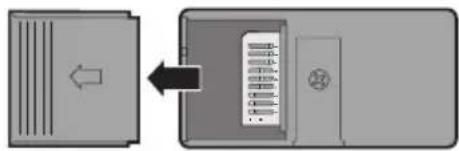
Single-Button and 3-Button Remote Controls:
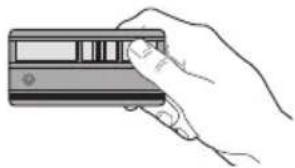
Slide the battery cover open to access the dip switches in the remote control.
2-Button Remote Control:
The 2-button remote control has two sets of dip switches.
Slide the battery cover open to access the dip switches for the smooth button. Remove the screw on the back of the remote control and remove the cover by pressing the tab. This will access the dip switches for the ribbed button.
3-Button Mini Remote Control:
The large top button is recommended for use with a garage door opener and/or light control product. The other push buttons can be used to operate another garage door opener and/or light control product.
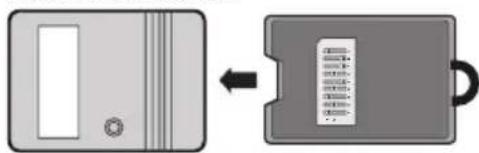
Access the dip switches by turning the remote over and removing the back of the case. Be careful to avoid moving circuit board components.
Single and 3-Button Remote Controls
flowchart
graph LR
    A["Server"] --> B["Device with internal components"]
    B --> C["Central component with circular symbol"]
2-Button Remote Controls

text_image
TabMini Remote Controls
text_image
Diagram showing a device with a left-side arrow pointing to a labeled card or folder icon.Use a pen or screwdriver to slide the dip switches.
Programming the remote control to an existing remote control
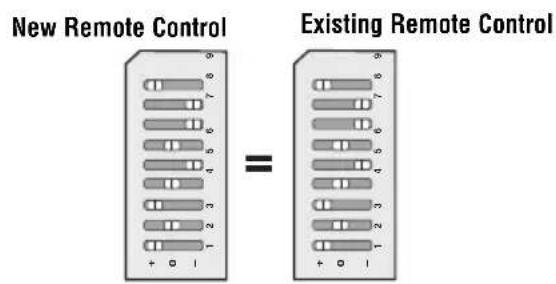
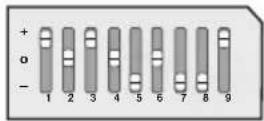
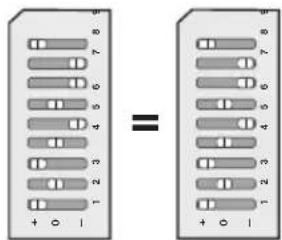
Locate the dip switches in the new and old remote controls. Place remote controls side by side and set the dip switches in the remote controls to matching positions (+,0,-).
Programming a 3-button remote control
When programming a single or 2-button remote control to a 3-button remote control it is very important to set dip switch #1 to the correct position. The dip switch in the single or 2-button remote control MUST correspond to the buttons on the 3-button remote control as shown.
Example: If you are programming a single-button remote control to the middle button on the 3-button remote control, dip switch #1 in the single-button remote control MUST be set to "0" in order for both buttons to work.
Programming the remote control without an existing remote control
Set the dip switches in the remote controls to any position you want (+,0,-).
Programming with Smart/Learn button
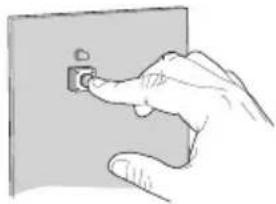
1 Press and release the Smart/Learn button on your product. The LED will light.
2 Within 30 seconds press and hold the button on the remote control that you wish to activate your product.
Programming is complete.
Repeat the steps above for each button and/or remote control you would like to program.
Programming with dip switches
1 Check the dip switch settings on the back of your product.
2 Use a pen or screwdriver to slide the dip switches in the remote control to match the dip switches on the back of the product.
When the dip switches have been set press the remote control button to activate your product.
text_image
New Remote Control = Existing Remote Control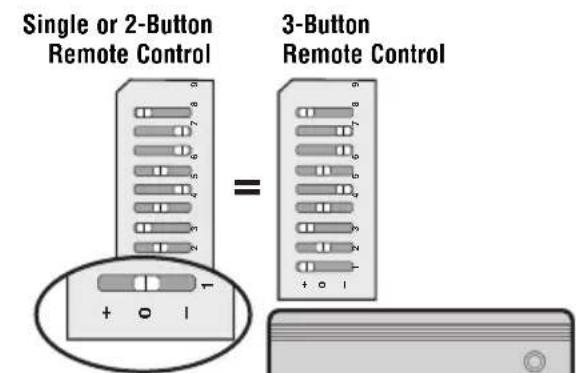
text_image
Single or 2-Button Remote Control 3-Button Remote ControlDip switch #1 must correspond to the 3-button remote control buttons
text_image
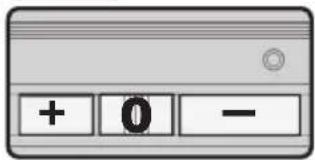
+ 0 -New Remote Control
1 Smart/Learn Button
natural_image
Hand inserting a small component into a wall socket (no text or symbols visible)2
natural_image
Line drawing of a hand holding a credit card (no text or symbols visible)Dip Switch Settings
From Product
text_image
Diagram showing two identical electrical or electronic components with numbered bands and polarity indicators (+, 0, 1)WARNING
Install the control station and receiver where the door is visible, but away from the door and its hardware. When a receiver is used to activate a commercial door opener, a reversing edge MUST be installed on the bottom of the door. Failure to install a reversing edge under these circumstances may result in SERIOUS INJURY or DEATH to persons trapped beneath the door.
Model 33LM 3-button remote controls can also be used with a 423LM 3-channel receiver and a 3-button door control to activate a commercial door operator in OPEN, CLOSE, and STOP mode.
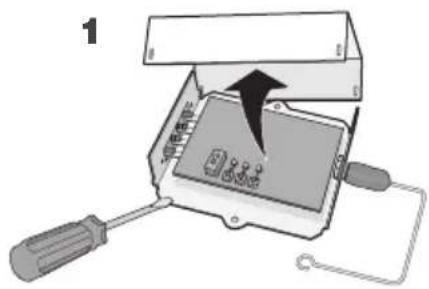
1 Use a screwdriver to pry open the receiver cover.
2 Verify that the slide switch on receiver is set to the N.C. position (other wise the commercial door operator will not operate).
3 Press and release the Smart/Learn button labeled "A" on the receiver. The adjacent LED will flash.
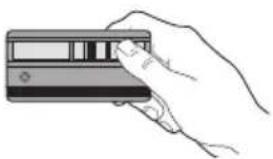
4 Within 30 seconds press and release the red button on the remote control. The red button is now programmed for CLOSE mode.
NOTE: If the remote control button is not pressed within 30 seconds, the LED next to the selected Smart/Learn button will turn OFF. In that case, press the Smart/Learn button again to repeat programming.
text_image
1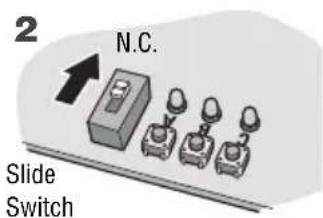
text_image
2 N.C. Slide Switch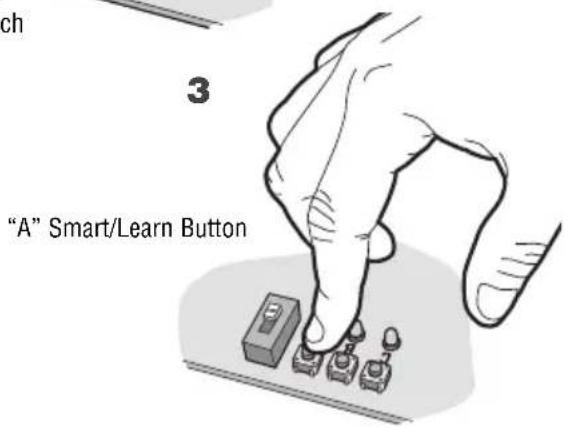
text_image
"A" Smart/Learn Button 3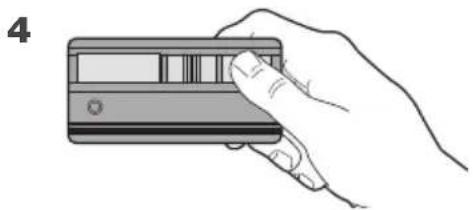
natural_image
Hand holding a card with a finger, no visible text or symbolsRepeat the steps 3-4 above with the yellow button on the remote control and the receiver Smart/Learn button "B" to program the CLOSE mode; and again with the green button on the remote control and the receiver Smart/Learn button "C" to program the OPEN mode.
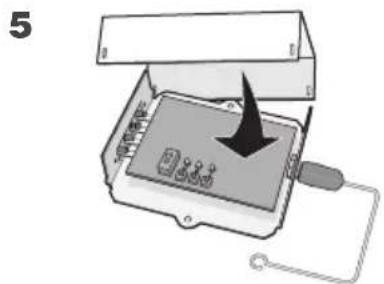
5 Replace the receiver cover.
text_image
5 6WARNING
To prevent possible SERIOUS INJURY or DEATH:
- NEVER allow small children near batteries.
- If battery is swallowed, immediately notify doctor.
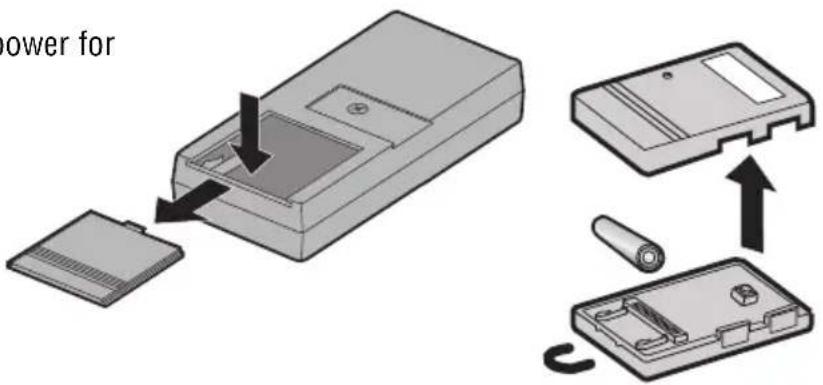
The 12 volt battery should produce power for 1 year.
Dispose of old batteries properly.
text_image
power forNOTICE: To comply with FCC and or Industry Canada rules (IC), adjustment or modifications of this receiver and/or remote control are prohibited, except for changing the code setting or replacing the battery. THERE ARE NO OTHER USER SERVICEABLE PARTS.
Tested to Comply with FCC Standards FOR HOME OR OFFICE USE. Operation is subject to the following two conditions: (1) this device may not cause harmful interference, and (2) this device must accept any interference received, including interference that may cause undesired operation.
REPLACEMENT PARTS
Visor clip 29C128
12V battery 10A14
FOR TECHNICAL SUPPORT DIAL OUR TOLL FREE NUMBER:
1-800-528-9131
www.liftmaster.com
LiftMaster®
text_image
Diagram showing equivalence between two remote control devices with labeled buttons and a central display.natural_image
Hand inserting a small component into a wall socket (no text or symbols visible)2
natural_image
Line drawing of a hand holding a card (no text or symbols visible)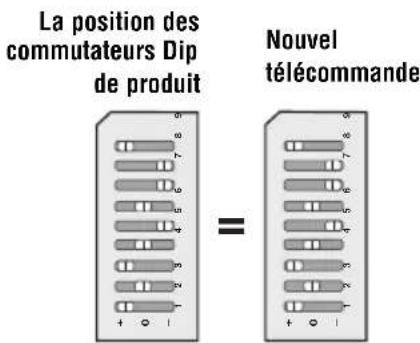
natural_image
Line drawing of a hand holding a credit card (no text or symbols visible)text_image
Diagram showing a device with a black arrow pointing to a screen, labeled in Chinese characters.