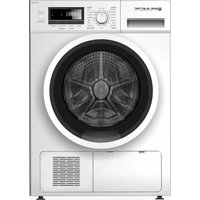
EMTD81P1 - Tumble dryer EAS Electric - Free user manual and instructions
Find the device manual for free EMTD81P1 EAS Electric in PDF.


| Product Type | Heat Pump Tumble Dryer |
| Brand | EAS Electric |
| Model | EMTD81P1 |
| Nominal Capacity | 8.0 kg |
| Dimensions (W x D x H) | 650 x 595 x 845 mm |
| Net Weight | 49 kg |
| Power Supply | 220-240 V ~, 50 Hz |
| Nominal Power | 800 W |
| Refrigerant | R290 (flammable) |
| Energy Class | A++ |
| Annual Weighted Consumption | 234.2 kWh/year |
| Drying Programs | Cotton (Extra/Plancha), Synthetics (Extra/Normal), Wool, Jeans, Bedding, Sport, Shirts, Mix, Delicate, Refresh, Time, Cooling |
| Options | Delayed Start (up to 24h), Drying Intensity, Anti-crease (30 or 120 min), My Cycle, Child Lock |
| Condensation Type | Condensation with water tank |
| Noise Level | 69 dB (standard cotton program) |
| Maintenance | Empty water tank after each cycle; clean lint filter after each cycle; clean heat exchanger every 6 months |
| Safety | Child lock, overheating protection, automatic stop at end of cycle, door safety |
| Warranty | 3 years (Spain and Portugal) |
Frequently Asked Questions - EMTD81P1 EAS Electric
User questions about EMTD81P1 EAS Electric
0 question about this device. Answer the ones you know or ask your own.
Ask a new question about this device
Download the instructions for your Tumble dryer in PDF format for free! Find your manual EMTD81P1 - EAS Electric and take your electronic device back in hand. On this page are published all the documents necessary for the use of your device. EMTD81P1 by EAS Electric.
USER MANUAL EMTD81P1 EAS Electric
SECADORA
TUMBLE DRYER
SÉCHE-LINGE
MÁQUINA DE SECAR
EMTD81P1
Escanee para ver este manual en otros idiomas y actualizaciones Scan for manual in other languages and further updates Manuel dans d'autres langues et mis à jour Manual em outras línguas e actualizações


soporte tubería
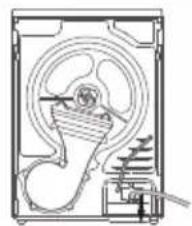
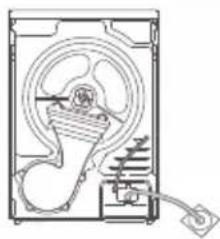
Enchufe

Cargue

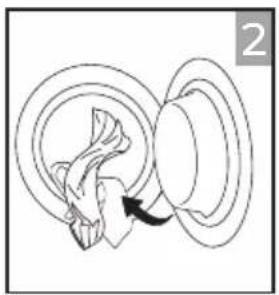
Cierre la puerta
Secado

Encienda

Elija un
programa

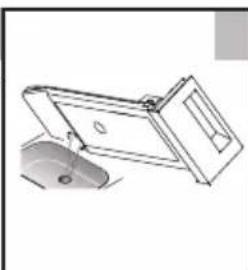
saque el depósito
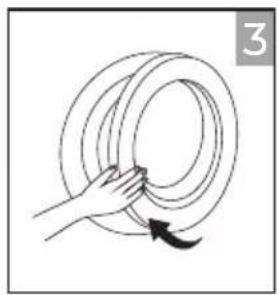
limpie el filtro
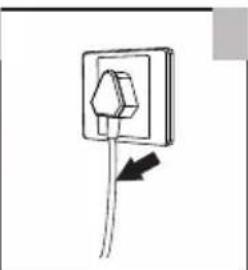
apague

Nota
Aviso
3 SAFETY INSTRUCTIONS
3 Important safety instructions
10 INSTALLATION
10 Product description
10 Installation
13 OPERATION
13 Quick start
14 Before each drying
15 Control panel
17 Option
20 Drying programmes table
22 MAINTENANCE
22 Cleaning and care
25 Troubleshooting
27 Technical specifications
28 Product fiches
29 WARRANTY

Safety Instructions

CAUTION: RISK OF FIRE!

Warning!
To prevent any damages to your and others' life or property, you have to follow the safety notes.
Intended use
- This heat pump dryer is intended for drying typical amounts of household laundry, which have been washed with water. It has been designed solely for private use and is not suitable for commercial or shared use (i.e. by several families in an apartment building).
- Use this appliance only as described in this user manual.
■ This appliance is for indoor use only.
■ Any other use is deemed improper and may result in damage to property or even personal injury.
■ The manufacturer accepts no liability for damage caused by improper use.
Safety Instructions
- The appliance corresponds to protection class I and may only be connected to a plug with a protective conductor that has been installed properly. When connecting the appliance to the mains, make sure that the mains voltage is correct. You can find more information about this on the rating plate.
- The electrical safety of this tumble dryer can only be guaranteed when correctly earthed. It is essential that this standard safety requirement is met. If in any doubt, please have the household wiring system tested by a qualified electrician. The manufacturer cannot be held liable for the consequences of an inadequate earthing system (e.g. electric shock).
⚠ Warning!
Electric shock hazard
■ Before connecting the tumble dryer, ensure that the connection parameter on the rating plate (fuse rating, voltage and frequency) match the mains electricity supply. If in any doubt, consult a qualified electrician.
- The electrical safety of this tumble dryer can only be guaranteed when correctly earthed. It is essential that this standard safety requirement is met. If in any doubt, please have the household wiring system tested by a qualified electrician. The manufacturer cannot be held liable for the consequences of an inadequate earthing system (e.g. electric shock).
- Do not pull the power cord forcefully. Please grasp the mains plug instead
- Do not plug/draw the mains plug with wet hands.
- Do not bend, clamp or damage the power cord and the power plug.
- If the power cable is damaged, it must be replaced by the manufacturer, its service agent or similarly qualified persons in order to avoid a hazard.
- Warning: The appliance must not be supplied through an external switching device, such as a timer, or connected to a circuit that is regularly switched on and off by a utility.
- Do not connect the appliance to the mains electricity supply by an extension lead, multi-socket adapter or similar.
■ The accessibility of the plug must always be ensured, in order to disconnect the tumble dryer from the mains. - If the appliance reaches an abnormally high temperature, immediately draw the main plug.
Injury danger
- The appliance must not be installed behind a lockable door, a sliding door or a door with a hinge on the opposite side to that of the tumble dryer, in such a way that a full opening of the tumble dryer door is restricted.
- Do not disassemble or install the dryer without any instruction or supervision.
- Do not stack this dryer on washing machine without stacking kits. (If you want to stack this dryer on a washing machine, please purchase the independent parts. Installation shall be done by the manufacturer, its service agent or similarly qualified persons to avoid any hazards.)
- Do not lean on the opened door of the dryer.
- Condensed water is not drinking water. It can cause health problems in both people and animals if consumed.
Damage danger
- Do not put more load than rated in this user manual. See the related chapter in the manual.
- Do not operate the dryer without the door filter.
- Do not dry the clothes before being spun.
- Do not expose the dryer directly under the sun.
- Do not install the dryer in humid and drenching environment.
■ While cleaning and maintenance, please do remember to pull out the power plug and do not directly spray the dryer with water.
■ The appliance should not be overturned during normal use or maintenance.

CAUTION: RISK OF FIRE!
Explosion & Fire danger
- Please do not dry the clothes with any flammable substances such as kerosene or alcohol. Otherwise, there may be explosion.
- The appliance contains an environmentally friendly but flammable R290 refrigerant. Keep away from open flame and other sources of ignition.
- The tumble dryer is not to be used if industrial chemicals have been used for cleaning.
- Do not dry unwashed items in the tumble dryer.
- Items that have been soiled with substances such as cooking oil, acetone, alcohol, petrol, kerosene, spot removers, turpentine, waxes and wax removers should be washed in hot water with an extra amount of detergent before being dried in the tumble dryer.
- Items such as foam rubber (latex foam), shower caps, waterproof textiles, rubber backed articles and clothes or pillows fitted with foam rubber pads should not be dried in the tumble dryer.
- Fabric softeners, or similar products, should be used as specified by the fabric softener instructions.
- Oil-affected items can ignite spontaneously, especially when exposed to heat sources such as in a tumble dryer. The items become warm, causing an oxidation reaction in the oil. Oxidation creates heat. If the heat cannot escape, the items can become hot enough to catch fire. Piling, stacking or storing oil-affected items can prevent heat from escaping and so create a fire hazard.
- Remove all objects from pockets such as lighters and matches.
- If it is unavoidable that fabrics that contain vegetable or cooking oil or have been contaminated by hair care products be placed in a tumble dryer they should first be washed in hot water with extra detergent. This will reduce, but not eliminate, the hazard.
■ WARNING: Never stop a tumble dryer before the end of the drying cycle unless all items are quickly removed and spread out so that the heat is dissipated.
- Openings must not be obstructed.
- The lint trap has to be cleaned frequently.
- Lint must not to be allowed to accumulate around the tumble dryer.
Safety with children
- This appliance can be used by children aged from 8 years and above and persons with reduced physical, sensory or mental capabilities or lack of experience and knowledge if they have been given supervision or instruction concerning use of the appliance in a safe way and understand the hazards involved. Children shall not play with the appliance. Cleaning and user maintenance shall not be done by children without supervision.
- Children should be supervised to ensure that they do not play with the appliance.
■ Children of less than 3 years should be kept away unless continuously supervised.
■ Always close the door after use. In this way you will avoid the danger of:
- Children climbing onto or into the dryer or hiding things in it.
- Pets or other small animals climbing into it.
Correct Disposal of this product:
This marking indicates that this product should not be disposed with other household wastes throughout the EU. To prevent possible harm to the environment or human health from uncontrolled waste disposal, recycle it responsibly to promote the sustainable reuse of material resources. To return your used device, please use the return and collection systems or contact the retailer where the product was purchased. They can take this product for environmental safe recycling.
Disposal of packaging material
The packaging is designed to protect the appliance from damage during transportation. The packaging materials are environmentally friendly and should be recycled. Recycling the packaging can reduce the use of raw materials in the manufacturing process and the amount of waste in landfill sites.
| Model | Rated capacity |
| EMTD81P1 | 8.0kg |
■ Product Description
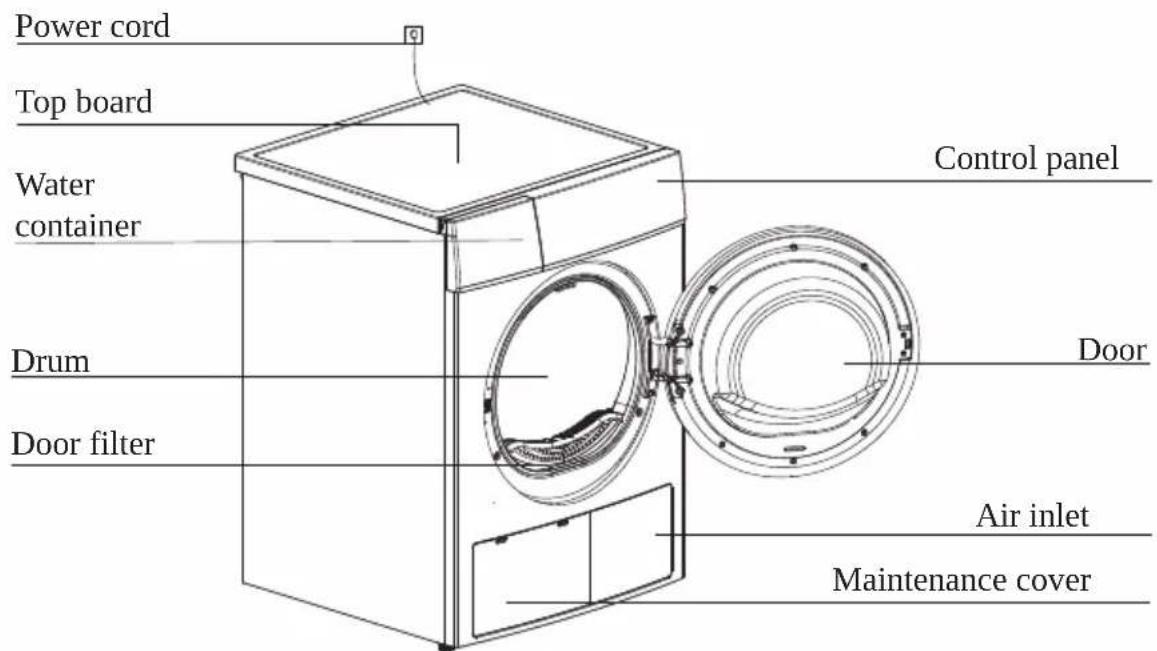
Note: The actual model you purchased might differ. Please see the product you purchased in kind prevail.
Accessories
The following parts are optional for specific models. If your dryer has following parts, please wear gloves to install them as per the instruction below.
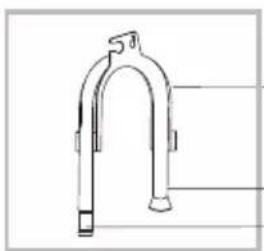
hose holder
condensing drain hose connector
Installation
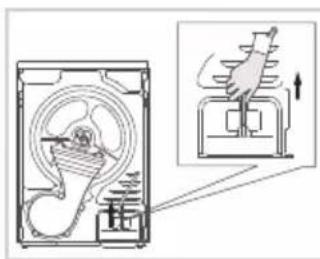
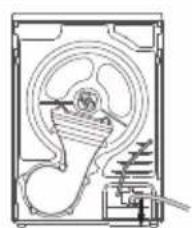
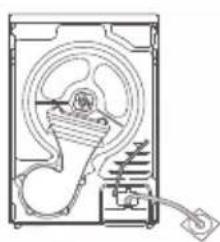
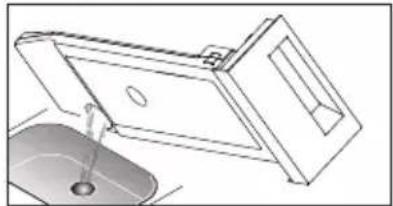
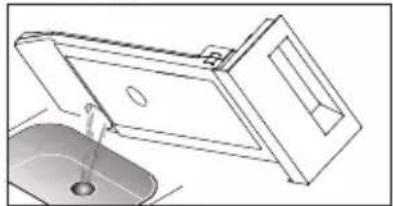
Pull up the upper drain hose
Connect the
external drain
hose to the
water pump
Put the external drain hose into the floor drain (be careful not to bend the external drain hose)
Transport
Move cautiously. Do not grasp any salient parts of machine. The machine door cannot be used as the handle for transport. If the dryer can't be transported erectly, the dryer can be tilted to right less than 30° .
Risk of injury and damage!
Improper handling of the appliance may result in injury.
- The appliance is very heavy. Never transport or carry the appliance alone; always with the assistance of another person.
- Remove all obstacles on the transport route and from the installation location, e.g. open doors and clear away objects lying on the floor.
- Do not use the open door as a handhold.
- Remove all package material before using the appliance.
■ Before setting up the tumble dryer, check it for any externally visible damage. Do not install or use a damaged tumble dryer. - Do not install the tumble dryer in a room where there is a risk of frost occurring. At temperatures around freezing point the tumble dryer may not be able to operate properly. There is a risk of damage if the condensed water is allowed to freeze in the pump and hoses.
Installation Position
⚠ Warning!
- Children can become entangled in the packaging film or swallow small parts and suffocate. Do not allow children to play with the packaging.
- The appliance must not be installed behind a lockable door, a sliding door or a door with a hinge on the opposite side to that of the tumble dryer, in such a way that a full opening of the tumble dryer door is restricted.
-
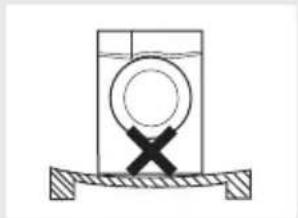
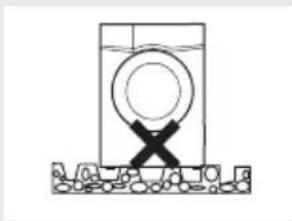
Do not restrict the floor clearance through deep pile carpets, strips of wood or similar. This might cause heat built-up which would interfere with the operation of the appliance.
-
It is recommended that, for your convenience, the machine is positioned close to your washing machine.
-
Do not stack this dryer on washing machine without stacking kits. (If you want to stack this dryer on a washing machine, please purchase the independent parts. Installation shall be done by the manufacturer, its service agent or similarly qualified persons to avoid any hazards.)
-
The tumble dryer must be installed in a clean place, where dirt does not accumulate. Air must be able to circulate freely around the appliance. Do not obstruct the front air inlet or the air intake grilles at the back of the machine.
-
To keep vibration and noise within minimum level when the dryer is in use, it must be placed on a firm and level surface.
- The feet must never be removed.
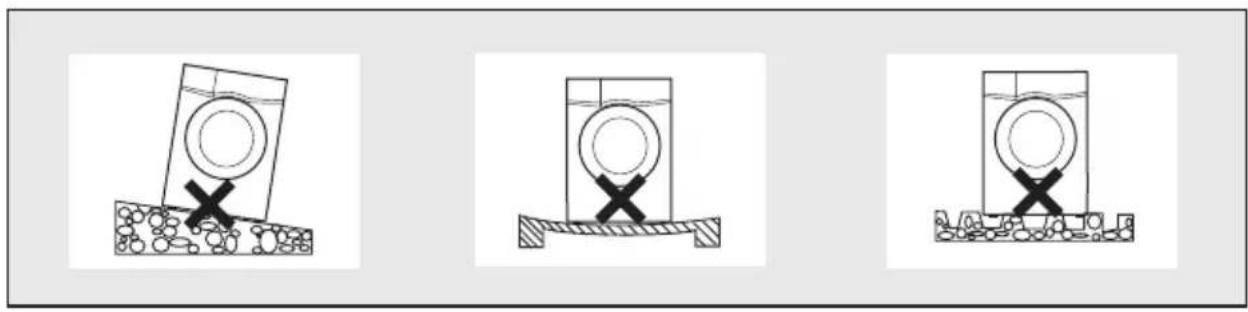
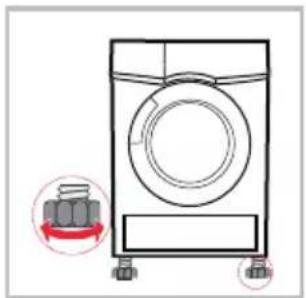
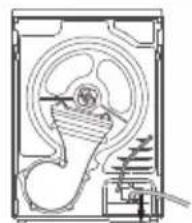
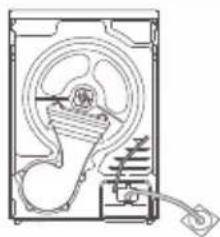
Level Adjusting
Once in its permanent operating position, check that the dryer is absolutely level with the aid of a spirit level. If it is not, adjust the feet by hand or using a tool.
Power Supply Connection
- Make sure that the voltage of the power supply is the same as the electric specification.
- Do not connect the dryer with the power connection board, a universal plug or socket, do not use multi-plug adapters and extension cables.

Quick Start

Note!
Before using, make sure the tumble dryer is installed correctly.
Before Drying
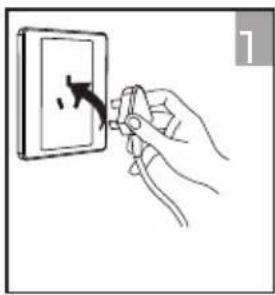
plug in

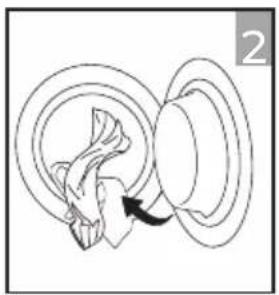
load

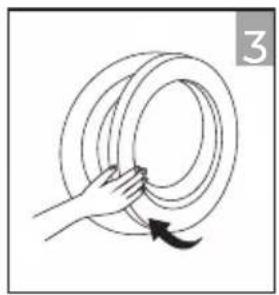
close the door
Drying

on

select
program

select function or default


start
After Drying
Buzzer beep and "0:00" on display.
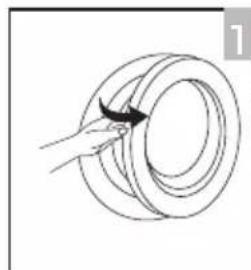
open the door and take out laundry
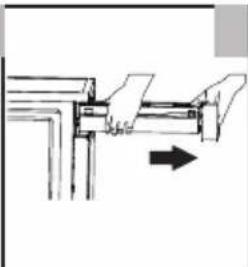
pull out the container
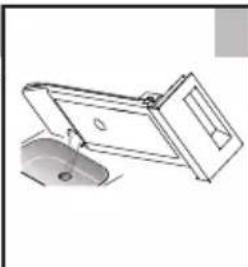
clean the filter power off
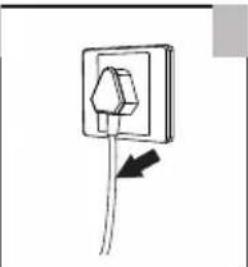
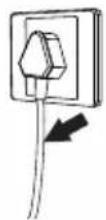

Note!
- If the socket with a switch is used, please press the switch to turn off the power directly.
■ Before Each Drying

Note!
Leave it to stand for 2 hours after transporting. Before first use, please use the soft fabric to clean the inside drum.
- Put some clean rags into the drum.
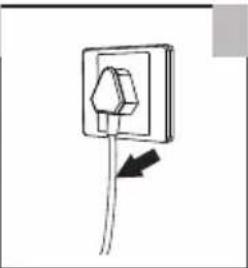
- Plug the power, press On/Off.
- Select the Refresh Programme, press Start/Pause button.
- After finishing this programme, please follow the "Cleaning and care" (refer to page 21) to clean the filter door.
During drying, the compressor and the water will generate some noise which is entirely normal.
- Before drying, thoroughly spin the laundry in washing machine. High spin speed shortens the drying time and saves energy.
- For uniform drying result, sort the laundry according to fabric type and select the appropriate drying programme.
- Before drying, please close zips, hooks and eyelets, button, tie fabric belts, etc.
- Remove all objects from pockets such as lighters and matches.
- Sew in or remove underwiring from bras.
- Close duvet covers and pillow cases to prevent small items from being rolled up inside them.
- Leave jackets open and undo any long zips so that textiles dry evenly.
- Do not over dry the clothes, because over dried clothes can easily get creases.
- Do not dry the articles containing rubber or similar elastic materials.
- Keep the area around the tumble dryer clean. Coal dust or flour may cause an explosion.
- The door shall be opened only after the programme of the tumble dryer is finished to avoid being scalded by hot steam or over heated drying machine.
- Clean the lint filter and empty water container after each use to avoid extension of drying time and increase of energy consumption.
- Do not dry clothes after dry-clean process.
The reference weight of dry clothes (weight per item)
 | Sweater(mixed 800g) | 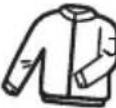 | jacket(cotton 800g) | 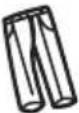 | Jeans(800g) | 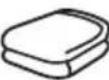 | Bath Towel(cotton 900g) |
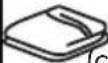 | Singlebedsheet(cotton 600g ) |  | Work clothes(1120g) | 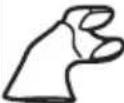 | Pyjamas(200g) | 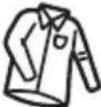 | Shirt(cotton 300g ) |
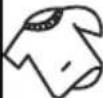 | T-Shirt(cotton 180g) |  | Underwear(cotton 70g ) |  | Socks(mixed-weave50g ) | ||

Note!
Do not put more load than rated.
Do not dry dripping wet laundry. The dryer might get damaged.
Only dry laundry suitable for tumble drying. Regard the laundry care labels:

Suitable for tumble drying

Normal drying process: Drying in the tumbler is possible under normal load and temperature 80° .

Mild drying process: Caution is appropriate when tumble drying. Select mild process with reduced thermal action.

Do not tumble dry: Articles unsuitable for drying in the tumbler.
Control Panel
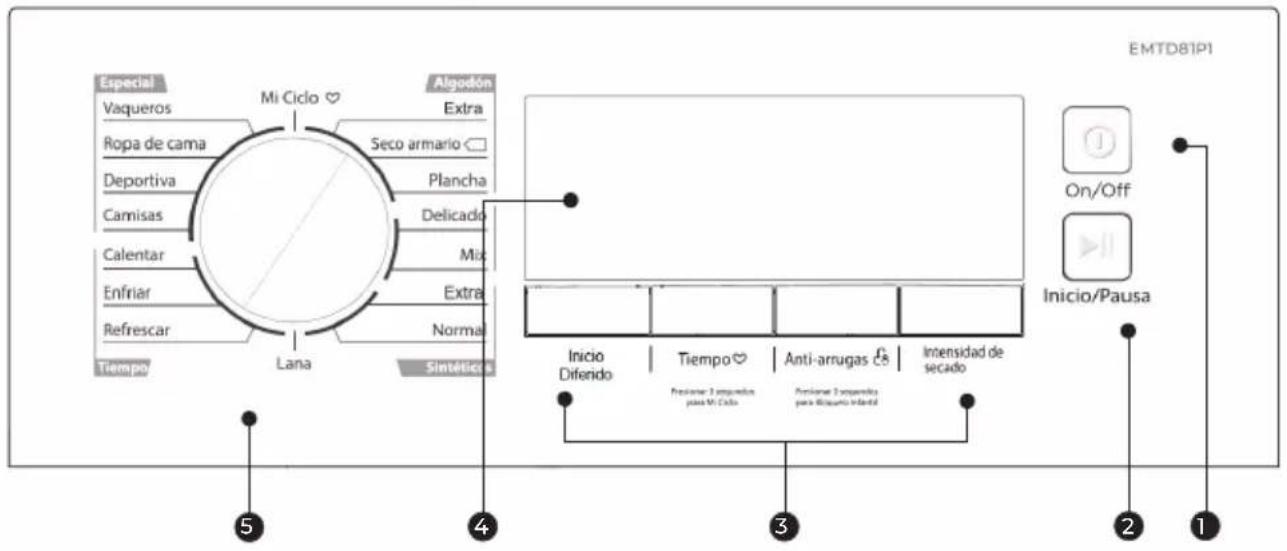
Product is switched on or off.
2 Start/Pause
Press the button to start or pause the drying cycle.
3 Option
These buttons are used for setting additional functions.
4 Display
The display shows the setting, estimated program time remaining and status messages of your dryer.
5 Programmes
Different drying cycles can be selected according to the users need and the type of laundry to be dried.

Option
Inicio Diferido
Inicio diferido
This function is used for delaying the start of the drying programme up to 24 hours. When the delayed programme starts, the time starts to countdown on the display and the delay icon blinks.
- Load your laundry and make sure the machine door is closed.
- Press the On/Off button, then use the programme selector knob to select the desired programme.
- You can additionally select the Antiarrugas or Signal functions according to your need.
- Press the Inicio Diferido button.
- Repeatedly to press the Inicio Diferido button to select the desired delay time.
- After the Start/Pause button is pressed, the dryer is at the running condition. The drying procedure will be automatically performed when the delay time is over.
- If you press the Start/Pause button again, the delay function will be paused.
- If you want to cancel the "Inicio Diferido" function, please press the On/Off button.
Tiempo
Tiempo
When the Tiempo programme is selected, the Tiempo button can be used to adjust the drying time in 10 min. steps.
You can adjust the dryness level of the laundry by pressing the Intensidad de secado button. There are four grades.
- The intensity function can be activated only before the programme starts.
- Press the Intensidad button repeatedly to increase the drying grade.
- Except the Plancha, Delicado, Lana and Tiempo program-mes, all the other programmes can be adjusted with the Intensity function.
Anti arrugas
Antiarrugas
At the end of the drying cycle, the anti-crease time is 30 minutes (default) or 120 minutes (selected). This function prevents the laundry from creases. The laundry can be removed during the anti-crease phase. Except Enfriar, Lana and Refrescar all the other programmes have this function.
Mi Ciclo
Mi Ciclo
Used to define and save your favourite programme, which is used frequently.
- Select the desired programme and other drying functions.
- Press and hold Tiempo for 3 seconds until the beep sounds and the desired programme has been saved.
- Turn the programme selector to the My Cycle position, then you can start your favourite programme. If you want to change the My Cycle settings, repeat the steps (1) and (2).
Child Lock
Child Lock
- This machine incorporates a special child safety lock, which can prevent children from carelessly pressing buttons or making the faulty operation.
- When the drying cycle is running, press the Antiarrugas button at the same time for 3 seconds to start child lock function.
- When child lock function is set, the display will show Child lock icon and all button are deactivated, except On/Off button.
- To deactivate the child lock function, the Antiarrugas button shall be pressed at the same time for 3 seconds.
■ Display

Antiarrugas (Anti-crease)

- When the LED display screen brightens up, rotate the programme knob to select the desired programme.
- Select the Inicio Diferido (Delay), Tiempo (Time), Intensidad de secado (Intensity), Antiarrugas (Anti-Crease) functions for additional options.
- Press the Start/Pause button.
- Press the On/Off button after the programme has completed.
Programme start
The drum will rotate after the programme starts. The cycle phase LED in the display will light up and the remaining programme time will be displayed.
Programme end
- The drum will stop rotating after the programme ends. The display will show "0:00", also the cycle phase LED showing "End" and related LED will illuminate. The dryer will start Anti-Crease function if user doesn't remove the load. (Refer to page 17). Please press On/Off button after unloading the tumble dryer to cut off power and pull out the plug.
- Deal with the problems according to "Trouble Shooting" section, if there is an unexpected stop during the drying procedure or the dryer shows an Error Code (Refer to page 24).
■ Drying Programmes Table
| Programme | Max Load | Application/Properties | Delay | Time | |
| Algodón | Extra | 8.0kg | For single or multi-layer cotton laundry to be dried completely for direct storage. | Y | N |
| Seco armario | |||||
| Plancha | For single layer cotton laundry to remain damp for ironing. | ||||
| Delicado | 1.0kg | For delicate laundry that is suitable for drying or laundry advised to be hand washed at low temperature. | Y | N | |
| Mix | 3.5kg | For mixed fabrics from cotton and synthetics. | Y | N | |
| Sintéticos | Extra | 3.5kg | For thick or multi-layer synthetic fabrics to be dried completely. | Y | N |
| Normal | To dry thin synthetic textiles, which are not ironed, such as easy care shirts, baby cloths or socks. | ||||
| Lana | 1.0kg | To refresh you wool items and make them more fresh and fluffy. | Y | N | |
| Especial | Vaqueros | 4.0kg | To dry jeans or leisure clothes that are spun at high speed in the washing machine. | Y | N |
| Ropa de cama | 4.0kg | To dry bed linen, bed sheets or other large items. | |||
| Deportiva | 3.0kg | To dry sportswear and thin fabrics from polyester, which are not ironed. | |||
| Camisas | 1.0kg | For easy care laundry, such as shirts and blouses equipped with anti-crease functionality to minimize the ironing effort Place clothes loosely in the dryer. Once dried, remove quickly and hang it on a clothes hanger. | |||
| Mi Ciclo | — | Define and save your favourite programme. | Y | — | |
| Tiempo | Calentar | — | To dry individual items or complete the drying process of multi-layer fabrics with different drying behavior, such as jackets, pillows or voluminous items. Min 10 min. to max. 120 min. (in 10 min. steps) | Y | Y |
| Enfriar | — | To air items without heating. Min. 10 min to max. 30 min.(in 10 min. steps) | |||
| Refrescar | 1.0kg | To refresh clothes kept at closed environment for a long time or to remove odors. Min. 20 min to max. 150 min.(in 10 min. steps) | |||
Note for Test Institutes:
☐ Test programme in accordance with Regulation 392/2012/EU for energy labelling, measured in accordance with EN 61121 and suitable for drying normal cotton load at rated load capacity.
■ Consumption Data
| Model | Program | Capa-city | Spin Speed / Residual Humidity | Drying Time | Energy Consumption |
| EMTD81P1 | Algodón Seco armario | 8kg | 1000rpm / 60% | 175min | 1.90kWh |
| Algodón Seco armario | 4kg | 1000rpm / 60% | 105min | 1.10kWh | |
| Sintéticos Normal | 3.5kg | 800rpm / 40% | 60min | 0.60kWh |

Note!
- Thick or multi-layered fabrics, e.g. jackets etc., are not easy to dry. You had better choose Algodón Extra programme or use the "Intensidad de secado" function.
- As uneven material, thick and multi-layered clothes are not easy to dry, it is better to choose the appropriate time drying programme to completely dry them if some parts of the clothes are still damp after programme finishes.
1 All data are measured in accordance with EN 61121.
The actual consumption may differ from the values given in the table, depending on the amount of the laundry, type of fabric, residual moisture and any additional functions selected.
■ Cleaning and Care
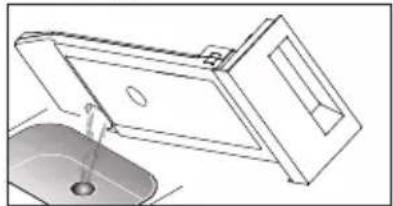
Empty the water container
- Pull out and hold the water container with two hands.
- Tilt the water container, pour out the condensate water into the basin.
- Install the water container.
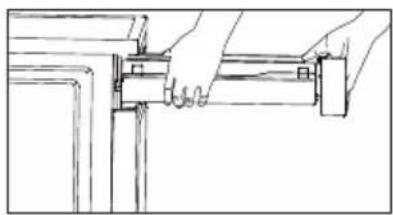
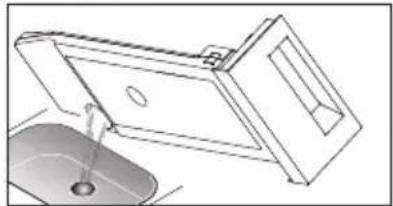
⚠ Warning!
Empty the water container after each use. Once the water container is filled completely, the programme will be paused and the "☐" icon will light. After the container is emptied, the dryer can be restarted by pressing Start/Pause button.
- Do not drink the condensate water.
- Do not use the dryer without the water container.
Clean the filters
This dryer has a primary door lint filter for additional protection. Make sure you clean the door filter after each cycle.
Clean the door filter
- Open the door.
- Take out the door filter.
- Open the filter and remove the fluff on the filter, You can clean it in running water.
- Dry the door filter thoroughly before installing it back.

Note!
Take notice of the correct orientation before to insert the door filter.
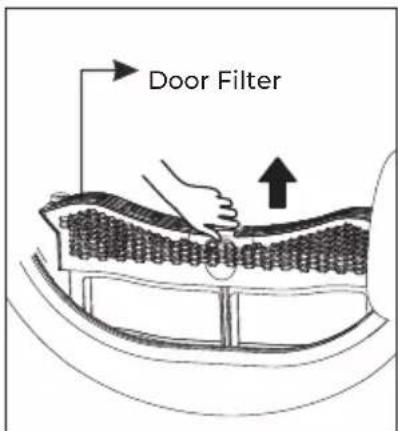
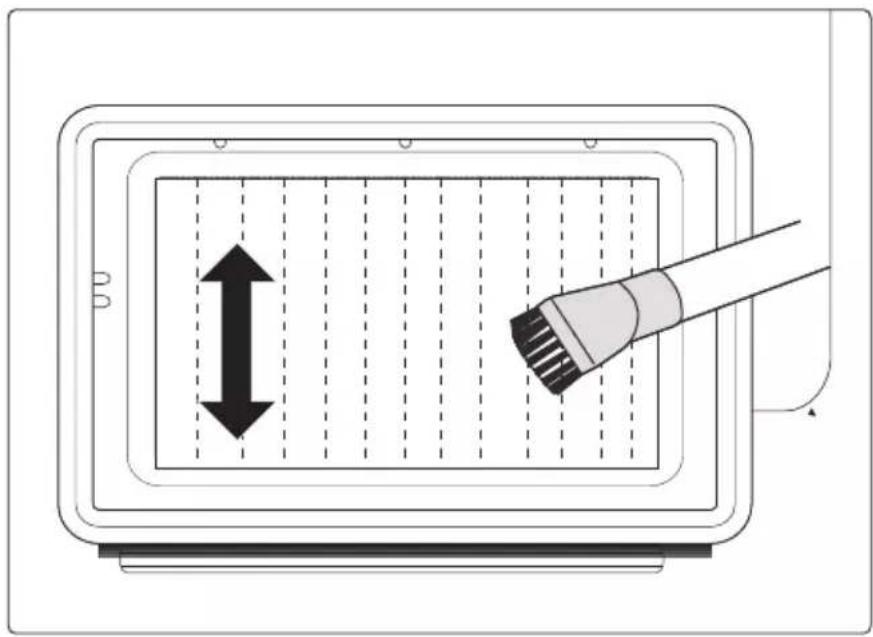
Clean the heat exchanger
⚠ Warning!
Do not touch the heat exchanger with your hand, which may cause an injury.
- As necessary, approx. once every 6 months, remove the fluff from the heat exchanger using a vacuum cleaner with a dusting brush attached.
- Clean the heat exchanger without applying any pressure. Otherwise the heat exchanger could be damaged. The dryer will not dry if the cooling fins are damaged or bent.
Clean Tumble dryer
⚠ Warning!
- Disconnect the power cord before cleaning!
- Clean the dryer with a wet cloth which is only damped by clean water.
- Do not use solvents, abrasive cleaners, glass cleaners or all-purpose cleaners. These could damage plastic surfaces and other parts.
- Please wear gloves when cleaning.
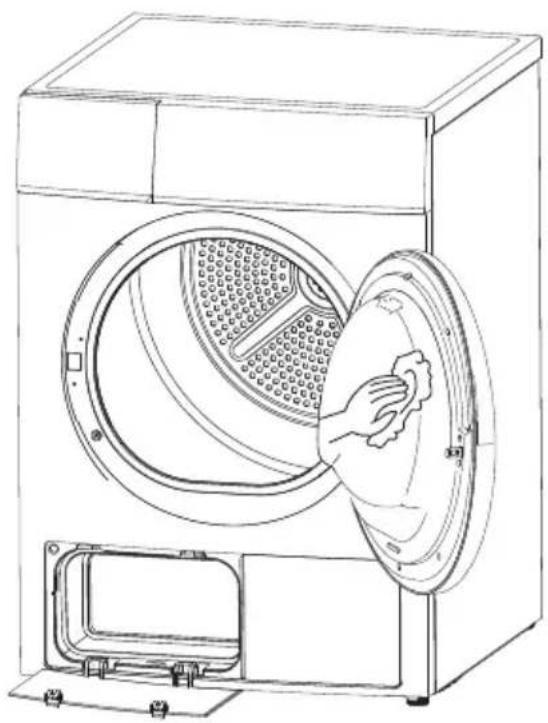
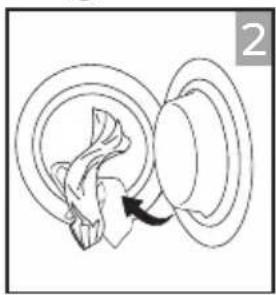
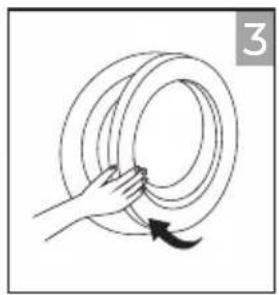
• Prepare a wet cloth damped by clean water.
- Clean the door, especially the inside window.
- Clean the sealing around the door opening.
- Clean the humidity sensor inside the drum.
• Take out all the filters, clean the sealing and air flow openings.
- Before starting the dryer, dry all parts with a soft cloth.
■Trouble Shooting
Many malfunctions and faults that might occur in daily operation can be easily remedied. Time and money will be saved because a service call won't be needed. The following guide may help you to find the reason for a malfunction and correct it.
| Display | Reason | Solutions |
| “E32” | Humidity sensor error | Please contact your local service center if the problem occurs. |
| “E33” | Temperature sensor error | |
| “E82” | Communication error |
⚠ Warning!
- Only authorised technicians can carry out repairs.
- If the LED displays other prompt and the dryer does not work, please call the service.

Note!
Before you call the service, please check if you have dealt with the problems yourself consulting the user instructions.
| Problem | Solution |
| Display is not on | Check if the power supply works.Check if the mains plug is inserted.Check the selected programme.Press the On/Off button. |
| “Ful” is lighting | Check the water container. If it's full, please pour out the condensate water and restart the dryer. If the container is not full, please restart the dryer directly.If the “ful” icon is still lighting after you have finished the first two steps, please call the service. |
| “ [t]is lighting | Clean the lint filter. |
| Dryer does not start | Connect the tumble dryer to the mains.Turn on the tumble dryer.Check that the door is closed.Check the programme is set.Press the Inicio/Pausa button. |
| Degree of dryness was not reached or drying time too long | Clean lint filter and heat exchanger.Empty the water container.Check the drain hose.Check installation place is appropriate.Keep the air inlet clean.Use higher drying intensity level programme or time programme. |
| There are humming noises | The compressor is operating. These noises are quite normal and do not indicate a fault. |
| The dryer switches off at the end of the programme | The dryer switches off automatically for energy saving. This is not an error but a normal function. |

Warning!
If you cannot deal with the problems by yourself and need help:
- Press the On/Off button.
- Pull out the mains plug and call the service.

Technical Specifications
| ModelParameter | EMTD81P1 |
| Dimension(L*W*H) | 650*595*845(mm) |
| Ambient temperature | +5°C ~ +35°C |
| Rated input power | 800W |
| Rated voltage | 220-240V~ |
| Rated frequency | 50Hz |
| Refrigerant | R290 |
| Weight of product | 49kg |
| Rated capacity | 8.0kg |
| GWP | 3 |
| CO2 - eq | 0.00t |
| Quantity of refrigerant | 150g |
Contains fluorinated greenhouse gases covered by the Kyoto Protocol. Hermetically sealed.

Note!
- The rated capacity is the maximum capacity to be dried at one time. Make sure that the dry clothes which are loaded into the appliance do not exceed the rated capacity.
- Do not install the tumble dryer in a room when there is a risk of frost occurring. At temperatures around freezing point the tumble dryer may not be able to operate properly.
- There is a risk of damage if the condensate water is allowed to freeze in the pump, hoses and / or condensate water container.
Product Fiches
| Model | EMTD81P1 |
| Rated Capacity | 8.0kg |
| Dryer Type | Condenser |
| Energy efficiency class | A++ |
| Weighted annual energy consumption (AEc) 1 | 234.2kWh/year |
| Automatic or non-automatic | Automatic |
| EU Ecolabel | N/A |
| Energy consumption of the standard cotton programme | |
| Weighted energy consumption of the standard cotton programme at full and partial load | 1.44kWh |
| Energy consumption of the standard cotton programme at full load | 1.90kWh |
| Energy consumption of the standard cotton programme at partial load | 1.10kWh |
| Power consumption of the off-mode (Po) | 0.4W |
| Power consumption of the left-on mode (PI) | 0.8 W |
| Duration of the left-on mode | 10 min |
| Programme time of the 'standard cotton programme' | |
| Weighted programme time of the standard cotton programme at full and partial load | 135min |
| Programme time of the standard cotton programme at full load | 175min |
| Programme time of the standard cotton programme at partial load | 105min |
| Condensation efficiency class A (most efficient) to G (least efficient) | B |
| Average condensation efficiency of the standard cotton programme at full load | 81% |
| Average condensation efficiency of the standard cotton programme at partial load | 81% |
| Weighted condensation efficiency for the standard cotton programme at full and partial load | 81% |
| Sound power level for the standard cotton programme at full load | 69dB |
Remarks:
1 Energy consumption per year, based on 160 drying cycles of the standard cotton (Algodón Seco armario) programme at full and partial load, and the consumption of the low-power modes. Actual energy consumption per cycle will depend on how the appliance is used The programme 'Cotton Standard' used at full and partial load is the standard drying programme to which the information in the label and the fiche relates. This programme is suitable for drying normal wet cotton laundry and it is the most efficient programme in terms of energy consumption for cotton.
WARRANTY CONDITIONS
This appliance is guaranteed for three years from the date of sale against all manufacturing defects, including labour and spare parts. In order to justify the date of purchase, it will be compulsory to present the invoice or purchase receipt. The conditions of this warranty apply only to Spain and Portugal. If you have purchased this product in another country, please consult your distributor for the applicable conditions.
WARRANTY EXCLUSIONS
- Remote controls, drain intake rubbers, dockings and door seals, weather stripping.
- Damage to enamels, paints, nickel plating, chrome plating, oxidation or other types of aesthetic parts or components that do not affect the internal functioning of the appliance.
- Damage to wear parts due to use, corrosion or oxidation, whether caused by normal use of the appliance or accelerated deterioration due to unfavorable environmental or climatic circumstances. Not suitable for outdoor use.
- Damage to fragile pieces of glass, glass ceramic, plastics, handles, baskets, doors or light bulbs when their failure or breakage is not attributable to a manufacturing defect.
- Faults produced by fortuitous causes or accidents of force majeure, or as a consequence of abnormal, negligent or inappropriate use of the device.
- Civil liabilities of any nature.
- Consequential damage to the appliance as long as it has not been caused by an internal malfunction.
- Maintenance or upkeep of the appliance: periodic reviews, adjustments and greases.
- Faults that accessories and complements, adapters, external cables, bags, spare parts of all kinds, lamps, as well as any part considered consumable by the manufacturer, may suffer.
- Faults caused by incorrect or illegal installation, inadequate ventilation, lack of grounding in the home, power disturbances, inappropriate modifications or use of non-original spare parts.
- Appliances used in industrial applications or for commercial purposes.
- Appliances with illegible or altered serial number.
- Defects or breakdowns produced as a result of fixes, repairs, modifications, or disassembly of the installation of the device by the user or by a technician not authorized by the manufacturer, or as a result of manifest non-compliance with the manufacturer's instructions for use and maintenance.
- During the warranty period it is essential to keep all manuals together with the equipment. If the equipment is sold, donated or given away, the manual and all related documents must be given to the new user. If any of these are lost, their replacement cannot be claimed.
- Faults that have their origin or are a direct or indirect consequence of: contact with liquids, chemicals and other substances, as well as conditions derived from the climate or the environment: earthquakes, fires, floods, excessive heat or any other external force, such as insects, rodents and other animals that may have access to the interior of the machine or its connection points.
- Damages derived from terrorism, riot or popular tumult, legal or illegal demonstrations and strikes; facts of actions of the Armed Forces or the State Security Forces in times of peace; armed conflicts and acts of war (declared or not); nuclear reaction or radiation or radioactive contamination; vice or defect of the goods; facts classified by the Government of the Nation as "national catastrophe or calamity".
Design and specifications are subject to change without notice for product improvement. Any changes to the manual will be updated on our website, you can check the latest version.

EAS ELECTRIC
SMART TECHNOLOGY
www.easelectric.es


support de tuyau
tuyau d'évacuation de la condensation raccord de tuyau
Instalación

Branchez
Chargez
Fermez la porte
Séchage


Allumez
Antiarrugas (Anti-rides)

Attention
CONDITIONS DE LA GARANTIE
EXCLUSIONS DE LA GARANTIE

suporte de tubos
Nivelamento da máquina de secar roupa
Ligar

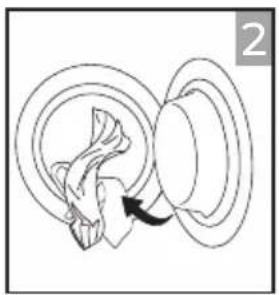
Carregar

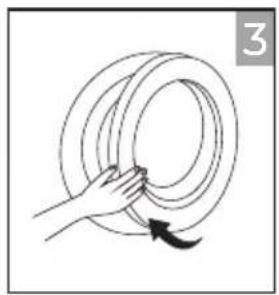
Fechar a porta
Secagem

Ligar


Escolha um
programa

remover o depósito
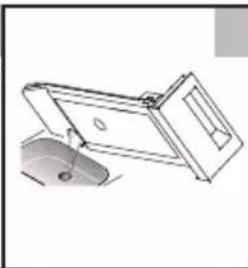
limpar o filtro
desligar

Nota
Aviso
Scan for manual in other languages and further updates:
- SECADORA
- SECADO
- NOTA
- AVISO
- SAFETY INSTRUCTIONS
- WARNING
- INTENDED USE
- ELECTRIC SHOCK HAZARD
- INJURY DANGER
- DAMAGE DANGER
- EXPLOSION & FIRE DANGER
- SAFETY WITH CHILDREN
- CORRECT DISPOSAL OF THIS PRODUCT
- DISPOSAL OF PACKAGING MATERIAL
- PRODUCT DESCRIPTION
- ACCESSORIES
- INSTALLATION
- TRANSPORT
- INSTALLATION POSITION
- ⚠ WARNING
- LEVEL ADJUSTING
- POWER SUPPLY CONNECTION
- QUICK START
- NOTE
- BEFORE DRYING
- DRYING
- AFTER DRYING
- BEFORE EACH DRYING
- 2 START/PAUSE
- 3 OPTION
- 4 DISPLAY
- 5 PROGRAMMES
- OPTION
- INICIO DIFERIDO
- TIEMPO
- ANTIARRUGAS
- MI CICLO
- CHILD LOCK
- DISPLAY
- PROGRAMME START
- PROGRAMME END
- NOTE FOR TEST INSTITUTES
- CONSUMPTION DATA
- CLEANING AND CARE
- EMPTY THE WATER CONTAINER
- CLEAN THE FILTERS
- CLEAN THE DOOR FILTER
- CLEAN THE HEAT EXCHANGER
- CLEAN TUMBLE DRYER
- TROUBLE SHOOTING
- REMARKS
- WARRANTY CONDITIONS
- WARRANTY EXCLUSIONS
- INSTALACIÓN
- SÉCHAGE
- ATTENTION
- CONDITIONS DE LA GARANTIE
- EXCLUSIONS DE LA GARANTIE
- NIVELAMENTO DA MÁQUINA DE SECAR ROUPA
- SECAGEM
Brand : EAS Electric
Model : EMTD81P1
Category : Tumble dryer