BackPack 3 - Speaker Ruark Audio - Free user manual and instructions
Find the device manual for free BackPack 3 Ruark Audio in PDF.
| Brand | Ruark Audio |
| Model | BackPack 3 (BP3) |
| Product type | Rechargeable external battery for audio speaker |
| Battery capacity | 3200 mAh |
| Rated voltage | 11.1 V DC |
| Charging voltage | 14 V DC |
| Charging time | Approximately 5 hours |
| Battery life | Approximately 12 hours |
| Compatibility | Ruark R1 mk2/mk3/mk4, MR1 mk1/mk2 |
| Battery type | Lithium-ion (Li-Ion) |
| Package contents | BackPack 3, mounting screws (x2), Allen key, power adapter |
| Charge indicator | Green LED: on during charging, off when fully charged |
| Reset button | Yes (to restart the speaker after installation) |
| Safety | Do not open, expose to heat, or incinerate. Contains lithium-ion batteries. |
| Warranty | 2 years (3 years if registered at www.ruarkaudio.com) |
| Care | Clean with a dry cloth. Do not use abrasive products. |
| Operating temperature | Avoid extreme temperatures (hot/cold) |
Frequently Asked Questions - BackPack 3 Ruark Audio
User questions about BackPack 3 Ruark Audio
0 question about this device. Answer the ones you know or ask your own.
Ask a new question about this device
Download the instructions for your Speaker in PDF format for free! Find your manual BackPack 3 - Ruark Audio and take your electronic device back in hand. On this page are published all the documents necessary for the use of your device. BackPack 3 by Ruark Audio.
USER MANUAL BackPack 3 Ruark Audio
BackPack 3, Allen key (1), 2 x M4 fixing screws (2), user guide.
Please retain all packaging.
Specifications
Model: BP3
Battery type: Li-Ion
Capacity: 3200mAh
Nominal output: 11.1VDC
Charge voltage: 14.0VDC
Approx. charge time: 5hrs
Approx. playback time: 12hrs
Compatible with: R1 mk2/
mk3/mk4, MR1 mk1/mk2
Regulatory information
This device is labelled in accordance with European Directive 2012/19/EC concerning waste electrical and electronic equipment. This symbol
indicates that the product or associated batteries should not be disposed of as general household waste. As with any electrical equipment, please dispose of it according to local regulations.

COMPLIANCE INFORMATION Hereby, Ruark Audio, declares
that this device complies with all EU Directive requirements as applicable by law. You can download the full CE Declaration of Conformity at www.ruarkaudio.com/doc/BP3doc.pdf

UK CONFORMITY ASSESSMENT This product conforms to all UK Conformity Assessment regulations
as applicable by law. You can download the full UKCA Declaration of Conformity at www.ruarkaudio.com/doc/BP3UKCA.pdf
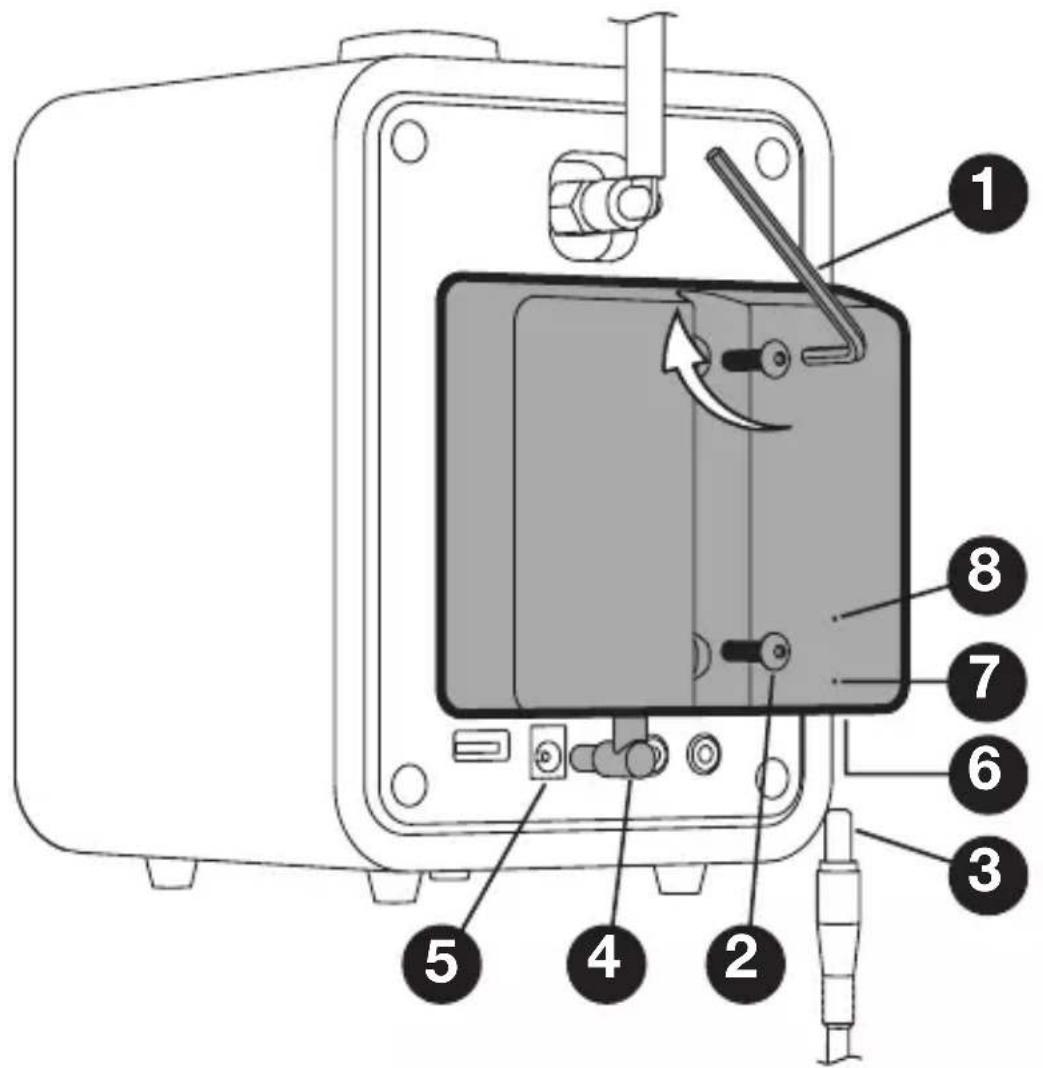
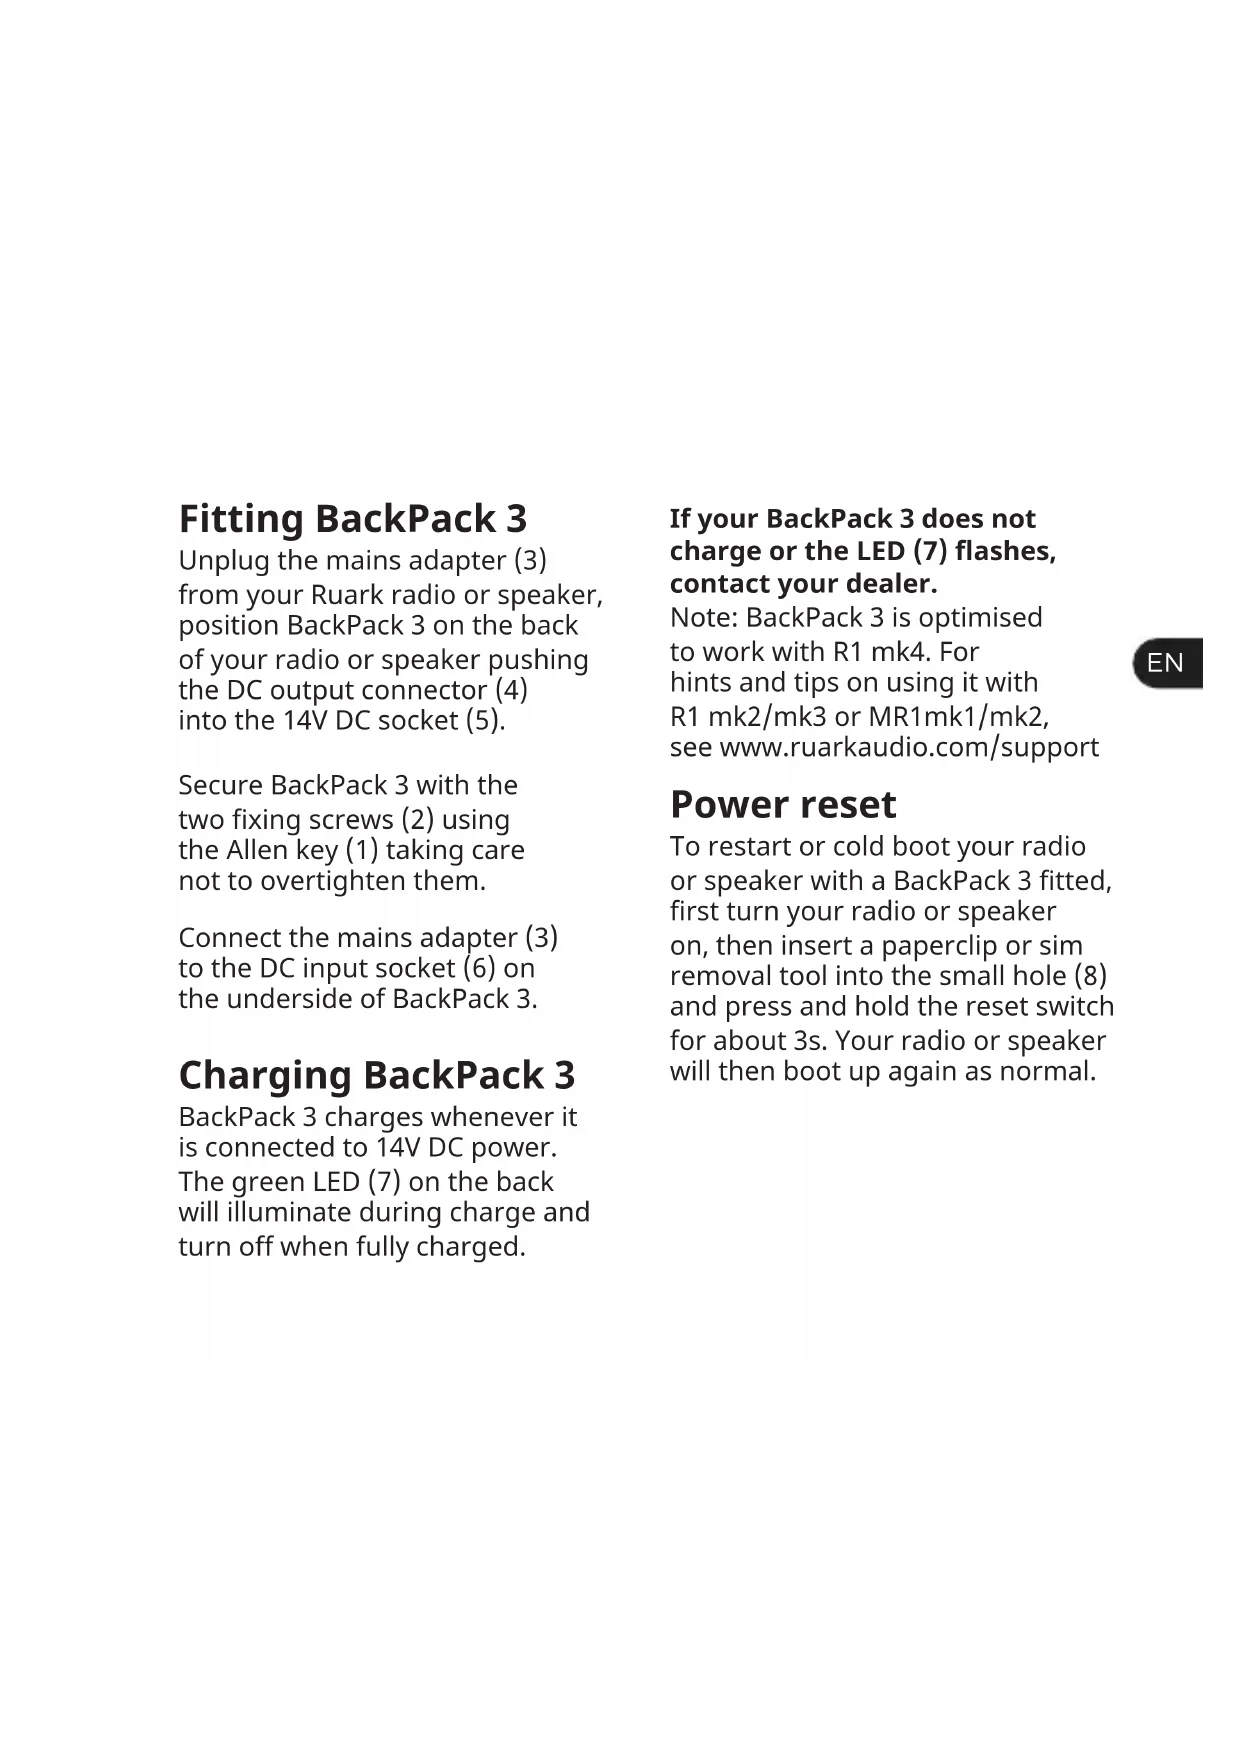
Fitting BackPack 3
Unplug the mains adapter (3) from your Ruark radio or speaker, position BackPack 3 on the back of your radio or speaker pushing the DC output connector (4) into the 14V DC socket (5).
Secure BackPack 3 with the two fixing screws (2) using the Allen key (1) taking care not to overtighten them.
Connect the mains adapter (3) to the DC input socket (6) on the underside of BackPack 3.
Charging BackPack 3
BackPack 3 charges whenever it is connected to 14V DC power. The green LED (7) on the back will illuminate during charge and turn off when fully charged.
If your BackPack 3 does not charge or the LED (7) flashes, contact your dealer.
Note: BackPack 3 is optimised to work with R1 mk4. For hints and tips on using it with R1 mk2/mk3 or MR1mk1/mk2, see www.ruarkaudio.com/support
Power reset
To restart or cold boot your radio or speaker with a BackPack 3 fitted, first turn your radio or speaker on, then insert a paperclip or sim removal tool into the small hole (8) and press and hold the reset switch for about 3s. Your radio or speaker will then boot up again as normal.
Safety information

CONTAINS LITHIUM-ION CELLS
- Never attempt to open the battery pack for any reason. If battery pack case is cracked or damaged, do not fit it to a radio or speaker. Do not crush, drop, or damage battery pack. Do not use a battery pack that has been dropped or damaged in any way. Damaged battery packs should be returned to service centre or recycled.
- Do not incinerate the battery pack even if it is severely damaged or is completely worn out.
-
If battery contents come into contact with the skin, immediately wash area with mild soap and water.
-
Read this user guide and follow all instructions, it will help you set up and operate your product properly.
- Heed all warnings and keep this user guide for future reference.
- Refer all servicing to qualified service personnel.
-
This device is intended to be operated ONLY from the AC voltages listed on the device or included power supply. Operation from voltages other than those indicated may cause irreversible damage to the device and void the product warranty.
-
Use only the power supply originally provided with your Ruark radio or speakers, or an approved alternative.
-
Ensure that the power adapter, mains plug or mains connector into the unit is readily accessible in case disconnection from the mains is required.
-
The mains adapter, mains plug or mains connector must be removed from the socket to completely disconnect the system from mains power.
- Do not place any naked flame sources, such as lighted candles, on or near the device. Do not install near any heat sources such as radiators, stoves, or other devices (including amplifiers) that produce heat.
- Avoid exposure to extreme heat or cold.
- Only use attachments/accessories specified for this device. Make no modifications to the system or accessories. Unauthorised alterations may compromise safety, regulatory compliance, and system performance.
- To reduce the risk of fire or electrical shock, do not expose the device to rain or moisture. Do not expose this device to dripping or splashing,
and do not place objects filled with liquids, such as vases, on or near the device. As with any electronic products, use care not to spill liquids into any part of the system. Liquids can cause a failure and/or a fire hazard.
- Always leave a space of at least 10cm around the device for ventilation and ensure that curtains or other objects never cover ventilation openings on the device.
Guarantee
Register your product to get an extended three-year guarantee.
As standard, this product is guaranteed to be free from defects for a period of two years from date of purchase, but this is extended to three years if you register your product at www.ruarkaudio.com. This guarantee remains valid providing this product has been treated with due care and attention. Product failure through accidental damage, excessive wear and tear, negligence or unauthorised modification will void this guarantee.
If this product was purchased in the UK and it develops a fault, please contact the retailer from which it was purchased, or contact us directly via our website www.ruarkaudio.com/support For products purchased outside the UK the distributor in the country of purchase guarantees the product. For details, please contact the local Ruark distributor or outlet. If returning this product, please ensure it is packed in its original packaging and a proof of purchase is included. This guarantee in no way varies or removes the purchaser's statutory rights. Errors and omissions excepted.
Copyright
© Ruark Audio. All rights reserved. Ruark Audio, the Ruark Audio logo, and other Ruark Audio marks are owned by Ruark Audio and may be registered. All other trademarks are the property of their respective owners.
Kasseindhold
BackPack 3, unbrakonøgle (1), 2 x M4 fikseringsskruer (2).
Gem alt indpakningsmateriale.
Specifikationer
Model: BP3
Batteritype: Li-Ion
Kapacitet: 3200mAh
INFORMATIONEN ZUR CE- KONFORMITÄT
Anbringen des BackPack 3
CE INFORMATIONS SUR LA CONFORMITÉ À LA CE
Montage de BackPack 3
BackPack 3のラジオへの
取り付け方法
BackPack 3 장착
Je BackPack 3 monteren
59 Tailors Court, Temple Farm Industrial Estate Southend-on-Sea, SS2 5TH, UK www.ruarkaudio.com
Designed in Great Britain

20210122.1