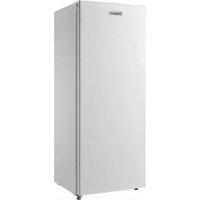
CA160BF - Freezer FRIGELUX - Free user manual and instructions
Find the device manual for free CA160BF FRIGELUX in PDF.


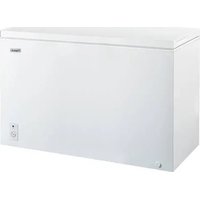
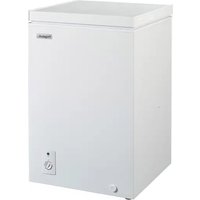
| Product Type | 4-star Chest Freezer |
| Brand | FrigeluX |
| Model | CA160BF |
| Net Volume | 160 L |
| Dimensions (H x W x D) | 850 x 600 x 550 mm |
| Weight | 30 kg |
| Power Supply | 220-240 V ~ 50 Hz, single-phase |
| Climate Class | N-ST (ambient temperature +16 °C to +38 °C) |
| Refrigerant | R600a (isobutane) |
| Freezing Capacity | 10 kg/24h |
| Temperature Settings | MIN (-12 °C), MID (-15 °C), MAX (-18 °C) |
| Defrost Type | Manual |
| Reversible Door | Yes (left or right opening) |
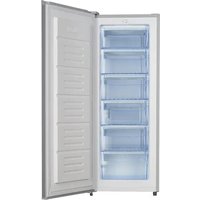
| Number of Drawers | 3 |
| Noise | Not specified |
| Energy Consumption | Not specified |
| Spare Parts | Available 7 to 10 years depending on part |
| Warranty | 1 year on functional parts |
| Maintenance and Cleaning | Baking soda for interior, vacuum cleaner for rear grille |
| Safety | Child lock? No, but instructions for children over 8 years |
Frequently Asked Questions - CA160BF FRIGELUX
User questions about CA160BF FRIGELUX
0 question about this device. Answer the ones you know or ask your own.
Ask a new question about this device
Download the instructions for your Freezer in PDF format for free! Find your manual CA160BF - FRIGELUX and take your electronic device back in hand. On this page are published all the documents necessary for the use of your device. CA160BF by FRIGELUX.
USER MANUAL CA160BF FRIGELUX
MANUEL D'INSTRUCTIONS

natural_image
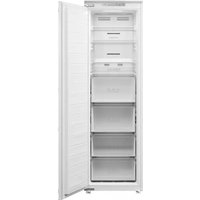
Exterior view of a white refrigerated refrigerator with 'Frigelux' branding on the front panel (no other text or symbols visible)CONGÉLATEUR – FREEZER
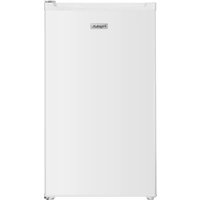
CA181BES - CA160BF - CA160XF
FR - MANUEL D'UTILISATION p. 6
Safety of children and other vulnerable people....21
General Security....21
Electrical Safety 22
Daily use 22
Important information about the installation! 23
ENERGY SAVINGS 23
Service 24
-
PRODUCT DESCRIPTION 26
-
INSTALLATION INSTRUCTIONS 26
Location 26
Leveling the fridge....27
Cleaning before first use 27
- OPERATING YOUR APPLIANCE....27
Temperature setting 27
- FOOD STORAGE 28
Food preservation and storage. 28
PREPARING FOODS FOR FREEZING 29
FOOD STORAGE 30
DEFROST FOOD 30
- CARE AND MAINTENANCE 30
Defrost 30
Internal cleaning of the device 31
Cleaning the exterior of the device 31
Moving the device....31
Energy savings....31
Switch off your device 31
Change of direction of the door 32
-
TROUBLESHOOTING GUIDE....33
-
ENVIRONMENT 34
-
WARNING 34
-
ALLGEMEINE SICHERHEITSHINWEISE 35
natural_image
Two identical rectangular panels, each displaying a checkmark and an 'X' symbol (no text or labels)natural_image
Abstract 3D graphic with layered color blocks and a cyan block, no text or symbols presentFigure 1

natural_image
Abstract color blocks with no visible text or symbols, featuring a cyan top and multiple colored layers (no text or symbols)Figure 2

natural_image
Abstract colorful geometric shapes with no text or symbolsFigure 3
natural_image
3D mechanical assembly diagram showing a yellow bracket and brown bracket with a pink cylindrical component, no text or symbols presentFigure 4

natural_image
Diagram showing a device being processed from a panel, with no visible text or symbolsFigure 5

natural_image
Simple 3D illustration of a flat surface with a curved edge, no text or symbols presentFigure 6

Before placing your new freezer into operation, please read these operating instructions carefully. They contain important information for safe use, for installation and for maintenance of the appliance. Please keep these operating instructions for future reference. Pass them on to possible new owners of the appliance.
Notes: which are important for your safety or for the proper functioning of the appliance, are stressed with a warning triangle and or with signal words (Warning! Caution! Important!). Please observe the following carefully.
1. GENERAL SAFETY INSTRUCTIONS
For your safety and correct usage, before installing and first using the appliance, read this user manual carefully, including its hints and warnings. To avoid unnecessary mistakes and accidents, it is important to make sure that all people using the appliance are thoroughly familiar with its operation and safety features. Save these instructions and be sure that they remain with the appliance if it is moved or sold, so that anyone using it throughout its life, will be properly informed on its usage and safety notices.
For the safety of life and property, keep the precautions of these user's instructions as the manufacturer is not responsible for damages caused by omission.
Safety of children and other vulnerable people
- This appliance can be used by children aged 8 and over and by people with reduced physical, sensory or mental capacities, or who have not learned to use the appliance, in the context where they are supervised by a person who is informed and aware of the risks involved. Children should not play with the device. Cleaning and user maintenance shall not be carried out by children, unless they are over 8 years old and supervised.
- Keep all packaging out of the reach of children, as there is a risk of suffocation.
- If you decide to scrap the appliance, unplug it from the wall socket, cut off the connection cable (as close to the appliance as you can) and remove the door in order to prevent children from playing with it and to lock themselves inside.
- Keep the appliance and its cord out of the reach of children under 8 years old.
- Children from 3 to 8 years old can load or unload this device.
- Children should be supervised so that they do not play with the device.
General Security
CAUTION — This appliance is designed for use in a domestic household.
CAUTION — Never store flammable substances such as aerosol cans inside this appliance as they may spill.
CAUTION — If the power cord is damaged, it must be replaced immediately by your manufacturer, or a qualified dealer, to avoid the risk of electric shock.
CAUTION — Do not damage the refrigeration circuit.
CAUTION — Do not use electrical devices inside the compartment unless permitted by the manufacturer.
CAUTION — The refrigerant and insulation system contain flammable gases. When disposing of the device, do so at an authorized collection center. Never expose the device to flames.
Refrigerant
Isobutane refrigerant (R 600a) is used in the device's refrigerant circuit. It is a highly flammable natural gas, and therefore dangerous for the environment. During transport and installation of the appliance, check that none of the components of the refrigeration circuit are damaged. The refrigerant (R 600a) is a flammable liquid.
Warning: Risk of fire
If the refrigeration circuit was damaged:
- Avoid naked flames and all sources of ignition.
- Ventilate the room where the device is located.
It is dangerous to modify the composition of this device in any way.
Any damage to the cord may cause a short circuit, and/or electric shock.
Electrical Safety
- We cannot be held responsible for any incident caused by improper electrical installation.
- The power cord must not be extended. Do not use an extension cord, adapter or multiple sockets.
- Check that the wall socket is not damaged. A wall outlet in poor condition could cause the device to overheat and explode.
■ Make sure you can access the device's wall socket. - Never pull on the main cable.
- Never remove the ground.
- If the wall outlet is loose, do not plug in the cord. There is a risk of electric shock or fire.
- This appliance operates on single phase current of 220\~240V/50Hz. The device must use a wall outlet connected to the earth according to the recommendations in force.
- If the power cable is damaged, do not replace it but contact your after-sales service.
- The power outlet should be easily accessible but out of the reach of children. If in doubt, contact your installer.
- Be careful not to trap or damage the power cord when positioning the device.
Daily use
- Warning! Refrigeration appliances without a 4-star compartment are not suitable for freezing foodstuffs.
- Never store flammable substances or liquids inside the appliance; this would cause a risk of exposure.
- Do not operate other electrical appliances inside this appliance (blenders, electric ice cream makers, etc.).
- Never put bottles or jars containing liquids in the freezer unless they are only filled to 2/3 of their capacity, freezing expands the liquids and the container could explode.
- When unplugging the appliance, always hold the plug in your hands and do not pull on the cord.
- Do not expose the device to direct sunlight.
- The device must be kept away from candles, light fixtures and other naked flames, in order to avoid the risk of fire.
- This appliance is intended exclusively for the storage of foodstuffs.
- The device is heavy. Be careful when moving it.
- If your device has wheels, remember that they are only used to facilitate small movements. Do not move it on longer trips.
- Never use the device or its parts to lean on.
- To avoid falling objects and prevent damage to the device, do not overload the device compartments.
To avoid contamination of food, please observe the following instructions:
- Regularly clean food contact surfaces and accessible drainage systems.
- Store raw meat and fish in suitable containers to avoid contact with any other food.
Warning! Cleaning and maintenance
- Before any maintenance, unplug the appliance and disconnect the power.
- Do not clean the device with metal objects, steam system, volatile oils, organic solvents or abrasive components.
- Do not use sharp or pointed objects to remove the ice. Use a plastic scraper.
Important information about the installation!
- This refrigeration appliance is not intended to be used as a built-in appliance
- For the electrical connections to be correct, follow the instructions provided in this manual.
- Unpack the device and check that it is not visually damaged. Do not plug in the device if it is damaged. Report any damage to the point of sale where you purchased it. In this case, keep the packaging.
- It is recommended to wait at least four hours before connecting the device to the current, so that the compressor is well supplied with oil.
- Good air circulation is necessary to avoid the risk of overheating. To ensure sufficient ventilation, follow the installation instructions provided.
- As soon as possible, prevent the appliance from touching walls and/or coming into contact with hot elements (compressor, condenser) in order to avoid the risk of fire. Always follow the installation instructions carefully.
- The appliance should not be located next to radiators or cooking fires.
- Make sure that the sockets are accessible once the device is installed.
ENERGY SAVINGS
To limit the power consumption of your device:
- Install it in a suitable place (see chapter "Installation").
- Keep doors open for as little time as possible.
- Do not put food that is still hot in your appliance.
- Ensure that your appliance is operating optimally by periodically cleaning the condenser (see the “Maintenance” chapter).
- Make sure your appliance is operating optimally by not allowing too much frost to accumulate in the freezer (defrost it when the thickness of frost exceeds 5 -6 mm).
- Periodically check the door seals and make sure they still close effectively. If this is not the case, contact your after-sales service.
This refrigeration appliance has been designed by the manufacturer in such a way as to guarantee the most efficient use of energy. Changing the current combination of drawers, baskets and shelves can impact the appliance's energy consumption.
Layout recommendations:
The following arrangement of equipment in your appliance (drawers, bins, shelves, etc.) is recommended so that energy is used as rationally as possible by the refrigeration appliance. Any change to this arrangement may impact the energy consumption of the device.
Service
- Any electrical work required to do the servicing of the appliance should be carried out by qualified electrician or competent person.
- This product must be serviced by an authorized Service Center, and only genuine spare parts must be used.
This appliance is for domestic use only. The manufacturer cannot be held responsible for another use.
Aesthetic and functional spare parts in accordance with REGULATION (EU) 2019/2019 (Annex II, point 3.), are made available to professional repairers and end users for a maximum period of 7 years or 10 years (list in Annex II, point 3.a.1 and 3.a.2) from the placing on the market of the last unit of the model. The list of spare parts and the procedure for ordering them (professional access / individual access) are available on the following website: www.interfroidservices.fr or by post at the following address:
FRIO - Interfroid Services, 143 Bd Pierre Lefaucheux - 72230 ARNAGE
For other functional spare parts not specified in EU Regulation 2019/2019, they are available for a period of 7 years.
The manufacturer's warranty is 1 year functional parts

R600a
Safety Instructions

Caution: Do not use mechanical devices or other means to speed up the defrosting process, other than those recommended by the manufacturer.

Caution: Do not block any ventilation grilles on the device.

Caution: Do not store explosive substances such as aerosol cans with flammable propellants in this device.

Caution: Do not damage the appliance's refrigeration circuit.

Attention: Refrigeration units operating with isobutane (R600a), they cannot be placed in an area with sources of ignition (for example, loose electrical contacts or where the refrigerant could collect in the event of a leak). The type of refrigerant is indicated on the nameplate of the cabinet.

Caution: Do not use electrical appliances in the appliance compartments unless they are of the type recommended by the manufacturer.
This appliance complies with all the European directives in force and their possible amendments.


2. PRODUCT DESCRIPTION
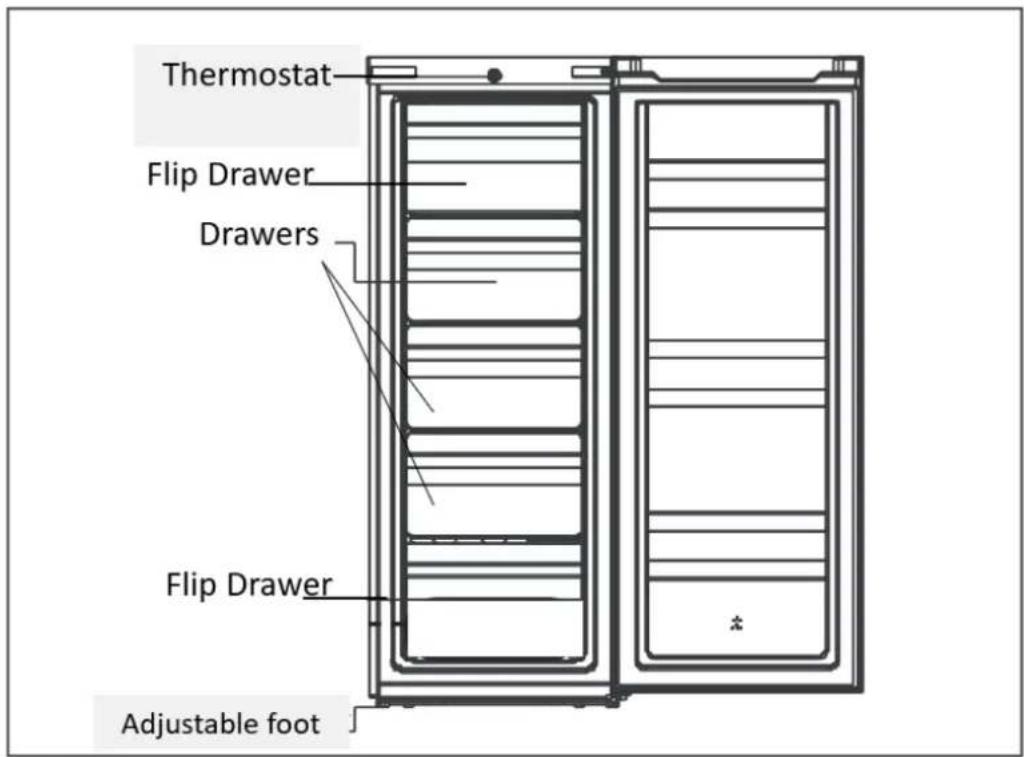
To find out more about your product, consult the online EPREL Database. As defined in Commission Delegated Regulation (EU) 2019/2016, all information relating to this refrigeration appliance is available on the EPREL Database (European Product Database for energy labelling). This database allows you to consult the information and technical documentation of your refrigeration appliance. You can access the EPREL Database by scanning the QR code on the energy label of your appliance or by going directly to: www.ec.europa.eu and entering the model of your refrigeration appliance.
3. INSTALLATION INSTRUCTIONS
Location
When selecting a position for your appliance, you must ensure that the floor is flat and firm, and that the room is well ventilated. An average ambient temperature is to be observed. This temperature is specific according to the climatic class of the device:
N-ST: This refrigeration appliance is intended for use at ambient temperatures between 16°C and 38°C.
Avoid placing your freezer near a heat source, for example, stove, boiler or radiator. So, avoid direct sunlight over-buildings or deckchairs. Make sure that the freezer is not placed near humidity (tumble dryer for example) otherwise condensation will occur on the cabinet. Never place the freezer in a wall or built into built-in cabinets or furniture. When your freezer is running, the rack at the back may become hot and the sides hot. Therefore, it must be installed leaving at least 10 cm of free space at the back, 30 cm above and 10 cm on the sides.
Leveling the fridge
If the freezer is not level, the door seal and magnetic alignment will be affected. Once the freezer is placed in its final location, adjust the front adjustable feet by turning them. Make sure the foot touches the ground before use. Look down from the top, loosen clockwise and counterclockwise tighten.

Cleaning before first use
Wipe the inside of the appliance with soapy water. Then rinse with lukewarm water using a sponge or cloth. Wash drawers and flaps in warm soapy water and dry them completely before replacing them in the appliance. Clean the exterior of the device with a damp cloth. If you need more information, see the cleaning section.
Before plugging in your device
Check that you have an outlet that is compatible with the plug supplied with the freezer. If not see section titled ELECTRICAL INFORMATION.
DO NOT START UP FOR FOUR HOURS AFTER THE UNIT HAS BEEN MOVED.
The coolant needs time to settle. If the unit is turned off at any time, wait 30 minutes before plugging it back in to allow the coolant to properly replenish.
Before filling the device
Before storing food in your freezer, plug it in and wait for 4 hours to make sure it is working properly.
4. OPERATING YOUR APPLIANCE
Temperature setting
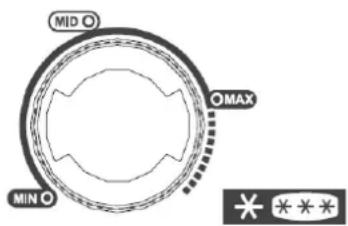
Your freezer is equipped with a thermostat located at the top, front of your appliance.
The appliance thermostat has 3 settings. The device guarantees that the temperature is maintained as long as it is in operation and used under normal conditions of use. The temperature inside the appliance can be influenced by many factors: ambient temperature, exposure to sunlight, number of door openings and amount of food stored... Slight changes in temperature are perfectly normal.
• MIN setting: average freezer compartment temperature ≤ -12°C
• MID setting: average freezer compartment temperature ≤ -15°C
• MAX setting: average freezer compartment temperature ≤ -18°C
NOTE:
- If the device is unplugged or loses power; wait 3-5 minutes before restarting otherwise the freezer will not restart.
- If you decide to change the temperature, change the thermostat in steps of one unit each time. Wait several hours for the temperature to stabilize at the desired level.
- At high ambient temperatures, e.g., hot summer days. It may be necessary to set the thermostat to
the coldest setting ("Max" position). This may cause the compressor to run continuously to maintain a low temperature in the cabinet.
- For the first time you install your freezer, set the thermostat knob to "Mid". Allow your freezer to cool completely before adding food to it. It is best to wait 24 hours before adding food. The thermostat knob controls the temperature.
Do not leave the door open too long so that the interior temperature does not rise too much.
5. FOOD STORAGE
The storage of foodstuffs must comply with regulatory storage temperatures established by the National Agency for Food, Environmental and Occupational Health and Safety (ANSES). Non-compliance with these storage temperatures involves risks of poisoning and food waste.
| Refrigerator compartments | Type of food |
| Door or balconies of fridge compartment | ·Foods with natural preservatives, such as jams,juices, drinks, condiments.·Do not store perishable foods. |
| Crisper drawer (salad drawer) | ·Fruits, herbs and vegetables should be placed separately in the crisper bin.·Do not store bananas, onions, potatoes, garlic in the refrigerator. |
| Fridge shelf – middle | ·Dairy products, eggs |
| Fridge shelf – top | ·Foods that do not need cooking, such as ready-to-eat foods, deli meats, leftovers. |
Food preservation and storage.
Under the recommended setting, the best shelf life is no more than 3 months in the freezer (4 stars); The better storage time may reduce other parameters.
| Storage conditions | ||||
| Compartment | Type of compartment | T°C mini | T°C maxi | T°C consigne |
| Compartment for non-frozen food | Compartment for fresh food | 0 | 8 | 4 |
| Compartment for highly perishable food | Compartment for highly perishable food | -3 | 3 | 2 |
| No star and ice making | s.o. | 0 | 0 | |
| Compartment for frozen food | 1 star | s.o. | -6 | -6 |
| 2 stars | s.o. | -12 | -12 | |
| 3 stars | s.o. | -18 | -18 | |
| 4 stars | s.o. | -18 | -18 | |
Non-compliance with these storage temperatures involves risks of poisoning and food waste. For optimal preservation of foodstuffs, it is recommended to set the temperatures of the compartments as follows:
| Compartment type | Storage temperature [°C] | Type of food | |
| 1 | Fridge | +2<=+8 | Eggs, cooked food, packaged food, fruit and vegetables, daily produce, cakes, beverages and other food not suitable for freezing |
| 2 | 4 Star Freezer | <=-18 | Seafood (fish, shrimp, crustaceans) fresh water, seafood and meat (recommended storage time 3 months, longer storage time will affect taste and nutritional qualities) Suitable for frozen foods |
| 3 | 3-star freezer | <=-18 | Seafood (fish, shrimp, crustaceans) fresh water, seafood and meat (recommended storage time 3 months, longer storage time will affect taste and nutritional qualities) Suitable for frozen foods |
| 4 | 2-star freezer | <=-12 | Seafood (fish, shrimp, crustaceans) fresh water, seafood and meat (recommended storage time 2 months, longer storage time will affect taste and nutritional qualities) Suitable for frozen foods |
| 5 | 1 star freezer | <=-6 | Seafood (fish, shrimp, crustaceans) fresh water, seafood and meat (recommended storage time of 1 month, longer storage time will affect taste and nutritional qualities) Suitable for frozen foods |
| 6 | Compartment 0 star | -6<=0 | Pork, beef, fish, chicken, processed foods (food to be consumed on the day of opening, recommended storage period of 3 days) Not suitable for frozen products |
| 7 | Costs | 2<=3 | Pork, beef, fish, chicken (food to be consumed on the day of opening or up to 2 days later, recommended storage period of 7 days) Not suitable for frozen products |
| 8 | fresh food | 0<=4 | Pork, beef, fish, chicken, processed foods (food to be consumed on the day of opening, recommended storage period of 3 days) |
| 9 | Wines | 5<=20 | Red, white, sparkling wine |
FROZEN PRODUCTS / FROZEN PRODUCTS
Your household appliance allows you to freeze food, it quickly lowers the temperature to the core and you can thus keep it longer. Freezing is a faster and more intense industrial process than home freezing. The products that you buy in the trade are frozen.
PREPARING FOODS FOR FREEZING
Caution: Freezing does not sterilize. It is therefore important that you prepare your food for freezing by respecting a few simple rules of hygiene. Wash your hands before touching food, clean used kitchen utensils before using them again.
Only freeze fresh, quality food. Refer to the “Food Freezing Guide” table to find out which products you can freeze and how long you can keep them. Blanch fruits and vegetables before freezing so that they retain color, aroma, taste and vitamins, Immerse them for a few moments in boiling water. Divide the food you want to freeze into small individual portions corresponding to a meal. Small portions are quickly frozen to the core. Pack the food tightly to prevent it from losing its flavor or dry out. Use plastic bags, polyethylene film, aluminum foil or containers suitable for freezing. If you use plastic bags, squeeze the air before sealing them. hermetically.
Note on each package:
- The freezing date.
- The expiry date.
■ The type of food contained. - The number of servings contained.
If you buy frozen foods, take them last when shopping. Check carefully:
- That their packaging is not damaged
- That they are not covered with a layer of frost (this would mean that they have been partially thawed). Pack them in an insulated bag or in newspaper, transport them quickly, put them away immediately.
Respect the expiry date indicated on their packaging. Your appliance is equipped with a freezer compartment ****, it allows you to keep frozen products in an optimal way.
FOOD STORAGE
Do not put fresh foods next to those that are already frozen in order to avoid causing an increase in the temperature of the latter.
Information: the maximum weight of food that you can freeze per 24 hours is indicated on the identification plate (located inside the freezer section of your appliance, on the left wall at the bottom) under the name: "FREEZING CAPACITY / FREEZING CAPACITY (kg/24h)".
DEFROST FOOD
You can defrost food in five different ways:
- By putting them in the freezer section of your appliance for several hours.
- By letting them thaw gently at room temperature.
- In a traditional oven at very low temperature (40/50°C).
- In the microwave.
- By cooking them directly. Thawing in the freezer is the slowest but safest method.
Caution: Never refreeze food that has been defrosted, even partially, without having cooked it first. We do not recommend that you take products straight out of the freezer (ice cream, ice cubes, etc.) directly to your mouth, as they are then at a very low temperature and you risk cold burns. Avoid touching frozen or deep-frozen foods with wet hands, they may stick together. We advise you to defrost your food only for immediate use.
6. CARE AND MAINTENANCE
Defrost
- The defrosting of your device is manual.
- It is necessary to defrost your device when the accumulated frost is about 2mm:
- Unplug your appliance from the main power.
- Remove all contents from the freezer compartment.
- Leave the door of your appliance open to allow the ice to melt.
• If necessary, remove large chunks of ice with a cloth or something that won't damage the walls. - Do not use hot water or other electric heating devices to melt accumulated ice.
• After defrosting, remove accumulated ice/water and wipe the freezer compartment with a soft cloth. - Restart the device according to the initial instructions. Never use a knife or other sharp instrument to scrape off the ice inside.
Internal cleaning of the device
Before any maintenance, unplug the appliance and disconnect the power.
You should clean the inside of your freezer with a weak solution of baking soda. Then rinse with lukewarm water with a damp sponge or cloth and wipe dry. Wash the accessories in hot soapy water and make sure they are completely dry before putting them back on. Water will flow into the defrost drain, it does not matter if the quantity of water is not important, this water arrives in the collection tank located at the back and evaporates naturally.
Warning: make sure that no piece of food obstructs the defrost drain.
Cleaning the exterior of the device
Before any maintenance, unplug the appliance and disconnect the power.
Use a soft cloth and no abrasive cleanser to avoid damaging the surface.
The condenser grill at the back of your freezer and adjacent components can be cleaned using a vacuum cleaner or soft brush to remove dust.
If you are going on vacation
If your appliance is not to be used for several months, remove all food, turn off and unplug the appliance from the outlet. Clean and dry the inside and outside of the appliance thoroughly. Also leave the door open, blocking it if necessary, to prevent condensation, odors, mold.
Moving the device
Caution: Condensation may appear on the outside of the device. This may be due to a change in ambient temperature. Wipe off any remaining moisture. If the problem persists, please contact a qualified technician for assistance.
Energy savings
- The freezer should be placed in the coolest place in the room, away from heat sources from other electrical appliances or heating, and not in direct sunlight.
- Allow hot food to cool to room temperature before placing it in the freezer. Overloading the freezer will result in higher compressor usage. Food that freezes too slowly can lose quality and spoil.
- Make sure food is properly wrapped, and wipe containers dry before placing them in the freezer. This reduces the formation of frost inside the freezer.
- The freezer storage compartment should not contain aluminum foil or wax paper. These coatings prevent the normal circulation of cold air and make the freezer less efficient.
- Organizing and labeling food reduces door opening times and lengthy searches. Take all the food you need at once and close the door as soon as possible.
Switch off your device
If the device is not likely to work for a long time:
- Remove all food from your appliance
- Switch off the appliance by unplugging the device.
- Clean it well.
- Leave the door open to prevent odors from rising.
Change of direction of the door
Warning! Before changing the door opening direction, please unplug the appliance.
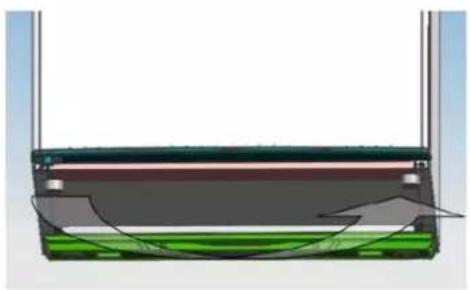
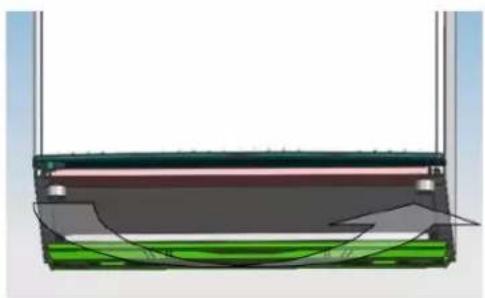
Your freezer has a reversible door. You can choose to open it from the left or from the right. To change the door opening direction, please follow the instructions below.
Tools needed: Phillips style screwdriver / Flat-blade screwdriver / Hexagonal spanner/ Hexagonal socket wrench

natural_image
Illustration of a colorful abstract design with layered panels and a cyan background (no text or symbols)Figure 1
natural_image
Close-up of a colorful wall panel with a blue top and decorative elements (no text or symbols visible)Figure 2

natural_image
Illustration of a colorful abstract panel or device with no visible text or symbolsFigure 3

natural_image
3D mechanical assembly diagram showing a green bracket and a brown bracket with a pink end, both without any text or symbols.Figure 4

natural_image
Diagram showing a device being processed from a panel, with no visible text or symbolsFigure 5
natural_image
Blank white rectangular object with a small blue icon at the bottom left corner (no text or symbols)Figure 6
natural_image
3D rendering of a black rectangular electronic component with green circuitry and mounting holes (no text or symbols visible)Figure 7

natural_image
3D diagram of a device with green base and black panel, no visible text or symbolsFigure 8

Figure 9

natural_image
Illustration of a cartoon character with a large arc and triangular head, set against a solid blue background (no text or symbols)Figure 10
Figure 11
natural_image
Cross-sectional diagram of a layered structure with green and gray components, no visible text or symbolsFigure 12
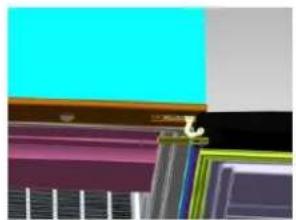
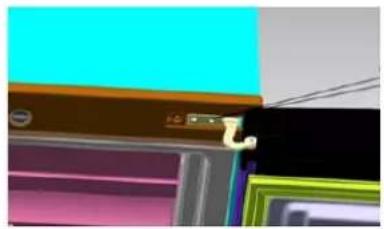
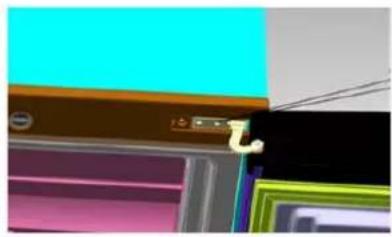
1) Remove the upper right hinge cover (Figure 1 - 2).
2) Remove the screws attached to the top hinge with a Phillips screwdriver (Figure 3).
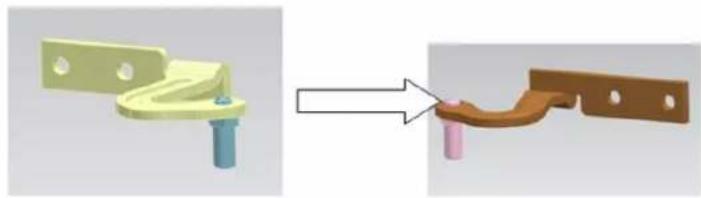
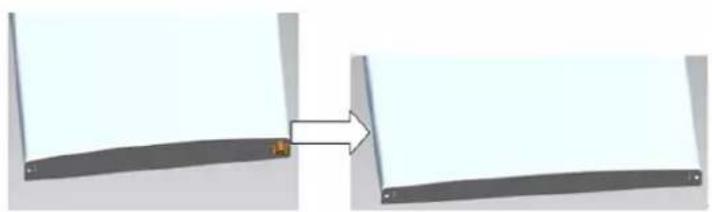
3) Replace the top hinge and top door limit block and door pad on the other side.
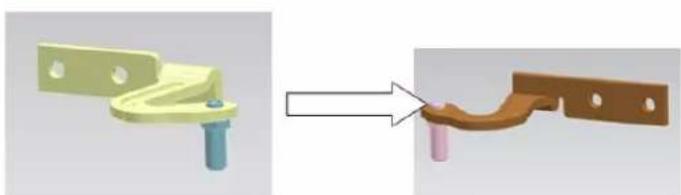
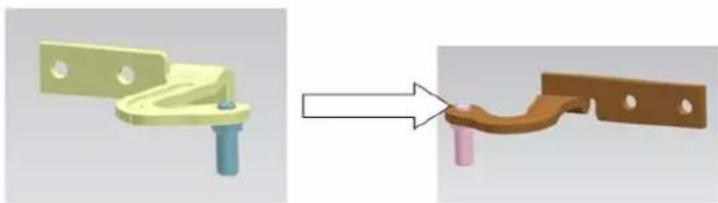
A. Remove the nut with sleeve. Take off the washer then remove the axes to the other side and fixed (Figure 4).
B. Remove the door limit block (Figure 5).
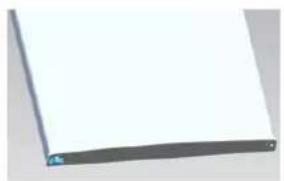
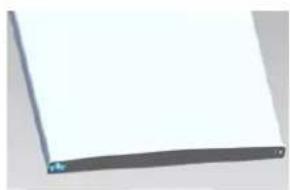
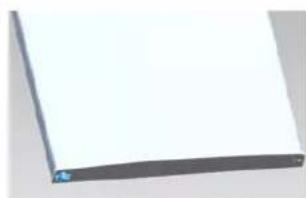
C. Please remove another door limit block, with screw mounting on the door (figure 6).
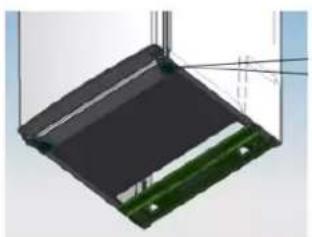
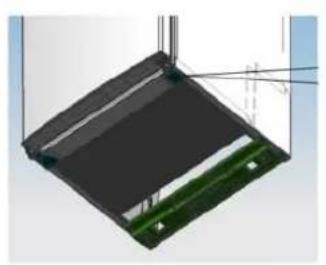
4) Disassemble the screws fixed the bottom-hinge with hexagonal socket wrench (figure 7).
Note: The tilt angle of the fridge-freezer is less than 45^ .
5) Replace the lower hinge on the other side and secure it with screws (figure 8).
6) Adjust the correct position of the door, fix the mid-hinge (figure 9).
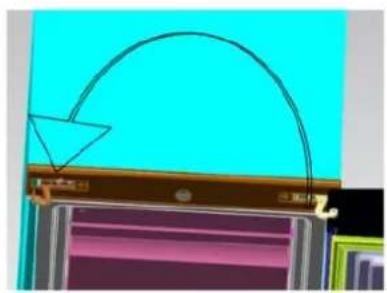
7) Replace the top hinge (figure 10).
8) Set the top door right position, fix the top-hinge and the cover (figure 11).
9) Replace the leveler on the other side and adjust it to make sure the cabinet is level (Figure 12).
Door space requirements
The appliance door must be able to open fully as shown.
W × D ≥ 902 × 1052 mm

7. TROUBLESHOOTING GUIDE
You can solve some common problems on your own and easily, thus saving the cost of a repair call. Try the following suggestions to see if your problem can be solved without help from a troubleshooter.
| Problems | Solutions |
| power cut | During a power outage, frozen food will be preserved for approximately 9 hours.Do not open the freezer too often during a power outage. |
| Unusual noises | √ Check the adjustment of the feet of your device and its stability.√ Check that it is not in contact with a wall.√ Check that all removable parts (bins, shelves, drawers, flaps, etc.) are in place. |
| The device does not cool enough | √ Check if the temperature is set correctly. If not, adjust the temperature appropriately.√ Check that you have not put a large quantity of food or hot food in your appliance.√ Be careful not to open the door of your appliance too often or leave it open.√ Check that the door is tightly closed.√ Position your device away from any source of heat.√ Make sure that the ventilation around the device is respected. |
| Unit does not cool at all | √ Check if your device is properly connected.√ Check if the circuit breaker in your house is not cut, if the fuse is not blown or is not unscrewed. |
| Frost forms inside your device | √ Be careful not to open the door of your appliance too often or leave it open. |
| Some foods are not completely frozen. | √ It is quite normal that foods that contain a lot√ , fats or alcohol are not completely frozen and remain partially soft (ice cream, fruit juice, etc.). |
| Frozen meats have white stripes | √ Check if the temperature of your device is set correctly and is not too low.√ Check to see if you have stored these meats too long in the freezer. |
| The door is difficult to open | √ It is normal for the door to have some resistance when opening, especially when you have just closed it. A small depression is created in your appliance which serves to ensure that the door is perfectly sealed. Just wait a few moments before reopening it. |
| The freezer does not work | √ Check if your device is plugged in and turned on.√ Check that the fuse in your electrical installation has not blown. |
| Condensation appears on the outside of the freezer | √ This may be due to a change in ambient temperature. Wipe off any remaining moisture. If the problem persists, contact the store where the purchase was made. |
| Peculiar smell in the device | √ Check for spoiled food, if so, throw it away.√ Check that your strong-smelling foods are wrapped |
8. ENVIRONMENT
This appliance is marked according to the European directive 2019 290 /UE on Waste Electrical and Electronic Equipment (By ensuring this product is disposed of correctly, you will help prevent potential negative consequences for the environment and human health, which could otherwise be caused by inappropriate waste handling of this product.

The symbol on the product, or on the documents accompanying the product, the Crossed Out Wheelie Bin, indicates that this appliance may not be treated as household waste. Instead it shall be handed over to the applicable collection point for the recycling of electrical and electronic equipment, or, if you are buying an equivalent product, to the retailer of the new product.
The user is responsible for taking the appliance to the appropriate collection center at the end of its useful life Selective and appropriate collection for the recycling of no longer used appliances and their disposal and destruction in an environmentally friendly manner, helps to prevent potential negative effects on the environment and health, and encourages the recycling of materials used to make the product.
For more detailed information about treatment, recovery and recycling of this product, please contact your local authority, your household waste disposal service or the retailer where you purchased the product.
9. WARNING
In an effort to constantly improve our products, we reserve the right to modify the technical characteristics without notice.
The guarantees for FRIGELUX brand products are exclusively stated by the distributors we have chosen. Nothing herein should be construed as an additional warranty.
FRIO ENTREPRISE cannot be held responsible for technical and editorial errors or omissions herein.
natural_image
Illustration of a window frame with color blocks and a blue background (no text or symbols)Figure 1

natural_image
Close-up of a colorful wall-mounted electronic component with no visible text or symbolsFigure 2
natural_image
Illustration of a colorful abstract panel or device with no visible text or symbolsFigure 3

natural_image
3D mechanical assembly diagram showing a yellow bracket and brown bracket with a pink cylindrical component, connected by an arrow indicating transformation (no text or symbols present)Figure 4

natural_image
Diagram showing a mechanical component being inserted into a panel, with no visible text or symbolsFigure 5
natural_image
Simple 3D illustration of a blank white surface with a thin gray border and a small blue square at the bottom left corner (no text or symbols)Figure 6

natural_image
3D rendering of a black rectangular electronic component with green circuitry and wiring (no text or symbols visible)Figure 7

natural_image
3D diagram of a layered electronic component with green and black components, no visible text or symbolsFigure 8

Figure 9

natural_image
Illustration of a curved arrow and triangle over a layered panel (no text or symbols)Figure 10

Figure 11
natural_image
Cross-sectional diagram of a layered structure with a curved arrow indicating direction (no text or symbols)Figure 12
natural_image
Illustration of a window with a blue sky and colorful panels (no text or symbols)Figure 1

natural_image
Abstract 3D rendering of layered colored panels with no visible text or symbolsFigure 2

natural_image
Illustration of a colorful abstract panel or device with no visible text or symbolsFigure 3
natural_image
3D mechanical assembly diagram showing a yellow bracket and brown bracket with a pink pin, connected by an arrow indicating transformation (no text or symbols present)Figure 4

natural_image
Diagram showing a device transitioning from a flat panel to a curved panel, with an arrow indicating the process (no text or symbols present)Figure 5
natural_image
3D rendering of a flat rectangular object with a small blue mark at the bottom left corner (no text or symbols visible)Figure 6
natural_image
3D rendering of a mechanical component with green base and black top, no visible text or symbolsFigure 7

natural_image
3D diagram of a rectangular electronic component with internal structure and wiring, no visible text or symbolsFigure 8

Figure 9
natural_image
Illustration of a geometric shape with a triangle and arc above a screen (no text or symbols)Figure 10

natural_image
Solid purple rectangular panel with no visible text, symbols, or markingsFigure 11

natural_image
Diagram of a layered structure with green and gray layers, showing a curved arrow indicating direction (no text or symbols)Figure 12
natural_image
Illustration of a colorful abstract background with no visible text, numbers, or symbols.Figure 1

natural_image
Close-up of a colorful wall panel with a cyan top and a black handle, no visible text or symbolsFigure 2
natural_image
Illustration of a colorful abstract panel or screen with a small yellow 'L' on the right side (no text or symbols)Figure 3
natural_image
3D mechanical assembly diagram showing a green bracket and a brown bracket with a pink pin, both without any text or symbols.Figure 4
natural_image
Diagram showing a device transitioning from a flat panel to a rectangular panel, with no visible text or symbols.Figure 5

natural_image
Simple 3D rendering of a flat rectangular object with a corner edge and a small protrusion at the bottom (no text or symbols)Figure 6

natural_image
3D rendering of a black rectangular electronic component with green internal structure, shown without any text or symbols.Figure 7

natural_image
3D diagram of a rectangular electronic component with green base and black top, showing internal structure and wiring (no text or symbols)Figure 8

Figure 9

natural_image
Illustration of a computer monitor with a curved screen and a triangle overlay (no text or symbols)Figure 10

natural_image
Solid purple rectangle with a small yellow border at the bottom (no text or symbols)Figure 11

natural_image
Cross-sectional diagram of a layered structure with internal layers and a curved arrow indicating direction (no text or symbols)Figure 12
- CONGÉLATEUR – FREEZER
- GENERAL SAFETY INSTRUCTIONS
- Safety of children and other vulnerable people
- General Security
- Refrigerant
- Warning: Risk of fire
- Electrical Safety
- Daily use
- Warning! Cleaning and maintenance
- Important information about the installation!
- ENERGY SAVINGS
- Layout recommendations:
- Service
- Safety Instructions
- PRODUCT DESCRIPTION
- INSTALLATION INSTRUCTIONS
- Location
- Leveling the fridge
- Cleaning before first use
- Before plugging in your device
- Before filling the device
- OPERATING YOUR APPLIANCE
- Temperature setting
- NOTE:
- FOOD STORAGE
- Food preservation and storage.
- FROZEN PRODUCTS / FROZEN PRODUCTS
- PREPARING FOODS FOR FREEZING
- Note on each package:
- FOOD STORAGE
- DEFROST FOOD
- CARE AND MAINTENANCE
- Defrost
- Internal cleaning of the device
- Cleaning the exterior of the device
- If you are going on vacation
- Moving the device
- Switch off your device
- Change of direction of the door
- Door space requirements
- TROUBLESHOOTING GUIDE
- ENVIRONMENT
- WARNING
Brand : FRIGELUX
Model : CA160BF
Category : Freezer