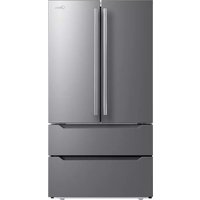
MRF29D6AST - Fridge MIDEA - Free user manual and instructions
Find the device manual for free MRF29D6AST MIDEA in PDF.
Download the instructions for your Fridge in PDF format for free! Find your manual MRF29D6AST - MIDEA and take your electronic device back in hand. On this page are published all the documents necessary for the use of your device. MRF29D6AST by MIDEA.
USER MANUAL MRF29D6AST MIDEA
USER MANUAL Warning notices: Before using this product, please read this manual carefully and keep it for future reference. The design and specifications are subject to change without prior notice for product improvement. Consult with your dealer or manufacturer for details. The diagram above is just for reference. Please take the appearance of the actual product as the standard.
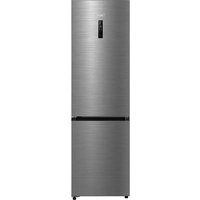
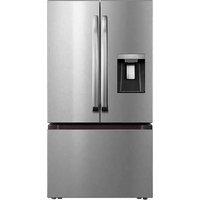
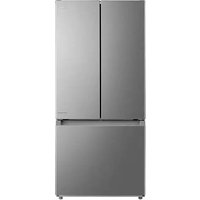
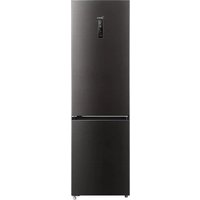
FRENCH DOOR REFRIGERATOR SERIES
Refrigerator Freezer Download the app & activate productLANGUAGES Free 3 months extension of the original limited warranty period!* Simply text a picture of your proof of purchase to: 1-844-224-1614 *The warranty extension is for the three months immediately following the completion of the product’s original warranty period. Individuals do not need to register the product in order to get all the rights and remedies of registered owners under the original limited warranty. EN English FR French ES Spanish04
Thank you for choosing Midea! Before using your new Midea product, please read this manual thoroughly to ensure that you know how to operate the features and functions that your new appliance offers in a safe way. CONTENTS
PRODUCT INSTALLATION
CLEANING AND MAINTENANCE
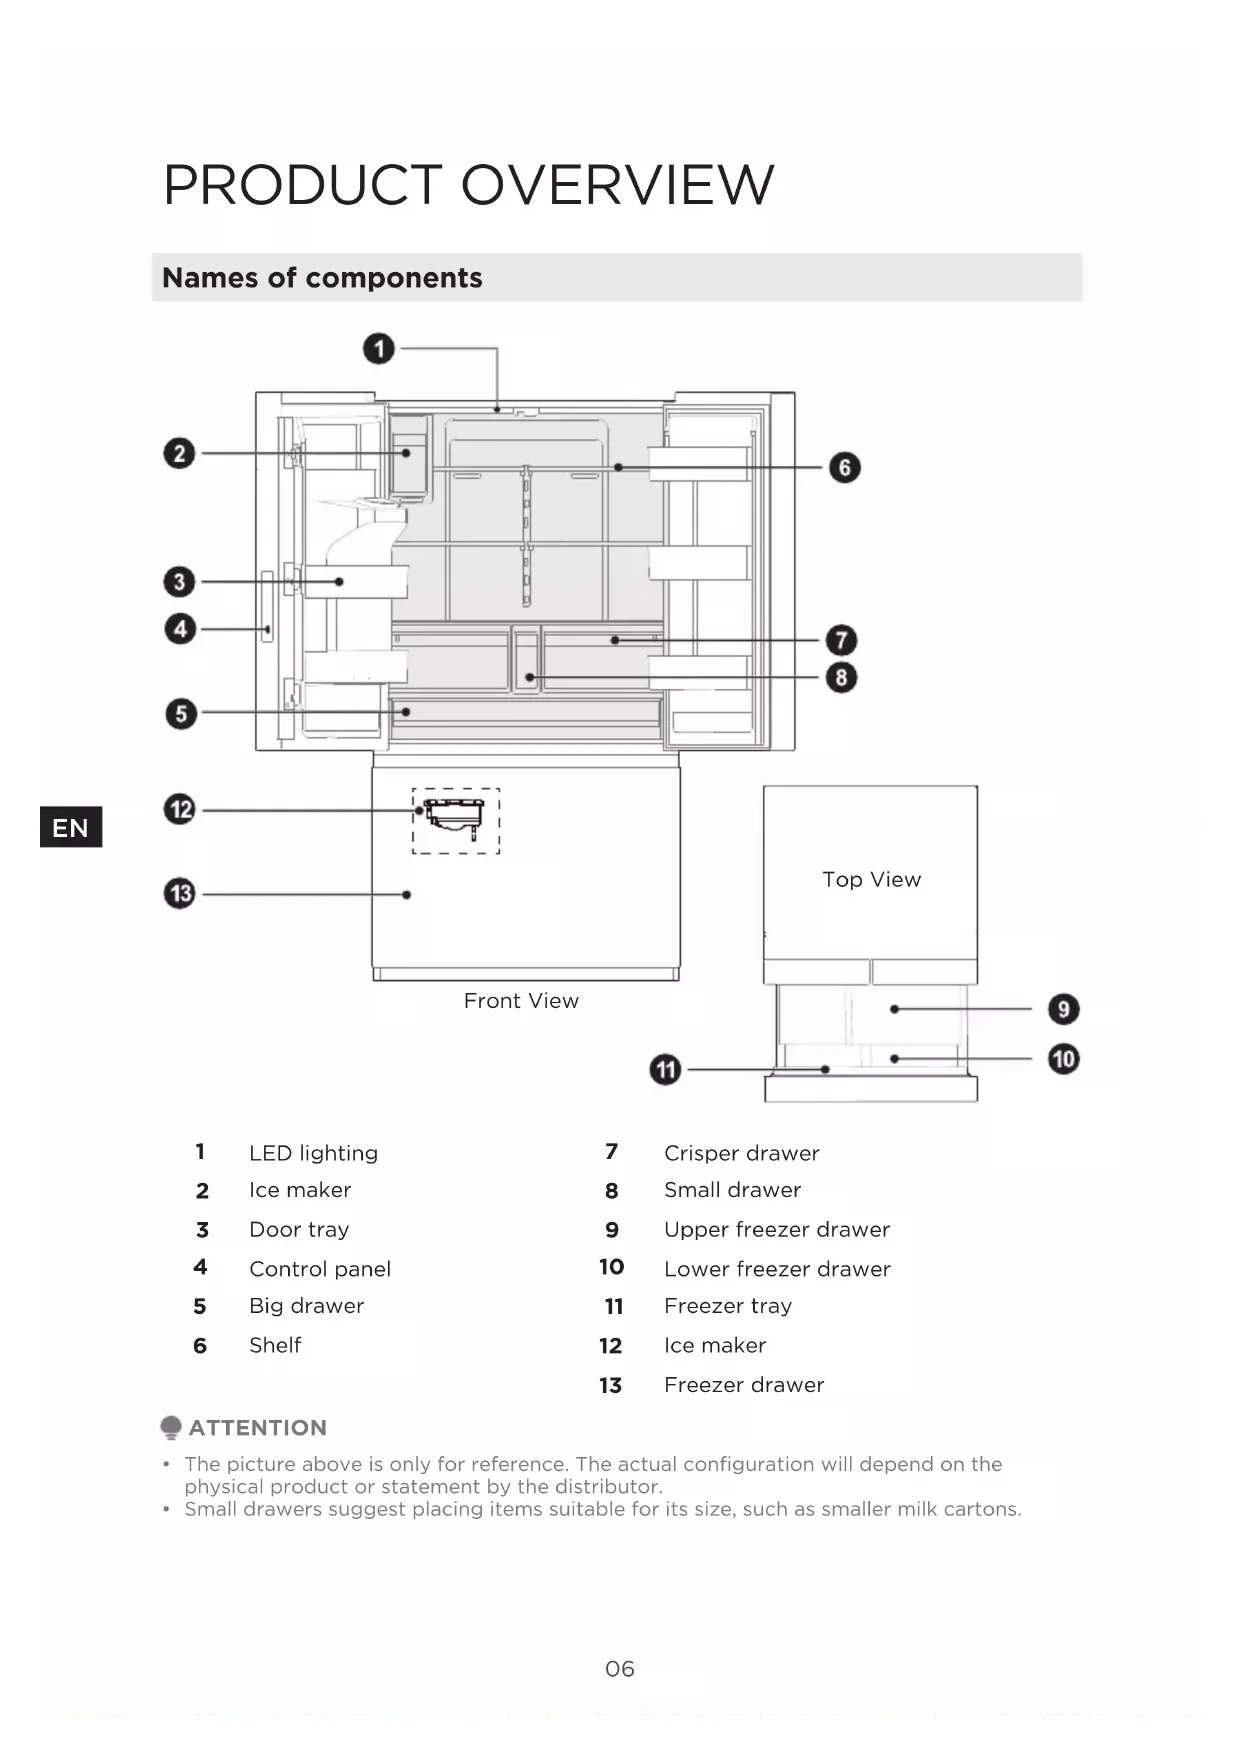
PRODUCT OVERVIEW Names of components
LED lighting Front View Top View
Upper freezer drawer
Lower freezer drawer
Freezer drawer ATTENTION ȼ The picture above is only for reference. The actual configuration will depend on thephysical product or statement by the distributor.ȼ Small drawers suggest placing items suitable for its size, such as smaller milk cartons.07
PRODUCT INSTALLATION Install Instruction Finding a suitable location
ȼ Keep away from heat and avoid direct sunlight. Do not place the refrigerator in moist or watery places to prevent rust or reduction of insulating eect. This refrigerator is designed to be free standing only and should not be installed in a recessed or built-in space. The refrigerator should be placed in a well-ventilated indoor place and the ground should be flat and sturdy. Dimensions and Clearances ȼ Too small of a distance from adjacent items may result in the degradation of freezing capability and increased electricity costs. Allow over 4" of clearance from each adjacent wall when installing the appliance. Required space for air circulation Top View >4">4">4">4">4">4" Providing a proper power supply ȼ Check your local power source. This refrigerator requires a AC115 V, 60 Hz power supply. ȼ Use a receptacle that accepts the grounding prong. The power cord is equipped with a 3-prong (grounding) plug which mates with a standard 3-prong (grounding) wall outlet to minimize the possibility of electric shock hazard from this refrigerator. CAUTION The refrigerator should always be plugged into its own individual electrical outlet which has a voltage rating that matches the rating plate. Never unplug your refrigerator by pulling on the power cord. Always grip the plug firmlyand pull straight out from the outlet.
WARNING: When positioning the appliance, ensure the supply cord is not
trapped orˏdamaged. Start to use ȼ The refrigerator should sit in an upright position for 2 hours before connecting power when it is initially started. ȼ The refrigerator should run 2 to 3 hours before loading fresh or frozen foods. The refrigerator should run for more than 4 hours in advance when the ambient temperature is high.08
Space requirement diagram (when the door is open and when the door is closed)
Installing the Water Line Installing the Water Line ȼ Water line installation kits are available as an addional accessory from your dealer or at a local hardware store.
1. First, shut o the main water supply
line and turn the ice-maker o.
2. Locate the nearest cold water supply
3. After connecting the water supply to
the water valve, turn your main water supply back on and flush several gallons of water to clear the water supply line. Cold water line Pipe clamp Shut o walve Water line installation kit Water connector Water tube Connecting the Water Line to The Refrigerator ȼ There are several items that you need to purchase to complete this connection. ȼ You will find these items sold as a kit at your local hardware store.
1. First, close the main water supply and
locate the nearest cold water line.
2. Second, connect the water valve to
the cold water line.
3. Turn water valve on and check for
4. When moving the refrigerator, you
can hang the power cord on the power cord hook. Connecting the Water Line to A Drinkable Water Source ȼ If your water line is not drinkable, please add an external water filter. ȼ If you must repair or disassemble the water line, cut o the plastic tubing to make sure you get a snug, leak- free connection. ATTENTION The minimum inlet water pressure: 276kPa. The maximum inlet water pressure: 689kPa.
WARNING: Connect to potable water supply
only. New hose-sets supplied with the appliance are to be used and that old hose- sets should not be reused. Power cord hook Water line Water connector10
Door handle installation (!/!ˏ0'!ˏ,.!10%+*/ˏ0+ˏ/!1.!ˏ0$!ˏ$* (!ˏ* ˏ,.!2!*0ˏ%*&1.5. Step ȆȐ F%.st take out the bolts for fixing the handle from the package bag of the userˏ manual and then fasten it on the door body with a cross screwdriver. ȇȐ Take out the door handle from the refrigerating chamber after the f%.st step isˏ completed, and then place it the door in the direction as on shown in the figureˏ and make the two bolts for fixing the handle in the handle. ȈȐ Use the allen wrench to fasten the screws in two holes of each handle with theˏ handle fixing bolts. Bolt Handle Bolt11
Installing Filter Flush the water system
ȼ Pull out the small drawer in the middle After installing the replacement water filter it is important to flush air from the water line so that water will not drip from the water dispenser.
1. Turn on the main water supply.
2. Dispense 2.5 gallons of water (flush for approximately 5 minutes) and discard
the dispensed water. NOTE: Do not dispense the entire 2.5 gallon amount continuously. Depress and release the dispenser pad for cycles of 30 seconds ON and 60 seconds OFF. In some homes, additional flushing may be required.
3. Open the refrigerator door to make sure there are no water leaks coming from
ȼ Press the filter knob and rotate 90° counterclockwise, the filter will disengage from the connector and the filter can be removed.
ȼ Check the water tray under the strainer with your finger, take out and dump the overflow water.12
Leveling feet To avoid vibration, the unit must be leveled. If required, adjust the leveling screws to compensate for the uneven floor. The front should be slightly higher than the rear to aid in door closing. Leveling screws can be turned easily by tipping the cabinet slightly. Turn the leveling screws counterclockwise to raise the unit, clockwise to lower it. Leveling doors List of tools to be provided by the user Pliers
1. Raise the lower door up to the level of the higher door.
2. Insert the supplied fastener-ring by using plier in the gap between the
hinge-grommet and the lower hinge. The number of fasten-rings you will need to insert depends on the gap. Lower hinge Fastener-ring Hinge grommet Pliers Moving the appliance
1. Remove all food from inside the appliance.
2. Pull the power plug out, insert and fix it into the power plug hook at the rear or
on top of the appliance.
3. Tape parts such as shelves and the door handle to prevent from falling off
while moving the appliance.
4. Move the appliance with more than two people carefully. When transporting
the appliance over a long distance, keep the appliance upright.
5. After installing the appliance, connect the power plug into a socket out to
switch on the appliance.13
- Any replacement or maintenance of the LED lamps is intended to be made by the manufacturer, its service agent or similar qualified person. Connecting the appliance After installing the appliance, connect the power plug into a socket outlet. ATTENTION
- After connecting the power supply cord (or plug) to the outlet, wait 2 or 3 hours before you put food into the appliance. If you add food before the appliance has cooled completely, your food may spoil. Precautions before operation:
- Do not place the appliance near cookers, radiators or other heat sources. If the ambient temperature is high, the compressor will run more frequently and for longer, resulting in increased energy consumption.
- Ensure that there is sufficient ventilation at the base of the appliance, on the sides of the appliance and at the back of the appliance. Never cover ventilation openings.
- Please also observe the spacing dimensions in the chapter “Installation”.
- The arrangement of drawers, shelves and racks as shown in the illustration offers the most efficient use of energy and should therefore be retained as far as possible. All drawers and shelves should remain in the appliance to keep the temperature stable and save energy.
- To obtain a larger storage space (e.g. for large refrigerated/frozen goods), the middle drawers can be removed. The top and bottom drawers and shelves should be removed last if necessary.
- An evenly filled refrigerator/freezer compartment contributes to optimal energy use. Therefore, avoid empty or half-empty compartments.
- Allow warm food to cool before placing it in the refrigerator/freezer. Food that has already cooled down increases energy efficiency.
- Allow frozen food to defrost in the refrigerator. The coldness of the frozen food reduces the energy consumption in the refrigerator compartment and thus increases the energy efficiency.
- Open the door only as briefly as necessary to minimise cold loss. Opening the door briefly and closing it properly reduces energy consumption.
- The door seals of your appliance must be perfectly intact so that the doors close properly and energy consumption is not increased unnecessarily.14
Temperature zone selection button
Refrigerating ice on icon
Freezer ice on icon ȼ When the refrigerator is turned on, the display screen will fully illimunate for 3 seconds and the starting up alert will chime when then the display screen enters the normal operation status. (For the initial connection to power, the default set temperature of the refrigerator section and the freezer section will be 39 °F and 0 °F respectively). ȼ It will display the set temperature of both refrigerator and freezer rooms when there is no error. ATTENTION The actual control panel may dier from model to model.15
Under normal circumstances, the display light will go out after 30 seconds in lock state. Button operation on display panel will activate the display screen. Opening the door will also activate the display screen, the display light willˏ dim and turn o when the door is closed. When “Error code” occurs, theˏ display screen will illuminate and turn o after 30 seconds. Operating instructions Lock/Unlock In the unlock state, press and hold the button for 3 seconds to enter the lock state and the buzzer sound rings. In the lock state, press and hold the button for 3 seconds to enter the unlock state and the buzzer sound rings. It will enter the lock state if there is no opening door action or any button operation within 30 seconds. The alarm sound can be stopped by pressing any one button in lock state, but all other button operations need to be performed in unlock state. Refrigerator temperature setting Click the button to change the set temperature of refrigerator section, Each time click the temperature setting will take eect after the display panel is locked. Each time click the temperature setting will take eect after the display panel is locked. or , the set temperature will drop 1°F or will rise 1°F. The Long press button and 4 seconds to turn on or turn o the fridge section. Freezer temperature setting Click the button to change the set temperature of freezer section, or , the set temperature will drop 1°F or will rise 1°F. The Mode setting Press the button to start the super cool mode. The icon will shine and the fridge section will be set at 34°F. The super cool mode will automaticallyˏ reset to normal setting after 1 hour from when the temperature in the fridge roomˏ reaches 34°F. It will also automatically revert to normal setting if the temperatureˏ in the fridge room cannot reach 34°F within 6 hours after pressing the butto* . When the refrigerator exits super cool mode, the set temperature of fridge section will revert to the set temperature prior to entering super cool mode. Press the button to start the super freeze mode. The icon will shine and the freezer section will be set to -7°F. The super freeze mode will automatically revert to normal setting after 26 hours from pressing the button . When the refrigerator exits the super freeze mode, the set temperature of freezer section will revert back to the set temperature before super freeze mode. Press the switch button When the function setting of the ice maker is eective, the indicator light of to set/cancel the function of the ice maker. the ice maker will be on, otherwise it will be o. Long press the ice making section. and 4 seconds to 01.*ˏ+*ˏ+.ˏ01.*ˏ+"" the refrigerating16
Filter element time reset ȼ Hold down "+.ˏȈˏ/!+* /ˏ"0!.ˏ"%(0!.ˏ%/ˏ.!,(! Ȑˏˏ0ˏ3%((ˏ.!/!0ˏ0$!ˏ"%(0!.ˏ $*#!ˏ0%)!(%*!ˏ* ˏ.!)%* ˏ5+1ˏ0+ˏ.!,(!ˏ*!40ˏ0%)!ˏ3$!*ˏ0$!ˏ"%(0!.ˏ$*#!ˏ%/ˏ 1!Ȑˏ Celsius transformation 3ˏ/!+* / to achieve Celsius Fahrenheit conversion "1*0%+*Ȑ ȼ Long press the Forcing AP mode ȼ Long press for 3ˏ/!+* / to forcibly set the wireless network module of theˏrefrigerator to AP mode and display AP in the temperature display area. Afterˏthe module enters AP mode successfully, it automatically exits AP mode, andˏthe temperature display area restores to normal temperature display. Sabbath mode and for 3ˏ/!+* / to enter or exit the ȼ Press /%)1(0*!+1/(5 the Sabbath mode. ȼ If the refrigerator is connected to the Internet, you can enter or exit the Sabbath mode through the corresponding function buttons in the SmartHome refrigerator control interface, and the ,, can select the automatic exit time. ȼ 6ˏ/!+* / after entering the Sabbath mode lock, the display goes out, the buzzer doesˏnot sound, the door opening lamp does not light up, and the distributor onlyˏdisplays the selected function in low brightness. ȼ $!*ˏ0$!ˏ,,ˏ!*(!/ˏ0$!ˏ0$ˏ"1*0%+*ȑˏ0$!ˏ,,ˏ)5ˏ/!* ˏˏ+))* ˏ0+ 01.*ˏ+""ˏ0$!ˏ%!ˏ)'!.ˏ"1*0%+*ˏ0ˏ0$!ˏ/)!ˏ0%)!Ȑ Anti-condensation heating element on/o mode. ȼ Press the ˏ* ˏˏˏˏˏˏ"+.ˏȊˏ/!+* /ȑˏ0$!ˏ$.!*$!%0ˏ%+*ˏ˜/$! ȑˏ* ˏ0$!*ˏ press the button , and the anti-condensation heating wire shutdown function is successfully set. ȼ Under the above settings, unlock and enter again, continue to press the and for 4ˏ/!+* /, the $.!*$!%0 icon no longer flashes, press the button toˏrelease the anti-condensation heating element off function. Open door prompt sound switch
- At the same time, press and button 4 seconds to activate or deactivate, close or open the door prompt tone. ATTENTION
- If the fridge section or freezer drawer is not closed after power-on, the app or refrigerator will give an alarm. It will call three times after exceeding 2 minutes, and then add one alarm every 1 minute.17
..+. indication ȼ When the following !..+.ˏ+ !/ appear on the display screen, it indicates a problemˏwith the refrigerator. Although the refrigerator in the following !..+. case canˏstill provide cool/freeze functions, the user should contact maintenanceˏpersonnelˏ0+ˏensure the normal use of refrigerator. &SSPS Code &SSPS Description EH The humidity sensor fails
The sensor at the bottom of SFGSJHFSBUPS ice maker fails CC The defrosting sensor in ice making chamber fails C9 The sensor in ice making chamber fails
The communication between main control board and ice making board fails
The initialization of SFGSJHFSBUPS ice maker fails
The initialization of GSFF[FS ice maker fails
The temperature sensor in the SFGSJHFSBUPS chamber fails
The temperature sensor in the GSFF[FS chamber fails E5 Frosting sensor for freezing fails
The communication between display board and main control board fails E7 The ambient temperature fails
The sensor at the bottom of GSFF[FS ice maker fails
'SFF[FS ice maker fails to turn over ice ATTENTION The quick-freezing function is designed to maintain the nutritional value of the food in the freezer. It can freeze the food in the shortest time. If a large amount of food is frozen at one time, it is recommended that the user turn on the quick-freezing function and put the food in. At this time, the freezing speed of the freezer compartment is increased, which can quickly freeze the food, effectively lock the nutrition of the food, and facilitate storage.18
Dispensing water and Ice ȼ The ice/water dispenser is located on the outside of refrigerating chamber door. It oers a choice of cubed or crushed ice, or cold water. The dispenser only works when the refrigerating chamber door is closed.
1. Dispensing cold water
ȼ Keep pressing the buttons WATER until the indicator turns on. ȼ Push the container in the direction of dispense paddle, Cold water starts to flow into the container. ȼ Remove the container from dispense water paddle and end the exporting of water.
2. Dispensing crushed ice
ȼ Keep pressing the buttons of CRUSHED until the signal turns up. ȼ Make the container tight with mouth of water dispenser to prevent the side jet. ȼ Press the container in the direction of dispense paddle. Fill the container with crushed ice. ȼ Remove the container from dispense paddle and end the exporting of water.
3. Dispensing ice cubes
t When the user presses the dispensing paddle for water/ice, there will be a 2 seconds delay. When taking ice, the user should try to keep the container close to the ice outlet to prevent the ice from splashing.
ȼ Keep pressing the buttons CUBED until the signal lights up. ȼ Push the container in the direction of dispense paddle, Ice cubes start to fall into the container. Remove the container from dispense paddle and end the exporting of ice. ȼ ATTENTION19
2. Energy consumption report
4. Refrigerator self-inspection
- Set the Sabbath mode POST /v1/api/plugin/setˏSabbathˏMode. ATTENTION The application (SmartHome) interface (about the demand response interface) allows the user to operate according to the smart grid signal intervention mode20
Tips on storing food Freezer compartment
- The freezer is designated for the storage of food frozen at very low temperature, long-term storage of frozen food, and for the production of ice.
- Only use the shelves in the door of the freezer to store frozen food, not for storing hot food designated for freezing.
- +ˏ*+0ˏ,10ˏ$+0ˏ"++ ˏ* ˏ".+6!*ˏ"++ ˏ*!40ˏ0+ˏ!$ˏ+0$!.Ȑˏ$!ˏ".+6!*ˏ"++ ˏ)5ˏ0$3Ȑ
- When freezing fresh food (such as meat, fish or chopped meat), cut them into parts that can be used at the same time.
- Storing frozen food: instructions are usually stated on the packages, which must be followed. If there is no information on the packaging, food should not be stored for longer than three months from the date of purchase.
- When purchasing frozen food, make sure that it was frozen at a suitable temperature and that the packaging is not damaged.
- Frozen food should be kept in suitable packages to retain the quality and should be returned to the freezer compartment as soon as possible.
- If a package of frozen food shows moisture or abnormal bulging, it is probable that it was stored at the wrong temperature and the content is spoiled.
- The storage period for frozen food depends on the room temperature, the thermostat setting, the frequency of opening the door of the freezer, the type of food and the time of transporting the product from the shop to the household. Always follow the instructions printed on the packaging and never exceed the maximum storage time stated on the package. Cooling compartment
- To reduce moisture and subsequent ice build-up, never put liquid into the refrigerator in unsealed containers. Frost tends to concentrate in the coolest parts of the evaporator. Storing uncovered liquids results in a more frequent need for defrosting.
- Never put warm foods in the refrigerator. These should first cool down at room temperature and then be placed so as to ensure adequate air circulation in the refrigerator.
- Foods or food containers should not touch the back wall of the refrigerator because they could freeze to the wall. Do not keep regularly opening the door of the refrigerator.
- Meat and clean fish (packed in a package or plastic foil) can be placed in the refrigerator, which can be used in 1–2 days.
- Fruit and vegetables without packaging can be placed in the part designated for fresh fruit and vegetables. Recommended Temperature The optimal temperature setting for food storage:
- Fridge: 4 °C(39 °F), Freezer: -18 °C(0 °F) ATTENTION The optimal temperature setting of each compartment depends on the ambient temperature. Above optimal temperature is based on the ambient temperature of '$.21
CLEANING AND MAINTENANCE
Defrosting ȼ The refrigerator is made based on the air-cooling principle and thus has automatic defrosting function. Frost formed due to change of season or temperature may also be manually removed by disconnection of the appliance from power supply or by wiping with a dry towel. Cleaning of stationary door bin ȼ According to the direction arrow in the figure below, use both hands to gently squeeze the bin and push it upward to remove it from the door. ȼ After washing the bin, re-install at the designated door section supports. Removal of adjustable door bin
- Remove the upper stationary door bin above the adjustable door bin. Squeeze and hold the handle underneath the adjustable door bin as shown in the image below. Lift the adjustable door bin upwards past the adjustable door bin track. To return the adjustable door bin to the door bin track, squeeze and hold the handle underneath the adjustable door bin and lower onto the adjustable door bin track until it is in the desired position. ATTENTION
- Using both hands to support the adjustable door bin, squeeze and hold the handleunderneath to support the items weight in the bin.• Position bin to the desired height by squeezing the handle to adjust height up ordown and release the handle to lock in place. Always confirm bin is secure after moving.
Cleaning of glass shelf Slot Upper end of fixed leg Lower end of fixed leg Please dismantle the cantilever shelf according to the arrows shown as above:
1. Please hold the front edge of shelf, and tilt the shelf inwards until the lower
end of fixed leg is separated from the slot of supporting iron;
2. Uplift the whole shelf until it can not rise anymore;
3. Take out the shelf horizontally.
During installation, put the upper end of the fixed leg into one of the upper slots on the supporting iron first and then put the lower end of the fixed leg into the third slot on the lower part of the supporting iron.23
Cleaning of ice storage unit ȼ When you need to use more ice than normally dispensed from the dispenser or need to clean the ice storage unit, you can take out the ice storage unit however it must be replaced immediately for proper function. ȼ Hold the handle of the ice storage unit with your hand, press it gently, and then pull it out horizontally. ATTENTION t In the process of removing the ice storage unit, Ice cubes may fall into refrigerator section, please remove fallen ice cubes immediately to reduce water spilling. If the ice cubes are not used for a long time, please clean them up in time. If the ice storage unit cannot be installed in place, rotate the tail as illustrated below to align it with the corresponding position in the ice tank.
Cleaning of freezer drawer
Upper freezer drawerIce storage boxLower freezer drawer Upper freezer drawer: ȼ Open the freezing chamber door to the maximum %/0*!, lift the tail of theˏ upper drawer of the freezing chamber, take out the upper freezer drawer. ȼ The ice storage box can be taken out for cleaning. Lower freezer drawer: ȼ Open the freezing chamber door to the maximum distance, lift the end of the lower freezer drawer and lift it up. ATTENTION Note: Don’t remove the lower freezer drawer if not necessary. Stop using Power failure: In case of power failure, even if it is 1.%*#ˏ3.)ˏ)%!*0ˏ0!),!.01.!, foods inside the appliance can be kept for several hours; during the power failure, the times of door opening shall be reduced, and no more fresh food shall be put into the appliance. Long-time nonuse: The appliance shall be unplugged and then cleaned; then the doors are left open to prevent odor. Moving: Before the refrigerator is moved, take all objects inside out, fix the glass partitions, vegetable holder, freezing chamber drawers and etc. with tape, and tighten the leveling feet; close the doors and seal them with tape. During moving, the appliance shall not be laid upside down or horizontally, or be vibrated; the inclination during movement shall be no more than 45°. ATTENTION The appliance shall run continuously once it is started. Generally, the operation of the appliance shall not be Jnterrupted; otherwise the service life may be impaired.Foods can be preserved for a couple of hours even in summer in case of power failure; it is recommended to reduce the frequency of opening door.25
TROUBLESHOOTING The following simple issues can be handled by the user. Please call the after-sale service department if the issues are not solved. Problem Possible trouble shooting steps Failed operation Odor Long-time operation of the compressor Light fails to illuminate Door can not be properly closed Loud noises ȼ Check whether the appliance is connected to power or whether the plug is in well contact ȼ Check whether the voltage is too low ȼ Check whether there is a power failure or partial circuits have tripped ȼ Odorous foods shall be tightly wrapped ȼ Check whether there is any rotten food ȼ Clean the inside of the refrigerator ȼ Long operation of the refrigerator is normal during warm ambient temperature ȼ When the ambient temperature is high it is not suggestible having too much food in the appliance at the same time ȼ Food should be cool before being put into the appliance ȼ The doors are opened too frequently ȼ Check whether the refrigerator is connected to power supply and whether the illuminating light is damaged ȼ Have the light replaced by a specialist ȼ The door is obstructed by contents ȼ The refrigerator is tilted ȼ Check whether the floor is level and whether the refrigerator is placed stably ȼ Check whether accessories are placed at proper locations26
Problem Possible reason Door seal fails to be tight
- Remove foreign matters on the door seal
- Heat the door seal and then cool it for restoration (or blow it with an electrical drier or use a hot towel for heating) Water pan overflows
- 2!./0+'%*#ˏ+"ˏ0$!ˏ.!".%#!.0+.ˏ+.ˏ+*0!*0/ˏ+*0%*%*#ˏ0+ˏ )1$ˏ30!.ˏ.1*+""ˏ.!ˏ.!(!/%*#ˏ0++ˏ)1$ˏ30!.
- The doors are not closed properly, resulting in frosting due to entry of air and increased water due to defrosting Hot housing
- Heat dissipation of the built-in condenser via the housing, which is normal when housing becomes hot due to high ambient temperature, storage of too much food or shutdown of the compressor is shut down, provide sound ventilation to facilitate heat dissipation Surface condensation
- Condensation on the exterior surface and door seals of the refrigerator is normal when the ambient humidity is too high. Just wipe the condensate with a clean towel. Abnormal noise
- Buzz: The compressor may produce buzzes during operation, and the buzzes are loud particularly upon start or stop. This is normal.
- Creak: Refrigerant flowing inside of the appliance may produce creak, which is normal.27
Federal Communications Commission (FCC) Compliance Statement for USA This device complies with part 15 of the FCC rules. Operation is subject to the following two conditions: (1) This device may not cause harmful interference, and (2) this device must accept any interference received, including interference that may cause undesired operation. Note: This equipment has been tested and found to comply with the limits for a Class B digital device, pursuant to part 15 of the FCC Rules. These limits are designed to provide reasonable protection against harmful interference in a residential installation. This equipment generates, uses and can radiate radio frequency energy and, if not installed and used in accordance with the instructions, may cause harmful interference to radio communications. However, there is no guarantee that interference will not occur in a particular installation. If this equipment does cause harmful interference to radio or television reception, which can be determined by turning the equipment off and on, the user is encouraged to try to correct the interference by one or more of the following measures:
- Reorient or relocate the receiving antenna.
- Increase the separation between the equipment and receiver.
- Connect the equipment into an outlet on a circuit different from that to which the receiver is connected.
- Consult the dealer or an experienced radio/TV technician for help. This equipment complies with FCC radiation exposure limits set forth for an uncontrolled environment. Industry Canada (IC) Compliance Statement for Canada This device complies with Industry Canada license-exempt RSS standard(s). Operation is subject to the following two conditions: (1) this device may not cause interference, and (2) this device must accept any interference, including interference that may cause undesired operation of the device. CAN ICES-003(B)/NMB-003(B) Midea is not responsible for any changes or modifications not expressly approved by Midea. Such modifications could void the user’s authority to operate the equipment. For model: MWB-S-WB01
Name, address and telephone number
Model number and serial number
A clear, detailed description of the problem
Proof of purchase including dealer or retailer name and address IF YOU NEED SERVICE:
1. Before contacting us to arrange service, please determine whether your product requires
repair. Some questions can be addressed without service. Please take a few minutes to review the Troubleshooting section of the User Manual, or visit http://us.Midea.com/support
2. All warranty service is provided exclusively by our authorized Midea Service Providers, in
the U.S. and Canada. Midea Customer Service In the U.S.A. or Canada, call 1-866-646-4332. If outside the 50 States of the United States or Canada, contact your authorized Midea dealer to determine whether another warranty applies.
1 YEAR PARTS AND LABOR
FIRST YEAR LIMITED WARRANTY (PARTS AND LABOR) Midea will repair or replace, without charge, any defects due to faulty materials or workmanship for one full year from the date of purchase. 8-12 years updates and technical supports will be available which may help customers plan to securely use and maintain the device for an appropriate amount of time. For further detail of warranty coverage and warranty repair information, visit www.midea.com or call 1-866-646-4332. Consumer will be responsible for:
Diagnostics, removal, transportation and reinstallation cost required because of service.
Costs of service calls that are a result of items listed under NORMAL RESPONSIBILITIES
This warranty applies only to products in ordinary household use, Home owners and Individual home users are the expected customers for this device, and the consumer is responsible for the items listed below:
1. Proper use of the appliance in accordance with the instructions provided with the product.
2. Routine maintenance and cleaning necessary to keep the good working condition.
3. Proper installation by an authorized service professional in accordance with instructions
provided with the appliance and in accordance with all local plumbing, electrical and / or gas codes.
4. Proper connection to a grounded power supply of sufficient voltage, replacement of
blown fuses, repair of loosened connections or defects in house wiring.
5. Expenses for making the appliance accessible for servicing.
6. Damages to finish after installation.
YOUR SOLE AND EXCLUSIVE REMEDY UNDER THIS LIMITED WARRANTY SHALL BE PRODUCT REPAIR OR REPLACEMENT AS PROVIDED HEREIN. Service must be provided by a Midea designated service company. This limited warranty is valid only in the 50 States of the United States or Canada and applies only when the major appliance is used in the country in which it was purchased. This limited warranty is effective from the date of original consumer purchase. Proof of original purchase date is required to obtain service under this limited warranty. WARRANTY29
1. Failure caused by damage to the unit while in your possession (other than damage
caused by defect or malfunction), by its improper installation, or by unreasonable use of the product, including without limitation, failure to provide reasonable and necessary maintenance or to follow the written Installation and Instruction Manual.
2. Products purchased “as-is” or refurbished are not covered by this warranty.
3. Food loss caused by refrigerator or freezer failure.
4. Service calls to repair or replace consumables such as water filters, light bulbs airfilters
etc., or handles, knobs and other cosmetic parts.
5. Product that has been transferred from its original owner.
6. Interior or exterior rust on the unit.
7. Damages caused by services performed by persons other than authorized Midea servicers;
use of parts other than Midea replacement parts; obtained from persons other than such Midea customer service; or external causes such as abuse, misuse, inadequate power supply or acts of God.
8. Service calls resulting from improper installation of your product.
9. Service calls to instruct you on the use of your product.
10. Surcharges including, but not limited to, any after hour, weekend, or holiday service calls,
tolls, ferry trip charges, or mileage expense for service calls to remote areas, including the state of Alaska.
11. If the unit is put to commercial, business, rental, or other use or application other than for
consumer use, we make no warranties, express or implied, including but not limited to, any implied warranty of merchantablility or fitness for particular use or purpose.
12. Product that has been removed outside the USA or Canada.
13. Products without original serial numbers or products that have serial numbers which have
been altered or cannot be readily determined. NOTE: Some states do not allow the exclusion or limitation of incidental or consequential damages. So this limitation or exclusion may not apply to you. The cost of repair or replacement under these excluded circumstances shall be borne by the customer.
DISCLAIMER OF IMPLIED WARRANTIES
IMPLIED WARRANTIES, INCLUDING ANY IMPLIED WARRANTY OF MERCHANTABILITY OR IMPLIED WARRANTY OF FITNESS FOR A PARTICULAR PURPOSE, ARE LIMITED TO ONE YEAR OR THE SHORTEST PERIOD ALLOWED BY LAW. Some states and provinces do not allow limitations on the duration of implied warranties of merchantability or fitness, so this limitation may not apply to you. This warranty gives you specific legal rights, and you also may have other rights that vary from state to state or province to province.