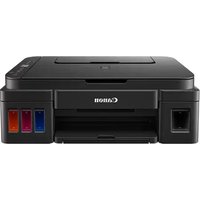
USER MANUAL PIXMA G2411 CANON
Read Safety and Important Information (addendum) first.
Connecting with Computer ...... page 4

![graph LR A["http://ij.start.canon"] --> B["Book Icon"] B --> C["OK"] C --> D["Video"]](/content/2026/04/655701/images/abef49c489730b67dc628028f123ecf299db31b1c49cc2cd2de001a00c503f88.jpg)


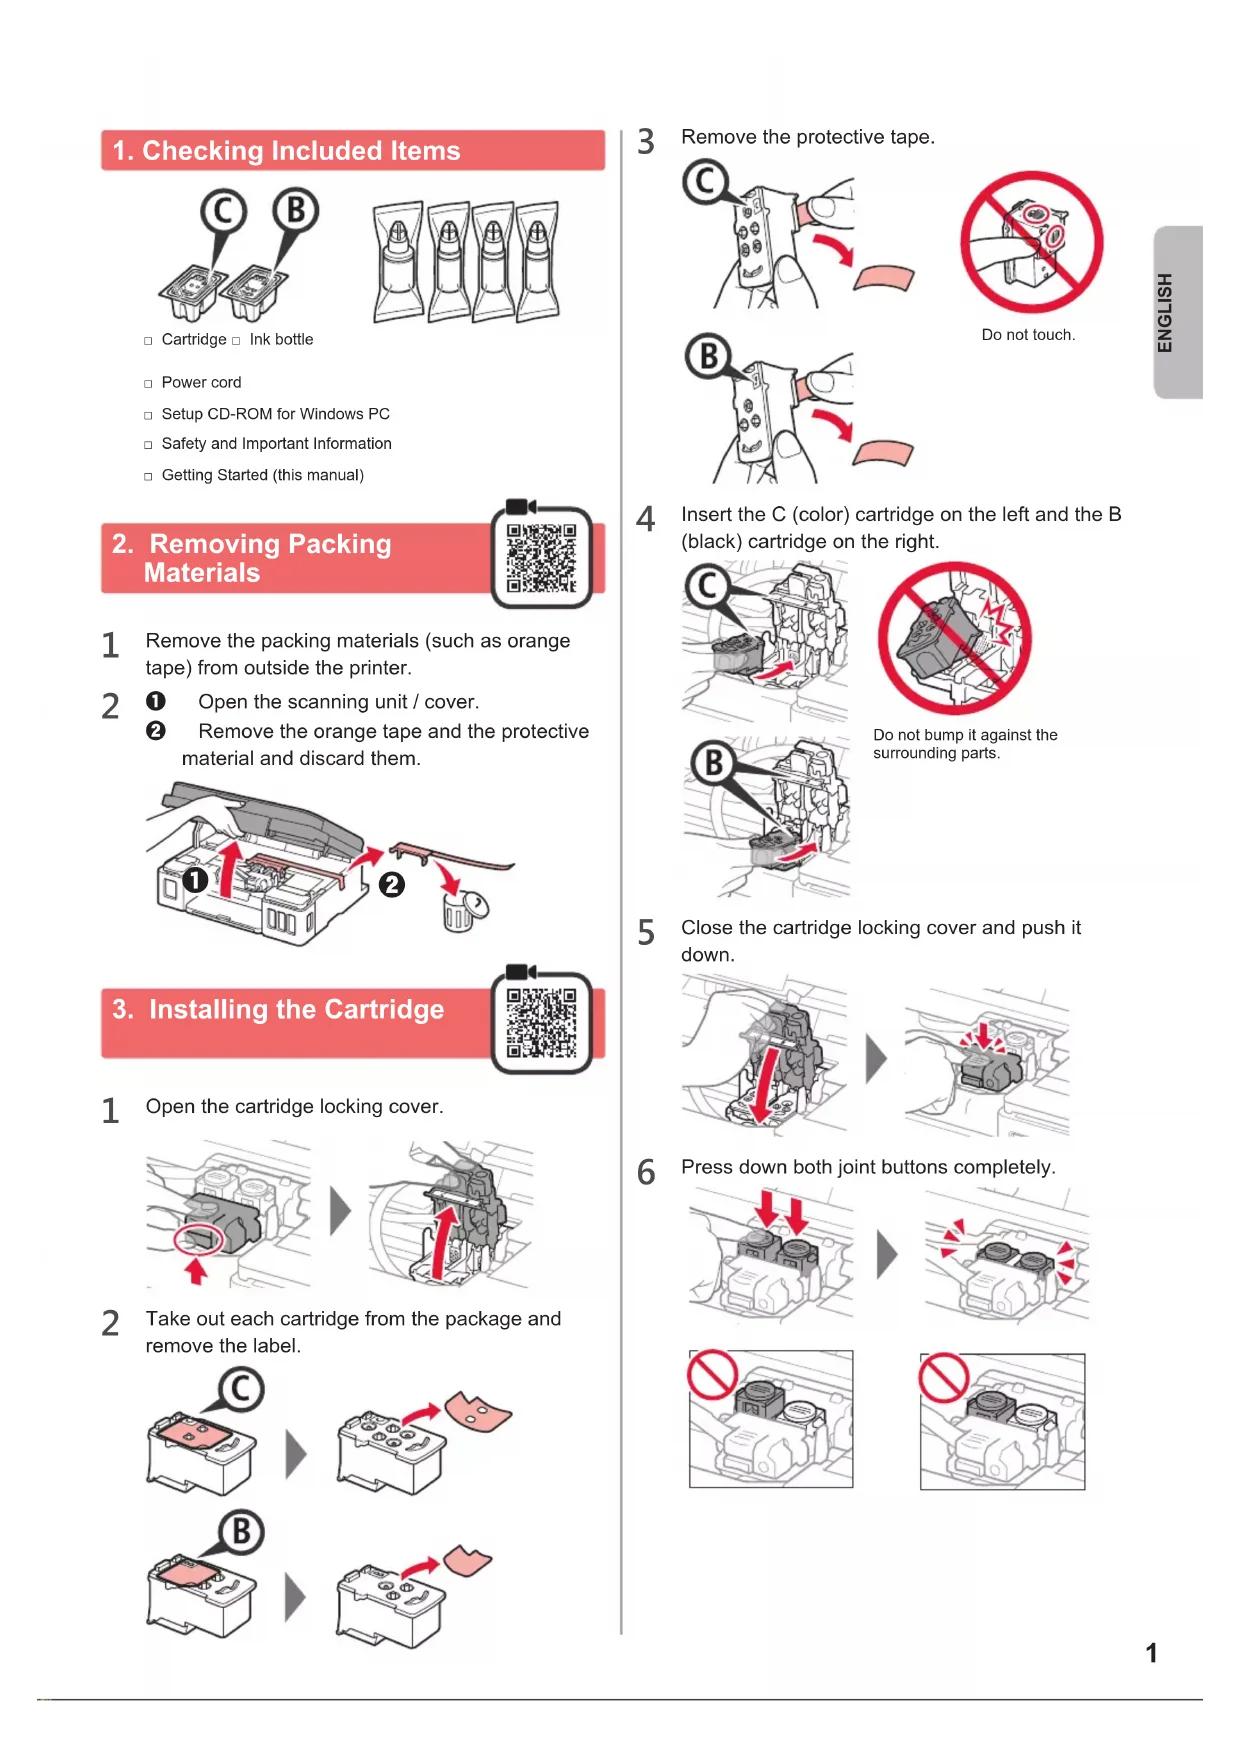
1. Checking Included Items

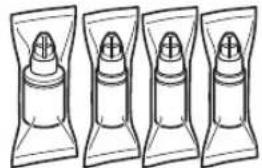
□ Cartridge □ Ink bottle
□ Power cord □ Setup CD-ROM for Windows PC □ Safety and Important Information □ Getting Started (this manual)
2. Removing Packing Materials

1 Remove the packing materials (such as orange tape) from outside the printer.
2 ① Open the scanning unit / cover.
② Remove the orange tape and the protective material and discard them.
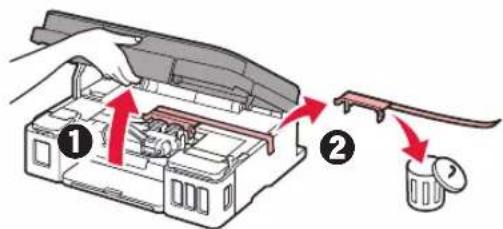
3. Installing the Cartridge

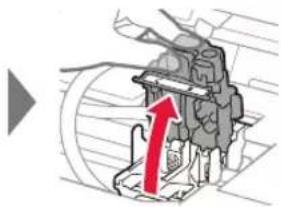
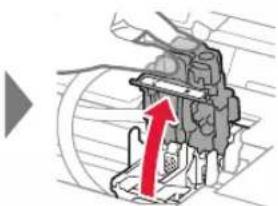
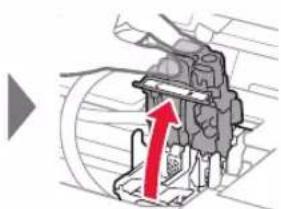
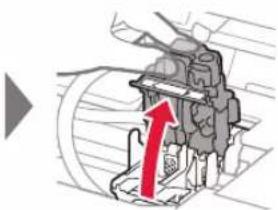
1 Open the cartridge locking cover.
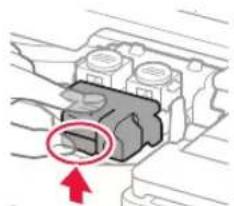
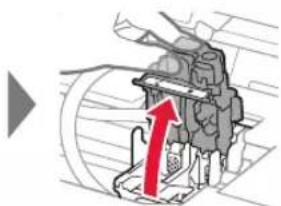
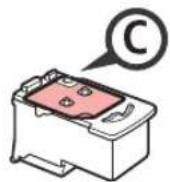
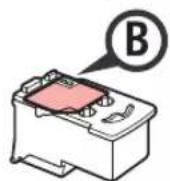
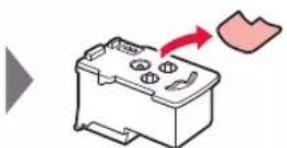
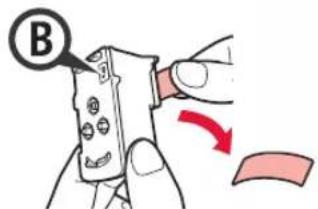
2 Take out each cartridge from the package and remove the label.
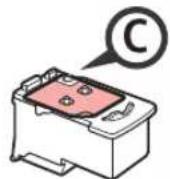
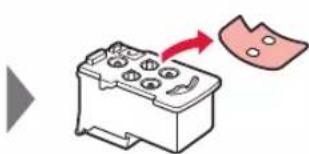
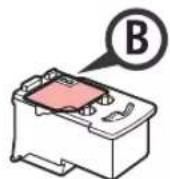
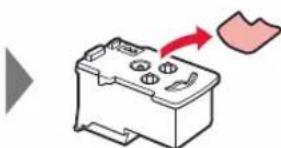
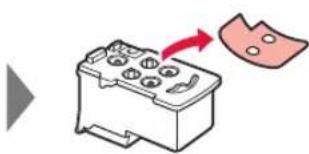
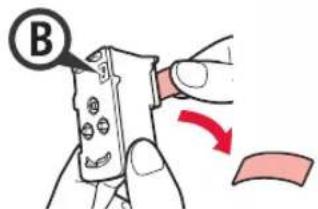
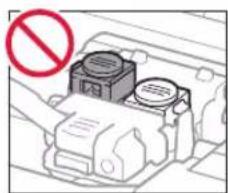
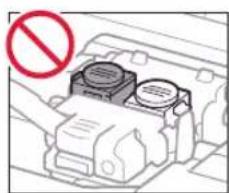
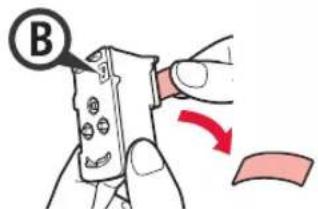
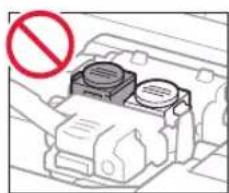
3 Remove the protective tape.
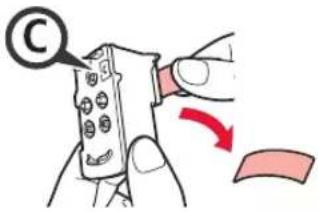

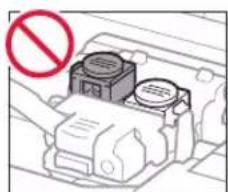
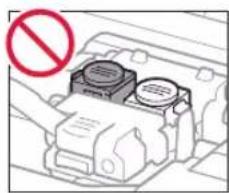
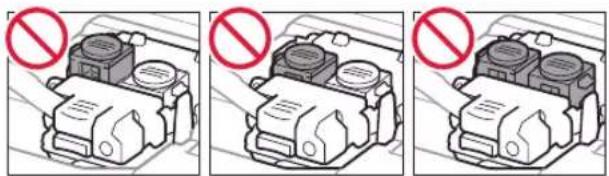
Do not touch.

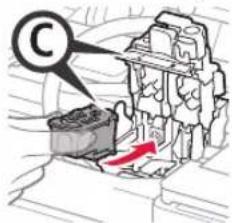
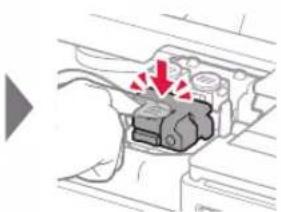
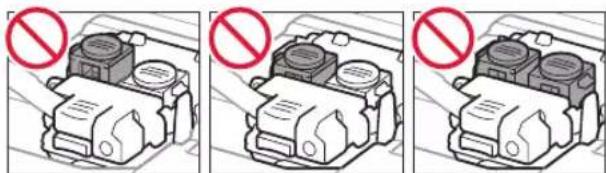
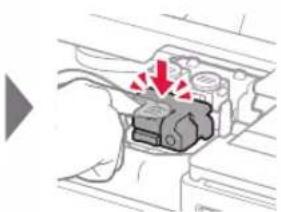
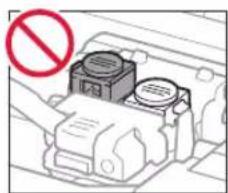
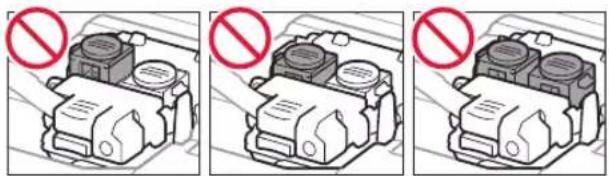
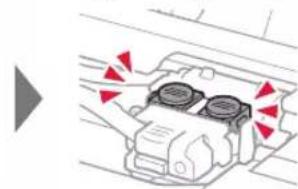
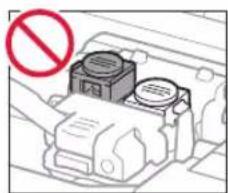
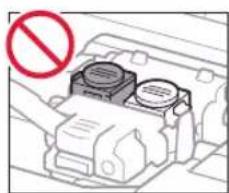
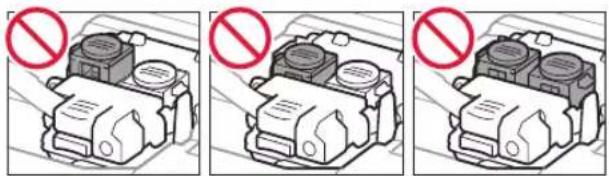
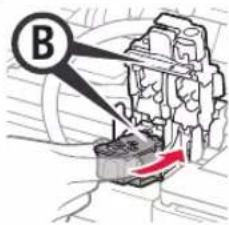
4 Insert the C (color) cartridge on the left and the B (black) cartridge on the right.
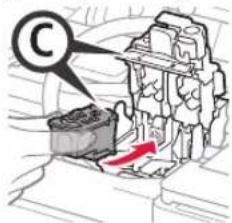

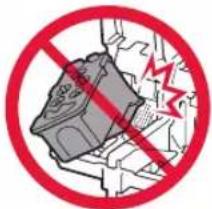
Do not bump it against the surrounding parts.
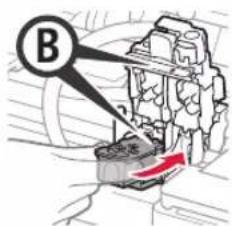
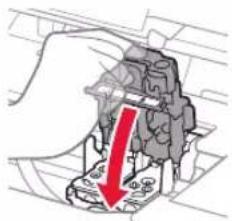
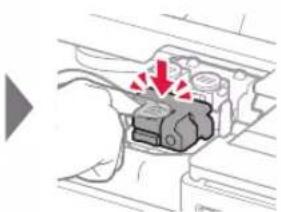
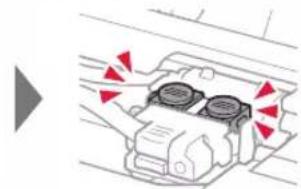
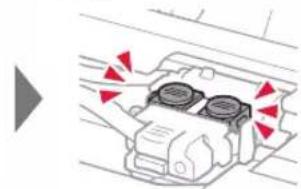
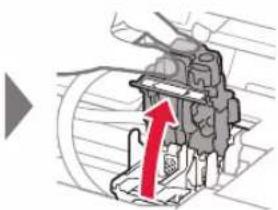
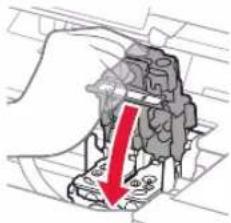
5 Close the cartridge locking cover and push it down.
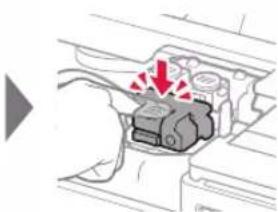
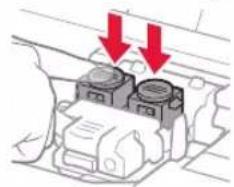
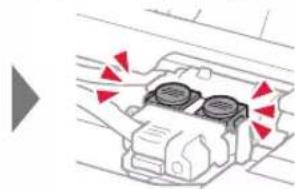
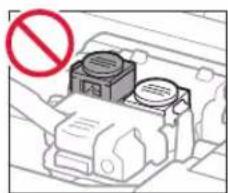
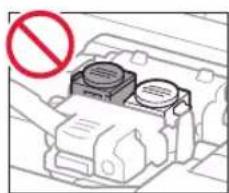
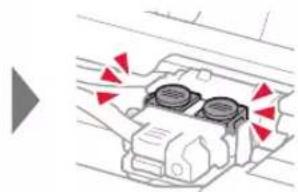
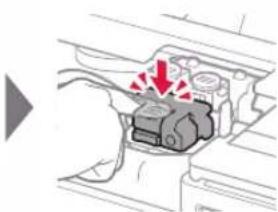
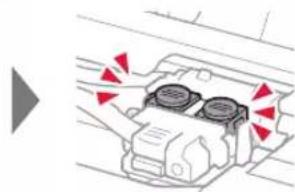
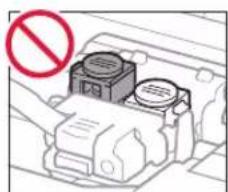
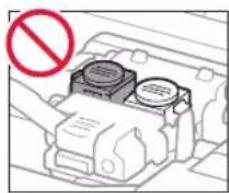
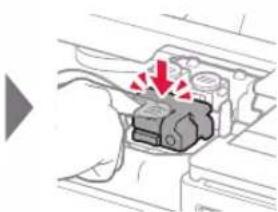
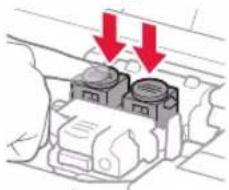
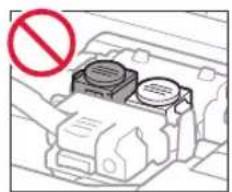
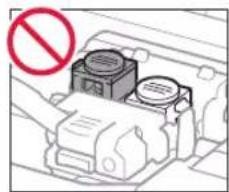
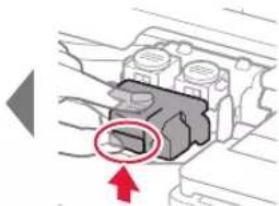
6 Press down both joint buttons completely.
4. Turning on Printer

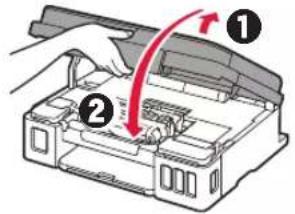
1 LIFT UP the scanning unit / cover, and then close it.
2 Connect the power cord.
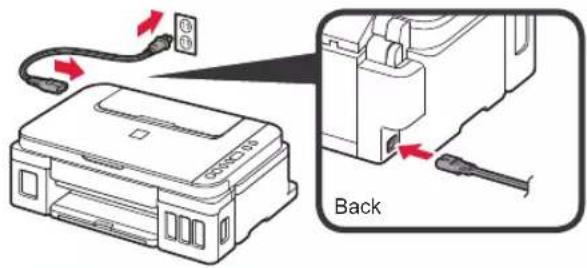
Do not connect any cables except the power cord yet.
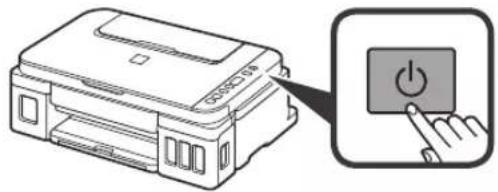
3 Press the ON button.
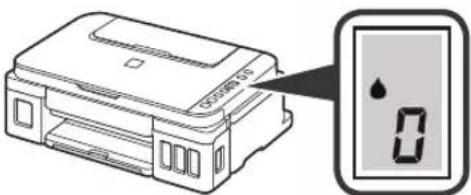
4 Confirm that (unk icon) and are displayed on the screen.
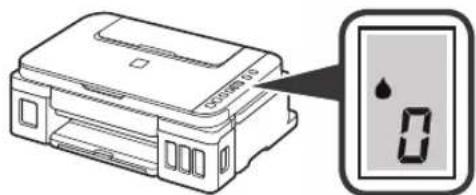
If a different screen appears, refer to "If any of the following screens appear" on page 3 to resolve the error.
5. Pouring Ink

This product requires careful handling of ink. Ink may splatter when the ink tanks are filled with ink. If ink gets on your clothes or belongings, it may not come off.
1 Open the scanning unit / cover.
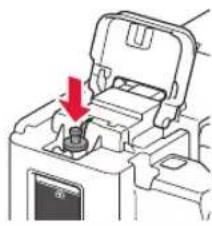
2 Open the ink tank cover.
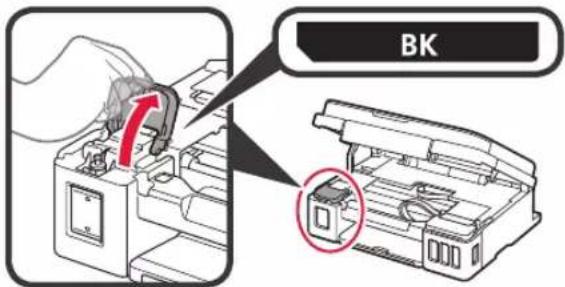
3 Grab and remove the tank cap of the ink tank.
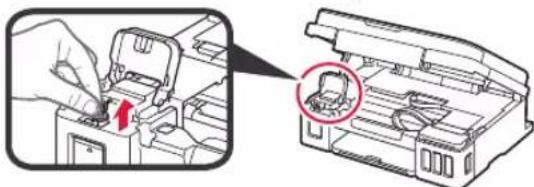
4 Hold the ink bottle upright and remove the bottle cap.

5 Insert the nozzle of the ink bottle into the inlet and stand the ink bottle upside down.
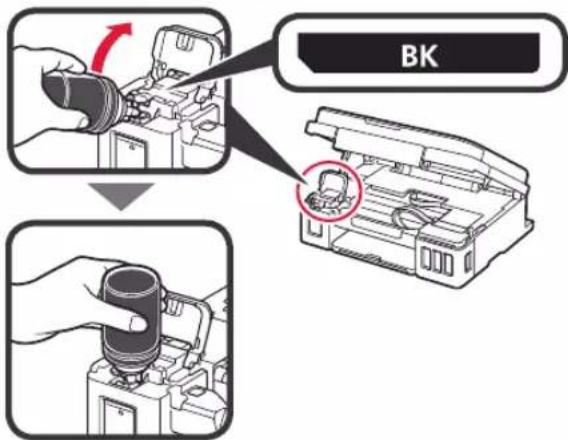
6 Pour all ink into the ink tank.
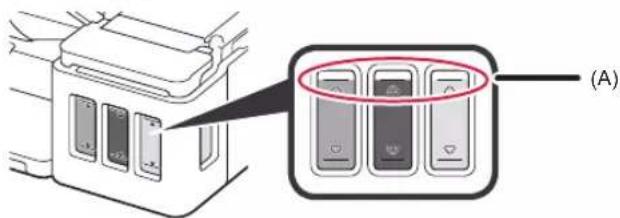
Confirm that the ink has been filled to the upper limit line (A).
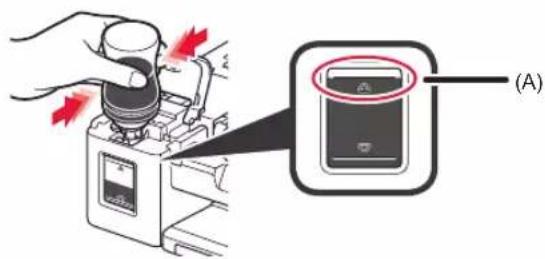
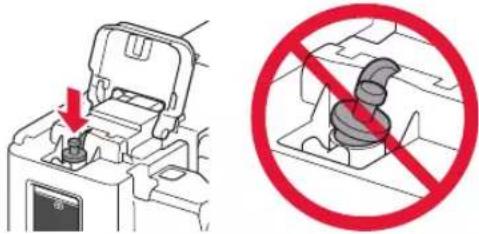
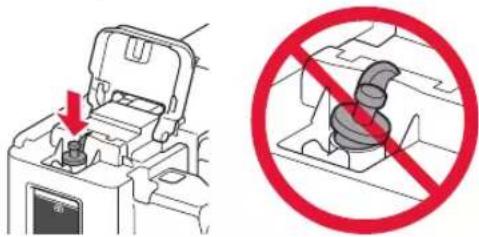
7 Replace the tank cap securely.
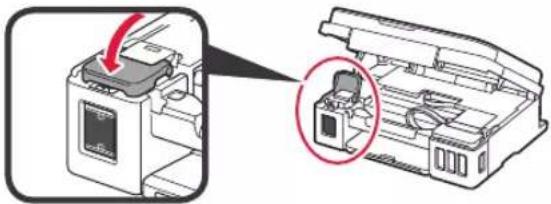
8 Close the ink tank cover.
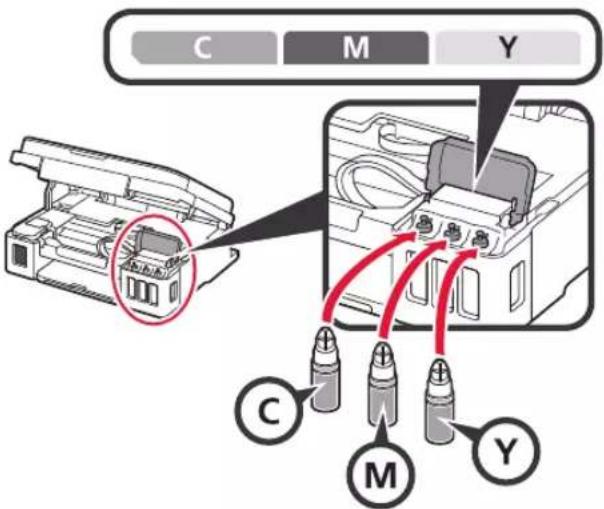
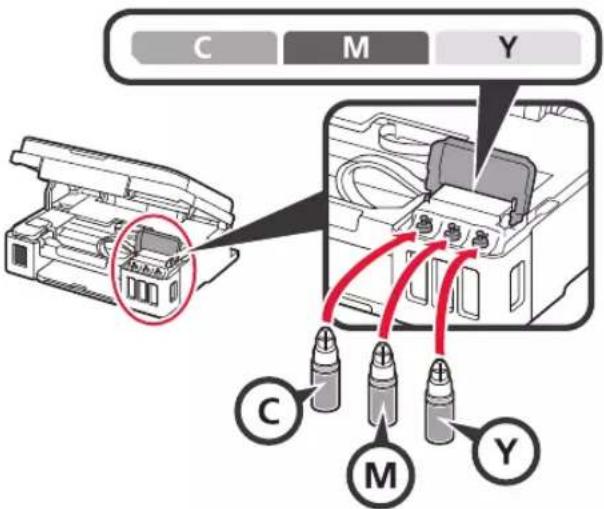
9 Repeat steps 2 to 8 to pour all ink into the corresponding ink tanks on the right according to the label.
Confirm that the ink has been filled to the upper limit line (A).
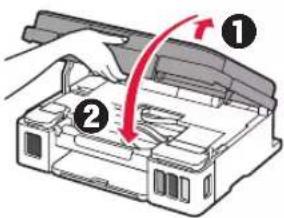
10 LIFT UP the scanning unit / cover, and then close it.
6. Preparing the Ink System
1 Press the Black button and confirm that (pink icon) disappears.
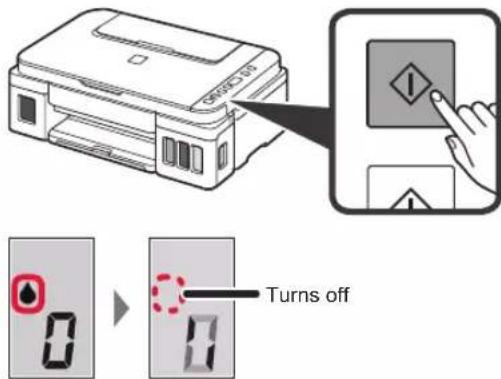
Ink preparation takes about 5 to 6 minutes. Proceed to the next page.

If any of the following screens appear
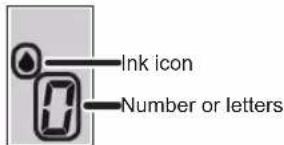
E04
The cartridges are not installed correctly.
→ "3. Installing the Cartridge" on page 1
E05
No cartridges are installed.
→ "3. Installing the Cartridge" on page 1
E09
The protective materials are not removed.
→ "2. Removing Packing Materials" on page 1
P08
Ink is not prepared normally.
Press the ON button to restart the printer, and then see "5. Pouring Ink" on page 2.
8
Waiting to prepare ink.
→ "6. Preparing the Ink System"
If you have not poured ink into the ink tank yet, see "5. Pouring Ink" on page 2.
For all other cases, refer to the Online Manual.
7. Connecting to Computer
You need a connection setup for each computer. Proceed with the setup from step 1 for each computer.
If you use the printer while it is not connected to a computer, confirm that γ is displayed on the printer's screen. The setup is now complete.
1 Start the setup file for either method A or method B.

Downloading from the Internet
① Open a web browser (etc.) on your computer. ② Input the following URL and access the Canon website.

③ Select Set Up.

④ Input the model name of your printer and click OK.

You can select a model name from the list.
⑤ Click Setup.

The procedures for Windows are shown below. If you are using a computer with an OS other than Windows, do the setup according to the on-screen instructions.
⑥ Click Download and download the setup file.
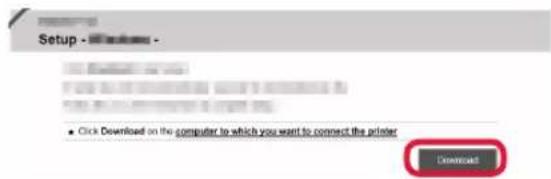
⑦ Execute the downloaded file.
Proceed to step 2 on the next page to continue.

Using Setup CD-ROM (Windows Only)
■ When using Windows 10 or Windows 8.1:
① Load the Setup CD-ROM in your computer.

② When the following message appears on the right side of your computer screen, click it.
![graph TD A["Laptop"] --> B["DVO RW Drive CANON_U"] B --> C["Iap to choose what happens with this disc"]](/content/2026/04/655701/images/db460ab28d7cd616b607fb5f9f9a4fa14a9e2fd4b6016f0b9bd9fdf9a31ec580.jpg)
When This Message Does Not Appear (or Has Disappeared)
- Click File Explorer on the taskbar.

- Click This PC on the left side of the opened window.
- Double-click the CD-ROM icon on the right side of the window.
If the contents of the CD-ROM appear, double-click Msetup4.exe.
- Proceed to step ④.
③ If the following screen appears, click Run Msetup4.exe.
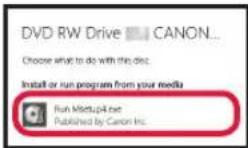
④ If the User Account Control dialog box appears, click Yes.
Proceed to step 2 to continue.
■ When using Windows 7:
① Load the Setup CD-ROM in your computer.

② When the AutoPlay screen appears, click Run Msetup4.exe.
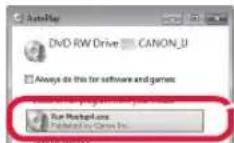
When AutoPlay Screen Does Not Appear
- Click Computer from the start menu.
- Double-click the CD-ROM icon on the right side of the opened window.
If the contents of the CD-ROM appear, double-click Msetup4.exe.
③ If the User Account Control dialog box appears, click Continue.
Proceed to step 2 to continue.
2 Click Start Setup.
If the following screen appears, click Exit.
![graph LR A["Start Setup"] --> B["Start Setup"] B --> C["On-Screen Instructions"] C --> D["Completed"] D --> E["Installation completed successfully."]](/content/2026/04/655701/images/d11b9abc64e577d20cc75a35bfe57cb8c2b37ac04fe8a6a95aa3ef016c19af53.jpg)
The setup is complete when it appears on the printer's screen. You can print from your computer.
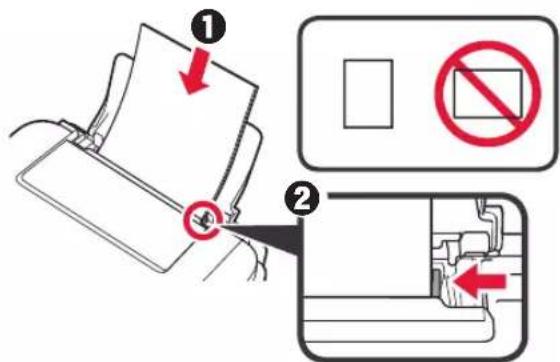
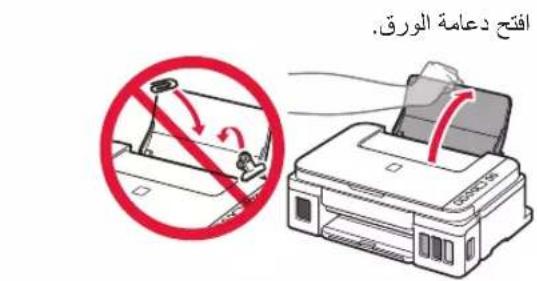
1 Open the paper support.
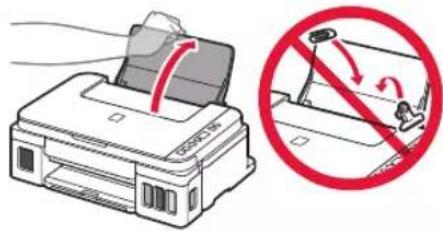
2 Slide the right paper guide to the end.
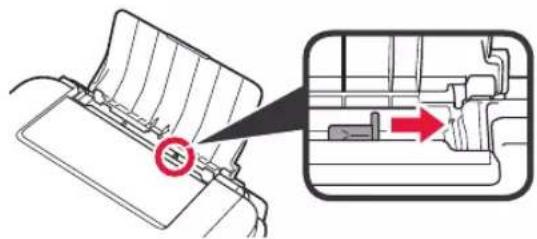
3 ① Load paper with the print side facing up.
② Slide the right paper guide to align it with the side of the paper stack.
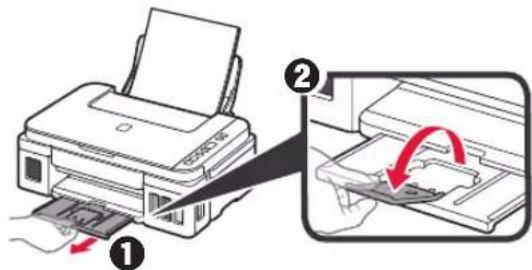
4 ① Pull out the paper output tray.
② Open the output tray extension.
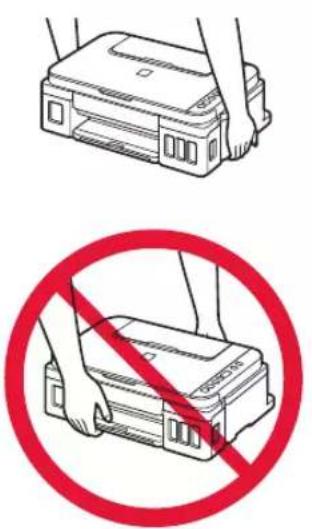
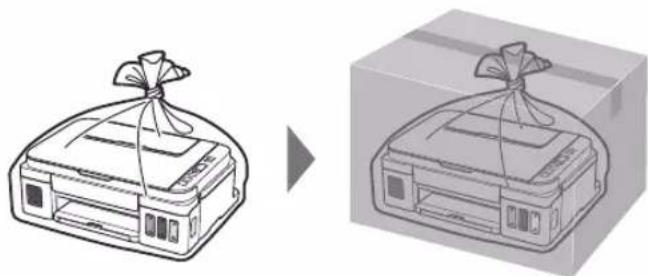
Transporting Your Printer
When relocating the printer, make sure of the following. Refer to the Online Manual for details.
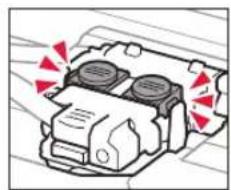
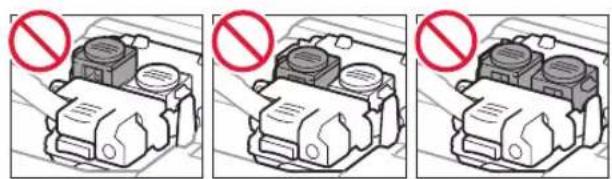
Check that both joint buttons are pressed down completely to avoid ink leaks.
Pack the printer in a plastic bag in case ink leaks.
- Pack the printer in a sturdy box so that it is placed with its bottom facing down, using sufficient protective material to ensure safe transport.
- Do not tilt the printer. Ink may leak.
- Please handle with care and ensure the box remains flat and NOT turned upside down or on its side, as the printer may be damaged and ink in the printer may leak.
- When a shipping agent is handling transport of the printer, have its box marked "THIS SIDE UP" to keep the printer with its bottom facing down. Mark also with "FRAGILE" or "HANDLE WITH CARE".

Do not touch.

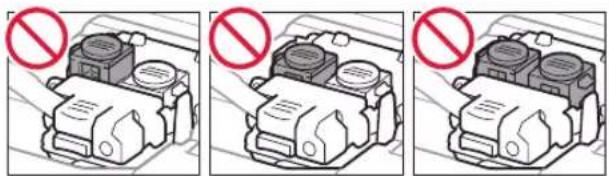
3. Installing the cartridge
2 Remove each cartridge from the package and remove the label.

Do not touch.
4 Insert the C (color) cartridge on the left and the B (black) cartridge on the right.
4. Turning on the printer

4 Confirm that the Ink (Ink) silicone and will be displayed on the screen.
7 Firmly replace the cartridge cover.
9 Repeat steps 2 to 8 to place all the ink in the corresponding ink cartridges on the right, according to the label.
4 ① Pull out the paper output tray.

Do not touch.

Do not touch.

Do not touch.


3
- Click Download on the computer to which you want to connect the printer

⑤ Click Settings.

Canon
http://ij.start.canon

6. manufacturers, customs officers

2

- Turn on the printer
1
3
4
Do not touch it.


◀
◀
3
4
Ink bottle



Access Online Manual
Access the Online Manual
Access the Online Manual
Access the Online Manual
Access the Online Manual