EMRH604X - Basket EAS Electric - Free user manual and instructions
Find the device manual for free EMRH604X EAS Electric in PDF.
| Brand | EAS Electric |
| Model | EMRH604X |
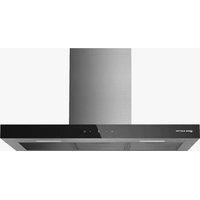
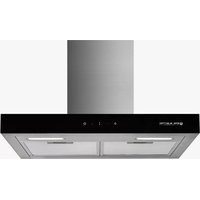
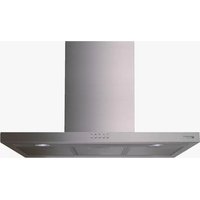
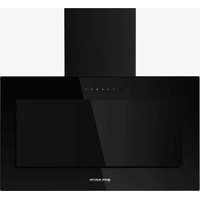
| Product type | Wall-mounted decorative hood |
| Color | Brushed stainless steel |
| Width | 60 cm |
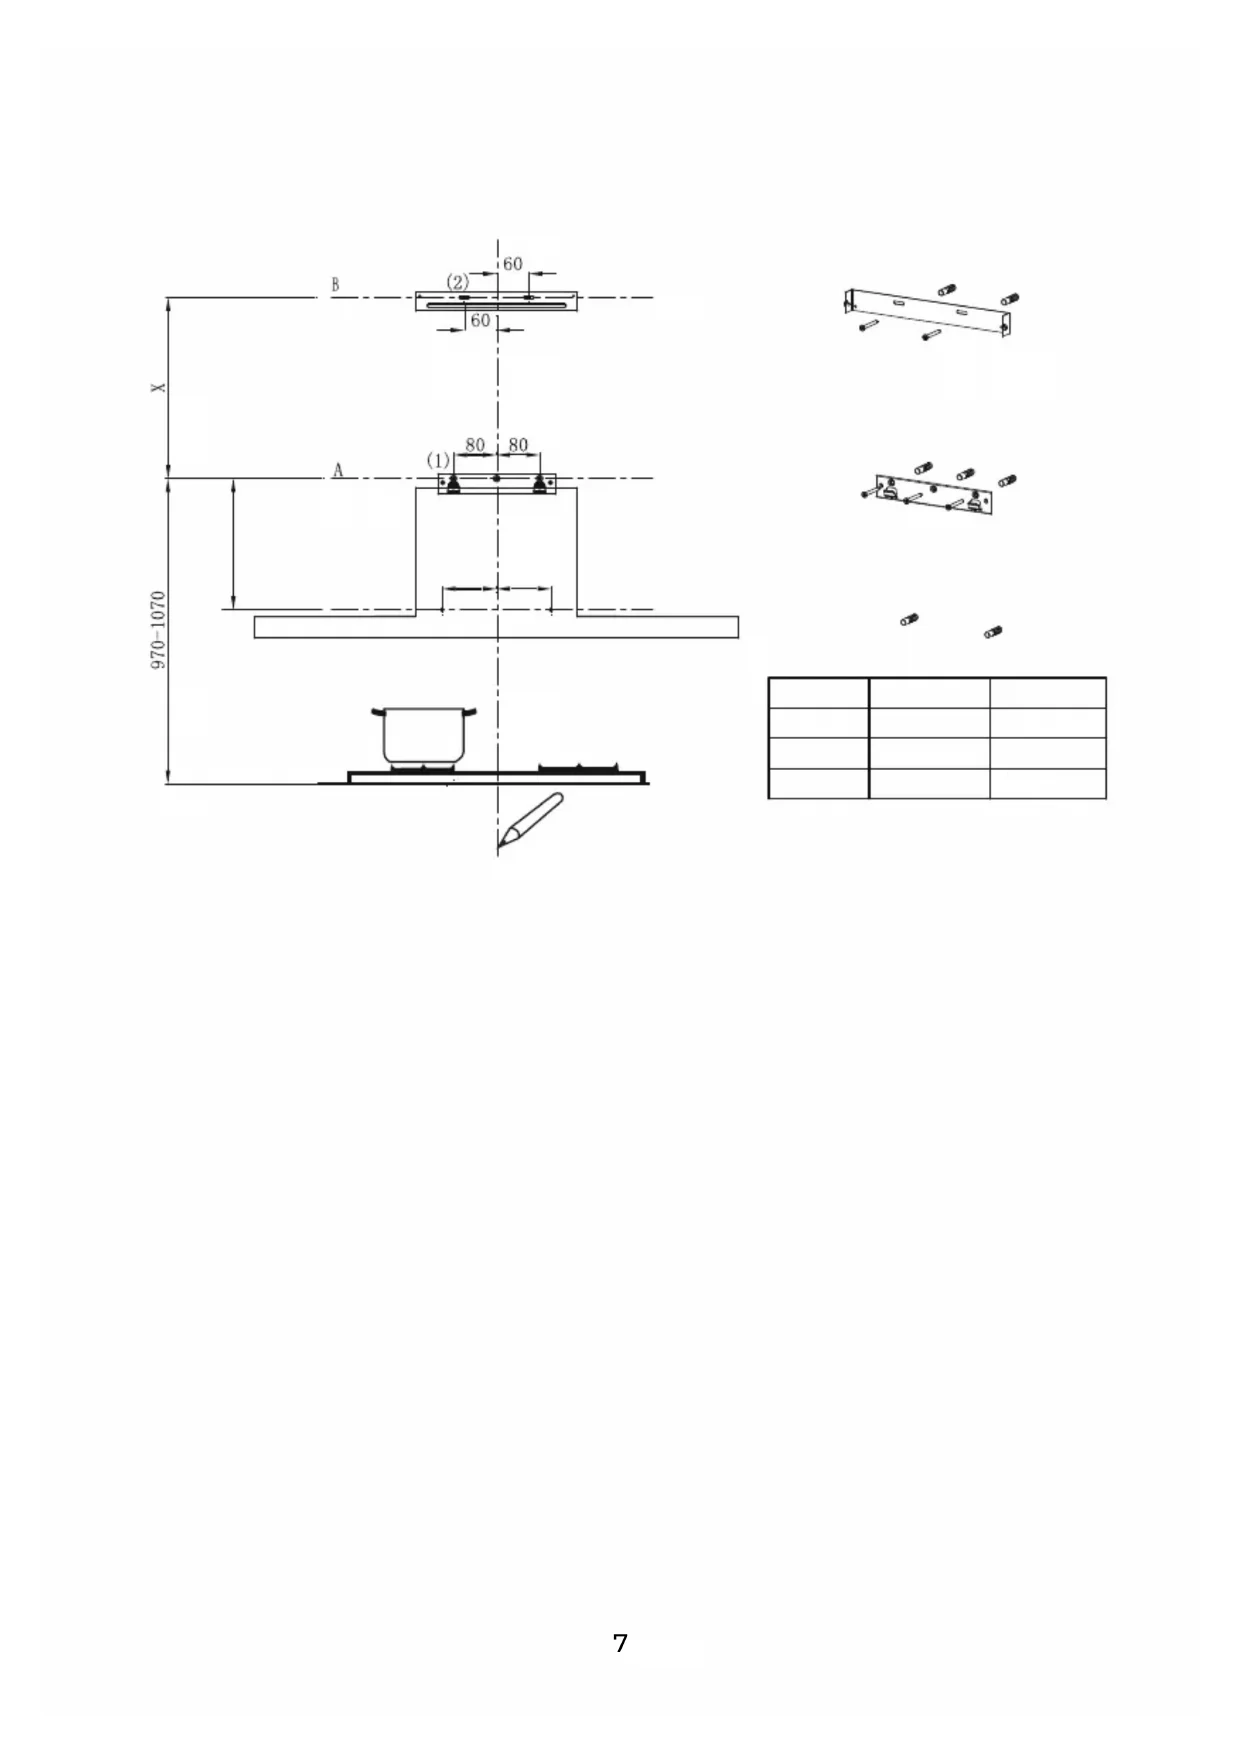
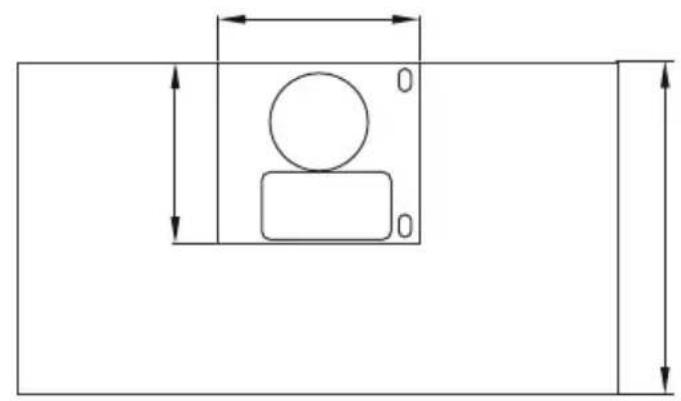
| Dimensions (H x W x D) | 970-1070 x 600 x 500 mm (approx.) |
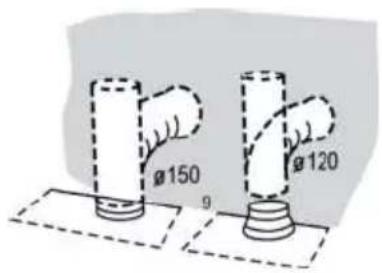
| Air outlet diameter | 120 mm or 150 mm |
| Power supply | 220-240 V ~ 50 Hz |
| Maximum power | 200 W (estimate) |
| Maximum airflow | 650 m³/h (approx.) |
| Maximum noise level | 65 dB(A) (approx.) |
| Number of speeds | 3 |
| Lighting | 2 x LED (intensity varies by model) |
| Filter type | Washable aluminum grease filter |
| Activated carbon filter | Optional for recirculation |
| Controls | Push buttons or mechanical slider |
| Special features | Intensive suction function, timer (optional) |
| Maintenance | Clean grease filters monthly; replace carbon filter every 3-6 months |
| Safety | Automatic shut-off in case of overheating (detected by thermostat) |
| Net weight | 15 kg (approx.) |
| Spare parts available | Grease filters, carbon filters, LED bulbs, control panel |
| Repairability | Repairability index: 7.5/10 (according to user reviews) |
| Warranty | 2 years (parts and labor) |
Frequently Asked Questions - EMRH604X EAS Electric
User questions about EMRH604X EAS Electric
0 question about this device. Answer the ones you know or ask your own.
Ask a new question about this device
Download the instructions for your Basket in PDF format for free! Find your manual EMRH604X - EAS Electric and take your electronic device back in hand. On this page are published all the documents necessary for the use of your device. EMRH604X by EAS Electric.
USER MANUAL EMRH604X EAS Electric
natural_image
Line drawing of a double-lit kitchen chimney with ventilation slots and ventilation duct (no text or symbols)
natural_image
Solid black right-pointing triangle shape on white background (no text or symbols)
natural_image
Solid black right-pointing triangle shape on white background (no text or symbols)
7
8
9
10
10
10
10
11
12
13


natural_image
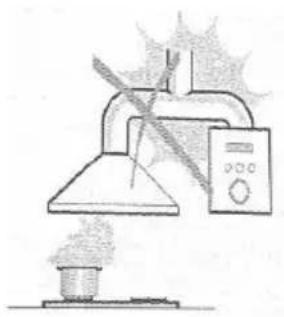
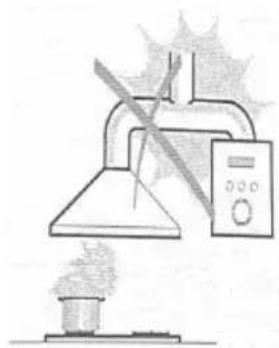
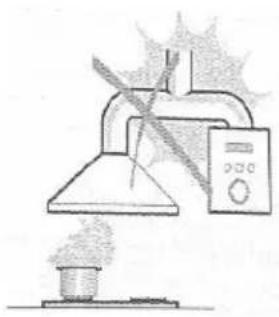
Simple line drawing of a laboratory setup with a lamp, control panel, and gas stove (no text or symbols)
text_image
2°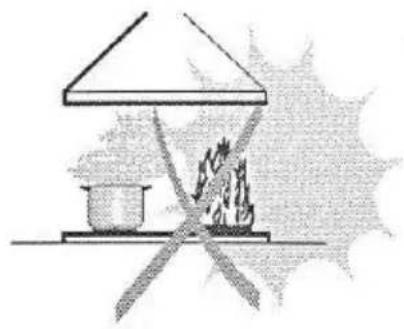
natural_image
Simple line drawing of a campfire setup with a stove and fire, no text or symbols present
text_image
Diagram illustrating the assembly of a box into a plastic component, showing structural changes and final packaging.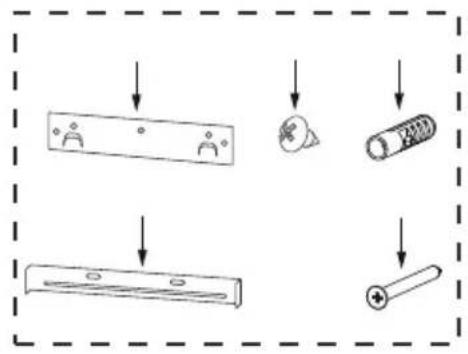
flowchart
graph TD
    A["Rectangular Component"] --> B["Conical Component"]
    B --> C["Circular Component"]
    C --> D["Circular Component"]

natural_image
Pure geometric diagram showing a rectangle with a circle inside and dimension arrows, no text or symbols present.
text_image
Technical diagram showing structural dimensions and symbols for a fire safety or electrical component, including lightning bolt and flame.
natural_image
Simple line drawing of a mechanical component with a vertical dimension arrow (no text or symbols)
natural_image
Technical line drawing of a mechanical assembly with dimension arrows (no text or symbols)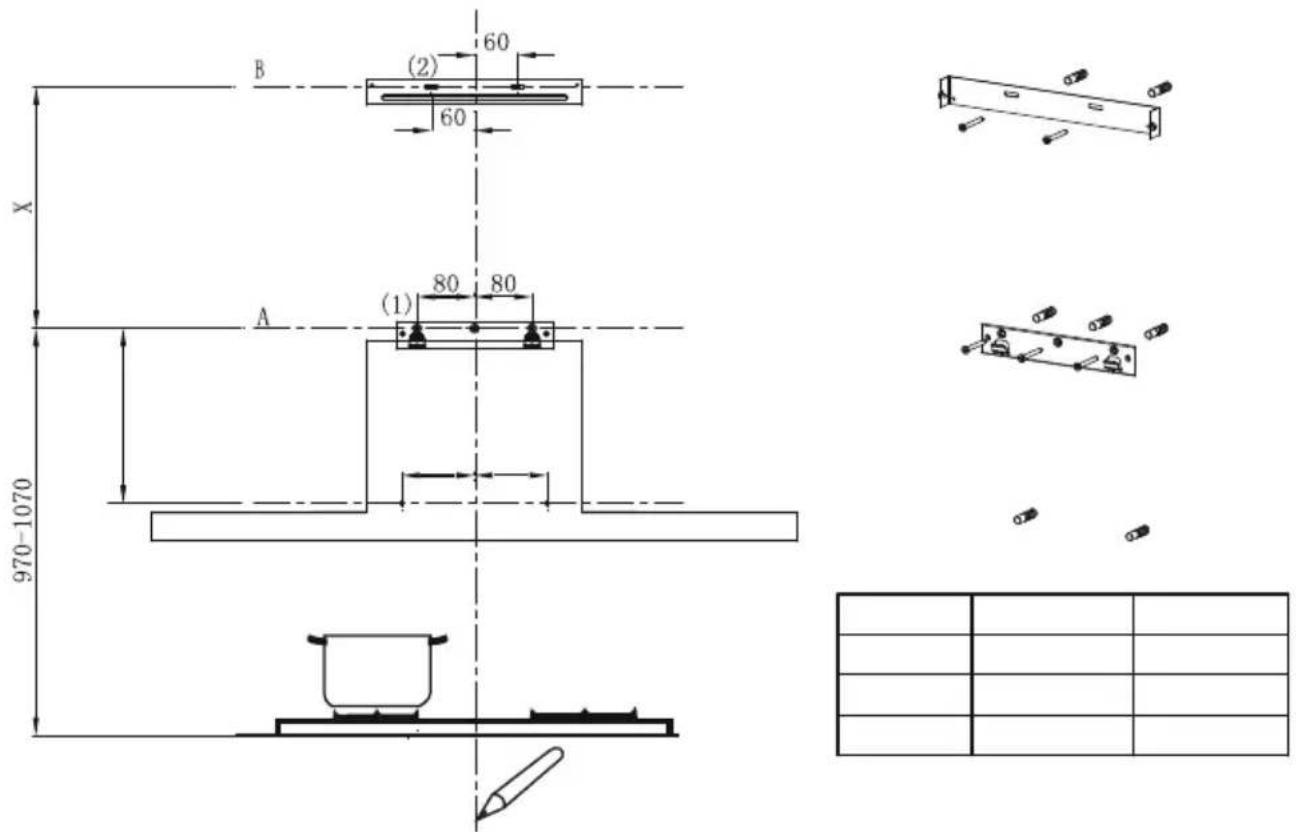
text_image
B (2) 60 60 X A (1) 80 80 970-1070 5
text_image
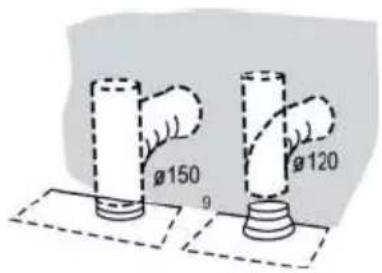
Ø150 Ø120
natural_image
Simple line drawing of a box with an upward arrow and a pointer, mounted on a base (no text or symbols)①
品

[NO TEXT]

[NO TEXT]

-

| 1 | |
natural_image
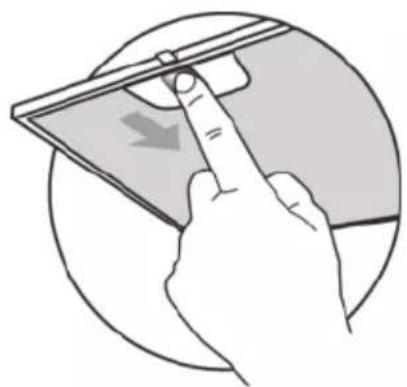
Illustration of a hand interacting with a tablet device, showing a finger pointing at the screen (no text or symbols present)
text_image
FIX REMOVE REMOVE FIX
natural_image
Three-step diagram showing a device interior, hand holding a cable, and close-up of the cable being inserted (no text or symbols) |
 |

natural_image
Solid black right-pointing triangle shape on white background (no text or symbols)
7
8
9
10
10
10
10
11
12
13

natural_image
Simple line drawing of a heating lamp with a control panel and smoke, no text or symbols present.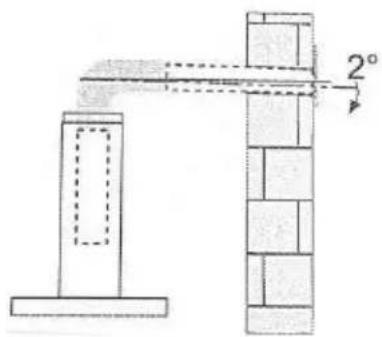
text_image
2°
natural_image
Simple line drawing of a house with a stove and fire, no text or symbols present
text_image
Diagram illustrating the assembly of a box into a plastic component, showing steps from raw material to final fan installation.
flowchart
graph TD
    A["Clamping"] --> B["Shaping"]
    B --> C["Rolling"]
    C --> D["Mounting"]

natural_image
Pure geometric diagram showing a rectangle with a circle inside and dimension arrows, no text or symbols present.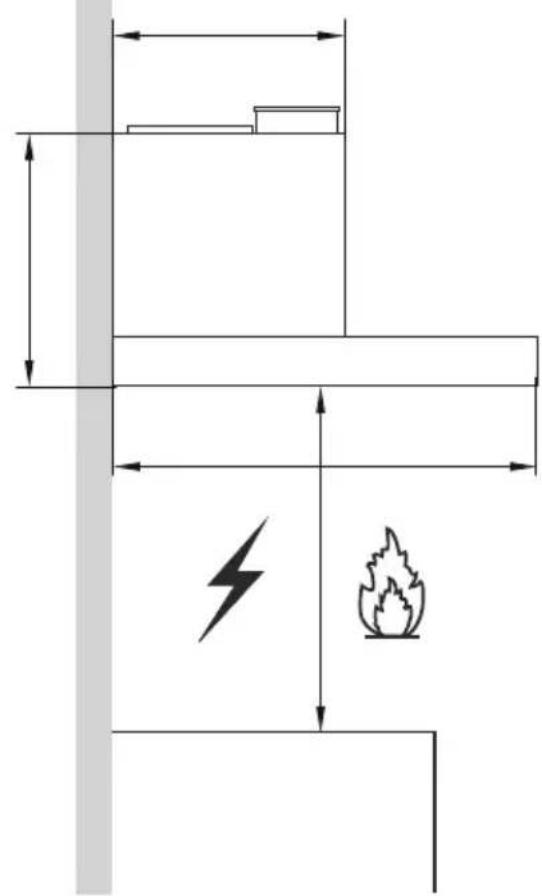
text_image
Technical diagram showing structural dimensions and symbols for a fire safety or ventilation system, including lightning bolt and flame icons.
natural_image
Simple line drawing of a mechanical component with a vertical dimension arrow (no text or symbols)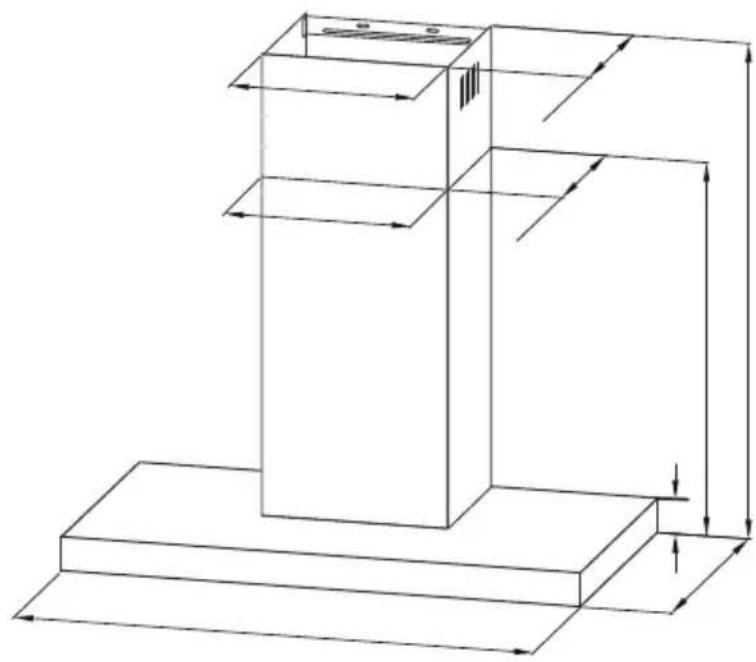
natural_image
Technical line drawing of a mechanical assembly with dimension lines and arrows indicating force or movement (no text or symbols)
text_image
B (2) 60 60 X A (1) 80 80 970-1070 5 5 5 5

text_image
Ø150 Ø120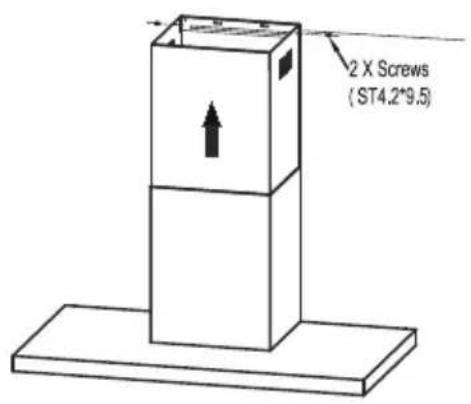
text_image
2 X Screws (ST4.2*9.5)①

品

[NO TEXT]

[NO TEXT]


| 1 | |

natural_image
Illustration of a hand interacting with a tablet device (no text or symbols visible)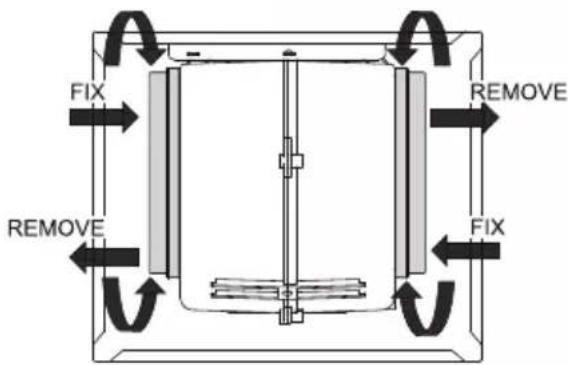
text_image
FIX REMOVE REMOVE FIX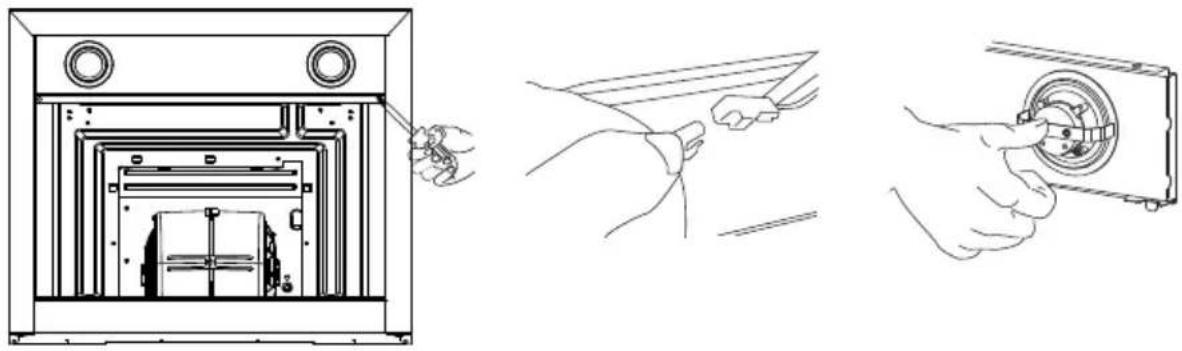
natural_image
Three-step diagram showing a device interior, hand positioning, and close-up of the component (no text or symbols)
text_image
Diagram showing a battery symbol with crosshair and minus sign, likely representing a battery or circuit symbol.
natural_image
Solid black right-pointing triangle shape on white background (no text or symbols)
7
8
9
10
10
10
10
11
12
13

natural_image
Simple line drawing of a laboratory setup with a conical flask, thermometer, and Bunsen burner (no text or symbols)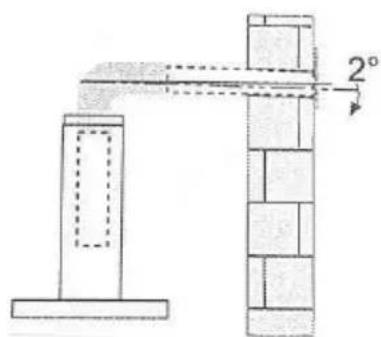
text_image
2°
natural_image
Simple line drawing of a campfire setup with a stove, fire, and a triangular roof (no text or symbols)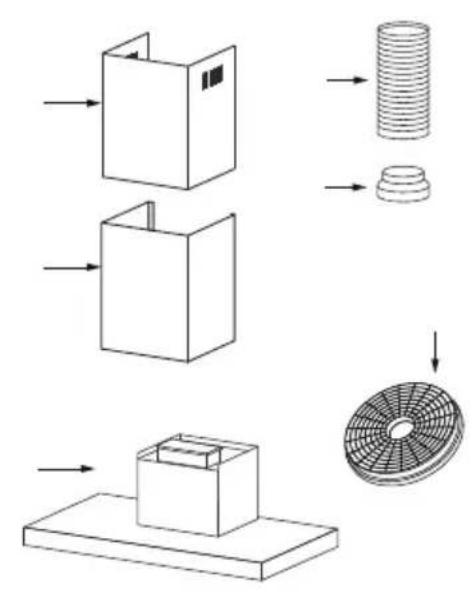
text_image
Diagram illustrating the assembly of a box into a plastic component, showing steps from raw material to final fan installation.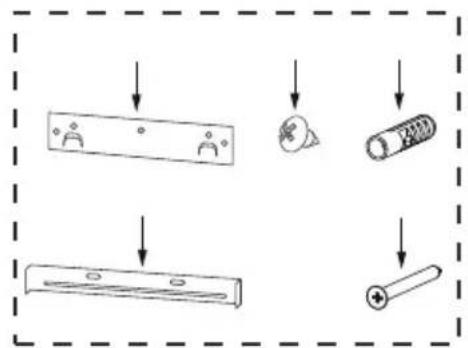
flowchart
graph TD
    A["Start"] --> B["Wire Connection"]
    B --> C["Clamping"]
    C --> D["Drying"]
    D --> E["Final Discharge"]
natural_image
Pure geometric diagram showing a rectangle with a circle inside and dimension arrows, no text or symbols present.
text_image
Technical diagram showing structural dimensions and symbols for a fire safety or electrical component, including lightning bolt and flame.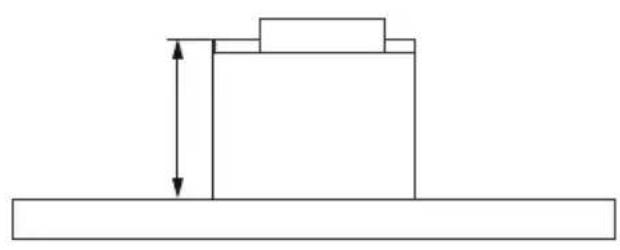
natural_image
Simple line drawing of a mechanical component with a vertical dimension arrow (no text or symbols)
natural_image
Pure technical line drawing of a mechanical assembly with no text, numbers, or symbols
text_image
B (2) 60 60 X A (1) 80 80 970-1070 5

text_image
Ø150 Ø120
natural_image
Simple line drawing of a box with an upward arrow and a pointer, mounted on a base (no text or symbols)①

品

[NO TEXT]
[NO TEXT]

| 1 | |

natural_image
Illustration of a hand interacting with a tablet device, showing a finger pointing at the screen (no text or symbols present)
text_image
FIX REMOVE REMOVE FIX
natural_image
Three-step diagram showing a device interior, hand holding a tool, and close-up of the final component (no text or symbols)
text_image
Diagram showing a battery symbol with crosshair and minus sign, likely representing a battery or circuit symbol.
natural_image
Solid black right-pointing triangle shape on white background (no text or symbols)
7
8
9
10
10
10
10
11
12
13

natural_image
Simple line drawing of a laboratory setup with a lamp, control panel, and gas stove (no text or symbols)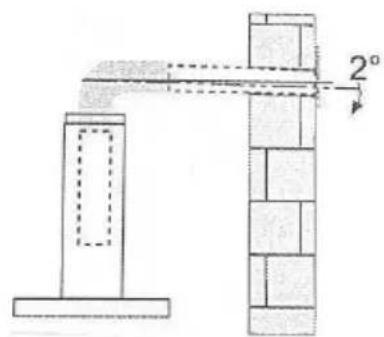
text_image
2°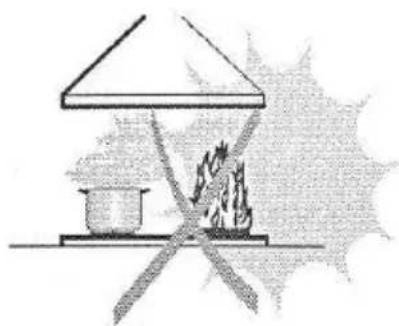
natural_image
Simple line drawing of a house with a pot and fire, no text or symbols present
text_image
Diagram illustrating the assembly of a box into a plastic component, showing stages from raw material to final packaging.
text_image
Diagram showing four different types of electrical components or connectors, including a battery, screw, switch, and motor.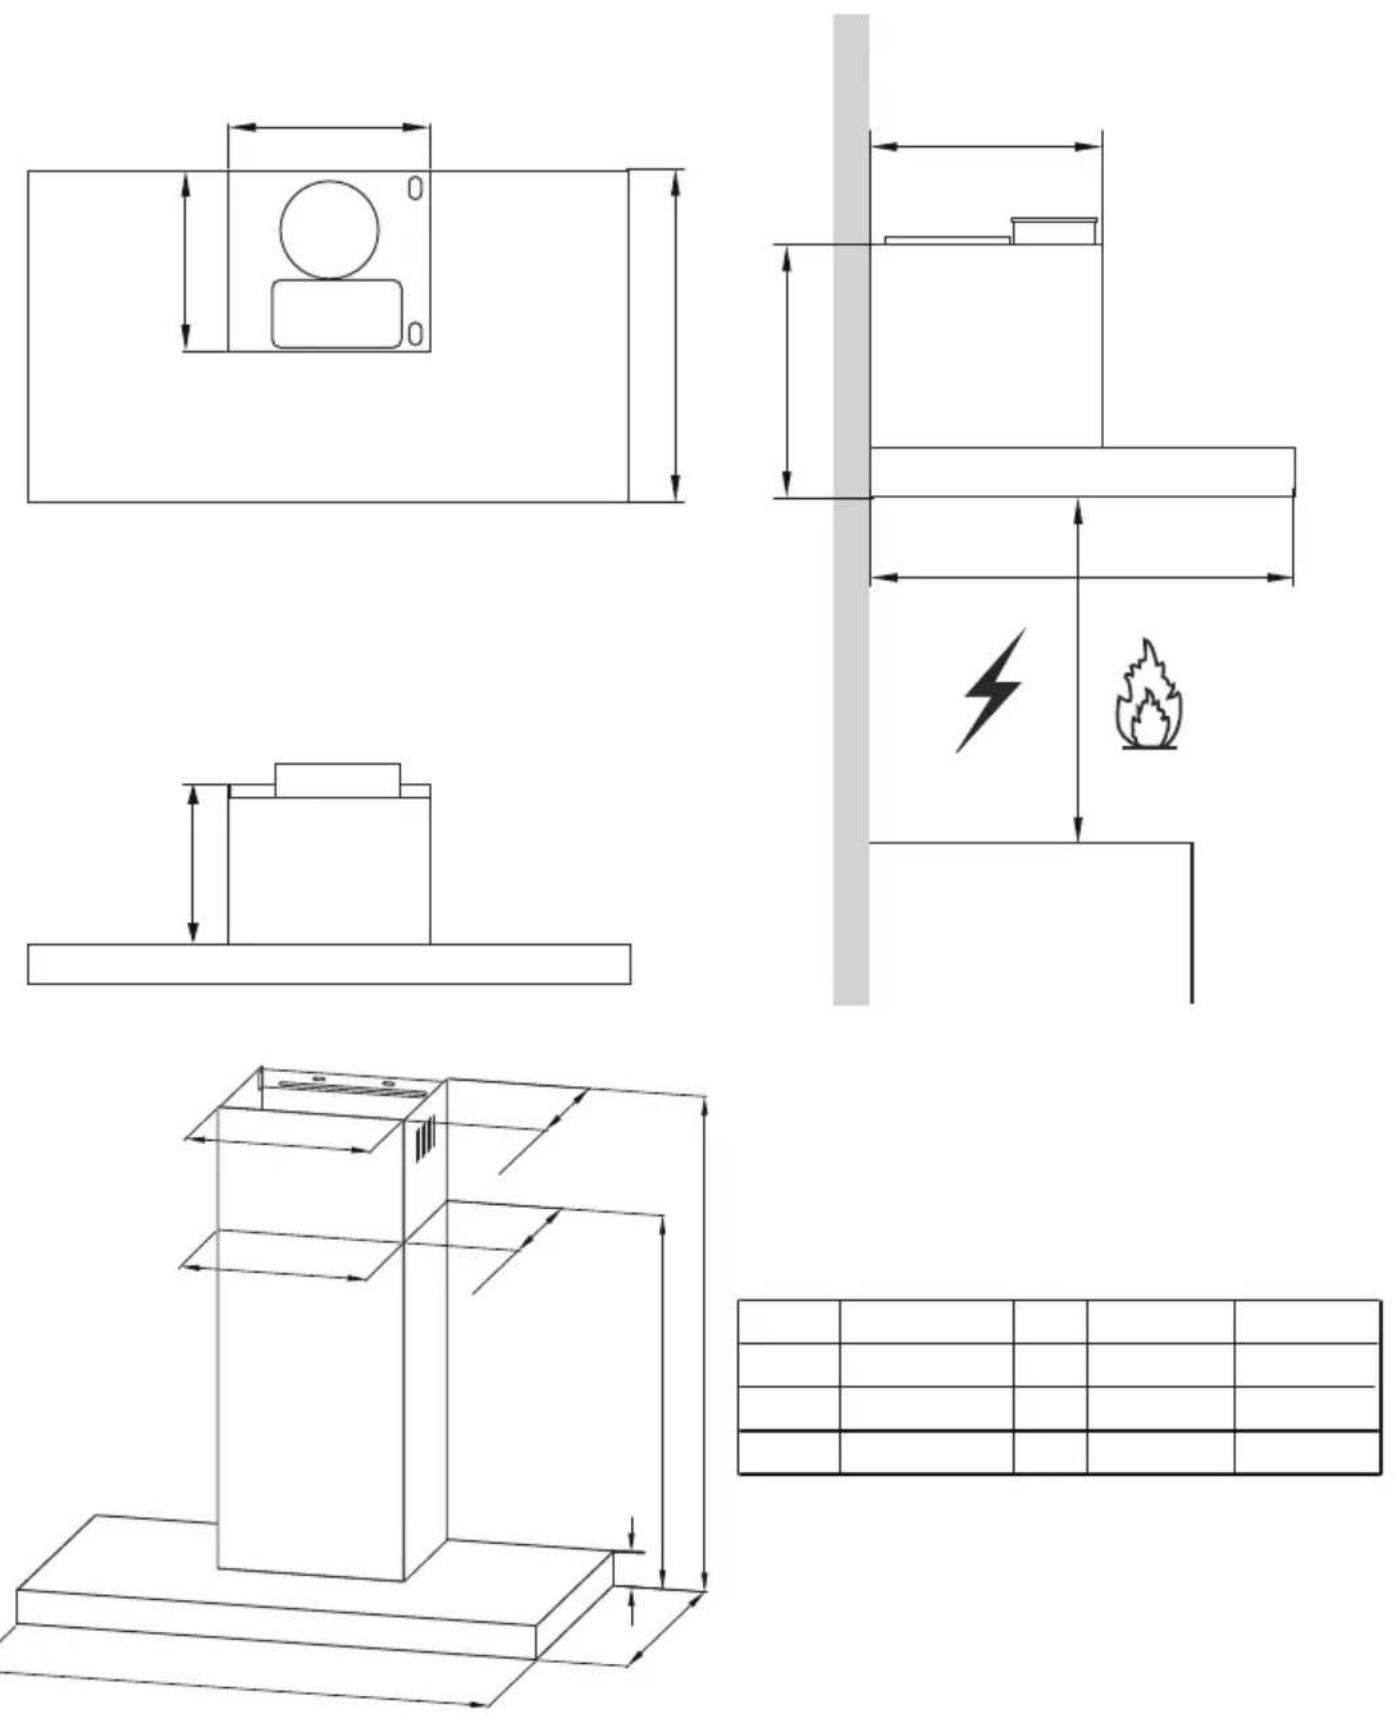

text_image
B (2) 60 60 X A (1) 80 80 970-1070 5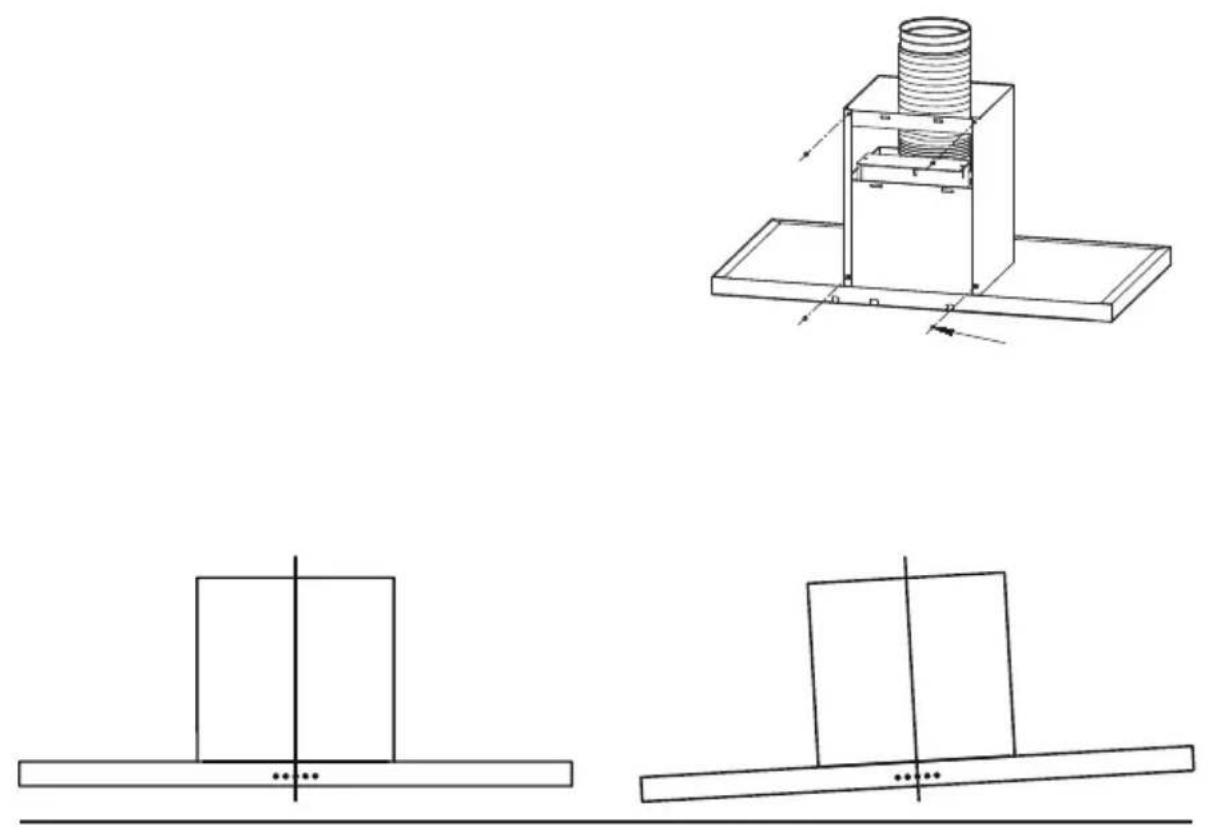
text_image
Ø150 Ø120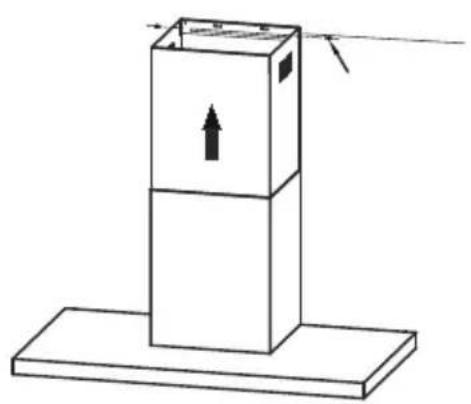
natural_image
Simple line drawing of a box with an upward arrow inside, mounted on a base (no text or symbols)①

品
[NO TEXT]

[NO TEXT]

| 1 | |

natural_image
Illustration of a hand pointing at a device with a downward arrow, enclosed in a circular frame (no text or symbols)
text_image
FIX REMOVE REMOVE FIX
natural_image
Three-step diagram showing a device interior, hand positioning, and installation of a circular component (no text or symbols)
text_image
Diagram showing a battery symbol with crosshair and minus sign, likely representing an electrical hazard symbol.