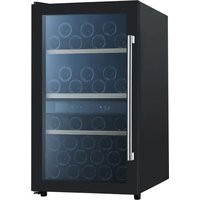
CUVEEV105 - Wine cellar VEDETTE - Free user manual and instructions
Find the device manual for free CUVEEV105 VEDETTE in PDF.
| Product type | Wine cellar |
| Brand | Vedette |
| Model | CUVEEV105 |
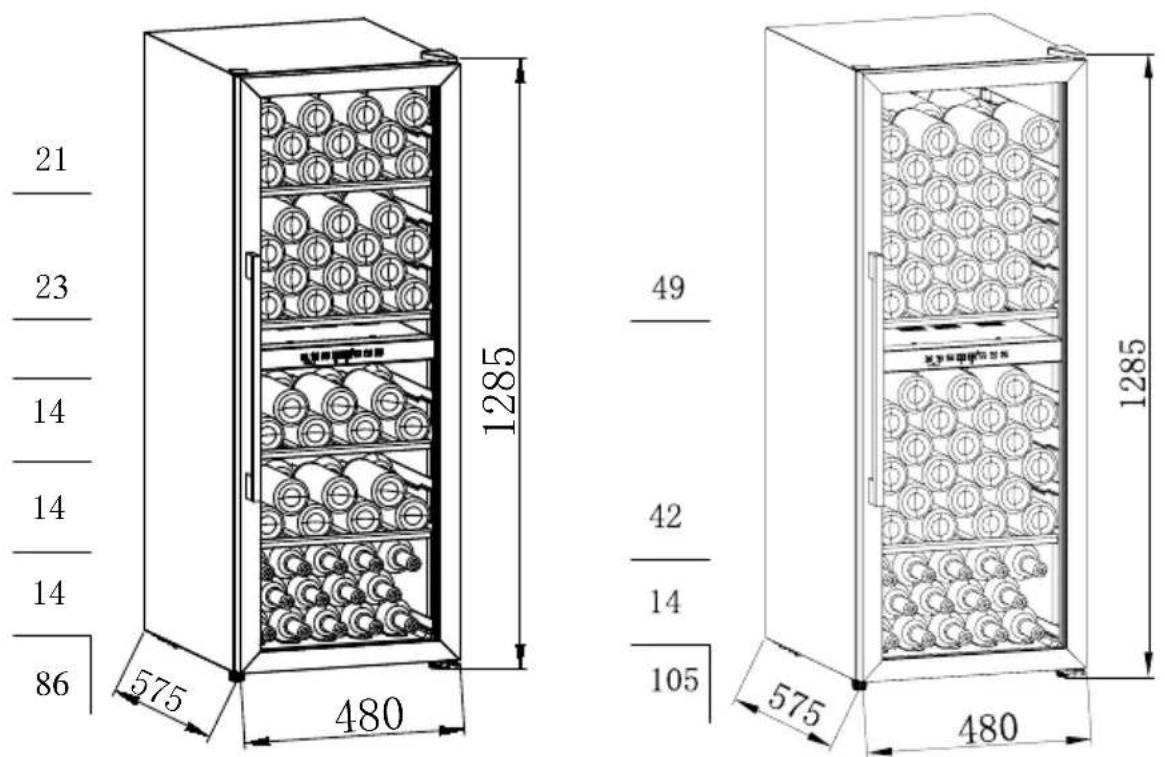
| Dimensions (H x W x D) | 1285 x 480 x 575 mm |
| Total volume | 193 L |
| Bottle capacity | 86 bottles (4 shelves) or 105 bottles (2 shelves) |
| Energy class | G |
| Annual energy consumption | 152 kWh/year |
| Noise level | 41 dB(A) - class C |
| Climate class | SN/N/ST (10°C to 38°C) |
| Adjustable temperature range | 5°C to 22°C (two zones) |
| Refrigerant type | Not specified (flammable per warning) |
| Interior lighting | LED (upper and lower zones) |
| Main features | Two independent temperature zones, electronic control, digital display, child lock, °C/°F switching, audible alarm |
| Installation type | Freestanding (not built-in) |
| Number of shelves | 4 removable shelves (wood) |
| Door reversibility | Yes (left/right) |
| Defrosting | Automatic |
| Maintenance and cleaning | Unplug, clean with lukewarm water and mild detergent, clean rear water reservoir |
| Safety | Child lock, malfunction alarm, warning against blocking ventilation and damaging refrigeration circuit |
| Spare parts and repairability | Spare parts availability for 10 years after purchase; legal warranty 2 years |
| General information | Household use only; do not store perishable food; optimal ambient temperature 10-38°C |
Frequently Asked Questions - CUVEEV105 VEDETTE
User questions about CUVEEV105 VEDETTE
0 question about this device. Answer the ones you know or ask your own.
Ask a new question about this device
Download the instructions for your Wine cellar in PDF format for free! Find your manual CUVEEV105 - VEDETTE and take your electronic device back in hand. On this page are published all the documents necessary for the use of your device. CUVEEV105 by VEDETTE.
USER MANUAL CUVEEV105 VEDETTE
natural_image
Front view line drawing of a double-door refrigerator with no text or symbolsCUVEEV105
TABLE DES MATIERES
INSTRUCTIONS DE SÉCURITÉ IMPORTANTES - 1-
DESCRIPTION DU PRODUIT - 7-
INSTRUCTIONS D'INSTALLATION - 8-
INVERSION DE LA PORTE - 10-
REMPLACEMENT DE LA LAMP - 11-
UTILISER VOTRE CAVE ÀVIN - 12-
NETTOYAGE ET ENTRETIEN - 16-
PANNES ET SOLUTIONS - 17-
SPECIFICATION TECHNIQUES - 18-
PROTECTION DE L'ENVIRONNEMENT - 20-
INSTRUCTIONS DE SÉCURITÉ IMPORTANTES
text_image
Warning sign depicting a flame symbol in yellow and black on a white backgroundSymbol ISO 7010 W021
text_image
Technical diagram of a server rack with numbered components for identificationtext_image
Technical diagram showing seven labeled mechanical components with numbered annotationstext_image
Technical diagram showing a 180-degree angle of change in an open refrigerator with internal components and mounting base.text_image
Diagram showing various electrical and lighting symbols including power, light bulb, grid, square, triangle, inverted triangle, and angle/angle indicators.SAFETY INSTRUCTIONS - 22-
PRODUCT DESCRIPTION - 28-
INSTALLION INSTRUCTIONS - 29-
DOOR RESERVING - 31-
LAMP REPLACEMENT - 32-
USE YOUR WINE CELLAR - 33-
CLEANING AND MAINTENANCE - 37-
BREAKDOWNS AND SOLUTIONS - 38-
TECHNICAL SPECIFICATION - 39-
ENVIRONMENTAL PROTECTION - 41-
THIS PRODUCT IS INTENDED FOR HOUSHOLD USE
ONLY! This product is used to chill red wine.
Please read these instructions carefully before the first use of this product and save this manual for your future reference.
SAFETY INSTRUCTIONS
Read these operating instructions carefully before using the device and keep them for future use.
- WARNING: When positioning the appliance, ensure the supply cord is not trapped or damaged.
- WARNING: Do not locate multiple portable socket-outlets or portable power supplies at the rear of the appliance.
• WARNING: Risk of child entrapment. - WARNING: Keep ventilation openings, in the appliance enclosure or in the built-in structure, clear of obstruction.
- WARNING: Do not damage the refrigerant circuit.
-
WARNING: Do not use mechanical devices or other means to accelerate the defrosting process, other than those recommended by the manufacturer.
-
WARNING: Do not use electrical appliances inside the food storage compartments of the appliance, unless they are of the type recommended by the manufacturer.
- Before disposing of your used wine cellar:
Remove its doors and leave the shelves in place so that a child cannot easily climb into the unit.
- Never allow children to use, play with or climb into the unit.
- Never clean the components of the unit with flammable liquids.
- Do not store or use gasoline or any other flammable liquids or gases near this or any other appliance. Vapors present a risk of fire or explosion.
- To clean your wine cellar, do not use abrasive cleaners or solvents. Glass cleaners or soapy water give excellent results.
text_image
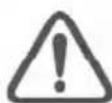
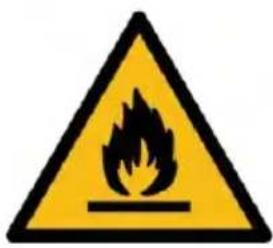
Warning sign depicting a flame symbol in yellow and black, indicating hazard or hazard status.Symbol ISO 7010 W021
This symbol mean that a fire hazard exists.
- Leave 10cm of free space at the back of the unit to allow for ventilation of the cooling system.
- In order to store your wines at a stable temperature, avoid leaving the door open for too long.
- Do not install your wine cellar near a heat source and avoid direct sunlight.
• Install your cellar on a flat, clean and stable floor.
- Do not install any other electrical equipment on your cellar.
- To ensure your safety, do not place your cellar in damp places.
- Do not store perishable food in this appliances as the indoor temperature may not be cold enough for proper storage.
- This appliance is intended to be used in household and similar applications but not in the following cases:
– staff kitchen areas in shops, offices and other working environments;
– farm houses and by clients in hotels, motels and other residential type environments;
- bed and breakfast type environments;
– catering and similar non-retail applications.
- This device is designed for use inside a house or apartment. It is essential that the temperature of the room in which it is used is not lower than 10^ C or higher than 38^ C for optimal use.
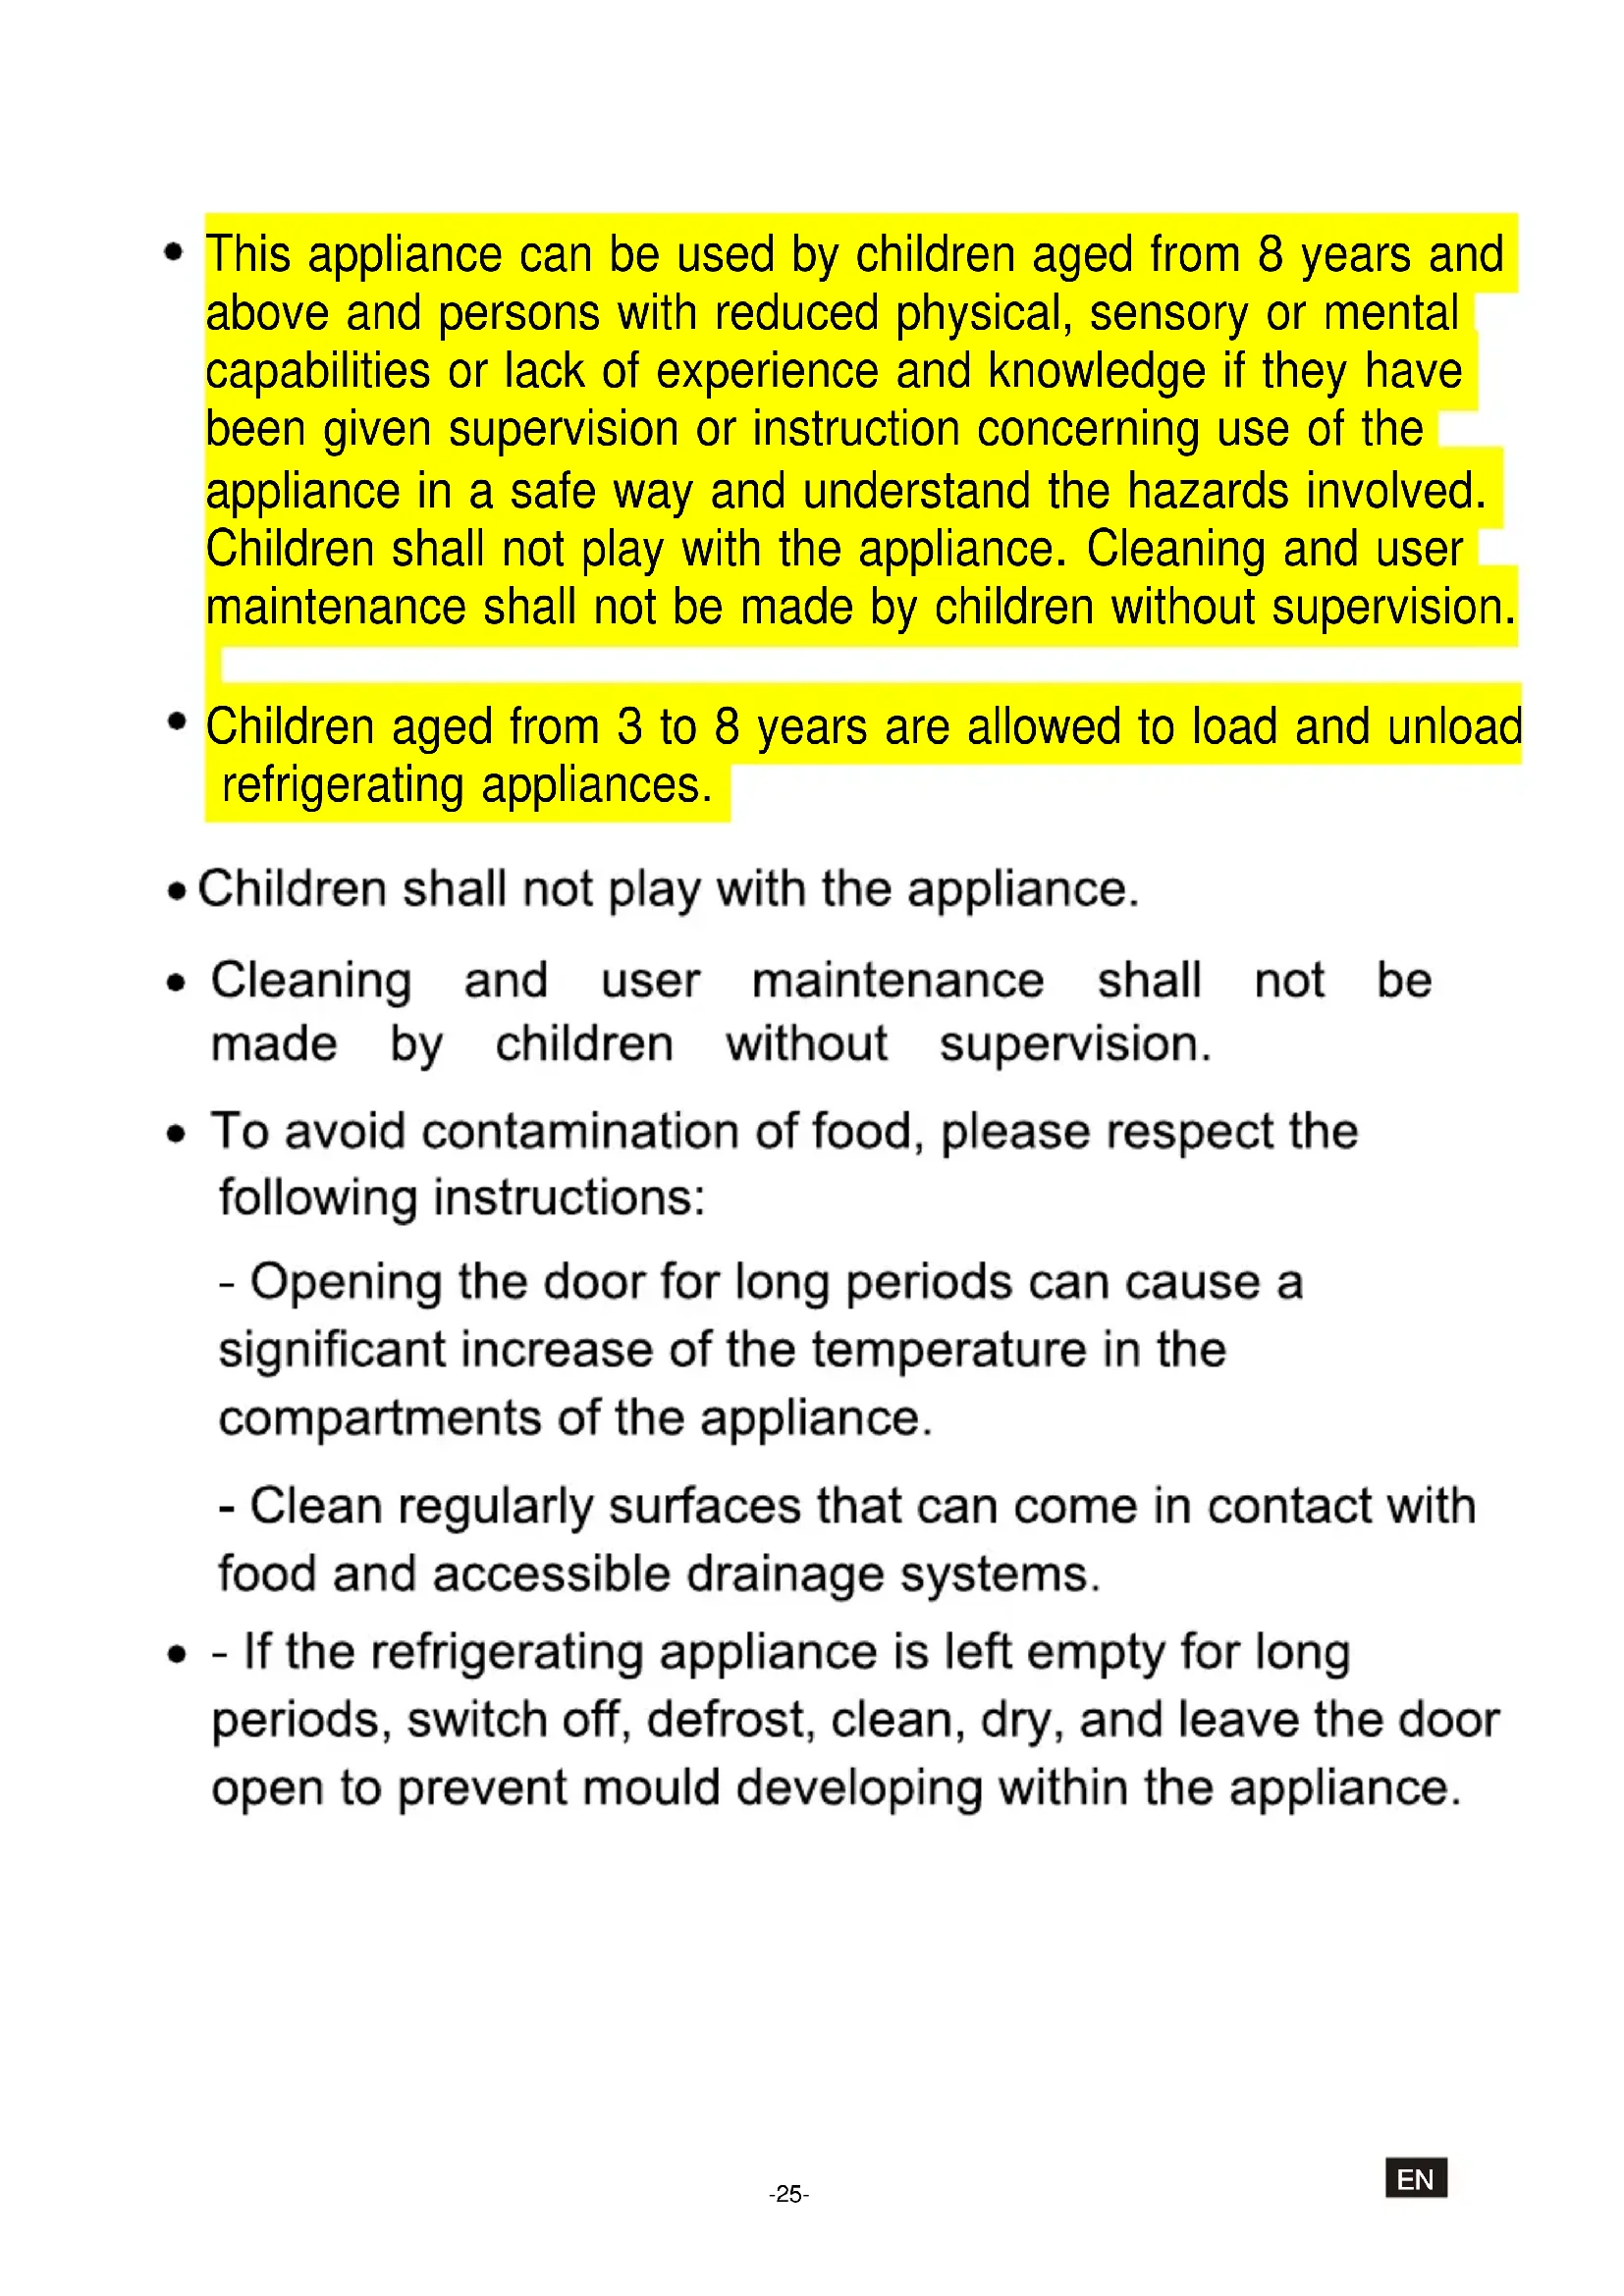
- Children aged from 3 to 8 years are allowed to load and unload refrigerating appliances.
- This appliance can be used by children aged from 8 years and above and persons with reduced physical, sensory or mental capabilities or lack of experience and knowledge if they have been given supervision or instruction concerning use of the appliance in a safe way and understand the hazards involved. Children shall not play with the appliance. Cleaning and user maintenance shall not be made by children without supervision.
- Children aged from 3 to 8 years are allowed to load and unload refrigerating appliances.
• Children shall not play with the appliance. - Cleaning and user maintenance shall not be made by children without supervision.
- To avoid contamination of food, please respect the following instructions:
- Opening the door for long periods can cause a significant increase of the temperature in the compartments of the appliance.
- Clean regularly surfaces that can come in contact with food and accessible drainage systems.
- If the refrigerating appliance is left empty for long periods, switch off, defrost, clean, dry, and leave the door open to prevent mould developing within the appliance.
- Do not store explosive substances such as aerosol cans with a flammable propellant in this appliance.
- If the supply cord is damaged, it must be replaced by the manufacturer, its service agent or similarly qualified persons in order to avoid a hazard.
By purchasing this wine cellar, you own a device that combines unique advantages:
♦ Less vibration: to preserve the quality of the wines.
- Small size, taking up less space.
WARNING: Do not use this product in a place where children can touch it and do not leave children to use it alone.
- This refrigerating appliance is not intended to be used as built-in appliance."
- this refrigerating appliance is not suitable for freezing foodstuffs.
- Extreme caution must be used when moving the appliance.
- This appliance must be installed on the ground, on a flat, horizontal surface, making sure that the ventilation openings are completely clear
- Regarding the information pertaining to the installation, handling, servicing and disposal of the appliance, thanks to refer to the below paragraph of the manual.
Disposal of waste
To avoid any harm to the environment or human health caused by the uncontrolled disposal of electrical waste, recycle the device responsibly to promote the reuse of material resources. Disposal must be done safely at public collection points provided for this purpose.
Older refrigerators may contain CFCs that destroy the ozone layer; contact your nearest waste treatment center for more details on proper disposal procedures.
Disposal of the appliance
Please according to local regulations regarding disposal of the appliance for its flammable refrigerant and blowing gas.
Before you scrap the appliance, please take off the doors to prevent children trapped.
Send the appliance to the designated disposal location.
PRODUCT DESCRIPTION
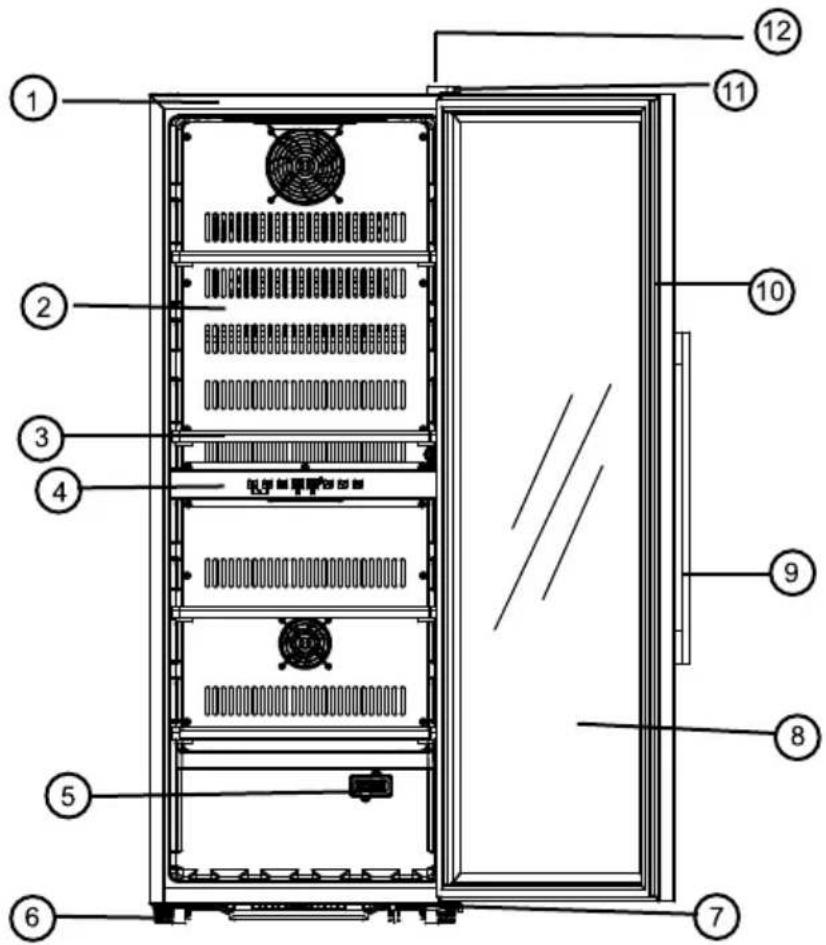
text_image
Technical diagram of a multi-chamber refrigerator with numbered components for identification| 1 | Housing |
| 2 | Cover board |
| 3 | Shelf |
| 4 | Control panel |
| 5 | Sensor shield |
| 6 | Adjustable foot |
| 7 | Lower hinge |
| 8 | Door |
| 9 | Handle |
| 10 | Door seal |
| 11 | Upper hinge |
| 12 | Upper hinge cover |
INSTALLATION INSTRUCTIONS
Before putting your wine cellar into service
- Remove all inner and outer packaging components.
- Check that none of the following parts are missing:
■ 4 removable shelves
■ 1 handle with screws
■ 1 ERP lable
■ 1 operating manual
■ 2 door hinges
- Before connecting your device to a power supply, allow it to stand upright for about 2 hours. This reduces the risk of malfunction of the refrigeration system due to handling during transport.
- Clean the inner surfaces of the unit with a soft cloth and warm water.
-
Place your unit on a floor strong enough to support the weight of the fully filled unit.
● Make sure the unit is level by adjusting the front feet underneath the unit. Make sure that the cellar rests on its feet in a stable manner. -
Install the appliance away from direct sunlight and heat sources (radiator, hot plate, etc.). Direct sunlight can damage the unit's coating and heat can increase its power consumption. If the ambient temperature is extremely cold or hot, this may prevent the unit from operating properly.
● The unit is not designed to be installed in a basement or cellar.
● This unit is designed exclusively for indoor use.
Caution: Make sure that the unit is kept away from any substance that may cause combustion.
- Check that the water tank is in place before connecting the unit.
- If the supply LED bulb is damaged, it must be replaced by the manufacturer, its service agent or similarly qualified persons in order to avoid a hazard.
- Regarding the information of the method for replacing illuminating lamps, thanks to refer to the below paragraph of the manual.
Door reserving
1. Parts for door reversing
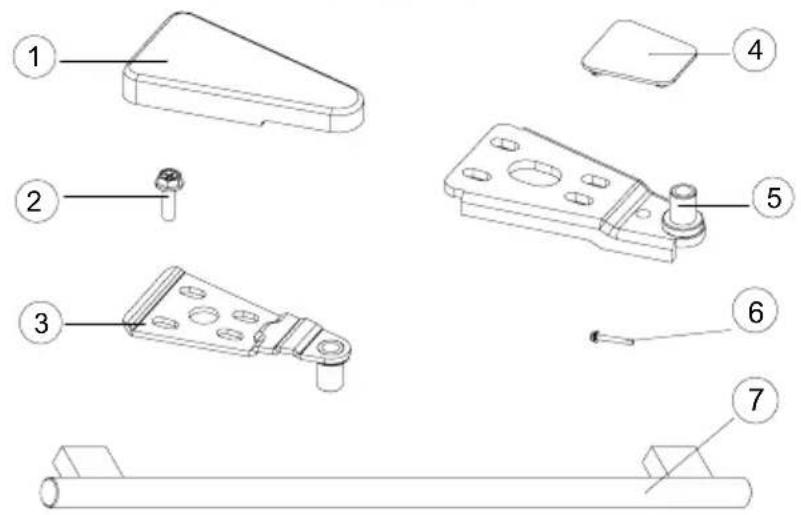
text_image
Technical diagram showing seven labeled mechanical components with numbered annotations①Door hinge cover
②Flange screw
③Door hinge
④Cap
⑤Lower door hinge
⑥Handle screw ⑦Handle
2. Handle installation
The handle is delivered in a separated package with screws together inside the carton.
① Reveal two small holes on the door frame from inner side by pulling out a bit the door seal ② Aim the handle to the holes and insert the screws from inside ③ Screw them up with screw-driver ④ Put back door seal to cover the screws.
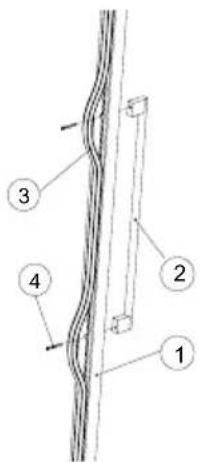
text_image
Diagram of a plant stem with numbered parts labeled 1 to 4, showing structural details.3. Reversing the door
Our wine coolers are delivered with the door opening from left tonight. To reverse the opening direction:
1) Close the door.
2) Take off the door hinge cover
① on the up right corner; Unscrew the flange screws ②; Take off door hinge ③; Remove the up left side cap ④.
3) Lift the door up until the door gets off the lower door hinge⑤.
4) Unscrew the lower door hinge.

text_image
m left tonight. To reverse the Housing Door ① ② ③ ④ ⑤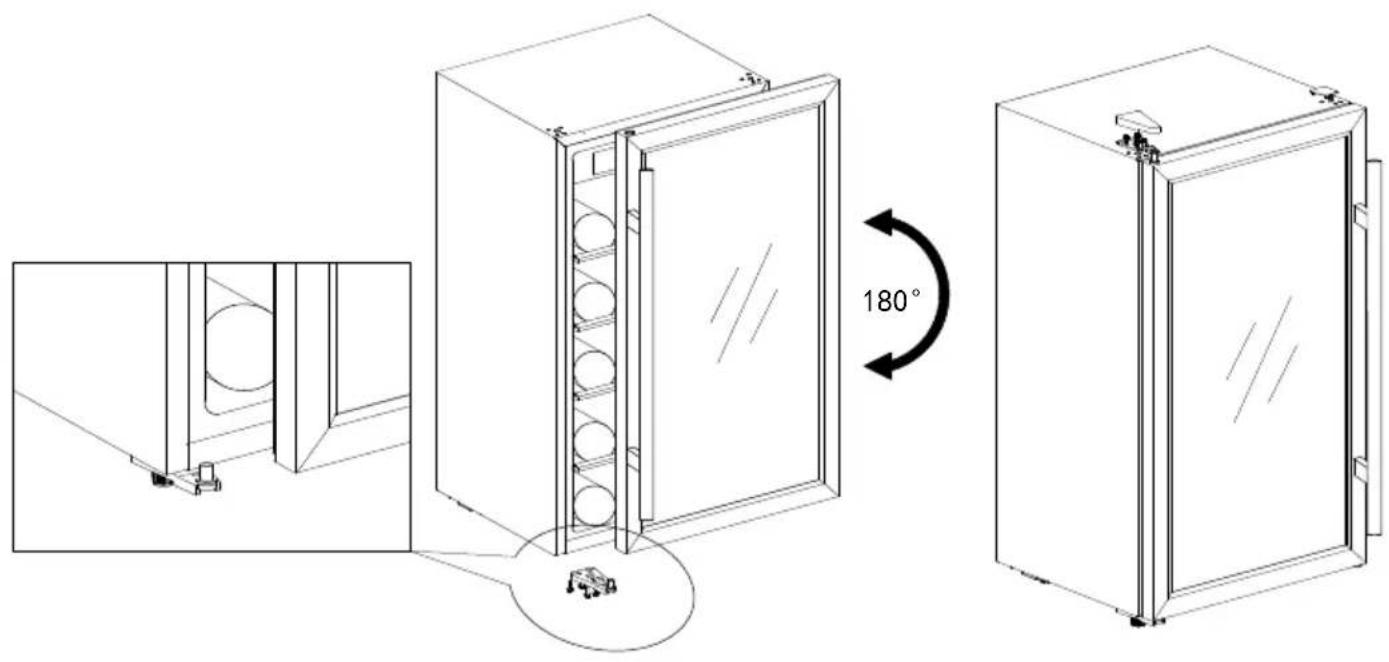
natural_image
Technical line drawing of a refrigerator with an 180-degree rotation indicator (no text or symbols present)5) Fit the lower door hinge⑤ to the down left corner; Put the door above and insert into the lower door hinge.
6) Fit the door hinge③ to the up left corner and screw the flange screws②; Put on the door hinge cover①; Put the cap to the up right side④.
Lamp replacement
Disassembly and assembly the lamp of upper zone Instructions:
- Use a screwdriver to remove a tapping screw in the view (1).
- Pull out the lampshade to the left by hand. See view(2).
- Use a screwdriver to remove two tapping screws (3) of the fixed LED lamp panel (4), remove the LED lamp panel and replace it with a new LED lamp panel, and then reinstall the two screw.
- Insert the newly removed lamp panel to the right into the slot of the lamp box (5) and secure the screws on the left side.
Disassembly and assembly the lamp of lower zone Instructions:
- Use a screwdriver to remove the two tapping screws from the view (1).
- Remove the entire LED lamp panel (3) and lampshade (2) components directly.
- The entire lampshade component can be placed on the countertop (with a scratch resistant pad). Use a screwdriver to remove the two screws (4) that secure the lamp panel, take out the old lamp panel, replace it with a new one and then fix the two screws (4) that were just removed. Last, install the entire lampshade component back to the corresponding position of the lampshade in the partition plate(5).
upper zone

text_image
(5) (4) (3) (2) (1)Lower zone
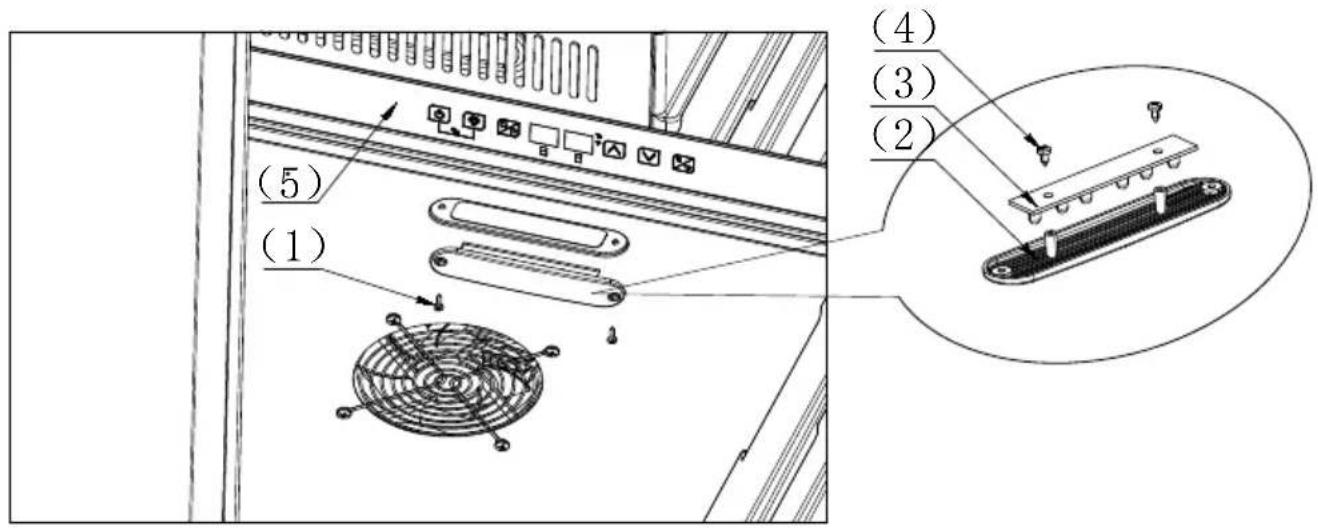
text_image
(1) (2) (3) (4) (5)USE YOUR WINE CELLAR
The temperature setting allows you to adjust it according to your needs:
Setting temperature before tasting red wines: Temperature recommended 5-22°C.
If the ambient temperature is higher or lower than the recommended temperatures, this will have a negative impact on its performance. For example, placing the unit in an extremely cold or hot place can cause variations in the internal temperature of the unit.
The internal temperature may vary depending on the location of the bottles, at the top, middle or bottom.
Adjustment may be necessary depending on the ambient temperature.
Do not hesitate to leave a thermometer inside the cellar in order to carry out regular monitoring.
Start operation
- Cleaning the compartment
Before power on, clean inside of the appliance and check the drainage pipe in good connection. (For details, please refer to the "Maintenance and cleaning")
- Put the appliance stand still
Before power on, level the appliance on the firm & dry floor for at least 30 minutes.
- Power on
The appliance start operation and it will cool down inside after 1 hour, otherwise you should check the power connection.
Control panel

text_image
Diagram showing various electrical and mechanical symbols including power, switches, diode, square, triangle, checkmark, and angle markings.If the keys are not active, please unlock first by pressing "on/off" and "Light" simultaneously for 3 seconds
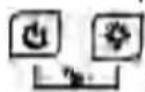
ON/OFF
- Keep pressing the key 3 seconds, power down, goes to stand-by mode.
- Keep pressing the key again 3 seconds to return back to normal working.
Light
Press the key, turn on or turn off the LED lights inside. In stand-by mode, the key is invalid.
Zone switch
Press the key to switch between upper zone and lower zone for choosing which zone to set temperature. Press the key once, the LED display in chosen zone flash regularly. Press up and down key to set temperature. Press the key again; switch the zone to set temperature.
UP
Press the key once, LED Display in regular flash showing current set temperature. Continue pressing to adjust set temperature, one press increase 1°F. Regular flash quit after 5 seconds detecting no press and new set temperature save. LED display return to show actual temperature inside.
Down
Press the key once, LED Display in regular flash showing current set temperature. Continue pressing to adjust set temperature, one press reduce 1°F. Regular flash quit after 5 seconds detecting no press and new set temperature save. LED display return to show actual temperature inside.
Child Lock (Combination key)
- Lock: Press both keys at the same time for 3 seconds to lock.
- Unlock: Press both keys at the same time for 3 seconds to unlock.

Fahrenheit/Celsius display interchange
Switch temperature display between Fahrenheit and Celsius by pressing the key.

Attention
- The ex-factory temperature of this product is 12 [, and the corresponding temperature range needs to be set according to the actual wine.
-
For both upper and lower zone, the cooling temperature could be set from 5^ C (lowest temperature) - 22^ C (highest temperature). But lower zone temperature will equal to or be higher than upper zone.
Moreover, when the temperature setting in the upper zone is higher than that in the lower zone, the set temperature in the lower zone will also follow the same set temperature as the upper zone.
In addition, when the same temperature is set in the upper and lower zones, the actual temperature in the lower zone is 1 to 2 degrees higher than the actual temperature in the upper zone. -
When it is used for the first time, the pre-set temperature for both zone is 12^ C.
-
Alarm sound: when the system malfunction occur and alarm sound, press any key on the control panel to cancel the alarm sound.
-
Temperature & defrost sensor failure: When the temperature sensor of upper zone failure occur, error code displays:
E1 for open circuit; E2 for short circuit.
When the temperature sensor of lower zone failure occur, error code displays:
E5 for open circuit; E6 for short circuit.
Wine storage
The appliance is equipped with sufficient shelves to allow your collection of wine get mature quietly and peacefully.
Four shelves loading capacity: 86bottles. Two shelves loading capacity: 105 bottles. (standard Bordeaux with 750ml). In order to reach the best energy efficiency, pls refer to the below bottles loading way.
text_image
21 23 14 14 14 86 575 480 1285 49 42 14 105 575 480 1285Loading capacity will vary in terms of different way of bottle arrangement or different bottle sizes.
Each shelf is designed to put on 1 or 2 layers of wine bottles. More than 2 layers of bottle arrangement on one shelf are not recommended.
◆ Each shelf could pull out partly to store wine bottles easily.
Open the door straight enough before pulling out shelves.
The shelf should be avoided in front of the fan as much as possible to avoid blocking the air inlet and affecting the cooling efficiency.
If the wine cooler would have no load for a long time, it is recommended to power it off, clean it carefully, and open the door for ventilation.
If it is unnecessary, please avoid to open the door frequently. And it is suggested not to open door for a long time in order to save energy consumption.
Below table is the recommended temperature for wine storing &drinking:
| Red Wine | 15-18°C |
| White Wine | 9-14°C |
| Rose wine | 10-11°C |
| Champagne & sparkling wine | 5- 8°C |
CLEANING AND MAINTENANCE
Cleaning your wine cellar
● Unplug your wine cellar and take out all the bottles.
- Clean the outside of the unit with hot water and a mild detergent.
- Remove the water tank at the bottom of the unit, then wash it.
Moving your wine cellar
- Remove all bottles and disconnect the wine cellar.
● Tape all loose parts inside your wine cellar. - Turn the feet to adjust their height to the minimum to avoid damage.
● Tighten the door to keep it closed. - Be sure to keep the wine cellar upright during transport.
BREAKDOWNS AND SOLUTIONS
Some malfunctions can be easily resolved. Before calling customer service or a repairer, please consult the following table :
| PROBLEM | POSSIBLE CAUSES & SOLUTIONS |
| The appliance makes lots of noise? | Please adjust the front foot, keep the appliance leveling.Please keep the appliance a bit space from walls. |
| Liquid flowing sound inside the cabinet? | It is normal because of the refrigerant working inside. |
| The appliance does not start? | Make sure the appliance is connected to the power properly.Make sure switch on the power.The compressor re-starts after 5 minutes for a power cut. |
| Compressor runs continuously? | If no cold is being produced, call the retailer's after-sale service. |
| Door does not seal tightly? | After long time use, the door seal might get stiff & distorted partially.Heat the door seal with hot-wind blower or hot towel.The door seal get softened and close the door. |
| The appliance does not cool sufficiently? | Please adjust temperature setting.Keep the appliance away from sunlight or heat.Please do not open the door frequently. |
| Unpleasant smells inside cabinet? | A little bit plastic smell for newly-buy appliance is normal and will disappear after a short time.Clean the compartment and ventilate it for a few hours. |
| Condensate on the glass door? | Please do not open the door frequently or for a long time.Please do not set the temperature too low.High ambient temperature and humidity would cause condensate. |
| The light is not working? | Check the power supply first.Call the retailer's after-sale service if the light is broken. |
TECHNICAL SPECIFICATION
| General information cooling | ||||
| Supplier's name or trade mark: Vedette | ||||
| Supplier's address: BUT INTERNATIONAL, 1 AVENUE SPINOZA 77184 EMERAINVILLE, FRANCE | ||||
| Model identifier: CUVEEV105 | ||||
| Type of refrigerating appliance: | ||||
| Low-noise appliance: | no | Design type: | freestanding | |
| Wine storage appliance: | yes | Other refrigerating appliance: | no | |
| General product parameters: | ||||
| Parameter | Value | Parameter | Value | |
| Overall dimensions (millimetre) | Height | 1285 | Total volume (dm3ou l) | 193 |
| Width | 480 | |||
| Depth | 575 | |||
| EEI | 171 | Energy efficiency class | G | |
| Airborne acoustical noise emissions (dB(A) re 1 pW) | 41 | Airborne acoustical noise emission class | C | |
| Annual energy consumption (kWh/a) | 152 | Climate class: | SN/N/ST | |
| Minimum ambient temperature (°C), for which the refrigerating appliance is suitable | 10 | Maximum ambient temperature (°C), for which the refrigerating appliance is suitable | 38 | |
| Winter setting | no | |||
| Compartment Parameters: | ||||
| Compartment type | Compartment parameters and values | |||
| Compartment Volume (dm3or l) | Recommended temperature setting for optimised food storage (°C) These settings shall not contradict the storage conditions set out in Annex IV, Table 3 | Freezing capacity (kg/24 h) | Defrosting type (auto-defrost = A, manual defrost = M) | |
TECHNICAL SPECIFICATION
| Pantry | no | — | — | — | — | |
| Wine storage | yes | 193L | 12 | — | A | |
| Cellar | no | — | — | — | — | |
| Fresh food | no | — | — | — | — | |
| Chill | no | — | — | — | — | |
| 0-star or ice-making | no | — | — | — | — | |
| 1-star | no | — | — | — | — | |
| 2-star | no | — | — | — | — | |
| 3-star | no | — | — | — | — | |
| 4-star | no | — | — | — | — | |
| 2-star section | no | — | — | — | — | |
| Variable temperature compartment | no | — | — | — | — | |
| For 4-star compartments | ||||||
| Fast freeze facility | No | |||||
| Light source parameters: | ||||||
| Type of light source | LED | |||||
| Energy efficiency class -light source | Exempted (EU) 2019/2015 | |||||
| Minimum duration of the guarantee offered by the manufacturer: 2 years | ||||||
| Additional information: N/A | ||||||
| Weblink to the manufacturer's website, where the information in point 4(a) Annex of Commission Regulation (EU) 2019/2019 is found: www.but.fr | ||||||
— extended temperate: 'this refrigerating appliance is intended to be used at ambient temperatures ranging from 10 °C to 32 °C',
— temperate:' this refrigerating appliance is intended to be used at ambient temperatures ranging from 16 °C to 32 °C',
— subtropical: 'this refrigerating appliance is intended to be used at ambient temperatures ranging from 16 °C to 38 °C',
— tropical: 'this refrigerating appliance is intended to be used at ambient temperatures ranging from 16 °C to 43 °C';
Flash the QR code on your appliance to access its main information.
The instruction manual shall state the minimum period during which spare parts are available
ENVIRONMENTAL PROTECTION
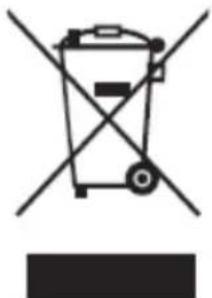
European directive 2012/19/EU on Waste from Electrical and Electronic Equipment (WEEE), requires that used household appliances are not thrown into the normal municipal waste stream. Used appliances must be collected separately in order to optimize the rate of recovery and recycling of materials that compose them, and to reduce the impact on human health and on the environment. The crossed bin symbol is affixed to all the products to remind you of the obligations of separated collection.
natural_image
Symbol of a trash bin crossed with a diagonal line, no text or numbers presentWe decline liability for any damage or accident derived from any use of this product which is not in conformity with the instructions contained in this booklet.
In accordance with Article L. 217 of the Consumer Code, your product benefits from a legal guarantee of of conformity of 2 years.
Duration of availability of spare parts: 10 years.
To contact our After-Sales Service, before going to your BUT store, call 09 78 97 97 97,
From Monday to Saturday from 8:00 am to 8:00 pm (local call price).
LE TRI

FACILE